Archives for March 2011

The Great Chicken Breast Adventure: Pocket Sandwiches

This is the second installment in my “The Great Chicken Breast Adventure” series.

To start at the beginning, read “Prepping the Chicken”.

Pocket sandwiches are not a new idea by any means; in fact, they go way back. You can find a variety of them in almost any culture: pasties from England, calzones from Italy, empanadas from Spain, pierogies from the Eastern block, and the list goes on and on and on. It seems that everybody needs a delicious portable food on occasion.

Mine are the purely American kind: you know, the kind that break all the rules and defy definition. The good ol’ American way! They follow the basic procedure of all the aforementioned - bread dough of some sort wrapped around a filling of some sort - but the type of bread and the type of filling don’t fit into any one category. So pocket sandwiches it is. If you can think of a better moniker, please let me know!

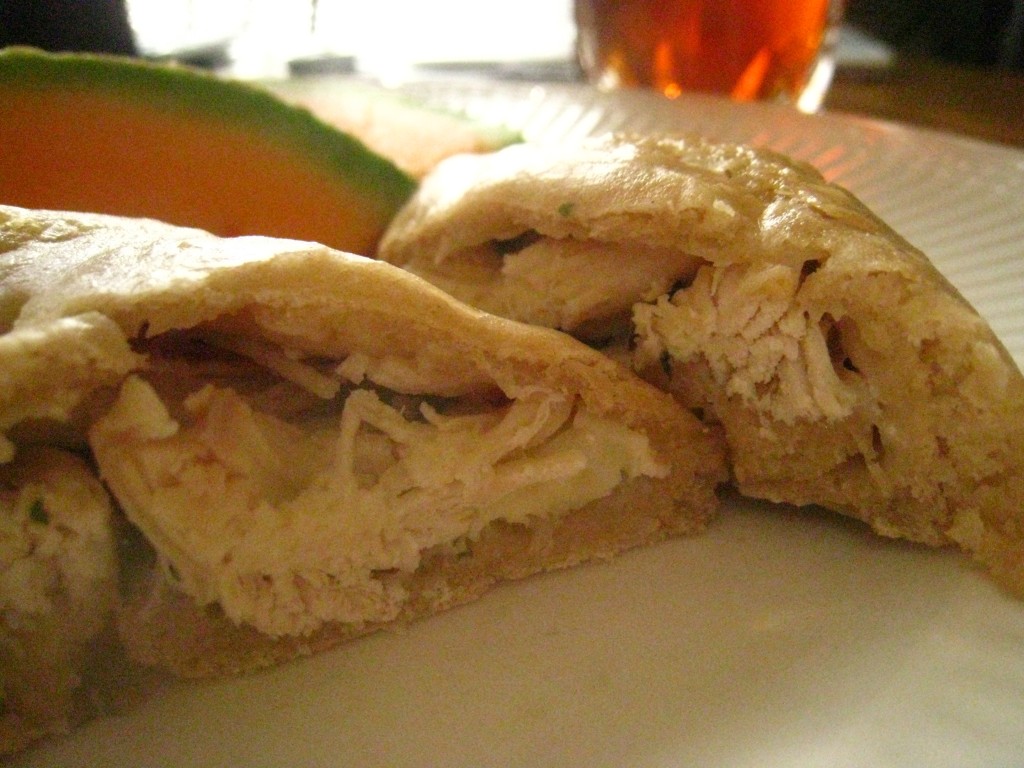
I used the shredded chicken I removed from the cooked chicken rib bones to make these chicken pocket sandwiches. Simply by changing the sauce and the cheese, you can create two very distinct tastes, as I will show you. I’m sure you can come up with a million different versions of your own once you have the basics down.

{Scroll down for a printable version of the recipe.}

To make your pocket sandwiches, you will need a pound of bread dough of some kind. Try the 5 Minute Artisan Bread, or a pizza dough. For Chicken Ranch Pockets, you will need ranch dressing , mozzarella cheese, and of course cooked chicken. Fresh parsley or other herbs are a delicious addition. For the Barbecue Chicken Pockets, you will need barbecue sauce, chicken, and cheddar or monterey jack cheese. In either case, a sprinkle of flour is also helpful to keep the cheese from disappearing into the bread, and additional seasonings or herbs are always tasty.

Here’s how to assemble and cook them:
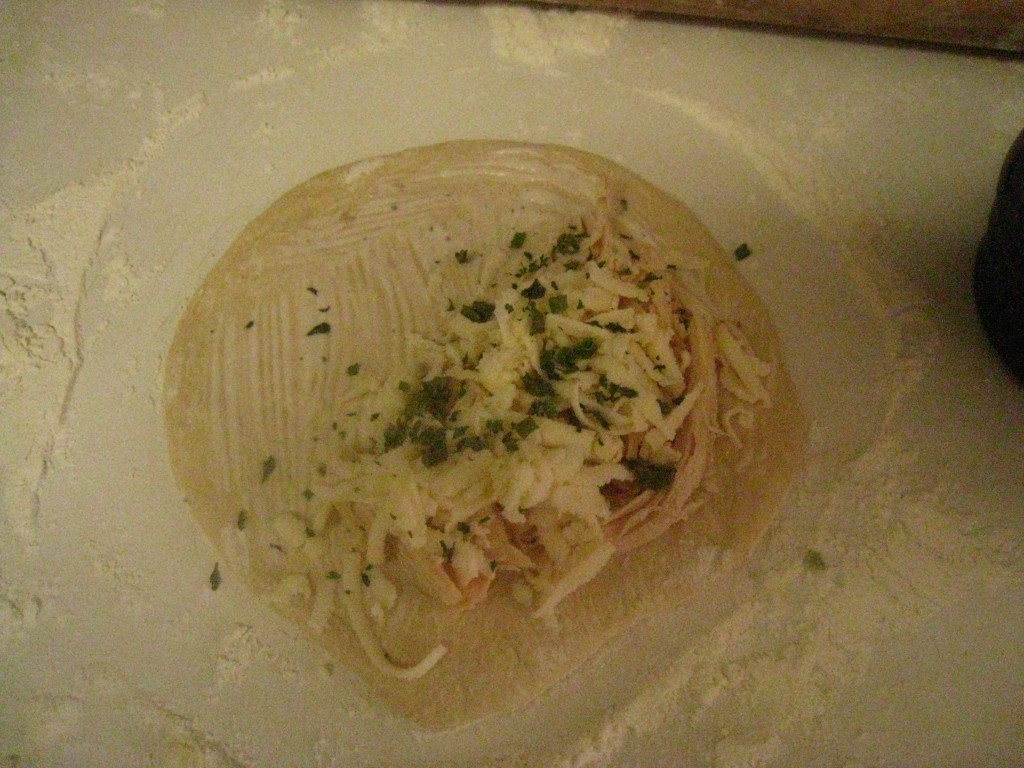
Divide your pound of dough into 6 equal portions. Roll out each portion into a 5″ circle. Spread 1 TBSP of sauce on the circle, and place the chicken cheese and any other seasonings on one side of the circle.
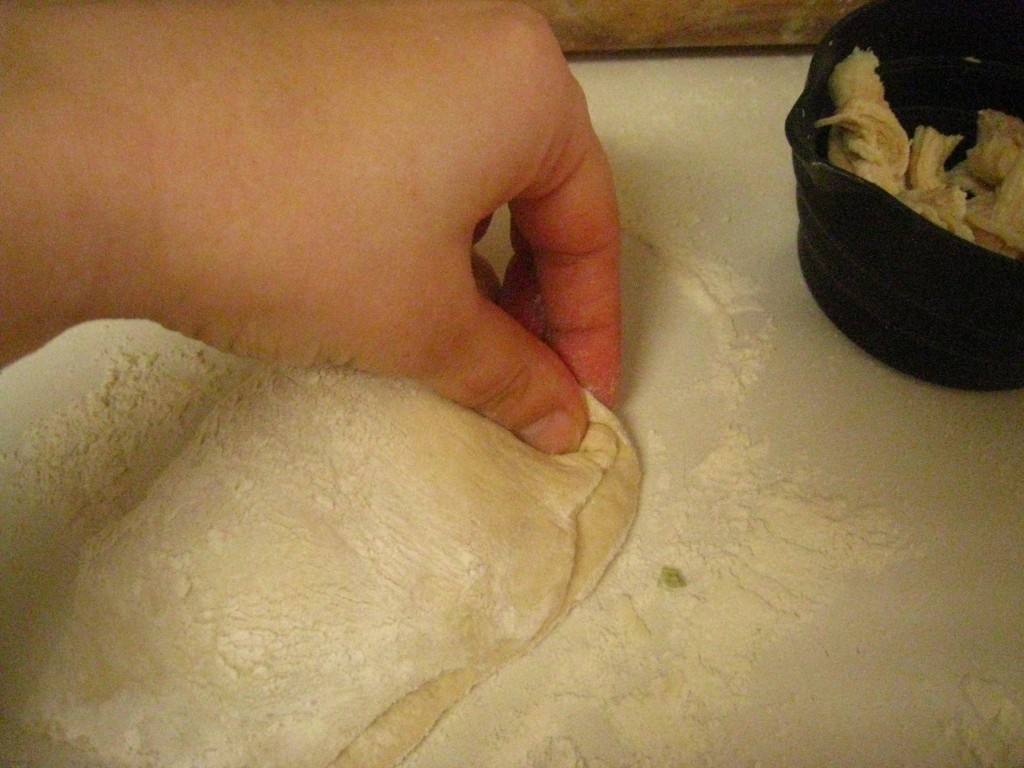
Fold the other half of dough over, and seal the edges. You can crimp them like a pie crust or the like and leave it at that…

…or you can work the seam until it smooths and practically disappears, which is my preference. Place the pockets on a pizza stone or cast iron pan. Brush the tops with water, and then use a knife to slash a line through the top. Bake at 450F for about 10 minutes, until bottom crust is golden and cheese is melted.

Provided you have all the ingredients in place (i.e. bread dough at the ready, chicken cooked and cheese shredded), this is a very QUICK recipe. It was quick for me because I had the artisan bread dough in the fridge and had previously prepped the chicken. Shredding the cheese took only a couple minutes.

It’s certainly EASY! And it makes a great easy lunch: fix up a batch of these to store in the freezer for an easy lunch option.

It’s definitely CHEAPer than buying a similar item at the store in the freezer section. Save some moula and make it yourself!

It’s also a good HEALTHY option, even healthier if you add some vegetables like chopped green peppers or tomatoes, or even broccoli. I like to serve it with fresh fruit for a well-rounded meal.

 

The Great Chicken Breast Adventure:Prepping the Chicken

I was literally in awe when I read this post from JessieLeigh of Parenting the Tiniest of Miracles. Jaw-dropping awe, I tell you. She fed her family of 5 with just 5 bone-in chicken breasts that made 5 - yes, 5! - meals! Is your jaw dropping, too?

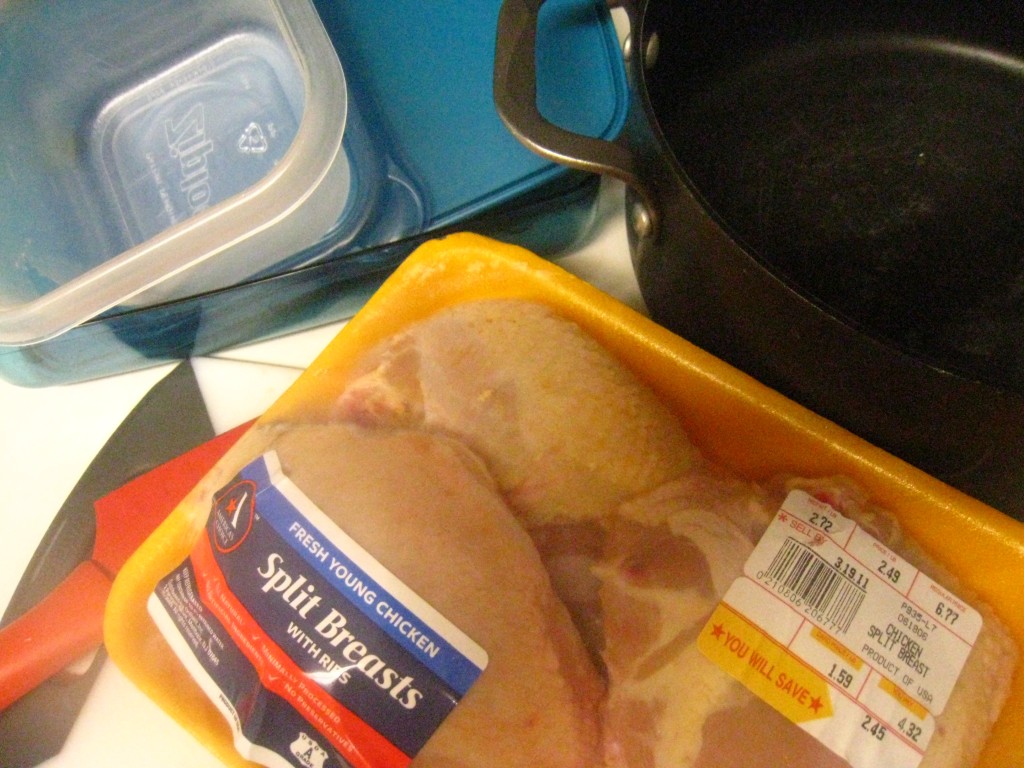
I realized I could learn something from her, and decided to challenge myself similarly. Lucky for me, split chicken breasts went on sale the very next week, so I picked up a package, eager to try and see if I could feed my family of 3 (because Baby Boy does not eat chicken breasts so he doesn’t count in this instance) 3 different meals with just 3 chicken breasts.

Come on, now, reach deep down inside and pull out your inner Bob the Builder: “Can she do it?” “Yes, she can!” Yessirree, Billy Bob, I made 3 different meals for my family with just 3 chicken breasts! Wanna see how? All this week, my posts will feature the Great Chicken Breast Adventure, detailing exactly what I did with those 3 chicken breasts.

First off, the prep. I am learning over and over that the biggest key to successfully having a “QECH” kitchen is a little advanced prep. Advanced prep usually takes only a portion of your time, but saves you oodles of time later when it counts. One great advantage is that you can choose when to do your prep, so you can maximize the time that you have.

You will need:

  • bone-in chicken breasts
  • a sharp knife
  • a cutting board
  • a large pot or stock pot
  • containers or bags for freezing

Prepping the chicken breasts didn’t take very long at all, and it was great to have the chicken ready-set-to-go in the freezer for quick weeknight meals. Here’s how I did it, per JessieLeigh’s instructions:

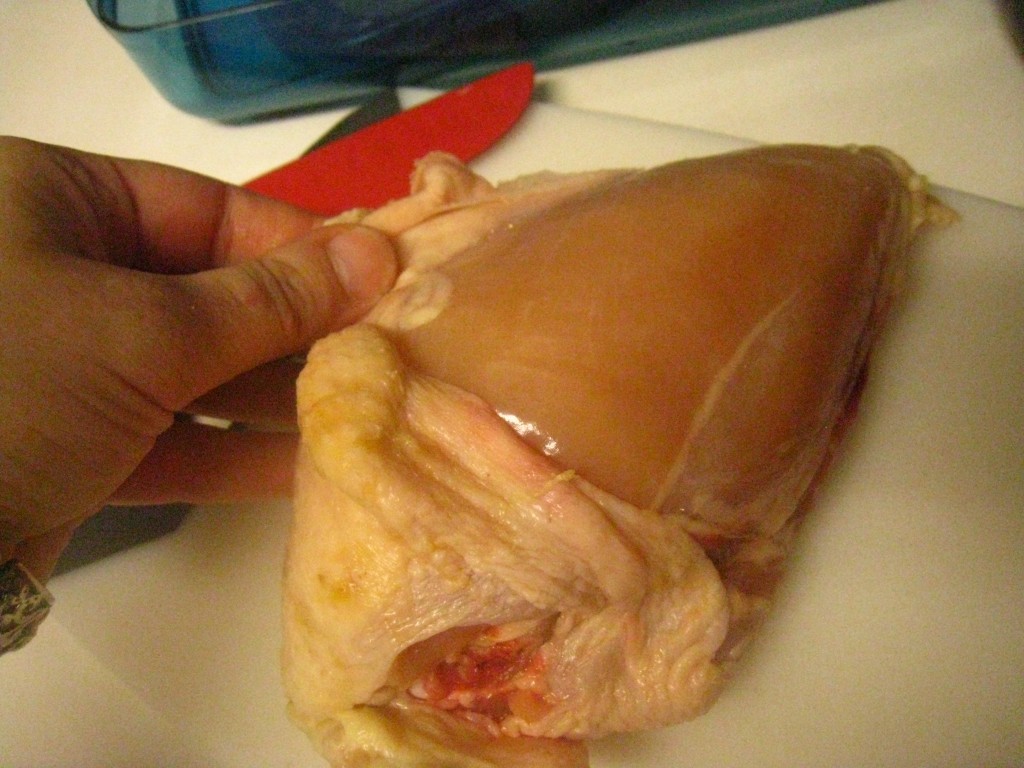
First, peel the skin off the breast, using a sharp knife to help where necessary. Keep the skins to help make a deliciously flavored broth later.

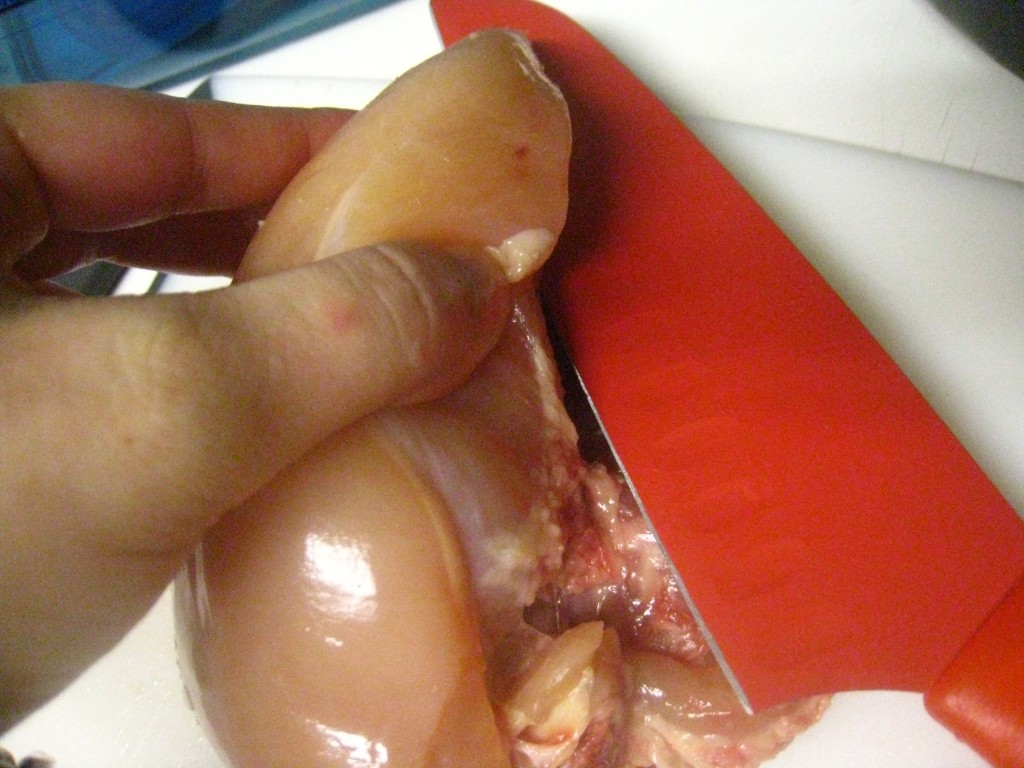
Next, slice the fatty meat portion off the bone with a sharp knife. Try to cut as close to the bone as possible, but don’t worry about perfection (unless you plan to serve the president. Or your mother-in-law.).

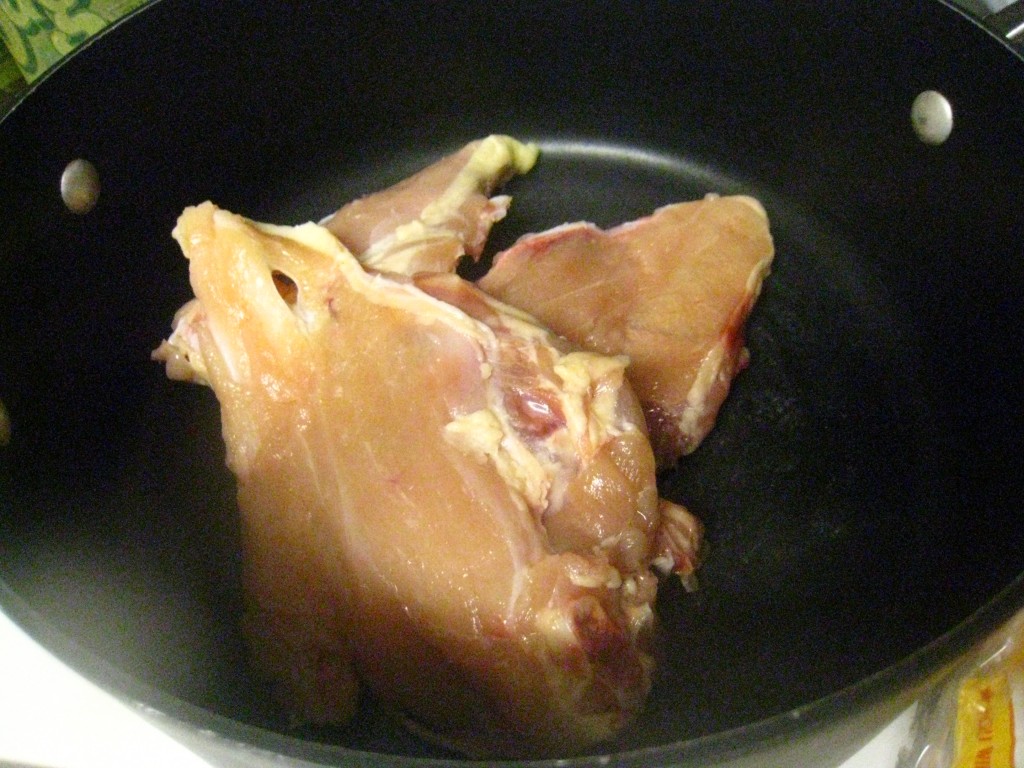
Place the bones with remaining bits of flesh into a large pot and cover with water. Bring to a boil and boil for 20-30 minutes or until cooked through. While they’re cooking, continue with the chicken breasts:

If any of the breasts are large enough, take advantage of their size and slice them in half to make 2 thinner chicken breast portions. This will stretch the meat even further!

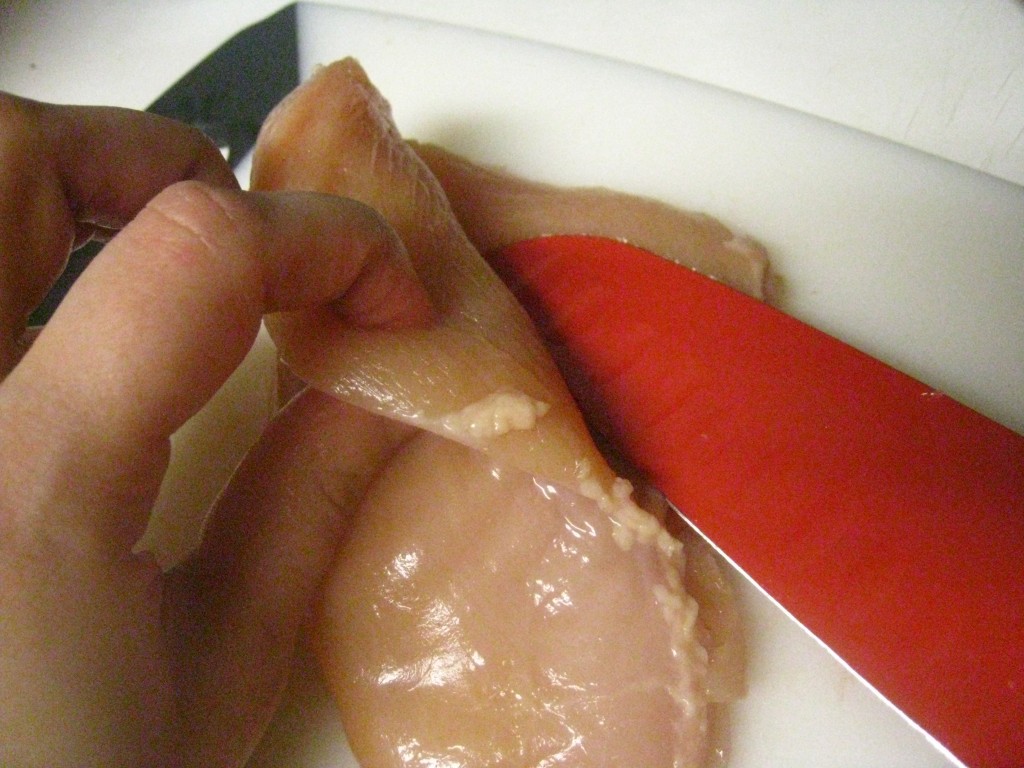
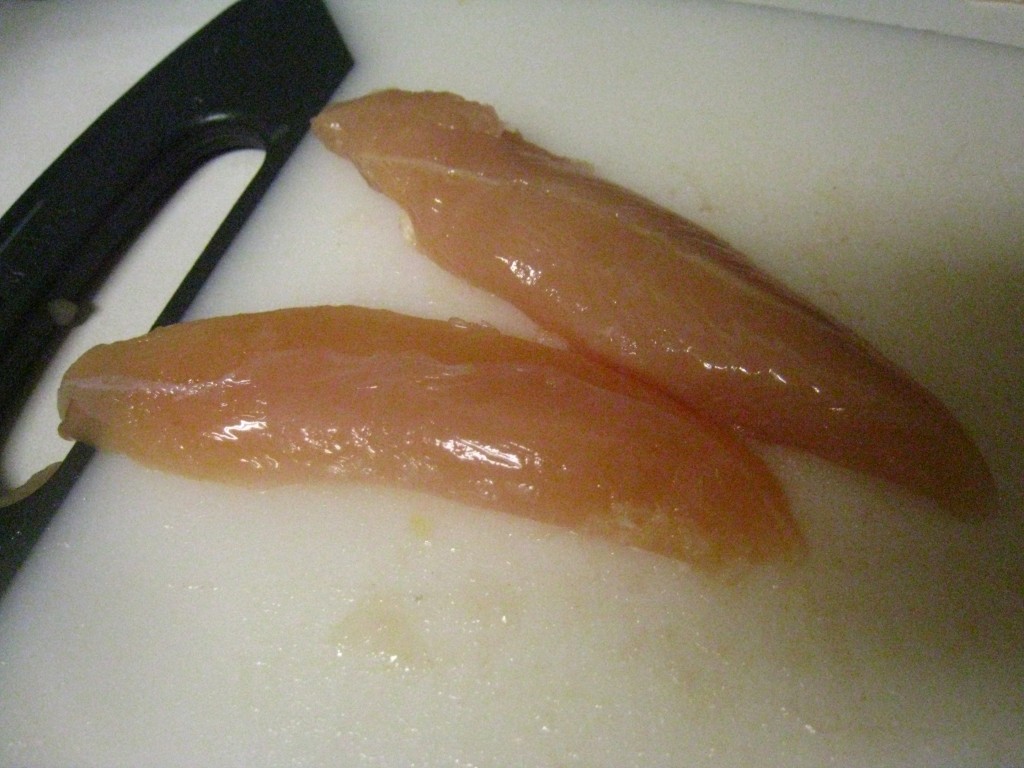
Slice off the tenders. I only got two; I think I did something wrong!

The main portion of the meat is now ready. You can either cube the chicken breasts (or a portion of them) and tenders or freeze them as is, depending on your intended use. I froze them all whole because I wanted to cook them in their entirety later on.

Now back to the bones you set to boiling.

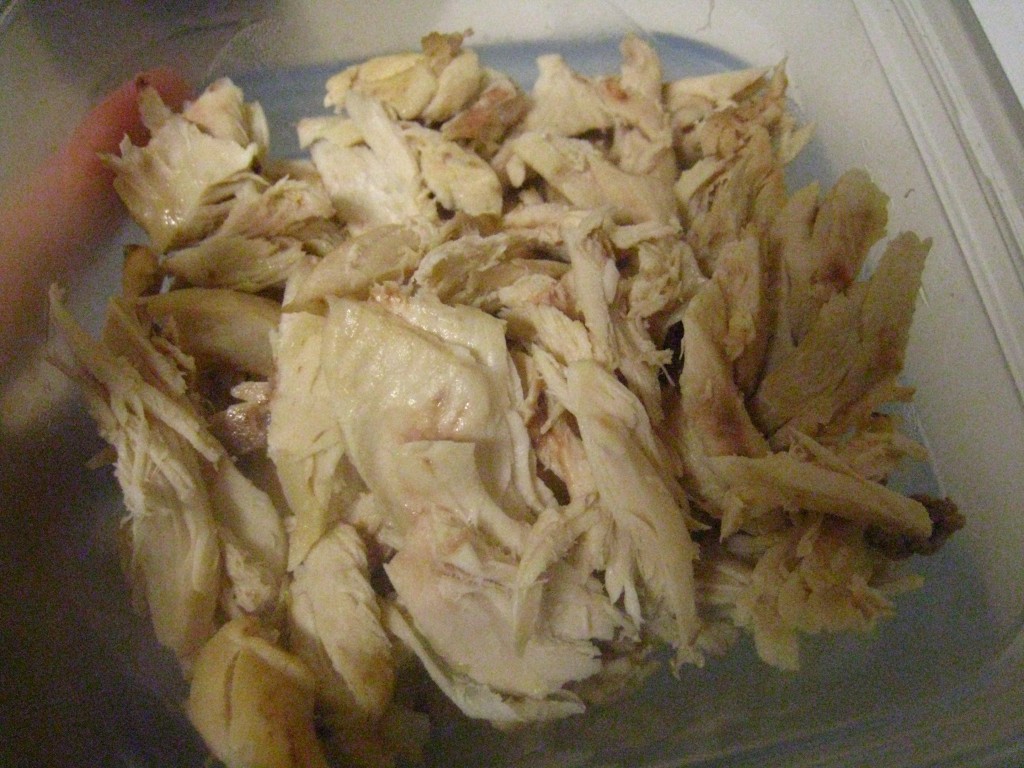
Remove them from the water (and don’t dump out the water!) and allow to cool until safe to handle. Using your fingers or a fork or knife, remove all the remaining now-cooked bits of chicken meat from the bones. I got about 1 1/2 cups. Use right away or freeze for a later meal.

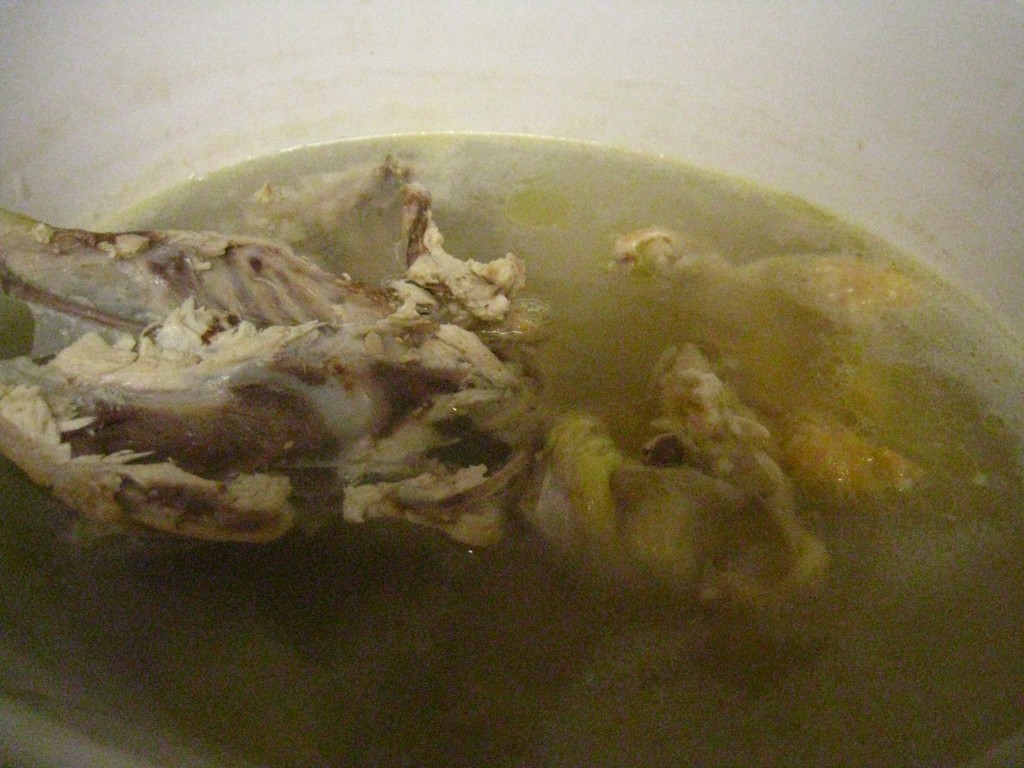
Place the bones, the water from cooking the bones, and the skins from earlier into a slow cooker. Add more water if necessary to cover everything and cook on low for 8-10 hours or on high for 4 hours. (I like to do this overnight so I choose the low option.) You can also add vegetables (like carrots and celery) or even vegetable peels and ends. I also like to add some salt, whole black pepper, bay leaves, allspice berries and even some dried lemongrass for added flavor.

After it cooks in the slow cooker for a nice long while, strain and store your homemade broth in the fridge to use for yet another meal!

That’s right: not one piece of this baby goes to waste!

I never wanted to de-bone and de-skin my own chicken breasts before, thinking it was just to much work, but then I read JessieLeigh’s post and changed my mind. It’s really very QUICK and doesn’t take much time at all.

I was also leery of the whole procedure, thinking that it required some knowledge of butchery. Nope. EASY as it comes!

It is no secret that bone-in, skin-on chicken breasts are a LOT CHEAPer than the bone-less, skin-less variety. Now you know what to do with them! Maximize the money you spend on them by using the skin and bones to make a savory broth.

And it’s so much HEALTHY-er to do your own prep instead of relying on pre-prepped packaging, because that usually requires some sort of stabilizer or preservative and flavoring or even coloring. And making your own broth is such an easy thing to do that adds so much nutritional benefit to your diet.

So what did I make with the chicken?

Barbecue Chicken Pocket Sandwiches

Chicken with Orange Sauce

Double (Triple?) Cheese Chicken Pizza with Broccoli


Find more frugal recipes at: Frugal Food Thursdays.

Guest Post on 5 Dollar Dinners!

Check out my guest post at 5 Dollar Dinners, detailing the anniversary meal my DH and I enjoyed at home.

A Springy Casserole

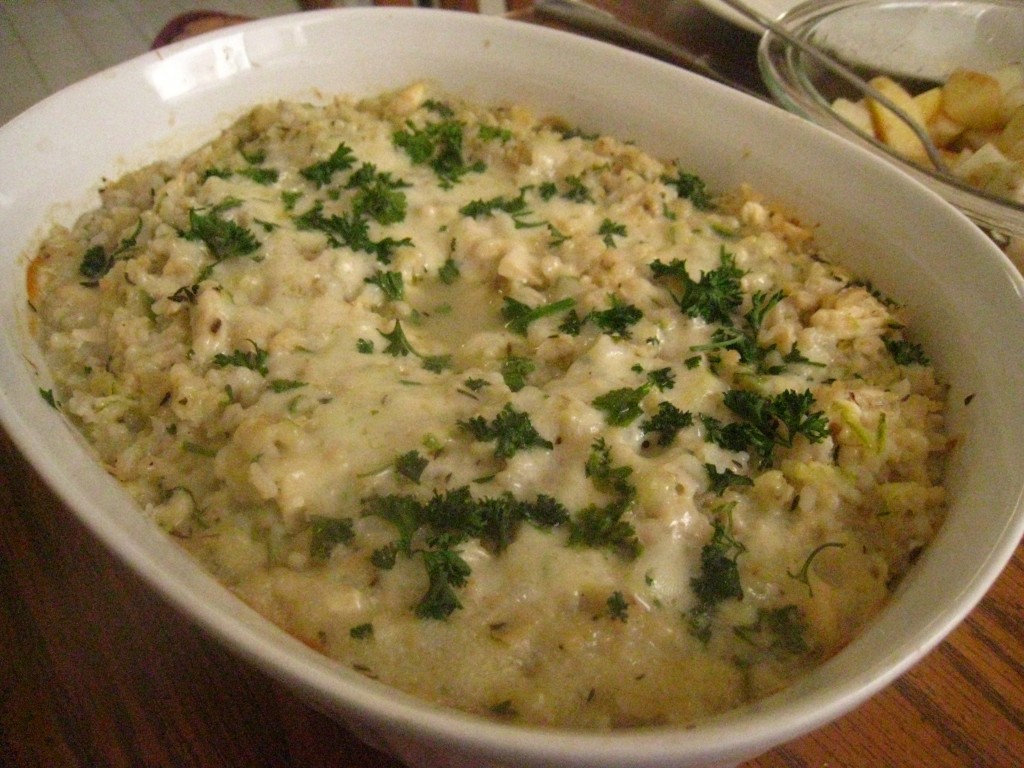
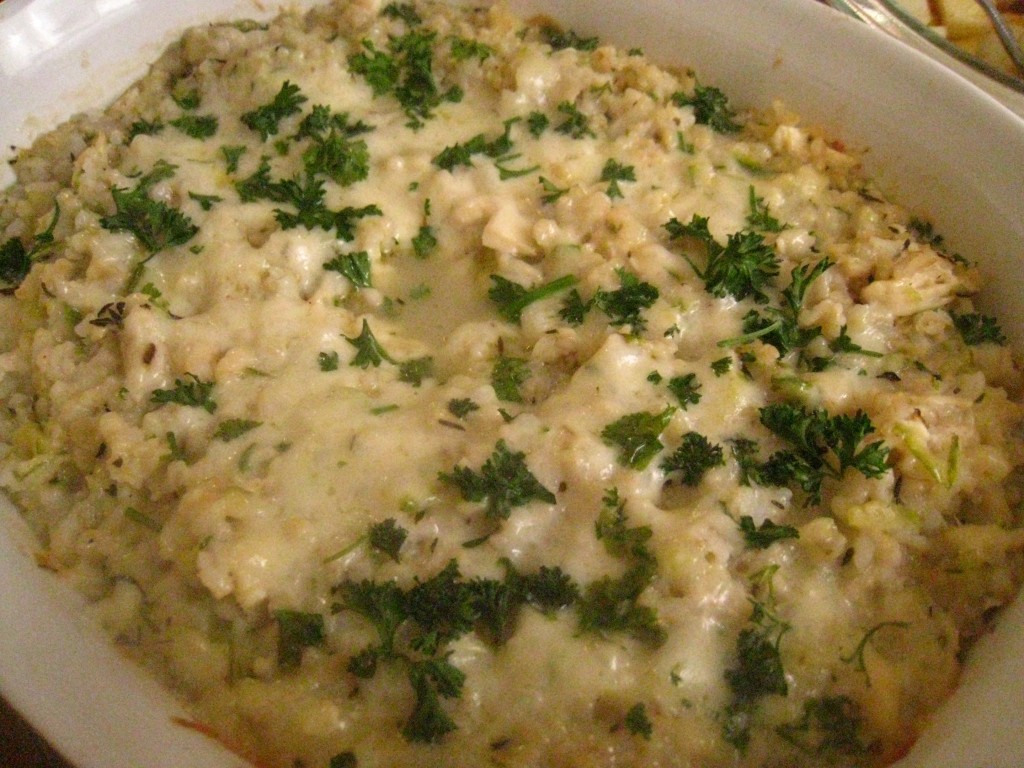
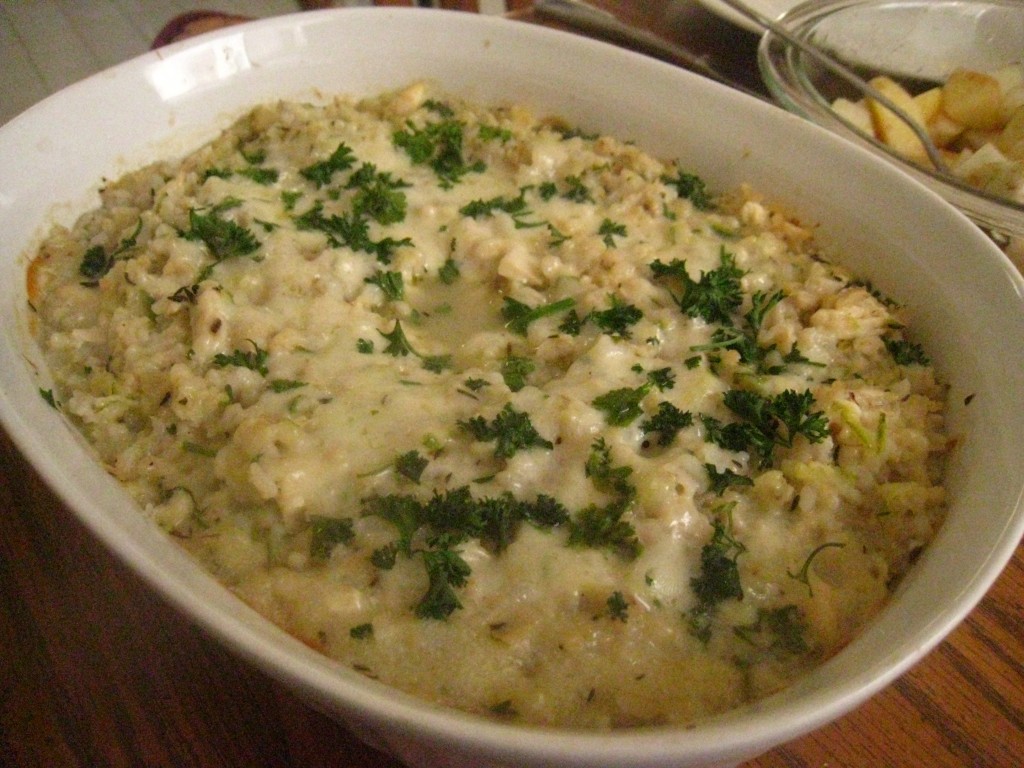
Usually, I think of casseroles as more of a comfort food, perfect for warming up the coldest days of winter. This casserole is different. This casserole speaks of warmer temperatures heralding the greener, brighter days of spring.

Sound good to you? Yeah, I thought so. I know I can’t possibly be the only one ready for winter to let go of its tenacious grasp. Hello, the calendar says it’s spring already!

I found the original recipe here on about.com when I was searching for the perfect combination of chicken, cheese and rice. Of course, I changed it up a bit because I like to do that. One thing I should mention: I made it with peppers, as the original suggests, to give to another family, but for us, I used zucchini instead, as you will see below. Both are great options, and of course, you can try other vegetables as well.


Provided you have previously cooked chicken and rice, this recipe comes together very QUICKly, although it’s perhaps not the quickest dinner ever. Plan on a little less than an hour, start to finish.

It’s very EASY, though.

It’s also CHEAP, like most casseroles. Like soup, casseroles are a great way to utilize leftover starches (like rice and pasta), meats (chicken especially) and veggies. Plan them into your menu!

It’s very HEALTHY, as well. I found a lot of recipes that called for processed cheese or canned cream soups, neither of which are good for you. This recipe uses wholesome, unprocessed ingredients, resulting in a fresh springy casserole.


Orange + Chocolate = Tastebud Heaven

Have you ever had a chocolate orange? They’re more readily available in Europe than here in the United States, but you can still find them around. If you’ve never had one, and you come across one - snatch it up! It’s pricey, but it’s worth every penny (well, once in a while anyway!).

It’s been a loooooonggg time since I’ve had one, but I remember well the amazing (and yet unlikely) combination of chocolate and orange. Whoever first put those two flavors together was a genius! Lately, I’ve been experimenting with the combination myself… and having a great deal of fun in the process! This morning, for example, I treated myself to orange chocolate pancakes. Wow. Orange juice in the batter and shaved chocolate stirred in - to die for!

Mostly, though, I’ve been experimenting with an orange mocha drink, or perhaps better entitled, “Chocolate Orange Cafe au Lait“. It’s a tough job, but somebody’s gotta do it.

The orange flavor is more of a faint reminiscence than a full-on tastebud explosion, but that’s probably a good thing considering all the other stuff going on in this drink. It starts with a simple syrup, to which is added a very basic hot chocolate, and a splash of coffee, all topped off with whipped cream (if desired). Once you’ve made the syrup, you can enjoy more Chocolate Orange Cafe au Laits for the next couple of weeks (if you don’t share! and I wouldn’t blame you.).

Chocolate Orange Cafe au Lait

Orange Simple Syrup:

1/2 cup sugar

1 cup water

rind from 1 small orange or clementine

Mocha:

1 TBSP cocoa

1 TBSP water

1/2 cup milk

1/2 cup brewed coffee

whipped cream, optional

To make the simple syrup, bring water, sugar and orange rind to boil in a small saucepan. Reduce heat and simmer for 10-15 minutes. Remove from heat and allow to steep as long as you’d like. Strain and store in refrigerator.

To make the cafe au lait, stir together the cocoa and water in the bottom of a large mug until you have a smooth paste. Stir in milk. Heat in microwave on High for about a minute. Stir until well blended; stir in coffee and 1-2 TBSP of simple syrup (or to taste). Top with whipped cream (if desired). Enjoy!

Once you’ve made the simple syrup, assembling the drink is super QUICK: quicker than standing in line at the coffee shop at any rate!

It’s very EASY, too. (That’s why being a barista doesn’t require any kind of culinary expertise!)

It’s also much CHEAPer than purchasing a fancy drink at a coffee shop (or even cheaper than purchasing store-bought orange simple syrup, especially since you’re using a part of the orange that is typically discarded).

It’s a lot HEALTHY-er than coffee shop drinks, too, because all the ingredients are natural, and you can use organic ingredients too!

Photobucket
Tempt my Tummy Tuesdays

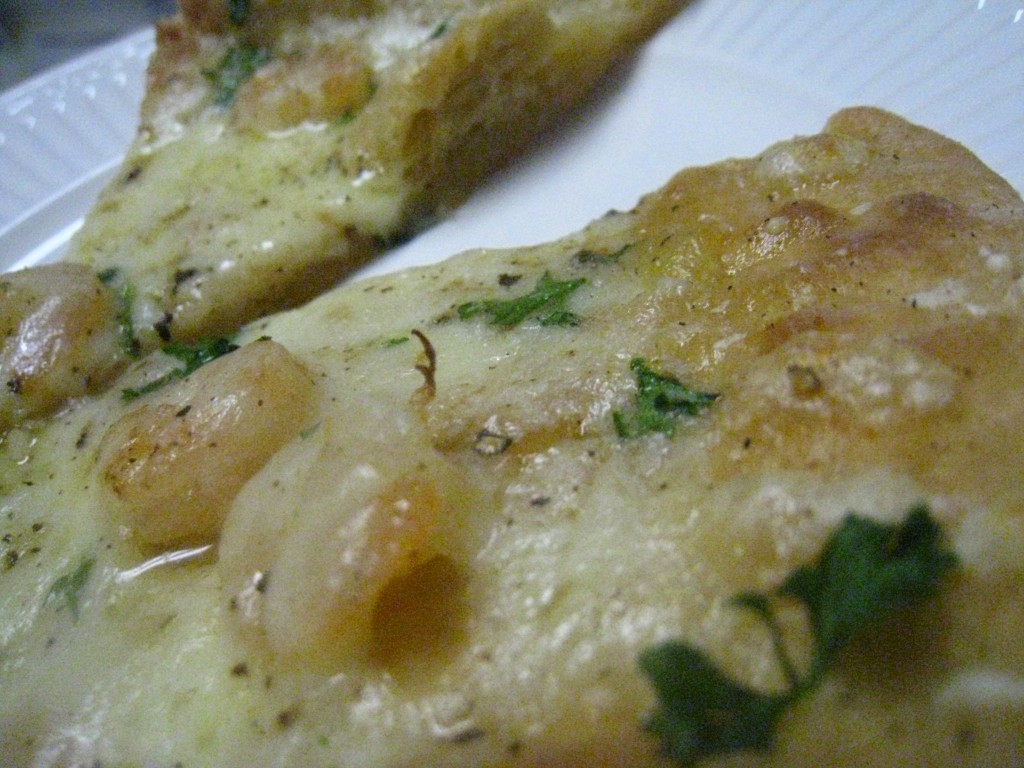
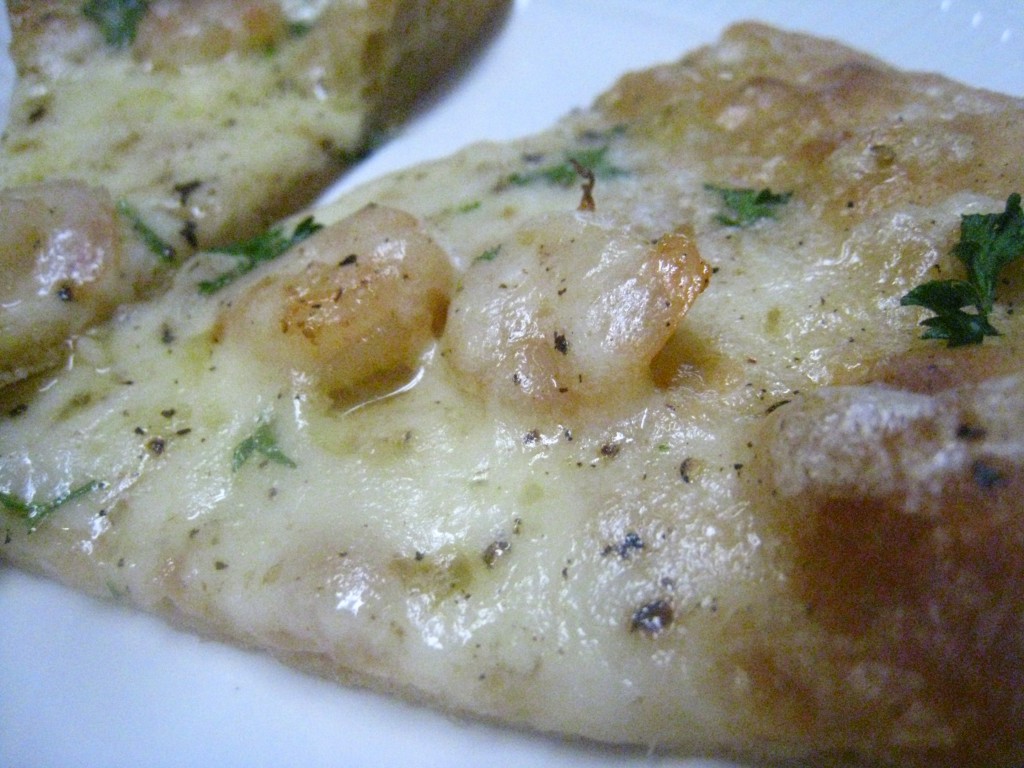
Shrimp Scampi… on Pizza!

We eat pizza around here at least twice a month. Not delivery, though. Oh, no! That’s far too expensive (and not very healthy). No, I actually have tons of fun making all kinds of different pizzas. My own creativity, though, is rather limited, so I rely on ideas from others with more active creative juices than my own.

I found this particular inspiration in a magazine that was sent to me at random: I don’t even remember exactly what the magazine was - a solicitation of some kind I think; all I remember is that it was full of a bunch of different recipes. Most of them I discarded, a few I clipped and saved for a while and then discarded, and this one stuck around until I did something with it.

It’s not often that I have shrimp hanging around, though, so who knows if I will ever do this again, but it was fun while it lasted! Naturally, I tweaked the recipe just a bit, because you know, I just can’t leave a recipe alone!

Homemade pizza is such a great QUICK weeknight meal. To be honest, I really think it’s faster to make it yourself than to order delivery.
It’s also very EASY. Yeah, you have to roll out the pizza dough, but that’s not all that difficult.

Making your own pizza is certainly CHEAPer than buying it. No question about it!

Making your own pizza is also always HEALTHY-er than buying or ordering it. Even the oil, butter and cheese in this recipe is actually good for you - fats are essential for your body, too.


My OAMS Trial - Month #2 is Underway

I am happy to announce that I successfully completed my first “OAMS” trial, by which I mean “Once a Month Shopping”, and by shopping I mean grocery shopping. I know many of you are anxious to see how it goes for me so you can decide if you would like to take the leap, too.

So far, it’s been a mixed bag. There are definitely both pros and cons as I have discovered.

Pros:

  • I did spend less overall. I went about $6.00 over the monthly grocery budget, which is pretty good, considering on a normal weekly shopping trip, I would easily go as much as $5 over the budget. I also included all my Certain Little Someone’s special food in my budget this time (like coconut milk for drinking, rice milk for baking, and special flours). Previously, I didn’t include that in the grocery budget because I kind of figured it took the place of the expensive Nutramigen formula we used to have to buy for him.
  • I really really enjoy having one big shopping trip. It’s so nice to be able to just buy everything we need all at once instead of trying to decide, “should I hold off on this item until next week or get it right away?”. It feels good to start out the cycle with a fully stocked kitchen.
  • It has made meal planning easier. I am now planning meals 2 weeks out, whereas I used to plan only one. I know this is nothing to those of you who regularly plan at least a month at a time (which will be my next step!), but for me, it’s a big thing.

Cons:

  • My kitchen was really getting very bare by the end of the month and my list was growing longer and longer by the minute, it seemed. Although it all worked out in the end for this month, I am concerned about the next cycle. Last time, I was coming off a fairly well stocked kitchen before embarking on this trial. This time, I’m coming from a barely stocked kitchen: big difference! We will see how it goes.
  • Somehow I miscalculated and we didn’t have *quite* enough of a few items to last through the month, so we just did without them for a few days until my big grocery shopping began.
  • One thing I felt consistently short of was adequate amounts of fruits and veggies. I will have to work on that this time around.

Overall, I was very pleased with the experiment, and excited about trying it again.

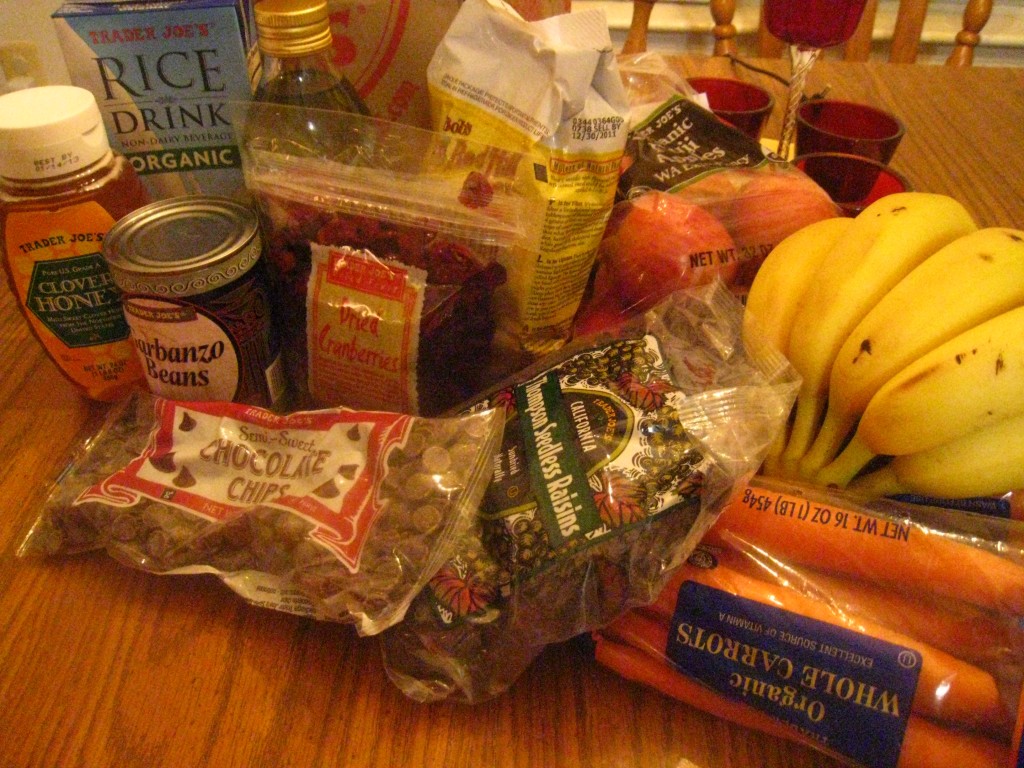
In the picture above, you can see my first stop this month, which was Trader Joe’s. Here’s what I bought and what it cost:

Trader Joe’s

8oz dried cranberries 1.99

16oz raisins 2.29

16oz ground flax seed 2.69

12oz semi-sweet choc. chips 2.29

2 lbs organic apples 2.49

2 lbs organic carrots 1.78

1 can garbanzo beans $0.89

8 bananas 1.69

24 oz honey - 4.49

16.9 oz olive oil - 3.49

TOT: $25.61

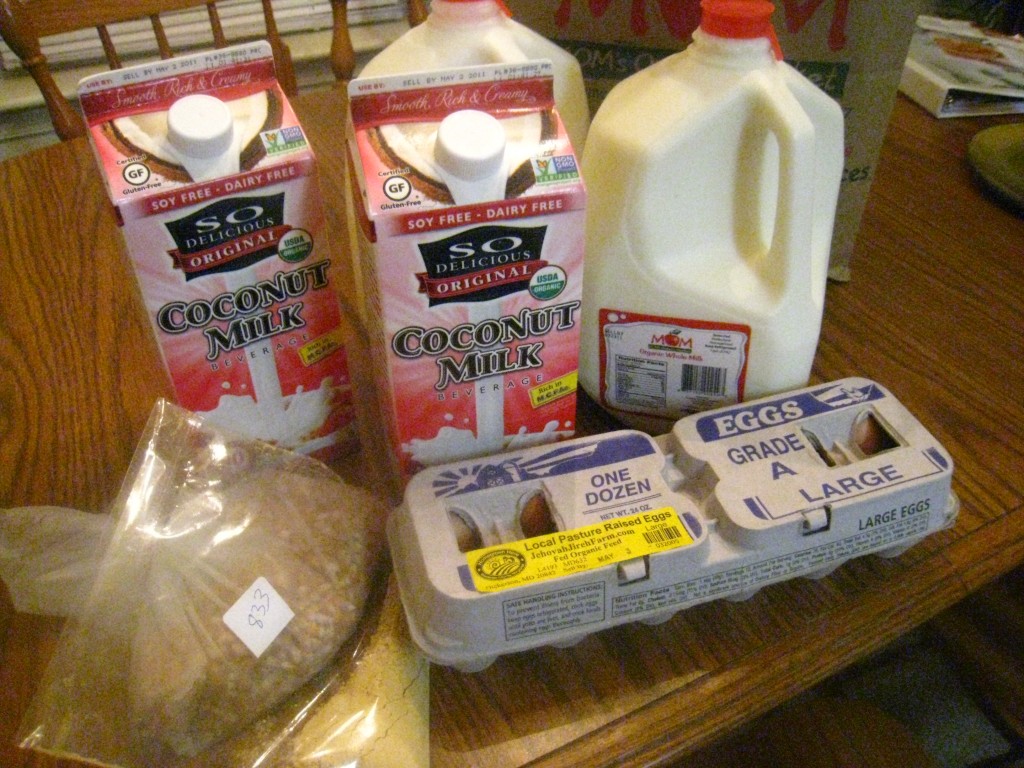
MOM’s

2 64oz carton So Delicious coconut milk 7.00

2 gal organic whole milk 11.20

1 dozen pastured local eggs 4.29

<1 oz. ginger root 1.36

2/3 lb popcorn kernels $0.93

TOT: $24.74

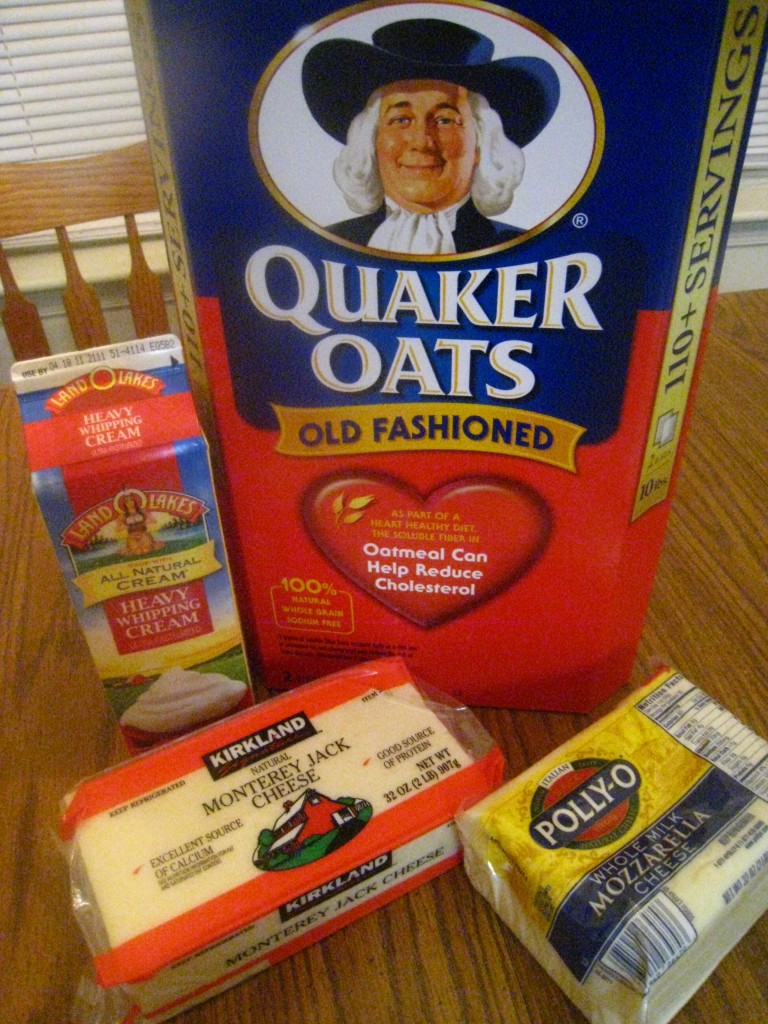
Costco

1 massive box of Quaker Oats 6.89

1 qt heavy cream 3.89

2 lbs Monterey Jack cheese 4.69

2 lbs Mozzarella cheese 5.79

TOT: 21.26

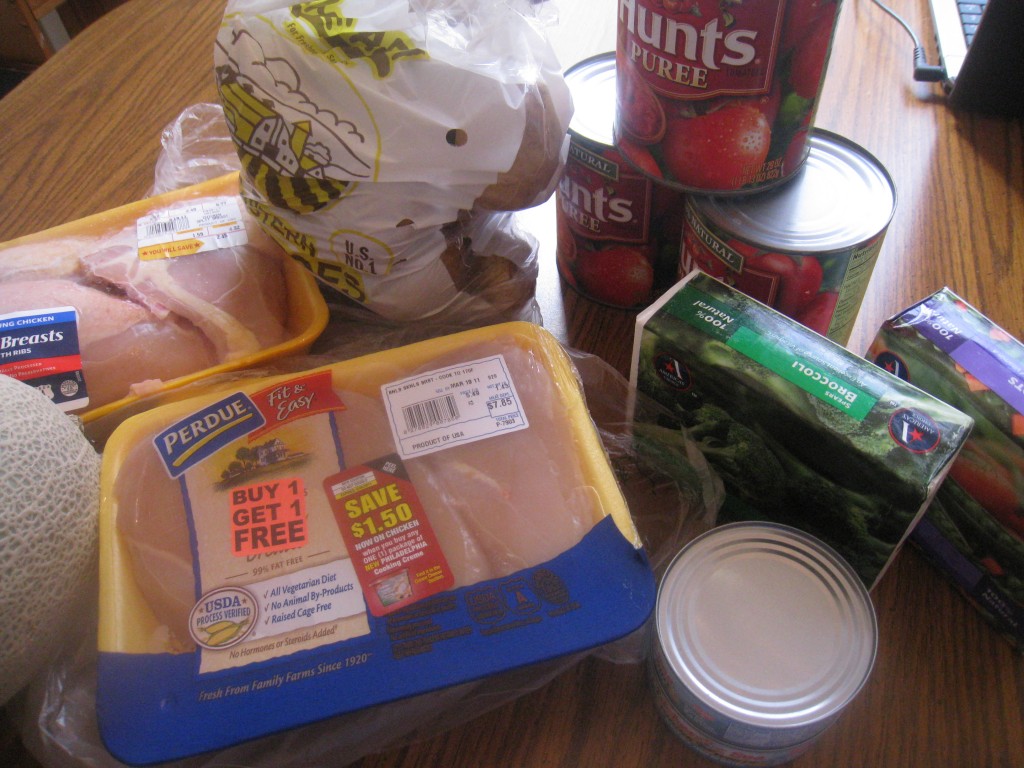
Super Fresh

3 16oz cans Hunts tomato sauce 2.00

1 lb frozen broccoli 1.00

1 lb frozen peas and carrots 1.00

2 6oz cans Chicken of the Sea tuna 3.18*

1 cantaloupe 1.99

5 lbs potatoes .99

3pc pkgSplit Chicken Breasts 4.32

2 pkgs Perdue boneless skinless chicken breasts 4.85

TOT: 19.33

*This was a mistake. My DH very sweetly did this leg of my shopping trip because I was under the weather, and accidentally grabbed the tuna that was not on sale.

Safeway

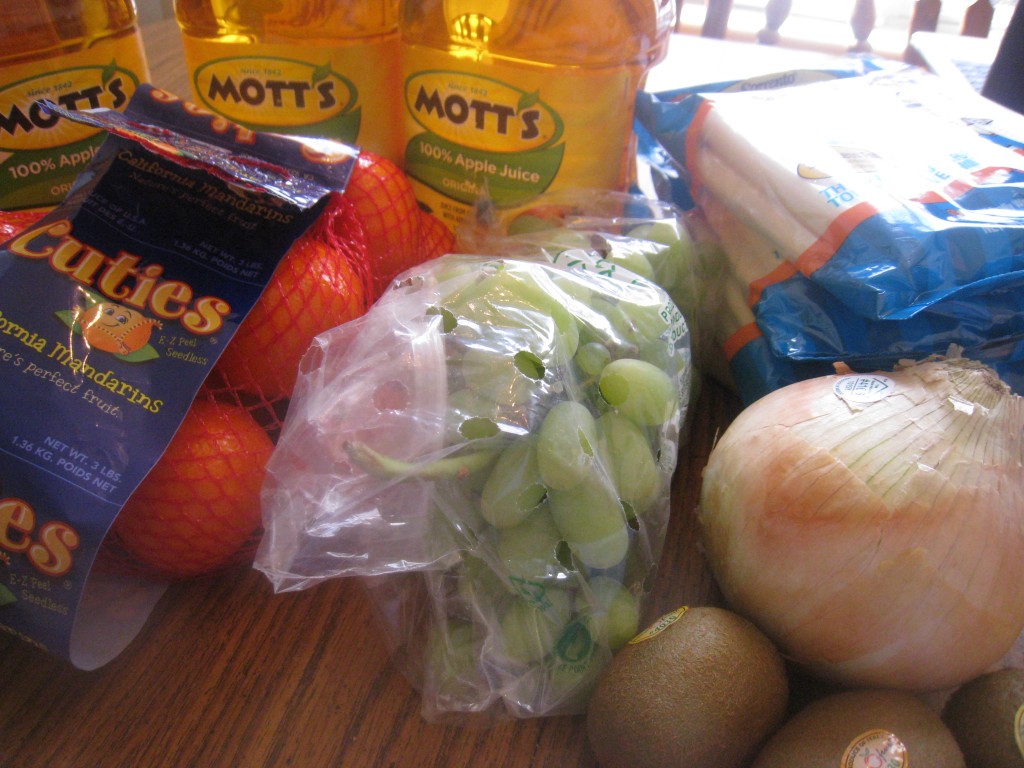
3 64oz bottles Mott’s Apple Juice 5.00

4 12oz pkgs Sorrento string cheese 6.00

1.3 lbs grapes 1.28

3 kiwi .99

1 lb onion 1.03

3 lbs Cutie clementines 2.50

TOT: 16.77

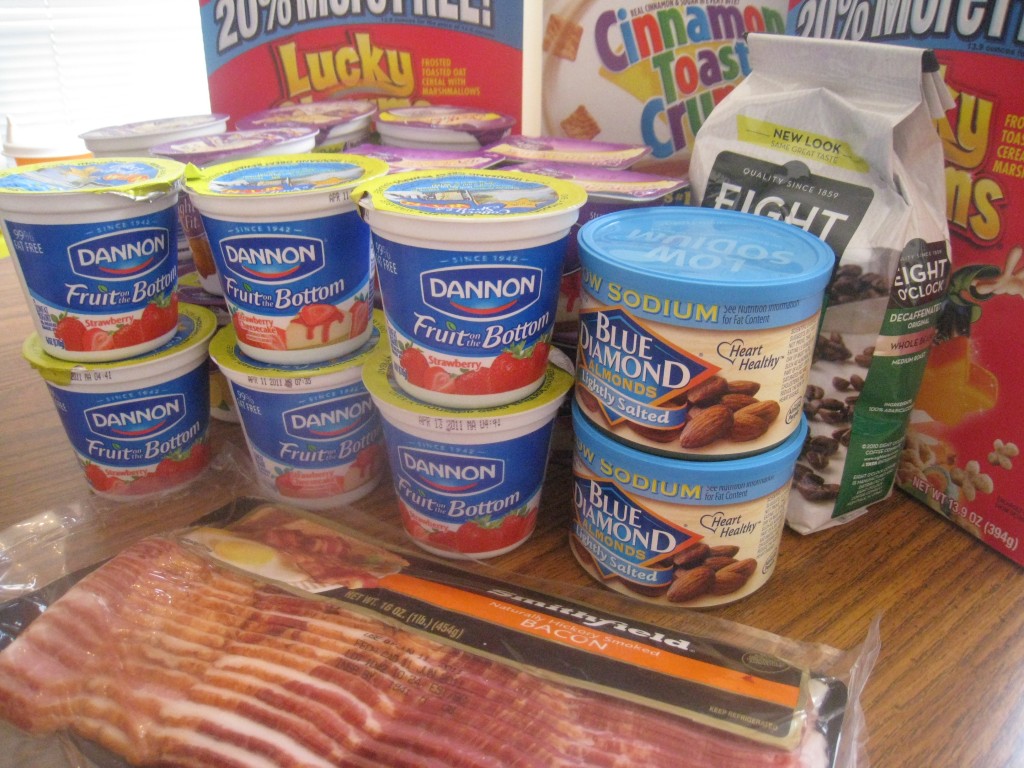
Note: the last store will reveal some of my compromises for the sake of relationships and other considerations. I mentioned last month that DH won’t touch my homemade yogurt so I always get him the yucky storebought kind. I actually don’ t mind Dannon yogurt, especially their all-natural line, but unfortunately, they were out of almost everything but Light and Fit (which has fake sugar, something I abhor). And the cereal is a snack for my Certain Little Someone, because there are so many things he can’t eat, I like to give him some yummy foods he can … at least when they cost next to nothing!

Giant

1 pkg Eight O’Clock coffee 3.99 (supposed to be 2.50 but the coupon didn’t make it to the store)

3 boxes very unhealthy cereal 1.70

1 lb Smithfield bacon 2.40

2 cans Blue Diamond almonds 3.50

20 Dannon yogurts 8.00

TOT: 22.94

GRAND TOTAL: approx. $130.00

That leaves me with about $70 to finish out the month, around $23/week. Think I can do it?


Triple-Ch. Muffins

I signed up to bring muffins to a ladies’ brunch this past weekend, not knowing exactly what kind of muffins I could bring, but knowing that in any case, muffins were a fairly Quick, Easy, Cheap and possibly Healthy choice for a brunch menu. As I mentally wandered through my kitchen, picturing what few ingredients I had left (this was before my big monthly grocery shopping, more on that in my next post), my mind’s eye settled on the container of cherries perched in the freezer. Perfect.

But cherries, delicious as they are, are much better when paired with chocolate. Naturally. (Isn’t everything much better when paired with chocolate?) And chocolate muffins, as delicious as they are, are even better when paired with the flavor and texture of cheesecake.

Oh yeah. Now we’re talking!

I gave a shout-out on my FB page, but nobody apparently had a recipe for such a creature, so I was left to my own devices. Always dangerous. I searched and searched (OK, went through a few pages on Google) but could not find a recipe anywhere for Chocolate Cherry Cheesecake Muffins. Really?! I was the first person to think of this amazing combo? (I highly doubt it; I’m sure there’s a recipe somewhere in cyberspace, but I couldn’t find it).

However, there were plenty of recipes for chocolate cheesecake muffins, so I compared 3 different variations, and came up with my own, to which I added cherries.

And there you have it, folks: Cherry Chocolate Cheesecake Muffins. (Hence the Triple-Ch)

marble-izing the muffins with a knife

This is perhaps not as QUICK as other muffin recipes, what with the extra cream cheese mixture, but totally worth it! They still come together in half an hour, give or take a few minutes.

Very EASY, although there are a few extra dishes to clean up afterwards.

With the addition of cream cheese and cherries, these are not the CHEAPest muffins, either, but here is where prior frugality shows its worth. I only ever buy cream cheese when it goes on sale for $1 or less, and then I stock up, so that is the cream cheese I used. Also, the cherries were frozen last year when cherry prices hit rock bottom for the season.

I was pleased with my HEALTHY alterations to the recipe:

  • using honey in the cream cheese mixture instead of sugar
  • replacing refined sugar with raw in the muffin batter
  • using 1/2 cup whole wheat flour
  • real butter instead of vegetable oil (and it added some delicious flavor, too!)
  • adding fruit and fruit juice to the mixture for extra nutrition!

So, perhaps not a health food, but certainly a healthier option than most other muffins.


Photobucket

1-2-3-Soup!

Well, it’s more like 1-2-3-4-5-Soup!, but 1-2-3 is just catchier, so there. And the credit for this post idea goes to Steph, the Cheapskate Cook, who just finished a round-up of great winter soup recipes.

The truth is, this is how I usually make soup: not with a recipe but with a basic guideline or formula (hence the 1-2-3-4-5). It’s hard to imagine that about a year ago or so, I could count on one hand the times I made soup. For some reason, soup seemed kind of nebulous to me, a concoction I couldn’t quite pin down to definable details and measurements, so I avoided it. When I did make soup, I wasn’t 100% satisfied with it, so I rarely tried.

Then I realized how frugal soup could be, as well as how cheap and quick. Of necessity, I needed some very quick, ready-at-the-instant weeknight dinners, and soup in the slow cooker was a perfect solution. So I began to experiment with a variety of soup recipes and began to realize that they all had an awful lot in common. And then the revelation deepened and I realized that most soups fit around a basic flexible formula.

And voila! There was no more mystery surrounding soup! I had uncoded it! Now I can make practically any soup using this formula and it almost always turns out great. I’ll share the formula with you in case there’s anyone else out there who hasn’t figured it out yet.

Note: this “formula” is for your basic broth-based soups. Creamy soups, stews, and other kinds of soup use different ingredients and methods.

I almost always make my soup in the slow cooker, because even though it takes a longer time, it’s ready immediately at dinner time, so it’s perfect for those days when you simply don’t have time to make dinner when it’s time to eat dinner. Also, even when I set the burner on the lowest setting possible, soup simmering on the stove-top tends to evaporate a lot more quickly than I think it will, which is just not good when combined with my absent-mindedness!

So without further ado, here’s how to make a perfect pot of soup any day. Just dump all the following into a slow cooker and cook on high 4-6 hours, or low 6-8 hours:

1. 6-8 cups liquid

This liquid could be any kind of broth (chicken, vegetable, beef), preferably homemade. Or it could be tomato juice (or combination of both). You can even use just plain water with a hamhock for a great ham and bean or ham and potato soup. For a slightly creamier soup, you can add a 1/2 cup or so of milk or cream about 15-20 minutes before serving.

2. Mirepoix + 1-2 additional cups chopped vegetables

The magical combination of onion, carrots and celery always ends up in soup. I would add a fourth member to that group, namely garlic. Those four ingredients can almost always be found in a broth-based soup, and for good reason: they add a lot of flavor and give depth to the broth. It’s kind of nice that they add a lot of nutritional value at the same time! You can saute them in butter or olive oil before adding them to the slow cooker, but that’s not necessary. I usually use about 1/4-1/2 cup chopped onion, 2 cloves minced garlic, 2 medium chopped carrots, and 2 chopped celery stalks.

Beyond the mirepoix, exactly what vegetable you use is limited only by what is in season and in your pantry, fridge or freezer. Corn and tomatoes are popular additions to soup, as are green peppers (hot peppers if you’re going for a spicy flavor!). Root vegetables do very well in soup: potatoes, carrots, parsnips, and beets (borscht, anyone?) all taste great in soup. I also like winter squash, like delicata, butternut, acorn or even pumpkin.

3. 2 cups cooked meat

This is where leftovers come in really handy! Pretty much any leftover meats can be worked into a soup with delicious results. I almost always end up with chicken or turkey soup, but I have also used sausage, ham, pork and beef. You can use seafood, lamb or buffalo if you want! If you want to go vegetarian, no problem: just throw any kind of beans in there instead. (If starting with dry beans, be sure to soak them before adding them to the soup.)

4. Seasonings to taste

Salt and freshly ground black pepper are a given and can be added any time. Dried herbs, like the Italian favorites parsley, oregano, rosemary, thyme and the like, can also be added any time. Hot spices like paprika and cumin - great in a Southwest bean soup or similar - can be added at the beginning. I prefer to add fresh herbs at the end, so they maintain a bit of their texture and flavor.

5. 2 cups cooked grains (added at the end)

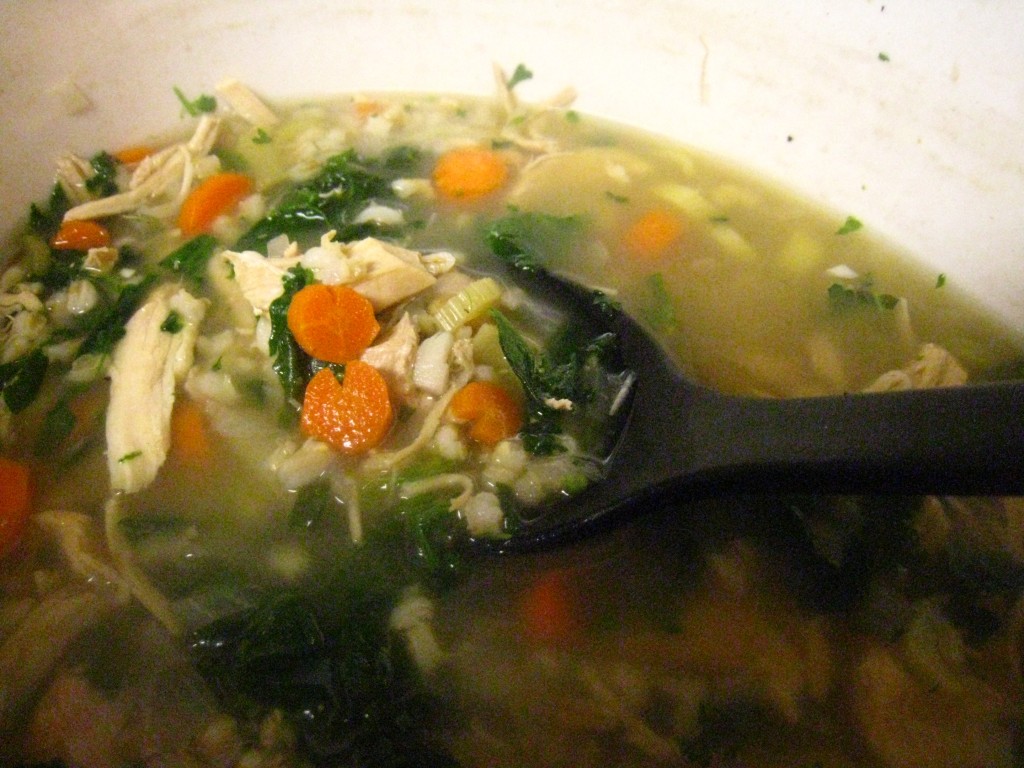
Most grains don’t do so well in the slow cooker, so it’s best to cook them separately and add them at the end. Again, leftovers shine here! Barley is the exception here, as you will see in the recipe below. Barley actually cooks up nicely in a slow cooker (on high 4-5 hours), and bulks up quite a bit, so all you have to do is add 1/2 - 3/4 cup at the beginning. Any kind of pasta and any kind of rice (brown, white, wild, etc.) work very well in soup. Quinoa is a delicious and trendy option.

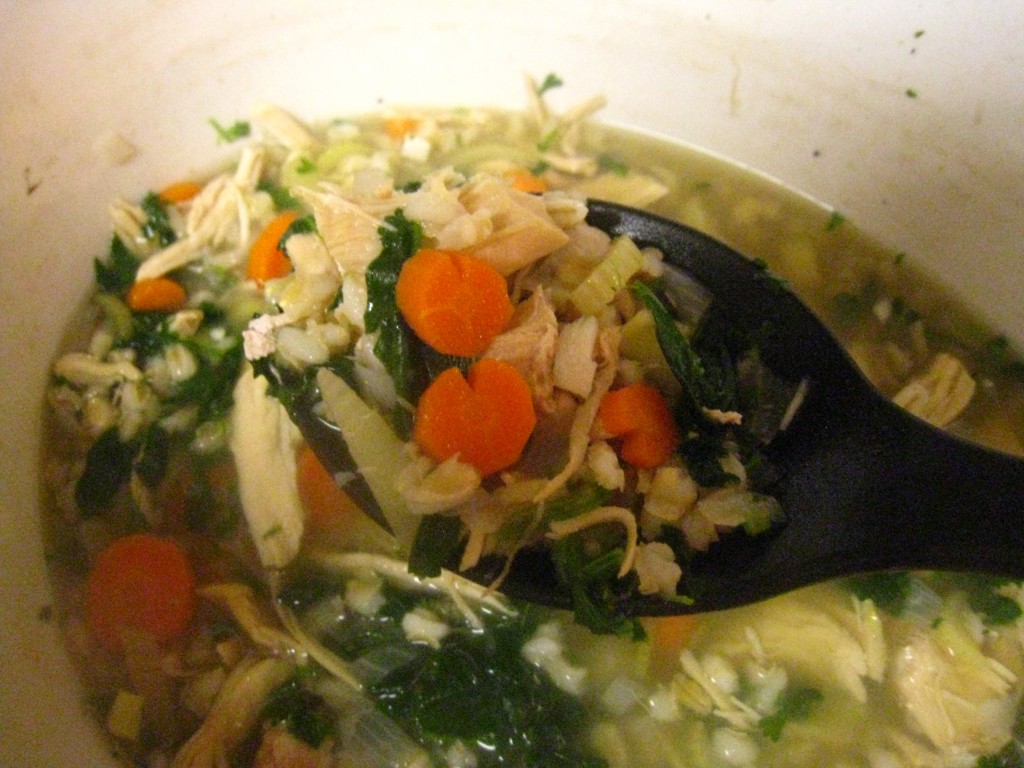
As you can see, starting with this basic formula, you can create a million different tunes soups, by mixing them up, like this:

Like I said, this makes a QUICK dinner when it comes to dinner time. All the work is done earlier in the day when you (hopefully) have a little more time.

It’s very EASY, especially when you follow the formula!

Soup is SO CHEAP! One of the most frugal meals available, for sure.

It’s also super HEALTHY. I actually think of soup as a healthy diet in microcosm. It has all the right proportions of protein, carbs, and vegetables, plus plenty of liquid (essential for our bodies made mostly of water!).

Inquiring minds want to know: What kind of soup do you like to make?

Sharing at Ultimate Recipe Swap

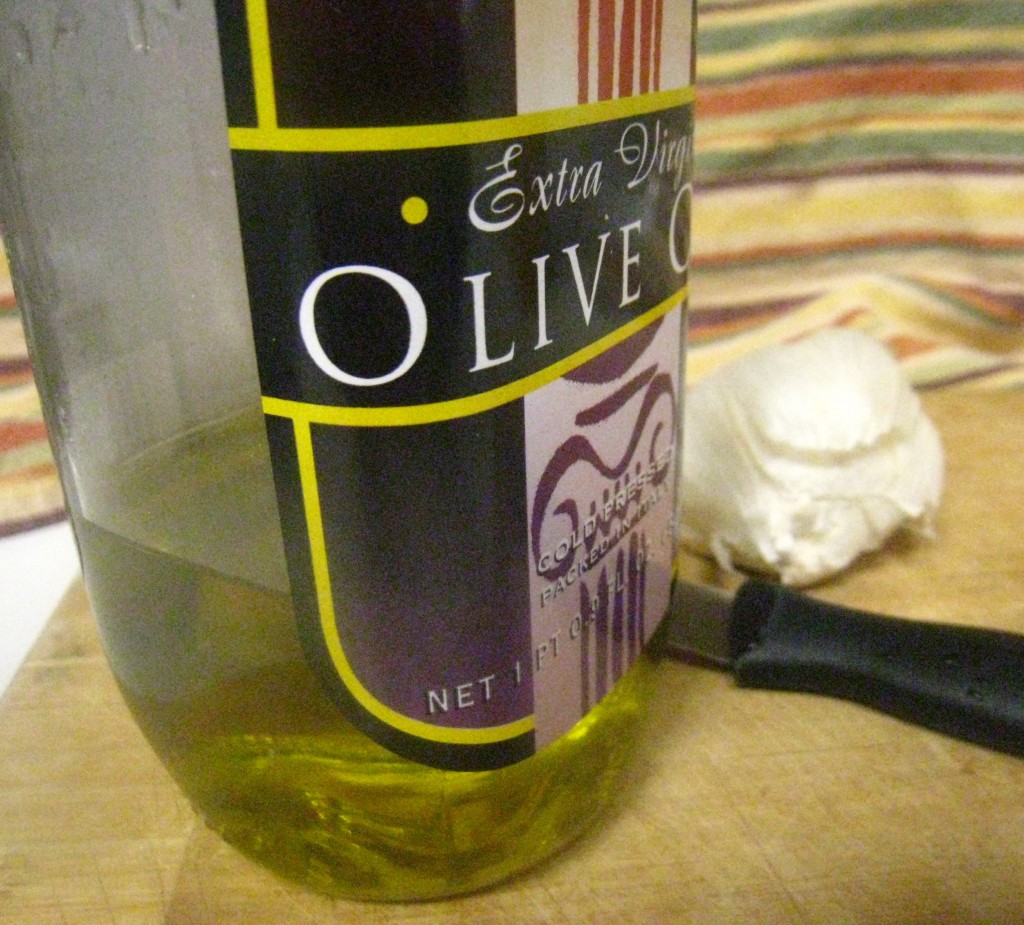
QECH Kitchen Staple: Extra Virgin Olive Oil

No kitchen is complete without a bottle of Extra Virgin Olive Oil (popularized as “EVOO” by Rachael Ray). Everyone knows, of course, that it is a healthy fat and most health-conscious people choose olive oil over other oils like vegetable oil (which is mostly soybean oil) or corn oil.

Side note here: many health-conscious people prefer canola oil over other oils because it is cheaper and has been widely advertised as a heart-healthy oil. I personally do not use canola oil, because it is a genetically modified ingredient (why I also avoid any soy product that isn’t organic) and because scientists had to significantly alter the rapeseed plant and resulting oil to make it fit for human consumption. See the wikipedia entry here. I don’t generally like to eat foods that require scientific intervention to make them fit for my consumption; I like to eat foods as close as possible to the way they were created.

Olive oil isn’t that far removed from the olive tree, so that’s a healthy oil choice I can be comfortable with! It’s more expensive than vegetable oils or canola oil, to be sure, but I find that one bottle lasts me a few months, so it’s an expensive I can manage. And I have to admit I use the cheapest bottle at Trader Joe’s ($3.99 for 17oz). It may not satisfy the cultivated palates of uppity chefs - even my uncultivated palate can tell that its flavor is not as good as more expensive oils that I have tasted - but it works with my budget so it works for me!

What exactly are the health benefits of olive oil? Most people already know this, but just in case, here’s a summary:

  1. high levels of polyphenol antioxidants, which are good for your heart
  2. helps maintain a healthy balance of Omega-6 and Omega-3 fats in your body
  3. healthy monounsaturated fats

Be aware that Extra Virgin Olive Oil is the most beneficial of olive oils because it is refined the least. Virgin, Pure and Light olive oil may all be cheaper but they are not as healthy, so I always stick to the Extra Virgin.

So how do I use olive oil in my kitchen?

1. Saute-ing vegetables and meat. Some people recommend against this, claiming that the high heat alters the chemical state of the oil and reduces its nutritional value. For the former, I can’t find enough scientific evidence to support those claims, and for the latter, the truth is that high heat reduces the nutritional value of anything, including olive oil. I believe that if one is going to saute something, it might as well be with olive oil, which is healthier to start with than most other oils.

2. Drizzling over steamed veggies. There’s just nothing like broccoli drizzled with olive oil and sprinkled with freshly ground black pepper. The same can be said about pretty much any vegetable, and I typically cook vegetables like this on a regular basis.

3. Making vinaigrettes and salad dressings. This is where olive oil really shines! I don’t think I’ve ever used the same recipe; mostly I just use a simple formula of 3 parts olive oil to 1 part vinegar, with added lemon juice, salt and pepper, and whatever other seasonings or herbs inspire me at the time. Sometimes I just splash a little olive oil and vinegar on my salad and top it off with some crushed black pepper.

4. Baking certain breads and pizza dough. In particular, I love using olive oil in my whole wheat pizza dough. I have also made some other whole wheat bread recipes that featured olive oil instead of butter or other fats, which makes for a delicious and healthy twist!

I’ve even made my Certain Little Someone some allergen-free cookies that featured olive oil. I wasn’t too sure how they would taste, but they ended up being delicious! Normally, though, olive oil doesn’t do well in baked goods because of its distinct taste, so I don’t bake desserts with it on a normal basis.

So how about you? What do you like to do with Extra Virgin Olive Oil?