Archives for December 2011

A Sparkling New Year: Make Your Own Sparkling Cider

If you want champagne, I can’t help you, because I don’t know how to make champagne. But if you prefer the non-alcoholic sort of bubbly, well then, you’ve come to the right place.

It’s actually incredibly easy to make your own sparkling cider! All you need is apple cider syrup and seltzer water.

Apple cider syrup? “What’s that?“, I hear you ask. I’ll tell you. It’s essentially boiled down apple cider. That’s it. Apparently, according to Foodie With Family, the early colonists boiled down their cider to preserve it throughout the winter and beyond following the apple crop season. They could have cider anytime, simply by reconstituting their apple cider concentrate.

There are a lot of applications for apple cider syrup, and it’s gaining momentum in foodie and food blog circles, and in my opinion, it’s worth keeping some jars of this stuff in the house year-round! Foodie with Family suggests a variety of usages, some of which I’ve tried, but I’m going to share with you her favorite, which is seriously the bomb.

But first, let’s make the cider syrup. Most of the posts I’ve read about it involve using large amounts of apple cider and boiling it away - on high! - for hours. Number one, I don’t have hours to babysit the stove. Number two, I don’t want the stove on high for hours. Solution? I just make less at a time. Works for me.

Honestly, though, it doesn’t really matter how much you start with, as long as it’s at least about 2 cups. The point of boiling it is to reduce it, so you want to start with enough so that you can substantially reduce it. From there, you can boil several gallons at a time if you have a large enough pot. And apparently it can be processed and stored in the pantry, but I just keep mine in the fridge.

Here’s how you do it:

Pour at least 2 cups of apple cider into a large pot on the stove over high heat. Use a ruler, or mark a wooden spoon, to note the level of your apple cider before it begins to boil. Bring to a boil and allow it to boil undisturbed until it is reduced in volume to one seventh of the original amount. (I didn’t twist my brain in circles trying to calculate exactly how much one-seventh was or is. I just looked for a syrupy texture that was quite a bit less than what I started with.) The ruler or marked wooden spoon will help you determine when it’s boiled long enough. Be careful, though: it goes very quickly from syrup to sludge, so the first few times you make it, watch closely until you get a good feel for the timing and the proper texture. You’re looking for an almost honey-like consistency, a slight thickness, but still pourable.

Once you have your apple cider syrup, making sparkling apple cider is a breeze! All you have to do is stir 1 TBSP of the cider syrup into a glass of cold seltzer water. Serve it over ice, if desired. I sprinkled a few fresh cranberries into mine for visual interest.

Once you have a batch of apple cider syrup made, the sparkling cider itself is so QUICK. And the great thing is you can make the cider syrup any time, even a month before you need it.

It’s very EASY, too. There is a trick to boiling the cider the right amount of time, but once you’ve mastered that it’s no big deal. And once that’s made, even a kindergartener could fix a glass of sparkling cider! If you wanted your kindergartener in the kitchen unattended, which I wouldn’t. Just sayin’.

It’s CHEAPer than buying those over-priced bottles of sparkling cider and grape juice. A huge bottle of seltzer water is usually less than $1 at my grocery store, and I can usually get a whole gallon of cider for $4. According to my calculations, a gallon of cider reduced by 7 is 2.25 cups, which is 36 TBSP-sized servings. That makes it about $0.11 a serving. Add that to the seltzer water, at $0.13/serving, and it’s less than $0.25 for each glass of sparkling cider. Compare that to the bottles of cider that only have 3 servings and go on sale for $2.50-$3! (Now, unpasteurized organic apple cider is a lot harder to come by - usually only available at farmer’s markets during apple season - and more expensive, about $6 or so. The beauty is that it can be reduced to syrup and preserved for the rest of the year!)

It’s much HEALTHY-er than some store-bought versions. Although Martinelli’s Sparkling Cider is all natural with no added sugars, the same cannot be said for other varieties, which often contain high fructosed corn syrup and other evils.

Sharing at Katherine Martinelli’s DIY Blog Hop.

Sticky Buns, a Family Christmas Tradition

sticky buns

My family is huge and crazy. Well, the people aren’t huge. The amount of people is huge. But the people in my family are definitely crazy. As Mark Twain once said, “In one way or another, all men are mad.” I think he was on to something there.

Here’s a little taste of Christmas in my family (both sides): (oh, and the box of Cocoa Puffs you see is totally a Christmas thing! I do not buy those normally! And my Certain Little Someone eats them as a special snack, and not for breakfast.)

Click to play this Smilebox slideshow
Create your own slideshow - Powered by Smilebox
This free slideshow design made with Smilebox

And in my huge family - as in any family - it’s a matter of course that we each differ from each other in many ways, and occasionally (of course, only very occasionally) disagree on matters of minor importance. But one thing we all agree on: we love Christmas! My parents did a great job of creating very special Christmas memories that we all treasure to this day, even as we get deeper into our thirties and um, forties (hoping my oldest sister doesn’t read this. Ahem.).

Our traditions are too numerous to count, but one of our favorites is having sticky buns for breakfast Christmas morning. My mom started making these when I was a little girl, and she taught each of us to make them. They’ve been a part of our holiday season for as long as I can remember, and this time of year doesn’t seem complete without them.

This year, we didn’t have time for such a breakfast on Christmas morning, because it happened to be Sunday, and Sunday means church. Especially Christmas Sunday! Can’t skip church on Christmas Sunday, that just doesn’t seem right. Anyway, we (or I, rather) decided that Christmas Eve morning would be the perfect day to have our traditional Christmas breakfast. And the fact that everyone in the family agreed with and listened to the middle child should be a sign to you of the importance of this tradition.

I convinced my littlest sister (already an amazing little baker at the age of 19) to make a couple batches of sticky buns for us all to eat on Christmas Eve morning, and she did a phenomenal job! Fluffy and sweet and soooo delicious!

I am going to give you my mom’s recipe in all its unaltered glory, as we ate it on Christmas Eve. (When I make them, I usually adapt the ingredients to be healthier, and I cut down on the caramel glaze to be cheaper (and healthier). Also, I leave out the nuts for my DH’s sake. ) In my normal day-to-day life I don’t eat this much sugar or refined flour, but for Christmas? Bring it on!


I also shared our own little family’s new tradition of a Sausage Ring for Christmas Eve morning, and it was well received! Can’t go wrong with sausage!

This recipe is neither QUICK, nor EASY, nor CHEAP, nor HEALTHY. Just so you know.

Sharing at Tasty Tuesday Parade of Foods, and

Tempt my Tummy Tuesdays

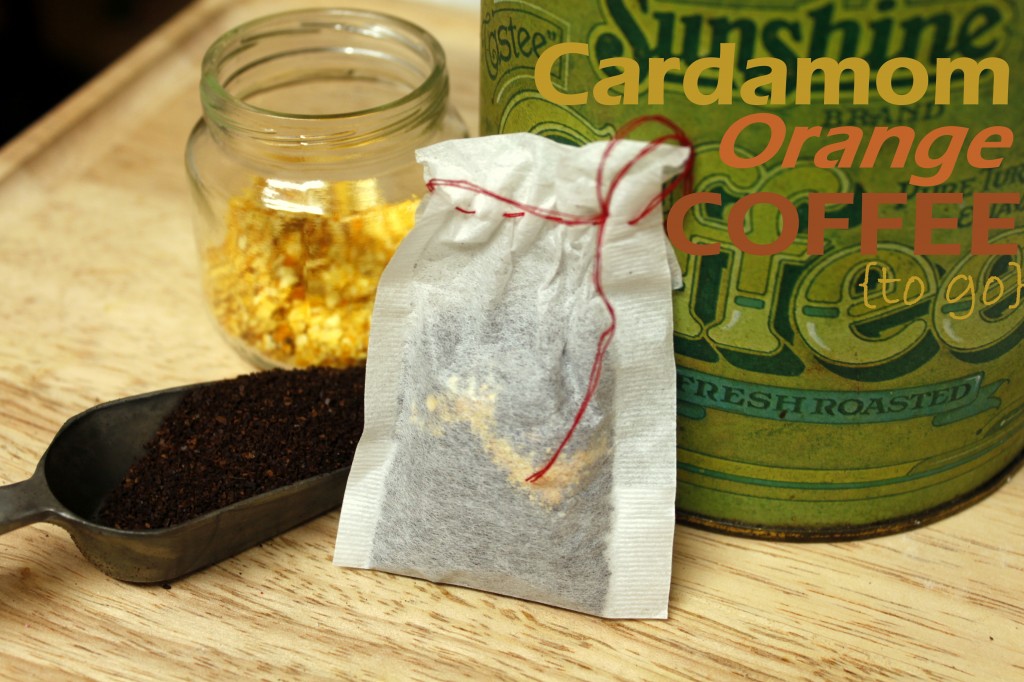
Gifts from the Kitchen: Cardamom-Orange Coffee {To Go}

cardamom orange coffee to go

My friend Sheila of Alice and the Mock Turtle knocks my socks off with her creativity. Her active mind is always churning with ideas and new ways of looking at things to come up with such unique solutions and fun stuff of all kinds.

One of her recent blog entries totally blew me away with its simplicity and just sheer genius! She used empty tea bags to create individual instant coffee bags and dressed them up for gift giving. I didn’t even know you could buy empty tea bags!

Anything with the word coffee instantly grabs my attention, so I was all over this idea like white on rice (or brown, I guess I should say) and I started thinking about how I could incorporate this into my gifts from the kitchen for Christmas.

And since I can’t leave well enough alone, I began dreaming of different flavored coffees - my own coffee blends, so to speak - that could be placed into these little tea bags for sheer coffee-drinking pleasure. Cardamom-Orange Coffee to Go is the result of that mental brainstorming.

coffee bag

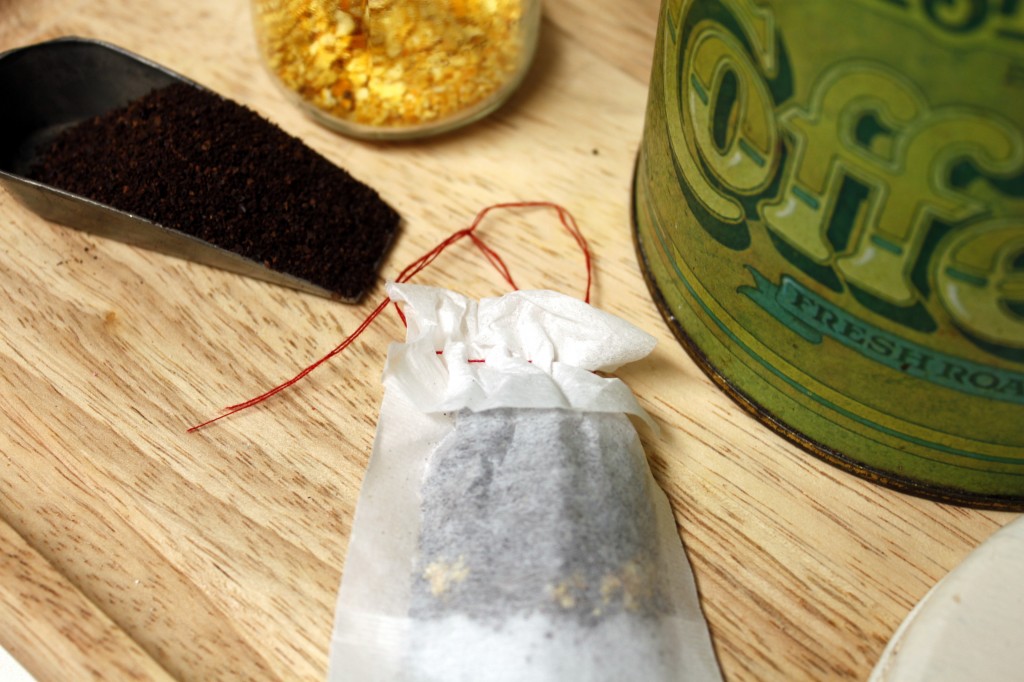
Sheila had found these amazing press-and-seal tea bags that you can iron after filling to create a completely sealed envelope of coffee. For some reason which I can’t remember now, I opted to go with Teavana’s PerfecTea paper filters instead. These tea bags don’t require any ironing (not my favorite chore), but neither do they have any way to seal them at all. I found that for my own use, simply folding over the top (as they were designed to do) was sufficient, and not even one teeny tiny coffee grind found its way into my coffee.

For gift-giving, though, I wanted to be sure that the envelope didn’t spill, so I simply used a doubled length of thread and a needle to make a running stitch through the top of the folded filter. I left a 3″-or-so length of thread on either side and tied those together into a knot. Not only did this keep the coffee grinds from spilling out of the bag, but it also created a useful handle for pulling the filter in and out of a cup of hot water. And it gathers, so it can be used to help squeeze out all the coffee goodness! The whole process took maybe 30 seconds for each coffee bag (and I am by no means a proficient sewer!).

Unfortunately, it’s too late for you to order the tea bags in time for Christmas at this point, but they may be available at your local Teavana store (or other tea specialty shop). If you can find the tea bags, filling them up is super quick and easy, making them a great Christmas gift or stocking stuffer!

Some gifting suggestions:

  • in a coffee-themed basket for a coffee lover (with mugs, coffee-themed decor, flavored syrups, etc.)
  • in a tin full of home-baked goodies
  • with homemade (or storebought if you’re running out of time!) biscotti
  • by itself in a jar, as Sheila suggested, together with cream and sugar
  • in a portable re-usable coffee mug (I did this for a friend)
I had some small “transparent archival plastic bags” (similar to these, except not self-sealing), that I used to hold the coffee bags, both to help keep the coffee fresh, and to give it a nice clean look. You can just use a plain old zip-top plastic bag if you don’t have anything like that, or a jar, like Sheila used.
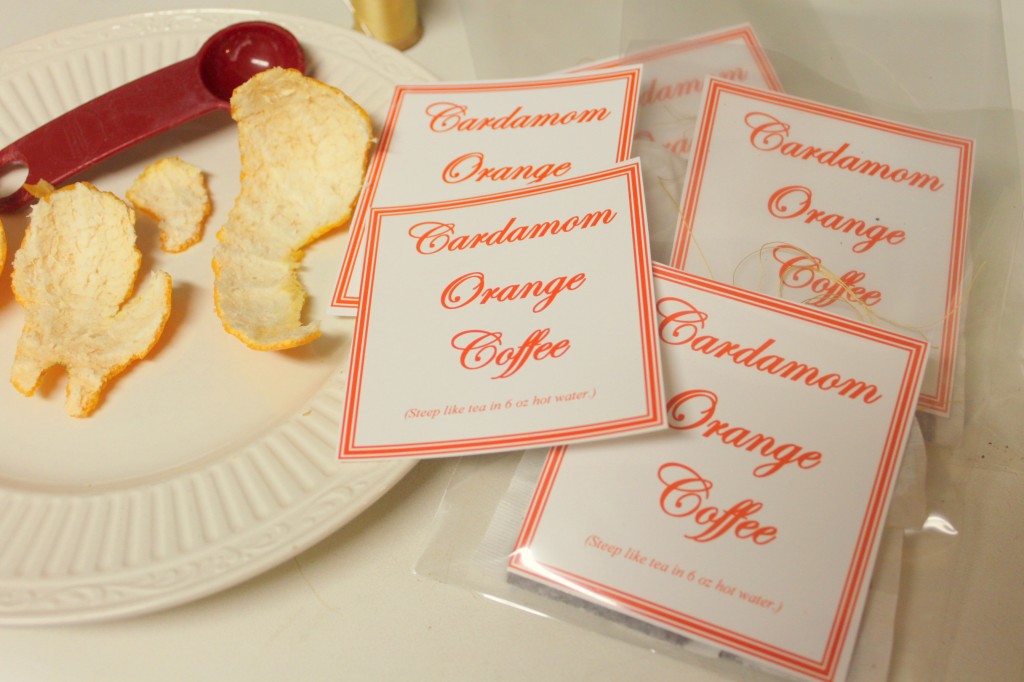
And just to make it all the more elegant for gifting, I even created some tags to go with my original coffee blend. I made it into a PDF just for you, friends! Cardamom-Orange Coffee {to go} label
Now… what to put in the coffee bags?! You can just use some plain good quality coffee beans, like Sheila did, or you can get all adventuresome with me and try out some exotic homemade naturally infused flavored coffee blends! I’ve been working on this cardamom-orange coffee flavor for a couple weeks now, so I’ll share it with you, but the sky is the limit as far as what you can put into the coffee to flavor it. Pretty much any spice or dried (dried to the point where it can be powdered) fruit can be added to the coffee beans to produce delicious flavored blends. If you experiment and come up with an awesome new flavor, tell me about it so I can try it, too!
And here’s a tip: the easiest way to get dried orange zest is to take the peels from an orange or clementine and set them out in a single layer on a plate to dry. When they’re completely dry, run them through the coffee grinder. I even just added a couple of the pieces of orange peel into the grinder with the whole coffee beans.
To use the tea bag, just place about 3 tsp of this coffee blend into the bag, seal as desired (or as required by the manufacturer), then place in a coffee mug. Pour 6 oz of hot water over the coffee bag and allow it to steep for several minutes, or until desired strength. I found that the tea bag filter limited the strength of the coffee, so any more than 6 oz of water resulted in a rather weak cup of coffee.
Once you have your little tea bags full of this yumminess, you will have super QUICK coffee at the ready wherever you are. You can fill your to-go cup with hot water , place one of these babies in there and run out the door!
Just as EASY as plain old coffee! OK, dealing with the paper filters is a little more effort, but not much.
Purchasing the filters is some additional expense that I normally don’t have, but for gift-giving, it can’t be beat! Definitely a CHEAP option for all the coffee-lovers in your life. And it’s way CHEAPer than buying the famous nationwide-brands line of naturally infused flavored coffee blends. Or even their instant coffee (does anybody really pay that much for instant coffee? You do? May I ask in the name of heaven WHY?!)
Infusing your coffee with natural elements like orange zest and cardamom is a lot HEALTHY-er than purchasing the artificially (read: chemically) flavored kinds available elsewhere.

Another Christmas Tree Tray - Veggies This Time!

Here’s yet another last-minute Christmas tray to bring to any festivities this weekend. Yesterday, I brought you a Christmas tree fruit tray. Today, it’s a Christmas tree veggie tray! Same concept, different produce.

Easy peasy.

This one I also found on Pinterest (naturally), originally from the Betty Crocker website. Here’s another Christmas tree veggie tray, also from Betty Crocker, if you’d like something a bit different, or if you have different tastes in veggies. And if you’re looking for yet another creative Christmas-tree-shaped appetizer tray, try this cheese cube Christmas tree from Cabot.


Serve your Christmas tree with a bowl of homemade dip on the side. Unfortunately, I have no specific dip recipe for you (I was in too much of a hurry to take measurements), but I can tell you how I made my Ranch-like version of dip: I dumped equal parts cream/yogurt cheese (homemade from yogurt) and plain yogurt in a bowl and mashed it together well until it was creamy. Then I stirred in garlic powder, freshly ground black pepper, dill, parsley, chives, and a bit of salt until it tasted right. Then I refrigerated it for a couple of hours before serving.

Just as QUICK as any other vegetable tray!

And just as EASY, but with so much more presentation!

It’s CHEAPer than the fruit tray, because these veggies are cheaper than those fruits.

And it’s very HEALTHY, too, nothing but veggies! (Well, except the pretzel sticks, which I don’t normally buy, but didn’t have time to come up with anything more creative. Carrot sticks? Celery sticks? Right shape, wrong color. Let me know if you come up with something!)

Sharing with Real Food Wednesday, and…
day2day joys

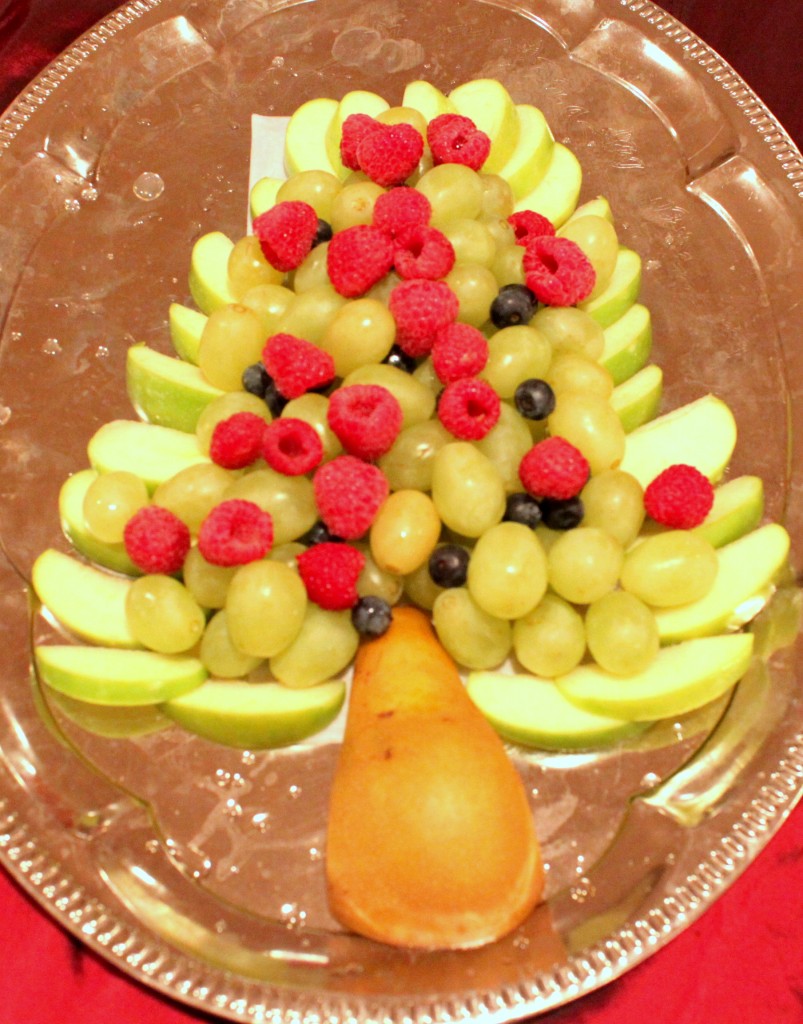
Festive Holiday Fruit Tray

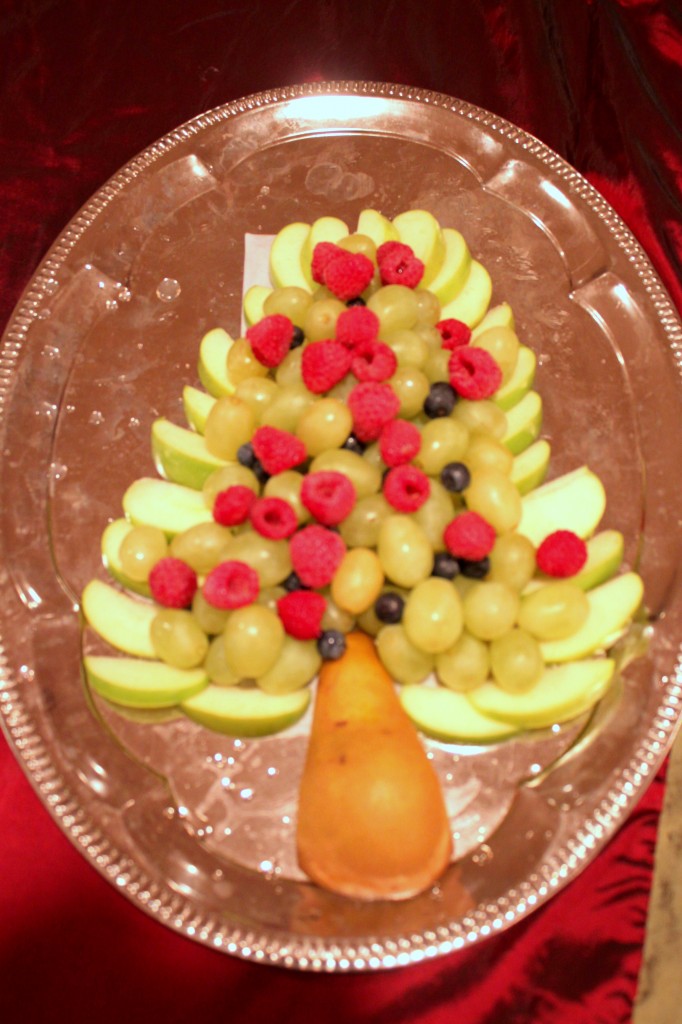
Christmas tree fruit tray

I’m loving Pinterest this Christmas season! It’s given me some great ideas for Christmas presents, Christmas decorating, Christmas wrapping, Christmas baking, Christmas cooking… and Christmas celebrating.

Some of these ideas take a little more work, which makes me question if it’s a good thing or not. Or at any rate, it makes my DH question! Me? I love all the holiday craziness. Bring it on, people!

But if you’re really frazzled, and don’t have the wits or time to come up with a dish for the holiday party this weekend, I’ve got your back. This particular Pinterest-inspired fruit tray is dead easy and perfectly brainless. A little on the pricey side this time of year, but whatever. Totally worth it.


For an extra touch, you can use a star cookie cutter to cut a star shape out of a pineapple wedge, or piece of cantaloupe. If you have a large enough pear or apple, and a metal cutter, you could use that as well. Place that at the top of the tree. (I just went without.)

This is so QUICK to put together. I washed all my fruit and sliced the apples at home, then brought it all to the function I was attending (my piano students’ Christmas recital). I formed the tree probably in 5 minutes or less.

Such an EASY, yet festive and creative, fruit tray to bring to any holiday function! Party-goers will love it, and you will have put very little effort into it (yeah, baby, that’s what I’m talkin’ about!).

It is NOT CHEAP this time of year! Unless maybe if you live in Florida or California. The apples aren’t expensive, but the grapes and berries. Oh my! I never pay that much for those fruits, since I usually only buy them in season. Oh well, totally worth it for a Christmas splurge.

It is very HEALTHY, though. Nothing but fruit!

Growing Home

The Secret to Perfectly Round Spiral Cookies

Christmas is pretty much the only time of year that I go all out with the cookie-baking, even busting out the rolling pin to make all kinds of complicated cookie varieties, like sugar cookies and spiral cookies. The rest of the year, I stick to the easy stuff, usually resorting to drop cookies and bar cookies because I’m lazy like that.

But if I’m going to go to all the trouble to make those kinds of cookies, then I want them to turn out right. And it always kind of annoys me that those silly spiral and icebox cookies get that flat edge where they rest on the counter or in the fridge. They’re supposed to be round for goodness’ sakes.

I’ve tried my best to form perfectly round logs, and treat them very gently so as to preserve the shape, to no avail. I always get that stinkin’ flat edge.

Until this year. This year, I have discovered the secret. I read about it on a blog (I forget which one now) for another purpose and immediately realized the possibilities of this little trick! My spiral and icebox cookies will now and forever more be round!

All you have to do is grab a toilet paper tube, or a paper towel tube, or a wrapping paper tube. For purposes of ease in handling, you will want to cut the paper towel tube in half, and the wrapping paper tube into several smaller portions.

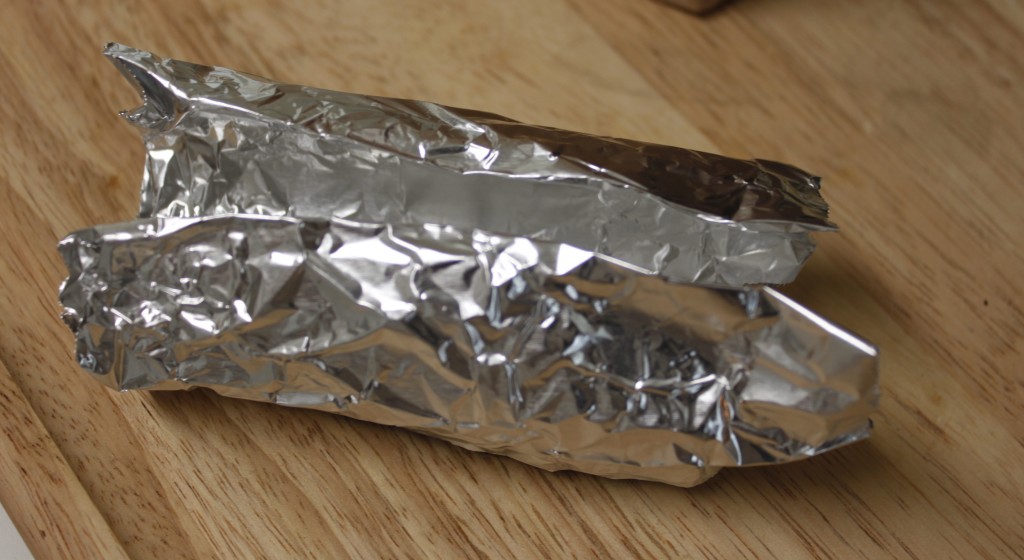
Once you have a cardboard tube approximately 6″ in length, cut a slit along one side of the tube so that it looks kind of like a hot dog bun. Take a piece of foil and wrap it around the inside of the cardboard-tube-hot-dog-bun, and fold it around the outside.

They say a picture is worth a thousand words, so here’s a picture of what I’m talking about:

Here’s another vantage point:

Now go about your business rolling up your perfectly round log of cookie dough, then gently place it inside the tube, like a hot dog in a bun.

The cardboard tube creates a mold that helps preserve the shape of the cookies. I’ve found that the toilet paper tubes are not as sturdy as the other kinds, and might need a piece of tape to hold the edges together.

Refrigerate or freeze your dough in this tube, then proceed to slice as usual. Voila! Perfectly round cookies!

Pictured are my Cinnamon Pinwheel cookies.
Growing Home

Gifting from the Kitchen in Style {the QECH way}: Brown Paper Packages

Now you can trick out your canisters with the best of them, and transform your empty egg cartons into muffin holders. We’re going further into upcycling gift wrap territory by using an even lowlier receptacle: the lowly shopping bag.

Not a plastic one. I haven’t figured out how to beautify those yet. No, I am speaking of the lovely, sturdy brown paper bags that you can find at places like Trader Joe’s, Whole Foods, or even a few mainstream grocery stores.

And it doesn’t take much to beautify a brown paper bag, honestly. In fact, all you have to do is cut it apart and wrap it with the outside facing in. Does that make sense to anyone here? No? OK, I’ll try again.

Step by step transformation of a grocery bag into wrapping paper:

  1. Remove the handles. Just pull ’em off!
  2. Cut straight down along one corner of the bag, all the way to the bottom.
  3. From there, cut off the bottom of the bag.
  4. Lay the bag out flat, with the designs from the outside facing up.
  5. Lay your gift on top of the bag and wrap as you would any present.
Clear now? OK, good.
This works best if you are wrapping a box, which makes it a little more difficult for using to gift from the kitchen. It’s easy enough, though, to line a cardboard box with tissue paper and place carefully wrapped homemade goodies inside. Some things I think would work particularly well wrapped this way:
  • a collection of salt dough ornaments
  • homemade jam or other canned goods
  • a selection of homemade chocolates and truffles (you can find some great recipes in our HealthyHolidays free eBook!)
  • themed gifts such as a spaghetti dinner (with noodles and sauce), ice cream fixings, or movie night
And of course, it’s limited only by your creativity! Whatever you need to wrap up can be wrapped in this style. Furthermore you can dress it up in a lot of different ways. I had some fun when I was wrapping presents the other night for my family, coming up with some different ways to dress up the paper bag.

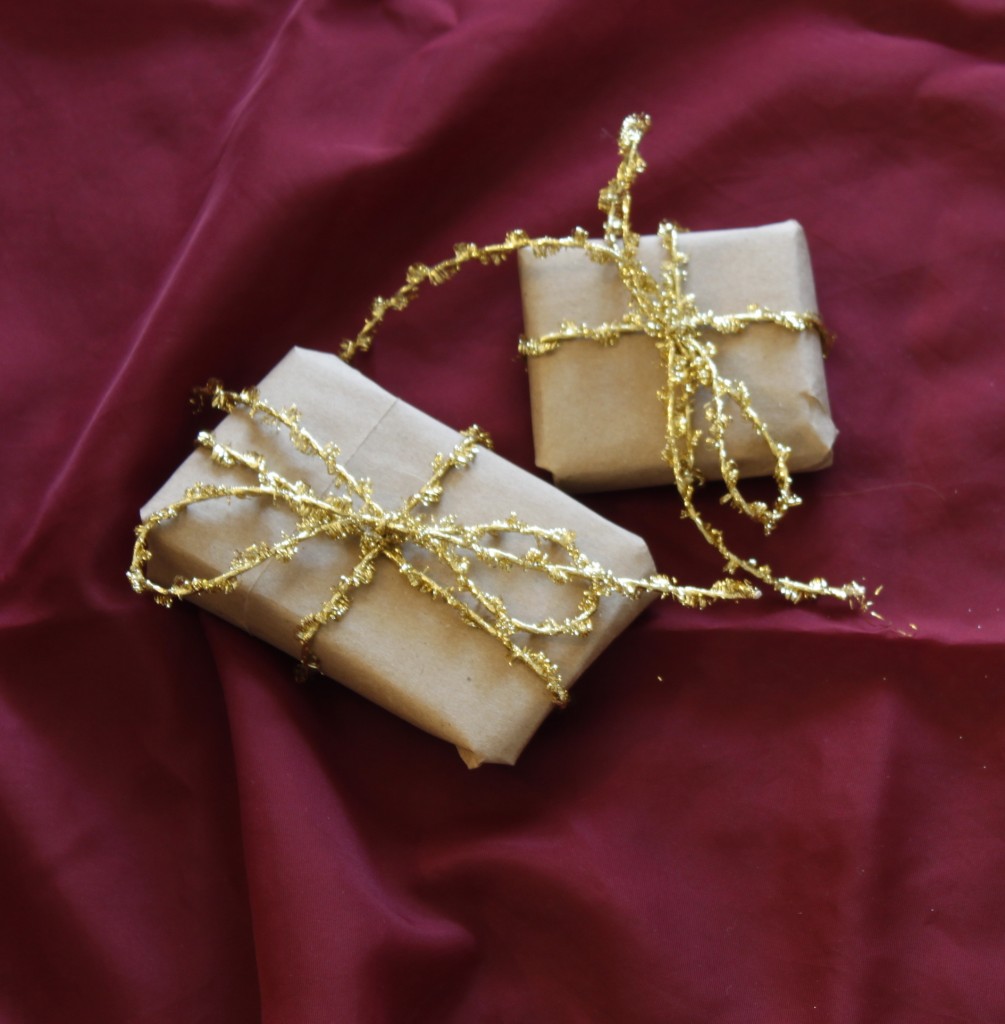
Use fancy or plain string and tie it in the old-fashioned way with a big ol' bow on top.
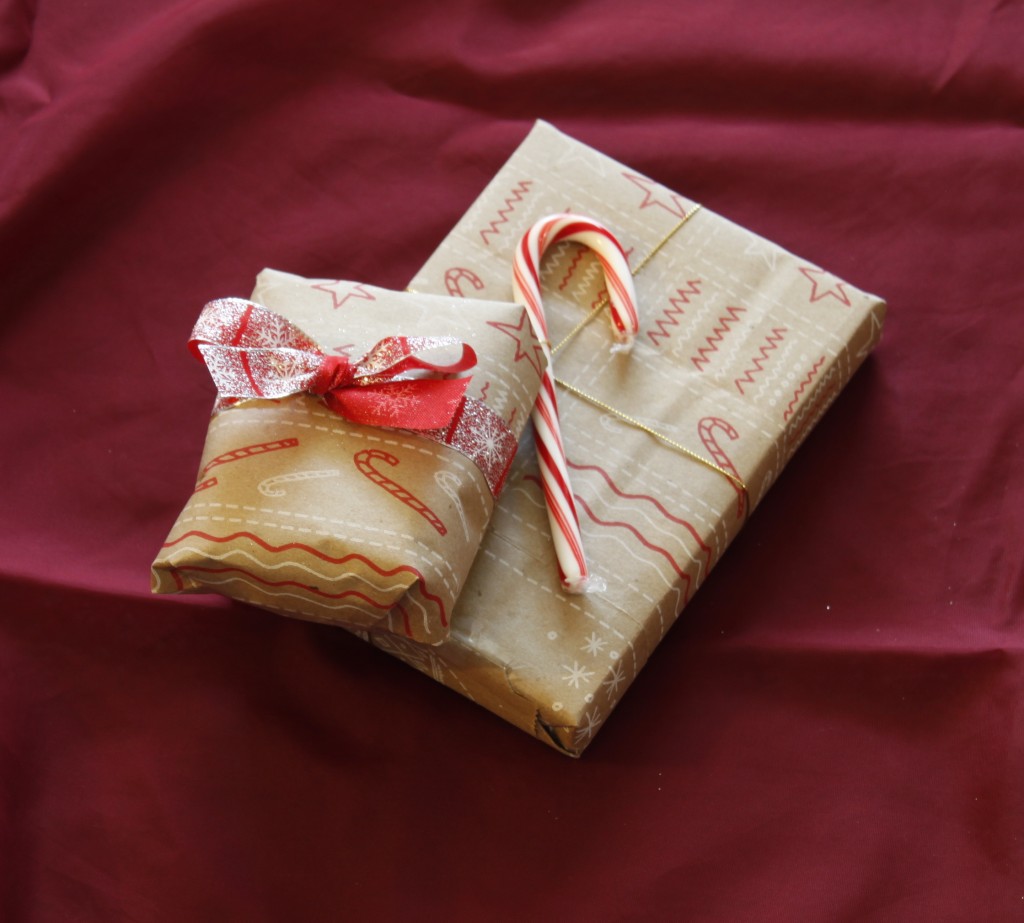
The easiest way to dress up brown paper: pretty fabric ribbon in any design or color. You can also write directly on the package in a coordinating marker or pen.

Cut apart old Christmas cards, and punch holes into them. Tie them onto the package for instant - and free - decoration.

Add natural elements - either real or fake - like cinnamon sticks, poinsiettas or sprigs of pine boughs.

Tie on a candy cane for embellishment. Other ideas: trinkets and small ornaments.

If you go to Trader Joe’s, their bags right now actually have some adorable designs on the side panels that make great gift wrap for small gifts! If you don’t have Trader Joe’s bags, you can accomplish the same thing by drawing designs with markers.You could also use stamps and other tools of the scrapbooking trader for a similar effect. (Hint: Set your kids to the task!)

Check out the fun print from the side panel of the Trader Joe's bag!

I find that the brown paper actually has a rustic elegance that is easily adaptable to both fun and glitzy looks. I even prefer it to wrapping paper, and plan to wrap the majority of my presents in it this year!
It’s almost as QUICK as using a roll of wrapping paper.
It’s almost as EASY: the paper is definitely more stiff and is therefore a little more difficult to work with. However, that same quality also makes it a lot sturdier.
It’s certainly CHEAP! I love taking trash and turning it into something useful and beautiful.
And it’s HEALTHY, I suppose. Healthy for the earth, at any rate.
Here are some more creative ideas for wrapping with what you have around the house from My Blessed Life.
Shared at Frugal Friday, and

Gifts from the Kitchen: Salt Dough Ornaments (Including Wheat-Free Version)

This is not an edible gift from the kitchen, but it is made from common ingredients that everyone has in their kitchen. And it’s made in the same manner as sugar cookies or other rolled cookies, by rolling out the dough and using cookie cutters to make the shapes. Just don’t eat it. And if you do, don’t say I didn’t warn you.

And this particular from-the-kitchen gift can also be made together with your little ones, making it a perfect gift for grandmas, grandpas, aunties and uncles who will oooh and ahhh in delight. (If you happen to be the grandma, grandpa, auntie or uncle of My Certain Little Someone and Baby Boy, just pretend you didn’t see this post and don’t forget to ooh and ahhh in delight!) My 3-year-old Certain Little Someone helped me in every different phase of this project: mixing the dough, cutting out the shapes, poking the holes with a straw, painting, and even threading the ribbon through the hole.

I even have a wheat-free version for you, in case your child, like mine, is allergic to wheat and would break out in hives if he touched dough with wheat flour in it. The non-wheat version is very similar, it just requires more salt than the original. I’ve found that Bob’s Red Mill rice flour on Amazon’s Subscribe & Save is often the cheapest wheat-free flour available.

You still have time to make these before Christmas, but be sure to allow several days for the ornaments to dry thoroughly. You can also dry them in the oven on the lowest setting for several hours, but I haven’t personally tried that. I’m just afraid to burn them!

I tried adding some peppermint extract to make some Christmas-scented ornaments, but after painting and sealing them, it was kind of pointless. If you choose to leave them au naturel, then you can add some scented oil or extract, about 1/4 tsp.

To make a dark color, you would need a lot of food coloring. Which is OK, because you’re not going to eat it! I squeezed quite a bit of food coloring into my dough for a beautiful pastel color, so I would recommend adding the food coloring before adding the water so you don’t alter the texture of the dough.


The brown rice flour ones are, predictably, a little more fragile than the wheat flour ones, so it would be helpful to keep those ones nice and thick to prevent crumbling.

These aren’t QUICK because they take a while to dry.

They are relatively EASY - perhaps not as easy as a cut and paste project, but definitely do-able, even with children.

This is definitely a CHEAP gift idea. Even the paint was only a couple bucks, and I had a can of sealer hanging around. Cheap enough to give to all the myriad aunts and uncles we have around here!

HEALTHY? Well, I wouldn’t eat it if I were you.

Christmas Breakfast: Cranberry-Orange Oatmeal

Cranberries and oranges are my go-to flavor combo this Christmas. What it is about those two ingredients together, I don’t know, but they taste like Christmas to me; there’s something almost magical about it. I’ve been combining them in all sorts of things, but the easiest for sure is this delicious oatmeal.

It’s easy to get in a bland old boring oatmeal rut. Well, it’s easy if you’re not me. I personally never make oatmeal the same way twice because I’m weird like that. But I have heard that it can be easy to get into the afore-mentioned oatmeal rut.

All you have to do, my friend, is add a few fun things to your oatmeal. In this particular case, very magical, very Christmas-y cranberries and oranges. From boring to exciting in one easy step.


There’s no wonder that oatmeal is one of the most popular breakfasts: it’s QUICK! If you choose to use them, steel oats can take longer, but soaking them overnight in the liquid will help them cook up pretty quickly the next morning.

Oatmeal is also EASY. Anybody can make oatmeal. And anybody can make cranberry orange oatmeal.

This is the time of year to make CHEAP cranberry orange oatmeal! Both cranberries and oranges are in season right now, so snap them up at the cheapest prices they’ll be all year round.

Cranberries are some of the HEALTHY-est berries you can eat (and one of very few actual berries), especially because of its high levels of antioxidants. So eat ’em up!

Shared at Let’s Do Brunch!, Tastetastic Thursday, and…

Tempt my Tummy Tuesdays

Menu Plan Monday: The Christmas Roller Coaster Edition

Wheeeee! My personal Christmas roller coaster has begun! It’s a little scary, but I’m determined to enjoy the ride.

My meals have got to be as quick as possible this week, because every day is packed with things to do, places to go, people to see. Looking ahead to next week, and the schedule’s even worse, so I’m thinking that I’ll be taking a break from menu-planning next week! Not many meals to plan, anyway, with all the special events going on.

Breakfasts

  • Baked Oatmeal with Cranberries (veganized to be allergy-friendly)
  • Muesli
  • Chocolate Spice Granola
  • Erewhon Cereal
  • Green Tea Oatmeal

Lunches

  • Leftovers
  • Freezer Stash of Non-Allergenic Foods (for Certain Little Someone)
  • Tuna Sandwiches (nitrate/nitrite-free deli ham)

Dinners

  • Crockpot Chicken & Vegetables, Lemon Spaghetti
  • Potato Soup, Muffins
  • Dinner Out
  • Chocolate Pancakes, Bananas
  • Tuna Casserole

Snacks

  • Nuts, Raisins, Cranberries, Dried Apples
  • Christmas Cookies

Additional Features

This is not just a menu plan, as wonderfulas that in itself is. Oh, no. Some more features for the curious among you…

This Week’s New Recipe

I try to incorporate one new recipe a week into my menu. This isn’t really difficult for me since I rarely make the same thing twice.

  • I’ve actually never tried chocolate pancakes before; that will be a nice festive change of pace.

In My Kitchen Today

On Mondays, I spend some extra time in the kitchen, cooking ahead and making baked goods to last for the week and beyond. A large portion of the day is often dedicated to allergen-free foods for my Certain Little Someone.

  • nothing today except maybe some broth and Christmas cookies

Some friends and I have collaborated to bring you an awesome little eBook just in time to help you with your Christmas baking! It’s chock full of easy, delicious cookie and candy recipes to help you celebrate the holidays in tasty style. Each recipe is built around wholesome ingredients, so you won’t even feel guilty indulging in one… or two… or even three! What’s more? We’re offering this book absolutely free - no strings attached - to each of our email subscribers! All you have to do is subscribe via email to any one of our blogs and you will receive a link for a free download of this sweet little book.

Collaborating with me are: The Purposed Heart, Intentional by Grace, and The Humbled Homemaker. Subscribe to all of these blogs just because you’ll be glad you did. Yes, they’re that good.