Archives for July 2012

Grandma’s Biscuits - With Spelt!

I’ve talked about Grandma’s biscuits here on the blog before, but today I want to share with you my latest favorite version. This time, I experimented with freshly ground spelt flour instead of the usual whole wheat flour. Dee.Lish.Us. Ya gotta try it.

Now, I know that spelt is a little harder to find than plain old whole wheat or wheat berries, and it’s a little more expensive. But if you have sensitivities or allergies to wheat, spelt can be a great substitute. It’s similar to wheat (kind of like wheat’s cousin), so it behaves a lot like wheat when baking, and it tastes very much like wheat. It’s got just a bit of a more nutty flavor, but unlike other wheat-free flours (like buckwheat, for example), it’s a pleasant improvement in the taste, not a detraction.

For a long time, I avoided baking with spelt because I didn’t want to spend the extra money merely as a replacement for wheat which my DH, myself, and Baby Boy can all eat just fine. And I was nervous about using it to replace wheat for My Certain Little Someone, whose allergies are quite intense and cause him to react to foods with similar proteins (like goat milk and cow’s milk, for example, or wheat and rye). Now that he’s almost 4 years old and has outgrown some of his allergens, I felt a little more confident introducing spelt.

And thankfully, I met with success! I’m so thrilled that I have a workable, reliable wheat substitute that I can use when baking for the whole family. No more different sets of pancakes or muffins or cookies. One batch will be safe for everybody. (And the angels rejoice!)

To get the new-and-improved version of Grandma’s biscuits, go to the Grain Mill Challenge Blog.

This post was made possible by WonderMill and the Grain Mill Challenge.

Sharing at Homestead Barn Hop, Titus 2sday, Traditional Tuesday, Healthy 2Day Wednesday, Works for Me Wednesday, Allergy-Free Wednesday, Women Living Well Wednesday, Frugal Days Sustainable Ways, Real Food Wednesday,Whole Foods Wednesday, Simple Lives Thursday, Your Green Resource, Ultimate Recipe Swap, Tastetastic Thursday, Eat Make Grow, Friday Favorites, Freaky Friday, Fight Back Friday, The Better Mom Mondays

Perusing the Archives{Menu Plan Monday 7/30/12}

menu plan monday Menu Plan Monday

If preservation was my theme last week, this week the theme is “spelt”. I’ve been having a lot of fun with spelt lately, especially since I’ve discovered that my wheat-allergic son can tolerate it! Now I can make one pizza crust or one batch of pancakes for everybody and everybody will enjoy it! If you’ve never tried spelt, you should, particularly if you are sensitive in any way to wheat. I’ve got some great spelt recipes coming up, and… a giveaway with whole spelt grains in the next week or two. Stay tuned!

Meanwhile, I’m in the process of transforming Quick and Easy Cheap and Healthy into Authentic Simplicity. Currently, I’m organizing my all my posts into new categories and tags. I’ve had a lot of fun going through some old posts (some of which I deleted!) and realizing that while some things change, many things stay the same. Here are some oldies but goodies you might enjoy (And by oldies I mean way back in 2007. Was there even an internet back then?:

Something from Nothing - Bread Crumbs


Health vs. Weight

QECH Staples - Honey

Breakfasts

Lunches

  • Leftovers
  • Sunbutter & Jelly Sandwiches
  • Nitrate-Free Lunchmeat Sandwiches
  • Egg Salad Sandwiches

Dinners

Snacks

  • Nuts, Cranberries
  • Popcorn
  • Cookies

In My Kitchen Today

The Best Short-Term AND Long-Term Storage for Fresh Herbs

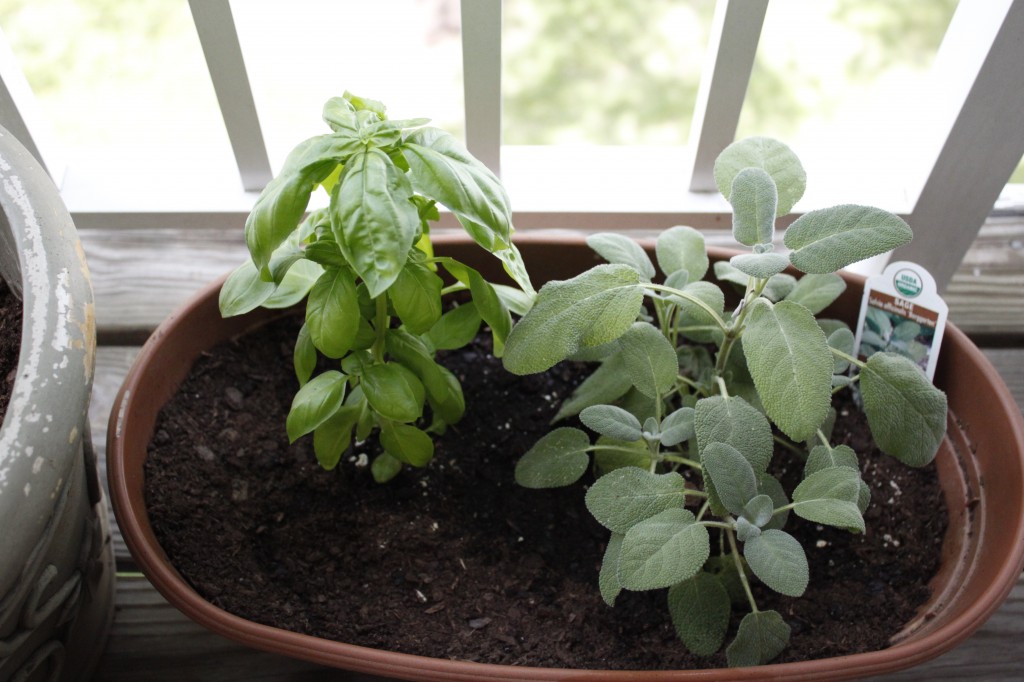
Honestly, the best way to keep herbs fresh for the longest period of time is to keep their roots firmly planted in the soil, where they will be nourished and happy for several months at least.

But if you, like me, cannot keep a dill plant alive to save your life, then you might benefit from these tips. (Oh, don’t worry; I will persevere in my yearly attempt to kill grow dill, but so far, I haven’t managed to keep it growing for longer than a couple weeks. Yeah, that was probably the record.) And, thankfully, these tips will also apply to a large number of other herbs, if you are also very good at killing those (Or if you just don’t have room for potted herbs. Or if it’s the winter and herbs would die anyway.)

I offer you my two favorite solutions for fresh herb storage (aside from the so-fresh-its-still-alive variety) that I have just hit upon this summer (all hail the mighty Pinterest!).

Short-Term Refrigerator Storage

OK, so this tip has been around a while, and I may have even tried it once or twice back in the day, but then I guess I forgot about it. The past few times I have purchased a bunch of fresh herbs, I tried the method where you stick it in a jar of water and either leave it on the counter at room temperature or put it in the fridge.

Maybe I did something wrong, but that didn’t work for me. Leaving it on the counter was a total disaster: the bunch of cilantro I was trying to keep fresh wilted the first day, and completely withered away the second day. Sadness. Good thing I only wasted $0.69!

I’ve tried the half-full glass of water in the fridge on multiple occasions, but you know what always happens? I bet you do know, because I bet the same thing happens to you (especially if you have those wired shelves, like me, instead of flat plastic or glass shelving) - inevitably, the glass tips over and spills the water everywhere. Annoying.

Plus, I find that even if I do manage to keep the jar or glass upright, the herbs don’t stay fresh for much longer than a few days. How am I supposed to use up a huge bunch of cilantro in that amount of time? Well, I guess I probably could if I put my mind to it. But I usually don’t.

Enter my now-favorite tip that I have (re)discovered:

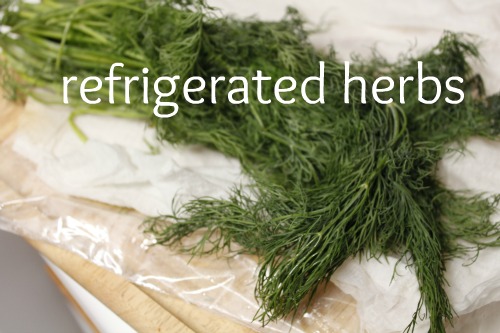
Wrap a damp paper towel around the fresh herbs and place in a zippered plastic bag.

Press out all the air and seal it shut. Refrigerate.

It’s like magic! The dill in that picture is a week old and is still fresh and yummy. I used some for dinner tonight, and have enough for a few more dinners. A couple of the fronds at the end froze just a bit in the fridge, but for the most part, it’s still in fabulous condition. I am now going to store all my fresh herbs in this manner! From hereon and henceforth.

But… I probably won’t actually get around to using all that dill in the next week. So, I need a long-term storage solution.

Long-Term Freezer Storage

I’m no stranger to freezing herbs; I have done it on many occasion. I’ve tried just sticking the herbs straight up into little freezer baggies. I’ve tried freezing them in a little water in ice cube trays. I’ve tried pureeing them and freezing them in ice cube trays. All of those methods will work to one extent or another.

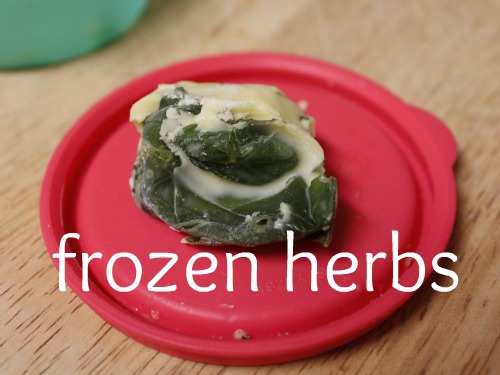
But now… I’ve taken the ice cube tray to a whole new level and added oil! Many thanks to The Gardener’s Eden for this fabulous idea! So far, this is my very favorite way to freeze herbs for later use. It won’t work for every use, but you can try freezing them in water or broth instead if you prefer. In any case, this is a delicious and super simple way to freeze herbs.

How do you store your fresh herbs?

Sharing at Freaky Friday, Fight Back Friday, Homestead Barn Hop, Titus 2sday, Traditional Tuesday, Healthy 2Day Wednesday, Works for Me Wednesday, Allergy-Free Wednesday, Women Living Well Wednesday, Frugal Days Sustainable Ways, Real Food Wednesday, Whole Foods Wednesday, Simple Lives Thursday, Your Green Resource

Canning - It’s Not What You Think!

Does the whole idea of canning scare you? Or do you feel like it’s just time-consuming? Or perhaps you think you just don’t have the skills necessary to can successfully.

A few years ago, that’s exactly how I felt: scared, apprehensive, and unsure about the whole concept of preserving at home by canning. But I took a deep breath, jumped in and started… and found, to my surprise, that canning was not at all what I thought it was!

If you’re still hesitant to experiment with canning, read my guest post today at Keeper of the Home that will reassure you about the ease and safety (not to mention the expense) of canning.

And be sure to come back on Thursday, because I’m going to have a nice little giveaway featuring one of the products I mention in that post!

Sharing at Works for Me Wednesday, Women Living Well Wednesday, Titus 2sDay, Allergy Free Wednesday, Whole Foods Wednesday,Traditional Tuesday, Real Food Wednesday, Frugal Days Sustainable Ways, Healthy 2Day Wednesday

Preservation is the Theme {Menu Plan Monday 7/23/12}

menu plan monday Menu Plan Monday

Last week, I mentioned I was busy preserving all kinds of things; this week, preserving is the theme on the blog! We’ll be talking about canning and how it’s a lot easier, cheaper, and quicker than you might think. And… I’ve got a great giveaway coming up later this week for canning newbies and old hands alike! So stick around, and subscribe if you need to so you don’t miss a thing.

And now for the menu…

Breakfasts

  • Spelt Pancakes
  • Peach Bread Pudding
  • 1-2-3 Granola!
  • Oat Muffins
  • Oatmeal

Lunches

  • Leftovers
  • Sunbutter & Jelly Sandwiches
  • Nitrate-Free Lunchmeat Sandwiches
  • Egg Salad Sandwiches

Dinners

  • Pork Carnitas on Spelt Tortillas, Cantaloupe
  • Pork Carnitas on Baked Potatoes, Sliced Apples
  • Mini German Pancakes with Apple Filling
  • Pasta Salad w/ Ricotta and Bacon, Fresh Fruit
  • Grilled Cheese on Sourdough Bread, Carrot Sticks

Snacks

  • Nuts, Cranberries
  • Popcorn
  • Cookies

In My Kitchen Today

Preserving with my Vitamix

I knew when I was saving up for my Vitamix that it would help me save time and money by enabling me to quickly make certain foods that I didn’t used to make, like sunflower seed butter or coconut milk. What I didn’t anticipate was how it would save me time and money by enabling me to more quickly accomplish tasks I was already doing, like shredding and puree-ing fruits and vegetables in order to preserve them.

At my most recent OAMS trip, I happened across a whole bunch of seconds produce at a local produce stand, especially some tomatoes and zucchini that were in excellent condition. We had just come off a very busy week of VBS and I didn’t have a great deal of time or energy, but I did want to take care of the veggies before they went completely bad. I did a quick little Google search to see if my Vitamix could be put to use for me, and sure enough! It could!

For most fruits and vegetables, I like to chop or puree them before freezing because then they are more usable when I need them. I do occasionally freeze jalapeno peppers and the like in their entirety, because they defrost very quickly. But for the most part, I like to be able to pull the veggies out of the freezer in a usable state. Out of the freezer, into the pot. Simple and quick! Plus, a lot of veggies change texture in the freezer and are not as easy to chop up when they are defrosted as they are when they are fresh.

Unfortunately, this prep work does take a bit of time, so I have been known to put off the task until it was too late. Those seconds tomatoes purchased at the produce stand for half price or less suddenly don’t seem like such a good deal when they’re leaking tomato juice all over the counter 3 days later because I didn’t feel like taking the time to prep them for the freezer.

Vitamix to the rescue!

Puree

The Vitamix is a blender, so naturally, it blends fruits and veggies into purees quite nicely. Any old blender will do the trick with most fruits and vegetables (especially cooked ones), but I will say that I burned out quite a few cheaper blenders by expecting a little bit too much of them in this department.

I was actually kinda floored by how quickly the Vitamix decimated (in a good way of course) my tomatoes. I cleaned them, peeled them (with the aid of some hot water), chopped them in quarters and squeezed out the seeds, then dumped the whole pile into the Vitamix. Turned it on, and I had several cups of tomato puree in (literally) seconds. I poured it into a bag and put it into the freezer to make into a fresh tomato sauce or some other yummy dish at some point in the future. It probably took me about 10 or 15 minutes to get from whole tomatoes to a freezer bag full of tomato puree.

Tomatoes aren’t the only things that can be quickly pureed in the Vitamix, of course. These fruits and veggies (and more) can be pureed in the Vitamix in a matter of seconds by setting the speed somewhere between 5 and 10 (depending on the fruit or vegetable and the desired thickness or smoothness):

  • Bananas - I like to pour the puree into ice cube trays and freeze it to use for recipes that call for mashed banana. No time for banana bread today, but you have a couple browning bananas? This is a quick way to save those bananas before they go completely bad.
  • Cooked Pumpkins, Winter Squash and Sweet Potato - You might need to add a little water (or broth, depending on if you want it for a sweet or savory use) to the blender for a really smooth puree. The puree can be used in all kinds of baked goods (Pumpkin Chocolate Chip Blondies are a big favorite!), or even soups and casseroles.
  • Apples - You can puree either cooked or raw apples in the Vitamix, although I personally prefer cooked. Raw applesauce will definitely need some lemon juice, and should be eaten or frozen right away. It goes brown very quickly! When I do make raw applesauce, I like to add some other fruit with it, like berries. The resulting texture and color is more pleasing.
  • Peaches - Like apples, they brown easily, so I personally don’t freeze them, pureed or otherwise. I do, however, like to make some yummy peach sorbet, and the Vitamix makes quick work of the puree.

Dry Chopping

The Vitamix can be used as a food processor for a variety of fruits and vegetables by utilizing either the Dry Chopping or Wet Chopping method. The Wet Chopping method requires you to cover the produce with water, then process them for one or two seconds at the highest speed. The Dry Chopping method is simply a matter of turning the blender on at a low speed (somewhere between 1 and 5, depending on the food in question), then dropping large chunks of the vegetable or fruit into the opening in the lid, allowing the blade to slice through it.

“Dry Chopping” is, I guess, something of a misnomer, because it’s more like shredding or mincing. If you want pieces that are diced or larger, you’ll probably want to use another tool or just do it by hand. But I’ve found the Dry Chopping method to be perfect for the following:

  • Celery - I always buy the organic celery at Trader Joe’s, which comes in a package of two. I never use up both of them before they start to yellow and turn, and I always tell myself that I need to freeze them up before that happens. But of course, I never do, because chopping up celery takes a really long time! I managed to rescue a good portion of my celery this time around, simply by dry chopping it in the Vitamix. You don’t even need to cut the celery in chunks before chopping it; just drop the entire stalks in one or two at a time and watch it chop away! I do recommend chopping only one or two stalks at a time, then cleaning out the container before continuing, just to make sure you get any strands off the blade before you have a tightly knotted mess on your hands! I freeze the resulting chopped celery to use in broth, soups, and casseroles.
  • Onions - This will help eliminate the tears! All you have to do is peel the onion, cut off the ends, and chop it into large chunks, then let the Vitamix do the mincing for you. Easy peasy.
  • Zucchini - Seeing as we are smack dab in the middle of the crazy zucchini season, this one comes in super handy! Shredded zucchini freezes beautifully and is perfect for making baked goods or tossing into pasta salads, onto pizza, or into casseroles.
  • Carrots - I don’t always run my carrots through the Vitamix, because I usually prefer to eat them in larger pieces. But the shredded carrots also work well in a variety of dishes, like this simple pasta salad that we had for dinner tonight.

I was going to make a video for you as I chopped away at my veggies, but my kitchen wasn’t clean I ran out of time. Instead, I’ll share with you the ones I found:

The second video shows you how to chop onions using the Wet Chopping method. Either Wet or Dry Chopping works for onions.

I’m sure there are many more veggies that can be chopped in such a manner, but these are the ones that come to mind.

As for the “preserving” part, all I did with my freshly pureed and chopped produce was pack it away in freezer bags and freezer-safe containers and pop it in the freezer. Done!

This post contains affiliate links, but is not sponsored in any way by Vitamix or any other brand. I just get a little enthusiastic about my Vitamix.

Sharing at Works for Me Wednesday, Women Living Well Wednesday, Titus 2sDay, Allergy Free Wednesday, Whole Foods Wednesday, Traditional Tuesday, Real Food Wednesday, Frugal Days Sustainable Ways, Healthy 2Day Wednesday , Simple Lives Thursday

Apple Pectin: How to Make It, How to Use It, and Why I Don’t

Fall Sunday 2010

For the past few years, I have enjoyed making my own jam. I love that it’s healthier than storebought jam because I use fresh local fruit and very little sugar (sometimes I even use honey!). I also love that it’s very easy to make and doesn’t take a great deal of time.

Last year, feeling comfortable with the whole jam-making process, I decided to step it up a notch and try my hand at homemade pectin.

What Homemade Pectin Is

Pectin, as I’m sure you know, is what holds the jam together. Pectin is what causes the jam to “set” and become more solid than liquid. Pectin comes from fruit, and apples are particularly rich in pectin.

Most people are familiar with store-bought pectin that comes in powder form and is sold in little boxes. Sometimes people do without any specific source of pectin at all and just boil the living daylights out of their fruit to release the pectin inside it. And sometimes people make their own pectin by boiling the living daylights out of apples.

How to Make Homemade Pectin

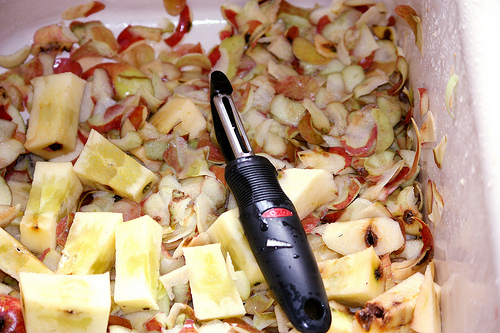
The process of making your own pectin is actually quite straightforward: simply cover a large amount of apple “leavings” (peels and cores) with water and then boil for several hours. Strain through a lined mesh sieve and store the remaining liquid in the freezer or in processed jars. If you would like more specific instructions, please see Fig Jam and Lime Cordial’s excellent tutorial on homemade pectin here.

How to Use Homemade Pectin

Using homemade pectin is not nearly as straightforward a matter as making it. That’s because the amount of pectin found in fruit varies greatly, and homemade apple pectin does not come with a chart to tell you how much you should use.

Another element of jam-making adds even more trickery to the issue, and that is sugar. You have to have the proper ratio of sugar to pectin if you ever want your jam to set.

Furthermore, you’re going to need a little bit of lemon juice, which is also essential to the gelling process.

And, of course, how much you use of each of these ingredients depends entirely on how much fruit you have and what kind it is.

Complicated much, yes?! Once again, I will refer you to Fig Jam and Lime Cordial and their Jam Making Primer. But to sum up, when making jam with your own homemade pectin, you need to combine the appropriate amounts of fruit, pectin and lemon juice into a pot and bring it to a full rolling boil. Once the fruit has softened, add the appropriate amount of sugar and bring it back to a boil. Boil the living daylights out of it until it sets. If it doesn’t set, add more sugar or pectin and boil it some more.

Why I Don’t Use Homemade Apple Pectin

Homemade apple pectin seemed like such a frugal and healthy idea - an all natural, chemical free alternative to store-bought pectin that I could make from apple scraps I would normally throw away. Brilliant, right?! Once I read about it, I was determined to give it a go. After excitedly bottling up and freezing several jars of homemade apple pectin during the peak of apple season last fall, I was anxious to try my hand at jam made completely 100% from scratch with the onset of berry season this year.

Imagine my dismay when my experiment was a complete and total flop. Oh, my jam “set” just fine. After I had almost completely boiled it away, that is. And added way more sugar than I usually do. And slaved over a hot stove for much longer than I usually do. And got spattered by hot bubbling jam more than ever before.

I decided that I would never bother with homemade apple pectin again. Why? Oh, let me just count the reasons why:

  1. Making the pectin was easy, but it was kind of time-consuming. And it took up valuable real estate in my freezer.
  2. I had to boil the jam for. ev. er. Usually, jam takes me about an hour, start to finish. With the apple pectin, it was easily twice that long.
  3. I started with four cups of mashed fruit, the typical amount used in an average batch of jam made with store-bought pectin. Typically, that amount will yield 3-4 pint jars of jam. How many pints did I get from my batch made with homemade pectin? One. Just one.
  4. The pectin I usually use requires only 1/4-1/2 cup of sugar (I usually use unrefined sugar) or honey. I can’t remember exactly how much sugar I used with the apple pectin, but it ended up being considerably more.
  5. I had to boil the fruit down for so long that I highly doubt any nutritional value is left.
  6. Also because of the lengthy boiling time, the resulting jam tastes cooked rather than fresh.
  7. Getting the jam to set when using apple pectin is much more tricky than when using store-bought pectins, because you have to get the ratio of pectin, sugar and acid just right or it won’t work. And you have to test it to see if it’s set, which is, in my opinon, a waste of good jam!

To sum up:

It’s not QUICK - it takes forever!

It’s not EASY - it involves a lot of work and a more knowledge of jam-making than I possess.

It’s not CHEAP - the pectin might be practically free, but if my yield is less than a quarter of what I would get otherwise, it is not at all worth it.

It’s not HEALTHY - all the nutrients are boiled away, so you’re mostly left with concentrated sugar held together by fruit juices and some pulp.

What I Use Instead

My one experience with apple pectin was enough to convince me to return to my favorite old standby, Pomona’s Pectin. Pomona’s Pectin is incredibly easy to use, is all natural, and requires only 1/4-1/2 cup sugar for most recipes. It also works with all kinds of sugar alternatives, including stevia and honey. I have never had a batch of jam fail in all the time I’ve been using Pomona’s Pectin, and it sets up very quickly - within a minute! No constant boiling, stirring, and testing for a proper set.

I wish Pomona were paying me to say this, but she’s not. The honest truth is: I LOVE THIS STUFF!

What kind of pectin do you like to use?

Sharing at Titus 2sday, Traditional Tuesdays, Homestead Barn Hop, Healthy 2Day Wednesday, Women Living Well Wednesday, Whole Foods Wednesday, Works for Me Wednesday, Real Food Wednesday, Frugal Days Sustainable Ways, Tastetastic Thursday, Simple Lives Thursday

Busy Preserving, No Time to Cook!

menu plan monday Menu Plan Monday

Did you catch my announcement about the new direction my blog will be taking soon? It’s exciting news, and you won’t want to miss it.

In other news… it’s been preservation city around here lately. Over the weekend, I:

  • made a batch of jam
  • made a batch of pickles
  • pureed and froze tomatoes for future tomato sauce
  • cooked and froze 2 whole chickens
  • froze a peck of green beans

I still need to grate some zucchini and put it in the freezer, but I will have to get to that tomorrow.

Breakfasts

  • Pancake Apples
  • Smoothies & Toast
  • 1-2-3 Granola! Parfaits
  • Oat Muffins
  • Oatmeal

Lunches

  • Leftovers
  • Sunbutter & Jelly Sandwiches
  • Nitrate-Free Lunchmeat Sandwiches
  • Egg Salad Sandwiches

Dinners

  • Baked Potatoes w/ Tangy Yogurt Chicken, Steamed Carrots
  • Chicken, Ricotta & Basil Pizza, Watermelon
  • Eggs, Bacon, and Spelt Biscuits
  • Tuna Salmon Pasta Salad, Fresh Fruit
  • Grilled Cheese on Sourdough Bread, Carrot Sticks

Snacks

  • Nuts, Cranberries
  • Popcorn

In My Kitchen Today

  • Sourdough Bread
  • Coconut Milk
  • Coconut Milk Yogurt
  • Grate & Freeze Zucchini

Big Changes Here at QECH!

For a long time now, I’ve felt kind of smothered in a way by the niche I’ve created for myself here at Quick and Easy Cheap and Healthy. Oh, I still like to do things the “QECH” way… but I’ve found that “QECH” is pretty much my approach to life, and not just food.

I don’t have a lot of time, so I tend to gravitate towards the fastest method that produces the best results. Like 5-minute Artisan Bread. Or my housekeeping schedule.

I like to think that I’m efficient, but the truth is that I’m just lazy. Hence, I try to find the easiest way to get things done, whether it’s laundry or homemade yogurt.

Above all, I am cheap, and I’m always looking for the most cost-effective way to get what I need. That’s why I’m always writing about stuff like 7 Ways to Use Over-Ripe Bananas or how to make Something from Nothing. And that’s why I buy clothes at thrift stores and off clearance racks.

And I try to do it all without compromising mine and my family’s health, which is no mean feat, let me tell you!

All of those tendencies culminated in my most recent project - Your Grocery Budget Toolbox - but there’s still more I want to write about, more I want to share.

Like how I make simple non-toxic cleaners for every room in my house.

Or how I keep (or don’t keep) my sanity with a pre-schooler and a toddler underfoot.

Or how I re-purpose items around the house and turn them into something new, which is a total win-win: something saved from the trash, and something gained with little-to-no cost!

So… my blog is going to be changing a little. Broadening the scope of its horizons and reach. Extending the borders a little.

It’s going to have a new name: Authentic Simplicity.

It’s going to have a new (but familiar) focus: living simply without sacrificing authenticity .

It’s going to be streamlined with four basic categories: on the Table, at Home, in the Budget, and from my Heart.

It’s going to be beautiful with a fresh new theme and design.

It’s going to be awesome!

So don’t worry if you keep noticing little changes here and there. Hopefully, by the beginning of September, Quick and Easy Cheap and Healthy will have completed its transformation into Authentic Simplicity, but there will probably be bumps along the way. Stay with me as we make the progression, and I apologize in advance for any hiccups!

The Easiest Way to Prepare Steak - Salt “Marinade”

Salt Marinated SteakMy DH has had some fun this summer, grilling on our little itty bitty charcoal grill. We had never had one before; I’m not sure why, to be honest! We just never got around to buying one, I guess because it’s a little awkward when you live in an apartment. But around Father’s Day, my DH determined that he was going to get one of those little cheap-o charcoal grills at Target by hook or by crook. Thankfully, neither hook nor crook was necessary, as his brother happened to have an extra one on hand. Still a cheap-o little charcoal grill, but one that had only been used once, and was in great condition. And FREE! Can’t beat free!

One of the first things we (by which I mean my DH) grilled was New York Strip Steak. Now, I know what you’re thinking. El Cheapo grilled steak? And New York Strip Steak at that?!

Yes, I know. It was highly out of character for me. But it was for Father’s Day. My DH is a great dad and he loves steak, so I decided to treat him with fancy schmancy steak in our not-so-fancy-schmancy grill. (Note to the mommies out there: this is a very sneaky way to get your husband to make his own Father’s Day dinner without him hardly even realizing it. Shameless, I know!)

And yes. I know. It’s July, and Father’s Day was a month ago. What can I say?

But it doesn’t have to be Father’s Day to enjoy grilling steak. Any old day is perfect for grilled steak. And what I love about this recipe is its speed - no need to think ahead and marinate for hours on end. For one thing, that’s not necessary with a good steak. For another, marinating for hours on end will not get you any better results than this simple salting method. I guarantee. Why take all day when 25 minutes will do?

Steak "marinading"

Salted New  York Strip SteakThis is a great QUICK meal for any hot summer night!

Steaks are EASY to cook, especially on the grill!

CHEAP? Um. No. Not even close! Especially since I bought Safeway’s Open Nature beef, which is not as good as grass-fed beef, but much better than regular old beef… and costs quite a bit more, too!

If you can get grass-fed beef, this is a very HEALTHY meal. I know that vegetarians would beg to differ with me, but if you’re an omnivore like me, you understand!

Sharing at Simple Lives Thursday, Tastetastic Thursday, Titus 2sday, Traditional Tuesday, Healthy 2Day Wednesday, Women Living Well Wednesday, Whole Foods Wednesday, Works for Me Wednesday, Real Food Wednesday, Allergy-Free Wednesday