Archives for August 2012

A Fruit, A Vegetable, and a Hot Dog {Food Waste Friday 8/30}

FoodWasteFriday
One of my biggest pet peeves is throwing away food. I could kick myself every time I dump food down the drain or in the trash: it’s just a complete and total waste! And I hate waste. Which is why I am so thrilled to link up to The Frugal Girl on her weekly feature where she posts a picture of all the food she had to throw away for the week, and invites other bloggers to do the same. The idea is to feel some accountability - who wants to admit they threw away all that money to the whole world? - to help you avoid throwing away food in the future.

I have a picture, and it’s even on the card on my computer, but now I’ve wasted diligently spent my time wisely on Facebook for the past hour and I have no more time to write this post. So no time to edit the picture, sorry! However, I can tell you what was in it:

  • a nectarine
  • half a cucumber
  • half a hot dog

The hot dog was my Certain Little Someone’s, who is usually a hot dog fiend! For some reason, he wasn’t up for eating the rest of that one, and it just got neglected in the fridge. The other two items were shoved way back into the back of the refrigerator and I forgot about them. That makes me very sad. This week, I’m going to attempt to remember all my produce.

How’d you do with food waste this week?
A Gift for You!

I plan on having a Facebook party to celebrate my new blog and my new look: you know, one of those Facebook parties with lots of prizes and fun conversations? Yes, one of those! I’m working behind the scenes to put it together and will let you know as soon as it’s ready. In the meantime, though, I thought I’d spoil you all with a free gift of my own!

To thank all of you for sticking with me through this switch, and for encouraging me and just being my friends, I am pleased to give you - absolutely free! - the first chapter of my eBook, “Your Grocery Budget Toolbox“.

While it might seem a paltry offering, the first chapter of this book is still chock full of valuable information. In fact, those who reviewed the book mentioned quite a few items from the first chapter as being relevatory and particularly useful in their quest to reduce their grocery bills. This chapter will give you the foundation you need to help you restructure your food spending.

What’s more, while parts of some chapters came from my blog and were previously published, this chapter contains entirely new original material that you won’t find anywhere else. And I’m giving it to you for free, because I really appreciate you coming to my blog and supporting me!

And if you like what you read, there’s a coupon code at the end of the chapter that will give you 20% off the purchase price of the book! Of course, there’s absolutely no obligation to buy. It’s just a free gift.

In order to receive this gift, all you have to do is follow my blog via RSS or email. That’s it! And although it might hurt my feelings (Ok, it will!) if you unsubscribe as soon as you’ve downloaded your free gift, you most certainly have permission to do so if you don’t like cluttering up your inbox. The practical side of me understands. But truthfully, I hope you will stick around, because it’s only going to get better around here!

So what are you waiting for? Go get your free gift!

Easy Protein-Rich Snacks

At this point in my life, I have no desire to go on GAPS, and the Paleo diet does not particularly appeal to me, but I have lately been endeavoring to shift the balance of proteins vs. carbs in my diet. I don’t want to eliminate carbs completely because I feel that they play an important nutritional role; but I do want to be more cautious about consuming carbs in excess, and I want to focus on carbs that are refined as little as possible.

Unfortunately, snacking has proven to be my downfall: It appears I’ve really gotten into the habit of eating carb-laden foods in between meals! Popcorn, homemade cookies or granola bars, dried fruits and the like are all go-to snacks for me. Not that those things are inherently unhealthy - they’re not - it’s just that I eat too much of them.

Another thing I’ve noticed is that carb-olicious snacks don’t tend to stick around with me for long. It’s like they evaporate into thin air after a little while, and then I start getting pangs in my stomach and shaky hands and a light head. But if I eat some protein and/or healthy fat, I can go for hours without feeling any hunger or low-sugar issues. (I will say that sometimes I do need to eat at least a small portion of carbs to get a more immediate rush of sugar to my blood if I’ve gone too long without sustenance.)

So…. all that to say that I’ve been getting a little more creative with our snacks here lately, and experimenting with protein-rich snacks that are filling but not super expensive, plus easy to keep on hand when the munchies strike. I’ve come up with this list of such snacks, mostly for my own benefit, and I thought you might be interested as well. And if you have any more ideas for me, please let me know! I’m in need of more inspiration.

Straight Up Protein

These snacks do not contain any carbs at all; they are only proteins (and fats).

  • Hard-boiled eggs - I actually want to get in the habit of having a few of these on hand in the fridge. Since my DH and I are currently the only ones in the house who eat eggs, it tends to take us a while to go through a whole dozen, so we definitely have some to spare most of the time.
  • Cheese sticks/Cheese slices/Cheese cubes - I’ve already gotten in the habit of buying two large bags of cheese sticks from Costco every month, and that’s plenty enough for my DH to have the requisite 2 in his lunch every day (force of habit!), and for me and Tiger Cub (formerly Baby Boy) to snack on occasionally. I know it’s not the healthiest version of cheese around, but for now, it works for me! (Read: it’s cheap, and the healthy cheese is too expensive.)
  • Nuts - I particularly love almonds, but pistachios and walnuts are yummy, too. I have some hazelnuts in my pantry, but since they are still in the shell, I rarely bother to deal with cracking them. But I like hazelnuts, too!
  • Nut/Seed butters - Around here, that’s mostly homemade sunflower seed butter because it’s safe for everyone, but I do occasionally indulge in my own personal jar of all-natural peanut butter. I usually use it as a dip for something like apples or - very rarely - celery.
  • Yogurt - I make yogurt with a machine once a week. Admittedly, I usually add some honey or jam to it which means added carbs, but over all it’s still a protein-rich snack (good fat, too, since I make it with whole milk). Sometimes I also mix it with freshly whipped cream, which is quite yummy.
  • Mini meatballs - The other week, I made meatloaf for dinner, and since I had a 3lb package of ground turkey to work with, I went ahead and doubled the recipe to season all the meat, but then rolled half of it into meatballs. I froze some and kept some others to eat as a quick snack.
  • Roasted chickpeas - My Certain Little Someone and I enjoy any flavor of roasted chickpeas; here’s a salt-and-vinegar chickpea recipe you might like.

Protein-Based Snacks

These snacks might contain some carbs, but they are based on proteins.

  • Coconut Cookies - These cookies have 3 ingredients: coconut flour, butter and a small amount of honey. They are very good, although I did find them to be a little bit dry. That might be because I had to use coconut oil and palm shortening in place of the butter, though.
  • Bean Brownies - My bean-based brownies always turn into fudge, but that might be because I have to substitute the eggs in order to keep them safe for my Certain Little Someone. But they’re still yummy!
  • High Protein Muffins - I haven’t tried these yet, but I’m putting them on the list so I will remember to! Nut or seed butter forms the base of these muffins.
  • Cookie Dough Dip - This bean-based dip could be completely carb-free if you eliminate the chocolate chips and use stevia to sweeten it. I dont’ think I would have the heart to eliminate the chocolate chips completely, though, so I’d probably just reduce them a little.
  • Peanut Butter and Jelly Cookie Dough Dip - This dip is also bean-based.
  • Baked Donut Holes - Coconut flour forms the base of these delicious little morsels, and there is very little sugar involved.
  • Raw Vegan Chocolate Cranberry Energy Bars - Kind of like a Larabar, I think. I’ve never made them because I don’t usually have that many nuts, and I don’t have a food processor. But they sound quite delicious and they’re on my Pinterest board because I would like to make them someday.
  • Peanut Butter Balls - Kind of like the old-fashioned “Buckeyes”, but made with peanut butter and coconut flour.
  • Chocolate Bark - Use nuts or coconut and it’s deliciously protein-rich!
  • Grain-Free Peanut Butter Chocolate Chip Cookies - yet another reason why “chickpeas” are on my grocery list!

Protein-Enriched Snacks

These snacks are carb-based, but use protein-rich ingredients as well.

  • No-Bake Energy Bites - These do have oatmeal, but they also have peanut butter and coconut.
  • Leslie’s Sunbutter Balls - These are made with a crispy rice cereal and call for dried fruits and chocolate, but the base is sunflower seed butter.
  • Flourless Peanut Butter Chocolate Chip Cookies - Once again, peanut butter is the core ingredient here, and it also contains eggs, but this recipe does call for a great deal of sugar. I would try with maybe 50-75% of the sugar called for, or I would experiment with stevia.
  • Beanie Butter Blondies - Chickpeas are the main ingredient, but it also calls for a small amount of flour. I think I might have more success with these than I have with the completely grain-free bean brownies.
  • 4-Ingredient Chewy Almond Butter Granola Bars - I made these with sunflower seed butter (and slightly less honey), and they were seriously the best granola bars I’ve ever made.
  • Cultured Coconut Milk Cheesecake - This recipe is on my list to try; it’s definitely more of a dessert than a snack, but it sounds divine!

Whew! I’m so glad I have compiled this list; I have a feeling I’m going to be referring to it often! I hope you find it useful as well.

So, my friend, what is your favorite protein-rich snack?


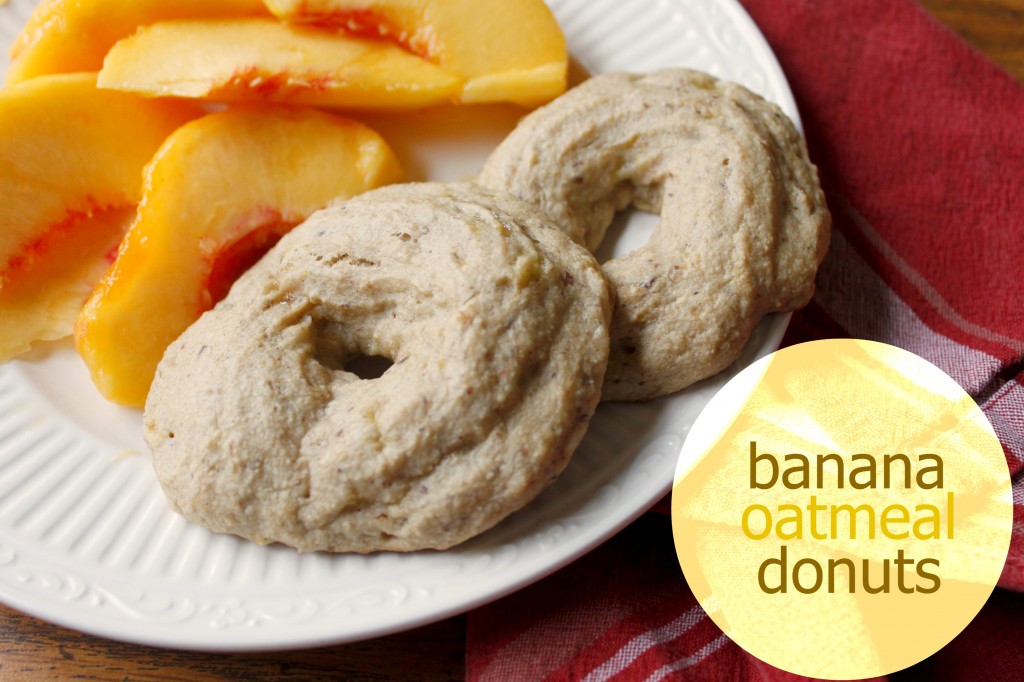
Banana Oatmeal Donuts

I just love it when I find a recipe that is so delicious I can’t resist it, and yet is healthy enough that I don’t feel the least bit guilty indulging. This is just such a recipe! These tasty and healthy donuts are made from whole grains, fruit, and healthy fats, with no refined sugars. They’re also egg-free, wheat-free and dairy-free if you’re on a limited diet. And they don’t taste like any of that! They just taste like yummy. Want the recipe? Get it at the Grain Mill Wagon: Banana Oatmeal Donuts.

I’ve got one more delicious grain mill recipe coming up for you next week - you’re going to love it! Another healthified indulgence, my favorite.

This post was made possible by the Grain Mill Challenge.

Sharing at Titus 2sday, Domestically Divine Tuesday,Teach Me Tuesday, Traditional Tuesday, Healthy 2Day Wednesday, Allergy-Free Wednesday, Whole Foods Wednesday, Works for Me Wednesday, Women Living Well Wednesday, Frugal Days Sustainable Ways, The Mommy Club, Tastetastic Thursday, Simple Lives Thursday, Your Green Resource, Freaky Friday, Fight Back Friday, Friday’s Favorites, Better Mom Mondays, Homestead Barn Hop, Motivating Monday

Authentic Simplicity is Here!

If you’re reading this via the RSS feed, you’ll want to click through and see the bee-yoo-ti-ful new design of what used to be Quick and Easy Cheap and Healthy. It’s now Authentic Simplicity, which is pretty much the same thing, only it looks and sounds a lot better.

There’s more to come; it’s definitely not finished quite yet. I have a couple more pages to add, and I need to organize and fill up the sidebar still (sorry, there’s no search bar at the moment!). But do you see those pretty little social media icons up in the corner? It took me at least 2 hours to figure out how to get them in the right place without cutting off parts of the header or icons or eliminating the content wrap altogether. (I’m totally NOT a geek!) Henceforth and therefore, I had no more time to finish the rest of my blog transformation to-do list, so all that stuff will have to wait.

Speaking of those social media icons, all of them have been updated with the new name (although not necessarily the new design yet), except for Facebook, which is going to require me to jump through a few hoops. I don’t know how long that will take, and I do apologize for the confusion it might cause while the Facebook page is in limbo between Quick and Easy Cheap and Healthy and Authentic Simplicity. I’m hoping that Facebook will grant my request to change the name rather than forcing you all to like a brand new page, so that you don’t have to jump through any hoops.

So … have fun and explore a little! Some pages that might interest you:

I have a brand spanking new About Authentic Simplicity page, as well as a new About Me page (with pictures!).

My four main categories (with multiple sub-categories) are:

At Home (all things related to housekeeping, child-rearing, and the like)

In the Budget (money-saving ideas mostly)

On My Mind (anything I feel like sharing!)

On the Table (recipes and tutorials)

I am so excited about this new look and new bend in the road! I hope you’ll stick around for the rest of the journey!

OH! I can NOT forget to say a huge “THANK YOU!” to my awesome husband, who designed the header and helped me with the rest of the design and some minor - and major - coding issues. It’s kind of nice, being a blogger, to be married to a graphic designer and electronic publishing coordinator (his day-job title). A providential match, to be sure!


Sharing at Titus 2sday, Domestically Divine Tuesday,Teach Me Tuesday, Works for Me Wednesday, Women Living Well Wednesday, Frugal Days Sustainable Ways, The Mommy Club, Simple Lives Thursday, Your Green Resource, Fellowship Friday,

Organizing on the Cheap Recap

Have you ever been frustrated by all the creative organization ideas you see in magazines and on blogs, only to realize that you simply can’t afford (or don’t want to spend the money) all those gorgeous bins, boxes, baskets and other containers? Me, too! I’ve learned to organize my home (uh, to a certain extent) without spending an arm and a leg, and I have a whole week’s worth of money-saving organizing tips that you will love!


Plus, I have a great list of other ideas from bloggers around the internet who also have a passion for organizing with repurposed and recycled items. You will not lack for inspiration!

I’m not the only one with great organizing ideas - far from it! Click on the image below to read posts by more than 20 other bloggers who also shared 5 days of organizing tips. You’ll find ideas for organizing naturally, for cleansing your mind and body, for organizing schoolrooms, offices, kitchens, linen closets and more.

Sharing at Fellowship Friday, Frugal Friday, Homestead Barn Hop, Better Mom Mondays, Titus 2sday, Domestically Divine Tuesday, Teach Me Tuesday, Works for Me Wednesday, Women Living Well Wednesday, Frugal Days Sustainable Ways, The Mommy Club, Simple Lives Thursday, Your Green Resource,

Even More Cheap Organizing Suggestions {Organizing on the Cheap}

I’m so happy you are here with us this week for 5 Days of Organizing - more than 20 bloggers will be bringing you daily inspiration for organizing every aspect of your life. And with back-to-school days breathing down our necks, we all need it!

Have you ever been frustrated by all the creative organization ideas you see in magazines and on blogs, only to realize that you simply can’t afford (or don’t want to spend the money) all those gorgeous bins, boxes, baskets and other containers? Me, too! I’ve learned to organize my home (uh, to a certain extent) without spending an arm and a leg, and I’ll be sharing my tricks with you all week long. Stick with me for great cheap organizing ideas!


Today’s your last chance to enter the giveaways! You can enter the cash giveaway right here on this blog post - just scroll down to the bottom - and if you click on the footer image, you will be directed to a page with a whole bunch of other giveaways.

I am not the only crazy person who organizes her home with other people’s cast-offs, recyclables, and cardboard boxes (Hey! Sometimes I get new stuff at the Dollar Store!). A quick browse through Pinterest reveals that many other people prefer to re-use, recycle and repurpose when it comes to organizing their homes.

Proof? Here ya go:

Take an old cylindrical wipes container and use it to store and dispense plastic bags. Keep one in the car, one under the kitchen sink, one in the diaper bag, and one in the beach bag!

This blogger used containers from IKEA to store kids' games and card games. I like IKEA and all - hey, it's cheap! - but I happened to have a surplus of empty wipes containers (the box kind this time) that served exactly the same purpose! Now the Toy Story 3 Memory game is neatly contained. Awesome.

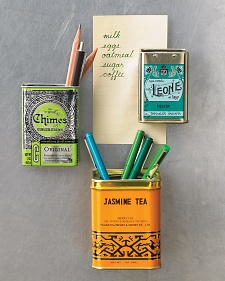
So simple, so quick, so CUTE! I love this idea from Martha Stewart. Now I just have to find some of those adorable little tins somewhere.

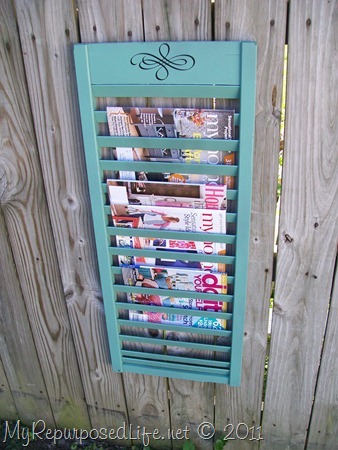
I need to remember this idea from My Repurposed Life the next time I'm staring at a shutter in an antique or thrift store and wondering, "Now what was that really cool project I was going to do?"

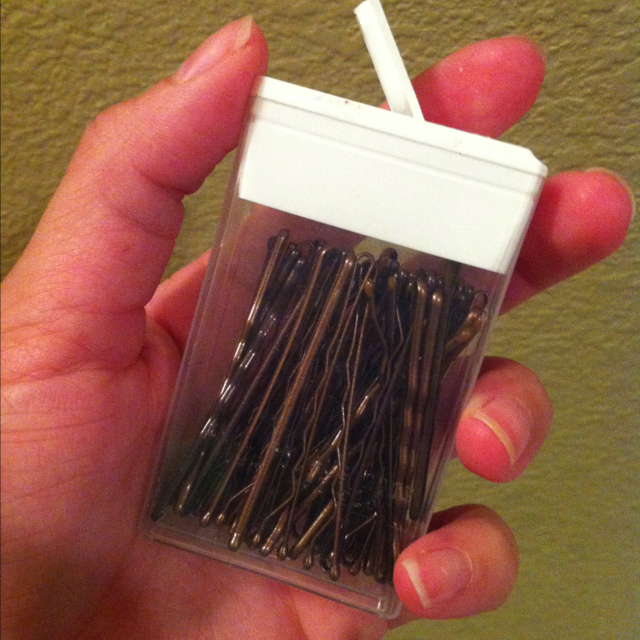
This is one of those head-smackers. You know, the kind where you smack your head and say, "Now why didn't I think of that?!" Repurpose old TicTac boxes into bobby pin holders (perfect for your purse!).

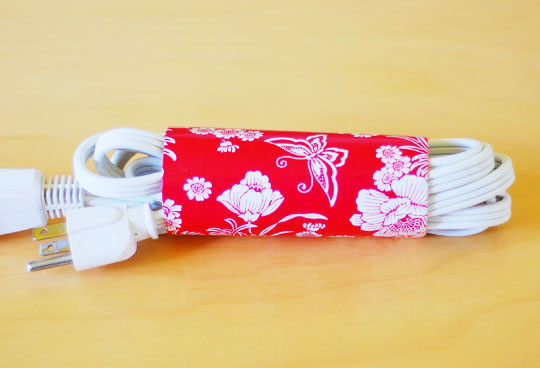
Use a toilet paper tube to corral cords. Brilliant!

From oven rack to jewelry organizer. That's just about the coolest thing ever. From Just Sew Sassy.

Do you have an organizational idea for repurposed items? Do share!

Visit these blogs for lots more ideas on organizing your kitchen, your office, or your homeschool room!

a Rafflecopter giveaway

Organize Your Home with Empty Shipping Boxes {Organizing on the Cheap}

I’m so happy you are here with us this week for 5 Days of Organizing - more than 20 bloggers will be bringing you daily inspiration for organizing every aspect of your life. And with back-to-school days breathing down our necks, we all need it!

Have you ever been frustrated by all the creative organization ideas you see in magazines and on blogs, only to realize that you simply can’t afford (or don’t want to spend the money) all those gorgeous bins, boxes, baskets and other containers? Me, too! I’ve learned to organize my home (uh, to a certain extent) without spending an arm and a leg, and I’ll be sharing my tricks with you all week long. Stick with me for great cheap organizing ideas!


You might want to scroll down to the bottom to enter the $50 Paypal cash giveaway, and then click on the footer image to find a whole bunch more giveaways (including one of Your Grocery Budget Toolbox by yours truly!).

So far this week, I’ve shown you my Yard-Sale Spice Cupboard Makeover, my Free Pantry Organization System, and my Dollar Tree Organized Sets.

Today, I’m going to share with you another favorite organizing trick that is absolutely free. Well, sort of. I guess it all depends on if you won a giveaway or did a little online shopping. In any case, whenever the UPS (or the USPS, or FedEx, I’m not picky) knocks on your door and delivers a package… save the box! No matter its size or shape, it will come in handy for containing and organizing something somewhere in your home.

Now, a little caveat: don’t get too carried away here, folks. If you win too many giveaways or do a little too much online shopping, you might find yourself overrun with more boxes than you can handle. And if you’re having trouble organizing the boxes that you are saving to organize with… well, then, you’ve got trouble, my friend. With a capital T.

My rule of thumb is this: if I have an out-of-the-way space to save the box indefinitely, I will. Sometimes I have smaller boxes hanging around the corners of my laundry room for quite some time. But if I don’t really have the space to keep the box, I just hold on to it for a few days until either I’m sick and tired of moving it around to get it out of my way or I have found a practical use for it elsewhere in the house. Then I use it or lose it.

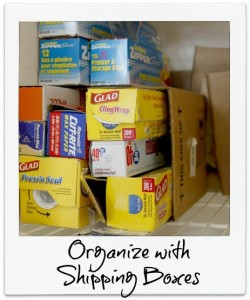
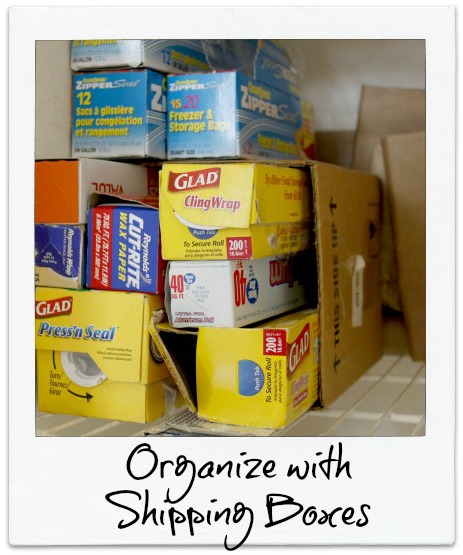
And how do I use these boxes? Well, pictured above you see one example. I used to have all those boxes of wraps (you know: foil, plastic wrap, wax paper, zip-top bags, etc.) piled in a heap on the floor of my pantry. I never knew how many of each I had and what I was out of, and frankly, it was a huge mess.

When I recently re-organized my pantry, tackling that disorderly heap was one of my first jobs! It was quite easy, really. The long boxes holding the wraps fit perfectly inside a rectangular box that had recently arrived. I set the box on its side on one of the pantry shelves, and now I can see easily how much foil or wax paper I have. What’s more, I can easily access each box without having to dig through a pile. Brilliant, really! And since I don’t care what it looks like, being in the pantry and not visible to the average visitor, I just left the box plain. But the beauty of a cardboard box is that you can quickly, easily, and frugally decorate it with some wrapping paper or scrap paper.

That’s not the only place I’ve used a cardboard box, though. Hardly!

Organize with Shipping Boxes

  • for off-season clothing storage (I have read that cardboard is actually a better storage solution for clothing than plastic because it allows the fabric to “breathe” - just be sure it’s not anywhere accessible to critters that can chew through the cardboard. Ew.)
  • for Christmas decoration storage
  • under the sink to contain all the junk that collects there.
  • under the bathroom sink to contain that 36-pack of toilet paper
  • as a depository for no-longer-wanted items - once it’s filled, it’s all ready to go to the Goodwill!
  • as a toy rotater - if your child has too many toys, box some of them up and hide them somewhere; in a month or two, bring out the hidden toys and hide some more.
  • book storage - if you simply don’t have any hidden place to put the boxes, cover them up with a table cloth and call it a nightstand/side table.
  • clothes your children have outgrown (if you’re saving them for baby)

That’s just scratching the surface of what these boxes can do! And since they come in all shapes and sizes, they can fit all kinds of different needs. Happy boxing!

Do you save shipping boxes?

Visit these blogs for lots more ideas on organizing your kitchen, your office, or your homeschool room!

a Rafflecopter giveaway

Sharing at Simple Lives Thursday, The Mommy Club, Your Green Resource

How to Organize for Less at the Dollar Store {Organizing on the Cheap}

I’m so happy you are here with us this week for 5 Days of Organizing - more than 20 bloggers will be bringing you daily inspiration for organizing every aspect of your life. And with back-to-school days breathing down our necks, we all need it!

Have you ever been frustrated by all the creative organization ideas you see in magazines and on blogs, only to realize that you simply can’t afford (or don’t want to spend the money) all those gorgeous bins, boxes, baskets and other containers? Me, too! I’ve learned to organize my home (uh, to a certain extent) without spending an arm and a leg, and I’ll be sharing my tricks with you all week long. Stick with me for great cheap organizing ideas!


Scroll down to the bottom to enter the cash giveaway; and when you’re done, click on the footer image to see other posts by other bloggers in this series PLUS lots more giveaways (including a copy of Your Grocery Budget Toolbox!).

The Dollar Store (we have Dollar Trees around here) is the cheap homemaker’s best friend. Granted, not everything there is even worth one dollar. And granted, they don’t have a lot in the way of “natural”. But you certainly can’t beat their price when it comes to organizational products!

I’ve mentioned already that I love to look at yard sales for my organizational tools, and I also love to reuse and repurpose items that come through my house, like the empty jars I wrote about yesterday. But if I ever want a matching set of containers, the Dollar Tree is where I go. Unlike at other fancier stores (The Container Store comes to mind), I can buy as many of an item as I need to have a coordinating set without going over budget.

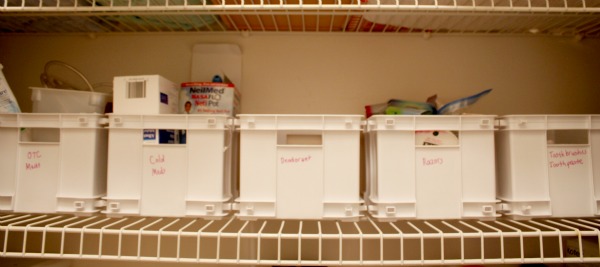
For example, in my linen closet, I have toiletries and over the counter meds organized in matching white boxes:

It’s not gorgeous, but… it’s hidden away in the closet, so I wasn’t particularly going for the gorgeous look. Practical is more my style when it comes to closet storage!

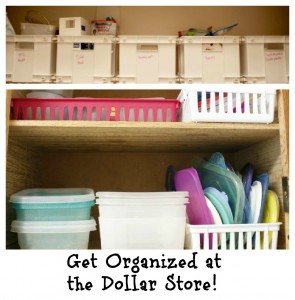
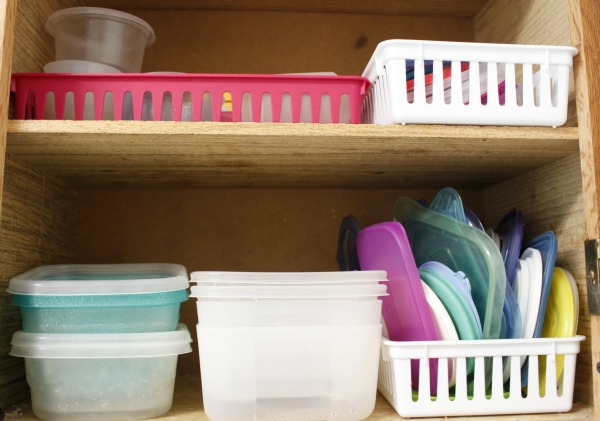
Also, in my kitchen cupboards, I have my small food storage containers and lids all neatly contained in Dollar Tree plastic boxes. I also have similar baskets in a different cupboard that contain toddler utensils and the like.

I’m sure I could show you lots of other examples from my own home, but for now, I’m going to give you a little tour of a Dollar Tree near me, where you can see for yourself the selection of organization tools they have. All for a dollar!

Organizational Products Available at the Dollar Store

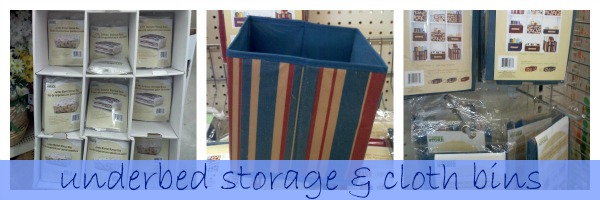
On the left side of this picture you see a display of a variety of under-the-bed storage bags. I will remind you that you get what you pay for: these are not super sturdy, folks! However, if you are careful and don’t over-stuff them, and then leave them where they are without going into and out of them a lot, they’ll last you for quite a while. I use a couple of these to store baby onesies, bibs and such underneath the crib.

In the middle, you see the dollar store version of a canvas bin - cute, no? I love the colors on it! The Dollar Tree has a whole collection of those right now, which you can see in the display on the right. I have similar boxes (I think I bought mine on clearance at Target) that I use to store stuffed animals and other toys in The Boys’ room. The fabric has gotten a little pilled in the past couple years, but other than that, they’ve held up very well. These types of boxes fit very nicely in deep shelves on entertainment centers, coffee tables, and home office units to store a huge variety of items.

I’ve personally moved away from using baskets as storage, mostly because the little people in my house tend to destroy them in, oh, about 5 nano-seconds. I find the little pieces of reed or wood or whatever all over the house. But if you don’t have destructive little ones, or if you have some nice up-high but still visible storage areas, OR if you have angelic children who never mess with your stuff… you will find baskets to fit your needs at the dollar store. Wow, can you believe all the possibilities in these pictures? All kinds of boxes and bins in a variety of colors, shapes and sizes to suit your needs. These containers have applications all around the house: in closets, in the laundry room, in bedrooms, in drawers, in cupboards, on shelves, in the bathroom, in the kitchen, etc. Anything you need to contain can be contained in one of these, I’m pretty sure. Unless you’re trying to contain a wild animal (or small child), and well, that ain’t gonna cut it. Ice cube trays and vases for storage? Why not? They are containers, are they not? Ice cube trays can fit easily inside a drawer in a desk to contain all those annoying little things like push pins and paper clips. And vases or glass containers like these can be used on a bathroom or kitchen counter to hold utensils, cotton balls, toothbrushes, scrub brushes, or whatever!

Have you ever organized your home at the Dollar Store?

Visit these blogs for lots more ideas on organizing your kitchen, your office, or your homeschool room!

a Rafflecopter giveaway

Sharing at Women Living Well Wednesday, Works for Me Wednesday, Frugal Days Sustainable Ways, Raising Homemakers, Simple Lives Thursday, The Mommy Club, Your Green Resource

How I Organized my Pantry for FREE with Empty Jars {Organizing on the Cheap}

I’m so happy you are here with us this week for 5 Days of Organizing - more than 20 bloggers will be bringing you daily inspiration for organizing every aspect of your life. And with back-to-school days breathing down our necks, we all need it!

Have you ever been frustrated by all the creative organization ideas you see in magazines and on blogs, only to realize that you simply can’t afford (or don’t want to spend the money) all those gorgeous bins, boxes, baskets and other containers? Me, too! I’ve learned to organize my home (uh, to a certain extent) without spending an arm and a leg, and I’ll be sharing my tricks with you all week long. Stick with me for great cheap organizing ideas!


Psssstt! Scroll down to the bottom for your chance to win $50 in cash!

The pantry is one of those areas that’s just difficult to keep organized, because it’s intended for storage, but is constantly being used. If you’re anything like me, all day long, you’re opening the door and either putting something in or taking something out. It’s a recipe for disorganizational disaster! (Yes, I’m aware I just made up a word. The red squiggly line was a dead giveaway.)

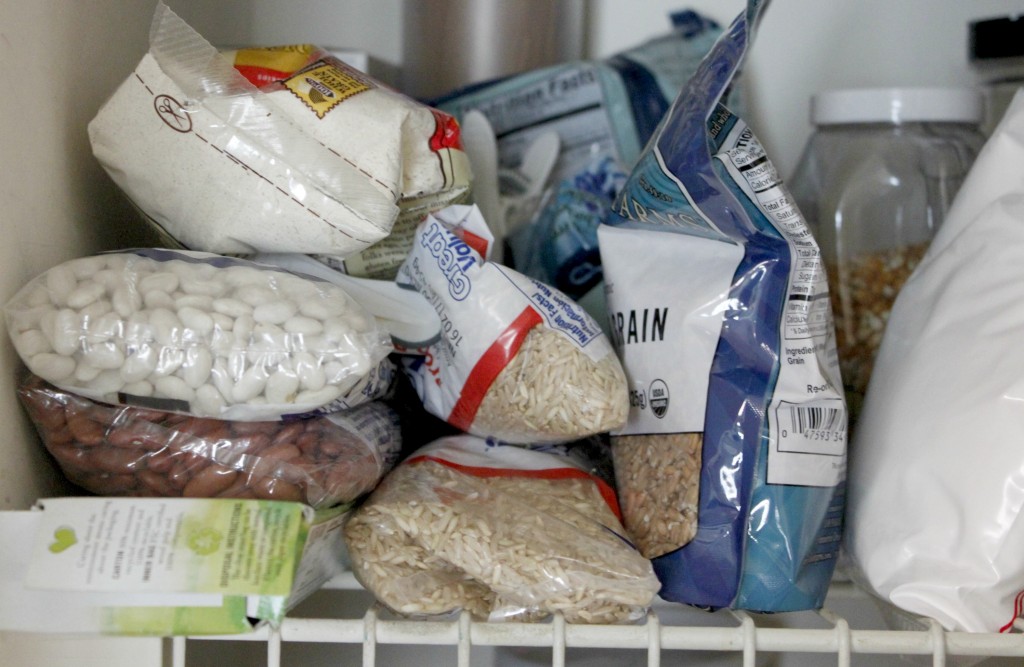
The pantry also rapidly becomes an unmanageable mess because of the packaging our food comes in, which is usually a temporary plastic or cardboard container. By “temporary”, I mean it was never intended to last beyond the life of the food it contains, and is therefore easily destructible. What’s worse is that all those temporary packages come in ALL different shapes and sizes. I suppose it would be boring if all the manufacturers decided to standardize their packaging just so we could all have neat cupboards… but it would also be awfully nice!

Of course, you could remedy this little problem by investing in a set of matching and stacking containers that fit neatly on your pantry shelves, like the Tupperware Modular Mates set or Anchor Hockings Square Glass version. The problem is, either one of those will set you back by quite a bit; and if you don’t have room in the budget for an *organizational products* line item, you will likely want to research cheaper options.

Well, guess what? I have a cheap option for you. How about FREE? Doesn’t that sound nice?

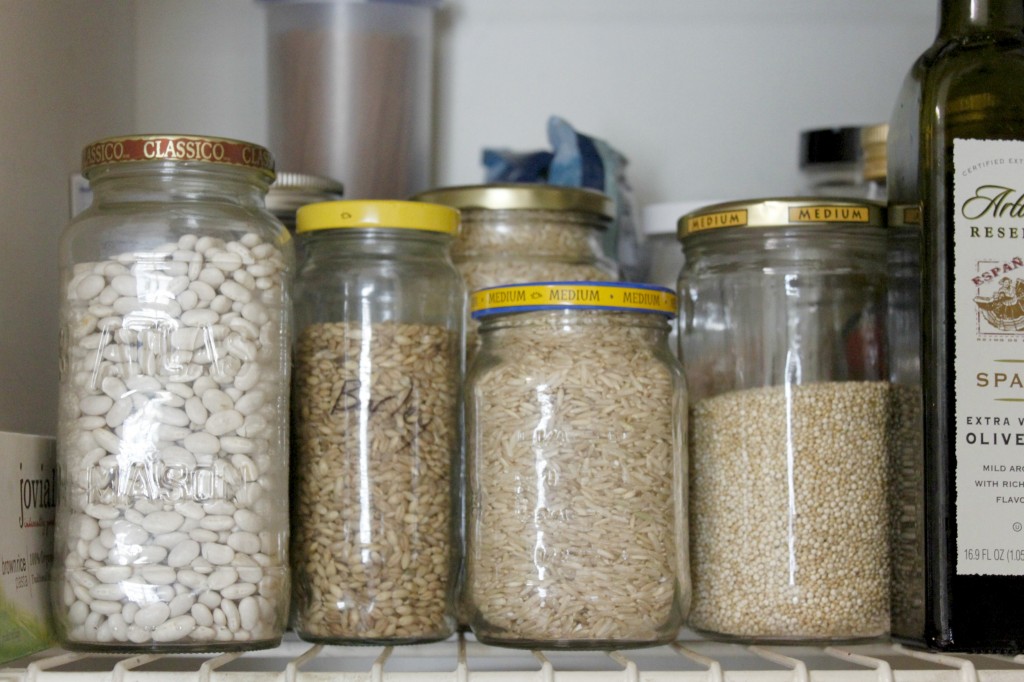
Make your very own customizable set of glass dry food storage containers simply by recycling the glass bottles and jars yourself instead of throwing them in the recycling bin.

The Benefits of Re-Using Empty Jars

  1. You save them from the landfill, or from going through the recycling process.
  2. You save money by not purchasing empty containers simply for the purpose of filling them.
  3. Plastic storage containers can leak chemicals into the food; glass is a safer option.
  4. Glass can go from freezer to fridge to pantry with ease, whereas plastic is a little less stable.
  5. Glass is clear, so you can see at a glance what each jar contains; you can also see at a glance what is in your pantry without having to shift piles of bags around.
  6. The glass jars, while of different sizes, are generally all round and therefore line up nicely in rows so that your pantry looks much neater and better organized.
  7. The glass jars are re-usable over and over and over again, and last MUCH longer than plastic.
  8. Glass is dishwasher-safe.

How to Organize Your Pantry with Empty Jars & Other Containers

  • Start out by saving every single glass jar that would otherwise end up in the recycling bin or trash can. Over time, as you develop your own personal system, you’ll learn which jars work really well and which ones you don’t really want to keep. You’ll get a feel for the sizes you use most often and the shapes that work best for you.
  • Wash them thoroughly and remove the labels by soaking them in warm water. If the label is really stubborn, you can usually remove it by applying a paste made of equal parts baking soda and coconut oil.
  • Store the empty jars in a handy location where they are easy to access when you need to fill them.
  • Whenever you buy bagged food from the store, pour it into one of your jars as soon as you come home.
  • If the food item is not readily identifiable (some grains, like barley, oats, wheat, and the like, can be difficult to differentiate), label the jar. (You can get as fancy as you want with this. I just use a Sharpie because it’s simple. And I like simple.)
  • You can “assign” specific jars to specific foods if you want; for example, if you come across a really large jar that’s perfect for your copious amounts of rice/oatmeal/wheat flour/etc. Or, when a jar empties, you can just wash it and return it to your stash of empty jars, ready for whatever food comes down the pike next.

What Jars Should You Save?

Unless you make ALL of your food completely from scratch, by which I mean you make your own coconut oil from coconuts (good for you!), then you likely already have a good number of jars in your pantry just waiting to be emptied and refilled. Speaking of coconut oil, oddly enough, Tropical Traditions is my favorite source for good quality glass storage jars. Not only do I love their raw honey, I love the perfect size of the raw honey jar! It’s great for making sour cream, or for storing a fresh batch of sunflower seed butter. And their quart jars of coconut oil are wonderful for storing different kinds of grains, or nuts, or flours, or seeds, or… just about anything! I think what I love most about their jars is that they are straight-sided and made of a very clear glass, which makes them perfect for storage purposes.

Other jars that you can use for pantry storage:

  • spaghetti sauce
  • jam
  • peanut butter
  • pickles (Leave them open in the sun for a day or so to get rid of the pickle smell. I have one de-pickling on my balcony as we speak!)
  • salsa
  • molasses

The sky’s the limit, really. If it comes in a jar, it’s fair game!

What to Store in Your Jars

The wonderful thing is that these jars can be used for liquid and dry goods, and in the refrigerator, freezer or pantry. So once again, the sky’s the limit! Whatever needs to be stored, chances are, a jar will fit your purposes. Pretty much any food that comes from the store in a plastic bag (or from a bulk bin) gets relocated to one of my empty jars, as does food I make from scratch at home (sour cream, yogurt, freshly ground flours, etc.). For example:

  • Grains (brown rice, wheat berries, barley, spelt, oat groats or steel cut oats, quinoa, etc.)
  • Beans
  • Flours (small jars are especially great for leftover bits of freshly ground flour that you don’t need in your recipe)
  • Nuts
  • Seeds
  • Dried fruits and vegetables
  • Chocolate Chips (ahem. very important.)
  • Whey
  • Yogurt
  • Sour Cream
  • Bacon Grease
  • Agar Flakes
  • Baking Powder
  • Baking Soda
  • Granola
  • Broth
  • Yeast
  • Flaxseed
  • etc. etc. etc.

Of course, these jars aren’t limited to the kitchen! They can find countless useful organization purposes all around the house, so there’s never really a good reason to throw one away.

Do you keep your empty jars? What is your favorite use for them?

Click on the box below to find all the great blogs and topics to help you get cleaned up and organized! I’m especially loving all the ones that focus on natural and healthy ways to keep you organized, as well as the budgeting and simplifying themes. Also, you can have a chance to enter multiple different giveaways, including a free copy of my own eBook, Your Grocery Budget Toolbox!

a Rafflecopter giveaway

Sharing at Teach Me Tuesday, Titus 2sday, Domestically Divine Tuesday, Women Living Well Wednesday, Works for Me Wednesday, Frugal Days Sustainable Ways, Raising Homemakers, Simple Lives Thursday, The Mommy Club, Your Green Resource