Archives for January 2013

Does English Seem Like a Foreign Language Sometimes?

360/365 - 09/23/10 [365 Days @ 50mm] - Alphabet Soup
I admit it. I’m totally a phonics geek. I love the phonetic aspect of language, and I love the challenge of untangling the mysteries of the sound-spelling relationship of the English language. I get practically giddy when I contemplate the various spellings of the long sound “a”, and I happen to think that homonyms are all sorts of fun.

You, too?

Or maybe not so much?

No matter which camp you’re in, you’re going to love this book that I discovered recently: It offers jewels of spelling insight that will delight the most decorated spelling bee contestant while at the same time clearing up mysteries of English phonetics that have left the rest of us scratching our heads in puzzlement our entire lives.

Uncovering The Logic of English, written by Denise Eide, answers the following questions (and more!) that have been plaguing you:

What’s with all the silent “e’s”?!

(With only a few exceptions, each silent “e” serves a distinct purpose.)

Are there any actual rules governing this language or is it just a big jumble of exceptions?

(There are definitely rules, and not as many of them as you might think; and they are far more consistent than they seem at first glance.)

Why do I have to add an “r” to “prefer” before adding the suffix “-ing”, but not when adding the suffix “-ence”?

(The answer lies in the accented syllable.)

Denise Eide walks her readers through a logical progression of the rules that govern our oft-maligned language, wording each rule in the clearest language possible so as to avoid confusion and generalizations. You won’t find such pithy statements as “When two vowels go walking, the first one does the talking” in this book, because that’s simply not true. I mean, have you ever encountered words like “niece” and “launch” that totally defy this frequently quoted but grossly inaccurate “rule”? It’s not that “niece” and “launch” are exceptions to the rule; it’s that the rule is wrong.

Denise takes the confusion out of the rules and states them accurately and clearly. In doing so, she proves that the exceptions to the rules are not nearly as frequent as we have often been lead to believe: In fact, she asserts that the 30 rules she has compiled in this book govern 98% of commonly used English words, leaving a mere 2% as true exceptions.

Uncovering the Logic of English was, for me, a quick and fascinating read. I did not agree with absolutely everything stated in the book; there were some phonograms not listed that I thought should be included, and once or twice, I thought it would be easier to state certain words as exceptions rather than creating an entire rule around them. But even so, I believe that every English speaker (and English writer and reader!) should read this book. Maybe even a couple times! You will no longer be confused by the seemingly irrational spelling patterns that have developed through the centuries, and will gain an appreciation for the logic that does indeed exist within the phonetic system of English!

If you homeschool (or teach) and have students that struggle with spelling and/or reading, then you need this book. I am confident it will be of more help to you than any other spelling or reading resource you might find.

Uncovering the Logic of English is available on Amazon.com for $13.60, or you can get the Kindle version for $7.99.

Denise Eide has also authored a cute little children’s alphabet book called Doodling Dragons that takes the time to teach the multiple sounds each letter can make in a simple and engaging way. Most alphabet books stop short with each letter’s most common sound, but this book briefly illustrates all the sounds each letter can make. The Boys find it funny and interesting, and it’s short enough to keep their attention from beginning to end.

Disclosure: I received both of these books for free at a conference, but was under no obligation to write a positive review. I was just really fascinated and wanted to share it with you.

Quick & Easy Fish Fingers

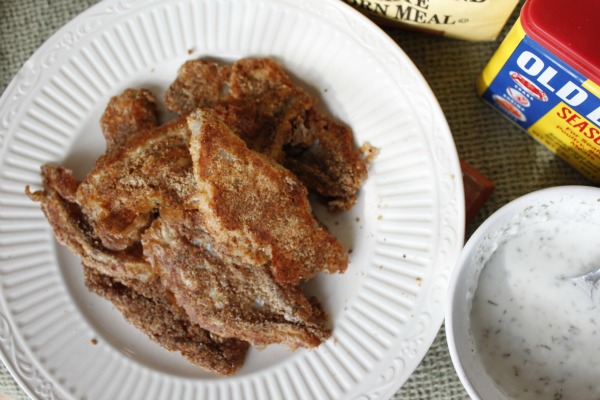
I don’t have a lot of fish recipes on this blog because, frankly, I didn’t really cook fish until about a year ago or so: Canned tuna and salmon were pretty much the extent of my fish-cooking repertoire. Also, since I didn’t really grow up eating a lot of fish, I hadn’t really developed a taste for it and honestly knew nothing about it.

But for the past year or more, I’ve been slowly learning more and more about fish and how to prepare it, and I’ve realized it’s a busy mama’s secret weapon for quick and easy - but healthy - meals. Fish fillets cook up so quickly no matter which method you choose and offer a lot of great nutritional benefits to boot. Currently, we eat fish once a week, and I’ve enjoyed trying many different recipes and experimenting with different cooking methods.

Typically, I buy the individually quick frozen wild-caught fish fillets because they are the most reasonably priced. I can typically get them for around $4 a pound, and many types of fish are available in this manner (tilapia, cod, whiting and perch, to name a few).

This particular recipe is one of my early experiments, and one that turned out perfectly. It was so simple and so yummy; my kind of recipe! I recommend using stone-ground non-GMO cornmeal for optimum nutrition.


How do you like to cook fish?

Cute Coffee Cozy - You’ll Never Guess What I Upcycled to Make It!

I love re-usable coffee cozies, mostly because I hate waste. Those disposable ones at the coffee shops always seem so pointless, but then I have this little problem of accidentally throwing away the re-usable kind. Henceforth and therefore, I have no desire to spend any amount of money or time on a re-usable coffee cozy (as cute as some may be, and I’ve seen some awfully cute ones!) when it’s just going to end up in the trash one day anyway.

When I was on my organizing spree earlier in January, I cleaned out my sock drawer. (Yes, my sock drawer.) In there was a lonely old slipper sock that had lost is mate a loooonnnngggg time ago and was merely biding time in the dark old drawer, waiting for me to sadly end its life. Only I couldn’t quite bring myself to do that, the poor lil’ slipper sock having been worn only a few times before being reduced to singlehood, and thus in excellent condition still. (I think I have already mentioned that I hate waste.)

As I sat staring at the spinsterly sock, waiting for inspiration to strike… it did! Inspiration, I mean. It struck! This perfectly good slipper sock (that was not dirty in the least, thankyouverymuch!) could have a new lease on life with a new purpose and a new design! All it would take was a snip of my scissors and what was old would be new again.

Almost gleefully, I grabbed a pair of scissors and made two short cuts (don’t worry, it didn’t hurt a bit). Reluctantly disposing of the heel portion - but only because no inspiration struck as to what I could do with that ridiculously shaped tube - I ran into the kitchen and tried first the toe and then the band. And woohoo! It worked! Perfectly, I might add.

Why, yes, indeed. I turned that lonely - but adorable - slipper sock into not one, but TWO adorable coffee cozies that, being free, will not cause me one moment’s grief if they happen to be accidentally disposed of. (OK, well, maybe a tiny moment, because they are awfully cute!)

So. Happen to have any spinsterly spare socks lying around your house in lonely dark drawers? (Of course you do, who am I kidding?!) Give them a new lease on life and release them from their loneliness with a fresh purpose as your own adorable little coffee cozy.

The best part? Everyone will think you knit it yourself by hand. (*snicker*)

Your Guide to Meal Planning

How to Meal Plan I think everyone of us struggles occasionally with the “5:00 Panic” - you know, that dreaded moment when you realize that your family is going to be simply starving any minute now and you have no clue what in the world to feed them. In most households, these panic attacks usually end with feeding the masses cold cereal or takeout.

Uh huh. I’m wise to your tricks! You thought I didn’t know, huh?

The 5:00 Panic

Well, I know because I’ve been there. Not the cold cereal part because we don’t buy it anymore, but the takeout part. That I’ll admit we have succumbed to on occasion when dinner was not adequately planned.

As I mention ( kind of ad nauseum, to be honest) in my eBook, Your Grocery Budget Toolbox, I have discovered that the best (and really the only way) to avoid the 5:00 Panic (and the cold cereal) is to plan ahead. I know, I know. I wish I had an easier answer for you, but I don’t. Some things in life are worth the extra effort, and I have discovered that menu planning is one of those things.

In fact, since last fall, I have been regularly planning our meals a month at a time using Plan to Eat, and I cannot tell you what a relief it is to to have that mealtime guide as I go through the month. Sure, the plans change occasionally, especially the breakfast and lunch options. But I would be a lot more stressed out (I know because that’s how I used to be before I started menu planning!) if I didn’t have a plan.

Menu Planning, Really?! Do I Have To?

I can totally understand, though, if menu planning is just not your thing: I’ve been there! I used to think it was pointless, since nine times out of ten, when I did plan a menu, we didn’t follow it! I felt like if I had enough staple grocery supplies in the house at all times I could just whip up any ol’ thing when it came time for dinner. Plus, I’m kind of a spontaneous girl in many ways, and the thought of having a menu plan seemed, well, rather rigid, to be honest.

Yeah, I had all kinds of excuses.

Yes, Really. You Gotta Learn How to Plan Your Menu.

You, too? Then you may want to read Crystal’s (of Crystal and Co.) new eBook, “How to Meal Plan: a Step By Step Guide”. It truly is a step-by-step guide to get you going on the path to menu planning freedom.

What I particularly love about Crystal’s book is the adorable printables that help you work through the menu-planning process. Not only does she offer you the standard menu planning chart, but she has worksheets that help you analyze your family’s needs and your own desires when it comes to cooking and meal planning. It’s not about what works for her, it’s about what works for you. She doesn’t just throw a calendar at you, and say, “Get busy planning!” No, she walks you through the process of determining how a menu plan would work best in your family and in your situation, and then how to trouble-shoot it when things go wrong.

Menu Planning Help for $0.99!!

Here’s the truly lovely thing: for the rest of the month (which is only like a week, so don’t relax now), you can get Crystal’s guide to meal planning for only $0.99. I think you can spare less than a buck to get some peace of mind at 5:00 for the rest of your life. Normally, it’s $5.99, which is still a good price, but for $0.99? Can’t be beat. And what do you have to lose?

I dare you. No, I triple dog dare you! Face 5:00 head on and kick that panic where it hurts!

Ahhhh. Feels good, doesn’t it?


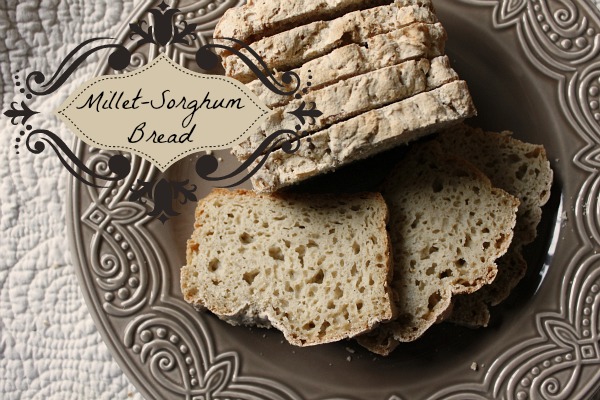
Gluten-Free, Egg-Free, Dairy-Free (And Delicious!) Bread

I am so thankful I no longer need to fuss with these kinds of recipes unless I really want to. My Certain Little Someone is no longer allergic to wheat, and can tolerate eggs and milk when they’re baked into something. This doesn’t mean I’m going to completely abstain from using all those other grains in my baking and cooking … oh no! I learned a lot during those years and intend to continue including a variety of grains in our diet.

One recipe I came to rely on heavily when I could not use wheat, eggs, or dairy, was this fabulous bread recipe from Paula at Whole Intentions. Over the course of time, I adapted it slightly with a few changes of my own and my lazy simplified method of rising and baking. I’m sharing my adapted version today over at Baking Whole Grains. Enjoy!


Frugal and Easy Essential Oil Storage {From an Upcycled Spice Rack}

Since joining Young Living Essential Oil’s distributor program in order to get a great discount on their oils, I have been slowly amassing my essential oil stockpile. It’s exciting, but it presented a new problem: where to put them.

Enter the spice rack I purchased at a yard sale a while back for the measly little price of $2.00! I’d been hanging on to it for a while, intending to freshen it up a bit for a new purpose (not being useful for containing spices, in my opinion), but hadn’t gotten around to that little task yet.

As soon as I started pondering how I should handle my essential oil storage situation, I immediately thought of that old spice rack! It was perfect for the task on multiple levels:

  • It was just the right size to hold the bottles.
  • The open shelves make accessing the bottles easy!
  • I had a spot on my bathroom wall where it would fit perfectly.

However, it was quite ugly. That dark brown stain is not exactly my thing.

So I set out to beautify it with an “almond” colored spray paint. Easy task, yes? Well, unfortunately, either me or my can of paint was struggling because the paint came out all drippy and splotchy instead of in a smooth, even coat. I followed the instructions on the can exactly so I would like to say it wasn’t me… but it had been a long while since I’d spray painted anything.

Whatever the case, my final coat of paint resulted in a strange crackled texture that I found to be appalling initially. But the longer I looked at it, the more I liked it! It kind of gave an antiqued textured look to the spice rack, which was rather serendipitous in my opinion. I had originally planned to apply some sort of filigreed rub-on transfer to the shelves as a decoration, but I think I actually like this sort of shabby chic look better.

I have no idea how you can replicate this look yourself (ha!), but at any rate, I do think a coat of spray paint in the color of your choice will dress up an old spice rack (you can find them at thrift stores and yard sales all the time) to store your own essential oils (or any other small bottle that needs storage, like nail polish… or spices).

Think essential oils are out of your price range? Think again! Read how I afford essential oils here.

Healthy Slow Cooker Recipes {and Giveaway!}

I love my crock pot, but I can get very frustrated when flipping through crock pot recipes: it seems they all call for canned this and packaged that, which makes me very sad. For oven or stove-top recipes, I can typically figure out some good substitutions for the processed stuff, but the crock pot? It’s kind of a different animal.

Which is why I’m so happy Stacy of Stacy Makes Cents took the guesswork out of the whole thing for me. She’s written an amazing eCookbook (appropriately called Crock On!) with all kinds of great recipes adapted just for the crock pot. The best part is that none of the recipes include creamed-this or powdered-that. Oh, maybe a can of vegetables here and there, but nothing processed or fake in this cookbook!

And she doesn’t cut corners either. I got a crock pot cookbook once that was 95% soup recipes, which was kind of a disappointment. I like soup and all, but we only eat it once a week or so, so that wasn’t super helpful. Stacy’s cookbook, however, goes way beyond soup and brings you recipes for sandwiches, sides, and even desserts! (Can you say Double Chocolate Peanut Butter Lava Cake?)

The very very very best part? (Kind of like the cherry on top?) The price. You know I like things to be nice and cheap. Well, this book is. It’s only $5. You can totally afford $5! Especially considering what you will get with those five little bucks.

But wait, my friend. It gets even better! Stacy has generously set up a special 15% discount code for my readers, so that each and every one of you can purchase Crock On! for only $4.25!! Just use the code: “authentic15”. (Please leave out the quotation marks. I know you know that, but just in case…) This code will expire January 31, 2012. (Oh, and no worries about wasting your money on the book just in case you win the giveaway. Stacy will refund your purchase if you win! It’s a win-win.)

And just when you thought the deal couldn’t be any sweeter, Stacy has given me permission to give away not one, but TWO, copies of Crock On! Suh-weet! Enter via the Rafflecopter below.
a Rafflecopter giveaway

What do you make in your slow cooker?

Super Fast and Simple Football Cake

I think it’s kinda funny that I am writing a Super Bowl post, because I have absolutely no interest in the Super Bowl. Not even this year, when the local team actually has a shot at the big game. The honest to goodness truth is that I could care less about football.

In fact, this cake has nothing to do with the Super Bowl. I actually made it for Tiger Cub’s second birthday a couple weeks ago, and am just now getting around to posting it, but I figured that was pretty good timing with the Super Bowl only a few weeks away. Around here, football fever is reaching an all-time high as the local fans get their hopes up, so it seems very fitting all around.

If, like me, the Super Bowl is not your thing, then perhaps you could find another use for this fun and simple cake. Maybe a child’s birthday? Father’s day? Little boy baby shower? Whatever the case, football is a fun theme and a super easy cake to make.

Trust me. I don’t do hard cakes. This is pretty much as easy as they come.

The Cake

My standard birthday cake recipe hitherto has been one variation or another of the Wacky Cake because it doesn’t require eggs or butter. Up until recently, The Boys were allergic to those things, so I avoided them. My favorite version is the Mocha Wacky Cake - just double the baking time for this cake. If you prefer not to have a mocha flavor, just use water instead of the coffee.

But really, you can use whatever chocolate cake recipe you want. The more important thing is how you bake it.

To make the football shape:

  • Bake your cake recipe in 2 round pans.
  • When the cakes are removed from the pans and completely cooled, cut a 1″ wide strip out of the middle of each layer so that you have 4 half circles.
  • Slide two half circles together until they meet to form the bottom layer.
  • Frost the bottom layer liberally, then top with the remaining two half circles.
  • Voila! You have just made a football-shaped cake!

Told ya it was easy.

The Frosting

The frosting is also easy because you do not have to fool with food coloring. Because, as Matthew McConaughey said so eloquently in The Wedding Planner, “Chocolate’s already brown.” Simply add a tablespoon of cocoa powder to the frosting recipe found here (or use your own favorite chocolate frosting) after you reserve about 1/4 cup of frosting for the laces.

Cover the cake in a thin layer of frosting to seal in the crumbs. Allow it to set until it’s firm to the touch. Then fill a decorator’s bag with your frosting, fitted with a star tip. If you’ve never piped stars before, here’s a video I found that illustrates the process:

Pipe stars to cover the top of the cake. If you’re not into stars (although I think they give a nice professional finished look to the cake), just swirl the frosting on with a knife. You can frost the sides, too, if you want. I only didn’t because I was running out of time, but next time I probably would.

Once the football is covered with chocolate frosting, take the reserved plain frosting and place it in a decorator’s bag with the round tip. Pipe the lacing onto the top of the football.

The Cake Balls

Now you know I can’t bear for any food to go to waste. Remember those strips of cake cut out of the middle of the circles? There was no way I was going to throw away that deliciousness. Nope! I turned it into cake balls.

You can do the same: all you need is a little bit extra frosting and some chocolate chips to melt. Here’s the process.

  • Simply crumble the strips of cake into a bowl, then stir in frosting until you have a mixture that can be formed into balls. (You should get about a dozen.)
  • Place the balls on a cookie sheet and freeze until firm.
  • Melt 1 cup of chocolate chips with 1 TBSP of palm shortening (or other oil) over low heat until smooth.
  • Dip the frozen balls into the melted chocolate and then place on a sheet of wax paper to set.

If I’d had time, I would have experimented with piping helmet details onto the balls with white chocolate or frosting to turn them into little mini football helmets, but I ran out of time. If you give that a try, let me know! And take a picture so I can see. I think it would be super cute!

So there you have it… a super simple football cake for the Super Bowl, or your next birthday party. Fun and easy - I love it!

How do you feel about the Super Bowl?

Toasty Salmon Melts

I’m always looking for great recipes that make use of canned salmon because it’s an inexpensive way to incorporate more of that healthy wild-caught fish into our diets. I don’t really love canned salmon, to be honest, but along the way I’ve discovered some great ways to cook it that are truly delicious. Our whole family enjoys eating fish, which I love!

I stumbled across this recipe for grilled salmon and cheese when searching for more canned salmon inspiration. I changed it up a little bit and turned it into these hot and toasty open-faced sandwiches that are great for lunch or dinner, served with a green salad and/or some fresh fruit. Easy, quick, and healthy. (There’s a reason my blog used to be called Quick and Easy Cheap and Healthy!)


You could also eat this fresh and raw, without baking, but please don’t tell me if you do. Blech.

What’s your favorite way to prepare canned salmon?


Save Money on Groceries {By Keeping Your Freezer Clean}

It is no secret that I am passionate about reducing waste and saving money on groceries. I even wrote the book about it. But what a lot of people don’t realize is that saving money on food (and other things) is a lot more involved than merely clipping coupons or finding the cheapest price.

In fact, I would say that a bigger impact on your grocery budget (and other parts of your budget, too, I daresay) is a little thing I like to call “Inventory Control”. Yes, I gave it a fancy little title and everything, but really, the concept is quite simple: keep track of how much food you have in your house.

Before you assume that you have all of this under control already and go clicking off to other great world wide web destinations, let’s chat for a minute. I have a few questions for you:

  • Have you ever unearthed a package of food that’s way past its expiration date?
  • Is your freezer (pantry/fridge/cupboard) ever so full that you don’t know what’s beyond the obvious front row?
  • Have you ever gone grocery shopping without a list, only to return home and find that half of what you bought you already have, and you forgot to buy half the things you really need? (Maybe that’s just a slight exaggeration?)
  • So tell me. How often do you clean out your fridge/freezer/pantry/cupboards?
  • Can you tell me right now off the top of your head how many cuts of meat you have on hand? How many packages of frozen vegetables? How many eggs? Or pounds of beans?

If you passed my little pop quiz with flying colors, then good for you. I mean it! You are on top of your Inventory Control, and you are well on your way to grocery budget success. But if you failed any of those questions, I have a suggestion for you.

Clean out your freezer.

That is, in fact, what I did today. The organizational bug that hit me at New Year’s still has a death grip on me, but I’m enjoying it, so I don’t mind. And the process of cleaning out my freezer was so gratifying I determined that I’m going to make it a monthly habit as preparation for my regular grocery shopping trip. There were a few things tucked in the back that I had completely forgotten about, and one or two things I realized I didn’t have (that I thought I did!).

Because I cleaned out my freezer I was able to:

  • Make a large batch of chicken broth
  • Make a batch of bread pudding and probably some bread crumbs as well
  • Put navy beans on my grocery list because I found a ham bone
  • Take stock of the cuts of meat remaining
  • Make room for what I will be buying at my big monthly shop next week
  • Organize what was left neatly so I can see at a glance what is available.

All that from about twenty minutes worth of work! In my opinion, the benefits of keeping my freezer (and other food storage areas, like the pantry, fridge and cupboards) neat and organized are such that I plan to work it into my monthly shopping routine. If I do it on a regular basis, it will take me 10 minutes or less to quickly go through the items in the freezer, toss out the yucky stuff, and put to use the leftover bits that need to be made into something. This will save me money because I won’t be buying food unnecessarily, and I can use what’s in the freezer to make something new (like the bread crumbs) from something that would otherwise be trashed.

How do you keep your food inventory under control?

Need some more help with your Food Inventory Control? Read about how I keep my pantry neat and organized without spending a dime.

Read many more money-saving tips in my eBook, Your Grocery Budget Toolbox. Each chapter presents a new tool that will help you save money on groceries, with an emphasis on healthy, whole foods. No extreme couponing allowed! These are all common-sense strategies that almost anyone can adapt to their personal needs and family situations. Read Crafty Garden Mama’s review (and get a discount code!) for more information. If you are interested, you can find purchasing information here.