Archives for March 2013

Easy Healthy Hygiene {Raising Healthy Families}

Welcome back to our Raising Healthy Families series! Each week, we’ll bring you another great post with a tip for helping you raise your families healthfully in this not-very-healthy world.

Today’s post is brought to you by yours truly!

Once I got serious about removing chemicals from my diet, I began to realize that I was ingesting and consuming even more chemicals (and potentially more dangerous ones) via the personal care products I used on a regular basis. After experimenting with a variety of toiletry options in a trial-and-error fashion over the past few years, I’ve settled on a simple but healthy hygiene routine for myself and The Boys.

Simple & Healthy Hygiene

One thing you need to understand about me: I like to keep things simple! I decided after a while that fussing around with concocting my own products made with special-order ingredients was definitely not for me. While I certainly love for all my hygiene items to be healthy and inexpensive, I don’t want to waste a lot of time and effort in mixing them up on a regular basis. So I pretty much only make toiletries if they use one or two ingredients; otherwise I’ve found some affordable brands to purchase that I trust and can recommend. I have a great deal of respect and admiration for anyone who makes their own toiletries for their family, but I’ve decided for myself that I prefer to spend my time on other things.

If you, too, want to provide healthy hygiene products for your family but don’t have a lot of time or desire to mess around with making your own, here are my recommendations!

Toothpaste

Although regular toothpaste gets a great score from EWG’s Skin Deep Guide, I choose to avoid fluoride, which eliminates almost all mainstream toothpaste products. I also prefer toothpaste that is made largely of natural ingredients rather than chemicals.

Some people suggest just brushing with baking powder, but others say that it’s way too abrasive for the enamel on your teeth. I say it’s disgusting, so I haven’t even tried it! Instead, I buy Trader Joe’s AntiPlaque Toothpaste, which is all natural and contains no fluoride. It contains the oils fennel, myrrh and peppermint for delicious flavor and a healthy mouth. It’s also very affordable, which is my favorite part! If you don’t have a Trader Joe’s close by (how sad!), many of my friends recommend Earthpaste. It’s rather pricey, though, at $7.99 a pop, so if that’s too much for you, try the widely available natural toothpaste options like Tom’s of Maine (which does have sodium lauryl sulfate).

Soap

Once again, I turn to Trader Joe’s for an affordable but natural healthy option. We lather up with their Honey Oat Soap, which costs less than $2 for 2 bars, but they also have a Lavender variety.

Aunt Mae’s Handmade Soap
If you don’t have Trader Joe’s, thankfully, I recently discovered a wonderful homemade soap entrepreneur that I am thrilled to recommend. Mae’s Natural Soap is handmade in small batches with the healthiest and best ingredients. Each bar costs just under $5, and the quality is totally worth it! Recently, Mae’s husband suddenly and unexpectedly passed away, and she is endeavoring to support her family with her soap-making business. {Stay tuned, because some bloggy friends and I will be bringing you an awesome giveaway of her soaps!}

Lotion

Lotion has been a tricky one for me, to be honest. Many people recommend straight coconut oil as a moisturizer, but I find it to be greasy and not super effective, personally. However, it’s definitely worth a try because you can’t get any simpler or more natural than that!

I’m currently working through a bottle of semi-natural lotion that someone gave me, but when I’m done with it, I’m going to be using “hard lotion” instead. Hard lotion comes in a bar (like soap) and rubs on to your skin to moisturize, and is made with all natural ingredients. MadeOn Lotion is a popular brand with reasonable prices - you can get a 3-pack (family lotion bar, pocket-size lotion bar, and lip balm) for just over $20. You can purchase 2 family-size refills for only $15, and 2 pocket refills for $9. I love that these lotions are made exclusively with shea butter, beeswax, and coconut oil. Good stuff there!

Shampoo

Shampoo is another tricky one for me, and I’ve done a lot of experimentation with different types of shampoo and methods of hair cleaning. It’s very important, though, to find a safe alternative because conventional shampoo is filled with chemicals.

There’s the ever-popular “No Poo” method, which is super simple and effective for most people. All you need is baking soda and apple cider vinegar: put a tablespoon of baking soda in a cup of water, and then put a tablespoon of apple cider vinegar in a cup of water. Wash with the baking soda mixture, rinse and then follow up with the vinegar mixture. After a few weeks (or maybe a month or two) of transition, your hair will be just as clean as if you used shampoo, and you’ll find you can go much longer between hair-cleaning sessions! I also found that my hair was a lot fuller and held a style a lot better when I cleaned with this method.

However, my hair really dried out after using baking soda and vinegar for 5-6 months. I’m guessing I could have tweaked my routine a little to accommodate that, but I decided I didn’t want to fuss with it anymore. Instead I use Kiss My Face Miss Treated shampoo and conditioner and L-O-V-E it. It’s expensive at regular price (around $8, depending on the store), but they often have coupons available (sign up for their newsletter); when combined with deals, I’m usually able to get a bottle for $4.

Deodorant

I’m going to tell you a little secret: I don’t wear deodorant every day. I can always tell when my diet is bad because then my BO is bad, too. (TMI, I know. Sorry.) And that’s when I need deodorant. But when my diet is healthy and I’m not doing any strenuous work, I don’t have a need for deodorant.

But when I do, I don’t want to use deodorant made with aluminum, which has been linked to Alzheimer’s disease. That’s enough to scare me away from it, so I concentrate on using aluminum-free deodorant when I do need it. Tom’s of Maine is a deodorant I’ve used on occasion, and it gets a low score of “1” from EWG. However, it still has ingredients that concern me, so I’m happy I’ve recently found an alternative with Lexie Naturals. Lexie:Deo is made with sodium bicarbonate, beeswax, shea butter, coconut oil, and essential oil (tea tree and lavender). A 2.25oz tube is $6.50, which is a couple dollars more than the average deodorant at the grocery store, but significantly better for you and your health!

Purchase Gift Cards at a Discount with Gift Card Rescue

*Sponsored Post brought to you by Gift Card Rescue So, have you followed my advice and started saving up gift cards to spend at Christmas? I’ll be honest - I haven’t yet. Life has been kind of crazy and in upheaval from the beginning of this year, but now that things are starting to settle down - and I actually have a working budget written out to start in April - I’m definitely going to get started on this year’s Christmas stash of gift cards.

Whether or not you choose to save money for Christmas in this way (although I honestly think it’s a great way for anybody and everybody to pay for Christmas!), you will still like what I have to share with you today. Because whether or not you use gift cards to buy Christmas gifts, you’re likely going to want to give away a gift card or two for Mother’s Day, Father’s Day, Teacher Appreciation Day, Admin Professionals Day, birthdays, anniversaries, and just-because-I-love-you days.

And when you go to buy those gift cards, make Gift Card Rescue your first stop. Gift Card Rescue is a trade-in service for gift cards - if you have one you don’t want, you trade it in for cash. They, in turn, sell it at a discount to someone who does want it. You don’t have to trade in gift cards to get access to their collection of cards for sale, most of which are at least 5% off, some up to 30% off the cash value!

You know I’m always interested in saving money wherever I can, and this is a fabulous and simple way to do that: purchase a gift card at a discount, and you’re automatically getting a sale price on whatever you buy with that card!

And you can rest assured that the gift cards are legitimate and will work. I had the privilege of using a gift card to Payless from Gift Card Rescue, and bought myself some super cute black flats and a whole set of bangle bracelets. The magnetic strip on the card was worn, but the cashier just typed in the card’s account number and it worked just as well. If for some reason your card does not work as advertised, Gift Card Rescue backs up their cards with a 90-day guarantee, and you can get a refund or be issued a new card to replace the defective one.

Chances are, though, your discounted gift card will work just fine, enabling you to buy gifts (for others… or for yourself!) for less, and, of course, save up for a debt-free Christmas!!


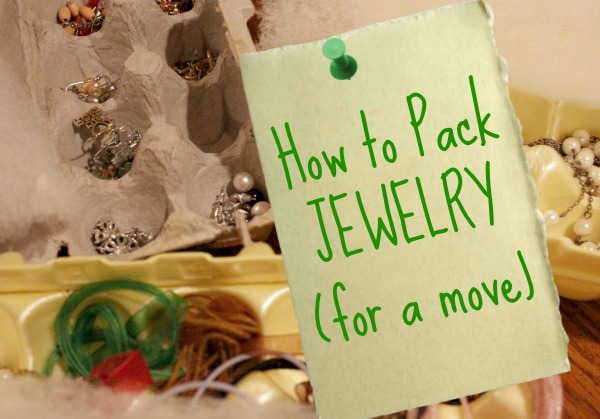
How to Pack Jewelry {Tips for the DIY Move}

Tips for the DIY Move If you’ve ever moved, you know how much of a pain it is! Along with the stress of finding a place to live, there’s the financial stress of relocating, not to mention the emotional and physical stress involved. Since I just went through a move myself, I thought I’d share a few tips I discovered along the way that might make it easier for you if you are about to embark on the adventure of moving!

Jewelry is one of those things that can be difficult to pack, especially if you don’t have a jewelry box (and even if you do). You don’t want to be left with a mass of orphaned earrings, knotted necklaces, and broken clasps when you arrive at your new home! I hit upon a nearly perfect solution for storing and packing jewelry during my last move, and I’m really excited to share it with you.

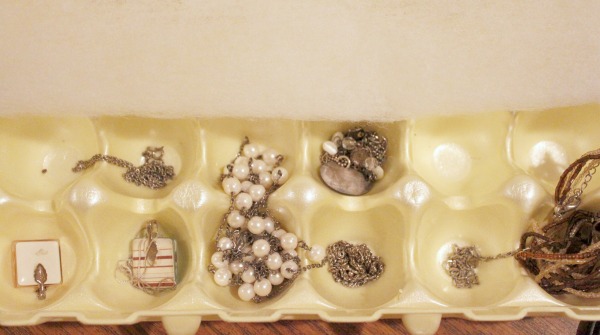
The secret is: egg cartons! If you don’t have any of your own, ask around your friends and family to see if anyone can spare a few for you. Egg cartons work perfectly for storing almost all jewelry:

  • Earrings - I even had a couple sets of large hoops that fit nicely into the pockets of the egg cartons.
  • Necklaces - It’s especially useful to pack chains in the egg cartons because you can easily keep them separate so they don’t twist around each other and arrive in knots. Larger necklaces, or necklaces that are less flexible, might not pack so well in an egg carton. If that’s the case, pack them separately in individual zippered plastic bags.
  • Bracelets - Any bracelet except the bangle types will fit perfectly into the egg cartons for easy transportation.
  • Rings - It’s like those little sections were made with rings in mind!

How to Pack Jewelry in Egg Cartons

It’s easy to pack your jewelry in egg cartons and ensure that they arrive safely at your destination.

  • Make sure your egg carton is clean! You don’t want icky sticky egg mess on your jewelry. Blech.
  • Place individual pieces of jewelry in each cup of the carton. Rings and some earrings can share the section, as long as you are sure they won’t damage each other.
  • Place a strip of cotton batting, fabric scraps, or any other kind of soft packaging material over the jewelry, being sure to cover the entire length of the carton.
  • Close the carton, making sure all the jewelry is contained inside and not hanging out.
  • Secure the carton with packing tape, wrapping it first lengthwise and then across the width.
  • Pack your egg cartons in a larger box. It’s OK if you store them in a box with other soft items like clothing; but be sure you don’t pack them in a box with items that could rip the cartons.

That’s it! The only jewelry that won’t pack well in an egg carton is larger or less flexible pieces. Just pack those in individual zippered plastic bags and place those right into the box with your egg cartons.

Where to Find Cheap Packing Supplies {Tips for the DIY Move}

Tips for the DIY Move There’s no way around it - moving is an expensive proposition, whether you’re paying someone to do it for you, or you’re doing it yourself. Even if your company pays to move you, there are still additional expenses involved in moving from one property to another. Selling, buying, or renting, it all gets expensive! Thankfully, we had the money saved up to cover all our moving costs, but my frugal self could not bear to spend anymore than absolutely necessary.

The good thing is, I’ve moved a time or two (or three or four. or more.) in my life, and I’ve learned some tricks about where to get packing supplies without breaking the bank.

Boxes

There’s no way around it - you’re gonna need boxes if you’re moving. How many and what kind all depends on the stuff you have, but the fact remains that boxes are a necessity. However, you most certainly do not have to pay the exorbitant prices charged by truck rental companies, office supply stores, or moving companies. At any rate, I never have!

  • Ask your friends. With this last move, I put a shout-out on the FB group for the ladies in my church, and someone had a whole collection of boxes from the last time they had moved! Free for the taking! Another friend brought me boxes and packaging material from her workplace, and still others brought me boxes that they collected here and there. If you’re on Facebook, just post a status asking for boxes and you’ll probably get plenty. If you’re not on FB, try the old-fashioned word-of-mouth version - that should work pretty well, too (she says with tongue-in-cheek).
  • Ask at grocery stores. I absolutely love produce boxes for packing! They’re the perfect size to carry, they often have handles, and they typically come with padding of some sort or another. I’ve found them to be very useful in particular for dishes and other fragile items like vases.
  • Ask at other stores. Many retail stores have a procedure for getting rid of their boxes, and so aren’t likely to have any to offer you. BUT I have had great success at Target! You can almost always find someone stocking shelves there, and they typically have a cart full of empty boxes trailing along beside them. Sometimes the boxes are too small to be used for moving, but I’ve had great success there.
  • Ask at work. At the very least, you probably get reams of paper delivered to your office - those boxes are a great size for packing just about anything! Save all the ones you come across; every little bit helps.

Packing Tape

I inadvertently had the opportunity to try out a few different sources for packing tape on this last move, and I can tell you confidently that of the 3 I tried, Staples definitely had the best deal! My first experience was with tape from the Dollar Tree, and I got so frustrated by its cheap quality that I could barely force myself to use up what I had bought. Then I bought a roll from Walmart, and while I was pleased with the quality, I was perturbed by the exorbitant price (more than 3 times the price of the Dollar Tree).

I struck gold at Staples! You can buy a six-pack of standard packing tape for $16.99, which comes to $2.83 a roll - that makes it less than the Walmart price but for almost twice the yardage. There may be better deals elsewhere, but that was the best price among the stores I checked in my area. If you don’t have Staples, try other office supply stores in your town to see if the prices are similar.

Packaging

When it comes to packing up valuable items, you want to be sure they are well padded and secure in their boxes. Bubble wrap and styrofoam can get pretty pricey, and are not exactly environmentally sound choices. I’ve found that recycled items can actually be the best packaging, and cheaper to boot!

  • Newspaper is GREAT for wrapping just about anything. It does leave black marks on some dishes, but a quick trip through the dishwasher or a swipe with a wet rag takes care of that problem. It also does get black ink all over your hands, but once again, a quick hand-washing session is all you need. Ask friends to give you their newspapers instead of dumping them in the recycling bin (you can do that when you’re unpacking). You can also stuff crumpled newspaper (or catalog/magazine pages) into nooks and crannies in boxes to prevent the items from shifting.
  • If you really don’t want to deal with the ink, a roll of butcher paper or plain newsprint (without any print on it) will do just as well (albeit more expensive).
  • Shredded paper is awesome packaging, and it’s completely free! Whenever I packed a box of breakable items, it always seemed like there were lots of little gaps and holes in between the stuff in the box. To fill in the gaps, I would take the bin from our paper shredder and dump the contents into the box: all the shredded paper would settle into the holes and fill them up nicely. I am happy to report that not one single boxed item was broken during the move! The only drawback is that you have to be careful when unpacking those boxes - lift the items up out of the shredded paper, and be sure to keep it contained in the box. Then you can just pour all the shredded paper into a garbage bag for recycling.
  • Recycle packaging from boxes you receive in the mail, and ask your friends to pass their recycled packaging along, too. I used paper, bubble wrap, plastic air bubbles, and more, all recycled from my own mail.
  • The Dollar Tree sells bubble wrap if you want to use that for especially valuable items. I bought 3 rolls there, and didn’t really find myself in need of anymore than that. It did the job just fine!
  • If you have a friend in the medical field, ask them for surgical wrapping. It’s sturdy and cloth-like and even stretches a little and is perfect for dishes, vases, knick-knacks and picture frames.
  • Washrags, hand towels, dish towels, and aprons are ideal for packing up your kitchen items. You’re going to use those things in the kitchen anyway, so might as well make use of them as you pack them into boxes! I wrapped drinking glasses, bowls, pans, knives, and more in my kitchen linens and they worked perfectly.
  • Don’t pack your blankets and towels away in a box! They can be used when packing the truck as padding for furniture and anything else not contained in a box. In a pinch, you can use them as padding in your boxes, too, but do be sure to leave a few out for packing the truck.

These are my honest-to-goodness, real-life tips for packing on your own without spending a lot of money. (One extra tip: Buy permanent markers at the dollar store. They come in packages of 4 - for a $1! - with different colors so you can organize the labeling on your boxes if you want. Trust me. You want your boxes to be well-labeled!)

What’s your best tip for moving on the cheap?

5 Simple Ways to Detoxify Your Home and Body {Raising Healthy Families}

Welcome back to the Raising Healthy Families series! Join us each week as we take a look at different ways to keep your family healthy and vibrant in a not-so-healthy world.

Today’s post is written by Stacy of A Delightful Home.

The fact that we live in a world full of chemicals, pesticides, and other harmful substances can’t be denied.

Sure, we strive to eat good food and use natural cleaners, but what do we do about the unclean air and the unhealthy things that have already made their way into our homes and bodies?

Stacy shares 5 simple ways to detoxify your home and body so you and your family can live the healthiest life possible (and they are not as crazy as you might think)!

How to Find a Rental {Or Not}

Tips for the DIY Move Here is my authoritative guide to finding the perfect rental.

Or not.

1. Hire a realtor. You’ll want someone who’s experienced and impartial (i.e., not affiliated with any of the properties you’re considering), but not afraid to take on renters. Ask co-workers or other acquaintances for recommendations. A realtor can help you wade through the sea of available options and help you find exactly what you’re looking for while representing your best interests to potential landlords.

OR… just do online searches on places like Trulia, Homes.com and even Craigslist, and contact the real estate agent who represents the apartment you’d like to see.

It worked for us.

2. Investigate the facility thoroughly before signing on the dotted line. Make sure the property is truly as advertised, because sometimes those landlords get a little creative with their listings. Cozy? Try “tight”. Charming? Perhaps “dated” is a better choice of words. You’ll also want to be sure that the building is sound, otherwise you might get stuck with drafty windows, wimpy water heaters, or inadequate heating units.

OR… Have you brother-in-law stop by to visit the place on his way home from work so he can give you a thumbs up or thumbs down. Accept the enthusiasm oozing from his voice over the phone as approval to move ahead. Tell the real estate agent as soon as possible that you’d like a 1-year… no wait, make that 2-year lease on the property, ASAP!

It worked for us.

3. Interview potential landlords. I mean, seriously, you never know what kind of crazies live in this world. Will they disappear and leave you wondering where (and to whom) you should pay the rent, with a broken washing machine on your hands (this may or may not have happened at some point in my life)? Do they have a secret criminal past (background check, perhaps?)? You want to be sure your landlord will be responsible and quick to respond whenever you have an issue with the property. Plus, you don’t want them to be weird.

OR… you can meet your landlord when you arrive to check out your new place and sign the lease… all in the same day.

It worked for us.

4. Avoid partial property rental situations. Again… you don’t want to be sharing space with crazies! Those situations where the landlords live in the same house as you, just a thin door (or wall) away? Creepy.

OR… Find a gorgeous, spacious basement apartment for rent in one of the richest areas in the county, with a humongous yard and a lovely arbored patio that you can (at least temporarily) call your own. Safe neighborhood, 50% more space than you had previously, and just off the main road for your DH’s commute to work.

It worked for us.

5. Negotiate the price. There may or may not be room to budge, but it doesn’t hurt to try! Just like in actual real estate transactions, it can be possible to lower the rent. It all depends on the landlords’ situation and what he/she is trying to get out of the place. It’s always worth a try!

OR… Don’t haggle over the price because you’re afraid someone else is going to snap up this gem before you can. And because, since utilities are included, you’re saving effectively $300 a month anyway, so who cares if the rent is at the top of your range?!

It worked for us.

Turn Your Power On with Chiropractic Care {Raising Healthy Families}

read more about positively real media here

This week’s installment of Raising Healthy Families is brought to you by Rachel of day2day joys. Come back next week for another great tip on keeping your family healthy in a not-so-healthy world!

For you to be able to turn your car on, you must have gas in the tank, for you to turn on a light in your room, you must have a light bulb, for you to even use your iPhone or laptop to read this now, the power has to be turned on and your device must be charged.

And to turn things on correctly, you have to take care of them because if you don’t, eventually they will break or run out of power.


Well, your body, namely your spine isn’t any different. But the majority of people do not know this concept.

What does that mean to turn your power on anyway? Please hop on over to Rachel’s blog to read the rest!

A Post-Flu Quest for Simplicity

A Post-Flu Quest for Simplicity

A big welcome to my friend Stephanie, The Cheapskate Cook, who generously offered to guest post for me as I’m in the middle of moving and re-settling. I’m currently tied up in knots at the DMV where I need 5 - yes, 5 - personal documents (that pretty much exhausts my repertoire of personal documents) just to transfer my drivers’ license. So while I’m waiting in line at the DMV, you can enjoy Stephanie’s thoughts on recovering from the flu.

The flu came to visit my house. Not just a quick visit, An extended one. The kind that drags on and on and until you can’t remember the last time you left the house and everyone was healthy at the same time and you ran out of easy food two days ago but no one feels healthy enough to go buy more, so you’re stuck dragging yourself to your feet and whipping together whatever you can that you still have ingredients for, and it doesn’t matter if this is what you eat for all three meals, because it’s probably all gonna come back out again in some nasty way.

That kind.

So our lives were stripped down to basics for a few days: sleep, eat, drink, sleep, change diapers, sleep.

And that’s about all we did. And TV. Lots of TV.

When we have weeks like this, I’m really hard on myself. My husband and I are down to our last nerves, trying to hold it together and take care of the kids and each other. We’re not actually mad at each other, but the reality is, the only people around to get mad at is… each other.

The kids watch far too much TV. Not only are they sick and listless, but if we dare turn off the tube in an attempt to rally something constructive (or at least non-electric), it’s amazing how quickly those listless kids muster the strength to protest.

Am I the only one in that boat? Am I the only one who’s had to call a time out on everything but the basics of life?

Interestingly, this time the worst part wasn’t the stage where we were really sick. It was easy to prioritize then. It was easy to only do what needed to get done.

It was when we were recovering that I melted down. It was during that awkward middle ground where we just weren’t healthy enough to do everything… but all I could see was everything that needed to get done.

The laundry piled high (flu laundry at that - ugh), dishes piled higher (if possible); I didn’t remember the last time the floor had been swept or vacuumed. And food? We’d eaten crackers for three days straight, Not even good, slightly less-processed crackers. Just saltines. For three days.

Oh, where to start?

Somewhere between pushing myself too hard one morning and laying around like a plague victim that afternoon, I realized something.

Sometimes I can’t do it all. Sometimes - wait, no-matter-what-the-time, I can’t do everything that needs to be done. I can’t do everything I think my kids deserve, that my husband deserves. I can run my self ragged trying to chase it all.

I can however, choose what is important to me and my family. I can choose what I will put my precious 24 hours a day to. And I can let the rest go.

In the quest for authentic simplicity is the beauty to choose. To decide to do things homemade, natural, organic, and sometimes to decide to buy pre-made and conventional. It’s our choice. It’s our simplicity, and it’s our job to choose it.

So the next day, after peeling myself out of bed, I chose to hold my sick little toddler and cuddle him on the couch. I chose to listen to my body and lean more on my Heavenly Father. I chose to look at picture books with my kids (reading was out the question because I had lost my voice). I chose to serve leftover chicken and rice soup for both lunch and dinner because, well, I chose to do some laundry instead of make dinner. And yes, I chose to turn on the TV. One step at a time. One choice at a time.

And you know what? I felt much, much better.

When Stephani and her husband got married, they lived in a renovated shed and had a grocery budget that matched. As a passionate whole-foodie, Stephani was determined to continue eating healthy, minimally-processed foods on their shoestring budget. So The Cheapskate Cook was born. You can follow the fun on her blog, where healthy meets frugal, or keep up with it via Facebook, Twitter, and Pinterest.

Supplements You Need {Raising Healthy Families}

Learn what supplements you should be taking by Clarinda over at A Jewel In The Making in this third post of Raising Healthy Families series.

Image courtesy of YaiSirichai/ FreeDigitalPhotos.net

You may be thinking that you eat pretty healthy and you don’t need these supplements or if you don’t eat too healthy what would be a great way to help your body become healthy (besides actually eating healthier) so what supplements does she recommend and why should you take them? Included are her quality brand recommendations.

Head on over to her blog to learn more in Do You Take These Supplements? If Not, You Should!

5 Nutritious Free Foods From Your Backyard! {Guest Post}

backyard foraging

Many thanks to Kristen of Smithspirations for guest-posting for me today as I am busy in the middle of moving! Please visit her site and say “hey” for me!

Gardening is one of my favorite hobbies. I just love going outside, picking a fresh bunch of vegetables and herbs, and walking into my kitchen to cook or prepare them. Right on par with my gardening affections is my fascination with using the many edible weeds that grow in my backyard. Most of us have no idea how many weeds that we consider bothers are actually tasty and nutritious foods! I’m excited to share with you five of my favorites that are well-known, nutritious, tasty, and easy to find.

Before you go picking and eating, keep in mind some foraging basics. Make sure that you only gather edible wild foods where you have the right to do so. Choose places that haven’t been contaminated with pesticides or other harmful chemicals; urban roadsides or sprayed lawns are places to avoid. Lastly, and most importantly, check before you chew. Make sure you know that you have positively identified your plant and haven’t mistaken it for a potentially harmful look-alike.

And now… on to the food!

dandelion flowers and leaves

Dandelion

Everyone is familiar with dandelions. Children love them for making bouquets, and adults tend to hate them for marring their lawns. But how many of us know that dandelions are nutritional powerhouses? Chock full of nutrients like beta-carotene, iron, calcium, B vitamins and other vitamins and minerals, dandelions offer a greater nutritional punch than spinach and other domesticated greens for the great price of free. Dandelions are usually best harvested in the early spring and late fall.

Young dandelion greens can be enjoyed raw in salads, as can the yellow flowers (minus the bitter green sepals, which are the small green leaves that hug the base of the flower). I like the leaves better cooked. Just sautéing them renders them quite bitter, but gently simmering them in a sauce or other liquid for about ten minutes after sautéing removes the bitterness, leaving you with a nutritious, economical, and tasty green side dish! Dandelion roots and leaves also make a very healthful tea that supports the liver. I like to roast freshly dug and washed roots and dry the leaves in the fall to have a detoxifying tea through the winter.

violet flower and leaves

Violets

Violet flowers not only look pretty, they also have a taste very similar to black pepper, and we enjoy them raw. I love sending my children out to gather violets for salads. They are so easy to spot and identify, and they add a wonderfully spiciness to an ordinary salad of garden veggies. My children think that it is so neat to eat wild flowers in their salads, and I think it makes them more willing to eat their greens. Though we usually just eat the flowers, violet leaves are also edible and said to be tasty anywhere other cooked greens would be used. You can find violets in the spring. Please know that African violets, the popular houseplants, are poisonous and not safe to eat.

purslane

Purslane

I’ve recently started seeing purslane seeds in the seed catalogs I get in the winter, but I never have any trouble finding purslane in my yard. These succulent plants with thick red/purple stems and plump oval-shaped green leaves are a common weed found in many gardens. When looking for purslane, be sure that the leaves have no dark spots and that the stems aren’t wiry. That plant might be spotted spurge which somewhat resembles purslane and is poisonous.

Purslane is excellent raw in salads or on sandwiches. It has a nice mild flavor, somewhat sweet and sour, and a juicy crunch that my children especially enjoy. You can also cook it by steaming, sauteing, boiling, or stir-frying for about 10 minutes. When it comes to nutrition, it is hard to beat purslane. It’s bursting with omega-3 fatty acids, vitamins A and C, and minerals like calcium, potassium, and iron. According to foraging expert Steve Brill, purslane is one of the most nutritious plants on the planet! I’ve heard of it becoming a popular ingredient at fancy posh restaurants now, too. I’ll probably just eat it at home and pretend to be posh.

chickweed

Chickweed

I finally realized what chickweed was this past year while gardening and constantly pulling out mats of a green weed with small leaves, tender stems, and itty bitty white flowers. Once I realized I could eat it, I couldn’t believe all of the food that was dumped into the compost bin! Along with being delicious, another great thing about chickweed is that you can often find it during colder seasons, allowing you to enjoy free greens for a greater part of the year.

Raw chickweed has a wonderfully sweet green flavor. I like to chop it up fine for salads. You can also quickly saute it, and I’ve found it to be an excellent ingredient for egg frittatas or omelets in place of spinach. If you like sprouts on your sandwiches or wraps, you might just find chickweed to be an excellent addition or substitute! Another highly nutritious plant, it provides ample amounts of vitamins A, C, and D, along with folic acid, calcium, potassium, zinc, iron, and other nutrients.

sheep sorrel

Sheep Sorrel

A neighbor once allowed me to taste some sorrel that was growing near his house years ago, and I had never tasted anything like it. It looks like a baby spinach leaf with rounded points on the sides, but tastes like lemons! I decided to grow a garden variety so that I could enjoy it at our new house, but was delighted last year to find a patch growing in our backyard. Like most other wild greens, sorrel provides a host of various nutrients. The best time to find sorrel is in the early spring and fall.

Its bright, strong, lemony flavor is a nice addition to salads, sandwiches, soups, and casseroles. If you have a recipe that calls for spinach, chard, or kale, throwing in some sorrel leaves just might take the dish to a whole new level! One of the best chicken soups I’ve made had a few handfuls of sorrel in it, and our whole family was amazed at the flavor. The leaves cook quickly, so try adding them during the last 10-20 minutes of cooking time for a soup or other dish.

Want more ideas and information?

There are so many more delicious, nutritious, and free foods available to us in our backyards. I love my Wild Edibles app, available both as a free “lite” version and a paid full version with over 150 plants listed. There are loads of photographs, illustrations, and information relating to harvesting, seasons, nutrition, recipes, and more. If you are interested in wild foods, I highly recommend it! No smart phone? No problem! “Wildman” Steve Brill’s website has a great section all about some of the most common wild plants in the United States area.

My name is Kristen Smith, and I am above all else a Christian, filled with God’s Holy Spirit, and living by every Word of God and that only by the grace of God. I am married to the handsome and admirable Jesse Smith, my high school sweetheart, pastor, and best friend. We have been blessed thus far by four precious children here and one waiting in heaven. I thoroughly enjoy homeschooling our older children in the Charlotte Mason and Classical styles; cooking real, whole foods via traditional, nourishing methods; living a more natural, DIY, and economical style of life; venturing into creative projects when I can somehow make the time.