Archives for June 2013

Simple Hospitality: Host a Kaffeeklatsch

Some times I think we have the idea that hosting guests in our home has to be a big ordeal complete with written invitations (or at least an evite), a set of fine china, a sparkling clean home, and the perfect balance of dinner guests. And sometimes I think that our hours spent browsing on Pinterest have convinced us that no event is complete without handmade decor, cute-si-fied mason jars, and/or an assortment of creative, delicious, and - of course - uber-healthy treats for every dietary need possible.

Simple Hospitality

Forget all that stuff. That is not what hospitality is all about!

Hospitality is about people getting together, plain and simple. The setting doesn’t really matter - you don’t need to spend hours of time impressing your friends with either your millions… or your ability to create what looks like a million bucks out of nothing.

Sure, we all love good food, and I love a themed party as well as anybody! Cute decorations and creative touches make me smile and say “awww”. But really, when I host (or attend) a get-together of any kind, what I’m really looking for is good conversation and fun with other people. All that other stuff is auxiliary and completely unnecessary.

So if you’re not feeling up to scrubbing the house top-to-bottom, or if you don’t have a crafty bone in your body, or if the thought of cooking up a full-course meal for other folks makes you sick to your stomach… well, then, don’t. Don’t do all that stuff.

But do have other people over. One of the easiest ways to get some friends over to your house for a good time of conversation and fellowship is to have them over for coffee. The Germans even have a name for it - Kaffeeklatsch - so if you want to make it sound a little more exciting, then that’s what you can call it!

A Kaffeeklatsch is super simple, inexpensive, and enjoyed by just about everybody (even the non-coffee drinkers; I’ll get to that in a minute).

How to Host a Kaffeeklatsch
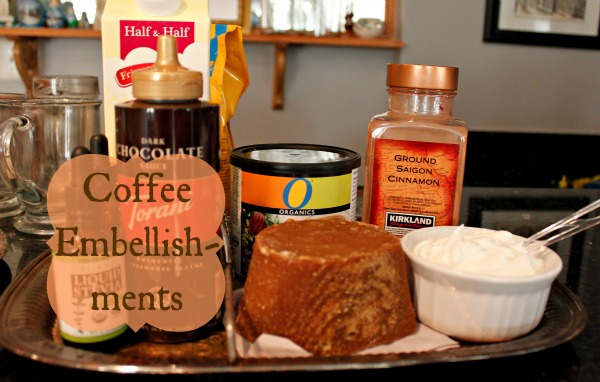
Here’s how I recently hosted a Kaffeeklatsch myself:

  • I invited my guests by text, Facebook message, and cell phone. No fancy-schmancy invitations needed!
  • I ran to Safeway (literally at the last minute) and picked up some coffee (Did you know, by the way, that Gevalia coffee is now available in grocery stores? It used to be mail-order only back in the day, but now it’s available to pick up any time! And it’s yummy stuff, so that’s what I got. Decaf for the sleepy folks who wanted to stay that way, and regular for the rest of us.)
  • While at Safeway, I also picked up some healthy-ish treats. Since this was a total impromptu gathering, I didn’t bother taking the time to make some truly healthy treats at home; I chose instead to compromise health for the sake of hospitality! So we had all-natural ice cream, Newman-O’s ginger creme cookies, dark chocolate with fruit and nuts, and some bake-at-home cookies from the Immaculate Baking Company (also all natural).
  • Once home, I set out the cookies and treats on trays, and got my French press ready to go.
  • I also set out different kinds of sweetener (chocolate-flavored stevia, for one - yum!), some chocolate syrup (all natural again), real whipped cream, and cinnamon for my guests to dress up their coffee.
  • I also had some organic hot chocolate mix ready for friends who preferred not to drink coffee. And if I had any tea-drinking friends present, I would have set out some options for hot tea as well.
  • And we all sipped our coffee, nibbled our treats, and chit-chatted until it got dark!

That’s it, friend! All there is to it.

What’s your favorite easy hospitality?

I was selected for this opportunity as a member of Clever Girls Collective and the content and opinions expressed here are all my own.

DIY Inexpensive Wall Art - Personalized, Customized, and Absolutely Lovely!

I haven’t posted much about my decorating skills, because, uh… I have none. I’m seriously lacking in that department. I’m always amazed at the genius and creativity of all those bloggers out there who look at an object and say, “Sweet! I can make THAT out of THIS!”, when “THAT” has absolutely nothing in common with “THIS”, and the end result is always extraordinary. I am not that kinda girl. I look at “THAT” and see… well, THAT.

So as you can see, creativity is not one of my strengths. Not even close! And that, my friend, is why I am inordinately proud of this recent project I completed! Because you know what? I completed the project start-to-finish without consulting Pinterest or any of those creative types (unless you count my DH, who has a degree in graphic design, and whose opinion was invaluable when it came to choosing the colors and papers). And I think the end result is absolutely lovely!

Here’s how this project evolved: I started with two picture frames that my DH had given to me for Christmas some years ago; and although I had pointed them out to him as a potential gift item, I had absolutely no idea what to do with them, so they sat largely unused for… umm…. a while. (Let’s just leave it at that.) The biggest problem was that I didn’t have enough actual pictures of people that were oriented in the same way (all vertical or all horizontal), and I also couldn’t figure out the best way to hang the two frames together, and where to put them, yada yada yada. Too many little problems for my pea-pickin’ little non-decorator brain to figure out.

But in our new place, I was determined to use them somehow, because - despite the issues they presented - they were beautiful frames, and my DH had given them to me. Thankfully, finding the spot on the wall was easy this time around. They fit perfectly in the space between the built-in media cabinet and the curtains and would totally finish out the little tableau I was creating there.

Unfortunately, figuring out what to put in those dumb frames was still an issue. I pondered over it for quite some time, mulling a variety of ideas before settling on creating some type of text-based graphic design myself. Then I pondered a little longer, trying to come up with two words that were 5 letters each, were meaningful to our family, and made sense. Faith and family would’ve been perfect except for the minor detail that “family” has 6 letters, not 5. Love and hope? Only four letters, and not necessarily words that personally meant a lot to us. Pretty words, but nothing that struck a chord in me.

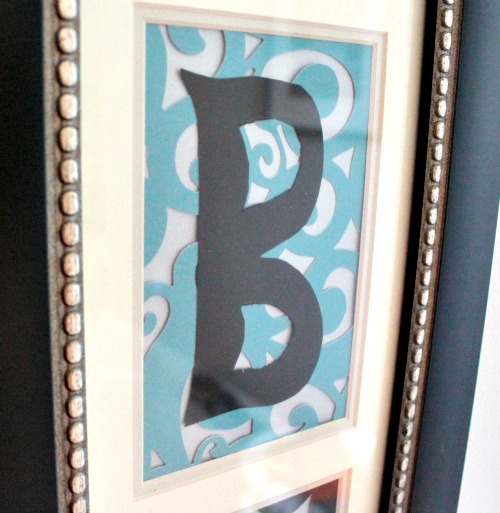
Finally, I settled on using our initials. Not a perfect solution, I guess, because if our family grows, then we have to redo them! But for now, it works beautifully: they are both meaningful and personal, and the 3 characters balance nicely in the middle of the 5 slots.

I love the finished result, and these frames -inexpensive wall art that they are!- make me smile every time I see them. The colors complement the overall color scheme in our living area (gray, blue, brown with some black/white accents) and help to create a put-together look. But what I love best is that this art is personal to me! It’s not something I picked up on sale at Michaels’ or from the clearance rack at Marshall’s, and that makes all the difference in the world.

What I love second best is the price! I already had the frames on hand, and the paper cost less than $10. The whole project came together in one afternoon, and wasn’t that difficult at all. Actually, it was really quite easy!

DIY Inexpensive Wall Art

I used:

  • 2 frames with 5 openings, with matting included
  • 2 sheets of blue open scrollwork scrapbook paper
  • 2 sheets of black open scrollwork scrapbook paper
  • 4 sheets of sturdy silver scrapbook paper
  • 1 sheet of sturdy white linen scrapbook paper
  • 1 sheet of sturdy black linen scrapbook paper
  • tape
  • glue stick
  • craft knife

I measured and cut the scrollwork and silver papers to fit the openings in the mat, then I taped them to the back of the mat (scrollwork paper first, then the silver background). I alternated the blue and the black scrollwork papers to create a balanced but varied design.

Then I drew the letters freehand (my DH actually drew the ampersand template for me because my ampersands kept coming out like “S”‘s, lol) onto a piece of paper that was cut the size of the mat opening, making sure the letter filled the space but was neither too large nor too small. Then, using scissors and the craft knife, I cut the letters out to create templates, which I used to cut out the actual letters on the sturdy linen paper. Again, I used black for one set of initials and white for another to kind of balance out the look but keep things fresh.

Then I just used my glue stick to carefully adhere the letters to the scrollwork paper through the opening in the mat. Once they dried, I put the mat back into the frame, put the backing on the frame, and secured it. Then my DH hung it on the wall, and… DONE!

Not bad for ten bucks, eh?

5 Quick Dinner Ideas {Menu: Fish}

If you have a busy schedule and are in need of some super-duper quick dinner ideas, fish can’t be beat in terms of getting a healthy meal on the table in no time flat. Filleted, frozen, and canned seafood are all great options that not only come together quickly, but are delicious and nourishing.

Note: Not all fish are created equal, and not all fish are healthy. The topic is far too complicated for me to delve into here, but I will point you instead to Monterey Bay Aquarium’s excellent resource, a printable guide (or app!) that tells you at a glance which types of fish are the best. And since that chart is not particularly helpful in regards to tuna, I found this very informative resource that details what to look for in tuna and where to find it.

So if you need some super quick dinner ideas, I’ve got 5 great recipes for you that should be on the table in 30 minutes or less. I can personally vouch for each recipe, as these are the ones I turn to time and again whenever fish is on the menu (or I need dinner STAT!).

5 Quick Dinner Ideas

{When Fish is on the Menu}

super fast fish fingers

Perfect for lunch OR dinner: cornmeal-crusted fish fingers that come together in a jiffy and taste delicious!


toasty salmon melts

A hot open-faced sandwich with melty cheese... what's not to love?

tuna pasta salad

To avoid the issues presented by canned tuna, switch it out for canned salmon in this yummy pasta salad that's perfect any time of year.

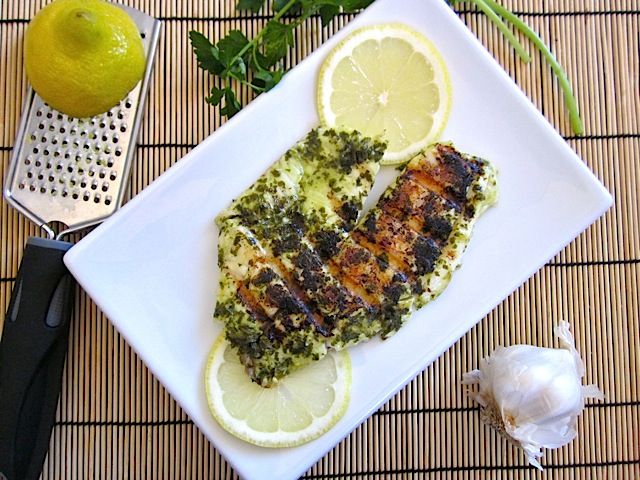
Lemon and fish just seem to be made for each other, as exemplified in this super simple recipe for Lemon Garlic Tilapia that can be made with just about any kind of fish.

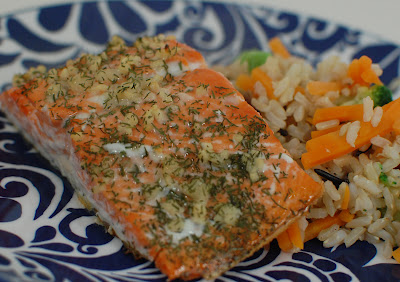
Garlic Dill Salmon: This is the first recipe I ever tried with salmon... and I keep coming back to it!

How to Clean Your Crock Pot

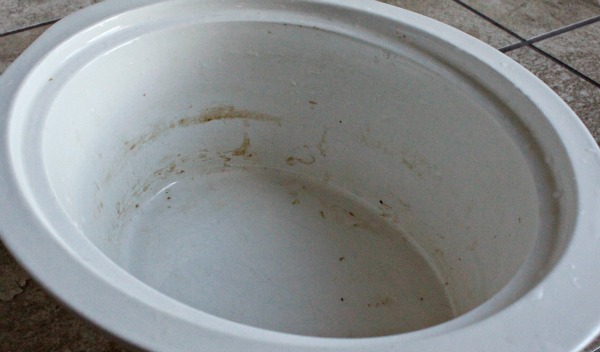
This post contains affiliate links. Thank you for supporting Authentic Simplicity! Years ago, I bought the crock pot you see here (the 5qt programmable one by Rival) at a yard sale for next to nothing. When I bought it, it was a lovely crisp white color and looked as if it had never been used. The lady who sold it to me exclaimed that she was so glad to be rid of it because, and I quote, “I got so tired of scrubbing that thing!”. I smiled and nodded because it seemed like the polite thing to do, but inside my head I was thinking, “What in the world is your problem, lady?! Just wipe it down when you’re done with it; what’s the big deal, anyway?”

Fast forward to the point in time where I actually used the crock pot… and then I understood. For whatever reason, this particular crock pot is hard to clean. Let me rephrase: this particular crock pot is almost impossible to clean. I can soak it for days and nothing happens besides the passing of time. I can scrub at it until I’m blue in the face and nothing happens except my face is blue. I’ve since heard from others that they suffer similar struggles with their crock pots, too, so it is not a unique situation to this specific one.

There have been times when I honestly just gave up on my crock pot ever being clean. Besides the whole issue of sanitization, the crock pot worked great! I loved that it could be programmed and that it automatically switched to “warm” when it was done cooking. It was the perfect size for my family, and it was quite reliable.

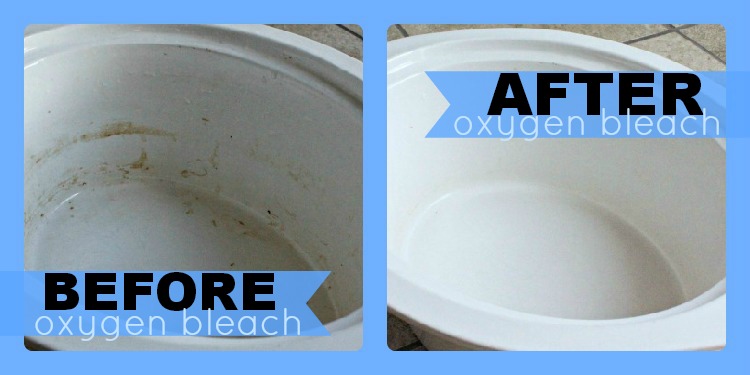
But it was dirty. dirty crock pot

Just between you and me, if it weren’t for the fact that I occasionally blog about food and therefore occasionally have to take pictures of my crock pot… I might never have renewed my interest in trying to get it really and truly clean. Honestly? The only thing that compelled me to search for a solution was the fact that I had to take pictures of the durned thing and show them to the entire world. Just bein’ authentic here.

So off I went in search of a solution. I tried a few different remedies that worked to one extent or another, like filling it with water and turning it on and letting it sit for a while. That was kind of a pain, though, and not super effective. It wasn’t until I experimented one day with oxygen bleach that I hit upon an actual, effectual method for cleaning my crock pot!

How to Clean Your Crock Pot

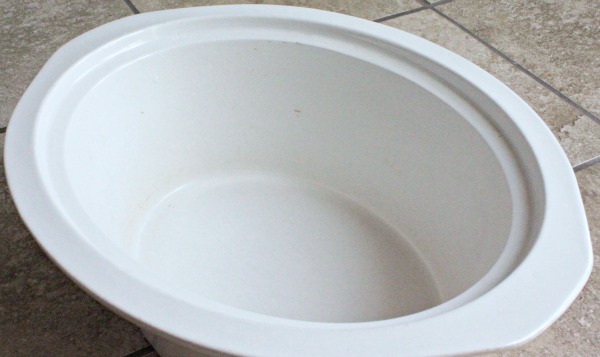
Since I already used oxygen bleach in my dishwasher , the container was handy right there under the sink and accessed easily enough. I just sprinkled some on the bottom of the pot and then filled it with hot water, adding a squirt or two of dish soap while I was at it. I let it sit for a few hours, and when I came back to it, pretty much all I had to do was wipe it down.

clean crock pot Now my crock pot routine is simple, and my crock pot is always clean (the inside of it anyway - I haven’t figured out how to soak the outside of it yet!). Here’s my simple method:

  • As soon as I’ve emptied the crock pot, I put it in the sink.
  • I generously sprinkle oxygen bleach (I like to get mine from Tropical Traditions) in the crock pot.
  • I fill the pot with hot water while squirting in a little bit of dish soap.
  • I let it sit for a while (a few hours, all day, all night, whatever works best for me at the moment).
  • When I come back to it, I wipe it down. Sometimes a little scrubbing is still required, and for the really stubborn stains, I’ll have to repeat the process. But most of the time, it’s just a matter of wiping and rinsing.

You can see why oxygen bleach is rapidly becoming my favorite household cleaning ingredient, right up there with vinegar and baking soda! Not only do I use it to clean my crock pots, I use it in my homemade dishwasher detergent, and I use it to get rid of stains in my carpet! Just today, I used my carpet cleaning mixture to also clean my tile floor in the kitchen, and my DH used it last week to clean the tiles in the bathroom. It’s an all-purpose, super-effective cleaner that is safe and natural. I highly recommend Tropical Traditions oxygen bleach, Oxy-Boost, or BioKleen.


Homemade Pink Lemonade

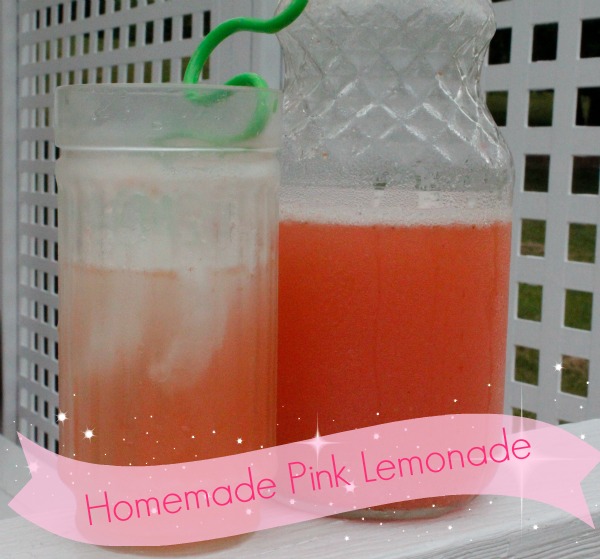
All Natural Homemade Pink Lemonade For my birthday in May, my wonderful DH hosted a lovely party for me, and even made most of the food! (I think I’ll keep him!) Included in the menu was some delicious strawberry lemonade, which he made himself from scratch to the delight of all our guests. He made a HUGE batch, and it was gone almost instantly.

Since then, we’ve made it a few more times because it was just so good we couldn’t resist. The last time I made it, though, I took it one step further. That one little step went from “amazing” to “Uh.May.Zing”. Just like that.

All Natural Homemade Pink Lemonade

It’s still strawberry lemonade… but it’s pink. So I call it “Pink Lemonade”. Fitting, huh? But unlike the pink lemonade you can buy just about anywhere else, this pretty little beverage has no artificial colors. No artificial flavors or preservatives, either! In fact, it has no refined sugar, and very little sugar at all. Can you say, “Mmm-mmm!”

All Natural Pink Lemonade


Natural Pink Lemonade

Healthy Frozen Treats {Raising Healthy Families}

Welcome Back to the Raising Healthy Family Series! In this final installment,
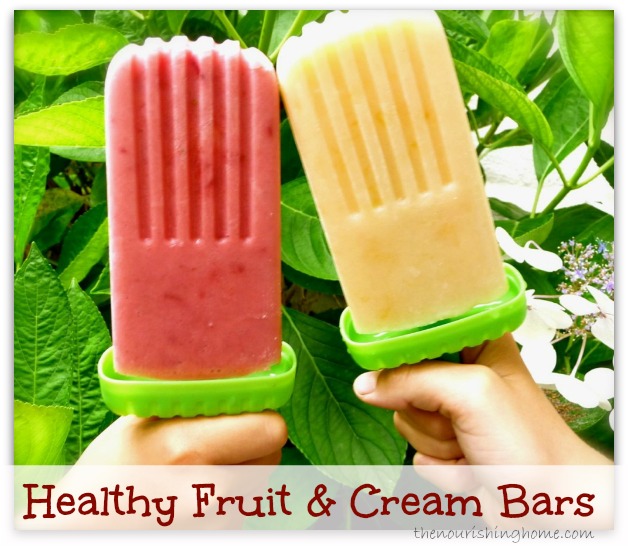
Kelly at The Nourishing Home is sharing a healthy way to beat the heat of summer without compromising good nutrition.

Making your own homemade ice pops and frozen treats is so easy and it’s fun too! And best of all, you’ll feel good knowing that your
family is enjoying a healthy boost of wholesome nutrients in each and every yummy bite!

So be sure to join Kelly at The Nourishing Home as she helps us celebrate summer
with some delicious and nutritious real food frozen treats certain to bring a smile to your kids faces, while keeping the ice cream man at bay!

How to Clean Carpet Stains Naturally{Plus Quickly, Plus Easily}

Note: This post contains referral links. Thanks for your support of Authentic Simplicity! Clean carpets quickly and easily with oxygen bleach. Fact: For 5 out of the 7 years I’ve been married, I’ve lived in apartments with nasty carpet.

Fact: It’s not my fault. (I swear!) The carpet in the first apartment was incredibly cheap (as was everything in that apartment, come to think of it), and seemed to collect stains like some people collect coins. And for some reason that I cannot comprehend for the life of me, apartment complexes seem particularly determined to floor all the dining rooms in their unit with carpet. I would take linoleum from the ’70’s over carpet in the dining room. Any. Day. (Of course, that would have nothing to do with the fact that I have 2 small boys who, every meal, end up with more food on the floor than in the tummy.)

The carpet in our current apartment is actually of very high quality, but it appears to have been around since the dawn of the house itself (say, 20 years?), and has apparently experienced its fair share of toddlerhood spills and other merriment. Oh yeah, and it started out as a lovely off-white color, I’m sure, but has long since faded to a dingy sort-of-something-color. I’m determined to cover it up with rugs, but so far all I’ve managed is a second-hand rug in the dining room. Hey, anything to cover up the handiwork of my two little blessings!

At any rate, I’m way more familiar with carpet stainage than I really actually care to be. And I am so beyond thrilled to be able to share with you the solution I have hit upon within the past year, because it’s one of those things that actually works. A lot of the solutions I see online for X-Y-Z and this-and-that tend to work for everybody else but me. (Anybody else have that problem?) So when something actually works (and works every time!) for me, I want to shout it from the rooftops.

So here’s my online rendition of the rooftop shout:

Clean your carpet stains with Oxygen Bleach!

(Hey, at least I didn’t use all caps.)

It’s really actually quite easy. Take a spray bottle and put a tablespoon or two of oxygen bleach in the bottom. (I never was a good one for specific measurements - I honestly just dump some until I think I have enough.) Fill the bottle the rest of the way with warm-ish water (never was good at temperatures either) and shake until the oxygen bleach dissolves (being sure to replace the nozzle on the spray bottle first, of course).

Spray the stain liberally with the oxygen bleach mixture and let it sit for a few minutes. (I don’t time it exactly, either. Bet you’re surprised by that.) Come back with a white rag and rub at the stain until it disappears.

And the amazing thing? It will disappear. Right before your very eyes. Like magic. I actually find it oddly entertaining, and am always secretly excited when I spot a new stain that needs to be cleaned.

This stuff has not failed me yet, and I’ve attacked many a stain with it. However, your mileage might vary - it depends on your carpet, the stain, and you. I also recommend testing just an unobtrusive corner of your carpet first to make sure you won’t ruin the color. I’ve only ever used this spray on nondescript beige-ish colors, so I’m not sure how it would react with a colored carpet.

Note: Do not use the oxygen bleach you can buy at the dollar tree. I don’t know exactly what’s in it, but it smells like chemicals and is blue (and sometimes pink, which is kind of funny), so I don’t trust it. Get the pure white unadulterated stuff from places like Tropical Traditions or Amazon.com.

How to Get Your Kids to Eat More Vegetables {Raising Healthy Families}

Welcome back to the Raising Healthy Families Series! 


We hope you’ve enjoyed joining us each Friday as we’ve shared different ways to keep your family healthy and vibrant in a not-so-healthy world!

Be sure to join us next Friday for our final post in this series from Kelly at The Nourishing Home, as she shares delicious, real food frozen treats that your family can enjoy all summer long.


Written by Jill of Jill’s Home Remedies


Getting a child to eat vegetables can be a monumental task that most moms hope to accomplish in their lifetime.
We all know that many kids balk at vegetables.
Moms therefore try to find ways to “hide” vegetables in meals and casseroles, hoping their children do not notice the “green and orange stuff” hidden within their food. They whisper to their older children that they “better not say the word ‘vegetable’ or their younger siblings won’t eat supper!”
My girls eat vegetables every day. I’m not talking about vegetables hidden in food; I’m talking about fresh, raw, healthy vegetables! My girls cheer when they see I’m chopping up a plate of celery, carrots and green pepper!
Hop on over to Jill’s Home Remedies for fun and practical tips on teaching your own kids to eat more vegetables!