Archives for July 2013

My IKEA Hack: {Almost} Built-Ins

Although we came by our current residence in a rather haphazard manner, we have enjoyed it tremendously. It’s so much bigger than our previous space, plus it has a HUGE back yard that The Boys love to play in. Besides which, it’s right off the main road, so the location is absolutely perfect.

However, it does have one drawback. (Can’t have everything, right?) Being a basement apartment, it is seriously lacking in storage space. Each bedroom has a closet, and there is a small storage unit under the stairs, but that’s about it. There’s no linen closet, no coat closet, and no laundry room (only a laundry closet) and I’m realizing that I relied heavily on those rooms for storing all sorts of things in our previous residence.
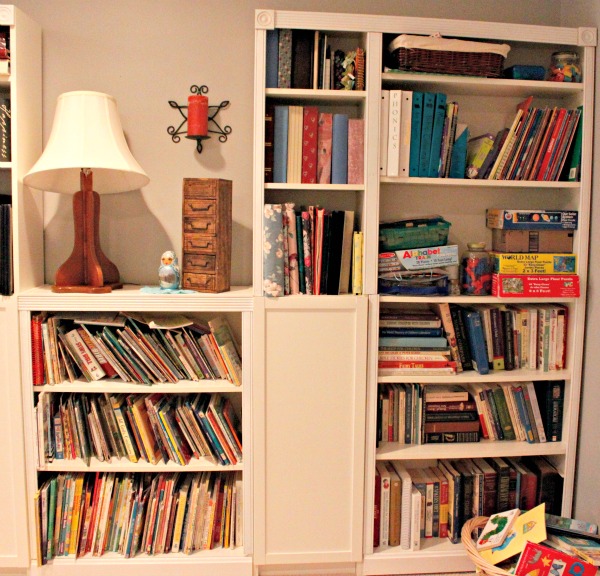
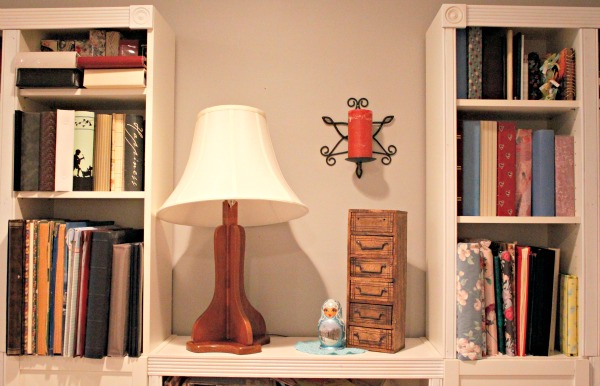
I’ve had to get seriously creative with storage here, and I’m going to show you some of the cheap ideas I’ve been able to employ. By far my favorite is this first one: our first-ever IKEA hack that was pretty darn successful if I do say so myself. We used IKEA’s line of “Billy” bookshelves and added some trim from Lowe’s to finish off the look. The result was a beautiful set of shelving that looks beautiful but cost much less than it would have elsewhere… plus it holds all our books! (I have no idea where we put all those things in our previous apartment, to be honest!)

Our IKEA Hack: Billy “Built-Ins”

We used the following Billy bookshelves:

As you can see, the shelves themselves cost around $350, considerably less than similar shelving found elsewhere. In addition to the shelving, the molding and trim (and the spray paint) cost another $60-75, bringing the total cost to a little over$400. Not bad, I think!

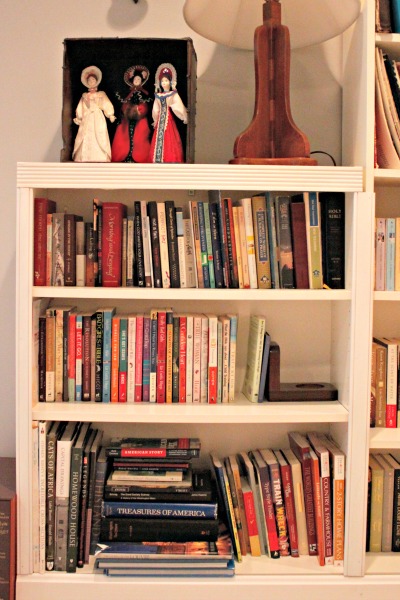
This is the first shelf in our set-up and contains our non-fiction collection.

We set them up in a sequence like this: short - tall - narrow, with the narrow shelves having doors on the bottom. (I love the doors because we can shove all the kids’ games in there and hide the mess!) We had wanted the shelves to extend all the way to the ceiling, and we thought we had measured enough space to include the shelf extenders. That would have added another $100 to the total cost, but as it turned out, for some reason the extenders were about an inch too short to fit. I’m sure we could have cut them to fit if we had wanted to bother (and they would really have looked like built-ins, then), but we didn’t. We just returned them and saved ourselves some moolah!

This tall shelf holds most of my sheet music and my fiction collection.

To finish off the look, we used the following pieces of molding and trim, cut, painted (with white spray paint), and attached by my DH himself:

  • 4 rosette medallions for the top corners
  • wide ribbed molding for the top shelves
  • 2.5″ wide molding, which we used wherever two shelves adjoined vertically (If it weren’t for the doors, we would have needed more of this.)
  • 1.5″ wide molding, which we placed along the vertical edges of all the shelves
  • baseboard along the bottom (except for where the doors are)

All our photo albums go in the top shelves of the narrow units.

I honestly can’t remember how many lengths of each type we bought from Lowe’s because it’s been a couple months. Besides which, it seems like we underestimated the amount we needed, and my DH ended up going back at least once to pick up more. (Moral of the story? Buy extra, and return what you don’t use!)

My DH worked really hard on this project in his spare time over the course of several evenings- maybe a week or two. Because he had to return to get more molding than he had initially purchased, it dragged on a little longer than it would have otherwise. And then it took me just about forever to sort and organize all our books, which had been packed in approximately a zillion different boxes!

The kids books are easily accessed by the little people, and the games are hidden behind the doors.

We are quite pleased with the finished product, and it’s definitely the focal point of the room where it sits, which we have dubbed “the library”. It’s really not a room, actually: it’s a super-wide hallway (read: rather nebulous waste of space that doesn’t immediately have an obvious purpose) that brings you from the living room into the master bedroom, and I can’t think of any better use for it than this (despite my DH’s campaigns for a ping-pong table!).
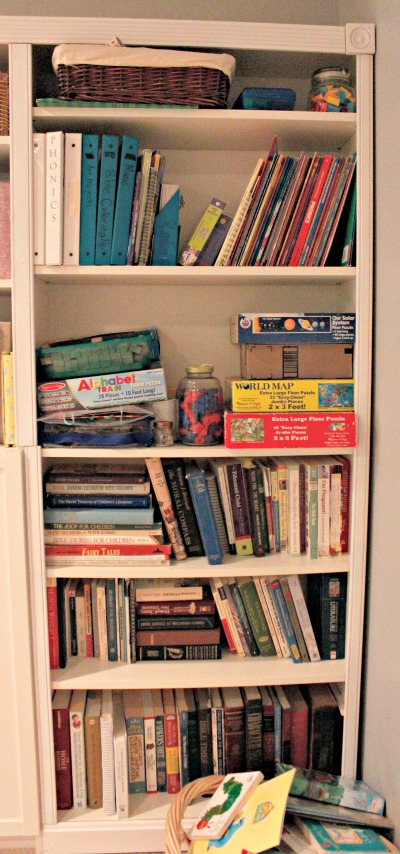
This tall shelf holds educational materials and reference books (dictionaries, medical books, college textbooks, etc.).
5 Picnic Food Ideas

As part of our Day-at-a-Time-Staycation, we’ve had quite a few picnics this summer. My Certain Little Someone was trying to keep track of them at first, but he lost count somewhere around 4 or 5, and we’ve had quite a few since then!

Except for the minor issue of bugs (ahem), I love picnicking because:

  • it’s a fun way to experience the outdoors.
  • it’s a fun way to eat lunch.
  • it’s one way to enjoy local parks and historic areas.
  • IT SAVES MONEY! No need to eat out when you have a picnic in tow.

(In case you couldn’t tell, that last point was my favorite one, and in my opinion is reason enough for picnicking anytime.)

Picnicking all summer long is no fun if every picnic is the same, besides which I’m not a huge sandwich fan, so I’ve been getting creative with our picnic lunches. Here are a few of the things we’ve enjoyed on our outdoor luncheons:

1. Cold Plate

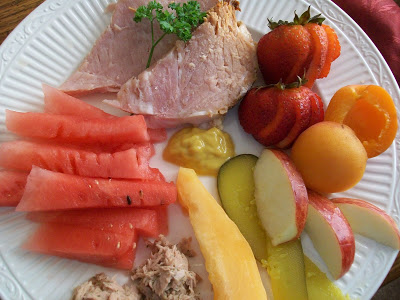
I actually posted about the idea of a Cold Plate lunch/dinner way back in 2009 (seems like ancient history now). The concept is this: just pack a variety of cold cuts and crudites that can be eaten with the fingers and with little fuss or mess.

Some ideas to include in your Cold Plate lunch:

  • Boiled Eggs
  • Cheese Cubes
  • Leftover Sliced Meat
  • Lunch Meat
  • Sliced Cheese
  • Various Vegetable Crudites: Celery Sticks, Carrot Sticks, Broccoli, Cucumbers, Peppers, etc.
  • Fruits: Grapes, Watermelon, Berries, Apple or Pear Slices, Clementines or Oranges
  • Dried Fruit

2. Meatballs & Dips

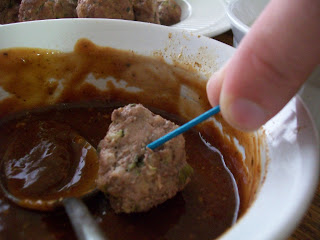
Another idea I posted way back when was a finger-food meal concept that included meatballs and sliced apples, both with dipping sauces. Meatballs can be made ahead, and can be made in pretty much any flavor profile desired, with an appropriate dip to match. Bring along some toothpicks and have a dippity-do-dah day!

Here are some meatball recipes I’ve enjoyed:

As a side dish, bring these super cute “Veggie Gardens”.

3. Bean Patties

Say wha?? Yep, bean patties. They’re healthy, sturdy, delicious, and super easy to make at home if you have some pre-cooked and/or canned beans. (I always keep a stash of cooked beans in my freezer ready to be used for occasions such as this.) Plus, like meatballs, you can make them pretty much any flavor you want!

I usually start with this black bean burger recipe, but the truth is that bean patties are really just a mixture of beans (pretty much any kind), shredded veggies (again, pretty much any kind), some sort of flour or starch (pretty much… yeah, you got it), and seasonings. Sometimes bread crumbs and/or eggs are added, and sometimes not. Whatever ingredients you use, just run them through your food processor until you have a consistency that’s able to be molded into patties. Fry your patties in a little bit of oil or bacon grease on medium-ish heat, and you’re done.

Falafels are a kind of bean patty (or meatless meatball, as they are sometimes formed in spheres rather than patties) made from chickpeas that are particularly delicious. Not a fan of beans? Try these Onion Quinoa Bites.

4. Boiled Eggs

My Certain Little Someone can’t have eggs, so I don’t do this one very often. However, at our last picnic, I made the aforementioned bean patties, which my DH cannot have, so I packed some boiled eggs for him instead. This is a super simple, portable dish that provides a great source of healthy protein and energy. Pair it with fresh fruits and veggies and you’ve got a winner meal right there.

5. Cheese & Crackers

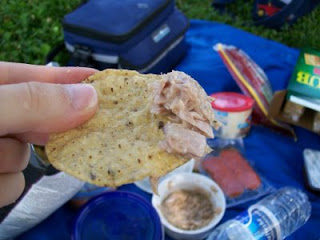
Here’s another idea from the olden days of my blog: Pack some crackers and assorted toppings for your picnic lunch. Cheese is an obvious choice, but tuna salad, egg salad, or chicken salad are great options, too. Really, just about anything you’d put on a slice of bread can be paired up with crackers, too, and it makes a fun lunch for everyone. In fact, bring a variety of toppings and everybody’s happy!

Happy Picnicking!

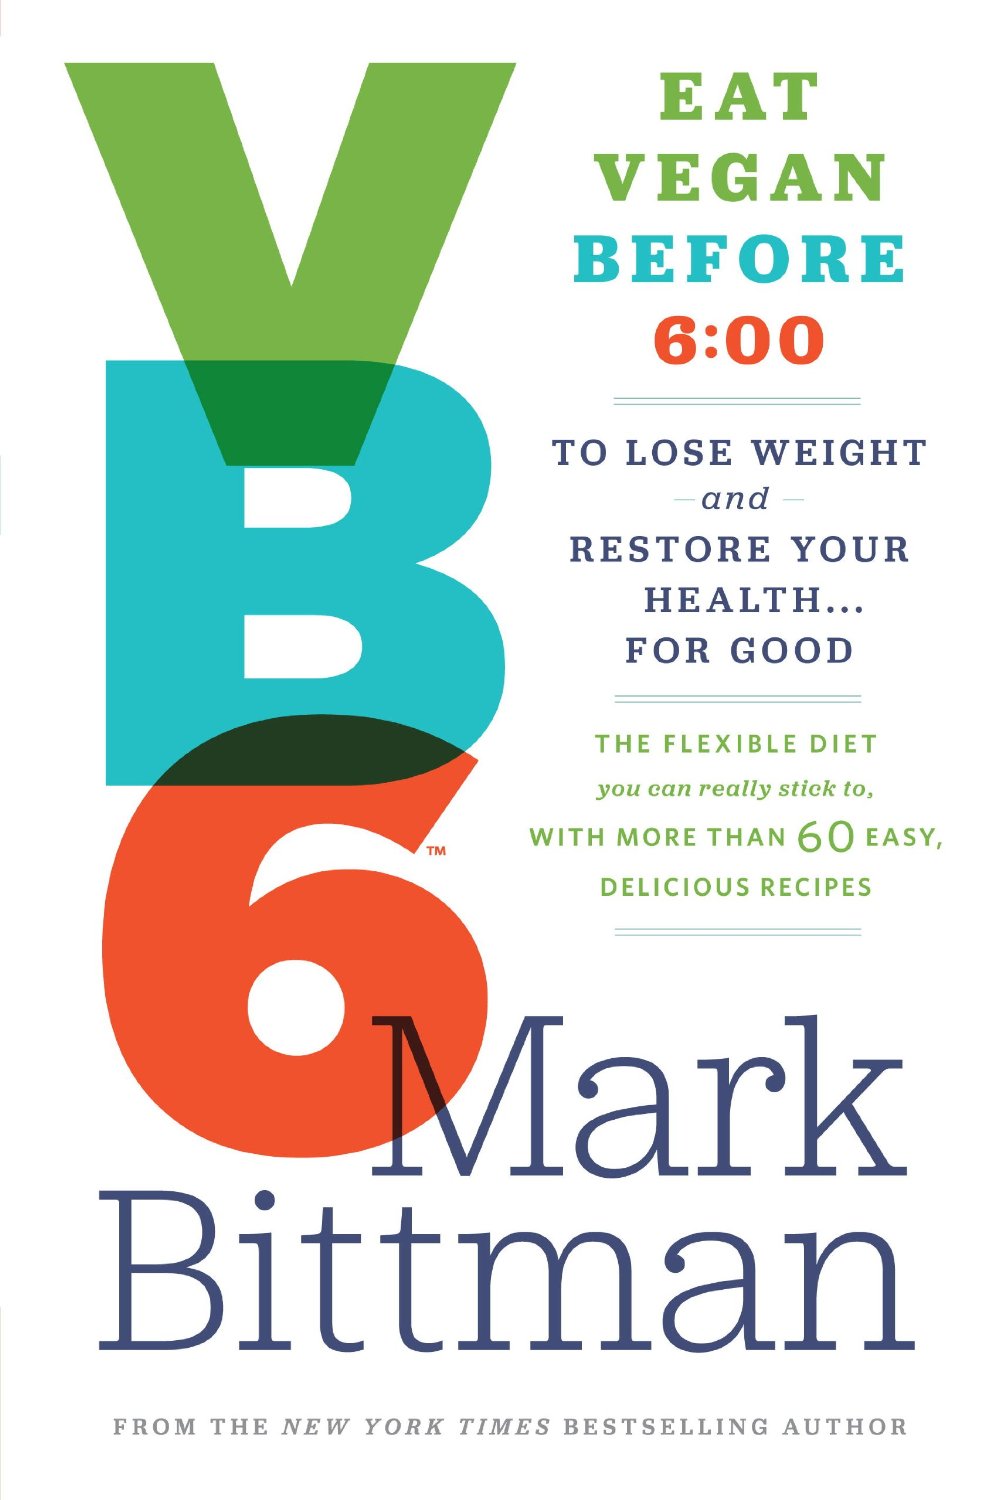
Vegan By Day, Omnivore By Night: Mark Bittman’s VB6

This post contains affiliate links.

Recently, as I was browsing through the cookbooks available on my local library’s eBook rental service, I stumbled across Mark Bittman’s latest book, called “VB6”. I’ve always loved Bittman’s simple approach to cooking , and I own a few of his cookbooks, so the title and the author caught my eye. I got in line to borrow it, and eagerly read through it as soon as it was downloaded.

I was intrigued, to say the least. Very intrigued! The whole idea behind VB6 is this: what successful and healthy diets all have in common is the fact that they are all plant-based. Whether or not they also include animal products (and sugars and starches) doesn’t seem to matter, as long as plant-based foods (fruits and vegetables) make up the majority of the diet. However, not many of us either want or need a full-time diet of nothing but fruits and vegetables.

That’s where VB6 comes in. The idea is that you eat like a vegan during the day, but come dinnertime, you can eat whatever you want. There’s structure balanced with flexibility, and between the two you end up eating well without sacrificing the foods you love.

I actually had no intention of following the plan Bittman lays forth in his book, until it started to make sense to me. I personally have a hard time eating the quantity of fruits and vegetables I should, and I’ve felt for a long time that that simple fact has kept me from achieving my optimum weight and experiencing my best health. Following the VB6 concept, even in a moderated way, would help me achieve both without actually “going on a diet” or drastically changing my eating habits.

What VB6 Is

  • It is a structured way of eating. The basic idea is this: Eat only fruits, vegetables, and whole grains throughout the day. Then allow yourself to eat whatever you want for dinner (whether that means meat, or pasta, or your favorite dessert).
  • It is a way to give your body the nutrient-rich foods it really needs, namely fruits and vegetables. I suppose this appeals to me because I’ve always struggled with getting enough fruits and veggies. On a good day, I have 5-6 servings of fruits and vegetables, and I know that’s not really good enough. A large portion of the vitamins and antioxidants your body needs are found in fresh produce, so it’s really important to eat more of those than anything else. When eating with the VB6 plan on mind, I can’t help but get in more than adequate servings of the food my body really needs.
  • It is a common sense and simple approach. It reminds me a lot of Michael Pollan’s simplified approach to eating: Eat Food. Not Too Much. Mostly Plants. Food is a necessity that should be enjoyed, not a science requiring a degree, nor a battle to be waged. Trying to “eat properly” should be a simple matter.

What VB6 Isn’t

  • It isn’t a diet. I don’t do diets. It’s a way of eating… in short, a lifestyle. Mark Bittman has been sticking to this way of eating for 6 years so far!
  • It isn’t restrictive. Yeah, I know, a “vegan” diet is nothing if not restrictive. But the whole point is that every day, you have an opportunity to enjoy whatever foods you want, even if they’re not vegan (or vegetarian, or paleo, or grain-free, or low-carb, or low-fat, or…)
  • It isn’t a fad. I kind of get sick of the fad diets that circulate… and sometimes re-circulate. Most of them hinge on some “revolutionary” concept or idea that will change your life and your health, and help you lose all kinds of weight. Meh. Not interested. VB6, while I suppose it definitely could become a fad, isn’t based on any new idea, and it doesn’t eliminate entire food groups (carbs, fat, grains, meat, etc.). It doesn’t have its own terminology, and you don’t need a new cookbook with special ingredients made just for it. No, it’s just a simple way to eat what you always knew you should (fruits and vegetables) without restricting all the foods you think you shouldn’t. It’s just a structured way to go about doing what you’ve always intended to do.
  • It isn’t rigid. Some meal plans and diets are so rigid, you have to follow a strict menu. Or, like Weight Watchers, you have to calculate how much of certain foods you’re allowed to have, and how much elbow room you have to fit in the foods you really want to eat. Although Bittman explains the science behind such things as calories, fat, carbs, and the glycemic index, he is very adamant that there is no need to calculate those things as you go through your day, eating. If you stick to the basic idea, all those things will take care of themselves. Furthermore, there’s room for flexibility: if you want eggs and bacon for breakfast one day, then by all means have eggs and bacon! Just make your dinner vegan… or just figure one day isn’t going to ruin everything.

What I Like About VB6

  • I like that it is straightforward and simple.
  • I like that it doesn’t eliminate entire food groups.
  • I like that it’s not actually vegan. Because I don’t do vegan.
  • I like that it’s a simple shift in perspective that allows you to both eat what you should… and allow yourself to occasionally eat what you “shouldn’t”.
  • I like that it is very flexible and can be adapted to each individual’s desires, needs, and philosophies.
  • I like that it is a friendly way to force me to eat more fruits and veggies, because that’s what I need more of in my diet.
  • I like that Mark Bittman for the most part isn’t tied to the conventional view of dieting (either low-carb or low-fat, or counting calories, etc.).
  • I like that counting calories is not involved, because I personally think that’s a pointless activity.

What I Don’t Like About VB6

  • I don’t like the idea of being strictly vegan during the day. Vegetarian perhaps, but not vegan. (More on that in a minute.)
  • Although Mark Bittman debunked a lot of common dieting myths in the book, and although he admitted that saturated fats don’t appear to be as evil as they’ve been portrayed for the last few decades, he still insists on keeping saturated fats to a minimum and encourages the use of vegetable oils. While vegetable oils might seem to have a healthier profile, the truth is that they’re very unstable and extremely difficult to keep from going rancid. That means the bottles in the store are by and large already rancid… which means that they are full of free radicals… which cause cancer and a whole host of other illnesses. I appreciate his whole-hearted recommendation of extra virgin olive oil as the best oil to use, but I wish he hadn’t recommended against coconut oil, which is just as healthy of an oil, if not healthier. I also will continue to enjoy butter, whole milk, bacon grease, and other products high in saturated fat simply because I don’t believe the saturated fat alone makes them unhealthy.

My Version of VB6

I’m not quite up to going vegan, even part-time! However, I’ve known for quite some time that eating lots and lots of veggies and fruits is really the best way for me to improve my health and my weight and unfortunately, I’ve had trouble really motivating myself to eat produce to the extent that I should. I think this concept could be the kick in the pants I need to help me get in all my fruits and veggies on a regular basis, without sacrificing other dietary pleasures.

So I decided to compromise by going vegetarian - rather than vegan - during the day. In the book, Mark Bittman explains that he has three basic categories for food: Unlimited, Flexible, and Treat foods. The unlimited foods can be eaten at any time whenever they are desired and include most fruits and vegetables. The Flexible group contains foods like whole grains and certain fruits and vegetables that are more calorie-dense or high in sugar. Those can be enjoyed every day, just in smaller quantities than the Unlimited foods. Then there are the Treats, which are only enjoyed at dinner time. In his plan, dairy products and eggs are considered treats, but I moved them up to the “Flexible” group, so that I can have cultured dairy (kefir and yogurt for now, but I want to try my hand at cultured butter, too) and eggs for breakfast or lunch if I want. Personally, I believe that grass-fed dairy and pastured eggs have great health benefits and I don’t want to reduce them from my diet that significantly.

I’m also not exactly sure what to put in my coffee. I have never found anything that quite gives coffee the creaminess I love like cream or whole milk does. So either I’m just going to be stubborn and continue drinking cream in my coffee, or I will experiment with dairy-free alternatives. We’ll see!

So here’s my personal VB6 plan, (which I guess I should actually call “VB5” because sometimes we eat dinner at 5):

  • Vegetarian foods only until 5pm. This means I will enjoy fruits, vegetables, whole grains, cultured dairy, and eggs only. No meat or meat products during the day.
  • Also no sugar until 5pm. Healthier sweeteners like maple syrup and honey can be enjoyed in very small amounts, but otherwise, I will stick to stevia or no sweetener at all.
  • From 5-8 I give myself permission to eat whatever I want. This usually means a “normal” dinner and some kind of sweet treat for the day, usually homemade.
  • After 8, if I’m hungry, I will enjoy a high-protein snack because when I eat sugar or carbs late at night, it shows up on the scale the next morning!

And that’s it! Simple, and yet kind of profound in a way, as well. If it turns out that my plan isn’t as effective as truly going vegan… then I might reconsider. Might. Depends on how desperately I want to lose those last few pounds of baby weight.

What do you think? Would you be willing to go vegan (or vegetarian) during the day?

Take a Staycation… One Day at a Time!

Except for the occasions when we’ve joined one or the other of our families for a “real” vacation, my DH and I have mostly enjoyed “staycations” throughout our married life. This year is no different, except that instead of taking one whole week to enjoy our staycation, we’re spreading it out through the summer. My DH’s work schedule is kind of erratic, so we take our little mini staycations whenever he has a day off during the week. Our goal is to go somewhere one day a week throughout the summer, but in reality, it will probably be slightly less than that. Still, we plan to pack our summer full of fun and exciting memories despite the fact that we’re not truly “going on vacation”.

Just in case you are in a similar boat (no time off, no money, no inclination for a real vacation), here are some ideas to help you enjoy your summer anyway! And on the cheap, too, of course, because that’s how I roll.

Family Self Portrait taken at Maymont Estate in Richmond, VA

1. Scout Out NearBy Tourist Spots

We are lucky to live in an area where we are approximately 2 hours away from a whole host of hot tourist spots: Washington DC, Baltimore, Annapolis, Richmond, Gettysburg, the Shenandoah Valley, and more. Day trips to places like Williamsburg or the Eastern shore are not out of the question. Not to mention the whole host of local, lesser-known historic towns and spots that boast all sorts of free or nearly-free touristy fun, like historic home tours, botanical gardens, zoos and the like. So we can literally spend the whole summer being tourists in our own town without visiting the same place twice.

You may or may not be so blessed, but I bet if you take the time to look at your area through the eyes of a tourist, you’ll find more options than you thought possible for stay-at-home fun, entertainment, and even learning. Chances are, the city (or big town) nearest to you has a website (or possibly even an app) with all sorts of tips on the best sites for tourists to see. Find favorite local spots like restaurants, historic homes, parks, recreation, museums, and more.

Don’t forget to think outside the immediate area as well. Decide how far you’re willing to drive for a day trip (maybe an hour? Two? Three, perhaps?) and widen your scope to check out what’s available in that radius.

Depending on what sort of things your family likes to do, you might enjoy any of the following types of tourist spots:

  • national/state parks
  • museums
  • historic homes
  • gardens
  • nature preserves
  • zoos
  • amusement parks or entertainment parks
  • historic old town centers
  • scenic drives
  • natural sites (like caverns, waterfalls, and the like)

He found a car just his size at the local coffee shop car show.

2. Visit Favorite Local Haunts

Let’s switch gears a little bit and get hyper-local here. Whether or not you’re already plugged into the local scene, make it a priority to visit all of your town’s hot spots this summer. I’m talking about the ice cream parlor that has lines out the door every day through the season, or the pizza joint that everybody knows about and has been to at least once. What’s the favorite playground or park that all the mommies know about? The coffee shop that’s crowded on Saturday mornings because of the uh-may-zing donuts and fresh lattes they carry? (Or maybe, as in my case, the local coffee shop that hosts a car show every Saturday morning? Now that’s a fun - and free - summer activity!)

If you don’t know where these local favorites are, you can find them simply by giving a little shout-out on Facebook. Your friends should be able to point you in the right direction. Or if your town newspaper/magazine hosts a “Best of” contest every year, check those out.

Cheap Fun: Train Rides at the Mall

3. Plan a Day of Fun

You don’t even need to “get away” for your day-by-day staycation! Really, all you need to do is plan a day around activities that are enjoyable to everyone in your family, and just a little different from your usual routine. Think about what your perfect relaxing day would look like, and make it happen!

Here’s an idea for a “Staycation Schedule”:

  • Sleep in.
  • Enjoy brunch at a leisurely hour.
  • Go to a local pool for the afternoon (or play water games in your back yard). AND/OR go to the mall and get cheap carousel rides or train rides, or play in the mall’s playground.
  • Make everybody’s favorite food for dinner as a family.
  • Go to the town’s free outdoor concert or movie (many towns host these on a weekly basis through the summer).
  • Finish the day by “camping” in your own backyard. Borrow a tent if you don’t have one, or put sleeping bags in the living room!

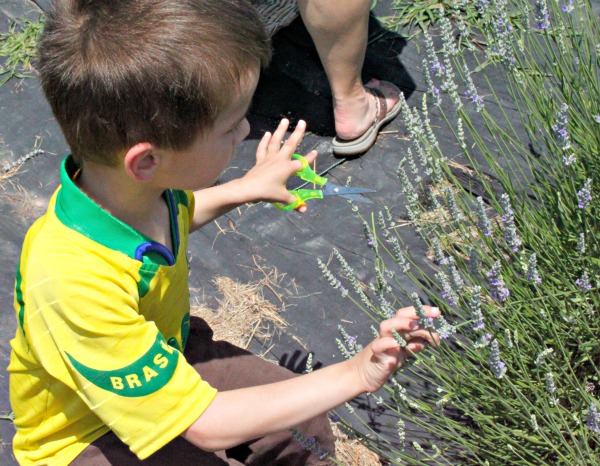
A day trip to a lavender farm, sponsored in part by a daily deal my sister bought.

4. Check Daily Deal Sites

Sites like Groupon, Eversave, Living Social (and/or the local version in your area - around here, we have Specialicious) are a great source of good deals on local entertainment. You’ll get vouchers for at least half off to such local places as:

  • restaurants
  • bowling
  • mini golf
  • local events
  • concerts
  • sporting events
  • classes
  • pool/water parks
  • and lots more!

Using deal sites like this might make summer fun activities affordable for your family when they wouldn’t be otherwise. We’ve used these deal sites to get half priced entry to the local water park, which The Boys absolutely loved! It’s not something we’d pay full price for, but half price was totally do-able, and definitely worth it.

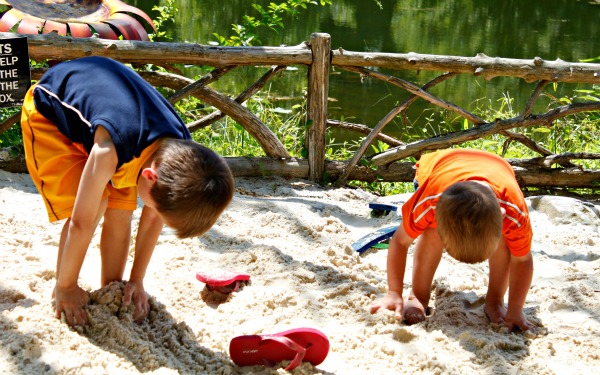
Playing in the sandbox at the local botanical gardens.

5. Attend Local Festivals & Events

It seems like there’s always a festival nearby around here. Some of them cost, some of them don’t. Some of them are worth it, some of them are not! The county fair is always free, and is always fun for the kids - animals to pet, shows to watch, and exhibits to enjoy. Other festivals celebrate local crops or industries, or even just townships. Do a quick Google search by combining your town or county’s name with the word “festival” and you’re sure to find some fun events to attend this summer.

5 Summer Uses for Lavender Oil

Summer is a wonderful time of year… but personally, I kind of dread it because it comes with some unfortunate baggage. You know, stuff like bugs (Ticks! Mosquites! Spiders! Yuck!), poison ivy, heat, heatstroke, heat headaches, sunburns… yeah, all that stuff I don’t really like.

This year, though, I’m armed and ready to actually enjoy all our summer adventures (we’ve had some really fun ones thus far)! Bugs begone! Sun, you will not burn me, nor will you give me a headache. And if you do, I know what to do!

The difference between this summer and all the summers before? Lavender essential oil. I made sure to have a full bottle on hand before summer began, and I’ve already put it to use on multiple occasions. Good thing each bottle has more than 100 drops of oil in it!

You can purchase a bottle of Young Living Lavender Oil here for just over $30 (it lasts a long time and is good for just about any malady). If you’re a YL distributor, the price drops to $23.50; click here to learn more about being a distributor. And if you just want more information about Young Living’s lavender oil, then this is the link you want. And clearly, with the exception of the last link, those are affiliate links. I’m sure you figured that out already but I have to tell ya just in case.

5 Summer Uses for Lavender Oil

1. Bug Spray

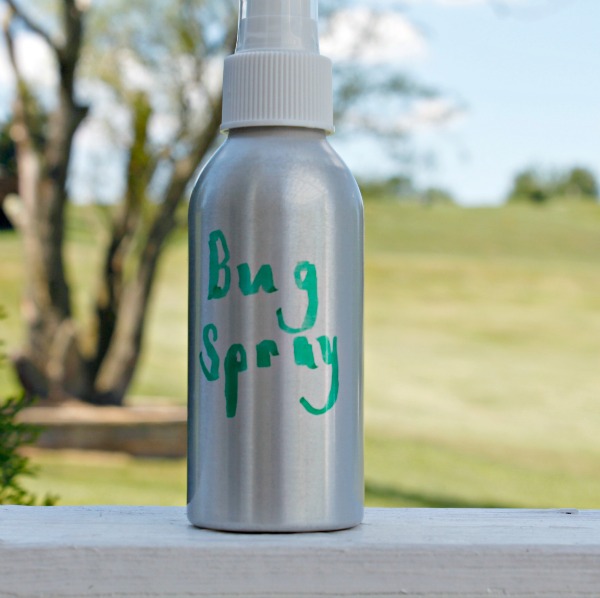
Lavender is apparently one of those fragrances that bugs just don’t like, so you can use it in bug sprays or diffuse it during outdoor gatherings. The picture above is actually a bug spray that I made using different essential oils besides lavender… but if you don’t have the Purification and Thieves oil (or you don’t like their scent) required for that recipe, you can try this Lavender/Citrus Bug Spray from Surviving the Stores or this even simpler bug spray made with only lavender oil and water (it can be used to freshen sheets OR keep the bugs away - I love a multi-tasker!).

Don’t want to bother with mixing up sprays and potions? No problemo! Just dab some lavender oil (neat or diluted) right on your wrists, neck, ankles and any other place you want to keep the bugs away. That’s all there is to it!

2. Insect Bites

And if the bugs break through your lavender-scented barrier? Guess what? It works to relieve the itching and heal the bite, too. Cool, huh? Lavender is the oil of choice for the majority of bug bites, including those form mosquitoes, gnats, chiggers, ants, and even spiders! For tick bites, you’ll want something stronger, but lavender will do the trick for most any other bug bite.

Since lavender is gentle on the skin, you don’t even need to dilute it (but you can if you want it to stretch further). Just put a dab on the bite as needed.

3. Sunscreen

I haven’t made my own sunscreen yet, but once I’ve finished up with the bottle of natural sunscreen I recently purchased, I’m definitely going to be trying my friend Mary’s super-simple recipe for homemade sunscreen. If you click on that link, you’ll find she has several different options, but the most basic one is just a mixture of lavender essential oil and coconut oil. (Yes, coconut oil. Don’t confuse plain old coconut oil with the coconut-scented tanning lotions of the past.)

4. Sunburn Relief

My DH never used to be burned by the sun, but I think I’ve rubbed off on him. Or maybe he’s just getting older. Or maybe he doesn’t have the chance to develop a base tan like he used to. Whatever the case, earlier this summer after an afternoon at the pool with The Boys, he had a terrible (and I mean terrible) sunburn. I felt so bad for him! Thankfully, though, I had my full bottle of lavender oil ready to be put to use.

Once or twice a day, I would massage some lavender oil into his shoulders where the worst of the burn was. Then I’d follow it up with some coconut oil. I’m not sure how quickly it would have healed without using those oils, but the heat from the burn cooled down within a day or so, and then the redness was gone in a few more days, after which it started peeling.

Clarinda shares how lavender helped heal her sunburn as well.

5. Headaches

The sun always gives me a headache. Probably it’s because I’m chronically dehydrated or something of the sort, but in any case, I don’t stay out in it too long if I can help it. But when I do get a headache, I turn to lavender oil. (Peppermint is apparently good for this, too.) All I do is put a drop or two on a cotton ball and take a deep breath of it every few minutes until the headache is gone. It usually takes about 10-15 minutes for the headache to disappear completely and then I’m good to go.

**Lavender Essential Oil photos courtesy of Young Living Essential Oils.

**I’m not a doctor, and I’m not trained to give medical advice. Follow these suggestions at your own risk, or ask your doctor for his/her opinion.

Oxygen Bleach, My New Favorite Household Cleaner {PLUS Giveaway!}

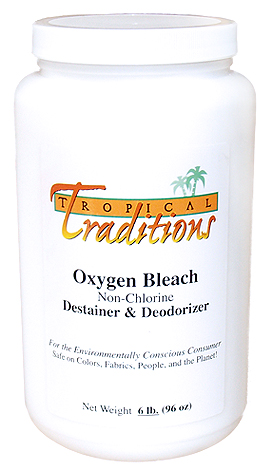
Oxygen Bleach has recently become my most favorite household cleaning ingredient. When I first started using oxygen bleach, I bought the cheap stuff at the dollar store; and while it was effective, I quickly realized that it was not pure oxygen bleach. Since I couldn’t figure out exactly what was added to it, I opted to be safe rather than sorry, and go for the good stuff.

Thankfully, around that time, Tropical Traditions offered to send me a big container of their oxygen bleach. I jumped at the chance, of course! And I am so glad I did! Since then, I’ve had the opportunity to try another natural brand of oxygen bleach, and I have to say the Tropical Traditions Oxygen Bleach was of significantly higher quality. It cleaned better and left less residue behind.

What do I do with my oxgyen bleach? The better question is, what don’t I do!? But here are a few of the household uses I have found for my bucket of oxygen bleach:

Clean carpets quickly and easily with oxygen bleach. Oxygen bleach has become just as essential to me as vinegar and baking soda in my selection of household cleaning supplies, and that’s saying something! To compete with those workhorses means a product has to be multi-purpose, effective, inexpensive, and easy to use, and oxygen bleach is all of those things. To be fair, it does cost more to purchase than either vinegar or baking soda, BUT you typically only need to use a tablespoon or less at a time, so it lasts forever. My big container from Tropical Traditions probably lasted a good six months.

Tropical Traditions Oxygen Bleach Giveaway

So you have the opportunity to win your own container of Tropical Traditions’ Oxygen Bleach! Lucky Ducky You! Please fill out the Rafflecopter below to enter the contest. This contest is only available in the US. This contest ends at midnight, Sunday, July 14, 2013.

And now for some legalese before the giveaway begins:

  • If you order by clicking on any of my links and have never ordered from Tropical Traditions in the past, you will receive a free book on Virgin Coconut Oil, and I will receive a discount coupon for referring you.
  • Tropical Traditions provided me with a free sample of this product to review, and I was under no obligation to review it if I so chose. Nor was I under any obligation to write a positive review or sponsor a product giveaway in return for the free product.

If you are not familiar with Tropical Traditions, here’s some info about this great company that provides high-quality food and household goods for those seeking to avoid chemicals and other additives:

  • Tropical Traditions: The Best Place to Get Virgin Coconut Oil
  • How to Use Coconut Oil
  • What is Virgin Coconut Oil?

Note: If you’re having trouble accessing the giveaway below, try entering via my Facebook page.

a Rafflecopter giveaway

5 Potty Training Tips

This post contains affiliate links. 5 Potty Training Tips

Potty training. The very words tend to elicit groans from even the most seasoned parents. It’s not exactly the funnest stage of toddlerhood, not even close. However, if one wants to get from Point A (Diaper World) to Point B (Underwear!) - kind of essential to daily life at some point before the age of 5 - one must go through the Land of Potty Training.

I have potty-trained a total of 2 children in my life, so I do not by any means consider myself an expert on the subject! In fact, I have no advice of my own to offer. However, before I ever embarked on the Great Adventure of Potty Training, I did some serious thinking and studying and learning. There was no way I was about to attempt something so seemingly complicated without a hefty store of knowledge on my side! I spoke to countless moms who had been there and done that, moms in real life, and moms online. I read blog posts. I read articles from experts. I even read a book or two. I sifted through all the information given to me (and wow, was it a lot!), found the common threads, and came up with my own potty-training philosophy. And then, with a heavy dose of apprehension and skepticism, I dove in.

And I was successful! Twice! With Boys! And they were only two years old!

Honestly? I still kind of can’t believe it. Everyone - and I mean everyone - warned me how difficult it was to potty train boys. I was seriously dreading the whole entire process, and could not believe my good fortune when the deed was done. And in a relatively short amount of time, too! I have to say that it was so much easier than I had been led to believe, and success came much more quickly than I expected.

And it’s not because I’m SuperMom. Ahem. No way. It’s because all those mommies and experts I consulted were totally onto something… and I was smart and listened to them!

So now, I’m going to give you the nuggets of advice that were given to me that were such a tremendous help, and, I think, were so effective in our potty-training endeavors.

Tip No. 1: Use Cloth Diapers

Truthfully, I believe the fact that we used cloth diapers is the number one reason both my boys were so easy to potty train. I didn’t even use them exclusively (my younger son struggled a lot with diaper rash, so I used disposable diapers fairly frequently with him), but I don’t think anything else can prepare a child for successful potty-training like cloth diapers can. When wearing cloth, an infant and young toddler can learn to recognize and associate the feelings of needing to pee and poop with the sensations of a wet and dirty diaper. Since disposables pull the moisture away from the bottom, it’s a lot harder for a small child to feel a wet diaper and create those associations. (By the way, my friend Erin has written THE ultimate resource on cloth-diapering if you want to look into that.)

But if it’s too late, and you haven’t been using cloth diapers, don’t despair! There is still much you can do.

Tip No. 2: Timing is Everything

One of the most oft-repeated pieces of potty-training advice is “Wait until your child is ready”, and there is much truth to this. You will only frustrate yourself and your child if you attempt to start potty-training before they are physically and emotionally ready… not to mention mature enough! I think it’s also easier the more verbal your child is, and the more easily he or she can communicate. I actually first attempted to potty-train my younger son right after he turned two, and while he was physically ready… he was definitely not mature enough, so we paused the potty-training and waited a few more months.

Typically, a child is physically ready to potty-train if they exhibit the following signs of readiness:

  • fewer diaper changes (indicating they have more control and can hold it)
  • communicating when they need a diaper change and/or insisting on a diaper change
  • knowing when they need to go and indicating that by finding a special place to do their business
  • understands his/her bodily functions
  • can follow directions
  • is physically capable of pulling pants up and down, sitting on the potty, etc.

Many parents take this advice to heart and wait until their child is 3 or even 4 years old before attempting to potty-train, but there are 2 sides to this timing coin. Prior to the age of 3, the average child tends to be a little more cooperative and malleable in their character. As toddlers get older, they gain independence with every new skill, and with that independence comes a fair amount of stubbornness and obstinance. Those character traits will not be on your side when you begin attempting to potty-train!

Furthermore, prior to the advent of disposable diapers (see Tip #1), the average age of potty-training in the United States was 18 months. (Read Diaper-Free Before Three for in-depth information on the history of diapering and potty-training in the United States.) It’s only been in the last few decades since disposable diapers have become the norm that the average potty-training age has doubled!

By the way, before I read that statistic, I had intended to wait until the age of 3 or so before attempting to potty-train, assuming it would be easier then. The fact that previous generations had continuously and successfully potty-trained their babies a lot sooner than that convinced me that there was no real need to wait until my children were “old enough”.

Tip No. 3: Get Your Child Ready

Here’s the step I think a lot of parents miss. They see the wisdom in waiting for their child to be ready, so they watch and wait for the signs of readiness, all the while unaware that they as parents can do an awful lot to help their child get ready. Instead of passively waiting for your child to show you he or she is ready (which could take forever), there are plenty of steps you can take to ensure your child is ready for potty-training long before they reach the age of 3:

  • Purchase a child-size potty (or a contraption that fits on the regular toilet) as soon as your child is capable of sitting up (I’m serious!), and give them plenty of chances to use it. At the very least, have them sit on it whenever they take a bath. If you have time when you’re changing their diaper, have them sit on it for a little while. Whether or not they do anything on it is immaterial at first; it’s just the whole concept of sitting on there and becoming familiar with it.
  • If your child exhibits signs when they need to go (mine never did), then watch for those cues and put them on the potty as soon as you can.
  • Talk to your child incessantly about their bodily functions. Whenever I changed my boys’ diapers, I talked about that part of their body and its function, and I talked about how it felt when their diaper was wet or dirty. I talked about what was in their diaper and the difference between a clean and dirty diaper. We talked “potty talk” a LOT!
  • Give your kids opportunity to observe an adult doing their business. It might be awkward, but it helps them understand the proper way to go about things.
  • Make it clear that you expect your little one to - sooner or later - learn to do their business in the potty and not in their diaper. They need to understand from an early age that there’s an end to the whole diaper experience.

If you begin putting into practice all those elements from an early age, your child will be “ready” to potty-train a lot sooner than if you just let time go by without so much as a mention of the whole concept. Both of my boys started exhibiting signs of readiness around 15-18 months of age.

Tip No. 4: Don’t Use “Pull-Ups”

I learned this one when I was a teacher and wasn’t even thinking about having kids, let alone thinking of potty-training. Hands down - and it doesn’t take a study to prove this - the children I encountered who were having difficulty potty-training all used pull-ups. To a kid, a pull-up is just a diaper. It feels the same, no matter what you call it. There is no incentive to take care of their needs anywhere other than where they always have… in the diaper. And the longer they wear the pull-up, the more deeply those habits become entrenched.

As a mom, though, I recognize the need to get out of the house and go places with your kid even during the potty-training phase. Of course, you don’t want to be cleaning up messes while you’re out! A friend of mine has a unique solution - she puts underwear on her child first, then puts a pull-up over that. The sensation of cloth is there, but the pull-up helps contain any mess. I used this method on several occasions with my older son and it was very effective.

With my younger son, however, I just take him out and deal with the mess if it happens. I bring along a few sets of clean underwear and shorts just in case, but I dont’ have to use them very often. (It happens, of course, and usually when you least want it to!)

Tip No. 5: Get Down to the Bare Essentials

And by this I mean, your child should have nothing on from the waist-down when you first begin to potty-train. I have to admit, I ignored this advice with my first son, and just kept him in underwear (no shorts) the first few days of potty-training. He had no problems grasping the concept of using the potty, though, and I didn’t even think about it when I started potty-training Son #2.

Then the common sense underlying that advice began to make perfect sense to me! Even a small child doesn’t want to experience the mess that is made by eliminating all over his legs and onto the floor, so foregoing underwear is a definite incentive for using the potty! Our little Tiger Cub (which is what we call the aforementioned Son #2) was very happy to do number one in the potty whenever he needed to, and that part was relatively easy to train. Going number two in the potty was another story altogether! He eventually discovered that going just a little at a time in his underwear was a lot more comfortable than going in the potty. However, when we removed the security of his underwear, he didn’t have any choice but to relieve himself in the right place. Periodically, he’ll test us on this, so we’ll take off his underwear until he poops in the right place. It takes less time each time, and the occasions when we need to do that are becoming fewer and farther between.

BONUS TIP

Of course, the very next day after I wrote this post and scheduled it to publish, Tiger Cub had a serious regression in his potty-training. Prior to that point, he had been regularly doing all his business on the potty, needing only occasional encouragement on our part, with rare accidents. Then, suddenly, he seemingly forgot HOW to go in the potty. He would run into the bathroom, and then just stand there while he did his business. Even worse, he both peed AND pooped in his underwear. At church. In the nursery.

*sigh* After a great deal of mental angst and deep pondering, it occurred to me that just a day or two prior to that, my DH and I had stopped rewarding little Mr. Tiger Cub with Skittles (his treat of choice - it’s amazing how motivating one little ball of sugar and additives can be!) every time he peed on the potty. Aha! Little Mr. Attitude apparently decided that if we weren’t going to reward him every time he did what he was supposed to… well, then, he just wouldn’t.

We have since reinstated the Skittles, and Tiger Cub appears to be recovering his ability to do his business in the right place. Moral of the story? (And the BONUS TIP?!) Keep up the incentives until your kid is good and potty-trained. And I mean GOOD and POTTY-TRAINED!

As I consider our approach to potty-training and the road bumps we encountered (or avoided) along the way, I believe these 5 tips have made the difference between success and failure for us. I hope they are as helpful to you as they have been to me, and I wish you the best of luck in your potty-training efforts!

Allergen-Free S’Mores Stars

This post originally appeared on my food allergy blog in 2011. S'Mores Stars

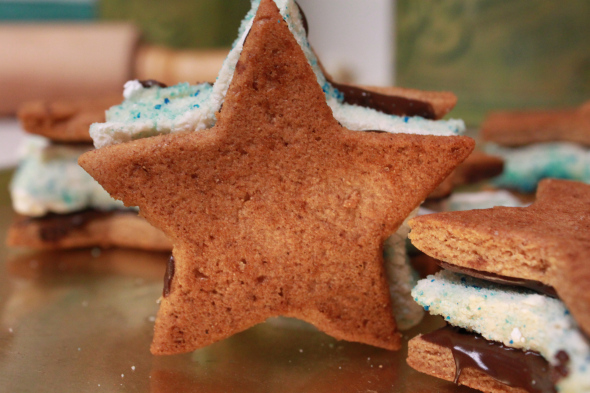
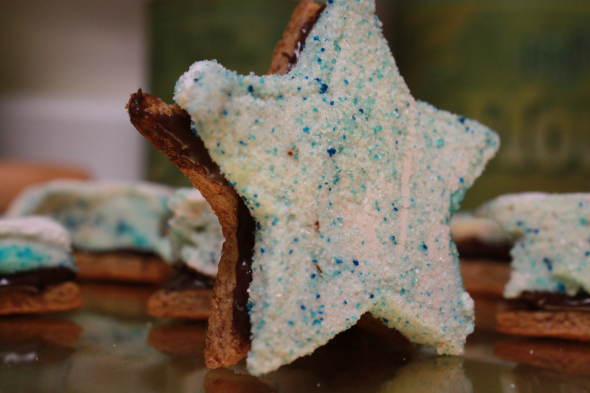
These babies are a lot of work, but totally worth it for a spectacular Fourth of July celebration! Everything is made from scratch, except the chocolate, which is just melted chocolate chips. If you want to make these, plan on making the marshmallows first (giving them adequate time to set), then the graham cracker stars, and then assembling them.

I found the marshmallow recipe on Food.com, and made it pretty much as it described. I like that it’s also corn-free, which I think is healthier, and also great for those with corn allergies/sensitivities.

Corn-Free Marshmallows

Ingredients

  • 2 TBSP gelatin
  • 1 cup cold water, divided
  • 2 cups sugar (I used raw)
  • 1/4 tsp salt
  • 2 tsp vanilla
  • powdered sugar or colored blue sugar
  1. Pour 1/2 cup water in a small bowl, and sprinkle with gelatin. Set aside.
  2. In a large saucepan, stir together sugar and remaining 1/2 cup water. Cook over medium heat until dissolved, stirring constantly. When sugar is dissolved, add gelatin and bring to a boil, stirring occasionally to keep it from sticking to the bottom. Remove from the heat, and pour into the bowl of a stand mixer; allow to cool to room temperature.
  3. Stir in salt and vanilla, then beat on high speed with the whisk attachment until fluffy and doubled in volume, about 10 minutes or so.
  4. Sprinkle sifted powdered sugar over the bottom of a 9×13 pan and pour marshmallow mixer into it, smoothing the top. Allow to set until you can touch the surface with your finger and it doesn’t stick.
  5. Using a greased spatula to help release it from the pan, turn marshmallow onto a surface sprinkled with either more sifted powdered sugar or colored blue (or red) sugar. Cut out stars with a metal star-shaped cookie cutter, dipping it into a bowl of hot water in between each cut. Roll each star in your sugar of choice until all surfaces are covered.


Blue S'Mores Stars For the graham cracker stars, I simply used my allergen-free graham cracker recipe and rolled and cut it into star shapes instead of squares. If you don’t need an allergen-free recipe, try this graham cracker recipe from Smitten Kitchen.


Allergen-Free Graham Crackers

Ingredients

  • 2 1/4 cups sorghum flour mix
  • 1/2 cup turbinado (raw) sugar
  • 2 tsp cinnamon
  • 1 tsp baking powder
  • 1/2 tsp xanthan gum
  • 1/2 tsp baking soda
  • 1/2 tsp sea salt
  • 7 TBSP coconut oil
  • 3 TBSP cold water
  • 3 TBSP honey
  • 1 tsp vanilla

Instructions

  1. Whisk together dry ingredients in a large mixing bowl. Add coconut oil and blend with pastry blender until mixture is crumbly.
  2. Add remaining ingredients and stir until dough can be manipulated into a soft ball, adding cold water 1 TBSP at a time if necessary.
  3. Cover dough and refrigerate one hour.
  4. Roll out half of the dough into a large rectangle between two plastic zippered bags (Rip the bags down the sides to form long sheets of plastic. This is sturdier than wax paper or plastic wrap). Leave it pretty thick, around 1/4″ or so. Peel off the top bag, and use a star-shaped cookie cutter to cut out stars. Continue until dough is gone.
  5. Place the stars on lightly greased cooking sheets and bake in a 325F oven for 10-15 minutes or until golden brown. Remove from the pan to cool on a wire rack.


S'Mores Stars Chocolate

1/2 cup safe chocolate chips

Melt the chocolate chips at in the microwave at 50% or 60% power, stirring every 15 or 20 seconds. Use immediately.

To Assemble:

Use a knife to spread a small amount (about 1 tsp or less) onto the surface of a graham cracker star. Immediately top with a marshmallow. Leave as is, or spread chocolate on another graham cracker star and place it on top of the marshmallow to form a complete sandwich. Allow to cool until the chocolate is set.

All Natural Homemade Bug Spray

This post contains affiliate links. I don’t like bugs. I don’t like them in my house, and I most certainly do not like them on my person.

However, bugs like me. They like me very much. They seem to consider me a veritable feast free for the taking, and I find that rather presumptuous of them.

Henceforth and therefore, I do what I can to keep them as far away from me as possible. In the past, this has meant, spraying myself all over with foul-smelling chemical-laced sprays that accomplished absolutely nothing. I was still a bug feast. Then I tried natural-ish (or at least DEET-free) bug sprays that still smelled pretty foul, and the same result. The bugs still bit me!

I figure, since the chemical sprays accomplished absolutely nothing, what harm could an all natural, homemade bug spray made out of essential oils do? The worst thing that could happen is that bugs would feast on me yet again, right?

And you know what? NO BUGS! I made myself a bottle of this bug spray recipe from Surviving the Stores, and have used it 3 times this summer. NO BUGS! Not even one!

And three times isn’t a lengthy track record by any means, but for me, it’s huge. (Remember; bugs love me!) Also, consider the 3 occasions I have used it thus far:

  1. At a lavender farm, where we picnicked and walked around lavender gardens and generally spent a great deal of time right up in a bug’s natural habitat.
  2. On an evening walk around the neighborhood, which is where I would typically have the biggest problem.
  3. On a walk through a local botanical garden, which is all outdoors and provides a beautiful habitat for all sorts of creatures… including bugs that bite!

I don’t think a bug even landed on me, and I haven’t been bitten even once this summer (which is quite the feat for me, I promise you!). I’m totally sold on this essential-oil-based bug spray and am excited to share it with you.

Note: To preserve the maximum effectiveness of the oils you’ll be using in this spray, I recommend you get a bottle such as this one intended for use with essential oils.


Thieves and Purification are two Young Living oil blends that I always have on hand:

  • Thieves oil is a blend of clove, cinnamon, rosemary, lemon, and eucalyptus oils and is famous for its ability to assist your immune system to both prevent and heal illnesses of any kind. Many people use it as an antiseptic type of spray as well, so not only does it protect you from insect bugs, it protects you from germy bugs!
  • Purification oil is a blend of citronella, lemongrass, lavandin, melaleuca, and myrtle. Purification is a great bug deterrent, but it can also be used to heal and soothe bug bites of any kind.

If you don’t have these oils on hand, you can purchase them here. You’ll notice right away, I’m sure, that the total combined cost is close to $70! “Seventy bucks for bug spray?! What?!” I hear you say. I know, I know, but consider this:

  • Each 15 ml bottle contains at least 320 drops of the oil, and you are only using 5 drops of each in this recipe. That means you could make more than 60 bottles of bug spray with these 2 bottles of oil! (Try buying 60 bottles of bug spray for $70.)
  • But of course you don’t need nearly that many bottles of bug spray unless you live on a campground, so it’s a good thing those oils have a lot of other uses. I dilute Thieves oil and put it on our feet whenever anybody in the house comes down with some kind of illness. I also make a spray out of Thieves oil, and use it like a disinfectant during the flu season, spraying it on door knobs and light switches and other often-touched surfaces. When Thieves oil is diffused, it disinfects the air in your home and helps prevent illness. Purification is good for keeping insects out of your home, too! I put some on cotton balls and set them in the corners of windows where the ants like to come in. I also recently used Purification to help heal a bout of poison ivy I had. You will soon find these essential oils to truly be essential!
  • Also consider becoming a distributor of Young Living oils, rather than simply a customer. After your initial starter kit purchase, the only obligation you have is to purchase $50 worth of oils within the next 12 months. That’s all it takes to maintain your distributor status! Or, if you choose, as a distributor, you can enroll in essential rewards (an auto-ship program) and get discounted shipping plus earn rewards and bonuses and maybe even get some free oils! Click here to enroll as a distributor. (Psst! The Everyday Oils starter kit comes with both Thieves and Purification plus 7 other awesome oils!)

Here’s to a happy, bug-free summer!