Archives for September 2013

5 Ways to Remove Labels

This post contains affiliate links and other assorted money-making madness.
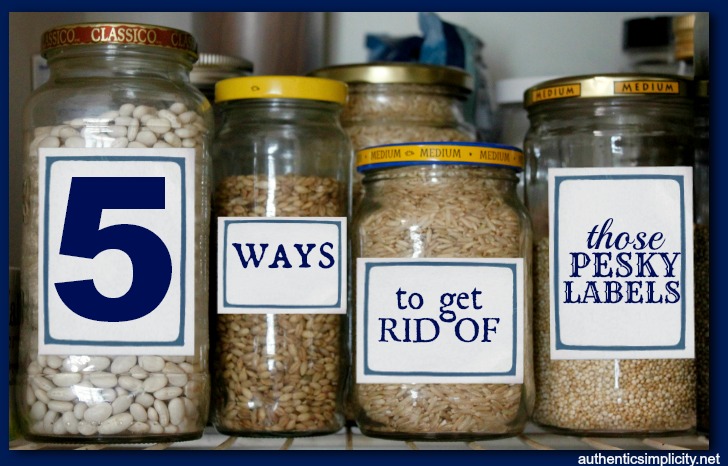
Remove labels from jars You know how I love to keep my pantry (which I actually don’t really have right now…) organized with glass jars, right? I waxed eloquent about it in this post: How I Organized My Pantry for Free with Empty Glass Jars. If you open up my fridge or any of my cupboards, you’ll see dozens of glass jars hard at work containing all our food.

But those pesky labels can really drive me crazy! Some come off quite easily… others not so much. I’ve had more than my fair share of label scrubbing, and I’ve learned a few tried-and-true methods for removing them with minimal fuss.

1. Soak in Warm Water

This should be the first step in any case. Sometimes (Ok, most of the time), I skip the “soak” part and just hold the jar under running water. Sometimes (Ok, quite frequently), I run the jar - with the label- through the dishwasher. In any case, the whole point is that I get the label on the jar thoroughly wet with warm or hot water, and that is the first step in the label-removal process. If you’re lucky, this will be all you have to do! Some labels just slip right off after a good washing. Usually, you won’t be that lucky, though, so on to the next step.

2. Scrape the Label

Sometimes the label just needs a little help coming off the jar, in which case you’ll want to employ some kind of scraping tool. I’ve used all sorts of things: plastic knives, fake credit cards (the kind they send you in the mail hoping to lure you to sign up), and who knows what else. But my favorite tool is a sturdy pan scraper like these I found on Amazon. They are the ultimate label scrubber-offer, so everybody should have one. (Cuz I said so.)

At the very least, the scraper will help you get rid of the paper label itself, so that all you will have left is sticky gunk. Sticky gunk is no good, so hang on to that scraper (cuz you’re gonna need it) and try one (or more!) of the following options:

3. Use Coconut Oil & Baking Soda

Combine equal parts coconut oil and baking soda (say, 1 TBSP of each) in a small container until you have a paste. Smear the paste all over the sticky residue and let it sit for 15-20 minutes or so. Scrub it off, and hopefully the label and sticky residue will come off, too. If not, repeat the process until it does. And don’t forget to use the scraper!

4. Use Peanut Butter

Smear it all over the sticky stuff and let it sit for a while. Scrub it off and repeat if necessary. You can use the scraper again to help get off some of the more stubborn sticky yuckiness.

You can also use any other heavy fat (like shortening, or other nut butters) with similar success.

5. Use Lemon Essential Oil

Nowadays I usually skip options #3 and #4 and go straight for the big guns. Lemon Essential Oil* is the bomb-diggety when it comes to removing that sticky gunk left behind by all those labels. All you have to do is drip one little drop right onto the jar. Rub the drop into all the sticky gunk, then scrub it off under hot running water. Magic! You might have to repeat this process once or twice with really stubborn stickiness, but it is far more effective than either of the other 2 options. Oh, and don’t forget the scraper! It can come in handy here, too.

*Lemon Essential oil comes in a 15ml bottle for less than $15 (just over $11 if you are a distributor), and that bottle can have as many as 400 drops in it. You can use Lemon Essential Oil all over the house in all kinds of cleaning applications, so you definitely get your money’s worth out of it.
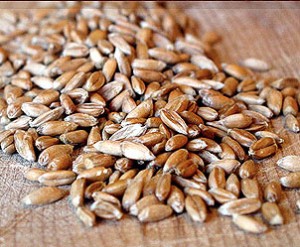
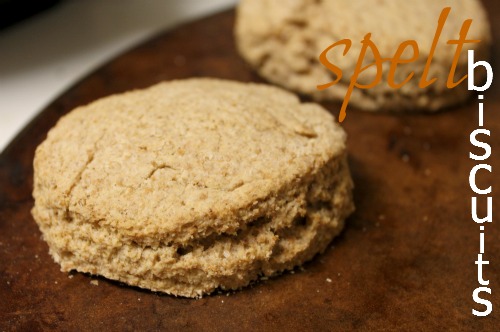
Spelt, The Delicious Whole Grain

So, let’s be brutally honest here. Among non-health-nuts (come on, you know your not-so-healthy friends call you that behind your back!), any mention of whole grains is likely to elicit a groan, a grimace, or maybe even a temper tantrum. Even among the healthiest of us (except for those who eschew grains altogether), we are forced to admit that in our SAD culture, the taste for whole-grain foods is an acquired one.

It’s true! Whole wheat breads and pastries can be slightly bitter in taste, and are almost always heavier in texture. If you want a really good croissant… it’s gotta be white flour, right? Let’s not kid ourselves now and pretend that whole wheat can make anything even close.

However, we also acknowledge the generally established truth that whole grains are much better for us than refined grains, and for lots of good reasons. Therefore we force ourselves to adopt the taste of whole grains and satisfy ourselves with occasionally less-than baked goods.

Well, I happen to think there is an alternative to this forced consumption of whole wheat, and that alternative is spelt.

Why Spelt?

I’ve waxed eloquent about spelt before , but let me sum up here:

  • Whole spelt tastes better than whole wheat. Period. I’ve been working through 50 pounds of hard white wheat berries for the past 6 months, and let me tell you - the difference between my sourdough bread made from the fresh ground wheatt flour and that made with the fresh ground spelt flour is the difference between edible and delicious. Clearly, this is all a matter of opinion, but my DH happens to agree, so that’s at least two of us! The loaves made with spelt are lighter in both taste and texture than those made with wheat. Everything else is exactly the same; the only difference is the type of grain used.
  • Spelt is just as easy to use as wheat. Many other alternative grains require adjustments of one kind or another when cooking, but I generally use spelt on a 1:1 ratio in all my recipes, and it usually turns out just fine. There have been a few times when I’ve had to add a little additional spelt to get just the right texture, but for the most part, if the recipe calls for a cup of flour, I use a cup of spelt flour.
  • In fact, spelt might be a little easier than wheat. When it comes to baking bread, spelt kneads a little more quickly than wheat does. Even knowing that, I was still surprised when my spelt bread dough was done kneading in my KitchenAid significantly sooner than my usual wheat-based dough. It kind of caught me off guard, to be honest, but it was a pleasant surprise! (Hence, one needs to remember not to OVER-knead when using spelt flour.)
  • Since it is more water-soluble, spelt is easier to digest than wheat.
  • Spelt is older than wheat. Way older. Unlike wheat, which has been hybridized over the years to be a very different grain from what it started out, spelt hasn’t changed since it was first cultivated thousands of years ago. I like things that have stood the test of time. Classics, they’re called, and they’re always good. You can read more about spelt here.

Spelt Recipes

I have a few tried and true spelt recipes here on the blog if you’re curious:

Vita-Spelt

I was recently privileged to sample a few high-quality spelt products made by Vita-Spelt, a well-established producer of all things spelt, and one of the companies that helped re-introduce it to the American public. I love Vita-Spelt’s passion for spelt, and the way they make it accessible to all of us.

  • PASTA: Spelt flour pasta is way yummier than whole-wheat pasta (although if I’m going to be 100% honest, it’s probably not *quite* as yummy as white-flour pasta, which most of us grew up with). Dinner guests will definitely find it more enjoyable than most whole-grain pastas available out there these days. It cooks up a little faster, too, which is a great time-saver. I tried Vita-Spelt’s whole spelt rotini, spaghetti, and macaroni noodles, and they were all fabulous!
  • SPELT BERRIES: In a word, awesome! If you have a grain mill, definitely try the whole grain spelt and see how it compares to wheat berries. Even if you don’t have a grain mill, the whole grain is delicious when cooked just like pasta and served in a whole-grain salad or pilaf.
  • SPELT FLOUR: The spelt flour was convenient and easy to use when I didn’t have time to grind up the berries. It was slightly darker in color than the freshly ground flour, but it worked just as well, and it’s a great option for anyone who doesn’t have a grain mill.

Win Some Spelt Products to Try For Yourself

Thanks to the generous folks at Vita-Spelt, one of my readers will win a case of spelt berries and flour to try for yourself! Whaddya think about that? Awesome, yes? Just fill out the Rafflecopter below for your chance to win and see if you like spelt as much as I do. (I know you will!) This contest is only open in the United States, and closes at midnight on Tuesday, October 1. Winner will be notified by email, and will have 3 days to respond, or another winner will be chosen.
a Rafflecopter giveaway

How to Bake With Stevia {Without Affecting Flavor}

How to Bake with Stevia Extract Almost a year ago, I wrote a post about how to convert sugar measurements to stevia for cooking and baking. All of the information in that post is true and accurate, but since then I’ve fine-tuned my routine a bit and developed a method for baking with stevia that doesn’t affect the texture or flavor of the final product. I’ve baked all kinds of things this way, and it seems to work across the board with all different kinds of recipes, so for the most part, this is how I bake with stevia.

1. Use Half the Amount of Sugar

The first step is to reduce the amount of sugar called for in the recipe by at least half. Now, for most conventional recipes, I already reduce the amount of sugar by as much as half anyway. So for the purposes of baking with stevia, I reduce the amount of sugar I would personally use by half.

For example:

  • A recipe calls for 1 cup of sugar. I think that sounds like a little bit too much sugar going on for that particular recipe, so I would probably only use 3/4 cup at most.
  • Since I’m going to also be adding stevia, I can reduce that 3/4 cup even more, and use 1/2 cup or less of sugar.
  • Most recipes can handle this without drastically affecting the final texture, but there are some recipes that for whatever reason will not work well with the reduced sugar. In those cases, I usually just forego that particular recipe!

If you’re starting with a recipe that’s already inherently fairly healthy and/or has been healthified, you can just reduce the sugar by half and move on to the next step.

2. Replace the Remaining Half of Sugar with Stevia

Now you can follow the conversion chart to replace the remaining amount of sugar the recipe requires.

For example:

  • The original recipe calls for 1/2 cup of sugar. You’ll put 1/4 cup of sugar in your batter.
  • You’ll add 1/4 t. of stevia to replace the remaining 1/4 cup of sweetener.

3. Proceed As Directed

Just finish up the recipe the way it’s written. You shouldn’t need to make any other adjustments unless you want to.

And that’s it! You’ve just significantly reduced the sugar in your baked goods without sacrificing taste or texture! It’s even better if you use a “healthier” sugar like coconut sugar or sucanat.

Stevia Plant

the stevia plant before processing into extract or powder

Where to Buy Stevia (Plus Also What Kind to Use)

I like to use liquid stevia (you can find either glycerin- or alcohol-based varieties), which is essentially an extract of stevia (like peppermint or vanilla extract). The powdered stevia goes through more processing and often has a bitter after-taste, so I stay away from it. (Plus, a lot of powdered stevia contains additional sugars which totally ruins the point.)

I usually get my stevia from one of the following sources:

  • Trader Joe’s (oh how I love Trader Joe’s!)- I *think* it costs around $7, but I’m not positive. I’ve had the same bottle for probably 6 months now, so I can’t remember exactly how much I paid. I do remember thinking it was an excellent price.
  • MOM’s - Mom’s Organic Market is a local chain and their stevia is actually a private label so I’m not sure the original manufacturer. I do know that their stevia tastes a lot better than other brands I’ve tried (NuNaturals, for example, which I like, but the stuff at Mom’s is better), so I’m thinking it’s probably from a more expensive brand that I haven’t tried yet, ha! The good news is that it is also priced very well (once again, not remembering the price, but remembering the impression that it was a great deal).
  • No access to either one of those stores? No worries! If your local health food store doesn’t carry reasonably priced stevia (and most of them don’t), you can order it online from Vitacost or Amazon (those are affiliate links right there). I ordered mine from both places before I was able to start purchasing it locally.

De-Odorize Stinky Carpets Easily and Naturally

I had never experienced stinky carpets in my life until recently… and whew! Not an experience I cared to repeat! And then… repeat it again I did. For some reason, our carpets (I don’t know if it’s because we’re in a basement apartment or what) seem to be particularly prone to collecting odors. What seems to happen is that moisture seeps into the carpet and never properly dries, thus creating a mildew-y nasty smell that can be tricky to eliminate.

Thank goodness for Google! I knew vaguely that baking powder was supposed to help with this problem, but wasn’t exactly sure how to go about it. Of course, every article I read had a slightly different approach to it, and some were more detailed than others, so in the end I kind of pulled my own method together based on what I read.

The first stinky carpet episode required several treatments (yes, it was that bad! The problem was that a drink had spilled underneath the couch, so we couldn’t find from whence the smell was emanating until it was really bad.). The second stinky carpet episode was significantly improved after just one treatment, and although it could probably use one more, I haven’t had the time to actually do that yet (on my lengthy to-do list…). So instead of actually doing it, I’m writing a blog post about how to do it. (Ha!)

The magic ingredient is baking soda. Yep, that’s it! I buy it in a big bag at Costco because I use it for all kinds of cleaning purposes. You’re gonna need a big bag for this particular project, too, because it uses up a LOT of baking soda.

I also added some Purification essential oil, which really helped a lot as well. You can add Purification or any essential oil, or you can just use the baking soda straight up.

How to DeOdorize Stinky Carpet

Here’s the process for de-stinkifying (that’s a word right?) your carpet:

  1. If moisture is involved (in my case, the first time it was), soak up as much of it as you can with rags.
  2. If you want to use essential oils (I recommend Purification), add a few drops to your baking soda (depending on the amount of carpet you want to cover, you’ll probably be using several cups of baking soda).
  3. Liberally (I mean liberally!) sprinkle pour baking soda over the affected area. Spread the baking soda around with your hands or a spoon (or a spatula, whatever gets the job done!) until all the stinky carpet is covered. Don’t be afraid to push the baking soda down into the carpet a bit; that will help it be more effective.
  4. Let it sit overnight.
  5. When you’re ready to clean it up, first use a broom and a dustpan to brush up as much of the baking soda as possible. Don’t try to vacuum it all up or you’ll run the risk of ruining your vacuum cleaner.
  6. When you have only a thin layer of baking soda left, vacuum it up.
  7. Once all the baking soda is removed, do a “sniff test”. Get your nose right up to the smelly spot on the carpet and take a whiff. Is it still stinky? Then repeat the process.
  8. Repeat as necessary until all odor is gone.

And there you have it folks: Better than Febreze or any other chemical-laden toxic carpet cleaner. Plus also, cheaper! Yeah, baby, that’s what I’m talkin’ ’bout.

5 Things I Buy at Whole Foods

As I mention in my book, Whole Foods can be a difficult place to shop if you’re on a really tight budget… BUT if you know what you’re looking for, and if you go armed with adequate resources, you can score some great real foods deals there.

First of all, let me say that not everything you can buy at Whole Foods is healthy! They carry a lot of processed stuff that might be organic and GMO-free, but it’s still processed and it’s still not that great for you. Furthermore, Whole Foods is definitely in it for the money, so profit will trump principle on occasion. Bear that in mind, and shop wisely.

Frankly, for all those reasons, I don’t really buy a whole lot at Whole Foods, but I do make a regular stop there during my monthly grocery shopping trip and pick up a few items. Which items, you ask?

These items:

1. The Friday Deal

Each Friday, Whole Foods holds a one-day sales event with one item at a great rock-bottom price. I don’t religiously stop there every Friday for their one-day deal, but I do try to pay attention so I know what exactly is on sale and if it’s worth stopping by or not. During blueberry season, they had organic blueberries for $1.99/lb, which around here is a fantastic price for conventional, let alone organic! I stocked up on the blueberries, and also on strawberries when they had a similar sale. The Friday deal in my area this week happens to be grass-fed ground beef for $4.99/lb, which is the lowest I ever see it, so again, I’m stocking up.

I have to say I’ve always been impressed by how well stocked they are with their one-day deals! I’ve gone late in the afternoon before, and they’ve still had plenty of the sale items left, which I really appreciate.

tuna pasta salad

2. Pole-Caught Tuna

I recently read that the best tuna in terms of sustainability and healthfulness is “pole-caught tuna” (more info in my post here), and was kind of bummed that 1.) I had no clue what that was and 2.) I had no clue where in the world to find it. After a bit of research, I discovered that Whole Foods carries pole-caught tuna… for only $1.49! Considering you pay at least that much for regular old junky tuna, that price is pretty awesome. Read more about Whole Foods’ seafood sustainability policies here.

3. Meat

While not all their meat is the ultimate in healthfulness (grass-fed, etc.), Whole Foods uses a “5-Step Animal Welfare” rating system on all their meat packaging that indicates how the animal was raised and treated throughout their life. Since that in turn can affect the healthfulness of the meat, it’s important information to know. And while their “Step 1” rating is probably only a step above the meat you can find in any other grocery store, it is at least an improvement… and sometimes it’s all I can afford! It’s just as affordable as meat sold anywhere else, and Whole Foods states that farms have to meet close to 100 standards to achieve even the Step 1 rating, so that is at least a small comfort to me. And when I can manage it or when it’s on sale, I like to buy their higher-rated meats as well.

4. Kerrygold Cheese

Whole Foods charges less than $3 for a 7oz package of Kerrygold grass-fed cheese, which is a really good price. Costco might have a better price, but you have to buy it in a significantly larger package, and if that package goes bad before you can use it… then it’s not such a great deal.

5. A Sweet Treat

OK, so I haven’t actually bought this yet, but my sister has, and I’ve enjoyed her generosity as she has shared it with me. She loves the bakery grab bags - a paper bag with several day old pastries for only $1.50! I’m not dumb enough to think that Whole Foods baked goods are significantly better than any other baked goods… but boy are they yummy!

What do you like to buy at Whole Foods?

Chicken Sandwich Spread {Dairy-Free!}

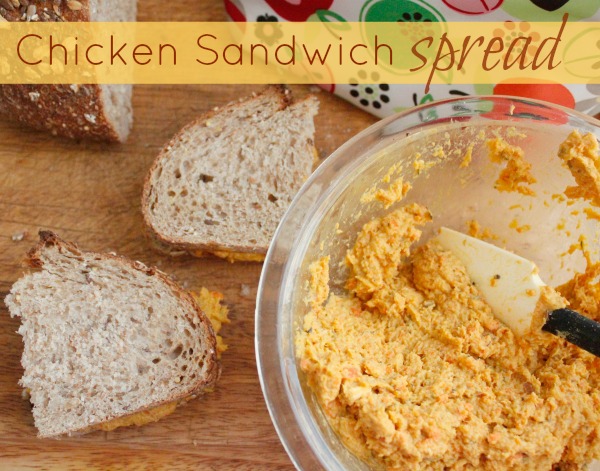
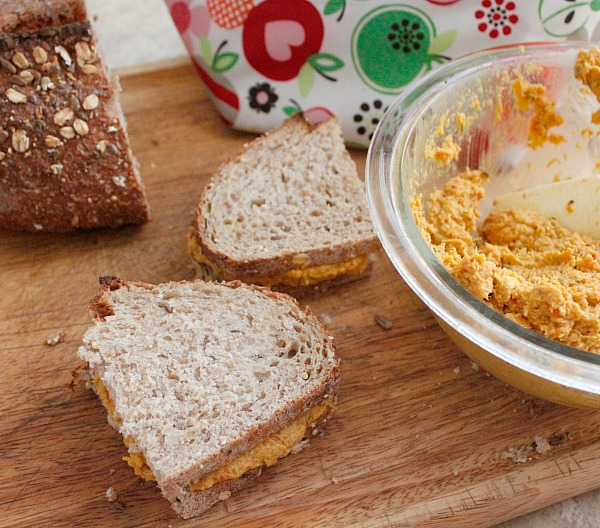
This post contains affiliate links because every little bit helps! Chicken Sandwich Spread Chicken salad - especially one with cranberries, apples, and walnuts in it - is one of my favorite uses for leftover chicken. Unfortunately, I don’t get the chance to make it very often due to my Certain Little Someone’s dairy and egg allergies. I’ve tried making it with dairy-free products like coconut milk yogurt and the like, but it just doesn’t taste the same.

A while back, though, I hit upon a unique solution that offers up the chicken salad taste but doesn’t require any dairy whatsoever: instead of binding the salad together with a mayonnaise or yogurt based dressing, all you have to do is blend the chicken with a little bit of broth to create a consistency perfect for sandwiches or crackers! Whether or not you have a dairy allergy or sensitivity, you’ll love this delicious take on the traditional chicken salad. Chicken Sandwich Spread

While this particular recipe is more of a spread than a typical chunky salad, you can control how smooth it is by how long you process or blend the ingredients together. Alternatively, you could divide the amount of chicken in half and stir in the second portion after the first has been processed.

I make mine in the Vitamix, but I would assume you can accomplish the same thing in a food processor. Chicken Salad Spread

This makes a great addition to your child’s lunchbox… or even your own lunchbox at work! For more great lunchbox ideas, read my recent post, “No More Boring Lunches!”

Can’t See the Light at the End of the Tunnel?

Note: I’ve used to my Amazon.com affiliate in the links to the various CD’s below. Thanks for supporting Authentic Simplicity! I rarely pause to share my heart here at Authentic Simplicity, mostly because I’m typically brimming with enthusiasm about other things, like cleaning carpet or storing excessive numbers of books or eating vegan for breakfast. Lately, though, my mind has been empty of all things practical while I deal with my heart that has been rebelliously insisting on some serious attention. Sometimes the details of life have to take a back seat so I can settle the big picture, and that’s what I’ve been grappling with lately.

Discouragement

Here’s the story: earlier this year, my DH, through no fault of his own (he is such an amazing man!), lost his job. If you’ve been through that experience, you know the roller-coaster of emotions that follows such a life-altering event. I don’t like roller-coasters, but this was one I had no choice but to ride! The painstakingly slow climb up the hill that takes forever, the crazy rush of hope at every possibility, the plunge into disappointment when it doesn’t work out, the twists and turns you weren’t expecting and don’t really welcome (hello, I thought we had already paid our car insurance bill through next year?!), all bringing you to a slow finish… right. back. where you started.

Oh yeah, and a massive headache to remember your thrilling ride of a lifetime.

And unlike real roller coaster rides where you get off at the end, this one just keeps looping around and around endlessly. What started out as a sprint has become a marathon, and it gets discouraging to say the least.

Encouragement

However.

(Thank goodness for the “however”!)

However, I can say honestly and truthfully that while I - more often than I care to admit - have my moments of doubt, discouragement, and despair, I know most certainly that much good has come out of our jolting journey through unemployment. I can’t think of a single good thing about real roller coaster rides, but this life-size one has been used for good in our lives. We can see where God prepared us for it financially, mentally, and emotionally, and we can see how He has provided each need along the way.

Throughout this journey, I’ve had to fight against the depression that’s always threatening to take over my mind and heart, and as usual, God has used music as a source of encouragement and exhortation in my life. The following songs have been particularly meaningful to me in recent months, and I want to share them with you in the event that you, too, could use a little encouragement.

Note: I just want to mention that we are not destitute or on the streets or anything! I am working full-time as a teacher (a job I L-O-V-E!!!) and my DH has a PT job with health benefits that pays decently while he’s looking for a FT job. Plus, he’s taking the time to launch his own online graphic design business, something he’s been wanting to do for a really long while now. We’re not exactly rolling in dough, but we have enough to pay the bills and are excited about what the future holds!

1. Our God is in Control by Steven Curtis Chapman

Our God is in Control has been a go-to encouragement song for me ever since the CD, Beauty Will Rise, was originally released. The entire CD, in fact, is just one encouraging song after another! SCC wrote it after the devastating experience of losing his little girl in a car accident in his own driveway. Each song reminds you to look up and keep the big picture (the eternal one) in mind. I’ve even sung this particular song in church because it has meant so much to me.

2. Worn by Tenth Avenue North

This is the first song I ever heard from this group, and I was introduced to it by my friend Rachel. It comes from their CD, “The Struggle“, that is full of songs addressing the various struggles we go through in life. What I love about this song is how it so beautifully and clearly expresses how I feel sometimes when it seems like one more day of the same-old-same-old is just too much to take. I will say that it doesn’t do to focus on this song for long. Listen to it, identify with it, cry all the way through… and then listen to another song with a happier ending. You’ll never pick it all back up again if you stay where this song ends!

3. You Are I AM by Mercy Me

The YouTube ID of Insert video URL or ID here is invalid.

I’ve been a big fan of Mercy Me for a long time now, and their CD, “The Hurt and the Healer” has become a very important one to me. It’s full of songs that speak to human suffering from a divine perspective, which is exactly the sort of song one needs to listen to in the middle of difficult times! This is one of those songs that you have to turn way up, lift your head, close your eyes, and raise your hands. (Even if you’re a Baptist. I mean it.) Instead of focusing on everything that’s wrong, it leads me to focus on Who God Is. He Is I Am, and that’s all I really need.

4. All Things Possible by Mark Shultz

Even my Certain Little Someone knows the words to this song and we both sing along whenever it comes on in the van. You just can’t help but be lifted up and encouraged after singing this song. It’s impossible! So sing it out, now! And also, “It Is Well” from the same CD (All Things Possible) is another uplifting super encouraging song. Put those two together and you can’t be beat!

5. Great Is Thy Faithfulness

Psalms 37:3 is translated in the NKJV this way: Trust in the Lord, and do good; Dwell in the land, and feed on His faithfulness. To me, that means learning that we exist only because of God’s faithfulness to us… but I also think it means focusing on and meditating on God’s faithfulness. If our mind is dwelling - feeding - on thoughts of God’s faithfulness, we cannot help but be lifted in spirit. To that end, I began singing the old hymn “Great is Thy Faithfulness” as I went around the house loading the dishwasher and whatnot. As I sang from my heart, it kind of fell into an arrangement of sorts, which I recorded here. (Although it feels a little weird recording myself like this… it’s just the easiest way to share with you what God has shared with me! Just ignore the unintentional twenties ‘do, the occasional “pitchy” note, and the computer glare on the mirror in the background. In fact, just close your eyes and listen to the message in the song.)