3 Apps for Moving {Tips for the DIY Move}

Tips for the DIY Move Now that I have a smart phone and a tablet that I use to organize my life, I find I’ve become moderately dependent on them! My first smart phone was actually rather dumb, and I never quite understood other people’s obsession with apps. My current smart phone, however, was eye-opening and now I’m also addicted to downloading and using apps. It’s a whole new world!

So when embarking on the adventure of moving, I tried to find apps that would be useful to help out with different aspects of the undertaking, and I sadly discovered that such apps were scarce. After a few intense Google searches (my life gets really intense, ya know…), I did manage to find a few helpful apps and thought I would share them with you as well.

Useful Apps for Moving

1. Trulia

Trulia has become one of the more popular real estate listing sites, but I’ve actually never used it. I have, however, used their app, and that is how we found our current place. Some have said that there are lots of spam and scam listings on Trulia, but I did not find that to be the case in my personal experience. I’m not sure if that’s a difference of the app vs. the website, or just that I got lucky. In any case, I found the Trulia app to be incredibly helpful and very easy to use.

Some of the features:

  • Set your search parameters (area, price range, number of bedrooms, etc.), and Trulia will automatically update the map with new listings.
  • You can delete listings (but they won’t disappear permanently - if you change your mind, you can easily pull them back up again) that don’t meet your requirements, and you can highlight ones that you want to look into further.
  • Listings are color coded so you can tell at a glance which houses you have already seen, which ones are new, and which ones you have highlighted.
  • Sign up to receive email notifications for when new houses become available in your price range and location.

Trulia was super simple to use: the main screen is a map of the area where you are house-hunting, and a little tab marks the spot of each listing. Tap on the tab to see the details, including pictures, of any house you are interested in.

There are two different apps, one for purchasing and one for renting (which was the one I used).

Trulia Real Estate for iPhone or iPad

Trulia Real Estate for Android Phone or Tablet

Trulia for Rent for iPhone or iPad

Trulia for Rent Android Phone or Tablet

All Trulia apps are free.

2. CLApp (Craigslist App)

There are quite a few Craigslist apps out there, but this is the one I happened to download and use. You can’t post anything on it, but you can browse the listings and they are always updated so you can keep on top of what’s available. Not only can you look for housing on Craigslist (although you definitely need to watch out for scams, but most of them are obvious), you can look for furniture to furnish your new dwelling, or you can find a new hairstylist or piano teacher or handyman in your new ‘hood. If you want to find a new job, you can do that, too!

CLApp is only available on Android, and is free.

3. Moving Planner

There’s so much you have to do when it comes to moving that it can be mind-boggling and overwhelming if you don’t have a plan! The Moving Planner app gives you that plan - it lists every single possible task you might need to do to accomplish your move successfully and gives you a deadline (3 weeks from move date, for example) in which to do it. It reminds you to change your address with all the different services you use (electric, cable, etc.); it reminds you to turn in equipment that you rented or borrowed; it reminds you to reserve the rental truck or moving company; and it reminds you to research your new location for the services you will require once you move.

You may forget about something that needs to be done, but The Moving Planner app has not forgotten! This little app can seriously be your brain when you’re in the muddled depths of packing boxes.

There’s a popular moving planner app for iPhones called Move Planner ($1.99), and this Moving Planner app ($0.99) I chose was Android’s answer to that one. According to reviews I read online, they’re very similar to each other and cover pretty much the same stuff, but I think the Android app is probably not as “pretty” and possibly not as user-friendly either.

Do you use apps to help keep you organized?



How to Pack Jewelry {Tips for the DIY Move}

Tips for the DIY Move If you’ve ever moved, you know how much of a pain it is! Along with the stress of finding a place to live, there’s the financial stress of relocating, not to mention the emotional and physical stress involved. Since I just went through a move myself, I thought I’d share a few tips I discovered along the way that might make it easier for you if you are about to embark on the adventure of moving!

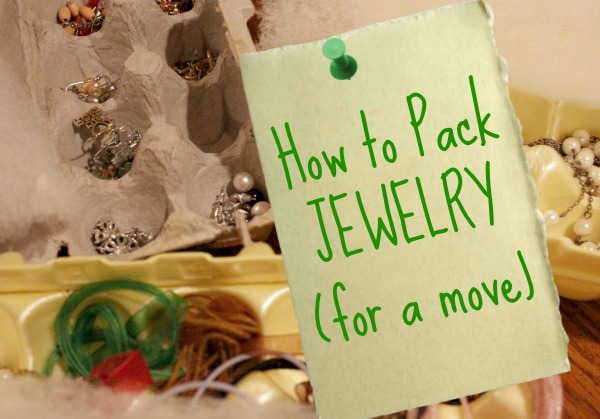
Jewelry is one of those things that can be difficult to pack, especially if you don’t have a jewelry box (and even if you do). You don’t want to be left with a mass of orphaned earrings, knotted necklaces, and broken clasps when you arrive at your new home! I hit upon a nearly perfect solution for storing and packing jewelry during my last move, and I’m really excited to share it with you.

The secret is: egg cartons! If you don’t have any of your own, ask around your friends and family to see if anyone can spare a few for you. Egg cartons work perfectly for storing almost all jewelry:

  • Earrings - I even had a couple sets of large hoops that fit nicely into the pockets of the egg cartons.
  • Necklaces - It’s especially useful to pack chains in the egg cartons because you can easily keep them separate so they don’t twist around each other and arrive in knots. Larger necklaces, or necklaces that are less flexible, might not pack so well in an egg carton. If that’s the case, pack them separately in individual zippered plastic bags.
  • Bracelets - Any bracelet except the bangle types will fit perfectly into the egg cartons for easy transportation.
  • Rings - It’s like those little sections were made with rings in mind!

How to Pack Jewelry in Egg Cartons

It’s easy to pack your jewelry in egg cartons and ensure that they arrive safely at your destination.

  • Make sure your egg carton is clean! You don’t want icky sticky egg mess on your jewelry. Blech.
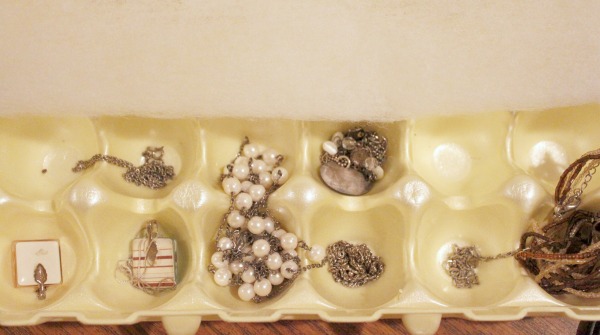
  • Place individual pieces of jewelry in each cup of the carton. Rings and some earrings can share the section, as long as you are sure they won’t damage each other.
  • Place a strip of cotton batting, fabric scraps, or any other kind of soft packaging material over the jewelry, being sure to cover the entire length of the carton.
  • Close the carton, making sure all the jewelry is contained inside and not hanging out.
  • Secure the carton with packing tape, wrapping it first lengthwise and then across the width.
  • Pack your egg cartons in a larger box. It’s OK if you store them in a box with other soft items like clothing; but be sure you don’t pack them in a box with items that could rip the cartons.

That’s it! The only jewelry that won’t pack well in an egg carton is larger or less flexible pieces. Just pack those in individual zippered plastic bags and place those right into the box with your egg cartons.

Where to Find Cheap Packing Supplies {Tips for the DIY Move}

Tips for the DIY Move There’s no way around it - moving is an expensive proposition, whether you’re paying someone to do it for you, or you’re doing it yourself. Even if your company pays to move you, there are still additional expenses involved in moving from one property to another. Selling, buying, or renting, it all gets expensive! Thankfully, we had the money saved up to cover all our moving costs, but my frugal self could not bear to spend anymore than absolutely necessary.

The good thing is, I’ve moved a time or two (or three or four. or more.) in my life, and I’ve learned some tricks about where to get packing supplies without breaking the bank.

Boxes

There’s no way around it - you’re gonna need boxes if you’re moving. How many and what kind all depends on the stuff you have, but the fact remains that boxes are a necessity. However, you most certainly do not have to pay the exorbitant prices charged by truck rental companies, office supply stores, or moving companies. At any rate, I never have!

  • Ask your friends. With this last move, I put a shout-out on the FB group for the ladies in my church, and someone had a whole collection of boxes from the last time they had moved! Free for the taking! Another friend brought me boxes and packaging material from her workplace, and still others brought me boxes that they collected here and there. If you’re on Facebook, just post a status asking for boxes and you’ll probably get plenty. If you’re not on FB, try the old-fashioned word-of-mouth version - that should work pretty well, too (she says with tongue-in-cheek).
  • Ask at grocery stores. I absolutely love produce boxes for packing! They’re the perfect size to carry, they often have handles, and they typically come with padding of some sort or another. I’ve found them to be very useful in particular for dishes and other fragile items like vases.
  • Ask at other stores. Many retail stores have a procedure for getting rid of their boxes, and so aren’t likely to have any to offer you. BUT I have had great success at Target! You can almost always find someone stocking shelves there, and they typically have a cart full of empty boxes trailing along beside them. Sometimes the boxes are too small to be used for moving, but I’ve had great success there.
  • Ask at work. At the very least, you probably get reams of paper delivered to your office - those boxes are a great size for packing just about anything! Save all the ones you come across; every little bit helps.

Packing Tape

I inadvertently had the opportunity to try out a few different sources for packing tape on this last move, and I can tell you confidently that of the 3 I tried, Staples definitely had the best deal! My first experience was with tape from the Dollar Tree, and I got so frustrated by its cheap quality that I could barely force myself to use up what I had bought. Then I bought a roll from Walmart, and while I was pleased with the quality, I was perturbed by the exorbitant price (more than 3 times the price of the Dollar Tree).

I struck gold at Staples! You can buy a six-pack of standard packing tape for $16.99, which comes to $2.83 a roll - that makes it less than the Walmart price but for almost twice the yardage. There may be better deals elsewhere, but that was the best price among the stores I checked in my area. If you don’t have Staples, try other office supply stores in your town to see if the prices are similar.

Packaging

When it comes to packing up valuable items, you want to be sure they are well padded and secure in their boxes. Bubble wrap and styrofoam can get pretty pricey, and are not exactly environmentally sound choices. I’ve found that recycled items can actually be the best packaging, and cheaper to boot!

  • Newspaper is GREAT for wrapping just about anything. It does leave black marks on some dishes, but a quick trip through the dishwasher or a swipe with a wet rag takes care of that problem. It also does get black ink all over your hands, but once again, a quick hand-washing session is all you need. Ask friends to give you their newspapers instead of dumping them in the recycling bin (you can do that when you’re unpacking). You can also stuff crumpled newspaper (or catalog/magazine pages) into nooks and crannies in boxes to prevent the items from shifting.
  • If you really don’t want to deal with the ink, a roll of butcher paper or plain newsprint (without any print on it) will do just as well (albeit more expensive).
  • Shredded paper is awesome packaging, and it’s completely free! Whenever I packed a box of breakable items, it always seemed like there were lots of little gaps and holes in between the stuff in the box. To fill in the gaps, I would take the bin from our paper shredder and dump the contents into the box: all the shredded paper would settle into the holes and fill them up nicely. I am happy to report that not one single boxed item was broken during the move! The only drawback is that you have to be careful when unpacking those boxes - lift the items up out of the shredded paper, and be sure to keep it contained in the box. Then you can just pour all the shredded paper into a garbage bag for recycling.
  • Recycle packaging from boxes you receive in the mail, and ask your friends to pass their recycled packaging along, too. I used paper, bubble wrap, plastic air bubbles, and more, all recycled from my own mail.
  • The Dollar Tree sells bubble wrap if you want to use that for especially valuable items. I bought 3 rolls there, and didn’t really find myself in need of anymore than that. It did the job just fine!
  • If you have a friend in the medical field, ask them for surgical wrapping. It’s sturdy and cloth-like and even stretches a little and is perfect for dishes, vases, knick-knacks and picture frames.
  • Washrags, hand towels, dish towels, and aprons are ideal for packing up your kitchen items. You’re going to use those things in the kitchen anyway, so might as well make use of them as you pack them into boxes! I wrapped drinking glasses, bowls, pans, knives, and more in my kitchen linens and they worked perfectly.
  • Don’t pack your blankets and towels away in a box! They can be used when packing the truck as padding for furniture and anything else not contained in a box. In a pinch, you can use them as padding in your boxes, too, but do be sure to leave a few out for packing the truck.

These are my honest-to-goodness, real-life tips for packing on your own without spending a lot of money. (One extra tip: Buy permanent markers at the dollar store. They come in packages of 4 - for a $1! - with different colors so you can organize the labeling on your boxes if you want. Trust me. You want your boxes to be well-labeled!)

What’s your best tip for moving on the cheap?

A Post-Flu Quest for Simplicity

A Post-Flu Quest for Simplicity

A big welcome to my friend Stephanie, The Cheapskate Cook, who generously offered to guest post for me as I’m in the middle of moving and re-settling. I’m currently tied up in knots at the DMV where I need 5 - yes, 5 - personal documents (that pretty much exhausts my repertoire of personal documents) just to transfer my drivers’ license. So while I’m waiting in line at the DMV, you can enjoy Stephanie’s thoughts on recovering from the flu.

The flu came to visit my house. Not just a quick visit, An extended one. The kind that drags on and on and until you can’t remember the last time you left the house and everyone was healthy at the same time and you ran out of easy food two days ago but no one feels healthy enough to go buy more, so you’re stuck dragging yourself to your feet and whipping together whatever you can that you still have ingredients for, and it doesn’t matter if this is what you eat for all three meals, because it’s probably all gonna come back out again in some nasty way.

That kind.

So our lives were stripped down to basics for a few days: sleep, eat, drink, sleep, change diapers, sleep.

And that’s about all we did. And TV. Lots of TV.

When we have weeks like this, I’m really hard on myself. My husband and I are down to our last nerves, trying to hold it together and take care of the kids and each other. We’re not actually mad at each other, but the reality is, the only people around to get mad at is… each other.

The kids watch far too much TV. Not only are they sick and listless, but if we dare turn off the tube in an attempt to rally something constructive (or at least non-electric), it’s amazing how quickly those listless kids muster the strength to protest.

Am I the only one in that boat? Am I the only one who’s had to call a time out on everything but the basics of life?

Interestingly, this time the worst part wasn’t the stage where we were really sick. It was easy to prioritize then. It was easy to only do what needed to get done.

It was when we were recovering that I melted down. It was during that awkward middle ground where we just weren’t healthy enough to do everything… but all I could see was everything that needed to get done.

The laundry piled high (flu laundry at that - ugh), dishes piled higher (if possible); I didn’t remember the last time the floor had been swept or vacuumed. And food? We’d eaten crackers for three days straight, Not even good, slightly less-processed crackers. Just saltines. For three days.

Oh, where to start?

Somewhere between pushing myself too hard one morning and laying around like a plague victim that afternoon, I realized something.

Sometimes I can’t do it all. Sometimes - wait, no-matter-what-the-time, I can’t do everything that needs to be done. I can’t do everything I think my kids deserve, that my husband deserves. I can run my self ragged trying to chase it all.

I can however, choose what is important to me and my family. I can choose what I will put my precious 24 hours a day to. And I can let the rest go.

In the quest for authentic simplicity is the beauty to choose. To decide to do things homemade, natural, organic, and sometimes to decide to buy pre-made and conventional. It’s our choice. It’s our simplicity, and it’s our job to choose it.

So the next day, after peeling myself out of bed, I chose to hold my sick little toddler and cuddle him on the couch. I chose to listen to my body and lean more on my Heavenly Father. I chose to look at picture books with my kids (reading was out the question because I had lost my voice). I chose to serve leftover chicken and rice soup for both lunch and dinner because, well, I chose to do some laundry instead of make dinner. And yes, I chose to turn on the TV. One step at a time. One choice at a time.

And you know what? I felt much, much better.

When Stephani and her husband got married, they lived in a renovated shed and had a grocery budget that matched. As a passionate whole-foodie, Stephani was determined to continue eating healthy, minimally-processed foods on their shoestring budget. So The Cheapskate Cook was born. You can follow the fun on her blog, where healthy meets frugal, or keep up with it via Facebook, Twitter, and Pinterest.

How to Get Your Husband to Clean the House

First, let me get one thing straight before I share my little magical tip with you. My DH is a pretty awesome guy who is quick to help out around the house whenever he senses my panic mode approaching (Because, honestly, nobody around here enjoys it when I go into panic mode. Ahem.). In fact, there are several chores he does on a regular basis - like folding clothes and making the bed - that really take a load off of me.

However, when it comes to getting down and dirty and actually doing the scrubbing kind of work… well, that’s where he’s a little more hesitant. And honestly, it’s entirely my fault, because all of my spray bottles are full of vinegar spray. The man hates the smell of vinegar. I mean, hates it with a passion.

I know he’s not the only one! I recall from my teaching days when one of my students would practically run gagging from the room whenever I pulled out the vinegar spray for wiping down the lunch tables (which was, as you can imagine, every day, right after lunch). And I’ve heard other similarly crunchy mamas complain remark that their sensitive hubbies likewise despise the smell of vinegar and thereby escape helping out with the menial housework.

There’s a simple solution to this dilemma, my friend. Instead of the vinegar spray, buy a bottle of all-natural cleaning spray (that doesn’t smell anything remotely like vinegar) that the hubster can wield with confidence. Scummy bathtubs, be gone! Crumby countertops, off with you! Toddler-trashed tabletops, off you go!

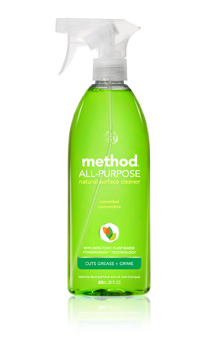
Thankfully, this solution doesn’t have to be expensive, either. I like to keep a bottle of Method on hand for just this purpose, and it doesn’t cost anymore than a regular chemical-filled spray would - around $3.99 regular price. And right now, in fact, Method is offering $1 off any online purchase of their All-Purpose Spray with the code APCBLOG. And no vinegar to be found here! Only amazing smells like Cucumber, Pink Grapefruit, and French Lavender. (Believe me, I’ve tried other natural brands that just flat out stink. These Method sprays smell like a garden!)

I can tell you with confidence that this little trick works like a charm (Doesn’t it, oh-darling-hubby-of-mine?!). Your heretofore reticent hubby will be “cleaning like a mother”! Whenever I have a bottle of Method spray handy, my DH is happy to scrub away at bathrooms, countertops and tabletops without the least hesitation. Not so much with the vinegar stuff. So off with you, now! Get yourself a bottle of Method All-Purpose Spray and watch your hubby clean away.

This post was sponsored but the story is true. You can ask my DH.

Your Guide to Meal Planning

How to Meal Plan I think everyone of us struggles occasionally with the “5:00 Panic” - you know, that dreaded moment when you realize that your family is going to be simply starving any minute now and you have no clue what in the world to feed them. In most households, these panic attacks usually end with feeding the masses cold cereal or takeout.

Uh huh. I’m wise to your tricks! You thought I didn’t know, huh?

The 5:00 Panic

Well, I know because I’ve been there. Not the cold cereal part because we don’t buy it anymore, but the takeout part. That I’ll admit we have succumbed to on occasion when dinner was not adequately planned.

As I mention ( kind of ad nauseum, to be honest) in my eBook, Your Grocery Budget Toolbox, I have discovered that the best (and really the only way) to avoid the 5:00 Panic (and the cold cereal) is to plan ahead. I know, I know. I wish I had an easier answer for you, but I don’t. Some things in life are worth the extra effort, and I have discovered that menu planning is one of those things.

In fact, since last fall, I have been regularly planning our meals a month at a time using Plan to Eat, and I cannot tell you what a relief it is to to have that mealtime guide as I go through the month. Sure, the plans change occasionally, especially the breakfast and lunch options. But I would be a lot more stressed out (I know because that’s how I used to be before I started menu planning!) if I didn’t have a plan.

Menu Planning, Really?! Do I Have To?

I can totally understand, though, if menu planning is just not your thing: I’ve been there! I used to think it was pointless, since nine times out of ten, when I did plan a menu, we didn’t follow it! I felt like if I had enough staple grocery supplies in the house at all times I could just whip up any ol’ thing when it came time for dinner. Plus, I’m kind of a spontaneous girl in many ways, and the thought of having a menu plan seemed, well, rather rigid, to be honest.

Yeah, I had all kinds of excuses.

Yes, Really. You Gotta Learn How to Plan Your Menu.

You, too? Then you may want to read Crystal’s (of Crystal and Co.) new eBook, “How to Meal Plan: a Step By Step Guide”. It truly is a step-by-step guide to get you going on the path to menu planning freedom.

What I particularly love about Crystal’s book is the adorable printables that help you work through the menu-planning process. Not only does she offer you the standard menu planning chart, but she has worksheets that help you analyze your family’s needs and your own desires when it comes to cooking and meal planning. It’s not about what works for her, it’s about what works for you. She doesn’t just throw a calendar at you, and say, “Get busy planning!” No, she walks you through the process of determining how a menu plan would work best in your family and in your situation, and then how to trouble-shoot it when things go wrong.

Menu Planning Help for $0.99!!

Here’s the truly lovely thing: for the rest of the month (which is only like a week, so don’t relax now), you can get Crystal’s guide to meal planning for only $0.99. I think you can spare less than a buck to get some peace of mind at 5:00 for the rest of your life. Normally, it’s $5.99, which is still a good price, but for $0.99? Can’t be beat. And what do you have to lose?

I dare you. No, I triple dog dare you! Face 5:00 head on and kick that panic where it hurts!

Ahhhh. Feels good, doesn’t it?


Frugal and Easy Essential Oil Storage {From an Upcycled Spice Rack}

Since joining Young Living Essential Oil’s distributor program in order to get a great discount on their oils, I have been slowly amassing my essential oil stockpile. It’s exciting, but it presented a new problem: where to put them.

Enter the spice rack I purchased at a yard sale a while back for the measly little price of $2.00! I’d been hanging on to it for a while, intending to freshen it up a bit for a new purpose (not being useful for containing spices, in my opinion), but hadn’t gotten around to that little task yet.

As soon as I started pondering how I should handle my essential oil storage situation, I immediately thought of that old spice rack! It was perfect for the task on multiple levels:

  • It was just the right size to hold the bottles.
  • The open shelves make accessing the bottles easy!
  • I had a spot on my bathroom wall where it would fit perfectly.

However, it was quite ugly. That dark brown stain is not exactly my thing.

So I set out to beautify it with an “almond” colored spray paint. Easy task, yes? Well, unfortunately, either me or my can of paint was struggling because the paint came out all drippy and splotchy instead of in a smooth, even coat. I followed the instructions on the can exactly so I would like to say it wasn’t me… but it had been a long while since I’d spray painted anything.

Whatever the case, my final coat of paint resulted in a strange crackled texture that I found to be appalling initially. But the longer I looked at it, the more I liked it! It kind of gave an antiqued textured look to the spice rack, which was rather serendipitous in my opinion. I had originally planned to apply some sort of filigreed rub-on transfer to the shelves as a decoration, but I think I actually like this sort of shabby chic look better.

I have no idea how you can replicate this look yourself (ha!), but at any rate, I do think a coat of spray paint in the color of your choice will dress up an old spice rack (you can find them at thrift stores and yard sales all the time) to store your own essential oils (or any other small bottle that needs storage, like nail polish… or spices).

Think essential oils are out of your price range? Think again! Read how I afford essential oils here.

How I Organized TWO Closets For $20!

The organizational bug hits me at random intervals throughout the year (much to my DH’s dismay), but it always arrives punctually between Christmas and New Year’s. Something about the influx of new stuff into the house fills me with an overpowering urge to purge out as much of the old stuff as possible.

This year was no different. The Boys’ closet had been bothering me for quite some time, because the little rolling closet organizer you see pictured above on the left had been serving us well for 4 years, and was ready to be retired. It started out as the receptacle for cloth diapers, baby toiletries, wash rags and the like, then slowly morphed into an organizer for little boys’ socks and shoes.

Um, yeah. That last part didn’t work out so well. As it turns out, little boys require sturdy sock-and-shoe organizers that can withstand a certain amount of rough handling. That little fabric organizer cart just did not cut it; the fabric shelves were slowly being ripped apart, and the socks and shoes got all mixed up with each other. Orphan boy socks were becoming something of an epidemic around our house, and I was determined to do something about the situation before I lost all my hair to frustration. (I would rather lose my hair for genetic reasons or something at least remotely romantic. Not to mere frustration.)

So I replaced that little Munchkin Baby Care Cart organizer thing-y with a set of sturdy plastic drawers: two small drawers for socks, two big drawers for shoes. Also, I found an unused lined basket from elsewhere in the house to contain their hats, gloves, and ties, which had previously been mixed in randomly with the socks and shoes. A big sigh of satisfaction and my hair was saved.

But I wasn’t done. Oh, no! My DH kindly asked if I wanted him to bring that old organizing cart down to the trash, but I said, “Give me a day. I bet I can figure out another use for it.” He looked at me skeptically (I don’t blame him!), but let me have my way.

Sure enough, the next day, I found a perfect use for that old cart! First, I fixed it up a little bit with some good old-fashioned needle and thread:

Almost as good as new!

Then I turned my attention to a sadly neglected corner of our walk-in closet (which, by the way, is very oddly shaped like a funky “L”) that I had hitherto been studiously avoiding. Another sigh, but this one was not of satisfaction! Piles and piles of pictures and photo albums were piled helter-skelter on the shelves, and boxes containing memories of all kinds were stacked on the floor. One shelf was dedicated to my DH’s sweaters and jeans because there was no more room in the dresser (Now, I wonder whose clothes were filling up all those drawers in the dresser?! Surely not mine!), but the poor guy just had them all piled up on top of each other in a big heap that was far from accessible. Grab one pair of jeans and the entire contents of the shelf came tumbling down.

I set out to rescue him from that dire fate, and neatly folded all the sweaters and jeans into compartments on the once-again stable little cart. I was also able to place his shorts and sports uniforms from another ill-used closet shelf into the cart, killing another bird with my little stone. And now that the shelf was empty, I was able to neatly organize all the photo albums and memory boxes that had previously littered the floor. Those big brown boxes on the right contain my wrapping and scrapbooking supplies (like stickers, tags, markers, ribbon, etc.) and had been on the floor in a different part of the closet, so moving them up onto a shelf freed up some room on the floor so I could organize my collection of boots more neatly.

Another sigh - this one of complete and total satisfaction! In one afternoon’s work, I:

  • organized The Boys’ closet
  • repaired the rolling cart
  • organized my DH’s clothing in the closet
  • organized my photo albums, memory boxes, and wrapping/scrapbooking supplies
  • organized my boots.

All for $20, which was the cost of the plastic drawers that replaced the rolling cart in The Boys’ closet. Not a bad day’s work, I say!

Do you have any organizing projects for the new year?

Three Birds, One Stone: Christmas, New Years’ and Thank You Cards

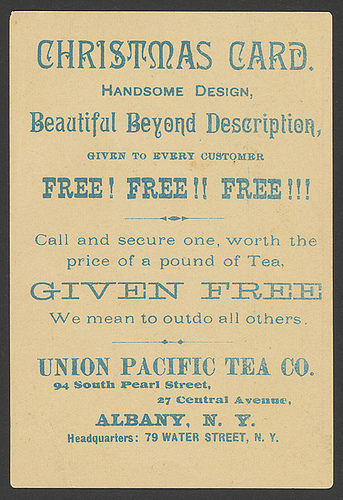
Union Pacific Tea Company XmasCard 2 This time of year, the card company execs are all rubbing their hands delightedly as we all rush to the store and purchase their overpriced boxes of pretty paper, then rush home to sign them, stamp them, and send them off to our far-flung friends and relatives in time to wish them a very merry Christmas.

Now, I love receiving Christmas cards and letters from family and friends, so I would be the last person on earth to suggest we eliminate the practice altogether. However, I do have a suggestion that might make the whole Christmas card process a little easier, a lot less frantic, and just as meaningful.

Send the Christmas cards after Christmas.

I mean, seriously. Why not?

The advantages of sending Christmas cards after Christmas:

  • You can wait until the Christmas frenetic rush of activity is over, and deal with the task during the afterglow of Christmas done.
  • You can extend greetings, wishes, and prayers for a happy, healthy New Year to all your family and friends.
  • The Christmas cheer doesn’t end at Christmas; it keeps giving into the New Year!
  • You can thank said far-flung friends and relatives for the gifts they gave you and your family at Christmas, without taking the time to write an extra card. One stone is all you need.
  • You can buy Christmas cards on clearance. 75% off, baby!

Disadvantages? I can’t think of any. Can you?

When do you typically send your Christmas cards?


A Simple Christmas Tip #19 – Send New Years’ Cards Instead of Christmas Cards

If you want more information, click here or on the graphic itself to take you to a full-length post on the topic. Click here to see all the posts in this series.

Come back tomorrow for another quick tip to help you simplify your Christmas by focusing less on spending and more on celebrating.