Groceries for a Month for a Family of Four

OAMS Monthly Shopping List 
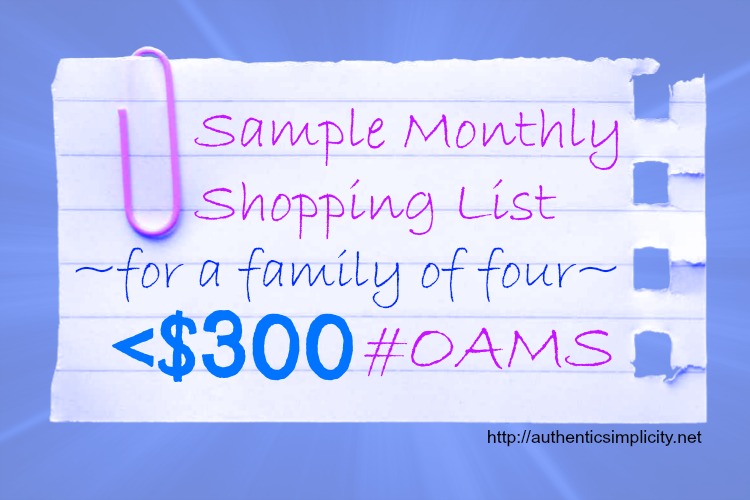
I realized recently that it’s been a long time - a really long time - since I’ve updated you all on our OAMS (Once-A-Month-Shopping) experience. It’s been almost 3 years since I last shared a sample monthly shopping trip with you, which is a bit too long, don’t you agree? A lot has changed since then - our location, our shopping habits, and even our diet to a certain extent.

For those of you new to the concept (you can read about it more at length in my eBook, Your Grocery Budget Toolbox, or by browsing through the OAMS archives), OAMS is a method of grocery shopping that saves time and money because you’re only shopping once a month, as the name suggests. Technically, though, I shop twice a month, because I usually include a mini-trip mid-cycle to re-stock produce and milk. However, the bulk of my grocery shopping is done in one weekend every month, and that’s what we eat on until the next monthly shopping trip.

This past weekend was my OAMS trip for March/April (I do my shopping in the middle of the month because that’s when we worked it into our budget), and it involved 6 stores over a span of about 4 or 5 hours (including a pit stop for lunch and a quick trip to the dollar store). Also included in this list is the meat and eggs delivered to me from a local farm. Here’s what I hauled home:
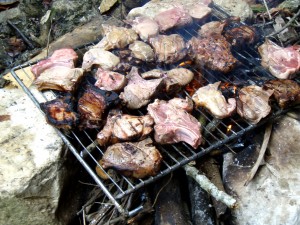
Meat #oams #frugal #wholefoods MEAT & SEAFOOD

1.6 lbs Wild Alaskan Pollock $6.42

1.3 lbs Ground Lamb $4.58

2 6oz cans Skipjack Tuna (pole-caught) $2.98

8 oz Black Forest Ham $3.49

2 lbs Grass-Fed Ground Beef $11.21

2 Pastured Roasting Chickens $23.81

Produce #oams #frugal #wholefoods PRODUCE

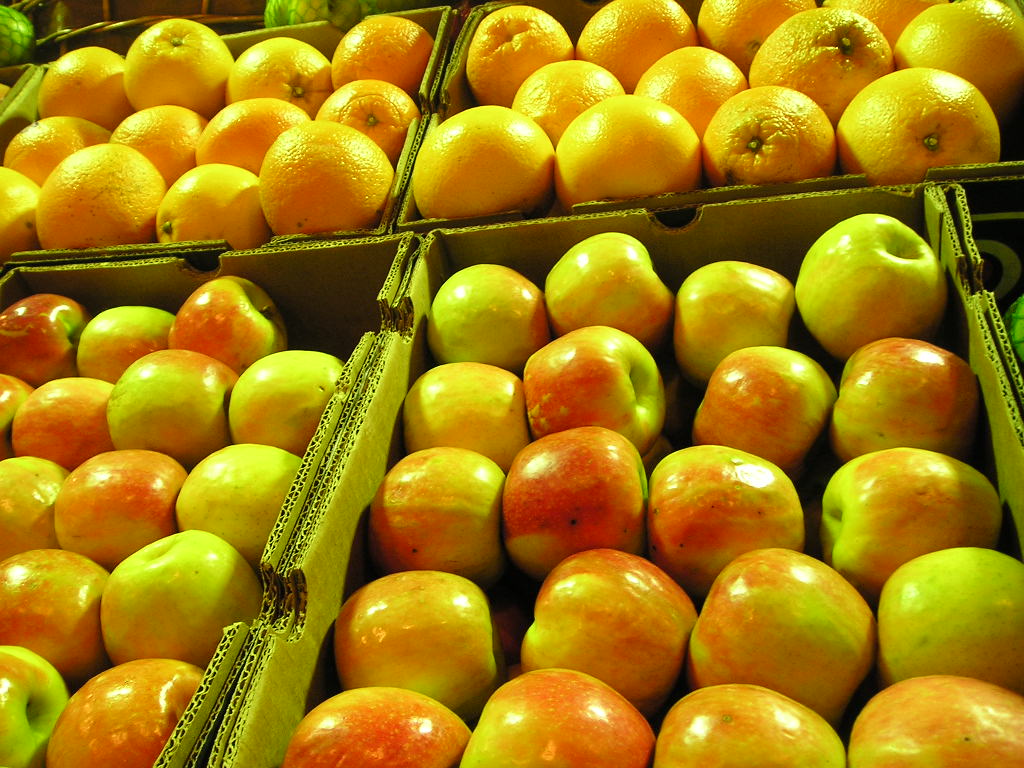
5 lbs. Grapefruit $1.99

2 lbs. Strawberries $3.99

3 lbs. Organic Apples $4.49

2 pkgs Blueberries $3.18

2 pkgs Blackberries $2.78

1 Mango $0.99

3 lbs Bananas $1.31

5 lbs. Pears $4.49

2 lbs. Organic Carrots $1.78

1 Onion $0.89

4 Organic Avocados $3.99

1 Pineapple $1.99

2.3 lbs Green Beans $2.98

1 bunch Cilantro $0.50

.5 lb Ginger Root $1.24

2.3 lbs Broccoli $2.26

1 Cantaloupe $2.49

.6 lbs Persian Cucumbers $0.63

1 Cauliflower $1.99

1 lb Sweet Potatoes $1.47

2 lbs Grapes $4.24

5 lbs Potatoes $1.99

1 Napa Cabbage $1.12

Dairy #oams #frugal #wholefoods DAIRY & NON-DAIRY

2 cans Coconut Milk $2.58

2 cans Coconut Milk Cream $4.58

1 pt. Organic Heavy Cream $2.99

2 lbs Organic Yogurt $2.99

2 6oz cups Coconut Milk Yogurt $2.98

<1 lb Goat Cheddar Cheese $4.80

1 pt Open Nature Coffee Cream $1.79

1 gal. Low-Temp Pasteurized Pastured Milk $5.69

1 box Coconut Cream $2.49

Dried Fruit #oams #frugal #wholefoods 
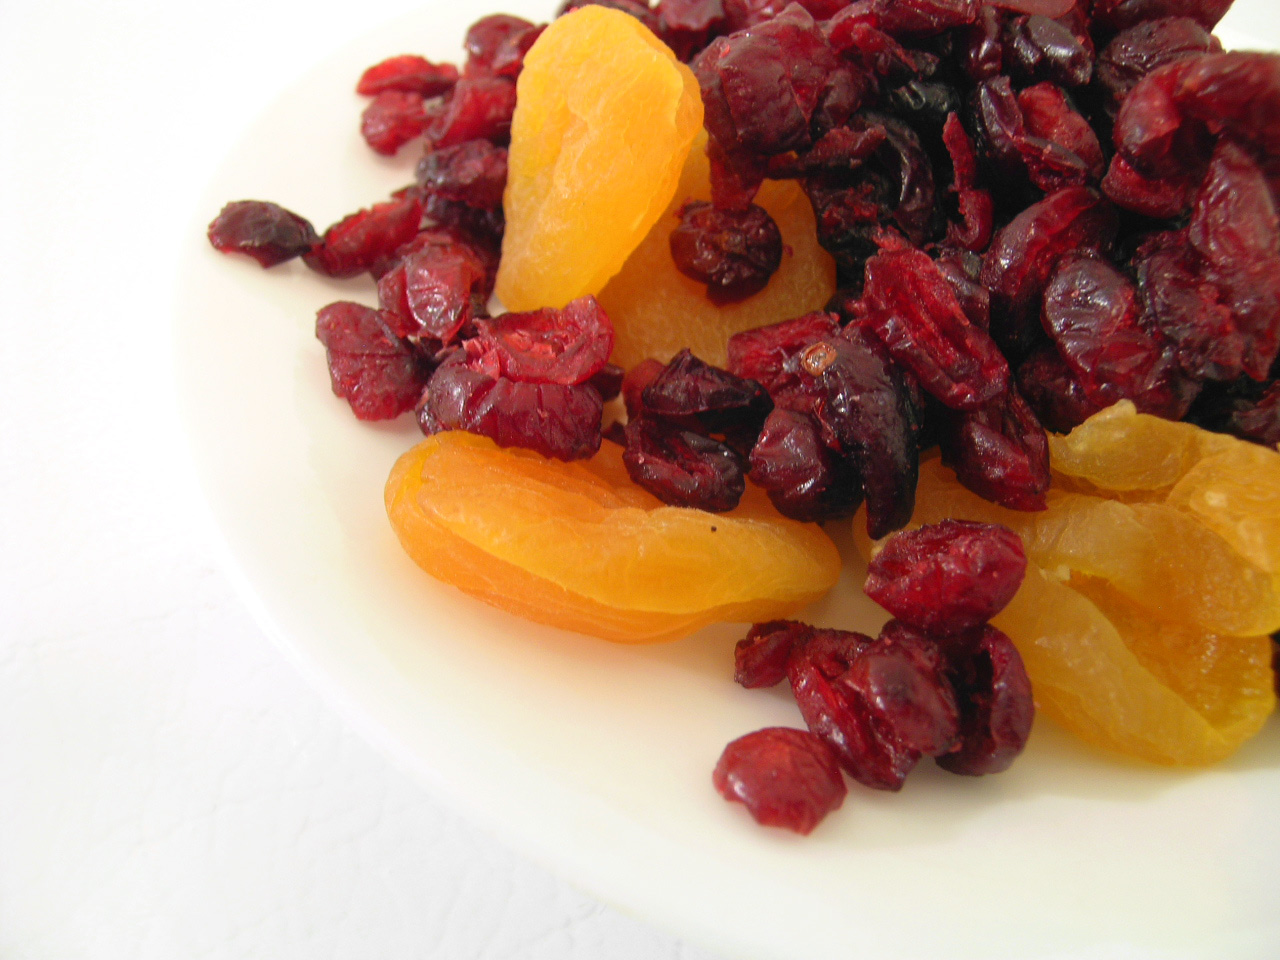
DRIED, FROZEN & CANNED FRUITS/VEGGIES

1 lb. Raisins $1.89

1 can Pumpkin $0.89

Organic Banana Chips $2.99

1 bag Frozen Spinach $1.49

1 bag Frozen Organic Corn $1.79

1 bag Frozen Organic Peas $1.99

8 oz Dried Cranberries $1.99

1 lb Prunes $3.29

Flour & Baking Supplies #oams #frugal #wholefoods BAKING, ETC.

5 lbs White Whole Wheat Flour $2.99

1 lb Quinoa-Brown Rice Pasta $2.99

12oz Spelt Pasta $2.49

1 lb Organic Coconut Sugar $3.99

1 lb Cashew Meal $4.99

1 bottle Organic Ketchup $1.99

12oz Fair Trade Coffee $3.99

2 lbs. Local Maple Syrup $15.99

2 lbs Coconut Oil $15.99

1 large bottle Cinnamon $2.59

4 bottles Organic Grape Juice $10.00

TOTAL COST: $236.41

A few notes about this month’s shopping trip:

I was unusually under my $250 budget - typically I go over by a few dollars!

Yes, this is really all the food we will eat for the next month, EXCEPT that I will go buy some more produce (apples, bananas, pears, etc.) in about two weeks and I will also probably buy another gallon of milk. Do keep in mind that I’m also working off of food I already have here at home -there’s more meat in my freezer left over from previous month’s shopping, as well as potatoes, pasta, rice, beans, and other staples.

Also note that I purchase grains in bulk about twice a year, and that is not included in the regular grocery budget. One of these days I’m going to start buying meat in bulk as well, and that also will come out of a separate budget.

I didn’t think to take pictures of my shopping trip, so the pictures here are just randomness.


Einkorn, the Ancient Grain {Giveaway, Too!}

Win Einkorn Berries from Tropical Traditions #giveaway #ancientgrains #traditionalfoodAre you concerned about the effects of modern wheat on your health? There is certainly reason to be! Modern wheat has been blamed on a large number of health issues, and the rising numbers of people who simply cannot tolerate it seem to provide evidence that there is truth to the accusations.

The Trouble With Wheat

My opinion, though, is that the issue is not with wheat in and of itself, because mankind has been enjoying wheat since the beginning of time (by which I mean Adam and Eve), and all of these health issues have only cropped up since the beginning of the Industrial Age. I’m thinking that the problem lies with all the changes modern science has forced on the ancient grain, turning it into a mere shadow of its former wholesome self. It’s now easy to grow and easy to harvest, and therefore very inexpensive… but at what cost? The cost of our health, it seems.

Now I haven’t turned my back on wheat entirely, but I have switched the bulk of my cooking and baking over to two ancient grains that are cousins (or forerunners) of modern wheat. These two grains - spelt and einkorn - have remain unchanged over history, unlike wheat, which has been tinkered with since the ’40s. As such, they retain a nutritional integrity missing from modern wheat.

wheatTry Einkorn Instead

Note: If you order by clicking on any of my links and have never ordered from Tropical Traditions in the past, you will receive a free book on Virgin Coconut Oil, and I will receive a discount coupon for referring you.

Today, Tropical Traditions: The Best Place to Get Virgin Coconut Oil, is generously offering one of my readers the chance to win a 5lb. bag of whole Einkorn berries that you can grind to make your own ancient flour!

I had a chance to use these Einkorn berries myself, and I was very impressed! The flour I made with them worked much like regular ol’ wheat flour, and I didn’t have to make any adjustments to my recipes. The taste and texture were just as good - if not better - than those I made with wheat flour, as well.

The only thing that was different about the einkorn is the texture of the raw dough: for lack of a better word, it was significantly “stretchier” than the dough or batter made with wheat. I’m guessing it has something to do with the quantity or quality of gluten in einkorn, but it doesn’t affect the final product. Once baked, the texture was just like something made with wheat.

If you’re not sure where to start with Einkorn berries, here’s a great recipe from Tropical Traditions’ recipe site.

The main drawback to einkorn is the price. Gulp! It’s almost twice the cost of either wheat or spelt! If you can afford it, I say go for it! But if not… enter the giveaway below.

Win Einkorn Berries to Try For Yourself

This giveaway is only for residents of the United States aged 18 and older. It will end on Tuesday, March 11, at midnight. Winner will be notified by email and has 48 hours to respond or will forfeit the prize.

Tropical Traditions provided me with a free sample of this product to review, and I was under no obligation to review it if I so chose. Nor was I under any obligation to write a positive review or sponsor a product giveaway in return for the free product.

Curious about coconut oil? Click here for more information on its many uses!
c233592993f6d2f29baaaf58b998fd99e68b80cdefce272f4b

Why I Use Young Living Essential Oils

Young Living Essential Oils #yleo #essential oils If you are interested in using essential oils as an alternative to chemical-based medications, then you’ve probably come across at least a few different brands, all of them claiming to be the best for one reason or another. The information out there is often conflicting, always biased, and extremely difficult to sort through.

I can’t tell you definitively which brand of essential oils (EO’s) is the best, but I can tell you why I chose to use Young Living oils almost exclusively. I’m not writing this post to bash any other essential oil companies out there - I have no reason to do that - but simply to explain what benefits led me to choose YL over other brands in the event that my decision-making process is helpful to someone else out there researching the available options.

Why I Use Young Living Essential Oils

  • History - Young Living has over 20 years built into the industry, giving them plenty of time to learn about and invest into the oils they sell, as well as plenty of time to develop a reputation. Many of the brands out there have popped up seemingly overnight (certainly that is not true of all of them, and surely there are companies even older than YL, but I am not speaking of those on this point), and are relative unknowns as far as I am concerned. It is awfully easy for those start-ups to be here today and gone tomorrow. Young Living is not a start-up or an unknown entity, and that’s enough to edge it out over others that were recommended to me.
  • Reputation - Twenty years has given Young Living plenty of time to develop a reputation, and aside from those who are skeptical of any alternative medicine, that reputation is a very good one. The vast majority of people who have used Young Living oils have been very pleased with them and found them to be of high quality. I can count on one hand the number of negative reviews I’ve read in terms of the performance of Young Living’s oils.
  • Quality - The quality of the oils is what is behind their strong reputation. Much has been made online of Gas Chromatography /Mass Spectrometry testing, but in reality that test only tells the beginning of the story when it comes to essential oils. Young Living performs a total of 7 tests on every batch of oil that passes through their facilities and onto their customers, and if the oils don’t pass the tests, they don’t sell them. Even so, that’s not enough to establish the quality of the oils, because once again, each of those tests tells only part of the story. The chemical makeup of an essential oils depends on so many factors, all of which are highly variable, so YL makes sure that optimum conditions exists in all those factors. Starting with the seed of the plant, and continuing with its cultivation and harvest, YL monitors every step of the way to ensure that the highest quality oil is the end result. If you don’t believe me, read this summary from a chemist that explains in detail all the efforts YL takes to ensure a quality product.
  • Training and Support - If I ordered a random oil from a random company online, chances are I’m left to sink or swim when it comes to using that oil. Sure, a quick google search will tell me the basics about any particular oil. Or I could read tomes and tomes of textbooks about oils, their chemistry, their usage, etc, and I probably will (I’ve already read a few!). But what has helped me more than anything has been the support of my sponsor and the rest of the folks on her team. Any time I have a question, I know where to go, and someone on the team always has an answer for me! Young Living’s company structure was intended to create that network of support so that no one is left in the dark on how to use their oils. As my own team grows, my desire is to create that same environment of training and support that has been so beneficial to me.
  • Thieves’ Oil! - This proprietary blend is produced only by Young Living, and although others have similar products, this is the one I kept hearing about over and over and over again. I haven’t been disappointed with this powerful oil, and I always make sure to have some on hand. I clean and disinfect with it, and I use it whenever someone in my family gets sick! I have seen it first hand cut colds and the like short when they’ve already started, and I’ve also seen it prevent various sicknesses from passing through the family from one person to the next. Good stuff, I tell you.

Reasons Why YOU Might Like Young Living Oils

Some more for you to consider as you make your decision:

  • Young Living has grown 75% in the past year! That’s some pretty incredibly amazing word-of-mouth sales going on there!
  • Young Living’s wholesale price (available to distributors) is comparable to a lot of the companies I’ve seen online, plus you have the option to enroll in their Essential Rewards autoship program, which allows you to earn bonus points you can use towards free oils! I’ve received 4 or 5 free bottles of oil in the past 6-8 months. When other companies imply that they are cheaper than YL, that’s probably because they’re comparing against the full retail price.
  • Young Living makes it easy for you to get the wholesale price - all you have to do is purchase a starter kit (from $40-150) and then make another $50 purchase within the year. No other commitment, but all the benefits of having a wholesale account.
  • Of the major brands, Young Living is the only one I know of that owns and operates their own farms and produces their own oils. Not all of their oils are produced in this way, but quite a few of them are. Some of those farms are based in the US, and some of those farms are based in other countries where the plants are indigenous to that area.

If you think you’d like to give Young Living oils a try, I’d be happy to have you join my team! Visit my Young Living website for more information.

Please note that I am not a doctor and I am not dispensing medical advice. I’m simply sharing what I use for my own family.

French Toast Casserole with Streusel Topping

French Toast Casserole with Streusel Topping #breakfast #wholefoods #nutfree

Delicious Breakfast - French Toast Casserole with Streusel Topping

On holidays and weekends, one of my favorite things to do is fix my family a slightly more involved breakfast than usual (read: something besides toast and a smoothie). It’s a plus if said breakfast is deliciously decadent without really being decadent. And it’s a total plus if said deliciously decadent breakfast is made with the leftover bread that accumulates over time in my freezer.

This breakfast is all of these and more. My DH even called it “epic” and he’s not one to effuse over his food. I’m thinking the cinnamon syrup is what pushed him over the edge this time.

French Toast Casserole with Oatmeal Streusel #breakfast #nutfree #wholefoods

Delicious French Toast Casserole with Oatmeal Streusel Topping and Cinnamon Syrup

If you don’t keep your bread ends in your freezer… well, you should! You can make a lot of things with leftover bits and pieces of bread, and this recipe is one of them. Other recipes include:

Chocolate Bread Pudding

Bread Crumbs

Easy Peasy Cheese Ball

Chicken Zucchini Stuffing Casserole
French Toast Casserole with Oatmeal Streusel #breakfast #wholefoods #nutfree

5 Creative Ideas for Leftover Meat

5 ideas for leftover meat Got some leftover meat and no idea what to do with it? I’ve got an idea for you! No more boring casseroles or lame pasta dishes: Here’s some creative fun you can have that will turn your hunk of “meh” into “YUM!”.

5 Creative Ideas for Leftover Meat

1. Spring Rolls

This is probably one of my favorite leftover options. Literally any kind of meat - and it doesn’t have to be Asian-flavored - can be rolled up in a rice paper wrapper, fried or baked, and served with a dip. Certainly you can make them Asian flavors if you want, but why not go with Mexican or BBQ, if that’s what you’ve got? Mexican spring rolls can be served with salsa, and BBQ spring rolls with (what else?) barbecue sauce.

If you’ve never played with spring roll wrappers before, here’s my super brief tutorial:

  • They come fresh or dried. Many regular grocery stores carry both types, but I usually buy mine at the Asian store. The fresh ones are more expensive and can be found in the produce or freezer section, while the dried ones are usually somewhere near the rice noodles and that kind of thing.
  • The fresh ones (which I’ve never actually used) are pliable and ready to be used. Just place a couple tablespoons of the filling (whatever you want!) on to one side of the wrapper, and fold up the closest edge to cover the filling. Fold the sides up, then roll the whole thing all the way to the other edge. Dip your fingers in water to seal the edge.
  • Dried wrappers need to be briefly soaked in water before using. Once they’re pliable (but not too much so, or they’ll rip) fill them in the same way I described above. No need to seal with water, though.
  • Fry them up on the stove top (make sure your oil is hot enough or the seal won’t stick).
  • OR bake them in the oven following these directions.

I’m totally serious, by the way, that just about any thing can be wrapped up in a spring roll! Don’t feel like you need a special recipe or anything: if you’ve got shredded BBQ meat, for example, just plop some of it on the wrapper, top it with a sprinkle of cheese (or maybe some cole slaw?), wrap it up and cook it!

2. Stir Fry

Again with the Asian influence, but seriously. Stir fry is the way to go! Especially if you also have leftover veggies - even better!

Once again, you don’t have to worry about sticking to an Asian flavor of some kind, although practically any cooked meat can morph into Asian cuisine via stir fry. Just follow this great tutorial from AllRecipes.com , keeping in mind that pre-cooked meats and veggies will not need nearly as much time as is prescribed in the article.

A stir fry is also great because it can also utilize any leftover starch (noodles or rice, for example) that you may have. Get rid of those leftovers in one fell swoop!

flatbread sandwich thins3. Sandwiches

Now, I’m not talking about a boring ol’ meatloaf sandwich with a hunk of nasty cold meatloaf shoved between two slices of plain ol’ bread. No way. Not how I roll.

What I’m talking about is creativity, and it starts with the bread. If you want your leftover sandwich to appeal to the masses (i.e. your starving leftover-hating family), it’s going to have to have some charm to it. Thankfully, the possibilities are practically endless:

  • biscuits
  • English muffins
  • flatbread
  • muffins (why not?)
  • waffles (Yes! Truthfully my favorite sandwich bread.)
  • pita bread
  • croissant
  • bagel
  • etc.

You get the idea. Now top it with some fancy (or not so fancy) cheese, a little bit of sauce and maybe some crunchy shredded veggies for good measure, and you’ve got some gourmet leftovers goin’ on!

sausage zucchini pizza4. Pizza

Everybody knows that everybody hates leftovers, right? BUT! Everybody loves pizza, right? So there ya go. Turn the leftovers into pizza and everybody’s happy.

And it’s so easy, too! Pizza crust is a yeast bread, but it doesn’t require all that bothersome kneading and rising stuff, so even a novice can manage it. I usually make either my Spelt Pizza Crust or my Honey Whole Wheat Pizza Crust, but you can make any kind of pizza crust you desire.

Then top it with a sauce of some kind, and it most certainly does not have to be pizza sauce. (I guess technically it doesn’t even need sauce… but it’s nice if you have it.) If you have a sauce that went with the meat when you first ate it, then that’s perfect! Whatever it is, it will work. If not, try Ranch dressing, or BBQ sauce, or a basic white sauce or cheese sauce.

Next, slice or shred the meat and sprinkle it over the sauce. Top with veggies and cheese like you would any pizza, and bake as usual. No complaints on leftover night!

ham fruit pasta salad5. Salad

Here you have two options. You can go with a green salad or a starch salad, and you can get as creative as you want with either one.

Personally, a green salad seems kind of like a boring option, so since we’re looking at creative ideas here, let’s talk about the “starch salad”. I say “starch salad” because you can use just about any kind of starch as the main component:

  • potato (and voila! you have potato salad!)
  • bread (panzanella anybody?)
  • pasta
  • whole grains such as rice, barley, and the like
  • quinoa

Cook the starch as you normally wood, then add your meat and whatever vegetables you like. To finish off your leftover magic, whip up a simple vinaigrette to bring it all together. My “Not Your Grandma’s” Ham & Pasta Salad is a great example that can get you started.

There you go, friend! Five fun ideas for leftover meat that will please your palate and your hungry family. Here’s to NO WASTE!


Upcycle Your Christmas Cards - Christmas Card Ornaments

upcycled christmas card ornaments text

Now that Christmas is over, I’m sure you have a plethora of Christmas cards you don’t really know what to do with. At least I know that’s what happens to me every year! The photograph ones I keep in a photo album, but the actual Christmas cards are not so easily dealt with: they’re so pretty, you hate to throw them away… but what can you do with them?

This year, I hit upon a creative solution: Every year at Christmas, I like to help my boys make some ornaments they can give as gifts to various family members. One year it was cinnamon ornaments, and another year they were made with salt dough. I feel like the whole process teaches them the joy of giving as well as the joy of creating, and family members (grandparents especially!) love to receive their little handmade treasures - a total win-win!

This past Christmas, I took on an ambitious project for their ornament gifts; and in the end, their role was minimal (probably shoulda waited ’til they were a little older), but I loved the final result anyway! What I particularly love about this project (which I originally found on Pinterest , of course) is that it is made of recycled materials. In particular, it makes use of Christmas cards, which are so beautiful… but so plentiful. You can only use them for gift tags so much, and then even that gets a little old, ya know? I was thrilled to find this unique and creative usage for all the Christmas cards I’d been hoarding in a little box.

Christmas card ornament

This isn’t as simple of a craft as I usually undertake, and I actually did have to buy some items specifically for this project (never happens!), but I love the result. I might make some more next year and give them as gifts myself!

Upcycle Christmas Cards into Christmas Card Ornaments

christmas card ornament 3

Christmas Card Ornaments

Summary: Upcycle your old Christmas cards into these beautiful ornaments.

You will need:

  • Mason Jar Rings
  • Christmas Cards
  • Acetate Sheets (I found a pad of “mock” acetate at Michaels)
  • Hot Glue Gun & Glue
  • White Glue
  • Foam Adhesive Stickers
  • Glue Dots
  • Sharp Scissors
  • Glitter
  • Ribbon

Instructions

  1. Choose a Christmas card with a picture or motif that will fit within the frame made by a Mason jar ring. Place the jar ring on the card, and trace around the edge of the ring with a pencil. Cut out the circle you traced, and glue the picture to the back of the ring.
  2. Cut out one or two small details from the remainder of the card (or from complementary cards), and attach them to the circle with a foam sticker to create a 3D effect.
  3. Place the ring down on a sheet of acetate paper. With the hot glue gun, glue all around the edge of the ring, adhering it to the acetate. Allow it to cool and dry completely, then trim the paper and the dried glue close to the edge of the ring.
  4. Pour some glitter onto a plate. Drizzle some glue around the outer edge of the acetate, then place the ornament face down in the glitter. Shake off the excess glitter and allow to dry.
  5. Cut out one or two more small details from a Christmas card, and affix them to the front of the acetate sheet with a glue dot.
  6. Tie a ribbon around the ring, creating a loop at the top so it can hang. (You might need to secure the ribbon with just a bit of hot glue.)

christmas card ornament 2

Maty’s All Natural {And Effective} Cough Syrup {Plus Giveaway!}

This is a sponsored post. Thanksgiving will be here in just one short day, and then in one short month… Christmas! Wow, it’s coming up fast!

And somewhere in the midst of all the festivities, another not-so-joyous season will creep in unwelcome and unannounced: I am speaking of flu season, of course. And even if you don’t get the flu, chances are you’re going to catch one of the many colds flying around this time of year, so now’s a good time to stock up on your remedies.

But forget those antihistamines, NSAID’s, and any other cold meds that line the drugstore shelves - you won’t need them. Trust me, there are a multitude of effective and safe natural remedies that quickly relieve cold symptoms while helping your body to heal faster without side effects.

Safe Natural Remedies from the Drugstore

As you know, I like to use essential oils whenever possible in treating various illnesses in my family. I also employ time-honored home remedies and the occasional homeopathic medicine when I find it useful. I also always like to keep a few ready remedies on hand for those winter illnesses that are sure to come: cough syrup and chest rub, for example. Sure, I could make them myself - I have before - but in this busy time of year, I like to have something on hand I can trust.

A frank little side note here: to be perfectly honest, I don’t always find the homemade remedies to be as effective as some store-bought ones. Just sayin.

An effective - but natural and safe - remedy I make sure to always have on hand this time of year is cough syrup. Tiger Cub in particular seems susceptible to coughs whenever he has a cold, sometimes with coughing fits that keep him up at night and make him miserable. I’ve found that while raw honey itself is only partially effective, a honey-based mixture like Maty’s All Natural Cough Syrup knocks the cough out almost instantly.

Check out the ingredients in this cough syrup:

  • buckwheat honey
  • zinc
  • grapefruit seed extract
  • celtic sea salt
  • lemon peel
  • lemon balm
  • apple cider vinegar
  • cinnamon
  • cayenne pepper

This stuff packs a punch! (And yeah, I have most of those ingredients in my kitchen, but do I have time to whip up my own cough syrup? Uh, no. Not hardly!) As a matter of fact, Tiger Cub has a cold right now, and last night his cough was keeping him awake: as soon as I gave him a spoonful of Maty’s Cough Syrup, his cough stopped and he slept soundly! In fact, I didn’t hear him cough again until earlier this evening, and once again, when I gave him a spoonful of Maty’s Cough Syrup it stopped the cough in its tracks!

Here’s some more information about Maty’s from the founder:

In 1996, my daughter Maty was born with severe heart defects. And to make matters worse, she was also born without a spleen. By age five, Maty underwent three complex heart surgeries.

For those first few years of her life, it was a challenging time for our family. We were constantly in and out of doctors offices. Although her heart was mended, she was left with difficult medical issues and a weakened immune system. Her condition made her vulnerable.

Desperate to help my little girl, I devoted my time to finding natural remedies that would help her get and stay healthy. And it soon became my passion. I started reading everything and anything to do with natural ways of healing. I took classes in natural healing and even got certified as a holistic health practitioner.

And along the way I discovered natural remedies that really worked and started using them on my family. Whatʼs even better is that I was now equipped with modern knowledge of healing and incorporated that into these old time remedies to make them even better. I bottled some of these remedies up and gave them to family and friends to help them get healthier. And they became popular.

Your Chance to Win

If you want to give Maty’s a try, enter our giveaway! The winner gets to choose one full-size version of any of Maty’s popular products:

  • All Natural Cough Syrup

  • All Natural Kids’ Cough Syrup

  • All Natural Baby Chest Rub

  • All Natural Vapor Rub

  • Breathe Better Nasal Ointment

This giveaway is only open to US residents and will end Sunday, December 1 at midnight.
a Rafflecopter giveaway

5 Things I Buy at Whole Foods

As I mention in my book, Whole Foods can be a difficult place to shop if you’re on a really tight budget… BUT if you know what you’re looking for, and if you go armed with adequate resources, you can score some great real foods deals there.

First of all, let me say that not everything you can buy at Whole Foods is healthy! They carry a lot of processed stuff that might be organic and GMO-free, but it’s still processed and it’s still not that great for you. Furthermore, Whole Foods is definitely in it for the money, so profit will trump principle on occasion. Bear that in mind, and shop wisely.

Frankly, for all those reasons, I don’t really buy a whole lot at Whole Foods, but I do make a regular stop there during my monthly grocery shopping trip and pick up a few items. Which items, you ask?

These items:

1. The Friday Deal

Each Friday, Whole Foods holds a one-day sales event with one item at a great rock-bottom price. I don’t religiously stop there every Friday for their one-day deal, but I do try to pay attention so I know what exactly is on sale and if it’s worth stopping by or not. During blueberry season, they had organic blueberries for $1.99/lb, which around here is a fantastic price for conventional, let alone organic! I stocked up on the blueberries, and also on strawberries when they had a similar sale. The Friday deal in my area this week happens to be grass-fed ground beef for $4.99/lb, which is the lowest I ever see it, so again, I’m stocking up.

I have to say I’ve always been impressed by how well stocked they are with their one-day deals! I’ve gone late in the afternoon before, and they’ve still had plenty of the sale items left, which I really appreciate.

tuna pasta salad

2. Pole-Caught Tuna

I recently read that the best tuna in terms of sustainability and healthfulness is “pole-caught tuna” (more info in my post here), and was kind of bummed that 1.) I had no clue what that was and 2.) I had no clue where in the world to find it. After a bit of research, I discovered that Whole Foods carries pole-caught tuna… for only $1.49! Considering you pay at least that much for regular old junky tuna, that price is pretty awesome. Read more about Whole Foods’ seafood sustainability policies here.

3. Meat

While not all their meat is the ultimate in healthfulness (grass-fed, etc.), Whole Foods uses a “5-Step Animal Welfare” rating system on all their meat packaging that indicates how the animal was raised and treated throughout their life. Since that in turn can affect the healthfulness of the meat, it’s important information to know. And while their “Step 1” rating is probably only a step above the meat you can find in any other grocery store, it is at least an improvement… and sometimes it’s all I can afford! It’s just as affordable as meat sold anywhere else, and Whole Foods states that farms have to meet close to 100 standards to achieve even the Step 1 rating, so that is at least a small comfort to me. And when I can manage it or when it’s on sale, I like to buy their higher-rated meats as well.

4. Kerrygold Cheese

Whole Foods charges less than $3 for a 7oz package of Kerrygold grass-fed cheese, which is a really good price. Costco might have a better price, but you have to buy it in a significantly larger package, and if that package goes bad before you can use it… then it’s not such a great deal.

5. A Sweet Treat

OK, so I haven’t actually bought this yet, but my sister has, and I’ve enjoyed her generosity as she has shared it with me. She loves the bakery grab bags - a paper bag with several day old pastries for only $1.50! I’m not dumb enough to think that Whole Foods baked goods are significantly better than any other baked goods… but boy are they yummy!

What do you like to buy at Whole Foods?

My IKEA Hack: {Almost} Built-Ins

Although we came by our current residence in a rather haphazard manner, we have enjoyed it tremendously. It’s so much bigger than our previous space, plus it has a HUGE back yard that The Boys love to play in. Besides which, it’s right off the main road, so the location is absolutely perfect.

However, it does have one drawback. (Can’t have everything, right?) Being a basement apartment, it is seriously lacking in storage space. Each bedroom has a closet, and there is a small storage unit under the stairs, but that’s about it. There’s no linen closet, no coat closet, and no laundry room (only a laundry closet) and I’m realizing that I relied heavily on those rooms for storing all sorts of things in our previous residence.

I’ve had to get seriously creative with storage here, and I’m going to show you some of the cheap ideas I’ve been able to employ. By far my favorite is this first one: our first-ever IKEA hack that was pretty darn successful if I do say so myself. We used IKEA’s line of “Billy” bookshelves and added some trim from Lowe’s to finish off the look. The result was a beautiful set of shelving that looks beautiful but cost much less than it would have elsewhere… plus it holds all our books! (I have no idea where we put all those things in our previous apartment, to be honest!)

Our IKEA Hack: Billy “Built-Ins”

We used the following Billy bookshelves:

As you can see, the shelves themselves cost around $350, considerably less than similar shelving found elsewhere. In addition to the shelving, the molding and trim (and the spray paint) cost another $60-75, bringing the total cost to a little over$400. Not bad, I think!

This is the first shelf in our set-up and contains our non-fiction collection.

We set them up in a sequence like this: short - tall - narrow, with the narrow shelves having doors on the bottom. (I love the doors because we can shove all the kids’ games in there and hide the mess!) We had wanted the shelves to extend all the way to the ceiling, and we thought we had measured enough space to include the shelf extenders. That would have added another $100 to the total cost, but as it turned out, for some reason the extenders were about an inch too short to fit. I’m sure we could have cut them to fit if we had wanted to bother (and they would really have looked like built-ins, then), but we didn’t. We just returned them and saved ourselves some moolah!

This tall shelf holds most of my sheet music and my fiction collection.

To finish off the look, we used the following pieces of molding and trim, cut, painted (with white spray paint), and attached by my DH himself:

  • 4 rosette medallions for the top corners
  • wide ribbed molding for the top shelves
  • 2.5″ wide molding, which we used wherever two shelves adjoined vertically (If it weren’t for the doors, we would have needed more of this.)
  • 1.5″ wide molding, which we placed along the vertical edges of all the shelves
  • baseboard along the bottom (except for where the doors are)

All our photo albums go in the top shelves of the narrow units.

I honestly can’t remember how many lengths of each type we bought from Lowe’s because it’s been a couple months. Besides which, it seems like we underestimated the amount we needed, and my DH ended up going back at least once to pick up more. (Moral of the story? Buy extra, and return what you don’t use!)

My DH worked really hard on this project in his spare time over the course of several evenings- maybe a week or two. Because he had to return to get more molding than he had initially purchased, it dragged on a little longer than it would have otherwise. And then it took me just about forever to sort and organize all our books, which had been packed in approximately a zillion different boxes!

The kids books are easily accessed by the little people, and the games are hidden behind the doors.

We are quite pleased with the finished product, and it’s definitely the focal point of the room where it sits, which we have dubbed “the library”. It’s really not a room, actually: it’s a super-wide hallway (read: rather nebulous waste of space that doesn’t immediately have an obvious purpose) that brings you from the living room into the master bedroom, and I can’t think of any better use for it than this (despite my DH’s campaigns for a ping-pong table!).

This tall shelf holds educational materials and reference books (dictionaries, medical books, college textbooks, etc.).

Take a Staycation… One Day at a Time!

Except for the occasions when we’ve joined one or the other of our families for a “real” vacation, my DH and I have mostly enjoyed “staycations” throughout our married life. This year is no different, except that instead of taking one whole week to enjoy our staycation, we’re spreading it out through the summer. My DH’s work schedule is kind of erratic, so we take our little mini staycations whenever he has a day off during the week. Our goal is to go somewhere one day a week throughout the summer, but in reality, it will probably be slightly less than that. Still, we plan to pack our summer full of fun and exciting memories despite the fact that we’re not truly “going on vacation”.

Just in case you are in a similar boat (no time off, no money, no inclination for a real vacation), here are some ideas to help you enjoy your summer anyway! And on the cheap, too, of course, because that’s how I roll.

Family Self Portrait taken at Maymont Estate in Richmond, VA

1. Scout Out NearBy Tourist Spots

We are lucky to live in an area where we are approximately 2 hours away from a whole host of hot tourist spots: Washington DC, Baltimore, Annapolis, Richmond, Gettysburg, the Shenandoah Valley, and more. Day trips to places like Williamsburg or the Eastern shore are not out of the question. Not to mention the whole host of local, lesser-known historic towns and spots that boast all sorts of free or nearly-free touristy fun, like historic home tours, botanical gardens, zoos and the like. So we can literally spend the whole summer being tourists in our own town without visiting the same place twice.

You may or may not be so blessed, but I bet if you take the time to look at your area through the eyes of a tourist, you’ll find more options than you thought possible for stay-at-home fun, entertainment, and even learning. Chances are, the city (or big town) nearest to you has a website (or possibly even an app) with all sorts of tips on the best sites for tourists to see. Find favorite local spots like restaurants, historic homes, parks, recreation, museums, and more.

Don’t forget to think outside the immediate area as well. Decide how far you’re willing to drive for a day trip (maybe an hour? Two? Three, perhaps?) and widen your scope to check out what’s available in that radius.

Depending on what sort of things your family likes to do, you might enjoy any of the following types of tourist spots:

  • national/state parks
  • museums
  • historic homes
  • gardens
  • nature preserves
  • zoos
  • amusement parks or entertainment parks
  • historic old town centers
  • scenic drives
  • natural sites (like caverns, waterfalls, and the like)

He found a car just his size at the local coffee shop car show.

2. Visit Favorite Local Haunts

Let’s switch gears a little bit and get hyper-local here. Whether or not you’re already plugged into the local scene, make it a priority to visit all of your town’s hot spots this summer. I’m talking about the ice cream parlor that has lines out the door every day through the season, or the pizza joint that everybody knows about and has been to at least once. What’s the favorite playground or park that all the mommies know about? The coffee shop that’s crowded on Saturday mornings because of the uh-may-zing donuts and fresh lattes they carry? (Or maybe, as in my case, the local coffee shop that hosts a car show every Saturday morning? Now that’s a fun - and free - summer activity!)

If you don’t know where these local favorites are, you can find them simply by giving a little shout-out on Facebook. Your friends should be able to point you in the right direction. Or if your town newspaper/magazine hosts a “Best of” contest every year, check those out.

Cheap Fun: Train Rides at the Mall

3. Plan a Day of Fun

You don’t even need to “get away” for your day-by-day staycation! Really, all you need to do is plan a day around activities that are enjoyable to everyone in your family, and just a little different from your usual routine. Think about what your perfect relaxing day would look like, and make it happen!

Here’s an idea for a “Staycation Schedule”:

  • Sleep in.
  • Enjoy brunch at a leisurely hour.
  • Go to a local pool for the afternoon (or play water games in your back yard). AND/OR go to the mall and get cheap carousel rides or train rides, or play in the mall’s playground.
  • Make everybody’s favorite food for dinner as a family.
  • Go to the town’s free outdoor concert or movie (many towns host these on a weekly basis through the summer).
  • Finish the day by “camping” in your own backyard. Borrow a tent if you don’t have one, or put sleeping bags in the living room!

A day trip to a lavender farm, sponsored in part by a daily deal my sister bought.

4. Check Daily Deal Sites

Sites like Groupon, Eversave, Living Social (and/or the local version in your area - around here, we have Specialicious) are a great source of good deals on local entertainment. You’ll get vouchers for at least half off to such local places as:

  • restaurants
  • bowling
  • mini golf
  • local events
  • concerts
  • sporting events
  • classes
  • pool/water parks
  • and lots more!

Using deal sites like this might make summer fun activities affordable for your family when they wouldn’t be otherwise. We’ve used these deal sites to get half priced entry to the local water park, which The Boys absolutely loved! It’s not something we’d pay full price for, but half price was totally do-able, and definitely worth it.

Playing in the sandbox at the local botanical gardens.

5. Attend Local Festivals & Events

It seems like there’s always a festival nearby around here. Some of them cost, some of them don’t. Some of them are worth it, some of them are not! The county fair is always free, and is always fun for the kids - animals to pet, shows to watch, and exhibits to enjoy. Other festivals celebrate local crops or industries, or even just townships. Do a quick Google search by combining your town or county’s name with the word “festival” and you’re sure to find some fun events to attend this summer.