The Best BBQ Sauce!

Next week is the Fourth of July, can you believe it? I can’t. I just realized I really need to plan a special July 4th menu, but then I realized that would involve knowing what we are doing for Fourth of July. Huh. Better get crackin’ on that.

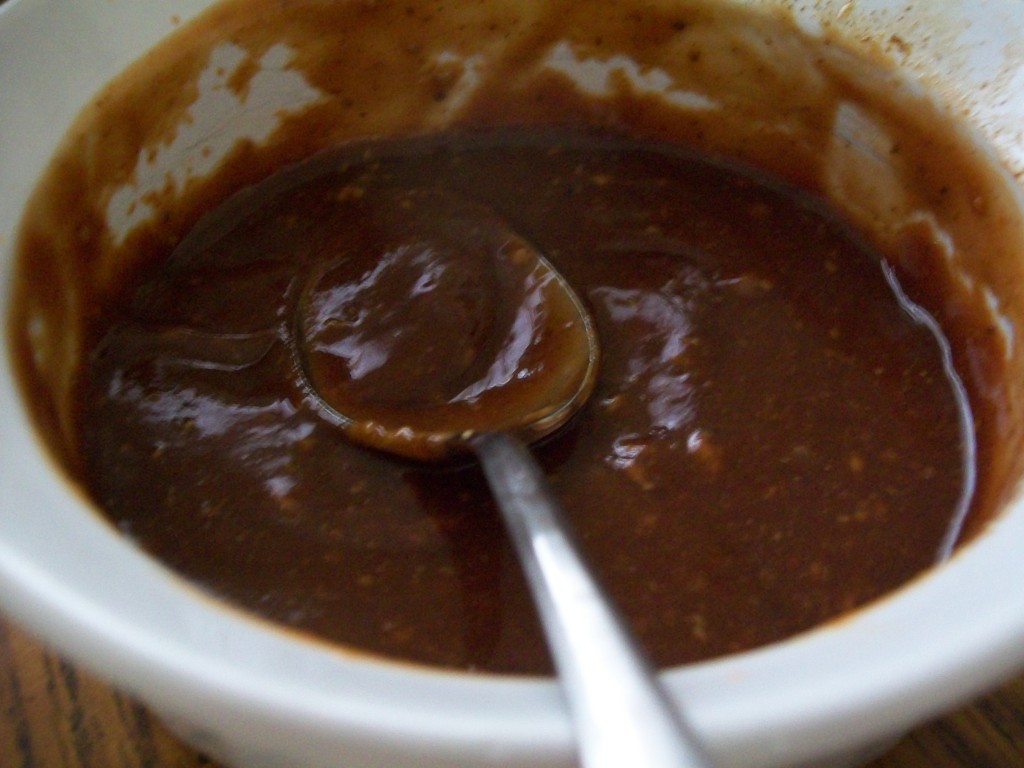
Here’s a recipe that might help with your Fourth of July plans (if you have them): the best barbecue sauce recipe! It’s my favorite recipe, the one I make all the time. I love it because it’s from my favorite vintage cookbook, and I love it because it’s flexible and easily adaptable to the ingredients I have on hand and my whims at the moment.

You’ll find my favorite bbq sauce recipe over at Homemaker’s Challenge.

And if you’re looking for more July 4th inspiration, well, here ya go:

Red White and Blue Fruit Salad
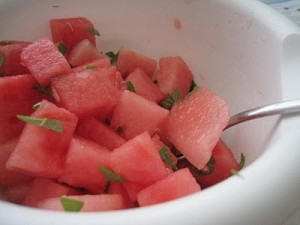
Simple Sweet Watermelon Salad (With mint! Yum!)

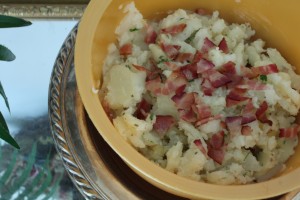
French Potato Salad. Ish.

Red White and Blue Jello (and not from a box!)

How Not to Waste Your Fresh Local Produce

FoodWasteFriday
One of my biggest pet peeves is throwing away food. I could kick myself every time I dump food down the drain or in the trash: it’s just a complete and total waste! And I hate waste. Which is why I am so thrilled to link up to The Frugal Girl on her weekly feature where she posts a picture of all the food she had to throw away for the week, and invites other bloggers to do the same. The idea is to feel some accountability - who wants to admit they threw away all that money to the whole world? - to help you avoid throwing away food in the future.

So in the picture above, you see what I threw away this week:

  1. pork bones and other remnants
  2. chicken broth
  3. summer squash

I should have put the pork bones in the freezer to save them until I had a chance to make broth, but no. I left them in the fridge like a dum-dum, and there they sat for 2 weeks or more, waiting in vain for me to broth-ify them. *sigh*

Then there was the broth (made with chicken bones that I did put in the freezer once upon a time) that got shoved to the back of the bottom shelf of the refrigerator, which spells certain death in the perishable food world. I have no idea how old it is, so I say better safe than sorry.

And finally, the saddest tale of all, the beautiful little summer squashes that I bought at the farmers market 2 weeks ago. I just forgot about them, can you believe it? By the time I realized they were too far gone, I couldn’t really face it, so I left them in the fridge a few more days. Ahem. So the next week, when I bought squash at the farmers’ market, I took it home and shredded it and put it in the freezer. No more rotting squash for me!

The good thing is that I am learning! Over the past month since the farmers’ market opened up, I’ve realized a few important habits I needed to develop in order to make the most of the fresh local produce I bring home every week.

Here’s what to do with the random fruits and veggies you pick up at the farmers’ market or in your CSA box before they end up in the compost pin or the trash disposal.

  • Make a plan. If you just wing it - which is what I like to do - it ain’t gonna happen. You’re going to end up with spoiled produce every time. Incorporate your fresh fruits and veggies into your menu plan instead of just assuming you will eat them at some point.
  • First eat the produce that deteriorates more quickly. Berries and green beans are right up there on this list! When you make your menu plan, incorporate these short-lived fruits and veggies into the earlier days so they at least have a fighting chance.
  • Freeze what you won’t eat before it goes bad. Almost any fruit or vegetable can be frozen, and it’s super easy, too. Most veggies benefit from some blanching or parboiling before freezing, but most fruits can be frozen as is.
  • Store the produce properly. When stored properly, many fruits and vegetables will last longer than you might think. I stumbled across a fabulous blog post that shows you how to store almost any kind of produce.
  • Invest in special produce storage containers. I really love the Tupperware Fridge Smart System, but others swear by the Debbie Meyer Green Bags. My Fridge Smart containers really do a fabulous job of extending the life of my produce.
How do you use up your fresh produce before it goes bad?

5 Days Series: Tried and Tested Whole Wheat Recipes

Join my friends and I as we spend 5 days together, exploring a variety of topics all related to mothering and homemaking!

Welcome back to 5 Days with Whole Wheat Flour! If you’ve missed any of the posts in the series, here they are:

  • different types of wheat available,
  • why you should choose whole wheat
  • benefits of grinding your own wheat
  • tips for baking with whole wheat flour

I’m going to close out the series by leaving you with a list of tried-and-true recipes that utilize whole wheat flour. Some of them consist entirely of 100% whole wheat, some only partial. Some are from my blog, many are from blogs I read and love. But they all have one thing in common: they are tested recipes that work. Most of them I have made myself on more than one occasion; the others come from trusted sources that have found them to be reliable. Keep this list handy, because you will need it!

At the end of the post, I’ve included a link-up so you can add your own favorite whole wheat recipes! Add as many as you like, just make sure they’re recipes you can recommend to anyone. And share with your friends - the more recipes we have, the more comprehensive the resource.

Breads

Mashed Potato Crescent Rolls - This is a family favorite recipe that I adapted for the bread machine.

Honey Whole Wheat English Muffins - This one also utilizes the bread machine.

Artisan Bread in 5 Minutes a Day (one of my variations) - I make the master recipe differently almost every time. This is a very successful version.

Flatbread Sandwich Thins - A creative twist on the artisan bread in 5 minutes a day recipe.

Anyone Can Make it Homemade Bread - Make it with half whole wheat flour for a delicious and healthy homemade bread!

Whole Wheat Sourdough Starter - As soon as I get my nerve up, I’m going to attempt this.

Quick Breads

Ugly Savory Pumpkin Muffins - You’ve had pumpkin muffins before, I’m sure. But have you had savory pumpkin muffins?

Better than Red Lobster Garlic Cheese Biscuits - I admit I love those biscuits at Red Lobster. These take care of the craving and are a lot healthier!

Pumpkin Bread - I’m ready for pumpkin season now; are you?

Whole Wheat Sourdough Biscuits - Recipes like these make me want to give sourdough another go.

Very-Little-Bother Bread - My friend Steph’s favorite bread recipe

Great Harvest Honey Whole Wheat Bread Copycat - This one is on my list to try. I love Great Harvest!

Breakfast

Individual Oven Pancakes - I had to play around with it a little bit to get this just right when using whole wheat flour.

Grandma’s Biscuits with an Autumn Twist - The twist? Pumpkin!

Pumpkin Donut Holes - These are awesome. We gobble them up around here.

Healthier Blueberry Muffins - Every cook needs a blueberry muffin recipe in their repertoire.

Whole Wheat Waffles - Yes, even waffles can be healthy! Er.

Dessert

1-2-3 Fruit Crisp - Fruit crisp is the perfect vehicle for whole grains!

Sugar and Spice Cupcakes - Based on the wacky cake recipe, these are flavored with spices like ginger, cloves, and cardamom. This is awesomeness.

Gingersnaps - Whole wheat flour in the yummiest little package ever!

Oatmeal Jumbles - Cookies, actually.

Pumpkin Chocolate Chip Blondies - You haven’t really lived until you’ve eaten a few of these.

Ginger Peach Shortcakes - You’re going to want to keep this one handy. Peach season is coming soon!

Strawberry Summer Cake - Make it before strawberry season is over!

Main Dish

Cream of Chicken Soup - Yes, you can use whole wheat flour as a thickener!

Creamy Chicken and Rice Soup - I’ve made this one, and it’s delicious.

Savory Oven Pancake - The Dutch Pancake gone savory.

Slow Cooker Chicken & Whole Wheat Garlic Dumplings - I shouldn’t type such things when I’m hungry.

Perfectly Frugal Pizza Crust - Everybody needs a good pizza crust recipe.

The Entire Series
Day 1: What’s With All The Different Kinds of Wheat?
Day 2: Why Whole Wheat?
Day 3: Getting the Most Out of Your Wheat (Grind it Fresh)
Day 4: How to Bake with Whole Wheat Flour
Day 5: Tried and Tested Whole Wheat Recipes

What’s your favorite whole wheat recipe?


Sharing at Katherine Martinelli

How to Bake with Whole Wheat Flour

Join my friends and I as we spend 5 days together, exploring a variety of topics all related to mothering and homemaking!

Welcome back to 5 Days with Whole Wheat Flour! So far we’ve discussed the different types of wheat available, why you should choose whole wheat , and the benefits of grinding your own wheat. Today, it’s all about the point where the rubber meets the road: actually baking with whole wheat.

Now that you are fully armed with information about wheat, it’s time to learn how to use it. Baking with whole wheat is kind of tricky, not only because of the taste, but because of the texture as well. Not to mention that it behaves somewhat differently from white flour in baked goods, so you have to use it in a slightly different way.


Grind

I know I already said this yesterday, but if you missed out on that post, I will repeat it just for you: grind your own wheat berries for the freshest, best tasting flour ever! Whole wheat flour gets a bad rep in part because it is often already rancid when you buy it from the store. Part of that bitter taste comes from the tannins in the bran, but part of it is also the rancid quality. Freshly ground flour tastes nutty and sometimes sweet, not bitter.

Sift

As we discussed in the post “Why Whole Wheat?”, there are some concerns about the digestibility of whole wheat, particularly the bran. Some people resolve the issue by soaking or sprouting their flour, but I feel that sifting the flour is sufficient. Since (at least) the days of Rome, flour has traditionally been sifted to remove the larger pieces of bran left behind in the milling process. If you grind your wheat in the Vitamix, there’s not likely to be a lot of bran to sift out, but both store-bought and home-ground whole grain flours still benefit from a good sifting before baking. Sifting aerates the flour, which helps result in a lighter product in the end.

Weigh

The American system of measurement in baking - cups - is horridly inaccurate when it comes to measuring dry goods. One cup of flour can weigh 4 oz., or it can weigh 5.5 oz. Clearly, this makes a difference in whatever it is you’re baking, so it makes the most sense to weigh your flour when baking rather than using unreliable cup measurements. You can convert recipe measurements to weight, but it’s easier to start with a weight-based recipe in the first place. The easiest place to find such recipes is on British sites, like AllRecipes.co.uk. You can also find a huge list of measurement conversions at Convert-to.com.

If you don’t have a kitchen scale, I can highly recommend the one I use: The EatSmart Kitchen Scale. It’s small and lightweight, so it doesn’t take up a lot of space (a precious commodity in my kitchen!). Plus, it’s really easy to use and has proven to be very accurate.

Here’s a video of me sifting and weighing whole wheat flour to make bread. (I know, another vlog! Two days in a row! What is the world coming to?)

LinkedTube

Orange Juice

King Arthur Flour - the expert on the subject - recommends replacing up to a 1/4 cup of the liquid called for in a recipe with orange juice. The orange juice is supposed to offset the bitter taste that whole wheat flour can sometimes project, but it doesn’t make the bread (or whatever you’re baking) taste like orange juice. We don’t normally have orange juice sitting around, but when oranges are in season, I do make use of this tip. Maybe this winter, I will freeze some extra orange juice so I can have it all year long! Some people recommend adding a pinch (just a little pinch!) of citric acid to the dough for presumably the same reason.

Moist & Flavorful

The stronger flavor of whole wheat flour works very well in recipes that have a complementary strong flavor. I personally think that whole wheat flour adds a lot to recipes that have a lot of spices, like gingerbreads and gingersnaps. Pumpkin breads and cakes also work well with whole wheat flour, in my opinion. The molasses and ginger in recipes like this really go together well with the hearty whole wheat flavor. Carrot cake is another one that I believe is a good candidate for whole wheat flour. Also, these recipes generally have more moisture to them, another reason whole wheat flour works well in them. Whole wheat flour loves moisture! So if you’re just starting to bake with whole wheat, I suggest you start with a recipe like one of these.

Replacing White Flour

When starting with a white-flour-based recipe, you can replace up to 1/3 of the white flour with whole wheat flour and not have to make any adjustments.

More Liquid

Keep in mind that whole wheat flour absorbs more liquid than white flour, so if you’re adapting a white-flour-based recipe, you’ll want to add more liquid. Add just a tablespoon at a time until you get the consistency you desire.

Consider a Different Flour

If your only exposure to whole wheat flour is the kind you buy at the grocery store, consider trying a different type of flour. In particular, I would recommend either white whole wheat flour or whole wheat pastry flour (the latter is not particularly good for bread, though, if that’s what you want to bake). Whole wheat pastry flour can be difficult to find, but white whole wheat flour is readily available at most grocery stores. Both of these flours will have a lighter taste and texture than the whole wheat flour you are more accustomed to.

Baking Bread with Whole Wheat Flour

Everybody loves a slice of fresh homemade bread, but making a 100% whole wheat loaf of bread that rises beautifully and tastes hearty but delicious can be a seemingly impossible task. I admit I’m not there yet, but I’ve learned a few things along the way that have helped me in my journey to bake a better loaf of bread.

Vital Gluten

Healthy Bread in 5 Minutes a Day, my own personal favorite guide to bread baking, recommends adding 1/4 cup of vital gluten to a 4-lb batch of dough (7-8 cups flour) to aid in the rise and elasticity of the dough. Gluten is the element of wheat flour that helps create the rise and elasticity of the dough, so that the final product is light but not crumbly. This is why most bakers prefer to use a high protein type of wheat (like hard red spring wheat) to bake bread, because high protein is high gluten. Unfortunately, when using whole wheat, the bran cuts into the strands created by the gluten, reducing the elasticity and hindering the rise. Sifting helps with this, but so does adding gluten.

Personally, I haven’t followed this advice because it’s just one more thing to put on my grocery list. My grocery budget is pretty tight, and doesn’t really have room for extra stuff. I also admit to being more than a little fearful of ingesting too much gluten, considering the rise of wheat allergies, sensitivities, and celiac disease. I am not 100% convinced that it is in fact the healthiest way to make bread. I am also not 100% against using it, should I ever decide to spend money on it. You will have to make that call for yourself. If you want to check it out, Amazon.com carries Hodgson Mill’s Vital Gluten.

Ginger

I like to add a few dashes of powdered ginger to my bread dough, because it is also a conditioner. It makes the yeast happy, which helps give the dough a happy rise.

Eggs, Sugar, Milk & Butter

These ingredients are all considered “dough conditioners” and will help produce a lighter loaf of bread when baking with whole wheat flour. Most sandwich bread recipes contain one or more of these ingredients because they will all help create a more delicious and higher-rising loaf of bread, the kind most of us are familiar with when it comes to sandwiches.

What are your favorite tips for baking with whole wheat flour?

The Entire Series
Day 1: What’s With All The Different Kinds of Wheat?
Day 2: Why Whole Wheat?
Day 3: Getting the Most Out of Your Wheat (Grind it Fresh)
Day 4: How to Bake with Whole Wheat Flour
Day 5: Tried and Tested Whole Wheat Recipes

Sharing at Works for Me Wednesday, This Chick Cooks


5 Days with Whole Wheat Flour: Getting the Most Out of Your Wheat

Join my friends and I as we spend 5 days together, exploring a variety of topics all related to mothering and homemaking!

Welcome back to 5 Days with Whole Wheat Flour! So far we’ve discussed the different types of wheat available, and why you should choose whole wheat (for the most part) over white flour. Today, we’re going to discuss the benefits of grinding your own wheat.

Say what? Yes, grinding your own wheat. No, not by hand. (Heavens, that would take forever!) Not even with a stone.

These days, you can purchase appliances that will speedily grind your wheat (and any other grain or seed) for you so that you can have the freshest possible flour in a minute or less.

Why? Why would you want to invest in such a tool? I know that I don’t part with my (husband’s) hard-earned money easily, and I suspect you don’t either. Allow me to convince you of the necessity of such a tool, and encourage you to save up for one if you don’t have ready money for it.

The reason why whole wheat should be freshly ground if at all possible is the same reason why we avoid certain oils: rancidity. Polyunsaturated fats easily turn rancid simply by exposure to heat, light, or air, making them very unstable. Oils made from these fats are full of free radicals, which become the source of a large number of diseases in the body.

The oil in wheat comes from the germ. Here’s the picture from yesterday so you can see what it looks like:

Storebought whole wheat flour might not contain all the oils and the germ in its entirety, but even so, it does go rancid much more quickly than white flour. This is a good thing. Living food will go bad much more quickly than dead or dying food. The trick is to consume it before it turns rancid so that you can get the benefit of all its nutrients without the risk of free radicals.

In the case of certain oils (most vegetable oils), this is nigh unto impossible, which is why many experts recommend avoiding such oils. (The Good Fat Cookbook by Fran McCullough explains this in great detail.) But thankfully, with whole wheat, there is a way to easily acquire fresh whole wheat flour without worrying about rancidity and free radicals.

The answer is to grind it yourself. When you grind your own whole wheat, you can be sure it is as fresh as possible. The bran (the outer covering of the wheatberry) protects the inside contents of the grain so that it can stay fresh for years. It’s only when the bran is crushed (or milled) that the germ is exposed to light and air and begins to rancidize.

If you’re still not convinced, consider the “rat study” mentioned by Katie of Kitchen Stewardship (who, as I mentioned yesterday, has extensively studied this topic of wheat, and has a lot of great information on her blog) in her post about the nutrition of freshly ground wheat. In the study, rats were fed a variety of types of wheat; some freshly ground, some 15-day old ground flour, and some store-bought white flour. Within 4 generations, the rats fed the old flour and the white flour had become completely infertile. Four generations of rats is the equivalent of 100 human years… Americans have been eating white flour for about 130 years, and what has become a widespread problem? Infertility. I think it is no coincidence!

So whether you sprout it or soak it or not, clearly the healthiest wheat is the freshest wheat. Many experts suggest that freshly ground whole wheat can be refrigerated or frozen and used within 2-4 months. I say better safe than sorry. Grinding wheat in the appropriate equipment takes less than a minute, so it’s easy enough to grind your wheat right before you need to use it. If you have extras, you can store it in the freezer to use a tablespoon at a time as a thickener or sourdough feeder. But generally speaking, it’s best to use the flour you grind right away.

I have no experience with grain mills, so I will direct you Kelli at Lady of the Barn, who is also participating in the 5 Day series, and presented the results of her extensive research on grain mills earlier this week. She will direct you to the best grain mills for your purpose.

What I do have experience with is my Vitamix! With a Vitamix dry blade, you can grind wheat berries in a minute! It’s so easy to use, and I love that it’s a multi-purpose appliance. Aside from my yogurt machine, my rule for the kitchen is that all of my appliances must be multi-taskers, and the Vitamix certainly is that. I use it at least once a day, and for all kinds of things: smoothies, coconut milk, rice milk, brown rice flour, milk shakes, ice cream, etc. etc. But I especially love to use it for grinding fresh flour.

And whaddyaknow, I actually made you a video about it! This is my first ever vlog, can you believe it? I’ve been blogging for how long, and this is my first vlog? Crazy! And for you non-video-watchers (because I confess, I am one), I’ve written out my flour grinding method below the video. Enjoy!

LinkedTube

My Flour-Grinding Vitamix Method

  1. Store the wheat berries in the freezer. Grinding in the Vitamix generates a lot of heat, which can damage some of the vitamins, and it also means you have to give the flour some time to cool down before using it. If you freeze your berries first, that will help with both issues. I can use flour ground from frozen berries right away.
  2. Only grind grains in the Dry Blade, which must be bought separately.
  3. Grind one cup at a time. The Vitamix manual says you can grind up to two cups at a time, but I find that it grinds better when I only do one cup at a time.
  4. Turn the variable speed to “ten”, then the switch to High. Grind for one minute (set a timer if you need to).
  5. Sift the flour through a mesh strainer before using.

That’s all there is to it! To clean it, you can fill the container half way with water and a drop of dish soap, and blend it on high for about 30 seconds, then rinse. When there’s just dry dust from grains, Isimply give it a good rinse and let it dry.

Purchasing a Vitamix with a dry blade costs about $600, plus shipping. Gulp. I know! El Cheapo here can’t even think about that cost without shuddering! But you have a few options:

  • Consider a reconditioned machine. They cost about a $100 less, and come with a 5-year warranty.
  • Purchase it at Costco. Periodically Costco will have a Vitamix show where a vendor will come to demonstrate the product, and it’s usually cheaper then.
  • Save up! That’s what I did. I saved my spare pennies until I could afford one.
  • Follow Granola Mom 4 God’s example and put it on your wish list. Ask everyone to contribute what they would spend on your birthday or Christmas present to your Vitamix fund instead.

And if you think a Vitamix is still not worth it, I strongly urge you to think again. I normally don’t pay anymore for anything than I have to, and I’m famous for buying the cheapest thing possible. But can I tell you how many blenders and food processors I burned through before I finally threw up my hands in defeat and declared I wouldn’t purchase another one until I purchased a Vitamix!? I wasted probably several hundred dollars anyway on machine that just didn’t last. The Vitamix (a new one) comes with a 7-year warranty and usually lasts much, much longer than that.

Well. I seriously did not intend for this post to be such a Vitamix commercial, but I just got excited and a little carried away! Ahem. At any rate, I can assure you, Vitamix did not sponsor me in any way for this post, but I am a Vitamix affiliate. So if you click on my Vitamix links and make a purchase (yay, you!), then I will earn a small commission. The good news for you is that you also earn $25 in free shipping just for clicking my link, a win-win in my opinion! Or you can take my advice and wait until Vitamix comes to Costco for a better price. I totally understand, because that’s exactly what I did. At any rate, I really think you need to go get yourself a Vitamix.

And grind some grain, baby!

The Entire Series
Day 1: What’s With All The Different Kinds of Wheat?
Day 2: Why Whole Wheat?
Day 3: Getting the Most Out of Your Wheat (Grind it Fresh)
Day 4: How to Bake with Whole Wheat Flour
Day 5: Tried and Tested Whole Wheat Recipes

Sharing at Frugal Days, Sustainable Ways, and Works for Me Wednesday

5 Days with Whole Wheat Flour: What’s With All the Different Kinds of Wheat?

Join my friends and I as we spend 5 days together, exploring a variety of topics all related to mothering and homemaking!

It’s common knowledge that whole wheat flour is better for you than white all-purpose flour… but why is that? And what exactly is whole wheat flour, anyway? What’s the difference between whole and white flour?

We’ll talk about all these things and more every day this week - you won’t want to miss a single day, so be sure and subscribe if you haven’t already (Should I mention there’s a bonus free gift for subscribers?).

Wheat is a grain (or cereal) that has been around since the dawn of time, and has been a staple food for civilizations since the ancient Egyptians. It is the third most widely produced grain in the world, after corn and rice.

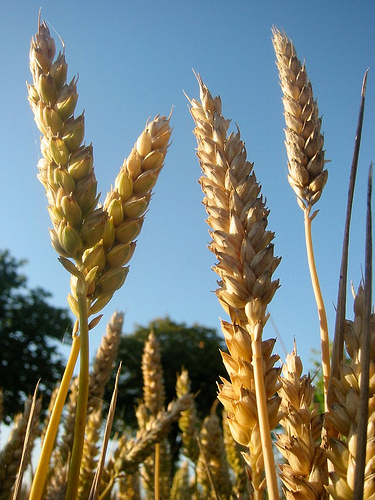
Wheat (Triticum aestivum L.)

You’ve probably heard of grains and flours similar to wheat, like durum, spelt, kamut, and emmer. Those are all variants of wheat, but for the purposes of this series, I’m going to focus exclusively on the common wheat flour you’ll find in any grocery store and in any kitchen.

The fact of the matter is, wheat is confusing enough! When I asked on Facebook for your questions about whole wheat flour, one repeated theme was the issue of all the different varieties, what they are, and what purpose they serve. And the most important: are they equally healthy?

I’ll do my best to answer your questions, and for whatever burning questions you have that may remain, I’ve included some very informative links at the bottom of this post.

Let’s untangle the wheat confusion, shall we?

There are two main kinds of wheat: hard and soft. Simple, right?

Not so fast. Wheat can also be “winter” or “spring” wheat, depending on when it was planted and harvested. And on top of all that, wheat can either be “red” or “white”.

Yes, I know. Confusing. Let’s break it down.

Hard & Soft

Hard wheat has a higher protein content than soft wheat, and that protein is mostly gluten. Gluten is what creates the highly prized elastic quality of bread dough, and is therefore a desirable element in bread flour. Hard wheat can be either spring or winter wheat (more on that in a minute). Soft wheat is lower in protein and higher in carbs, making it ideal for cakes and other sweets, but not so much for bread. Soft wheat is almost always winter wheat.

Spring & Winter

Depending on the area where it’s being cultivated, wheat can be sown either in the fall or spring. When wheat is sown in the fall, it becomes dormant over the cold winter months, then resumes growing in the spring. Such wheat is called “winter” wheat, and typically has a lower protein content in comparison to the same wheat grown in the summer. Spring wheat is sown in the spring and harvested in late summer or early fall, and has a comparatively higher protein content.

Red & White

This refers to the color of the bran, the outer layer of a wheat berry, and is the biggest difference between the two. Bread made from red wheat will be considerably darker in color than bread made from white wheat. Red wheat also has a slightly bitter taste from the tannin that creates the red color, whereas white wheat has a lighter (and many say more pleasant) flavor. Both hard and soft white wheat have about the same amount of protein as soft red winter wheat, but not as much as hard red wheat varieties. Otherwise, it has a very similar nutritional profile to all other wheat varieties. (See a comparison of all kinds of wheat here.)

Essentially, the different types of wheat all come down to the protein content, with soft white wheat having the least amount of protein, and hard red spring wheat having the most.

But that’s just the berry. We haven’t even talked about the milling process yet! Different flours are produced by using different wheat varieties, but also by grinding them differently.
flours
The most basic difference in wheat grinds is Whole Wheat vs. Enriched (or “White”). Whole wheat is exactly what it sounds like: a flour ground from all 3 parts - endosperm, bran and germ - of the wheat berry. Enriched or White flour is ground only from the endosperm and usually has the nutrients typically found in the bran and germ added back in (hence the term “enriched”) after grinding.

As grocery stores are offering more and more options these days, you’re bound to see bags of flour on the shelf that go beyond the usual “Whole Wheat Flour” and “All-Purpose Flour”. What are all those flours anyway? What kind of wheat are they made of? How are they ground? Are they whole grain? What is their protein content? What foods do you make with them?

Here’s a quick lexicon to help you sort through all those labels and determine which flour you need.

  • All-Purpose Flour (commonly called “white flour”) is a blend of 80% hard wheat and 20% soft wheat with a protein content of 8-11%. It is typically bleached, which means you’ll want to stay away from it if you’re trying to avoid chemicals in your food. Also, all-purpose flour is not a whole grain flour, meaning it’s made from the endosperm of the wheat berry and does not contain the nutrient-rich bran and germ.
  • Unbleached All-Purpose Flour (also called “white flour”) has been whitened naturally by aging for a few months rather than using chemicals. Once again, it is made only from the endosperm, not the bran or germ.
  • Bread Flour, unless specified as whole wheat bread flour, is also made only from the endosperm, and is high in protein. The most commonly available varieties in the grocery store are usually made from hard red spring wheat, and have some malted barley added. The protein content is typically high, from 12% to 20%, making it popular with bread bakers.
  • Cake Flour is a bleached white flour with a very low protein content (6-8%) to make it especially good for cakes and pastries. But not very good for your health.
  • Self-rising Flour is usually white flour with added leavening ingredients (baking soda and salt). It’s mostly used for biscuits.
  • Whole Wheat Flour is made from all parts of the wheat berry (germ, bran, and endosperm), but supermarket varieties are not typically labeled as to their ideal usage (bread or all-purpose). My guess is that most flours labeled “whole wheat” are ground from hard red winter wheat, and have a protein content of around 12%. Since it is made from the entire wheat berry, it is higher in fiber and overall nutritional content than white flours.
  • White Whole Wheat Flour is ground from white wheat berries, and also contains all 3 parts (germ, endosperm, bran). It’s a little lower in protein than its red counterpart, but has a lighter taste and color, making it ideal for anyone who wants to eat more whole grains but is put off by the taste, texture and color of the more common red wheat flour.
Those are the flours more readily available at any grocery store around the country. At specialty stores or larger stores, you might be able to find the following types of flours:
  • Pastry Flour is available in both whole wheat and white varieties, and has a lower protein content (9-10%). As its name suggests, it’s best for pastries, cookies, cakes, and the like. I’ve personally not found whole wheat pastry flour in any store near me, but Bob’s Red Mill, King Arthur Flour, and Hodgson Mill all carry this variety and are available in some stores around the country (and, of course, online). You can also find other producers of whole wheat pastry flour on Amazon.com.
  • Sprouted Flour is made from wheat berries that have been soaked until they sprout, then dried and milled. Sprouted flour is considered by many to be the healthiest form of wheat flour available, and is usually available at health food stores or you can, of course, find a variety of sprouted flours on Amazon.com. Cultures for Health is another good source for sprouted flour
  • Stone Ground Whole Wheat Flour is milled the old-fashioned way, using stone instead of steel. The benefit of stone ground flour is that the entire grain is ground at once, keeping the bran and germ together with the endosperm. When flour is ground on steel mills, the endosperm is typically removed and ground to create white flour, then the germ and bran are added back in afterward. Tropical Traditions and Arrowhead Mills both carry stone ground whole wheat flour.
Whew! That was a lot of information about one little grain, wasn’t it? Did you have any idea wheat was so complex?
The Entire Series
Day 1: What’s With All The Different Kinds of Wheat?
Day 2: Why Whole Wheat?
Day 3: Getting the Most Out of Your Wheat (Grind it Fresh)
Day 4: How to Bake with Whole Wheat Flour
Day 5: Tried and Tested Whole Wheat Recipes

For More Information:

The World’s Healthiest Foods: Whole Wheat

Bob’s Red Mill: Hard Red Wheat vs. Hard White Wheat

King Arthur Flour: Learn More About Our Wheat

Today’s Dietitian: Make Way for White Whole Wheat

The Fresh Loaf: White Vs. Red, Spring vs. Winter

This post contains affiliate links.

Linking up at Traditional Tuesdays, and Titus 2sDays


What To Do With 20 Pounds of Strawberries!

strawberries

It’s strawberry season, y’all! Time to go find a pick-your-own farm near you and get busy! The farm we go to - like many PYO farms, I imagine - offers a cheaper price per pound if you buy more than a certain amount. In the case of strawberries, that’s 20 pounds. So naturally, I had to pick 20+ pounds of strawberries! Why pay $2.59 a pound when I can pay $2.09?

And as much as The Guys and I love strawberries, there’s no way we could plow through 20 pounds of them before they went bad. After all, strawberries start to deteriorate almost as soon as you’ve picked them off the plant, so they have to be eaten rather quickly.

That was fine with me, though. At any rate, my entire purpose in picking strawberries was to preserve them so we could enjoy them for the 10 months of the year when they are not in season, so 20 pounds was perfect for me!

So what did I do with all those berries? I spent a decent portion of the weekend “putting them up” as the grandmas would say, and this is what I did:

  • I froze probably about 10 pounds of strawberries following these directions for freezing berries. I sliced about half of them and just packed them into freezer bags without bothering to flash freeze them. The rest I left whole and those I did flash freeze. My plan is to see which method I prefer as I use them throughout the rest of the year. (My opinion at the moment is that slicing them takes up a lot less space, but might render them less accessible.)
  • I dehydrated about a pound of strawberries, which wasn’t much, especially because they shrink considerably as they dry! To dehydrate, I sliced each strawberry into about 3 slices and laid them on a dehydrator tray. Once I set it going, the drying process took probably 4-6 hours. I’m not 100% sure because I got busy doing other things and going places and I don’t really know for sure how long it took. I do know that we all left the house for the evening, so I turned off the dehydrator and then forgot to turn it back on. Ugh! I had to throw out the strawberries that hadn’t dehydrated completely, which thankfully was not too many. Next time around, I will definitely dry more strawberries… and I won’t run off, leaving them unattended, either!
  • I also made some jam. I experimented this year with jam made from home-made pectin. That’s another post for another day. I also made two batches of jam using Pomona’s pectin, one which I froze, and one which I canned.
  • I made smoothies for breakfast one morning using the Straw-nana Berry Smoothie recipe from Spring Into Smoothies (Pssst! Spring Into Smoothies is available FREE to all my subscribers!)
  • I gave away some of the strawberries. What good is all that bounty if you don’t give some away?
  • I made this delicious Sour Cream Strawberry Ice Cream. Oh. My. It was sooooo gooooood. I didn’t have quite enough sour cream, so I used part plain yogurt, and wow! The most delicious ice cream ever! I also only used half a cup of (unrefined) sugar, and it was perfectly sweet. (Of course, the berries were picked ripe, so they were nice and sweet already.)
And that, my friends, is what you do with twenty pounds of strawberries!
What would you do with twenty pounds of strawberries?
Sharing at Frugal Friday

What to do With Wilting Greens

FoodWasteFriday
One of my biggest pet peeves is throwing away food. I could kick myself every time I dump food down the drain or in the trash: it’s just a complete and total waste! And I hate waste. Which is why I am so thrilled to link up to The Frugal Girl on her weekly feature where she posts a picture of all the food she had to throw away for the week, and invites other bloggers to do the same. The idea is to feel some accountability - who wants to admit they threw away all that money to the whole world? - to help you avoid throwing away food in the future.

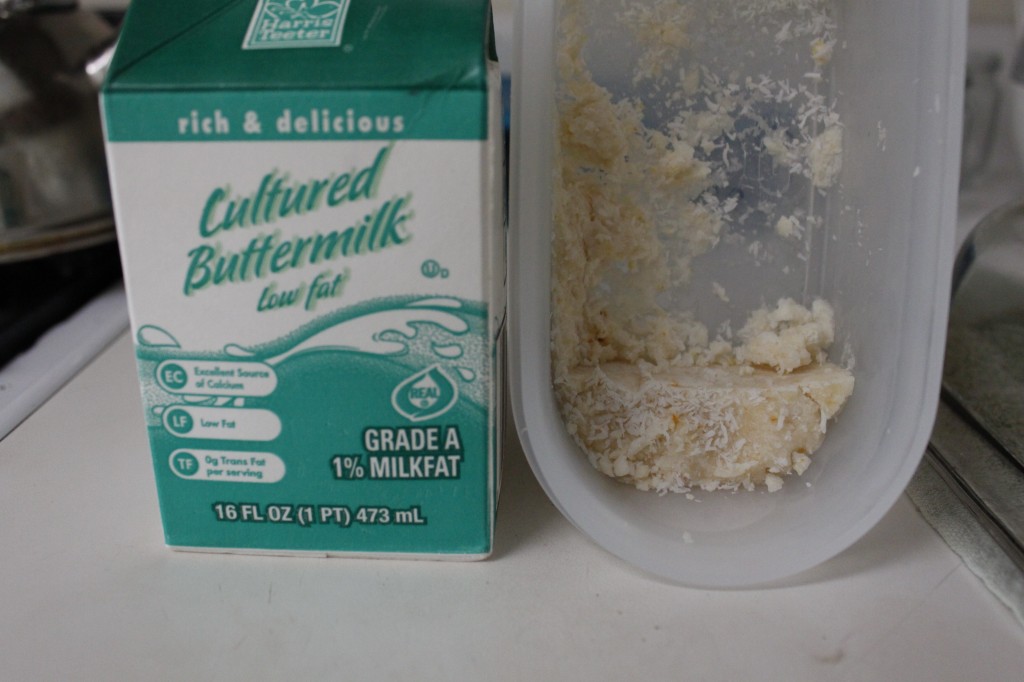
buttermilk and fudge
So in the picture above, you see what I threw away this week:

  1. half a carton of buttermilk (Expired May 2! Oops.)
  2. a few pieces of leftover coconut cream fudge that were, um, a couple weeks old (at least)

This is unfortunately only part of the story. I was gone all last week because my dad had open heart surgery (amazing how the body can heal from such a thing!) and the guys were left to fend for themselves. (Not entirely true: I made most of their food ahead of time, or otherwise planned easy-to-fix meals.) Since I am generally the one who manages the food inventory, nobody else paid attention to the various and sundry containers lying around the refrigerator. When I got home, I did have to throw away a few things that had escaped everyone else’s notice.

One thing I managed to salvage was the remainder of a bag of mixed greens I had bought at the farmers’ market a week before I left. The greens were just starting to wilt; they weren’t yellowing or getting slimy, so they were still in decent shape. I picked out enough of the best leaves to make myself a delicious salad for lunch, and I stuck the rest in the freezer to throw into a future pot of broth.

So if you find yourself with an excess of greens - any kind, from arugula to spinach! - don’t dump them down the garbage disposal. Instead, inspect them briefly, and if they are only wilted (no slime or browned leaves), consider using them in any of the following ways:

  • steamed or sauteed (If you like that sort of thing. Me? No, thank you!)
  • chopped up and added to scrambled eggs, omelets, or frittatas
  • as toppings on a pizza
  • added to soup
  • used in broth
  • dehydrated (it doesn’t take long in a dehydrator, a couple hours at most) and crumbled into soups like you would herbs
What is your favorite use for wilting greens?

Those who plan menus generally tend to waste less food. Not into menu planning? You might want to read Stephanie Langford’s eBook, “Plan It, Don’t Panic” for inspiration. Right now, it’s on sale 25% off with the code CHALLENGE25, making it only $3.74. Or you can just go for a bundle of all 3 of her books at 50% off (that’s only $19!) with the code BUNDLE50!

Sharing at Frugal Days, Sustainable Ways

Waste Food No More!

FoodWasteFriday
One of my biggest pet peeves is throwing away food. I could kick myself every time I dump food down the drain or in the trash: it’s just a complete and total waste! And I hate waste.

Which is why I was so thrilled recently to come across another blogger who hates wasteas much as (or more than) I do. The Frugal Girl has a weekly feature where she posts a picture of all the food she had to throw away for the week, and invites other bloggers to do the same. The idea is to feel some accountability - who wants to admit they threw away all that money to the whole world? - to help you avoid throwing away food in the future.

So in the picture above, you see what I threw away this week:

  1. a cooked kabocha squash
  2. a serving of beans
  3. half a serving of peanut-butter-chocolate oatmeal topped with bananas.

The story about the squash is very sad. I cooked it in order to puree it, and left it on the stove top to cool. And forgot about it. All night. I hate it when I do that!

The beans just languished in the fridge because they were just one serving, and kind of got pushed to the back and forgotten.

As for the oatmeal, I just made myself way too much of it one morning, and couldn’t finish it. And after it had spent a day in the fridge, it didn’t look so appetizing anymore. Yuck. So it spent the rest of the week in the fridge, waiting to be eaten, only to be studiously avoided. Oh well. Next time I’ll make myself a smaller portion!

While we’re on the subject, I thought you might like to read my most recent post for Homemaker’s Challenge: 5 Foods You Should Never Throw Away. You may be surprised by the amazing things you can accomplish with food scraps you used to throw down the disposal: apple peels and cores, citrus peels, veggie scraps and more! Waste food no more!

Something from Nothing: Healthy Fats {Guest Post}

something from nothing graphic

I’m so excited to have my friend Stephanie, The Cheapskate Cook, guest posting for me here today. Her blog is one of my favorites, and I read each and every post. She always inspires me with her cheerful attitude and her ability to stretch a grocery budget beyond believable limits. Speaking of stretching… she has a great idea that will help us all stretch our own grocery budgets. I’ve only recently started doing this, and I can’t believe it took me so long!

When I was four years old, I learned to stretch. I was in a ballet class full of tutus, tights, and soft pink shoes; and we were all sitting on the floor, legs stretched out in front of us, trying to touch our noses to our knees. I gritted my teeth and, unlike when I try to stretch today, my nose eventually bounced off my knee. Of course, I was four, so I was much more elastic than I am now.

However, that day I learned that stretching isn’t always easy. It’s not a comfortable word. Usually it implies extra work and maybe even a little bit of pain. Little did I know how much I would have to learn to stretch over the years.

Many of us have had to learn to stretch a lot of things. We had to stretch our comfort zones when we grew up and took responsibility of our work, our bills, and our future. We had to stretch our skill set when we took that job. We had to stretch our patience when we had that kid (especially when that kid turned two). And most of us reading this blog have had to stretch our grocery budget.

Anne has given us a lot of resources here, and I’m thankful to learn with other people who are stretching their food in healthy ways. I remember when we had $35/week for groceries, and I learned how to stretch chickens across more meals than I knew was possible. Who could’ve imagined the mileage you could get out of those things? It was like the endless poultry. I’m still learning these tips and tricks, one of which I want to share with you today.

Many of you are already familiar with making your own chicken broth or stock from the bones of leftover chicken (if you aren’t, here is an easy stepping stone method you can try as you cook up the chicken in your crock pot. If you already make chicken stock or broth, here is a list of tips I’ve learned over the years to increase nutrition and ease.). I’ve been doing this for years, and I usually pour the stock into clean glass jars then store them in the fridge or freezer (jars that are frozen can only be about 2/3 full to prevent the glass from breaking). But before I put them in the freezer, I wait.

I wait because I’ve found a way to stretch the chicken just a little farther. After the stock sits in the fridge for a few hours, a layer of fat forms on the top. This fat actually helps seal your stock and keep it from spoiling, so I try to leave at least a thin layer of fat on the stock.

But as you can see from the photo, the layer is often really thick. So I scoop the excess into a small jar and use it throughout the week whenever I need to sauté vegetables or meat, or grease pans for savory dishes. Works great, adds flavor, and it’s a healthy fat. Using a dab of this chicken fat helps me stretch expensive ingredients like butter and olive oil. And you know I’m all about stretching.

Little practices like this make my frugal kitchen a little more real foods based, helps me waste a little less, and keeps my food flavorful and healthy. Stretching isn’t always fun, but a frugal, efficient kitchen is very rewarding.

When Steph and her husband got married, they lived in a renovated shed and had a grocery budget that matched. As a passionate whole-foodie, Steph was determined to continue eating healthy, minimally-processed foods on their shoestring budget. So The Cheapskate Cook was born.

You only have until tomorrow morning at 8am to get 38 awesome e-books for only $29 - that’s less than $1 a book! Some of them are valued at $10 and more; in fact, the total savings is over $300!! Go get it while you can!