Welcome to the March edition of the Secret Recipe Club (Group A), the part of the show where the bloggers sing write about each others’ recipes (which they have secretly been testing on the sly).
My secret assignment this month was none other than our host for the week, The Heritage Cook. Jane, the heritage cook, is the one who keeps our Group A organized and ready to go every month. (Thanks, Jane!) Jane is passionate about eating local, organic and seasonal food, which appeals to me, as you can imagine. She has tons of recipes, and she knows what she’s talking about when it comes to the kitchen, so go check out her blog and be inspired!
My absolute favorite feature over at The Heritage Cook is Chocolate Mondays! Monday is bad, but Chocolate Monday? Good. Very very good.
So of course, I had to choose one of her delicious chocolate recipes; I simply had no choice! One of her more recent Chocolate Monday posts caught my eye because it featured not one, not two, but three chocolate drink recipes! You could take your pick of Orange Chocolate Ice Cream Shake, Copacabana Milkshake, and Brazilian Chocolate Drink.
 I went with the Brazilian Chocolate drink because:
- It was hot and I was cold.
- The other two had ice cream. I was cold.
- And I didn’t have any ice cream.
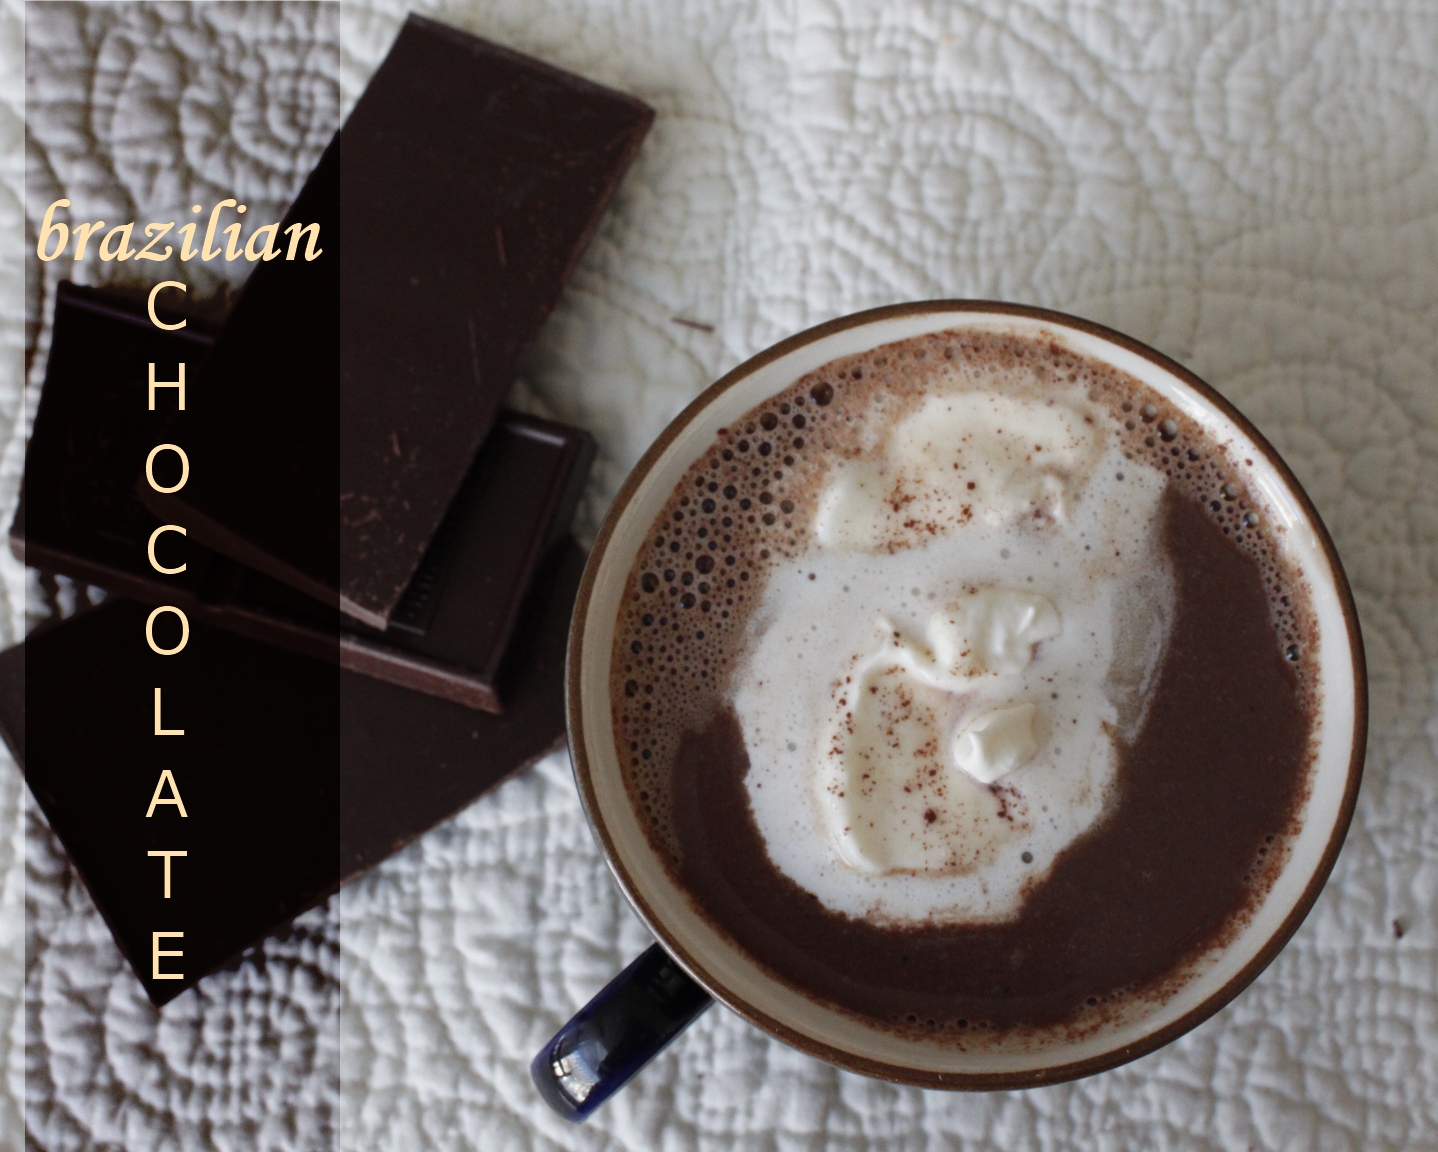
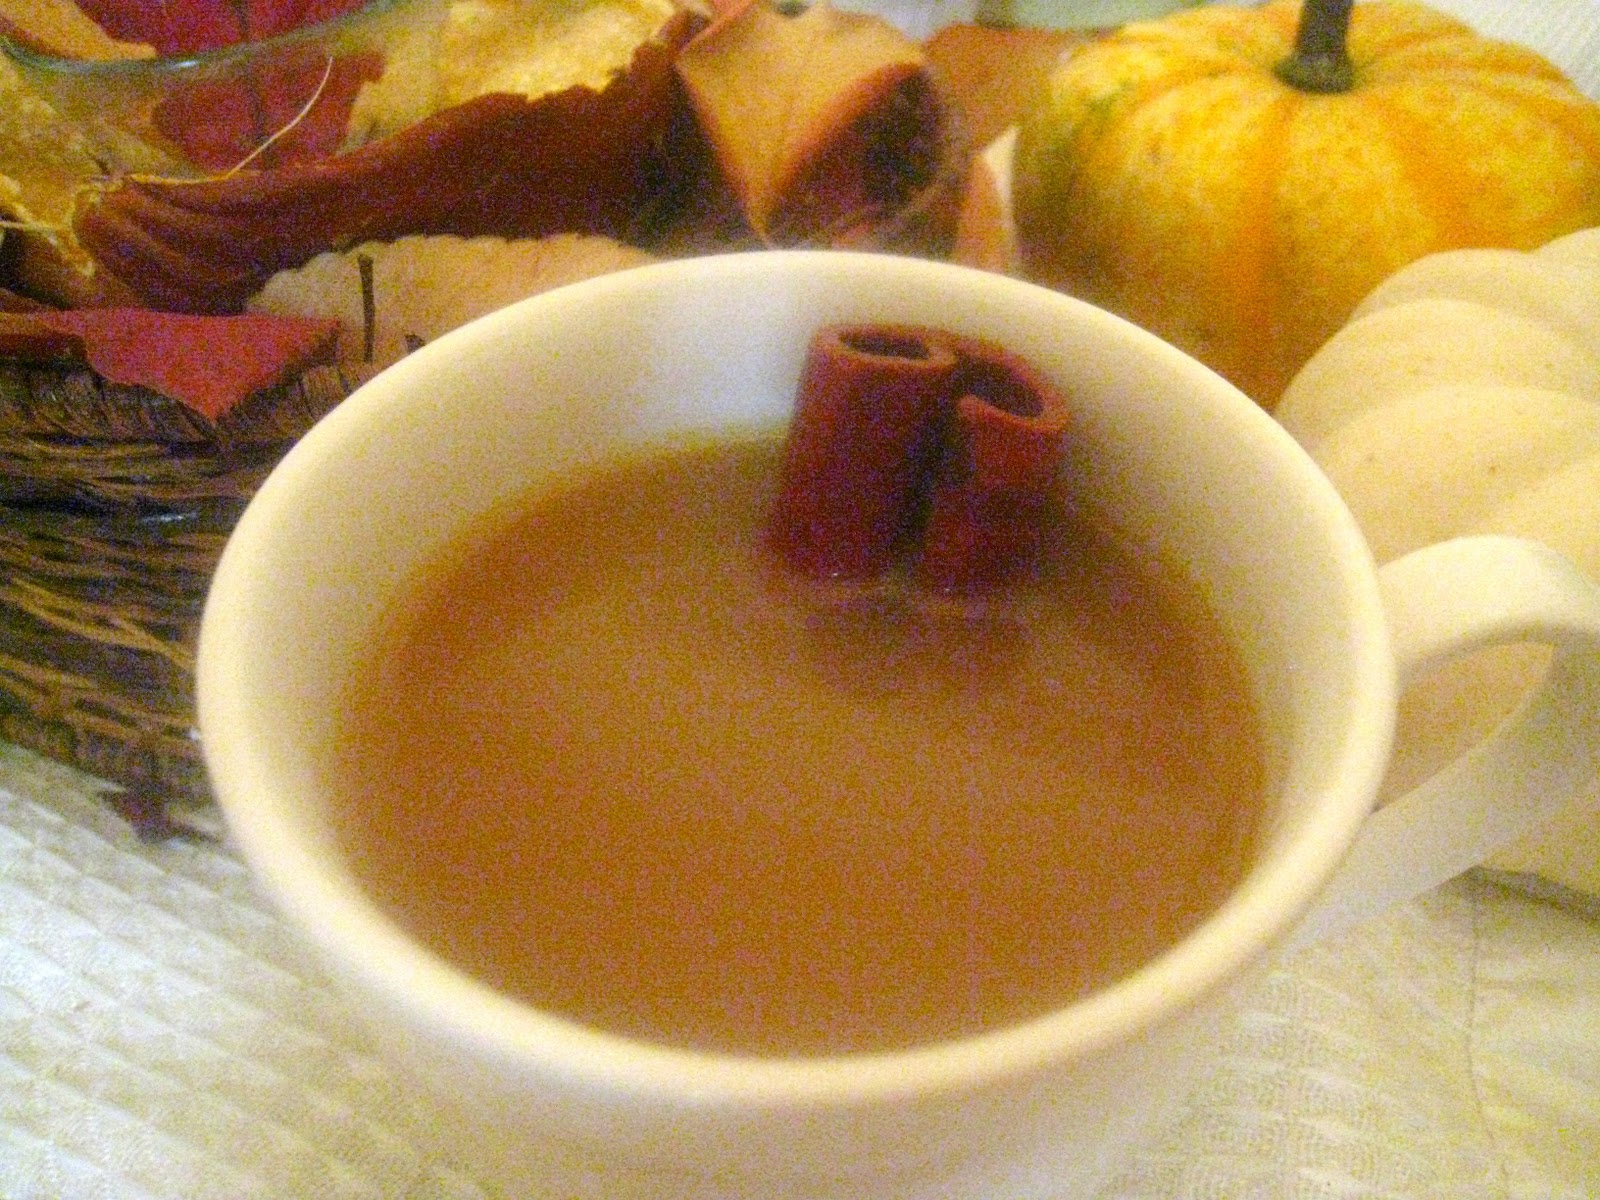
Recipe: Brazilian Chocolate
Summary: from “Chocolate” by Jean Pierre Wybauw
Ingredients
- 1 oz chocolate
- 1/4 cup strong coffee
- 1 cup milk
- 1-2 tsp raw sugar (or a few drops of stevia)
- 1 TBSP whipped cream
- cocoa powder for garnish
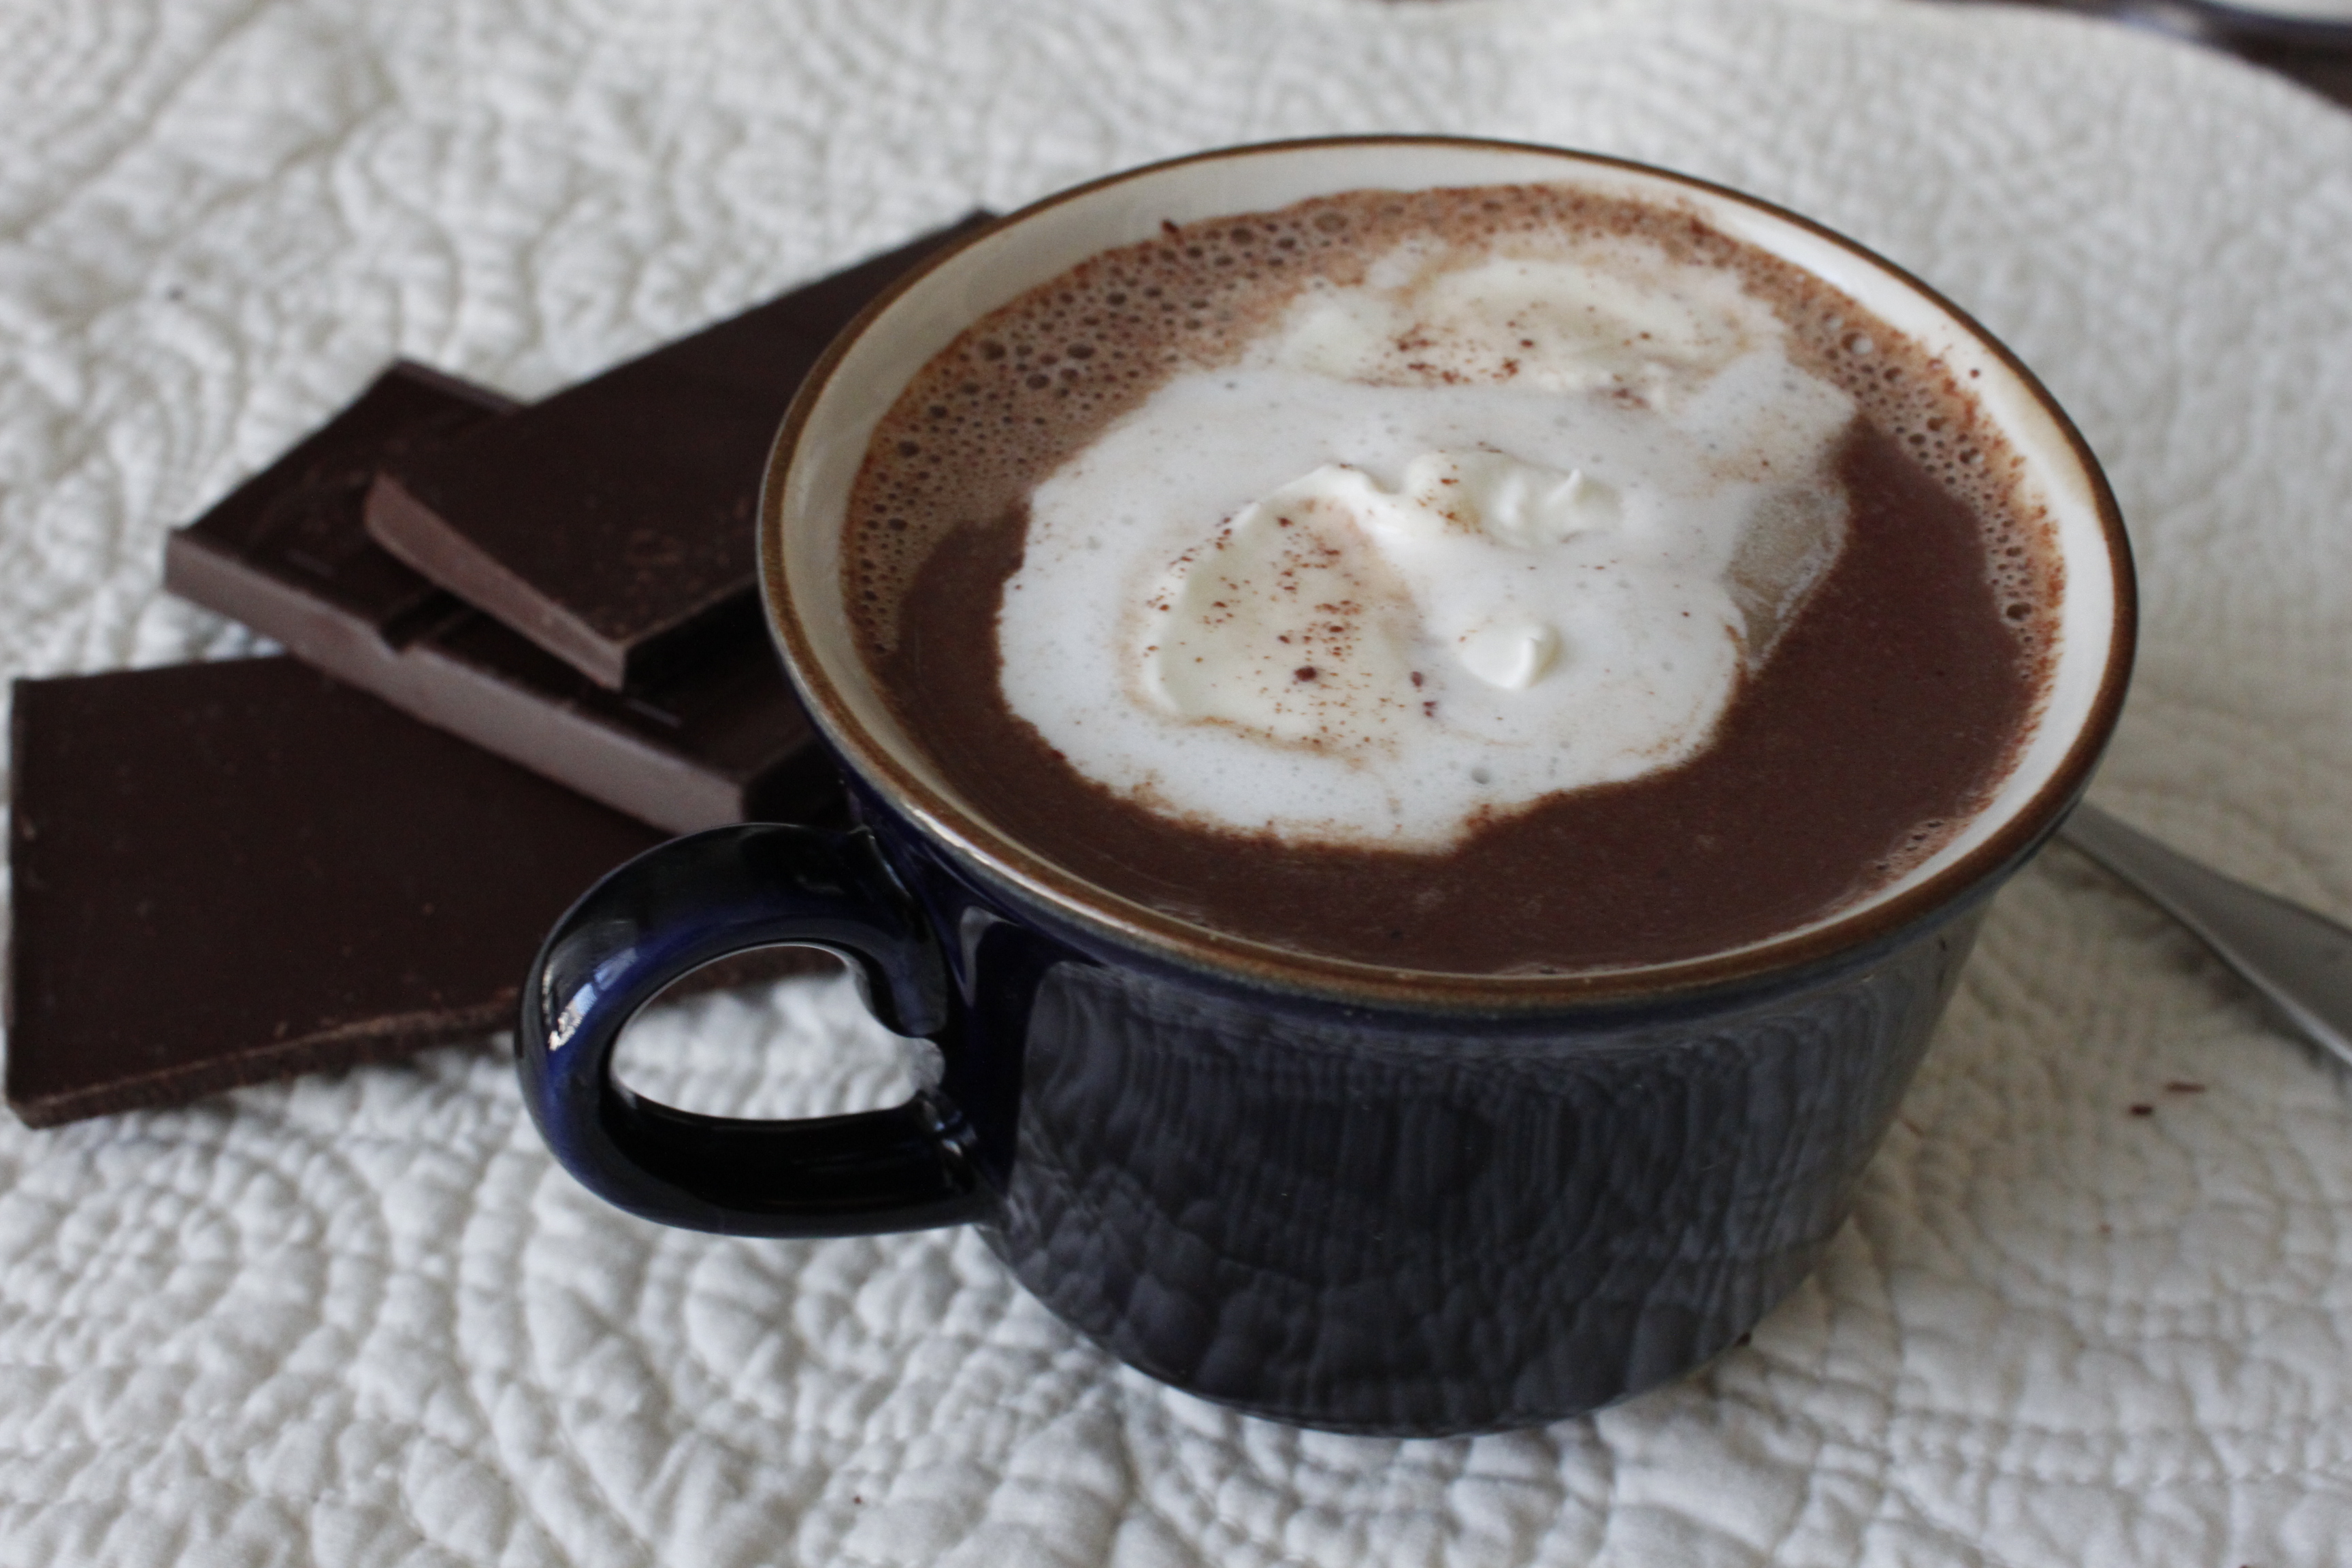
Instructions
- Place the chocolate in the bottom of a large mug. In a small pot, bring the milk and sugar just to a boil, stirring to dissolve the sugar. Pour the milk over the chocolate, stirring until melted. Add coffee.
- Top with whipped cream and a sprinkling of cocoa powder.


