SRC: Triple (Yes, Triple!) Chocolate Banana Cookies.


As Raina of Connor’s Cooking says, “With this name, who wouldn’t want to make it?!” Not me! Or me. However that grammar goes. Point being, I wanted to make it!! So I did.

Welcome to another round of the Secret Recipe Club(Group A), folks! This is where we pick bloggers’ names out of a hat (digital style) and secretly cook up something from their blog. Meanwhile, some other merry blogger is secretly cooking from your blog, which makes Reveal Day (today!) so much fun. Definitely the highlight of my blogging calendar!

So in case you haven’t figured it out yet, I was assigned Connor’s Cooking for my secret blog this month, and had fun perusing Raina’s blog looking for the perfect recipe to try. Just like me, the kitchen is her favorite place to be, and it shows in the large quantity of recipes to browse through. Once I came across the words “triple chocolate“, though, there was no turning back. Chocolate is part of my creed. I refuse to believe anything except that chocolate is healthy, so don’t even try to tell me otherwise. Something so good must be good for me. Right?

Unfortunately for me, I had only one precious little egg sitting in my refrigerator when I set out to make this recipe, and I didn’t want to use it up in cookies. Weird, yes, but hear me out: I like to buy pastured eggs from a local farm, and those little babies cost over $4 a dozen! One does not use such pricey beauties casually! I prefer to eat them straight as part of a meal, and look for egg replacements whenever possible in my baking.

And replacing an egg is so much easier than you might think, which I have learned in the past couple years of baking egg-free (and dairy-free and wheat-free) goodies for my Certain Little Someone. I’ve got a few tricks tucked up my sleeve that keep me baking, egg or no.

The trick this time is banana. Banana goes so well with chocolate that it’s a perfect choice for an egg replacer in a recipe like this. I also decided to take Raina’s advice and double the recipe - double the triple chocolate sounded good to me!

One little problem: I forgot to double the sugar. Oops. The flavor wasn’t too bad, but I think additional sugar would have helped with the texture some. So I have kindly given you the appropriate amount of sugar in the following recipe.
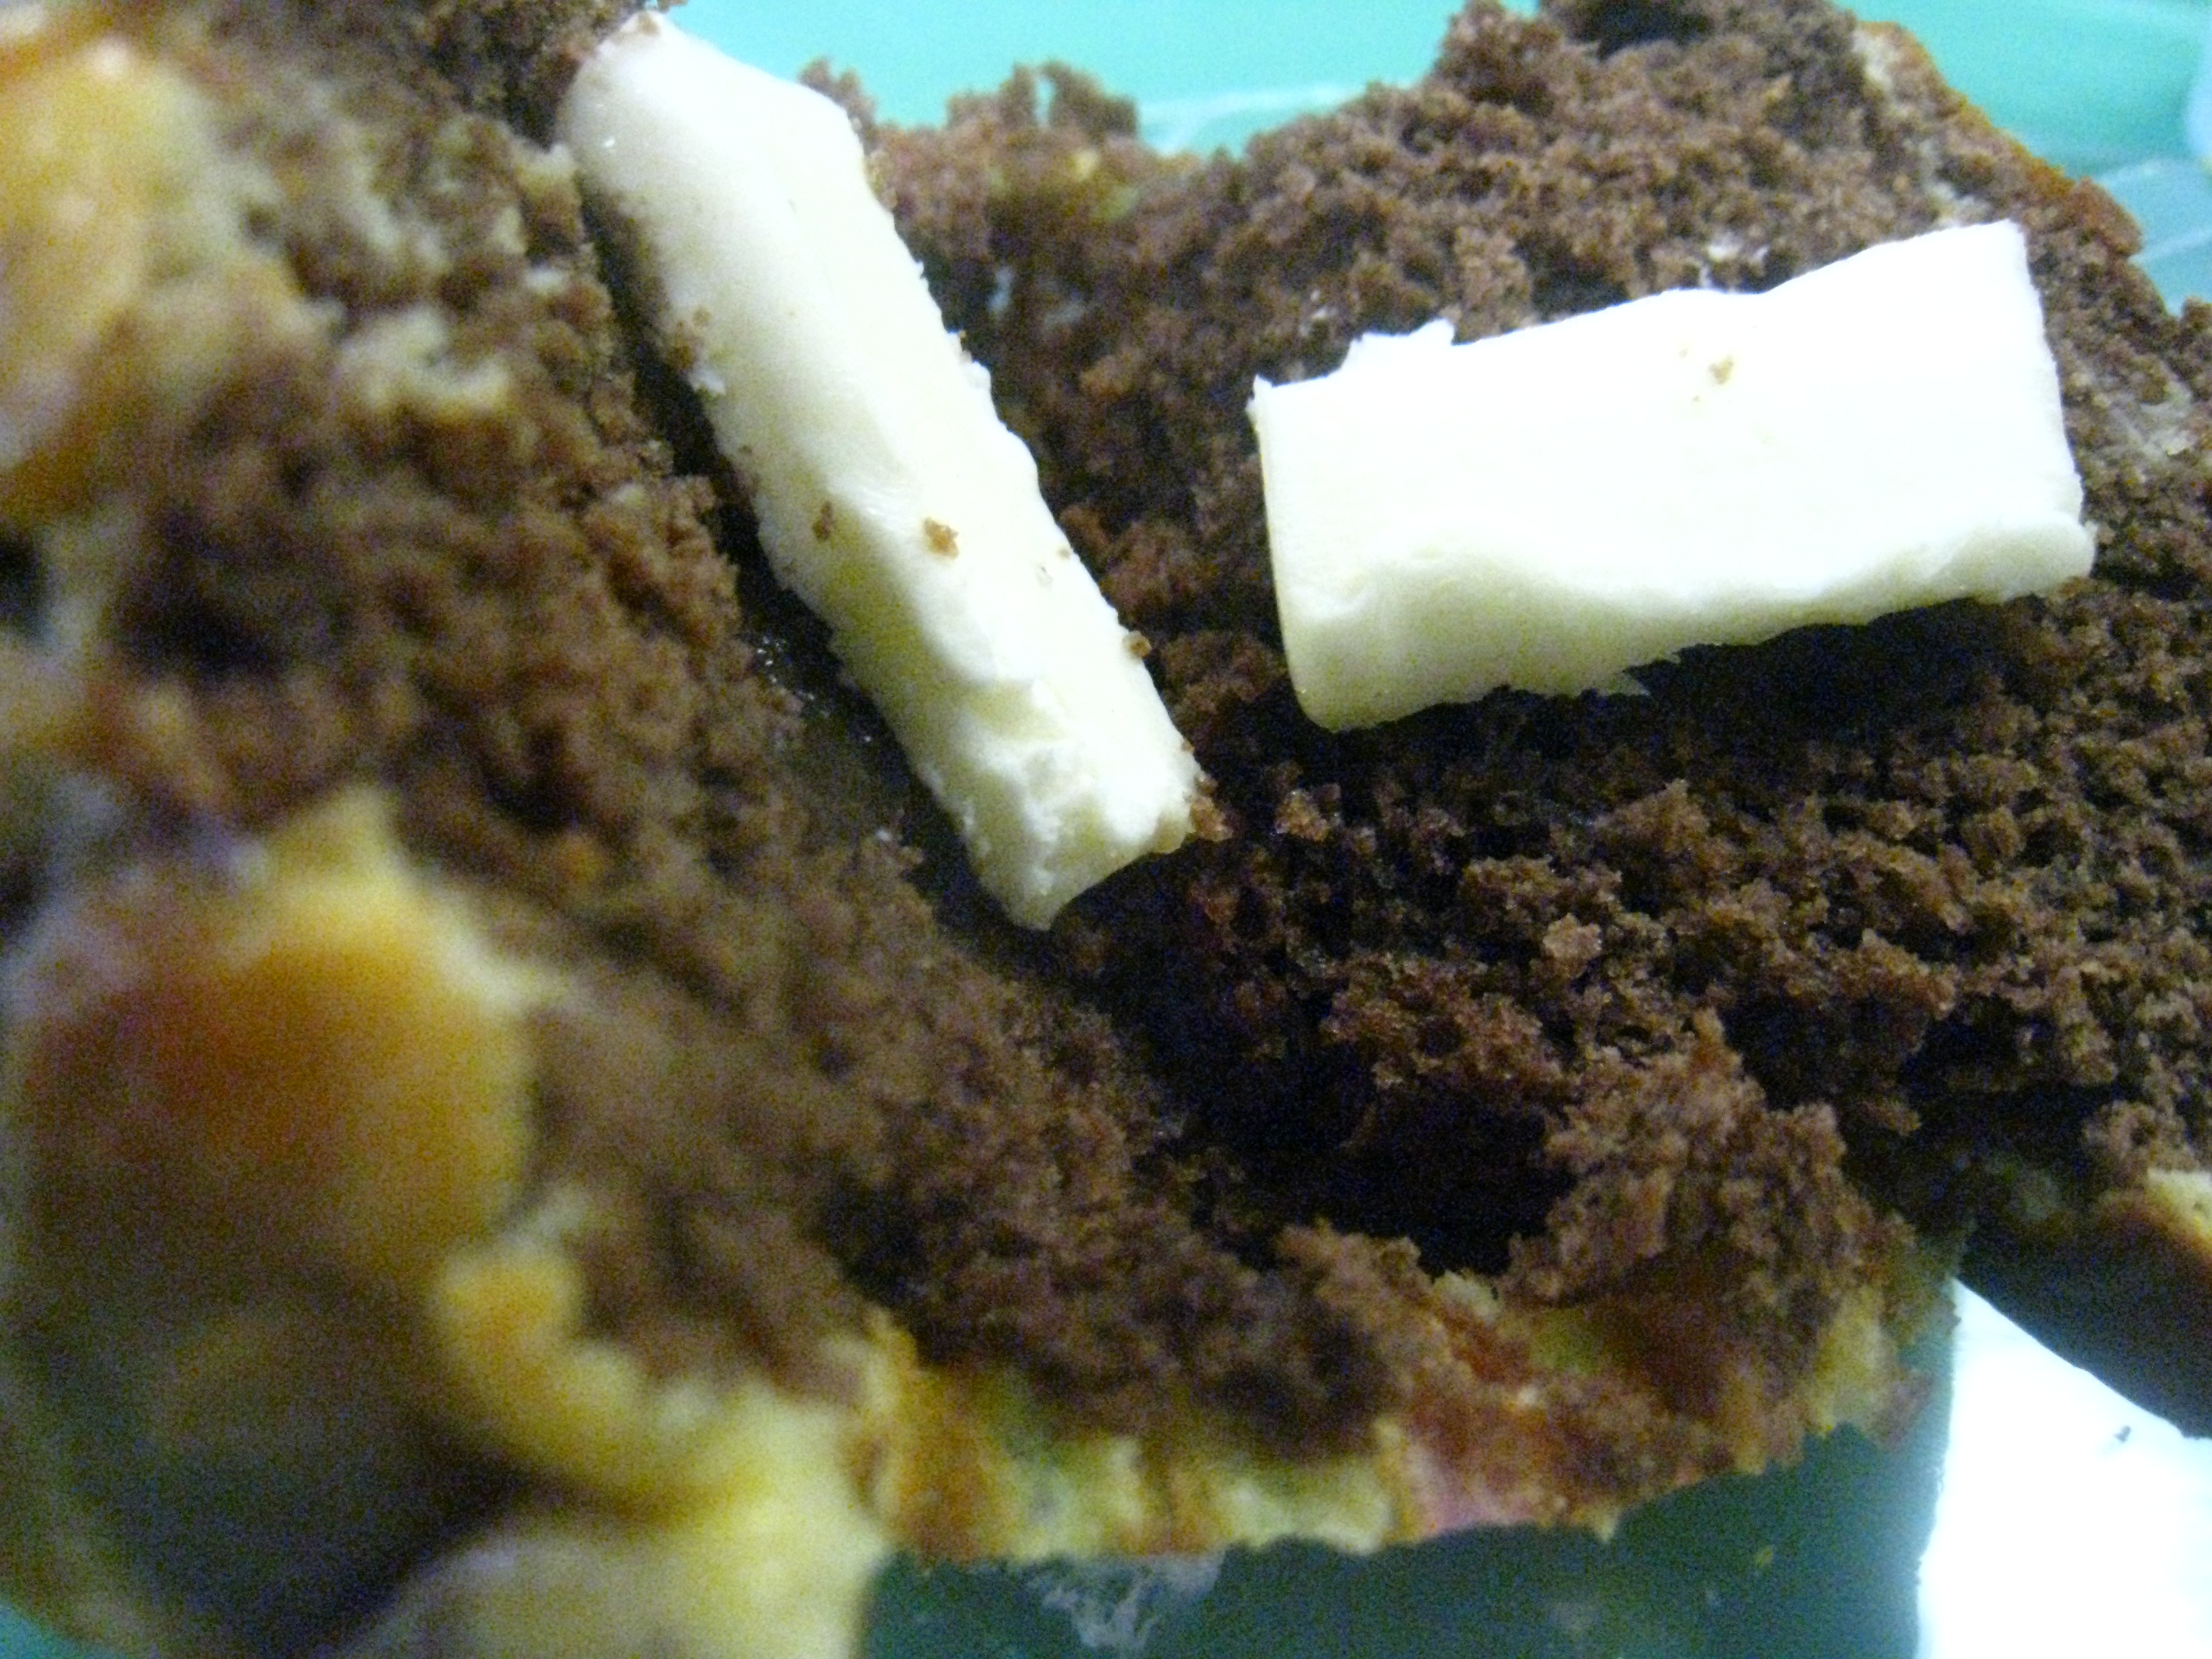


By the way, for the vanilla chips, I used Trader Joe’s brand, which is actually made with real milk, unlike other brands who essentially have created a chemical cocktail and called it “white chocolate”.

This is a great QUICK cookie recipe, just in time for these crazy holidays!

It’s also very EASY; nothin’ fancy goin’ on here, which is just how I like it.

Pretty CHEAP, over all, especially since I cheated on the egg!

HEALTHY-ish. It does have whole wheat flour, which is a plus. And a banana (although there is nothing unhealthy about an egg, so it’s not like that’s much of an improvement on the health scale). And, ummmm, well, that’s about all I can say for it. Enjoy in moderation, ‘K?


New Morning Graham Crackers, Oven S’Mores

Let’s just start out by saying that, no matter what, S’mores are not healthy. There’s just no way around that fact, even if you were to make each separate item yourself from scratch with organic ingredients. Too much sugar, and not enough nourishing food.

However, I think we’ll all agree that we feel a lot less guilty about the whole thing if at least one component or the other is a healthier version. For example, dark chocolate, instead of highly processed milk chocolate. Or homemade or all-natural marshmallows instead of the usual.

Or healthy graham crackers made from all-natural, organic ingredients. Now that’s what I’m talking about! I recently had the opportunity to try out a variety of foods produced by the Attune Foods company, including their different lines of breakfast cereal (Erewhon, Uncle Sam and Skinners), their probiotic line (Attune) and of course, their New Morning Graham Crackers.

And when you have a box of graham crackers, what is there to do with it other than make S’mores? To me, there is no better use for graham crackers. So that is what we did! Of course, we have no grill, so instead I made mine in the oven, and they were just as good as any made over a bonfire. OK, well, almost. Good enough for a rainy day or a grill-less apartment-living person like myself.

We made these at home on several occasions just for ourselves, but I also brought the supplies to our Labor Day cook-out with my family. My cutie-patootie little niece (close in age to my Certain Little Someone) saw the S’mores and asked her mommy if she could have “Pillows and Crocodiles”.

Pillows = marshmallows.

Crocodiles = “crackers” in 2yo language


Disclosure: I received free products from Attune Foods, but was not otherwise compensated for this post and all opinions are my own. (I really love S’mores. And I love organic graham crackers. True story.)

No Butter? No Eggs? You Can Still Make Cookies!

No Butter No Eggs Chocolate Chip Cookies #allergyfree Pick the most likely scenario:

  1. Your kid hands you a crumpled reminder from the teacher that you signed up to bring snack tomorrow. Yes, tomorow. It’s already 9:00 at night, and you are already in your PJs, ready to hit the sack before starting everything all over again tomorrow. You slap your forehead (or knock it against the wall a few times) and stumble to the kitchen, yank open the refrigerator… and just as you suspected: no butter, no eggs. What?! How are you supposed to whip up a snack without such basic ingredients as those?!
  2. Your kid wants to have his best friend over for a play date, and you want to provide a special snack. Problem: kid’s best friend is deathly allergic to dairy and eggs. What to do?
  3. Your kid is allergic to dairy and eggs and you hate throwing money out the door for safe snacks, so you want to make them yourself. But how do you make cookies without eggs or butter?!

(Notice how they all start with “your kid”? Amazing how those little creatures shake our lives up, huh?)

No matter what the problem is, the solution is the same: these Happy Vegan Chocolate Chip Cookies. Yes, happy. And No, I didn’t give them that name, but I like it, so I’ll keep it.

“But what do they taste like?” I hear you ask as I watch your lip curl in mild disgust? “Cardboard?”, you add with a sneer.

It may surprise you to learn that this is now by far my most favorite chocolate chip cookie recipe ever. Yes, I said ever. In bold with italics. Because as many different chocolate chip cookie recipes as I have tried, none of them has ever come out with quite this perfection of texture, taste, shape and substance. Who needs butter and eggs? Not me.

No Butter No Eggs Chocolate Chip Cookies #allergyfree

No Butter No Eggs Chocolate Chip Cookies #allergyfree

*Ingredient Notes:

  • I’ve used non-wheat flours with great success in this recipe. Oat and/or spelt flour is my favorite, but if you need to avoid gluten too, I suggest a blend with brown rice flour or sorghum flour as the base. Here’s a great recipe for your own gluten-free flour blend.
  • For completely vegan and allergen-free cookies, use Enjoy Life chocolate chips which are free of both dairy and soy products.
  • Palm shortening is my favorite oil to use in cookies, and Tropical Traditions is my favorite brand; when it goes on sale, it can be cheaper than the store-bought version and it’s very high quality. Coconut oil also works well in this recipe, but note that it creates more of a crisp cookie. I have even used extra virgin olive oil in a pinch! Canola oil works, but is not the healthiest choice of oil because of free radicals and the fact that it’s typically genetically modified.

Not the Recipe You’re Looking For?

Try one of these:


B2S: Snacks for School or After School

Last year, I did a great series on what to pack in your kids’ lunchbox, and I’m not even going to attempt to improve upon it this year! But since we’re in the swing of going back to school once again, I thought I’d share a few more ideas for healthy snacks that I’ve come across this past year. Most of these snacks are quick to prepare and relatively healthy (some more than others). Stay tuned tomorrow for some sandwich ideas!

From My Blog(s)

Gingersnaps

Sunbutter Surprises (great for peanut-free schools)

Healthy Fudgy Bites

Pumpkin Chocolate Chip Cookies

Homemade Jello

Sunbutter Surprises (great for peanut-free schools)

Teeny Tiny Peachy Pies

Nut-Free Date Balls

From Other Bloggers

{Better Than} Nutri-Grain Bars

Fruit Kebabs

Fruit on the Bottom Yogurt

S'Mores Bites

Apple Granola Sandwiches

Veggie Gardens

Secret Recipe Club: “Clifford” Bars

It’s time again for the Secret Recipe Club, the part of the show where the bloggers come out and sing their favorite song. Um, I mean blog about their favorite recipe from another blog that has previously (and secretly) been assigned. Which is even more fun.

I was thrilled to be assigned to This Chick Cooks, This Chick being the fabulous Katie, who delivers lots of amazing culinary concoctions on a regular basis, my favorites being the ones that are inspired by store-bought treats and eats.

I’ve made a few of her recipes before and loved them; I even blogged about my allergen-free version of her Better-Than-Nutrigrain Bars, which were fabulous (and I need to make those again; just thinking about them makes me drool a bit).

This time around, I kind of went the same route, choosing another granola-bar-like recipe, her Homemade Clif bars, and adapting it to be allergen-free. I just eliminated the nuts, and switched out the peanut butter for sunflower seed butter, so it’s easy enough to make those changes if you desire.

Oh, and apparently, to a toddler, “Clif bars” just doesn’t cut it. No. They are “Clifford” bars. I am not sure why since they are neither big nor red nor a dog, but… that is what my Certain Little Someone called them and so that is what they are.


The fact that these are no-bake makes them so QUICK! A nice alternative to traditional granola bars.

They are also super EASY!

It is definitely CHEAPer to make these than to buy their counterpart at the store, that’s for sure.

And, they are relatively HEALTHY as well. I feel good about giving them as a snack for my Certain Little Someone, especially if they take the place of a cookie or other sugary snack, because of the added nutritional elements like the dried fruit and whole grains.


Better than the Box: Gingersnaps!

Bad camera + bad photographer = terrible pictures.

*sigh*

I took 64 pictures of these stupid gingersnaps in the mid-afternoon when the lighting was perfect, and this is all I got.

*sigh*

I wish I had a better camera and some lighting equipment. But as my mother would say, “If wishes were horses, beggars would ride.” I don’t know exactly what that means, except that we don’t always get what we wish for. Oh, and another appropriate favorite saying of hers, “Beggars can’t be choosers.” Yup, definitely applicable.

So, even if they don’t look all that great in the pics, take my word for it that these gingersnaps are just as good as any you’ll buy at the grocery store. And I should know - we love gingersnaps around here, ginger being a favorite flavor of every member of the family, so we’ve tried a few. I can highly recommend Trader Joe’s Triple Ginger Snaps, which also have candied ginger in them… mmmmm! I’d have added candied ginger to these, but I don’t have any on hand. Next time!

I don’t know why, but despite our love for all things ginger, I have never once attempted to make gingersnaps until recently. I’ve made gingerbread bears for Christmas many years in a row, and I’ve even made soft ginger cookies, but never gingersnaps. I guess I figured they were easier to buy, so we only ate them on a rare occasion.

Once I tried it, though, we were hooked. I’ve made 2 batches in as many weeks, and we’ve eaten them like they’re going out of style. It might seem strange to talk about gingersnaps - a Christmas-y kind of treat - at Easter time, but perhaps you’ll change your mind when I tell you that they go oh-so-fabulously with my Coconut Lime Mousse. In fact, that is how I’m going to serve the mousse: in a teacup with a little gingersnap for decoration.

Won’t that just be so cute?!

There’s a lot to love about these little babies - their taste, the fact that they’re so easy to make, and their cute little size - but one of my favorite things is that they are naturally dairy-free and egg-free, and are easily made gluten-free. That means a delicious little snack my entire family can enjoy, which is a huge victory around here!

From start to finish, the entire batch takes half an hour or less, so I’d say it’s a pretty QUICK cookie recipe.

And all in one pot: can we say EASY?!

No eggs, no dairy not only means allergy-friendly, but CHEAP! Granted, the good shortening is very expensive, but this recipe uses less than a 1/4 cup.

I love that it uses little to no sugar, which makes it a HEALTHY-er cookie option. Molasses is still a sweetener and so should still be used sparingly, but it does offer nutrients, like iron, which you cannot find in even the best kind of cane sugar. I also love that whole grains - like brown rice, and whole wheat flour - go so well in this recipe. And you can totally omit the sugar, if you prefer - I just think it looks pretty - they taste just fine without it. Mind you, it’s essential to use organic palm oil shortening - none of that yucky vegetable Crisco stuff.

Berk's Girl: Sweets, Eats & Life's Treats

Triple-Ch. Muffins

I signed up to bring muffins to a ladies’ brunch this past weekend, not knowing exactly what kind of muffins I could bring, but knowing that in any case, muffins were a fairly Quick, Easy, Cheap and possibly Healthy choice for a brunch menu. As I mentally wandered through my kitchen, picturing what few ingredients I had left (this was before my big monthly grocery shopping, more on that in my next post), my mind’s eye settled on the container of cherries perched in the freezer. Perfect.

But cherries, delicious as they are, are much better when paired with chocolate. Naturally. (Isn’t everything much better when paired with chocolate?) And chocolate muffins, as delicious as they are, are even better when paired with the flavor and texture of cheesecake.

Oh yeah. Now we’re talking!

I gave a shout-out on my FB page, but nobody apparently had a recipe for such a creature, so I was left to my own devices. Always dangerous. I searched and searched (OK, went through a few pages on Google) but could not find a recipe anywhere for Chocolate Cherry Cheesecake Muffins. Really?! I was the first person to think of this amazing combo? (I highly doubt it; I’m sure there’s a recipe somewhere in cyberspace, but I couldn’t find it).

However, there were plenty of recipes for chocolate cheesecake muffins, so I compared 3 different variations, and came up with my own, to which I added cherries.

And there you have it, folks: Cherry Chocolate Cheesecake Muffins. (Hence the Triple-Ch)

marble-izing the muffins with a knife

This is perhaps not as QUICK as other muffin recipes, what with the extra cream cheese mixture, but totally worth it! They still come together in half an hour, give or take a few minutes.

Very EASY, although there are a few extra dishes to clean up afterwards.

With the addition of cream cheese and cherries, these are not the CHEAPest muffins, either, but here is where prior frugality shows its worth. I only ever buy cream cheese when it goes on sale for $1 or less, and then I stock up, so that is the cream cheese I used. Also, the cherries were frozen last year when cherry prices hit rock bottom for the season.

I was pleased with my HEALTHY alterations to the recipe:

  • using honey in the cream cheese mixture instead of sugar
  • replacing refined sugar with raw in the muffin batter
  • using 1/2 cup whole wheat flour
  • real butter instead of vegetable oil (and it added some delicious flavor, too!)
  • adding fruit and fruit juice to the mixture for extra nutrition!

So, perhaps not a health food, but certainly a healthier option than most other muffins.


Photobucket

Food Allergy Awareness Week: School and Snacks

Now here’s a hot topic! Because of the prevalence of food allergies these days, your child is likely to have an allergic classmate at some point in their school career. Managing allergies in the classroom is tricky at best and controversial at worst. Schools and teachers have been forced to attempt to make food allergy policies that protect the allergic students while not creating a hardship for the non-allergic children and their parents. Some have found a better balance than others; policies range from one extreme to the other, including:

  • peanut-free classrooms across the board OR peanut-free classrooms when a peanut allergy is present
  • separate lunch tables/work tables for food allergic children
  • special allergen-free zones
  • removing play-dough from pre-schools, daycares, and Kindergarten classrooms (because it contains wheat and a reaction can occur on contact even when it’s not ingested)

Even the parents of food allergic children are divided on the best way to handle food allergies at school, because it IS difficult to find the balance between protecting the one and preserving the freedom of the other. I’m not going to get involved in the debate, in part because I’m not entirely sure myself of the best solution.

However, I do want to address one thing: complaints about the policies from parents of non-allergic children.

What I really want to say to those parents who complain is this: Grow up.

Instead, I’ll say this:

Put yourself in the shoes of the food-allergic parents. Imagine that if someone touched your child with peanut butter on their fingers, your child might end up with an allergic reaction so severe that potentially inexperienced strangers will have to inject him with epinephrine and call an ambulance. If the treatment is not immediate and administered correctly, your child is in danger of dying. All from peanut-butter fingers.

When you look at it through someone else’s eyes, you can begin to appreciate the necessity of keeping a safe environment for food-allergic children. Most of the time, the prevention policies are reasonable enough and easy for everyone to follow. Of course, it can get ridiculous in extreme cases where children are severely allergic to multiple things; in that case, I personally think it’s probably best for the parents to consider if it might not be better to home-school or tutor their child rather than forcing 30+ individuals to totally change their lifestyle for the sake of one person.

So what can you do if your child is in a class with a food allergic child? Regardless of whether or not the school or teacher has policies in place to protect the food allergic one, here are some things you can do:

  1. Educate yourself about their specific allergens and the typical severity of their reactions. Talk to the parent and find out: would they have a reaction on contact or only on ingestion? Can they have eggs baked into cakes and cookies or not at all?
  2. Strictly follow whatever policies are in place. If that means no peanut in your child’s lunch, then don’t put peanut in your child’s lunch. Simple! (Avoiding peanut for one meal a day is really not that big a deal. Imagine trying to avoid 8 different common foods for every single meal and snack! If you’re stumped for lunch ideas beyond PB&J, check out this back-to-school post.)
  3. Educate your child. It means so much to me that my brother- and sister- in law - who live in the same town I do so we see them a lot and spend a lot of time with them - have educated their two children about my Certain Little Someone’s allergies and have strictly instructed them not to feed him anything other than what I allow them to feed him. They are so well trained that the other day, when we were eating out with him, my Certain Little Someone grabbed a (safe) french fry from his cousin’s bag. The cousin instinctively reacted with a gasp and grabbed the bag away from him. He didn’t see what my Certain Little Someone had eaten and was afraid it was unsafe for him. You can teach your child to be the same way for the sake of the other food allergic children. Tell your child to keep his or her food in the spot where it belongs and not to let it get anywhere near the allergic student. After eating, wash hands carefully to avoid touching the child with allergenic fingers. And carefully wipe your spot after eating (if eating in the classroom).
  4. Even if the parent of the allergic child brings a special snack just for her, consider preparing snacks that are allergen-free. Many kindergarten and lower elementary classrooms have special snack days or birthdays where parents bring in food to share with the class. If that’s the case in your child’s class, consider bringing food that is safe for everyone, including the allergic ones. I’m not suggesting that you go out and buy rice flour or other exotic ingredients just for that one snack, but consider foods that are naturally allergen-free, like fruits and vegetables. Serve them in finger-food sizes or with toothpicks. Offer a dip for those who don’t have allergies. For very young children, a box of allergen-free cereal (like Kix, Chex, Cocoa Puffs, Lucky Charms, or the like - no, not healthy, but an easy snack!) will be just as appreciated as anything else. For older children, plain potato chips are usually welcome. If you want to be a little healthier, there are several brands that make safe sweet potato chips that are healthier than regular chips. Tortilla chips and salsa are also usually free of the top 8 allergens. Fruit snacks and gummy snacks are usually allergen-free (albeit dreadfully unhealthy). OR talk to the parent of the allergic child and see if they have any ideas of a quick safe snack you can provide for all the children.
  5. If you want to bring a goodie bag for all the children to celebrate your child’s birthday, focus on non-food prizes like stickers, pens or pencils, erasers, notepads, and little toys. The party favor section at any big box store or party store will have a lot of options. If you must throw in a special treat, consider hard candies (for older children) or gummy candies (for younger children), as those are almost always allergen-free. Once again, check with the parents of the food allergic child before assuming anything.

That’s it for Food Allergy Awareness Week! I’ll be back tomorrow (hopefully!) with another great powdered-sugar-free frosting recipe for you. To recap, here are all the other FAAW posts:

The Dangers of Food Allergies

Food Allergies 101

Hosting the Food Allergic

Super Bowl Food for the Non-Fan

There are two kinds of people:

  1. The kind that go to a Super Bowl party for the football.
  2. The kind that go to a Super Bowl party for the food.
I suppose you could argue that there are subsets of both groups, such as those who only go to watch the commercials, or those who only go because it’s really the only thing going on that particular Sunday night. At any rate, I am firmly planted in group #2. And proud of it!
Forget the football. Bring on the food, baby!

Hence, I bring you an appetizer that is definitely not meant for the dedicated football fan, but for his/her foodie guest. When I made them and told my DH they were for a Super Bowl appetizer, he said (and I quote), “Yeah, right.” He is firmly planted in group #1.
Who cares if the real fans don’t appreciate these delicately crispy, lightly salty, and oh-so-good snacks? They weren’t intended for them anyway; they are strictly just for us. You know, the food fans.
Would you believe me if I told you these gourmet-like crisps are super easy? And super quick? Read on, and perhaps I can convince you.
The recipe doesn’t contain measurements because it really doesn’t matter. You can have as little as 1 TBSP of shredded parmesan, or as much as 3 cups. It all depends on how big your block of Parmesan is, how long you want to spend grating it, and how many foodie friends you have.
The only thing that’s really necessary is that you do indeed begin with a block of Parmesan and grate it yourself. Probably some freshly grated Parmesan at the store would be OK, but I really think it’s better to grate it yourself.
Parmesan Crisps
shredded parmesan
freshly ground black pepper
Place the shredded parmesan 1 TBSP-full at a time on a silicone- or parchment- lined cookie sheet. Sprinkle with black pepper.
Bake for 5 minutes at 400F or until the cheese is melted and the edges are golden crispy.
Allow to cool, then carefully remove from the cookie sheet and place in serving dish.
Most people say these are best served the same day they’re made, but I actually think they are sturdier and crisper the next day. They didn’t make it any farther than that around here….
Of course, you can use different seasonings, by the way. I like the simple subtlety of the black pepper, but spicy seasonings like cumin or red pepper flakes would be delicious, as would more Italian herbs like rosemary or basil. Try them all and see what you like best!
These also work great as a delicious accompaniment to soup or salad.
So QUICK: 10 minutes or less for one cookie-sheet-full! You definitely have time for that, especially since that small amount of time is so well invested in deliciousness like this.
Can you grate cheese and dump it on a pan? Then you can make these. EASY-Peasy!
CHEAP, on the other hand, is debatable. If you’re making a batch large enough to feed a lot of guests, it will take a large amount of Parmesan cheese, which gets expensive. However, if you just make a few as a garnish, or as part of a platter of other appetizers and noshy stuff, the expense is minimal. It doesn’t take much Parmesan to make a TBSP worth of shredded cheese.
It’s very HEALTHY, too! Cheese is a great source of protein and calcium, of course, but also vitamins B and A, among other things. So enjoy guilt-free!

A Super Bowl of “Chips” and Dip!


I say “chips” because I don’t want you to think they will be exactly like those fatty, crunchy discs you pull from the foil bag. Nope, they’re better! Not quite as crunchy - hence the quotes - but twice the flavor. Don’t believe me? Try them and see!

Better-Than-Chips
2 medium potatoes
1 TBSP olive oil
salt & pepper

Wash the potatoes thoroughly and peel if desired. Slice thinly (use a mandolin slicer if you have one), but not too thin (you don’t want the slices to be transparent). Drizzle the slices with the oil. Generously grease a cookie sheet with more olive oil and lay the slices on it in a single layer. Sprinkle with salt and pepper to taste. Bake at 400F for 20 minutes, or until edges are browned.

I chose to stick with the simplicity of salt and pepper because I knew I was going to make the dip below to go with them, but these can be seasoned in an infinite variety of ways. Use a seasoning blend or try your own favorite herbs and spices. I’ll probably experiment with quite a few myself and post them as I try them. Let me know how you flavor yours!

Chips have to go with dip, at least I think so. Unfortunately, most dip is just as fattening as the chips, and full of unnecessary ingredients. Try this dip, instead, that uses yogurt as a base. Use Greek yogurt, or strain regular yogurt in a mesh sieve lined with cheesecloth or the like.

Ranch Dip
1/2 cup Greek or strained yogurt
2 oz. cream cheese, softened
1/4 cup heavy cream, mixed with 1 tsp lemon juice
1 tsp dried parsley
1/2 tsp dried dillweed
1/2 tsp sea salt
1/4 tsp freshly ground black pepper
1 clove garlic, minced

Stir together the yogurt, cream cheese, and heavy cream until thoroughly blended. Mix in the spices. Refrigerate a couple hours before serving (ideally).

These chips are pretty QUICK, considering they were done, start to finish, in under 30 minutes. Just as quick as going to the store to pick up a bag! And the dip is super fast, aside from the refrigeration time, which isn’t 100% essential.

They are pretty EASY, with some qualifications: you have to slice them just the right thickness, and you have to cook them just the right amount of time.

Definitely much CHEAPer than buying a bag at the grocery store! Two potatoes are mere pennies. OK, well maybe dimes.

And soooo much HEALTHY-er than the chips in the bag. And the dip in the plastic container, too. All good stuff here, nothing to feel guilty about while you watch the big game!

Here’s another great healthy Super Bowl snack at my other blog, When Food is Dangerous: Crispy Chickpeas.

Find lots more Super Bowl snack ideas at: