DIY Furniture Polish - 3 Ingredients!

DIY furniture polish #yleo #essentialoils #nontoxic #naturalcleaningFirst off, let me start by being completely authentic with you. The absolute and total truth of the matter is that my natural tendency in life is NOT to polish the furniture. Meh. Polish shmolish. If it were up to me, dusting would be the extent of my furniture care (that and attempting to avoid liquid spillage on its surface).

But then I had two little boys (wonderful, darling boys), and I discovered that two little boys - no matter how small they are - can do quite a number on dining room furniture. Ya know, the wooden kind. Those little hands somehow always get sticky at every meal - or snack - and those sticky little hands somehow find their way all over the chairs. And all over the table. And the table legs. And the chair legs.

You get my drift.

And suddenly, my polish-hating-self (please note that is “polish” with a lower case “p”) was forced to realize the unwelcome truth that nothing would remove the sticky, gummy residue but… furniture polish. *Sigh*. Believe me, I tried other, simpler methods, but nothing quite did the trick until I actually broke down and polished the dad-blasted thing.

Thankfully, this polishing chore is only necessary once every couple months or so - we get by in the meantime by wiping down every single chair and every inch of the table top with a wet washrag on a daily basis. And thankfully, I’ve come across a super-simple, inexpensive DIY, all-natural (and any other adjectives that apply) furniture polish that literally takes seconds to mix up. And what’s more, it actually works. Woot!

This particular recipe makes a little batch that is just the right amount for our dining room furniture (a table, chairs, and a buffet, which, sadly, is no stranger to sticky fingers either). I don’t make anymore than this at a time because I don’t want to bother with storing it… and I certainly don’t need any reminders hanging around that there is polishing to be done!

DIY Furniture Polish

Ingredients

  • 2 T. olive oil
  • 2 T. vinegar
  • 5-10 drops Young Living’s Citrus Fresh essential oil*

Instructions

  1. Pour the ingredients into a small jar. Seal the lid and shake well until combined.
  2. Dip a rag into the mixture, dab it on the furniture, and polish it into the surface.

*You can also use lemon or any other citrus essential oil.

The vinegar is optional, but it does help cut through any sticky stubborn particles of food left behind on the furniture. It also helps the mixture go further and absorb more easily.

Happy polishing!

Well, as happy as it can be.

I’m happy to recommend Young Living essential oils as the highest quality oil readily available today. So much goes into Young Living’s quality control that sets it head and shoulders above almost any other oil on the market. Anyone is eligible to open a wholesale membership with Young Living, simply by purchasing a starter kit (these range in price from $40-$150). After that, the only requirement is to purchase $50 within the first year; otherwise there is no commitment to maintain your wholesale membership status. Check out my Young Living page for more information.

Uh, and in case it’s not obvious, I’m an independent distributor of Young Living Essential Oils.
How to Clean Your Crock Pot

This post contains affiliate links. Thank you for supporting Authentic Simplicity! Years ago, I bought the crock pot you see here (the 5qt programmable one by Rival) at a yard sale for next to nothing. When I bought it, it was a lovely crisp white color and looked as if it had never been used. The lady who sold it to me exclaimed that she was so glad to be rid of it because, and I quote, “I got so tired of scrubbing that thing!”. I smiled and nodded because it seemed like the polite thing to do, but inside my head I was thinking, “What in the world is your problem, lady?! Just wipe it down when you’re done with it; what’s the big deal, anyway?”

Fast forward to the point in time where I actually used the crock pot… and then I understood. For whatever reason, this particular crock pot is hard to clean. Let me rephrase: this particular crock pot is almost impossible to clean. I can soak it for days and nothing happens besides the passing of time. I can scrub at it until I’m blue in the face and nothing happens except my face is blue. I’ve since heard from others that they suffer similar struggles with their crock pots, too, so it is not a unique situation to this specific one.

There have been times when I honestly just gave up on my crock pot ever being clean. Besides the whole issue of sanitization, the crock pot worked great! I loved that it could be programmed and that it automatically switched to “warm” when it was done cooking. It was the perfect size for my family, and it was quite reliable.

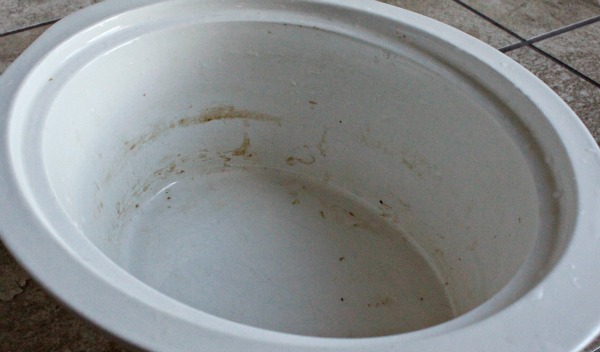
But it was dirty. dirty crock pot

Just between you and me, if it weren’t for the fact that I occasionally blog about food and therefore occasionally have to take pictures of my crock pot… I might never have renewed my interest in trying to get it really and truly clean. Honestly? The only thing that compelled me to search for a solution was the fact that I had to take pictures of the durned thing and show them to the entire world. Just bein’ authentic here.

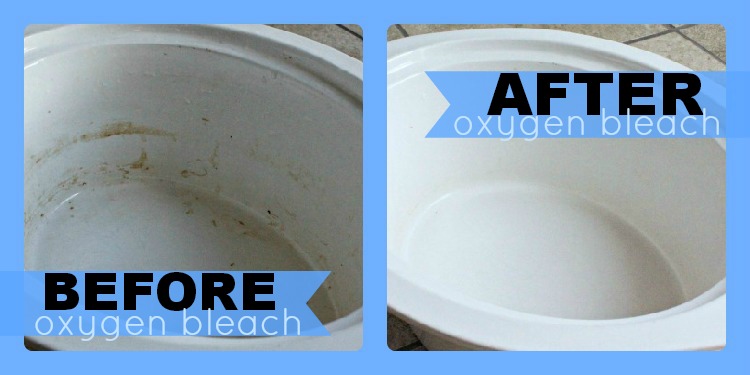
So off I went in search of a solution. I tried a few different remedies that worked to one extent or another, like filling it with water and turning it on and letting it sit for a while. That was kind of a pain, though, and not super effective. It wasn’t until I experimented one day with oxygen bleach that I hit upon an actual, effectual method for cleaning my crock pot!

How to Clean Your Crock Pot

Since I already used oxygen bleach in my dishwasher , the container was handy right there under the sink and accessed easily enough. I just sprinkled some on the bottom of the pot and then filled it with hot water, adding a squirt or two of dish soap while I was at it. I let it sit for a few hours, and when I came back to it, pretty much all I had to do was wipe it down.

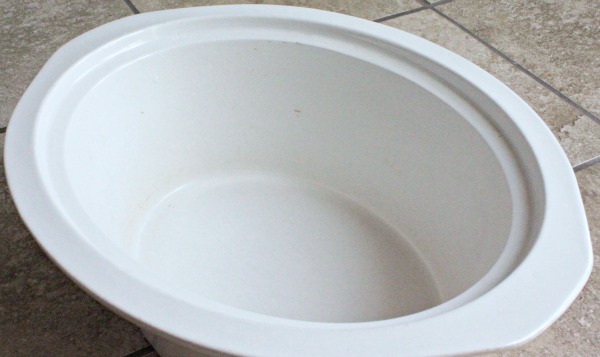
clean crock pot Now my crock pot routine is simple, and my crock pot is always clean (the inside of it anyway - I haven’t figured out how to soak the outside of it yet!). Here’s my simple method:

  • As soon as I’ve emptied the crock pot, I put it in the sink.
  • I generously sprinkle oxygen bleach (I like to get mine from Tropical Traditions) in the crock pot.
  • I fill the pot with hot water while squirting in a little bit of dish soap.
  • I let it sit for a while (a few hours, all day, all night, whatever works best for me at the moment).
  • When I come back to it, I wipe it down. Sometimes a little scrubbing is still required, and for the really stubborn stains, I’ll have to repeat the process. But most of the time, it’s just a matter of wiping and rinsing.

You can see why oxygen bleach is rapidly becoming my favorite household cleaning ingredient, right up there with vinegar and baking soda! Not only do I use it to clean my crock pots, I use it in my homemade dishwasher detergent, and I use it to get rid of stains in my carpet! Just today, I used my carpet cleaning mixture to also clean my tile floor in the kitchen, and my DH used it last week to clean the tiles in the bathroom. It’s an all-purpose, super-effective cleaner that is safe and natural. I highly recommend Tropical Traditions oxygen bleach, Oxy-Boost, or BioKleen.


How to Clean Carpet Stains Naturally{Plus Quickly, Plus Easily}

Note: This post contains referral links. Thanks for your support of Authentic Simplicity! Clean carpets quickly and easily with oxygen bleach. Fact: For 5 out of the 7 years I’ve been married, I’ve lived in apartments with nasty carpet.

Fact: It’s not my fault. (I swear!) The carpet in the first apartment was incredibly cheap (as was everything in that apartment, come to think of it), and seemed to collect stains like some people collect coins. And for some reason that I cannot comprehend for the life of me, apartment complexes seem particularly determined to floor all the dining rooms in their unit with carpet. I would take linoleum from the ’70’s over carpet in the dining room. Any. Day. (Of course, that would have nothing to do with the fact that I have 2 small boys who, every meal, end up with more food on the floor than in the tummy.)

The carpet in our current apartment is actually of very high quality, but it appears to have been around since the dawn of the house itself (say, 20 years?), and has apparently experienced its fair share of toddlerhood spills and other merriment. Oh yeah, and it started out as a lovely off-white color, I’m sure, but has long since faded to a dingy sort-of-something-color. I’m determined to cover it up with rugs, but so far all I’ve managed is a second-hand rug in the dining room. Hey, anything to cover up the handiwork of my two little blessings!

At any rate, I’m way more familiar with carpet stainage than I really actually care to be. And I am so beyond thrilled to be able to share with you the solution I have hit upon within the past year, because it’s one of those things that actually works. A lot of the solutions I see online for X-Y-Z and this-and-that tend to work for everybody else but me. (Anybody else have that problem?) So when something actually works (and works every time!) for me, I want to shout it from the rooftops.

So here’s my online rendition of the rooftop shout:

Clean your carpet stains with Oxygen Bleach!

(Hey, at least I didn’t use all caps.)

It’s really actually quite easy. Take a spray bottle and put a tablespoon or two of oxygen bleach in the bottom. (I never was a good one for specific measurements - I honestly just dump some until I think I have enough.) Fill the bottle the rest of the way with warm-ish water (never was good at temperatures either) and shake until the oxygen bleach dissolves (being sure to replace the nozzle on the spray bottle first, of course).

Spray the stain liberally with the oxygen bleach mixture and let it sit for a few minutes. (I don’t time it exactly, either. Bet you’re surprised by that.) Come back with a white rag and rub at the stain until it disappears.

And the amazing thing? It will disappear. Right before your very eyes. Like magic. I actually find it oddly entertaining, and am always secretly excited when I spot a new stain that needs to be cleaned.

This stuff has not failed me yet, and I’ve attacked many a stain with it. However, your mileage might vary - it depends on your carpet, the stain, and you. I also recommend testing just an unobtrusive corner of your carpet first to make sure you won’t ruin the color. I’ve only ever used this spray on nondescript beige-ish colors, so I’m not sure how it would react with a colored carpet.

Note: Do not use the oxygen bleach you can buy at the dollar tree. I don’t know exactly what’s in it, but it smells like chemicals and is blue (and sometimes pink, which is kind of funny), so I don’t trust it. Get the pure white unadulterated stuff from places like Tropical Traditions or Amazon.com.

How to Clean Your Shower Fixtures Easily!

You know how I love it when I discover the simplest way to accomplish a task. It’s even better when the simplest method is the most effective! And what really puts the cherry on top is when it also happens to be an all-natural, chemical-free solution.

Well, my friends, here’s one of those things that is all of the above: a simple, effective, all natural way to clean your shower head! I’m giving you the precise details on how to clean your shower head today over at Home Made Simple.