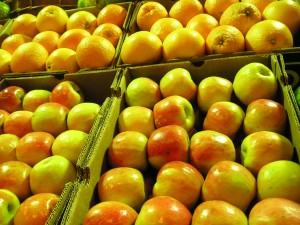
How to Wash Produce

How to Wash Produce #ygbt #oams #cleanfood Don’t you just love a tip that saves you time and money… and is good for you in the process? You can’t beat that, right?! Well, that’s the sort of tip I’ve got for you today.

  • I’ll save you TIME by showing you how to wash your produce all at once (and if you only go grocery shopping once a month, it saves you even more time).
  • I’ll save you MONEY by showing you how washing your produce all at once will make it last longer and stay fresher.
  • It’s GOOD FOR YOU because washing your produce and having fresher produce means fewer pesticides entering your body and more nutrition.

It’s a win-win all around, my friend! Here’s how to wash produce in big batches to save you time and money.

How to Wash Your Produce (and save time and money in the process)

First of all, I want to highly recommend that you go grocery shopping once a month if you’re really interested in saving yourself significant time and money. It might sound crazy, but trust me, it’s totally doable and it works. You’ll find all the info you need to get started in my eBook, Your Grocery Budget Toolbox.

Once you’ve gone on your monthly shopping trip, you’ll have a mountain of produce that you want to last as long as possible. There are a lot of ways to do that, and many of them are discussed in the book, but one of the best ways is simply to wash all the produce before you put it away. So pile up all the produce on the counter next to the sink, and then get started!

1. Fill the sink with water and some vinegar.

You can also add a couple drops of Thieves oil for added cleaning power! You don’t need a huge amount of vinegar; I just add a few generous splashes and call it good.

Place your produce gently in the water. Be sure not to put things like apples and blackberries in at the same time, because that could be seriously bad news for the blackberries. Depending on how much produce you have, you may need to do several batches.

Let the produce sit in the water for a minute or two.

2. Rinse the produce in a colander.

Remove the produce from the sink and place in a colander. If you have a double sink, you can rinse it right away; otherwise, you might need to wait to rinse until you’ve run all the produce through the vinegar bath.

Be sure to rinse the produce very thoroughly to get off all the remaining pesticides and bacteria, as well as all the vinegar.

3. Place the produce on a towel to dry.

Set out some towels on your countertops and put the produce on the towels in a single layer to dry. I sometimes leave it on the countertops overnight, depending on the time I get started with it, but generally it will take only a couple hours.

Carefully store the produce in the appropriate spot in the fridge or pantry.

This whole process takes 10-15 minutes plus drying time and saves you a lot of money in the long run! You’ll find that your produce lasts significantly longer when you wash it this way before storing it, which means less produce dumped in the trash. And, of course, your produce will be cleaner and fresher for you when you go to eat it, which is good for your health as well.

Helping you save money on your groceries is one of my favorite things to do ever, so I’m super excited about my latest project. I’m working on updating and slightly revising the ebook I mentioned earlier, Your Grocery Budget Toolbox. It’s going to be an even better resource to help you keep your money in your pocket while purchasing the highest quality of food possible for your family. Once the second edition of YGBT is released, I’ll be working on a spiral-bound print copy as well! And on top of all that, pretty soon after that I’ll be releasing an eCourse that personally walks you through the process of saving money on your groceries. I’m not a squee-in’ kinda girl normally, but I’m so excited about what I’ve got in store for you that I’m about to do just that! So make sure you sign up for email updates so you know when all of this brand new awesomeness is released. Here’s to healthy food… and more money in your pocket!

 

Groceries for a Month for a Family of Four

OAMS Monthly Shopping List I realized recently that it’s been a long time - a really long time - since I’ve updated you all on our OAMS (Once-A-Month-Shopping) experience. It’s been almost 3 years since I last shared a sample monthly shopping trip with you, which is a bit too long, don’t you agree? A lot has changed since then - our location, our shopping habits, and even our diet to a certain extent.

For those of you new to the concept (you can read about it more at length in my eBook, Your Grocery Budget Toolbox, or by browsing through the OAMS archives), OAMS is a method of grocery shopping that saves time and money because you’re only shopping once a month, as the name suggests. Technically, though, I shop twice a month, because I usually include a mini-trip mid-cycle to re-stock produce and milk. However, the bulk of my grocery shopping is done in one weekend every month, and that’s what we eat on until the next monthly shopping trip.

This past weekend was my OAMS trip for March/April (I do my shopping in the middle of the month because that’s when we worked it into our budget), and it involved 6 stores over a span of about 4 or 5 hours (including a pit stop for lunch and a quick trip to the dollar store). Also included in this list is the meat and eggs delivered to me from a local farm. Here’s what I hauled home:

Meat #oams #frugal #wholefoods MEAT & SEAFOOD

1.6 lbs Wild Alaskan Pollock $6.42

1.3 lbs Ground Lamb $4.58

2 6oz cans Skipjack Tuna (pole-caught) $2.98

8 oz Black Forest Ham $3.49

2 lbs Grass-Fed Ground Beef $11.21

2 Pastured Roasting Chickens $23.81

Produce #oams #frugal #wholefoods PRODUCE

5 lbs. Grapefruit $1.99

2 lbs. Strawberries $3.99

3 lbs. Organic Apples $4.49

2 pkgs Blueberries $3.18

2 pkgs Blackberries $2.78

1 Mango $0.99

3 lbs Bananas $1.31

5 lbs. Pears $4.49

2 lbs. Organic Carrots $1.78

1 Onion $0.89

4 Organic Avocados $3.99

1 Pineapple $1.99

2.3 lbs Green Beans $2.98

1 bunch Cilantro $0.50

.5 lb Ginger Root $1.24

2.3 lbs Broccoli $2.26

1 Cantaloupe $2.49

.6 lbs Persian Cucumbers $0.63

1 Cauliflower $1.99

1 lb Sweet Potatoes $1.47

2 lbs Grapes $4.24

5 lbs Potatoes $1.99

1 Napa Cabbage $1.12

Dairy #oams #frugal #wholefoods DAIRY & NON-DAIRY

2 cans Coconut Milk $2.58

2 cans Coconut Milk Cream $4.58

1 pt. Organic Heavy Cream $2.99

2 lbs Organic Yogurt $2.99

2 6oz cups Coconut Milk Yogurt $2.98

<1 lb Goat Cheddar Cheese $4.80

1 pt Open Nature Coffee Cream $1.79

1 gal. Low-Temp Pasteurized Pastured Milk $5.69

1 box Coconut Cream $2.49

Dried Fruit #oams #frugal #wholefoods DRIED, FROZEN & CANNED FRUITS/VEGGIES

1 lb. Raisins $1.89

1 can Pumpkin $0.89

Organic Banana Chips $2.99

1 bag Frozen Spinach $1.49

1 bag Frozen Organic Corn $1.79

1 bag Frozen Organic Peas $1.99

8 oz Dried Cranberries $1.99

1 lb Prunes $3.29

Flour & Baking Supplies #oams #frugal #wholefoods BAKING, ETC.

5 lbs White Whole Wheat Flour $2.99

1 lb Quinoa-Brown Rice Pasta $2.99

12oz Spelt Pasta $2.49

1 lb Organic Coconut Sugar $3.99

1 lb Cashew Meal $4.99

1 bottle Organic Ketchup $1.99

12oz Fair Trade Coffee $3.99

2 lbs. Local Maple Syrup $15.99

2 lbs Coconut Oil $15.99

1 large bottle Cinnamon $2.59

4 bottles Organic Grape Juice $10.00

TOTAL COST: $236.41

A few notes about this month’s shopping trip:

I was unusually under my $250 budget - typically I go over by a few dollars!

Yes, this is really all the food we will eat for the next month, EXCEPT that I will go buy some more produce (apples, bananas, pears, etc.) in about two weeks and I will also probably buy another gallon of milk. Do keep in mind that I’m also working off of food I already have here at home -there’s more meat in my freezer left over from previous month’s shopping, as well as potatoes, pasta, rice, beans, and other staples.

Also note that I purchase grains in bulk about twice a year, and that is not included in the regular grocery budget. One of these days I’m going to start buying meat in bulk as well, and that also will come out of a separate budget.

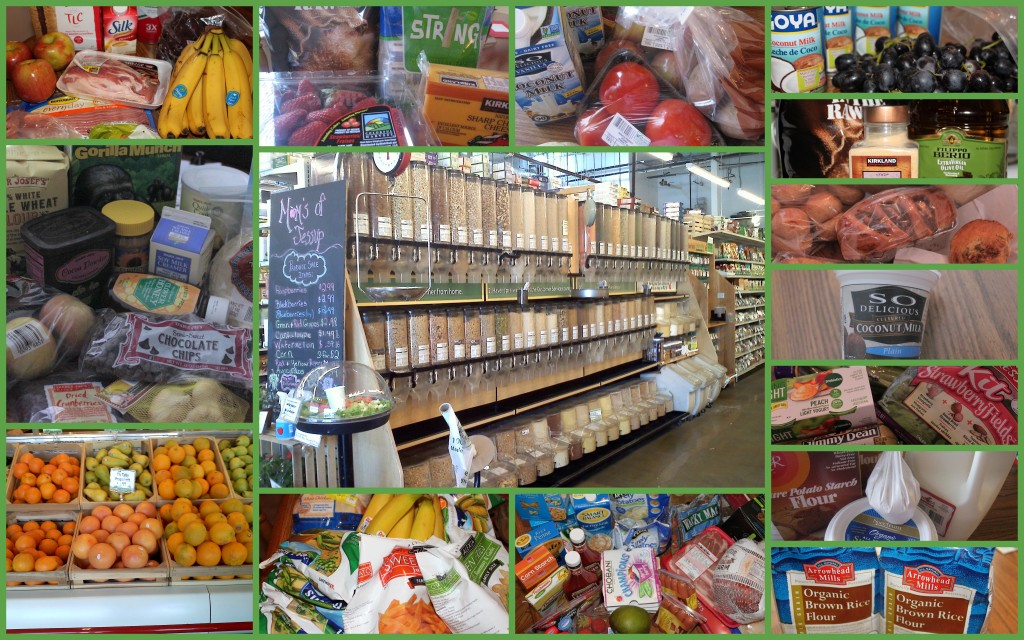
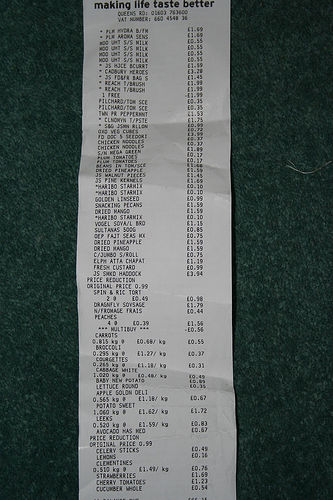
I didn’t think to take pictures of my shopping trip, so the pictures here are just randomness.


Save Money with Groceries with OAMS {on MoneySavingMom}

How to Make the Most of Your Grocery Budget Dollars

It bears repeating (over and over) that OAMS (once a month shopping) for groceries saves you lots of money, which is why I wrote a guest post on Money Saving Mom that tells you all about OAMS in a nutshell!

Almost a year ago, I switched my grocery shopping routine from weekly trips to monthly. It was one of the smartest moves I’ve made in my adult life.

Seriously, shopping once a month for groceries has helped me stick to my (very tight) grocery budget more than any other trick I’ve tried. More than coupons, more than sales, more than stockpiling, more than any other money-saving tip you can name (because I’ve done – and in some cases, continue to do – them all).

It seems counter-intuitive, but it works. Here’s why:

Read about why OAMS works so well here.

5 Ways to Maintain Your Price List

shopping list

photo by Bruce Turner

I have a thing for price lists. You may have noticed. I’ve explained what a price book is, and how to make one (both a hard copy price book and a digital price list), and now I am going to tell you how to maintain it.

There’s really not that much to it, honestly. Like most maintenance, it’s just a matter of keeping it up. Perhaps this is more of a quick tip sheet to help you keep on top of your price list.

  1. Bring your price list with you everywhere. That’s why I recommend using a small notebook or your smart phone to develop the list in the first place. In order for it to be effective, it must be portable!
  2. Update whenever you see a new price. This is one downside of the digital version: those spreadsheet apps are notoriously difficult to edit from the phone. A notebook is much easier to adjust on the spot, especially if it’s written in pencil.
  3. If you can’t update on the spot, save your grocery receipts. As soon as you get home, sit down with your list and compare your receipts with the prices on the list. Adjust as necessary. Make this a part of your grocery shopping routine; turn it into a habit.
  4. Periodically perform research. It’s a fact of modern life, and the result of inflation and grocery store competition: food prices will change. It’s gonna happen! You might get in a rut of buying cheese at one store, when in reality, the same cheese has a cheaper regular price elsewhere. So every now and then, you will have to do a little market research - literally! - and update your price list. Take a visit to all the grocery stores you frequent, and walk through the aisles, noting prices of items you buy often, and mark them down in your list. Warehouses (like Costco and BJ’s) also frequently change their stock out to adjust to their customers’ buying habits, so keep your eyes peeled when you shop there for items that might end up being cheaper to buy in bulk. (For example, Costco recently started carrying organic rice milk for a better price than I had been paying elsewhere.)
  5. Check out new grocery stores. In today’s changing market, you’re bound to have a new store open up in your area at some point. We just had 2 grocery stores open up in my town. (On my part, I’m totally excited about the Wegman’s coming soon!) And not just grocery stores: check out the discount stores, too, like Ollie’s, Big Lots, Family Dollar, Dollar Tree and more. And don’t forget about international markets: in my area, we have Asian stores, Mexican stores, African stores, and more.

Do you have a price list? Do you find it difficult to maintain?

Read the rest of the series:

What is a Price List (or Book)?

How to Make a Hard Copy Price Book

How to Make a Digital Price Book

How to Maintain Your Price List

Making a Price List: The Digital Version

photo by lustfish

A price list is essential for anyone desiring to save the most money on their grocery budget, whether they shop at regular old grocery or get all their food from a local farm. As long as you have multiple sources for the same food, there is bound to be some competition and therefore, variance in price. I’ve already shown you how to make a hard copy of your price list, so today we’re going to move into the 21st century with a digital version!

The digital version requires all the same information:

  • item
  • brand
  • regular price
  • unit size
  • store

Personally, I find a digital price list to be the easiest way to record local prices, because spreadsheets are a great way to organize a lot of information at one time. You can just glance through the list and see the information you’re looking for automatically! I also love that a spreadsheet will alphabetize each section for you, making it that much easier to find.

There are 3 main spreadsheet software options (probably more lesser known options, too, but we’ll stick with these for now):

  • Microsoft Excel - Most people have this on their computers, so it’s an obvious choice. On the other hand, it’s expensive, so you probably won’t want to invest in it just for your grocery price list if you don’t already have it. You can buy the QuickOffice app (currently $9.99) that will allow you to view and edit (to a certain extent) your spreadsheet on your iPhone or Android.
  • Open Office - I don’t have much experience with this, but unlike Microsoft, it’s free. No app for phones, though, as far as I can tell.
  • Google Docs - my personal favorite because Google Docs has a free Android app ($4.99 for iPhone) that I can bring to the store, both to reference and to update when necessary.

As an example, you can see my own personal price list here.

You can organize your own spreadsheet in one of two ways:

  1. with one sheet for each category (like Produce, Dairy, Meat, etc.)
  2. with all categories on one sheet, separated by different colored bars

I’ve personally opted for the second one so that all the information is contained in one place. Either one would work just as well.

In any case, each sheet should have 5 columns labeled the following:

Item - Brand - Unit Size - Store - Price

It’s pretty self-explanatory, but just in case, here’s what each of those columns should contain:

  • Item: the generic name for the item you are recording, for example, apples or chicken breasts. One thing I need to do more consistently, and re-organize my list to act accordingly: add any qualifying adjectives after the title. For example, if you record both organic and conventional prices, your list would have a line with the word “apples” followed by a line with “apples, organic“. Or perhaps “fish, farm-raised” and “fish, wild-caught“.
  • Brand: record the different prices for each brand in a different line and differentiate it here. This is important! It will help you compare generic vs. name brand prices, AND it will help you determine if you can get a good price for an item using a coupon during a super doubles or triples event.
  • Unit Size: record the size of the container in question. You can go about this two ways. You can use a lowest-common-denominator unit of measurement for each item - like an ounce, for example - and calculate each price by that unit. So you would divide the price of a 16oz container by 16, or an 8oz container by 8, etc. With this method, you can clearly see the bottom line: which package is cheapest. OR you can be lazy like me and just record each item’s size as it is and do the mental math when comparing prices.
  • Store: record the name of the store (or farm or co-op, etc.) with the price you are noting.
  • Price: record the price, either the actual price of the item in question, or the price-per-base-unit as mentioned above.

Now you can see at a glance what store has the best price on any item from your grocery list! Plus, using the spreadsheet features, you can organize each list in multiple different ways. For example, on Google docs, you can sort:

  • alphabetically by item - Select the range you want to sort, and highlight it. Click on “Data” and then “Sort Range by Column A, A-Z”
  • alphabetically by store - Select the range you want to sort, and highlight it. Click on “Data” and then “Sort Range”. Then choose column D (or whichever column in your spreadsheet contains the store names) in the window that pops up.
  • by price, lowest-to-highest - Select the range you want to sort, and highlight it. Click on “Data” and then “Sort Range”. Then choose column E (or whichever column in your spreadsheet contains the prices) in the window that pops up. Select A-Z.
  • by price, highest-to-lowest - Select the range you want to sort, and highlight it. Click on “Data” and then “Sort Range”. Then choose column E (or whichever column in your spreadsheet contains the prices) in the window that pops up. Select Z-A.

In the same manner, you could also choose to sort by brand or unit size. I imagine the other spreadsheet software options have the same sorting functions.

And there you have it: the 21st century version of a price list!

If you have an online price list spreadsheet, I’d love to see if (if you don’t mind sharing, of course!)! Just leave a link in the comments.

Read the rest of the series:

What is a Price List (or Book)?

How to Make a Hard Copy Price Book

How to Make a Digital Price Book

How to Maintain Your Price List

Making a Price List: the Hard Copy

start your notebook now photo by woodleywonderworks

So a long time ago, I started a series on making and keeping a price list and got as far as one whopping post. Then life intervened and other things moved up in the priorities, and now I’m finally getting back to it. If you need a refresher, check out my first post in the series about what exactly a price list is. Today, we’re going to talk about how to make a price list the old-fashioned way, with a hard copy!

Why, in this digital age, would anyone want a hard copy? What’s the point?

There are a few benefits, namely:

  1. You can carry it with you. If you don’t have a smart phone, this is the only way to take it with you to jot down changes or refer to it at a moment’s notice. Even if you do have a smart phone, they can be difficult to update, especially if you’re using a spreadsheet like Google Docs.
  2. It can be easier to use than a digital format. Maybe I’m the only one who feels this way, but I actually prefer to browse through my grocery ads rather than using the online versions. To me, it’s just easier to flip through the actual pages quickly to see what I need, even though I have a pretty fast cable internet connection. The same principle applies to a price book. You can quickly flip through its pages to find what you’re looking for, whereas (if your phone is anything like my phone) it can take forever to get to the exact app, and then the app has to load, and then you have to go to the right spot on the app.
  3. You don’t have to worry about internet access, wi-fi connections, or 3G networks. As long as you have your little book with you, you can use and update your price list no matter where the hot spots are.

Personally, I don’t have a hard copy price book because my fingers are far more comfortable typing than writing, but I will admit there are times when I wish I did have a hard copy to use as a reference or to update when I’m out and about.

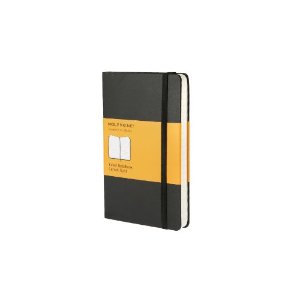
Let’s get down to business then, and actually make a price list. You’ll want to start with a small notebook, something like this:

Of course, it doesn’t have to be the exact same thing, but what you’re looking for is approximately the same size: large enough to keep detailed records, but small enough to fit in your purse or pocket. You also want it to be relatively sturdy so that it doesn’t get beaten up by being lugged around all the time. You’ll also want it to have at least 100 pages.

Now you have a notebook. What do you do with it?

First you’ll need to organize it into sections. You pretty much have two choices, and you can go with whichever one works for you:

  1. Alphabetically. Mark out sections by putting a big capital letter up in the top right corner of the page, about every 5 pages or so (Leave more pages for more popular letters, like “S”, and fewer - or no - pages for letters like “X” and “Q”.
  2. Categorically. Mark out sections by writing in large letters at the top of a page some general food categories, like “Dairy”, “Produce”, “Meat”, etc. Leave about 10 pages for each of these sections.

If your page doesn’t have a margin where you can write the price, you may want to draw in one so that you can have all your prices in a neat column.

Now you need to fill in your price book. Whether you’re filing by category or alphabetically, you’ll need to create mini-sections, simply by jotting in some more specific categories of food, like “Apples” under “A” or “Produce, or “Milk” under “Dairy” or “M”. Beside the name of the item in question, jot down a unit (pound for apples, gallon or 1/2 gallon for milk, for example). All the prices listed below should be based on that unit.

In each mini-section, you will list the name of the store that sells it, and the regular price at that store. For example:

Note: these prices are not accurate as far as I know.

That’s all there is to it! Keep your price book with you at all times so that you can update prices as needed, or refer to it when you come across what you think may be a good deal.

Do you have a price book? Hard copy or digital?

Disclosure: This post contains affiliate links.

Read the rest of the series:

What is a Price List (or Book)?

How to Make a Hard Copy Price Book

How to Make a Digital Price Book

How to Maintain Your Price List


The Best Weapon in My Grocery Budget Arsenal

shopping list
photo by jiva
So you’re browsing through your grocery ads (or a great healthy foods deals blog that you happen to love!) and you notice that your favorite brand of all-natural sausage is on sale for $3.99. Score! Off you go to the grocery store and load up on a few packages, only to realize that the regular price is $4.19. Hmmm, not as much of a great deal as you thought. Or maybe the very next day, you see that another grocery store in town has the same identical package of sausage on sale for $2.99. Now that is a great deal, for sure! Until you realize that WalMart’s regular price is $2.79.

And here you are, stuck with several packages of sausage that you paid in excess of $3!

There is a way to avoid such a scenario! Like all good things, it requires a little bit of effort to get started, and a certain amount of maintenance. But if you are serious about saving money on your groceries, it is absolutely essential.

I am speaking, of course, about the price book, or the price list, as it is also called.

Never heard of it? Don’t worry; you’re not the only one! That’s why I’m going to dedicate the next few Fridays to a series on Price Lists and How to Use Them. Utilizing a price list or book will ensure that you never over-pay for groceries again!

In short, a price list or book is exactly what it sounds like: a list of the prices in your area for groceries and foods you frequently buy. It can be an actual notebook; it can be a spreadsheet document; or it can be all in your head if you’re just that good.

A price list details the exact quantity and price that a certain food item is available for at any given store in your area, and should be more or less exhaustive. A quick glance through your personal price list will tell you that the cheapest place to buy pickles (if you don’t make them yourself, which is cheaper) is your local XYZ Groceries, or that the store on your way home from work has the best price in the most convenient location.

The price list should document regular prices, not sale prices. Regular prices change less frequently and are easier to track (although they do change, as evidenced by my most recent OAMS trip!).

Each line item in your price list should contain the following information:

Item - Brand - Amount in Package - Store Where it’s Sold - Price

Additionally, for like items sold in different sized packages, it’s useful to also denote the price per the lowest common denominator in size. In other words, when sugar is sold in 3lb or 5lb packages, you can compare the price per pound instead of per package.

Here’s what my price list looks like.

The advantage of a price book/list is obvious: next time you’re browsing through the circular and an item is advertised as being a great sale price, you can check it against your list of area prices on that item or a similar item. If the sale price is indeed significantly lower than your recorded prices, then by all means, stock up! If not, you’ve just saved yourself a handful of cash. And with Christmas coming up, that handful of cash is going to come in… well… handy!

Read the rest of the series:

What is a Price List (or Book)?

How to Make a Hard Copy Price Book

How to Make a Digital Price Book

How to Maintain Your Price List


More About Making Your OAMS List: The Nitty Gritty

I thought last week’s post about making your OAMS list would be the last in the series, then I started to make my own list for my big shopping trip this weekend. And I realized I hadn’t even scratched the surface!

Let’s get down to the nitty-gritty of how to make a real, workable list with the following features:

  • makes use of all food sources in your area and online
  • allows you to use coupons and combine sales
  • takes advantage of online circulars and deals blogs.
What you will need is some kind of spreadsheet program, like Excel or Google Docs. Although I have Excel, I like to use Google Docs because it becomes a tab in my browser, so I can easily go back and forth from deal blogs, online circulars, coupon databases and more when creating my list. The other thing I love about Google Docs is that it saves automatically, so I don’t have to worry about losing all my hard work.
In the preliminary stages of making my list, I like to use the “Sheets” feature of a spreadsheet program, creating one sheet for each store or food source that I visit on my big trip. On Google docs, just go to the bottom left corner of your spreadsheet, click the + sign to add another sheet. Right click on the tab for the new sheet, and select “Rename”. Type in the name of a store you are including in your shopping trip.
Now you need to set the page up to make the most of sale prices and coupons and other deals you’ve found online and in the store’s circular. You’ll need four columns, labeled with the following:
  • Item (and quantity you are going to buy if more than one)
  • Price
  • Coupon
  • Final Price
Here’s how to use each column:
Under “Item” , type in the exact name (especially the brand) of the item you want to buy. After the item name, indicate how many you want to buy if you are buying more than one.
Under “Price“, type in the sale price for the item (or regular price if it’s not on sale). If you don’t know the exact regular price, type in your best estimate.
In the “Coupon” column, write the amount and quantity required for any coupons you may be using on that item. For example if you have a coupon good for $1 off 2 items, then type in “$1 off 2”. You’ll develop your own shorthand or code as time goes on.
In the “Final Price” column, subtract the value of the coupon from the price, and type that amount in. I like to set that column to automatically put the money in this format: $00.00. You can do that by highlighting the column, clicking on “Format”, then selecting “Number”. From there, choose the second Currency format.
Now it’s time to make the First Draft of your list. Browse through the store’s ad or your favorite blog’s deal list and coupon match-ups to find any items you wrote down in your list of what you need to purchase for the month.Additionally, if you see any great deals for items you use a lot, even if they’re not on your list of what you need to have, go ahead and throw them on the spreadsheet, too. The first draft is where you put everything you might possibly want to buy this month. We’ll refine it in a minute.
Repeat this process for every store you’re willing to shop at this month. I’ll go to quite a few stores, especially since in my area, they seem to be clustered together. If I’m going to one, I might as well go across the street and go to the other, especially if there are significantly good deals to be had. Also, I spread this process over a few days (usually a Friday, Saturday and Monday), so I’m not spending a whole entire day out grocery shopping.
Your style might be a little different. Maybe you’d rather stick to just a couple tried and true stores, and that’s fine! It all depends on if money or time is your bottom line.
Don’t forget about stores like Walmart, Target, Trader Joe’s, Aldi’s, and warehouse stores. They don’t typically have weekly ads with amazing loss-leader sales like grocery stores can, but they often have the best non-sale prices. Familiarize yourself with the prices at those stores (more on that starting next week!), so you can take advantage of their great pricing in your OAMS trip. If ground beef isn’t on sale at any grocery store, you’ll know where you can get it for the next best price if you need it.
Once you’ve finished your First Draft, it’s time to refine it down to the finished product, your Master List. Go through each of the sheets on your grocery list spreadsheet, and tabulate the Final Price tab. Do this easily by highlighting the column and selecting the Greek E button (Mathematicians: what is that thing called?!) and choosing “SUM”.
Use a calculator (or your head if you’re just that good) to add up each of those sums and find your total estimated cost for the month. If you’re within your budget, hooray! Your list is almost done. If not, you’ve got some fine tuning to do. If you’ve come in over budget, go back through your list and eliminate or reduce the quantity of all non-essential items. Only you can determine what those are, so I’m not even going to go into that. I’ll just give you an example from the list I made yesterday: I wanted to take advantage of Harris Teeter’s great deal on Northland’s Juice, but I just couldn’t do that AND buy the whole case of rice milk at Costco that I want to buy. Since I use rice milk a LOT in baking, and we don’t really drink juice hardly ever, it was an easy call just to delete that row.
Add up your totals again, and repeat the process until you’re under budget.
If you have an Android phone or tablet, then your list is now DONE! All you have to do is use the Android Google Docs App to access your spreadsheet when you’re at the store.
If you don’t have that capability, then you have to print out your list (unless, of course, you want to bring your computer to the store with you…). The easiest way to do that is unfortunately not super easy. I couldn’t find a way on Google Docs to combine all the sheets so that they automatically print onto one piece of paper. I hate wasting all that copy paper and ink, so what I have done is make one more sheet called “Master List”, and copy and paste all the other lists into that one. Print out the Master List (on scrap paper if you have it!), and you’re ready to go shopping!
Want to see my Grocery List? Here you go:

Find the complete series here:
How to Make the Most of Your Grocery Budget Dollars: Just Jump In to OAMS!
Five Ways OAMS Saves You Money
How the “Mini Trips” Work
How to Make Your OAMS List, Part 1
How to Make Your OAMS List, Part 2
Sample OAMS Trip

How to Make Your OAMS List

This is the final installment in my OAMS series. You can start at the beginning if you missed the others.

Making your list for a huge shopping trip that’s supposed to last for a whole month can be a bit daunting. It’s almost like trying to pack for a month-long overseas vacation, trying to make sure you’ve covered all your bases so that you have everything you need for the whole trip. Cold weather, warm weather, swimwear, pajamas… you’ve got to have it all or you’ll be up a creek without a paddle!

It’s even scarier when you’re dealing with food - you know, the stuff that’s supposed to nourish you and keep you alive! If you’ve committed to staying out of the stores between monthly trips (with the exception of weekly mini trips to stock up on produce and the like), you might get a little panicky thinking that you’re not prepared to feed everyone adequately for a whole month without breaking the rules and dashing into the store for a last-minute unbudgeted purchase.

That’s where the list comes in. A well-thought-out, planned list will save you a lot of worry and stress and help make sure you’ve got all the food bases covered for an entire month.

1. Start making your list the minute you’re done with the last month’s shopping trip. I keep a magnetic notepad on my fridge where I jot down what food items are getting low and need to be replaced as I come across them. I’ll notice that I’m almost out of ginger when I’m baking, so I’ll write “ginger” on my list. I use the last of the oatmeal to make a big batch of granola, so I’ll write “oatmeal” on the list.

This is by far the best way to make sure you have the foods you actually need on your list. Continue compiling it for the whole month long, and you will have a pretty accurate representation of the foods you need to buy for the month.

2. Look through your menu plans for the past few weeks or months, if you can. If you don’t have access to those, then just think about what a typical week looks like for your family regarding the foods you eat, particularly meats and main dishes. How often is meat the center of your meal? How often do you eat beans? Rice? Pasta? Potatoes? Do you make eggs every day for breakfast?

Knowing how often you consume a particular food will help you know how much of it you need to buy to cover a whole month. For example, we eat pasta once a week or less, so I know that a couple boxes of pasta will suffice for the whole month. Right now, since my DH is the only one in the house eating them, one dozen lasts a whole month.

This is particularly useful when it comes to meat. Over the years, we have developed a pattern for our weeknight menu that usually includes 1 or 2 meat-based meals with an additional leftover-based meal (soup, casserole, pizza or pasta), plus a meatless meal and a fish-based meal. Knowing this helps me determine how much and what kinds of meat to buy for the month.

3. Don’t forget about lunch supplies. What usually goes into packed lunches for the family? I don’t have kids in school, so I only have to worry about my DH’s lunch, and he has a pretty familiar pattern that we follow. He really likes to have cheese, yogurt, and a banana in every lunch, so I make sure I have enough of those things to last for the whole month. If you pack a lot of sandwiches, make sure you’ve got enough bread and sandwich fillings (meat, cheese, tuna, etc.) to last.

4. Keep your baking cupboard fully stocked. If you make a lot from scratch - and you should, for the benefits to your health and budget! - make sure you always have enough of the following:


  • flour (whatever kind(s) you use)
  • sugar
  • honey, maple syrup, etc.
  • baking soda and powder
  • vanilla
  • common spices (cinnamon, oregano, etc.)
  • oil and butter
  • corn, tapioca, or arrowroot starch
  • eggs or egg replacements
You will learn as you get deeper into OAMS how much of each item you generally go through in a month. I’ve learned that I go through 5lbs of all-purpose flour and 5 lbs of whole wheat flour in about 6 weeks, so I buy accordingly. A big 6lb bag of raw sugar takes us about 2 months to finish, but a 24oz bottle of honey disappears in less than a month.
5. Buy a LOT of produce. If each person in the family is supposed to have at least 5 servings of fruits or vegetables a day, it’s going to take a lot of produce to ensure that they actually do.
Of course, a lot of produce doesn’t last very long, so you can’t buy it all at once (hence, the weekly mini trips). Much of it will last a couple of weeks, though, so plan accordingly. Here are some long-lasting produce options that you can stock up on in your monthly trip:
  • carrots
  • apples
  • citrus
  • celery
  • potatoes
  • winter squash
  • sweet potatoes
  • un-cut melon
You can also invest in some products that help keep produce fresh in the fridge to extend the life of certain other foods. Of course, frozen foods will last for quite some time in the freezer, so you can take advantage of that if you have the freezer space. Canned goods will last almost indefinitely, but there’s a trade-off in that they’re not as healthy as fresh or frozen.
Note: One fruit I’ve found that we just can’t keep on hand is bananas. We eat a lot of them, and I have to admit I occasionally go to the store TWICE in one week to replenish our supply. They just don’t keep past a few days.

Find the complete series here:
How to Make the Most of Your Grocery Budget Dollars: Just Jump In to OAMS!
Five Ways OAMS Saves You Money
How the “Mini Trips” Work
How to Make Your OAMS List, Part 1
How to Make Your OAMS List, Part 2
Sample OAMS Trip

OAMS: The Mini Trip

If you’re new to the concept of Once a Month Shopping (OAMS), readthe beginning of my series here, and more information about how it saves you money here.

So you’re thinking about OAMS, but the question comes to mind - what about the food that won’t last for a whole month? Dairy products? Meat? Produce? And what about foods I forgot to buy during the monthly trip but really need?

The truth is that produce is really the only thing that has to be bought on a regular basis before it goes bad.

Dairy products often last as long as a month if you buy them at their freshest and leave them un-opened until you use them. Excess milk and butter can even be frozen if you have a large freezer. Yogurt often has a shelf-life of at least 2-3 weeks; we don’t have any problem buying one months’ worth at a time. Cheese will start to mold shortly after the package is opened, so consider buying smaller packages (which is unfortunately more expensive), and once opened, repackage it carefully to prevent molding. You can also grate it and freeze the grated cheese: frozen cheese isn’t great eaten straight up, but it can be used in baked goods, casseroles, and pasta dishes.

Meat can be frozen to extend its life by quite some time. I almost always put my meat directly into the freezer unless I know I’m using it within a few days. The only time I don’t is when I plan to use the meat that day or the next. The only trick is remembering to pull meat out of the freezer at least a day before you need it to give it adequate time to thaw (where a menu plan comes in handy!)

That brings us to produce, really the only thing that needs to be replenished on a regular basis. This is where the mini-trip comes in.

A “mini-trip” is a short shopping trip that occurs on the “off” weeks between monthly shopping trips. On a “mini-trip”, you can replenish your supply of fresh produce, and take advantage of any super-good sales that might occur. In a typical month, I take about 30% off my total monthly grocery budget and spread it over the 3-4 off weeks to spend on things as I need them.

For me, that means $15-20 a week to spend on whatever is deemed essential for that week. Typically, this is what I spend that money on:

The vast majority of it goes to produce. Two-thirds or more of the weekly allotment goes to fresh fruits and vegetables, usually from the farmers’ market during the growing season. We go through fruits and veggies fast around here, so a lot of my money goes to that.

I also usually end up at one grocery store to pick up a great sale. I try not to go to more than one grocery store on the off-weeks, so I scan the ads to determine who has the best deals (if any) on things I need or can’t afford to pass up. Usually this means great prices on produce or meat, or occasionally super-cheap and free products.


Once at the store, I check out the clearance and the marked-down produce and meat, too. Sometimes I find really great deals that fit within my budget that I can take advantage of.


If a store is holding a super-doubles or tripled-coupon event, I buy the best deals there. Depending on what foods we need to get through the rest of the week, and how much that leaves in my weekly budget, I’m able to buy more or less of the best deals offered at that store during the week. Because I have a smaller amount of money available to me, I’m able to really prioritize what are the best deals, and what I can leave behind.

I’ll use this week as an example: I spent about $11 at the farmers’ market, so I have about $9 left, which I’ll probably use at Harris Teeter to get some deals I saw in their ad, including some additional produce.

Find the complete series here:
How to Make the Most of Your Grocery Budget Dollars: Just Jump In to OAMS!
Five Ways OAMS Saves You Money
How the “Mini Trips” Work
How to Make Your OAMS List, Part 1
How to Make Your OAMS List, Part 2
Sample OAMS Trip