My IKEA Hack: {Almost} Built-Ins

Although we came by our current residence in a rather haphazard manner, we have enjoyed it tremendously. It’s so much bigger than our previous space, plus it has a HUGE back yard that The Boys love to play in. Besides which, it’s right off the main road, so the location is absolutely perfect.

However, it does have one drawback. (Can’t have everything, right?) Being a basement apartment, it is seriously lacking in storage space. Each bedroom has a closet, and there is a small storage unit under the stairs, but that’s about it. There’s no linen closet, no coat closet, and no laundry room (only a laundry closet) and I’m realizing that I relied heavily on those rooms for storing all sorts of things in our previous residence.
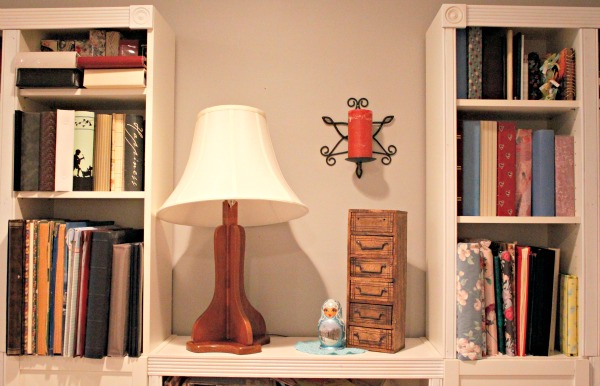
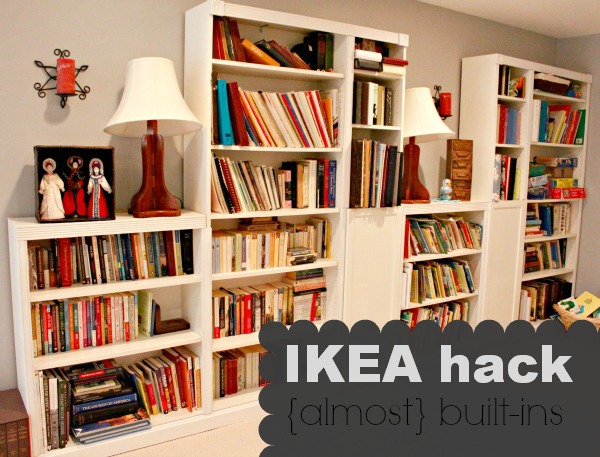
I’ve had to get seriously creative with storage here, and I’m going to show you some of the cheap ideas I’ve been able to employ. By far my favorite is this first one: our first-ever IKEA hack that was pretty darn successful if I do say so myself. We used IKEA’s line of “Billy” bookshelves and added some trim from Lowe’s to finish off the look. The result was a beautiful set of shelving that looks beautiful but cost much less than it would have elsewhere… plus it holds all our books! (I have no idea where we put all those things in our previous apartment, to be honest!)

Our IKEA Hack: Billy “Built-Ins”

We used the following Billy bookshelves:

As you can see, the shelves themselves cost around $350, considerably less than similar shelving found elsewhere. In addition to the shelving, the molding and trim (and the spray paint) cost another $60-75, bringing the total cost to a little over$400. Not bad, I think!

This is the first shelf in our set-up and contains our non-fiction collection.

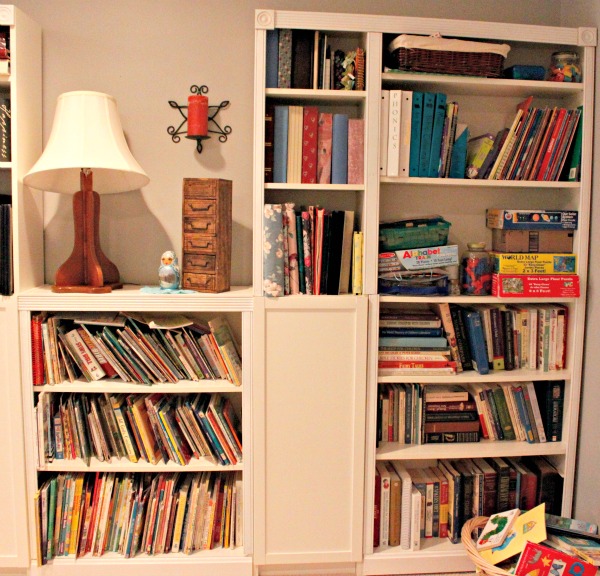
We set them up in a sequence like this: short - tall - narrow, with the narrow shelves having doors on the bottom. (I love the doors because we can shove all the kids’ games in there and hide the mess!) We had wanted the shelves to extend all the way to the ceiling, and we thought we had measured enough space to include the shelf extenders. That would have added another $100 to the total cost, but as it turned out, for some reason the extenders were about an inch too short to fit. I’m sure we could have cut them to fit if we had wanted to bother (and they would really have looked like built-ins, then), but we didn’t. We just returned them and saved ourselves some moolah!

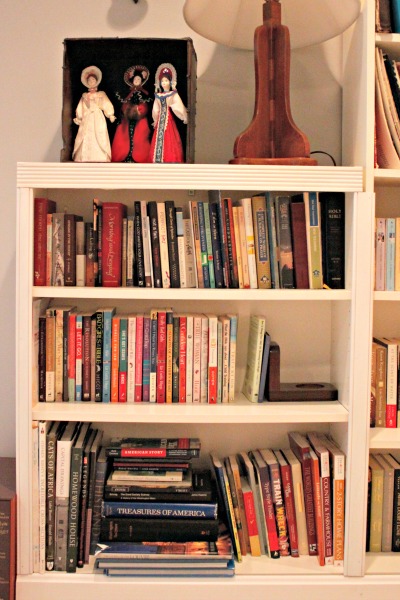
This tall shelf holds most of my sheet music and my fiction collection.

To finish off the look, we used the following pieces of molding and trim, cut, painted (with white spray paint), and attached by my DH himself:

  • 4 rosette medallions for the top corners
  • wide ribbed molding for the top shelves
  • 2.5″ wide molding, which we used wherever two shelves adjoined vertically (If it weren’t for the doors, we would have needed more of this.)
  • 1.5″ wide molding, which we placed along the vertical edges of all the shelves
  • baseboard along the bottom (except for where the doors are)

All our photo albums go in the top shelves of the narrow units.

I honestly can’t remember how many lengths of each type we bought from Lowe’s because it’s been a couple months. Besides which, it seems like we underestimated the amount we needed, and my DH ended up going back at least once to pick up more. (Moral of the story? Buy extra, and return what you don’t use!)

My DH worked really hard on this project in his spare time over the course of several evenings- maybe a week or two. Because he had to return to get more molding than he had initially purchased, it dragged on a little longer than it would have otherwise. And then it took me just about forever to sort and organize all our books, which had been packed in approximately a zillion different boxes!

The kids books are easily accessed by the little people, and the games are hidden behind the doors.

We are quite pleased with the finished product, and it’s definitely the focal point of the room where it sits, which we have dubbed “the library”. It’s really not a room, actually: it’s a super-wide hallway (read: rather nebulous waste of space that doesn’t immediately have an obvious purpose) that brings you from the living room into the master bedroom, and I can’t think of any better use for it than this (despite my DH’s campaigns for a ping-pong table!).
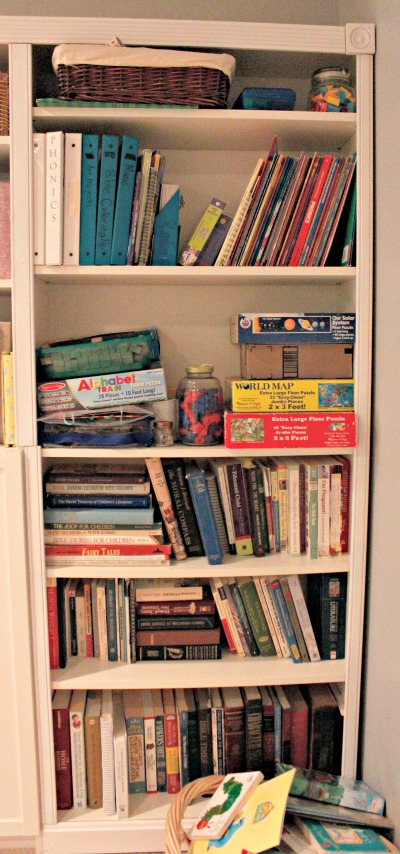
This tall shelf holds educational materials and reference books (dictionaries, medical books, college textbooks, etc.).
Organizing on the Cheap Recap

Have you ever been frustrated by all the creative organization ideas you see in magazines and on blogs, only to realize that you simply can’t afford (or don’t want to spend the money) all those gorgeous bins, boxes, baskets and other containers? Me, too! I’ve learned to organize my home (uh, to a certain extent) without spending an arm and a leg, and I have a whole week’s worth of money-saving organizing tips that you will love!


Plus, I have a great list of other ideas from bloggers around the internet who also have a passion for organizing with repurposed and recycled items. You will not lack for inspiration!

I’m not the only one with great organizing ideas - far from it! Click on the image below to read posts by more than 20 other bloggers who also shared 5 days of organizing tips. You’ll find ideas for organizing naturally, for cleansing your mind and body, for organizing schoolrooms, offices, kitchens, linen closets and more.

Sharing at Fellowship Friday, Frugal Friday, Homestead Barn Hop, Better Mom Mondays, Titus 2sday, Domestically Divine Tuesday, Teach Me Tuesday, Works for Me Wednesday, Women Living Well Wednesday, Frugal Days Sustainable Ways, The Mommy Club, Simple Lives Thursday, Your Green Resource,

Organize Your Home with Empty Shipping Boxes {Organizing on the Cheap}

I’m so happy you are here with us this week for 5 Days of Organizing - more than 20 bloggers will be bringing you daily inspiration for organizing every aspect of your life. And with back-to-school days breathing down our necks, we all need it!

Have you ever been frustrated by all the creative organization ideas you see in magazines and on blogs, only to realize that you simply can’t afford (or don’t want to spend the money) all those gorgeous bins, boxes, baskets and other containers? Me, too! I’ve learned to organize my home (uh, to a certain extent) without spending an arm and a leg, and I’ll be sharing my tricks with you all week long. Stick with me for great cheap organizing ideas!


You might want to scroll down to the bottom to enter the $50 Paypal cash giveaway, and then click on the footer image to find a whole bunch more giveaways (including one of Your Grocery Budget Toolbox by yours truly!).

So far this week, I’ve shown you my Yard-Sale Spice Cupboard Makeover, my Free Pantry Organization System, and my Dollar Tree Organized Sets.

Today, I’m going to share with you another favorite organizing trick that is absolutely free. Well, sort of. I guess it all depends on if you won a giveaway or did a little online shopping. In any case, whenever the UPS (or the USPS, or FedEx, I’m not picky) knocks on your door and delivers a package… save the box! No matter its size or shape, it will come in handy for containing and organizing something somewhere in your home.

Now, a little caveat: don’t get too carried away here, folks. If you win too many giveaways or do a little too much online shopping, you might find yourself overrun with more boxes than you can handle. And if you’re having trouble organizing the boxes that you are saving to organize with… well, then, you’ve got trouble, my friend. With a capital T.

My rule of thumb is this: if I have an out-of-the-way space to save the box indefinitely, I will. Sometimes I have smaller boxes hanging around the corners of my laundry room for quite some time. But if I don’t really have the space to keep the box, I just hold on to it for a few days until either I’m sick and tired of moving it around to get it out of my way or I have found a practical use for it elsewhere in the house. Then I use it or lose it.

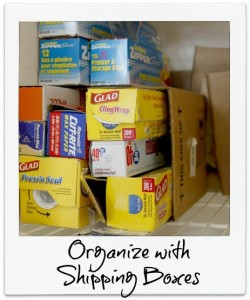
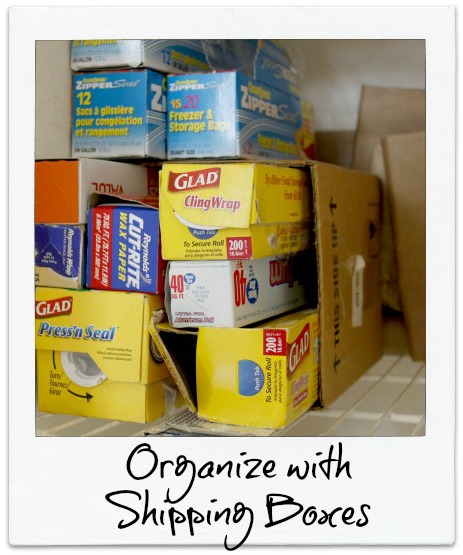
And how do I use these boxes? Well, pictured above you see one example. I used to have all those boxes of wraps (you know: foil, plastic wrap, wax paper, zip-top bags, etc.) piled in a heap on the floor of my pantry. I never knew how many of each I had and what I was out of, and frankly, it was a huge mess.

When I recently re-organized my pantry, tackling that disorderly heap was one of my first jobs! It was quite easy, really. The long boxes holding the wraps fit perfectly inside a rectangular box that had recently arrived. I set the box on its side on one of the pantry shelves, and now I can see easily how much foil or wax paper I have. What’s more, I can easily access each box without having to dig through a pile. Brilliant, really! And since I don’t care what it looks like, being in the pantry and not visible to the average visitor, I just left the box plain. But the beauty of a cardboard box is that you can quickly, easily, and frugally decorate it with some wrapping paper or scrap paper.

That’s not the only place I’ve used a cardboard box, though. Hardly!

Organize with Shipping Boxes

  • for off-season clothing storage (I have read that cardboard is actually a better storage solution for clothing than plastic because it allows the fabric to “breathe” - just be sure it’s not anywhere accessible to critters that can chew through the cardboard. Ew.)
  • for Christmas decoration storage
  • under the sink to contain all the junk that collects there.
  • under the bathroom sink to contain that 36-pack of toilet paper
  • as a depository for no-longer-wanted items - once it’s filled, it’s all ready to go to the Goodwill!
  • as a toy rotater - if your child has too many toys, box some of them up and hide them somewhere; in a month or two, bring out the hidden toys and hide some more.
  • book storage - if you simply don’t have any hidden place to put the boxes, cover them up with a table cloth and call it a nightstand/side table.
  • clothes your children have outgrown (if you’re saving them for baby)

That’s just scratching the surface of what these boxes can do! And since they come in all shapes and sizes, they can fit all kinds of different needs. Happy boxing!

Do you save shipping boxes?

Visit these blogs for lots more ideas on organizing your kitchen, your office, or your homeschool room!

a Rafflecopter giveaway

Sharing at Simple Lives Thursday, The Mommy Club, Your Green Resource

How to Organize for Less at the Dollar Store {Organizing on the Cheap}

I’m so happy you are here with us this week for 5 Days of Organizing - more than 20 bloggers will be bringing you daily inspiration for organizing every aspect of your life. And with back-to-school days breathing down our necks, we all need it!

Have you ever been frustrated by all the creative organization ideas you see in magazines and on blogs, only to realize that you simply can’t afford (or don’t want to spend the money) all those gorgeous bins, boxes, baskets and other containers? Me, too! I’ve learned to organize my home (uh, to a certain extent) without spending an arm and a leg, and I’ll be sharing my tricks with you all week long. Stick with me for great cheap organizing ideas!


Scroll down to the bottom to enter the cash giveaway; and when you’re done, click on the footer image to see other posts by other bloggers in this series PLUS lots more giveaways (including a copy of Your Grocery Budget Toolbox!).

The Dollar Store (we have Dollar Trees around here) is the cheap homemaker’s best friend. Granted, not everything there is even worth one dollar. And granted, they don’t have a lot in the way of “natural”. But you certainly can’t beat their price when it comes to organizational products!

I’ve mentioned already that I love to look at yard sales for my organizational tools, and I also love to reuse and repurpose items that come through my house, like the empty jars I wrote about yesterday. But if I ever want a matching set of containers, the Dollar Tree is where I go. Unlike at other fancier stores (The Container Store comes to mind), I can buy as many of an item as I need to have a coordinating set without going over budget.

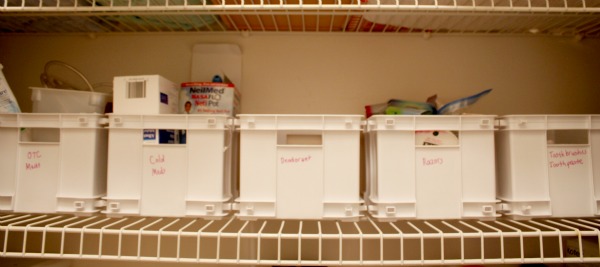
For example, in my linen closet, I have toiletries and over the counter meds organized in matching white boxes:

It’s not gorgeous, but… it’s hidden away in the closet, so I wasn’t particularly going for the gorgeous look. Practical is more my style when it comes to closet storage!

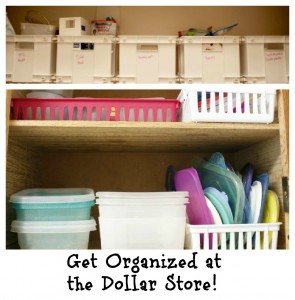
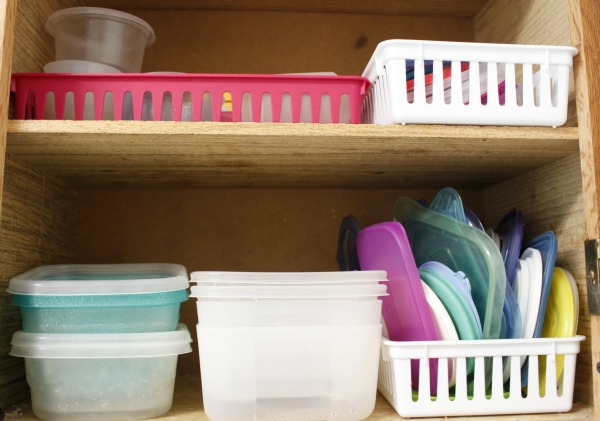
Also, in my kitchen cupboards, I have my small food storage containers and lids all neatly contained in Dollar Tree plastic boxes. I also have similar baskets in a different cupboard that contain toddler utensils and the like.

I’m sure I could show you lots of other examples from my own home, but for now, I’m going to give you a little tour of a Dollar Tree near me, where you can see for yourself the selection of organization tools they have. All for a dollar!

Organizational Products Available at the Dollar Store

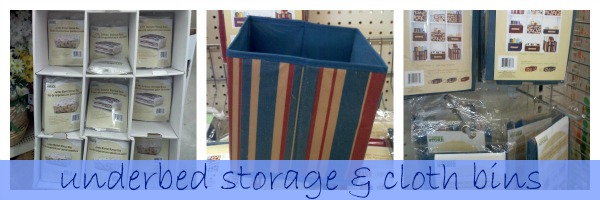
On the left side of this picture you see a display of a variety of under-the-bed storage bags. I will remind you that you get what you pay for: these are not super sturdy, folks! However, if you are careful and don’t over-stuff them, and then leave them where they are without going into and out of them a lot, they’ll last you for quite a while. I use a couple of these to store baby onesies, bibs and such underneath the crib.

In the middle, you see the dollar store version of a canvas bin - cute, no? I love the colors on it! The Dollar Tree has a whole collection of those right now, which you can see in the display on the right. I have similar boxes (I think I bought mine on clearance at Target) that I use to store stuffed animals and other toys in The Boys’ room. The fabric has gotten a little pilled in the past couple years, but other than that, they’ve held up very well. These types of boxes fit very nicely in deep shelves on entertainment centers, coffee tables, and home office units to store a huge variety of items.

I’ve personally moved away from using baskets as storage, mostly because the little people in my house tend to destroy them in, oh, about 5 nano-seconds. I find the little pieces of reed or wood or whatever all over the house. But if you don’t have destructive little ones, or if you have some nice up-high but still visible storage areas, OR if you have angelic children who never mess with your stuff… you will find baskets to fit your needs at the dollar store. Wow, can you believe all the possibilities in these pictures? All kinds of boxes and bins in a variety of colors, shapes and sizes to suit your needs. These containers have applications all around the house: in closets, in the laundry room, in bedrooms, in drawers, in cupboards, on shelves, in the bathroom, in the kitchen, etc. Anything you need to contain can be contained in one of these, I’m pretty sure. Unless you’re trying to contain a wild animal (or small child), and well, that ain’t gonna cut it. Ice cube trays and vases for storage? Why not? They are containers, are they not? Ice cube trays can fit easily inside a drawer in a desk to contain all those annoying little things like push pins and paper clips. And vases or glass containers like these can be used on a bathroom or kitchen counter to hold utensils, cotton balls, toothbrushes, scrub brushes, or whatever!

Have you ever organized your home at the Dollar Store?

Visit these blogs for lots more ideas on organizing your kitchen, your office, or your homeschool room!

a Rafflecopter giveaway

Sharing at Women Living Well Wednesday, Works for Me Wednesday, Frugal Days Sustainable Ways, Raising Homemakers, Simple Lives Thursday, The Mommy Club, Your Green Resource

How I Organized my Pantry for FREE with Empty Jars {Organizing on the Cheap}

I’m so happy you are here with us this week for 5 Days of Organizing - more than 20 bloggers will be bringing you daily inspiration for organizing every aspect of your life. And with back-to-school days breathing down our necks, we all need it!

Have you ever been frustrated by all the creative organization ideas you see in magazines and on blogs, only to realize that you simply can’t afford (or don’t want to spend the money) all those gorgeous bins, boxes, baskets and other containers? Me, too! I’ve learned to organize my home (uh, to a certain extent) without spending an arm and a leg, and I’ll be sharing my tricks with you all week long. Stick with me for great cheap organizing ideas!


Psssstt! Scroll down to the bottom for your chance to win $50 in cash!

The pantry is one of those areas that’s just difficult to keep organized, because it’s intended for storage, but is constantly being used. If you’re anything like me, all day long, you’re opening the door and either putting something in or taking something out. It’s a recipe for disorganizational disaster! (Yes, I’m aware I just made up a word. The red squiggly line was a dead giveaway.)

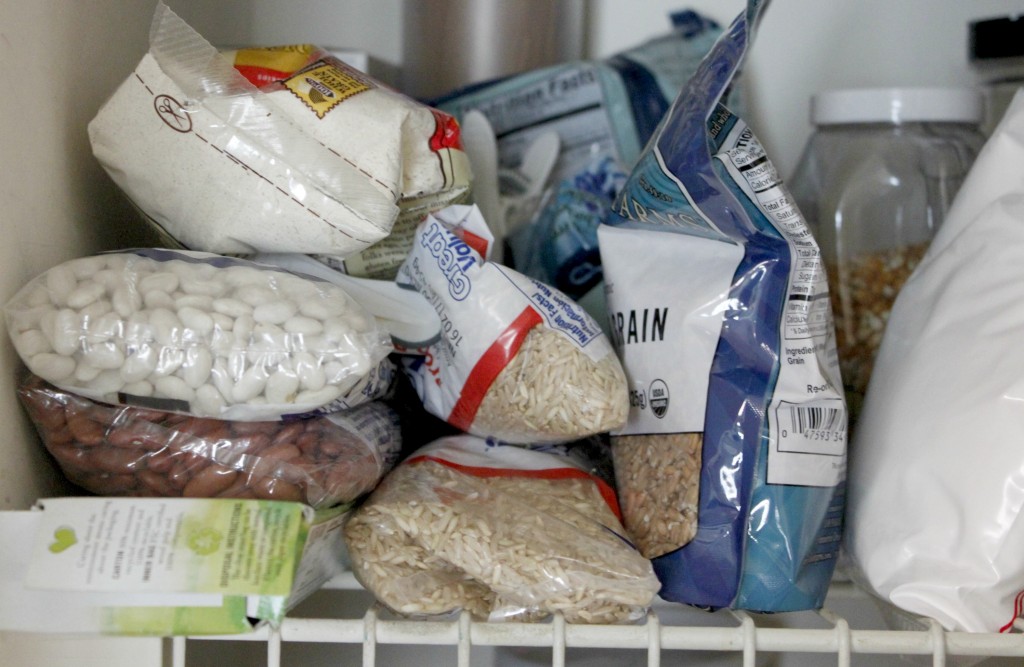
The pantry also rapidly becomes an unmanageable mess because of the packaging our food comes in, which is usually a temporary plastic or cardboard container. By “temporary”, I mean it was never intended to last beyond the life of the food it contains, and is therefore easily destructible. What’s worse is that all those temporary packages come in ALL different shapes and sizes. I suppose it would be boring if all the manufacturers decided to standardize their packaging just so we could all have neat cupboards… but it would also be awfully nice!

Of course, you could remedy this little problem by investing in a set of matching and stacking containers that fit neatly on your pantry shelves, like the Tupperware Modular Mates set or Anchor Hockings Square Glass version. The problem is, either one of those will set you back by quite a bit; and if you don’t have room in the budget for an *organizational products* line item, you will likely want to research cheaper options.

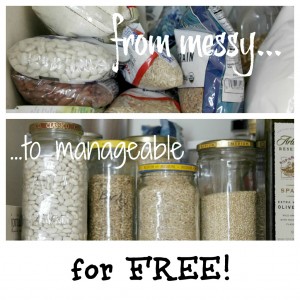
Well, guess what? I have a cheap option for you. How about FREE? Doesn’t that sound nice?

Make your very own customizable set of glass dry food storage containers simply by recycling the glass bottles and jars yourself instead of throwing them in the recycling bin.

The Benefits of Re-Using Empty Jars

  1. You save them from the landfill, or from going through the recycling process.
  2. You save money by not purchasing empty containers simply for the purpose of filling them.
  3. Plastic storage containers can leak chemicals into the food; glass is a safer option.
  4. Glass can go from freezer to fridge to pantry with ease, whereas plastic is a little less stable.
  5. Glass is clear, so you can see at a glance what each jar contains; you can also see at a glance what is in your pantry without having to shift piles of bags around.
  6. The glass jars, while of different sizes, are generally all round and therefore line up nicely in rows so that your pantry looks much neater and better organized.
  7. The glass jars are re-usable over and over and over again, and last MUCH longer than plastic.
  8. Glass is dishwasher-safe.

How to Organize Your Pantry with Empty Jars & Other Containers

  • Start out by saving every single glass jar that would otherwise end up in the recycling bin or trash can. Over time, as you develop your own personal system, you’ll learn which jars work really well and which ones you don’t really want to keep. You’ll get a feel for the sizes you use most often and the shapes that work best for you.
  • Wash them thoroughly and remove the labels by soaking them in warm water. If the label is really stubborn, you can usually remove it by applying a paste made of equal parts baking soda and coconut oil.
  • Store the empty jars in a handy location where they are easy to access when you need to fill them.
  • Whenever you buy bagged food from the store, pour it into one of your jars as soon as you come home.
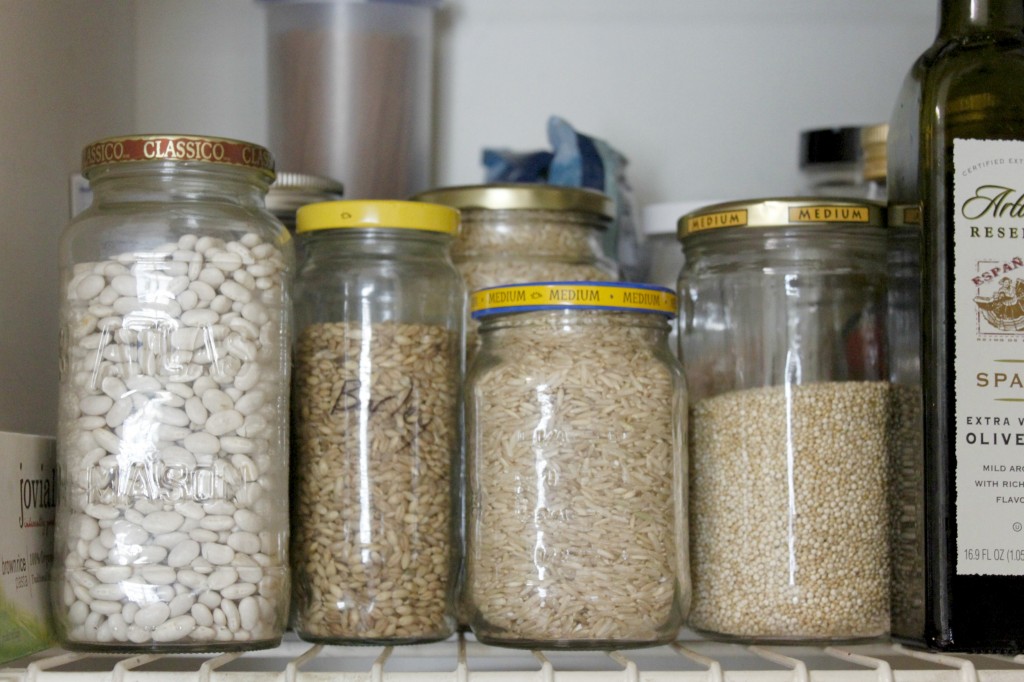
  • If the food item is not readily identifiable (some grains, like barley, oats, wheat, and the like, can be difficult to differentiate), label the jar. (You can get as fancy as you want with this. I just use a Sharpie because it’s simple. And I like simple.)
  • You can “assign” specific jars to specific foods if you want; for example, if you come across a really large jar that’s perfect for your copious amounts of rice/oatmeal/wheat flour/etc. Or, when a jar empties, you can just wash it and return it to your stash of empty jars, ready for whatever food comes down the pike next.

What Jars Should You Save?

Unless you make ALL of your food completely from scratch, by which I mean you make your own coconut oil from coconuts (good for you!), then you likely already have a good number of jars in your pantry just waiting to be emptied and refilled. Speaking of coconut oil, oddly enough, Tropical Traditions is my favorite source for good quality glass storage jars. Not only do I love their raw honey, I love the perfect size of the raw honey jar! It’s great for making sour cream, or for storing a fresh batch of sunflower seed butter. And their quart jars of coconut oil are wonderful for storing different kinds of grains, or nuts, or flours, or seeds, or… just about anything! I think what I love most about their jars is that they are straight-sided and made of a very clear glass, which makes them perfect for storage purposes.

Other jars that you can use for pantry storage:

  • spaghetti sauce
  • jam
  • peanut butter
  • pickles (Leave them open in the sun for a day or so to get rid of the pickle smell. I have one de-pickling on my balcony as we speak!)
  • salsa
  • molasses

The sky’s the limit, really. If it comes in a jar, it’s fair game!

What to Store in Your Jars

The wonderful thing is that these jars can be used for liquid and dry goods, and in the refrigerator, freezer or pantry. So once again, the sky’s the limit! Whatever needs to be stored, chances are, a jar will fit your purposes. Pretty much any food that comes from the store in a plastic bag (or from a bulk bin) gets relocated to one of my empty jars, as does food I make from scratch at home (sour cream, yogurt, freshly ground flours, etc.). For example:

  • Grains (brown rice, wheat berries, barley, spelt, oat groats or steel cut oats, quinoa, etc.)
  • Beans
  • Flours (small jars are especially great for leftover bits of freshly ground flour that you don’t need in your recipe)
  • Nuts
  • Seeds
  • Dried fruits and vegetables
  • Chocolate Chips (ahem. very important.)
  • Whey
  • Yogurt
  • Sour Cream
  • Bacon Grease
  • Agar Flakes
  • Baking Powder
  • Baking Soda
  • Granola
  • Broth
  • Yeast
  • Flaxseed
  • etc. etc. etc.

Of course, these jars aren’t limited to the kitchen! They can find countless useful organization purposes all around the house, so there’s never really a good reason to throw one away.

Do you keep your empty jars? What is your favorite use for them?

Click on the box below to find all the great blogs and topics to help you get cleaned up and organized! I’m especially loving all the ones that focus on natural and healthy ways to keep you organized, as well as the budgeting and simplifying themes. Also, you can have a chance to enter multiple different giveaways, including a free copy of my own eBook, Your Grocery Budget Toolbox!

a Rafflecopter giveaway

Sharing at Teach Me Tuesday, Titus 2sday, Domestically Divine Tuesday, Women Living Well Wednesday, Works for Me Wednesday, Frugal Days Sustainable Ways, Raising Homemakers, Simple Lives Thursday, The Mommy Club, Your Green Resource

How I Organized My Spices With Yard Sale Finds {Organizing on the Cheap}

I’m so happy you are here with us this week for 5 Days of Organizing - more than 20 bloggers will be bringing you daily inspiration for organizing every aspect of your life. And with back-to-school days breathing down our necks, we all need it!

Have you ever been frustrated by all the creative organization ideas you see in magazines and on blogs, only to realize that you simply can’t afford (or don’t want to spend the money) all those gorgeous bins, boxes, baskets and other containers? Me, too! I’ve learned to organize my home (uh, to a certain extent) without spending an arm and a leg, and I’ll be sharing my tricks with you all week long. Stick with me for great cheap organizing ideas!


AND>>>>>> Scroll down to the bottom of the post for a cash giveaway!! You might win a little cash to do some organizing yourself!
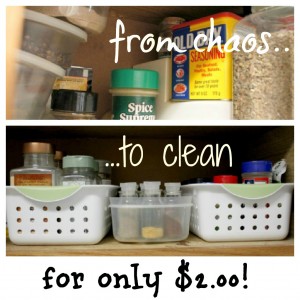
I’m so glad I finally get the chance to share with you how I organized my spice cupboard. An embarrassingly long time ago, I invited you to help me figure out a cost-effective way to organize my spices, and you all certainly delivered! I got lots of great suggestions:

  • The spice rack (more of a small set of drawers) I was eyeing at a more expensive online store is available at Amazon for only $35, which was significantly cheaper than the one I had seen. I figured I could save up my Swagbucks Amazon gift cards to buy it, but unfortunately, I keep finding far more interesting things to spend my free money on!
  • Others suggested cheaper spice rack alternatives, like this SpiceStor Organizer Rack 20 Cabinet Door Spice Clips
    or Spectrum 43778 Scroll Wall Mount Spice Rack Boxed, or Swivel Store Organizer Storage System, all of which seemed like they would do the trick nicely.
  • Ami suggested I organize them in baby food jars in a drawer a la this example she found on Pinterest. Unfortunately, I have no spare drawer to use for spices, although I did spend a considerable amount of time trying to figure out how I could rearrange my drawers and cabinets to accommodate the concept. Alas, it was a no-go.
  • Rita and Kristine were the ones who really helped me out! Kristine had seen an idea on America’s Test Kitchen to organize all your spices in zippered plastic storage bags like these, then label them, and store them upright, organized alphabetically, in a container of some kind (like a basket or box). Rita had a similar thought, but recommended using small glass jars (like baby food jars, or 1/2-pint canning jars).

First, I tried Kristine’s idea, but I ended up ordering the wrong size of bags (they were way too small!) from Amazon, which set me back on my little project. I was all set to order a larger size, but then I started to get concerned about the effects of storing food long-term in plastic. The danger is probably minimal, but it was enough to worry me that I started leaning towards Rita’s idea of using jars.

So between the two of them, I came up with the idea to store spice bottles like these in some containers I had lying around the house. That way, all my spices would be contained in jars of the same size,which I could easily label myself, and those jars could then be contained in small boxes that I could easily pull in and out of the cupboard as I needed them. I hadn’t quite gotten around to ordering those spice bottles from Amazon, though, when I went yard saling one day and found this:

BINGO! Now, I wasn’t all that excited about the spice rack itself - I have hardly any wall space in my kitchen for one thing, and for another I kind of thought it was dog ugly. It is now awaiting a chance to be spray-painted and repurposed as a rack for my nail polish bottles and other manicuring supplies (that as a busy mommy and blogger, I almost never use by the way). But the bottles were exactly what I wanted, and for a fraction of the price! A set of the 6 spice bottles on Amazon would be $6, which is not a bad price at all, but twice the number of bottles, and for only $2?! And new!… or at least still in the packaging! You bet I snatched those babies up.

I took them home, ran them through a cycle in the dishwasher, dried them thoroughly, and poured my spices into them. I didn’t have the time then (and haven’t taken the time since) to beautify them with pretty labels, but one day I will get around to that. For the moment, though, I’ve just written the name of the spice on the neck of the bottle with a Sharpie. Works for me!

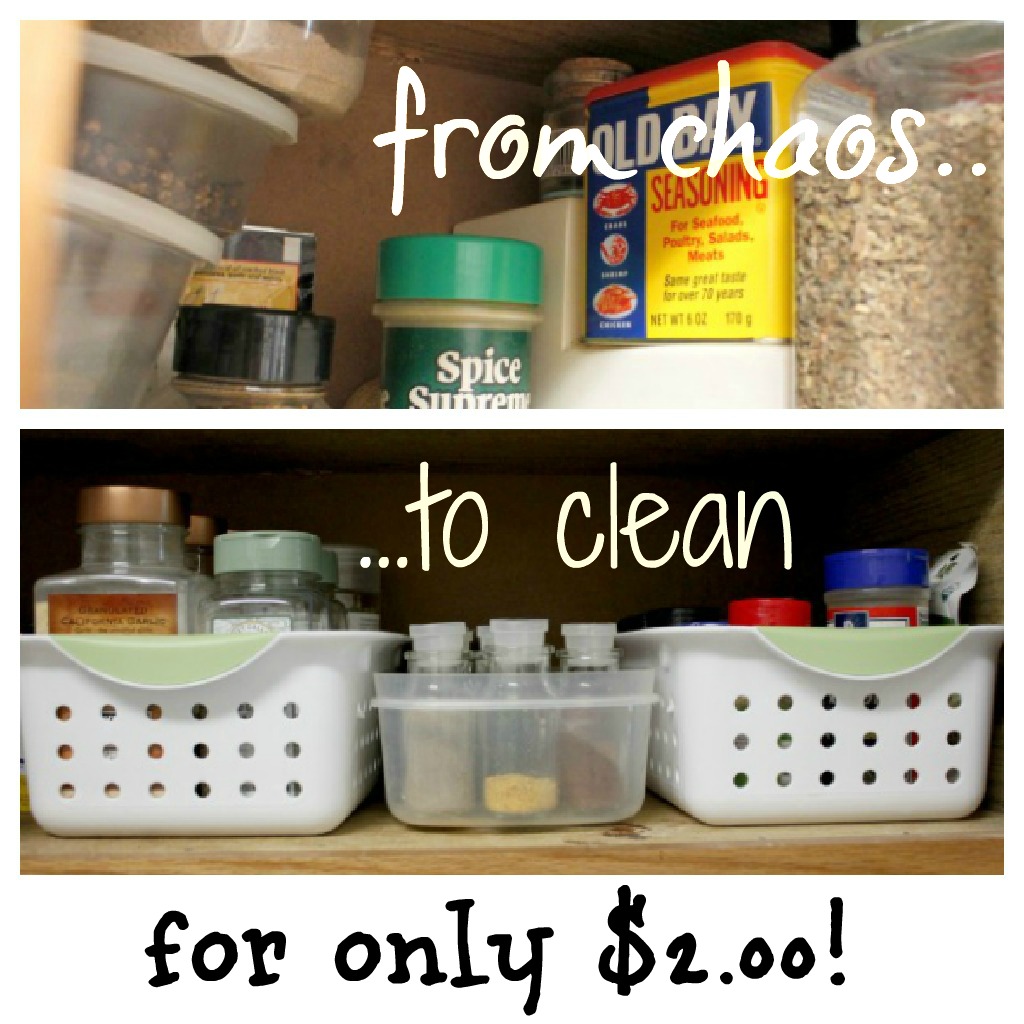
So here you see the finished product, my cheaply organized spices, thanks to a yard sale find:

On the left, you see a basket containing my large jars of bulk spices, the ones I use most often: granulated garlic, cinnamon, oregano, etc. I opted to keep them in their original containers, because pouring them into smaller jars would just be too time-consuming, and I would have to do it far too often for it to be an ideal situation for me.

On the right, you see more spices that I kept in their original containers. Eventually, I will get another set of spice bottles and finish the transfer, but for now, I left these spices in their original plastic bottles. Most of them are spice blends (like lemon pepper) that I don’t use too often, and most of them are a relatively uniform size that fits nicely into the container.

In the middle is the box where I put the spice bottles. These spices mostly came from plastic bulk containers or even bags. These are the ones that I typically buy “loose” so I need a neat and organized place to put them. The glass jars fit the bill perfectly!

As for the boxes that I used to hold all the bottles, I originally had bought them at the Dollar Tree, I believe (more on that later this week!), for another purpose. Having served their original purpose, they needed a new home, and found a perfect fit in my spice cupboard! The box in the middle is a Rubbermaid container that used to contain brown sugar. I don’t buy brown sugar anymore, so the little plastic box needed a new job. Now it holds spices, which is a much more worthy endeavor.

How to find cheap organizing ideas at yard sales:

  • Have a list, at the very least a mental one. Know what you need and what you’re looking for. Are you trying to organize your bathroom cupboards? Or your linen closet? Do you need boxes? If so, what size? Or would bottles fit the bill better? Maybe even bowls? Is the storage going to be visible? Then you will want it to be pretty. Is it going to be in the closet? Then, pretty is not quite as important.
  • But don’t get stuck in a box. Literally. Although I had mentally settled on the idea of using spice bottles, I was willing to consider any other workable option. As I was yard-saling, I kept my eyes peeled for ANYthing that might potentially work in a spice cupboard. I was beyond thrilled when I actually found the exact thing I was looking for… but that doesn’t always happen! Sometimes I end up finding something better, just by being a little more creative and open.
  • Know your price point. I knew that the glass bottles on Amazon were $1 apiece, so there was no way I would pay more than that at a yard sale, especially if it were used.
  • Don’t be afraid to haggle. My personal rule of thumb: if I don’t like the price, I offer half what they are asking, but I’m willing to pay 75% because typically, that’s what their rebound offer will be (although, usually, they just take whatever I offer). In the case of my spice bottles, I took the $2 and ran! No need to haggle with that one!
  • Be prepared to wait, or have a plan B. Some things I will just keep looking for at thrift stores and yard sales until I find something that will work. Other times, my need is more immediate, so if I don’t find what I need right away, I’ll go to my plan B. I was not in a huge hurry (obviously) to finish organizing my spice cupboard, but I also knew in the back of my mind that if I ever got completely fed up with it, I just needed to place an order on Amazon and be done with it.
  • Clean the items thoroughly. Depending on what it is, run it through the dishwasher or washing machine, or just give it a good scrub. No need to obsess about it, but it is a good idea to wash away whatever it might have collected at its previous home.

Other cheap organizing ideas with yard sale finds:

  • I found a big pourable Tupperware container for a couple bucks that I use to store the oatmeal that I buy in bulk.
  • I keep books that we don’t use very often (and don’t fit on my bookshelves) in 2 large trunks that I bought at yard sales for less than $10 each. Those trunks also double as a side table in our living room! I’ve used the trunks previously to store extra linens as well.
  • I’ve found those hanging canvas shelves (the kind you use for shoes and sweaters) at thrift stores and yard sales, and I have several of them in different closets throughout the house.
  • I’ve also bought several under-the-bed storage boxes at yard sales for one or two dollars each. I’ve seen plenty of other sizes of plastic storage boxes like those at yard sales, too, although those sizes don’t usually work well for me.

What yard sale treasures have you found that have helped you organize your home or life?

Visit these blogs for lots more ideas on organizing your kitchen, your office, or your homeschool room! Just click on the image below (And by clicking below, you can access even more great giveaways!).

a Rafflecopter giveaway

Sharing at Better Mom Mondays, Homestead Barn Hop, Teach Me Tuesday, Titus 2sday, Domestically Divine Tuesday, Women Living Well Wednesday, Works for Me Wednesday, Frugal Days Sustainable Ways, Raising Homemakers, Simple Lives Thursday, The Mommy Club, Your Green Resource