How to Bake With Stevia {Without Affecting Flavor}

How to Bake with Stevia Extract Almost a year ago, I wrote a post about how to convert sugar measurements to stevia for cooking and baking. All of the information in that post is true and accurate, but since then I’ve fine-tuned my routine a bit and developed a method for baking with stevia that doesn’t affect the texture or flavor of the final product. I’ve baked all kinds of things this way, and it seems to work across the board with all different kinds of recipes, so for the most part, this is how I bake with stevia.

1. Use Half the Amount of Sugar

The first step is to reduce the amount of sugar called for in the recipe by at least half. Now, for most conventional recipes, I already reduce the amount of sugar by as much as half anyway. So for the purposes of baking with stevia, I reduce the amount of sugar I would personally use by half.

For example:

  • A recipe calls for 1 cup of sugar. I think that sounds like a little bit too much sugar going on for that particular recipe, so I would probably only use 3/4 cup at most.
  • Since I’m going to also be adding stevia, I can reduce that 3/4 cup even more, and use 1/2 cup or less of sugar.
  • Most recipes can handle this without drastically affecting the final texture, but there are some recipes that for whatever reason will not work well with the reduced sugar. In those cases, I usually just forego that particular recipe!

If you’re starting with a recipe that’s already inherently fairly healthy and/or has been healthified, you can just reduce the sugar by half and move on to the next step.

2. Replace the Remaining Half of Sugar with Stevia

Now you can follow the conversion chart to replace the remaining amount of sugar the recipe requires.

For example:

  • The original recipe calls for 1/2 cup of sugar. You’ll put 1/4 cup of sugar in your batter.
  • You’ll add 1/4 t. of stevia to replace the remaining 1/4 cup of sweetener.

3. Proceed As Directed

Just finish up the recipe the way it’s written. You shouldn’t need to make any other adjustments unless you want to.

And that’s it! You’ve just significantly reduced the sugar in your baked goods without sacrificing taste or texture! It’s even better if you use a “healthier” sugar like coconut sugar or sucanat.

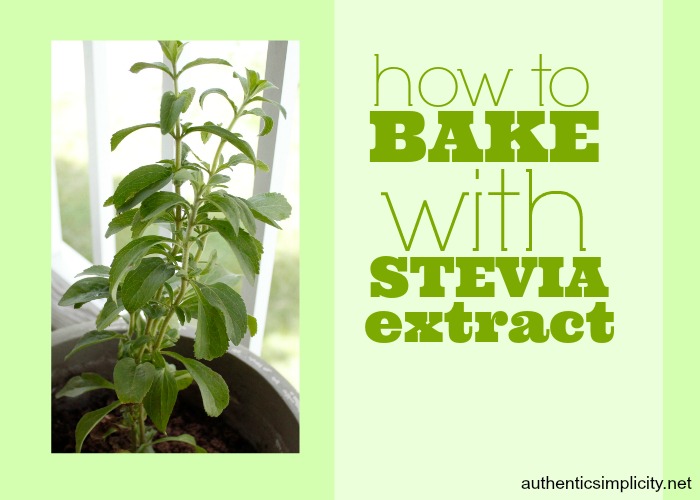
Stevia Plant

the stevia plant before processing into extract or powder

Where to Buy Stevia (Plus Also What Kind to Use)

I like to use liquid stevia (you can find either glycerin- or alcohol-based varieties), which is essentially an extract of stevia (like peppermint or vanilla extract). The powdered stevia goes through more processing and often has a bitter after-taste, so I stay away from it. (Plus, a lot of powdered stevia contains additional sugars which totally ruins the point.)

I usually get my stevia from one of the following sources:

  • Trader Joe’s (oh how I love Trader Joe’s!)- I *think* it costs around $7, but I’m not positive. I’ve had the same bottle for probably 6 months now, so I can’t remember exactly how much I paid. I do remember thinking it was an excellent price.
  • MOM’s - Mom’s Organic Market is a local chain and their stevia is actually a private label so I’m not sure the original manufacturer. I do know that their stevia tastes a lot better than other brands I’ve tried (NuNaturals, for example, which I like, but the stuff at Mom’s is better), so I’m thinking it’s probably from a more expensive brand that I haven’t tried yet, ha! The good news is that it is also priced very well (once again, not remembering the price, but remembering the impression that it was a great deal).
  • No access to either one of those stores? No worries! If your local health food store doesn’t carry reasonably priced stevia (and most of them don’t), you can order it online from Vitacost or Amazon (those are affiliate links right there). I ordered mine from both places before I was able to start purchasing it locally.

How to Substitute Stevia for Sugar

Welcome back to the Get Healthy & Fit series here at Authentic Simplicity! Joining me are 18 other bloggers, all desirous of improving their health and raising their level of fitness. We each have a different goal in mind and a different plan to reach that goal; and you can follow each blogger’s progress here. Follow along on Twitter and Pinterest as well!

I discussed my personal goals at length the first week, but to sum up, this is what I’m hoping to do in the course of these 12 weeks:

  • Kick my sugar habit
  • Lose approximately 10 lbs. and a few inches
  • Fit in my clothes
  • Develop sustainable habits like eating more proteins and fewer carbs


After going to Allume and pigging out on the goodies there, I fell off the wagon for a week or so and indulged my sweet tooth way too often. I’m back on track now, though, and really disciplining myself to almost eliminate sugar completely. I allow myself to enjoy it on the weekends (mostly Sunday) and a few chocolate chips here and there throughout the week, but for the most part, I’m sweetening with only stevia and occasionally some raw honey.

How to Substitute Stevia for Sugar

When I first started using stevia as a sweetener, I pretty much just played it safe and used it mostly in my coffee. I wasn’t really sure what else to do with it, so for a long time, I did nothing else. Then when I got serious about reducing the sugar in my diet, I started experimenting a lot more with stevia, and found out that it wasn’t as complicated as I thought. In fact, I’ve discovered that replacing sugar with stevia in most recipes is really as simple as this:

A few notes to clarify the information on the chart:

  1. The 1 cup:1 tsp. ratio works well in fractions, too: a 1/2 cup of sugar is a 1/2 tsp of stevia, a 1/4 cup of sugar is 1/4 tsp. stevia, etc.
  2. The measurements for stevia are base measurements, by which I mean you may want to increase them slightly depending on your taste. For me, 5 drops is a perfect replacement for a tablespoon of sugar, but I know many people prefer a few more drops.
  3. These stevia measurements are for both liquid and powder forms.
  4. Different brands make their stevia products differently, so you may have to experiment. I use mostly NuNaturals glycerine-based liquid stevia.
  5. While these conversions are pretty reliable, they may not work in every recipe. Some recipes require the bulk that sugar gives, so you may have to adjust other ingredients (namely the ratio of liquids to dry) to compensate for the difference. This should be easy to adjust if you’re working with a recipe you have used before, because you’ll know if the batter is right or not. If it’s too dry, add some more liquid; if it’s too wet, add some more flour. I recommend experimenting with your own tried-and-true recipes and allowing yourself to become accustomed to its usage before attempting to convert brand-new recipes from sugar to stevia.
  6. The measurements for tablespoons and teaspoons also work for converting honey to stevia. The cup measurement is a little more iffy because of the other qualities besides sweetness that honey brings to a recipe (namely, the fact that it’s liquid). In a recipe that calls for larger amounts of honey, start by replacing half of it with stevia (according to the conversion rates on the chart), and then go from there. Be prepared to adjust the recipe as necessary.

How to Use Stevia Plus A List of Stevia Recipes

Welcome back to the Get Healthy & Fit series here at Authentic Simplicity! Joining me are 18 other bloggers, all desirous of improving their health and raising their level of fitness. We each have a different goal in mind and a different plan to reach that goal; and you can follow each blogger’s progress here. Follow along on Twitter and Pinterest as well!

I discussed my personal goals at length the first week, but to sum up, this is what I’m hoping to do in the course of these 12 weeks:

  • Kick my sugar habit
  • Lose approximately 10 lbs. and a few inches
  • Fit in my clothes
  • Develop sustainable habits like eating more proteins and fewer carbs

Types of Stevia, and Which Ones to Use

I’ve mentioned before that I’m using stevia more and more as a sweetener, and I’ve almost completely eliminated sugar (cane sugar) from my diet. I don’t eat sugar at all at home, and I try to keep my consumption of it minimal when I’m eating elsewhere. Personally, I think it’s the best thing anyone can do for their health!

Stevia is a great replacement for sugar because it doesn’t raise the glycemic levels, which is good news for people like me who are purposely reducing carbs and sugar for that very reason. Of course, food manufacturers see the money available here, and are doing everything they can to profit from this trend, which inevitably results in a watered down, less-than-healthful product.

Consequently, you’ll see all kinds of stevia sweeteners popping up in stores everywhere, but not all of them are created equal. Real Food Forager and Kitchen Stewardship both have done a lot of research about stevia and have written great posts about the different kinds and which ones you should use. Since my information on stevia largely comes from them, I will direct you to their work instead of attempting to reinvent the wheel.

Suffice it to say, your best bet with commercially available stevia is the liquid form, preferably glycerin-based rather than alcohol-based. Powdered stevia (with the notable exception of the SweetLeaf brand) is often highly processed with added chemicals and sugars, which, in my opinion, makes it a less desirable option. I do still occasionally use it, but mostly because I received a whole package of different types of stevia in a giveaway, and I hate to waste them! (You know how I feel about food waste!)

In an ideal situation, you could grow your own stevia and make your own stevia liquid from that. I was actually attempting to do exactly that this year, but something happened to my plant and the whole thing turned black. I am thinking it was a little cold snap we had, but since none of my other plants were affected, I’m not really sure. I still plan to order some dried stevia online and make my own liquid, which is also an option if you’re not up to growing your own stevia.

Stevia Plant

How to Use Stevia

Since stevia is a LOT sweeter than sugar, you only have to use a few drops of it per serving. As you can imagine, this complicates the process of baking, where the ratio of dry to wet ingredients is important. I also find that stevia - even liquid stevia - can negatively impact the taste of the finished product unless you use the more highly processed powdered stevia products that act as a one-to-one sugar replacement. My personal opinion is that I don’t really like baked goods made with stevia alone, so when I do bake with it, I usually prefer to use part stevia and part other sweetener (such as honey or palm sugar).

I use my stevia all the time in beverages and raw foods, though. You have to play with it a bit to find your personal level of desired sweetness, but I find that 5 drops is the perfect amount in my cup of coffee.

Other easy uses for stevia that don’t require a recipe:

  • Oatmeal
  • Yogurt
  • Smoothies
  • Tea
  • Lemonade
  • Dips (I love to mix peanut butter, plain yogurt, cocoa, and a little bit of stevia for a great apple dip!)
  • Whipped Cream

I also have used liquid stevia with good success in vinaigrettes and other dressings, as well as tomato sauce. I just add a few drops until I get the desired level of sweetness.

Stevia Recipes

If you’re not familiar with stevia, it’s best to start with recipes that have already been adjusted rather than attempting to substitute your favorites. Once you’ve experimented with it, you’ll get a better handle on how to work it into your regular recipe repertoire (hey, say that 3 times fast!).

To get you a head start, here are some great recipes (most of them I’ve tried myself, but some of them are on my to-try list) that use stevia:

This Week’s Update

Unfortunately, there was an upward trend on the scale this week, which I am blaming entirely on Aunt Flow (Dad-Blast that woman!). The measurements continue to creep downward every so slowly.

Here are my current stats that I will update every Monday:

Weight: 135 (up almost a pound)

Waist (inches): 30-31

Butt: 40

Find out how the other ladies are doing with their weight loss efforts and other goals by clicking on the image below.

Sharing at Homestead Barn Hop, Mom’s Monday Mingle, The Bulletin Board, Better Mom Mondays, Motivation Monday, Open Call Tuesday, Delicious Dishes, Teach Me Tuesday, Titus 2sDay, Hip Homeschool Hop, Tiny Tip Tuesday, Titus 2 Tuesday, Tip me Tuesday, Trivium Tuesday, Healthy 2Day Wednesday, Allergy-Free Wednesday, Works for Me Wednesday, Women Living Well Wednesday, Frugal Days Sustainable Ways, Real Food Wednesday, Whole Foods Wednesday, Keep it Real Thursday, Tastetastic Thursday, Homemaking Link UP, Simple Lives Thursday, Thought-Provoking Thursday, Life in Bloom, Frugal Thursday Rewind, Fellowship Friday, Fight Back Friday, Feast in Fellowship Friday, Frugal Friday, I’m Lovin’ It, Weekend Bloggy Reading, Snacktime Saturday, Show & Share Saturday, Weekend Whatever