 Let’s set the background here: 3 years ago, I didn’t even know you could make yogurt at home. I know - dumb, right? I was totally clueless! Then I heard somebody mention making their own yogurt and I thought, “Hey! That’s cool! How do you do that?” So I started googling “make your own yogurt”, and came across a bunch of different blog posts with tutorials involving crock pots, thermometers, towels and lengthy instructions.
Um. No thank you. (Quick and Easy, remember?)
The whole thing just seemed so complicated, despite the fact that everybody said, “Oh, it’s so easy!” Okay. I’m very sorry, but I don’t believe you. Because I have found a very simple way to make yogurt, and it really is easy. Very easy.
It involves a yogurt machine, which, oddly enough, breaks all my rules about single-purpose appliances that take up space on my counter-top. I prefer all my appliances to fit neatly in my cupboard, and I also prefer them to work hard (so I don’t have to) and be skilled at multiple tasks. I make an exception for Mr. Yogurt Machine. Yes, it is totally worth it. I wouldn’t make exceptions for any other appliance but my dear friend, the yogurt maker.

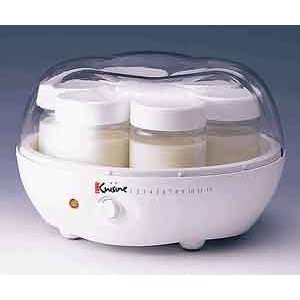
My particular yogurt machine is this EuroCuisine, which I purchased on Amazon.com for about $25. Unfortunately, the price has risen since then, and the cheapest I could find was this one for $28.90. Another brand is “Deni”, and they have better prices - $20.82 for a yogurt machine similar to the Euro Cuisine . I personally have no experience with that brand, so I can’t comment on the quality, but I will say that they are rated almost as high as the Euro Cuisine by users.
Another option is a quart yogurt maker, which uses one large quart size container instead of small jars. Those tend to be more expensive, starting around $50. Here’s one by YoGourmet for $49.95.
So what’s the point of having a yogurt machine, you ask? This: it regulates the temperature of the incubating milk so you don’t have to. No fooling with different kinds of insulation - towels, crock pots, coolers, etc - to make sure the proper temperature is maintained. No need to check the temp with a thermometer. Just pour the yogurt mixture into the jars, place the lid on top, and set it going for at least 12 hours. Your job is done, and the machine does the rest!
I definitely recommend using whole milk to make your own yogurt, for lots of reasons, but at least because it will create a much better texture in the final product.
I typically use plain yogurt (usually Dannon brand) as my starter, but you can purchase starters from Cultures for Health. Typically, once you’ve made a batch of yogurt, you can use some of your own homemade yogurt as a starter for the next batch. After a few batches, you’ll want to start with a new starter again.
Easy Machine Yogurt
Ingredients
- 4 cups whole milk
- 2-3 TBSP plain yogurt
Instructions
- Heat the milk in a saucepan just until it starts to bubble around the edges. Remove from heat, and cool until it is no longer steaming (if you have a thermometer, the temperature should be 100-110F.)
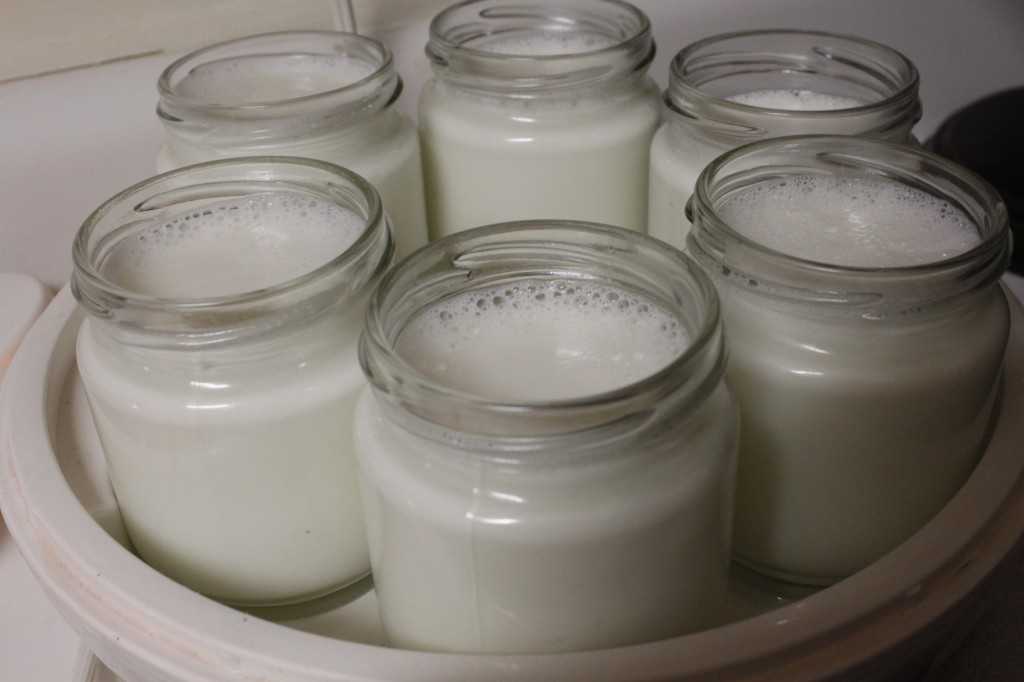
- Pour about a cup of the heated milk into a separate container. Stir in the yogurt until it’s blended in. Stir the yogurt-milk mixture into the rest of the milk. Pour into machine containers, and place them (without their caps) into the machine. Cover with the lid and start machine.
- Remove the yogurt from the machine 12-18 hours later.
The actual yogurt prep is quite QUICK, although yogurt definitely takes time.
It’s definitely EASY. No question about that.
I also believe it is CHEAP, or I wouldn’t do it this way. The machine will pay for itself in a matter of months in your savings on store-bought yogurt. I’ve had mine for several years now, so it’s more than paid for itself, especially since I often use it to make non-dairy yogurts that are considerably pricy.
Making your own yogurt is very HEALTHY, and worth it for sure. Even the best store-bought yogurt has unnecessary additives and usually sweetener, too.
This post contains affiliate links. Thank you for supporting Quick and Easy, Cheap and Healthy.


