Archives for December 2010

Merry Christmas Eve! Our Christmas Eve Breakfast

Traditions are an important element of the Christmas celebration; they are what makes the holiday a holiday. Growing up, my family had many Christmas traditions we held onto firmly, considering them sacred and unbreakable. Sure, my dad teased us often about opening presents Christmas morning instead of Christmas Eve (oh, the horror at even the mere mention!), or he would threaten not to make the usual Christmas Eve shopping trip and pizza buffet lunch… but we knew he would never seriously follow through. 
Because tradition is tradition
And because it wouldn’t be Christmas without those traditions
I’m not a child anymore; I am married now and have my own child. The past several Christmases have been spent trying to sort through which family’s traditions to keep, which ones to pass on, and which new ones to create. The last part has been the hardest. Our little family has spent a great deal of thought and energy in trying to satisfy both sets of in-laws (and will continue to do so, don’t worry - extended family is worth every ounce of effort!) but we have neglected our own nucleus of father, mother, son (and soon son #2). 
That is changing this year. Of course, one year does not a new tradition create, but at least we are attempting to make special memories with our own little family, and hoping that one or more of these intentionally memory-making moments will become a tradition to last a lifetime… or at least until our children get married!
One of these memory-making moments took place this very morning. Christmas Eve morning seemed like the opportune moment to carve out a special time that was just us. There are no family obligations on either side for this portion of time, so I took advantage of that and made it ours: our own Christmas Eve breakfast. 
I will admit it wasn’t easy, given our family’s dietary issues, especially our Certain Little Someone’s allergies. Most brunch and breakfast items involve wheat, eggs and dairy, all of them major no-nos. And I could never bring myself to make a special holiday meal that he couldn’t eat. No way. It had to be safe for everyone. 
And yet special
Tall order!
I found the answer on my friend Robin’s blog, Big Red Kitchen. She has been churning out some amazing ideas for the holidays in her Advent series, and this week she focused on some breakfast/brunch ideas. I was immediately attracted to her gorgeous Sausage Apple Ring. It fit all my requirements:
  • special enough for a holiday
  • delicious to everyone
  • easily adaptable to our diet

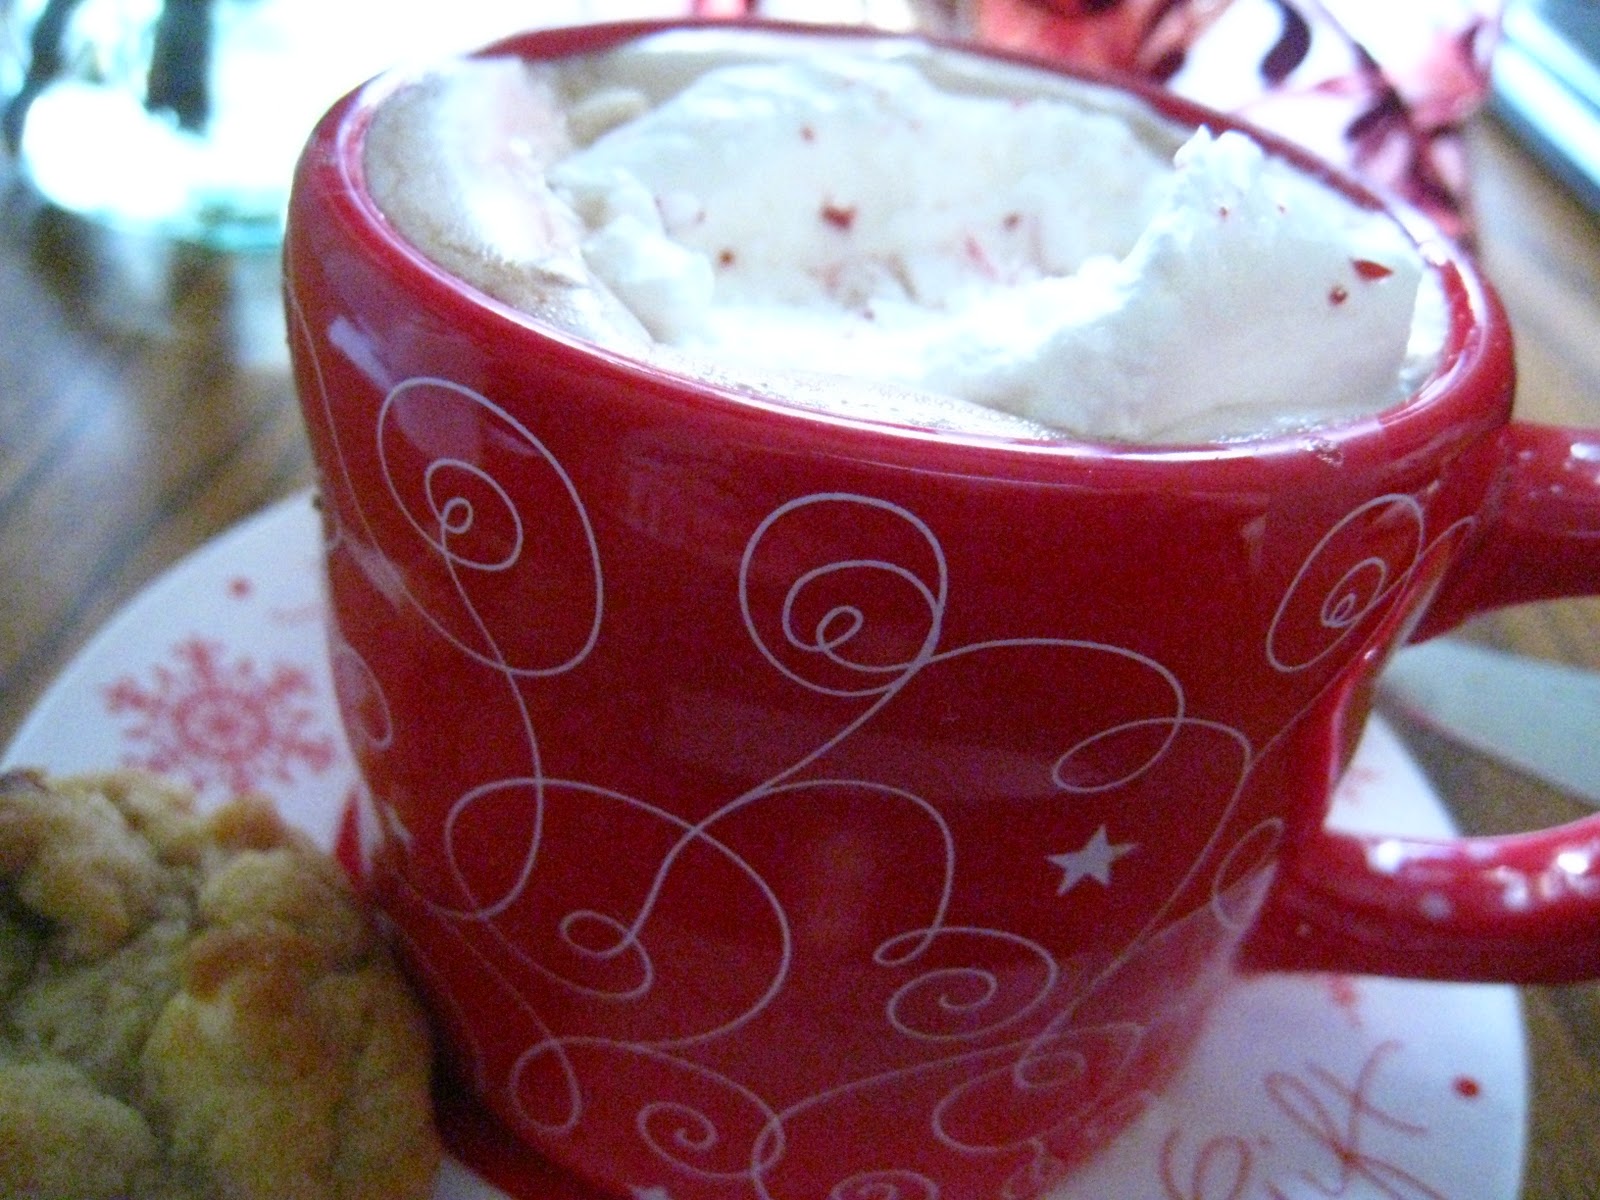
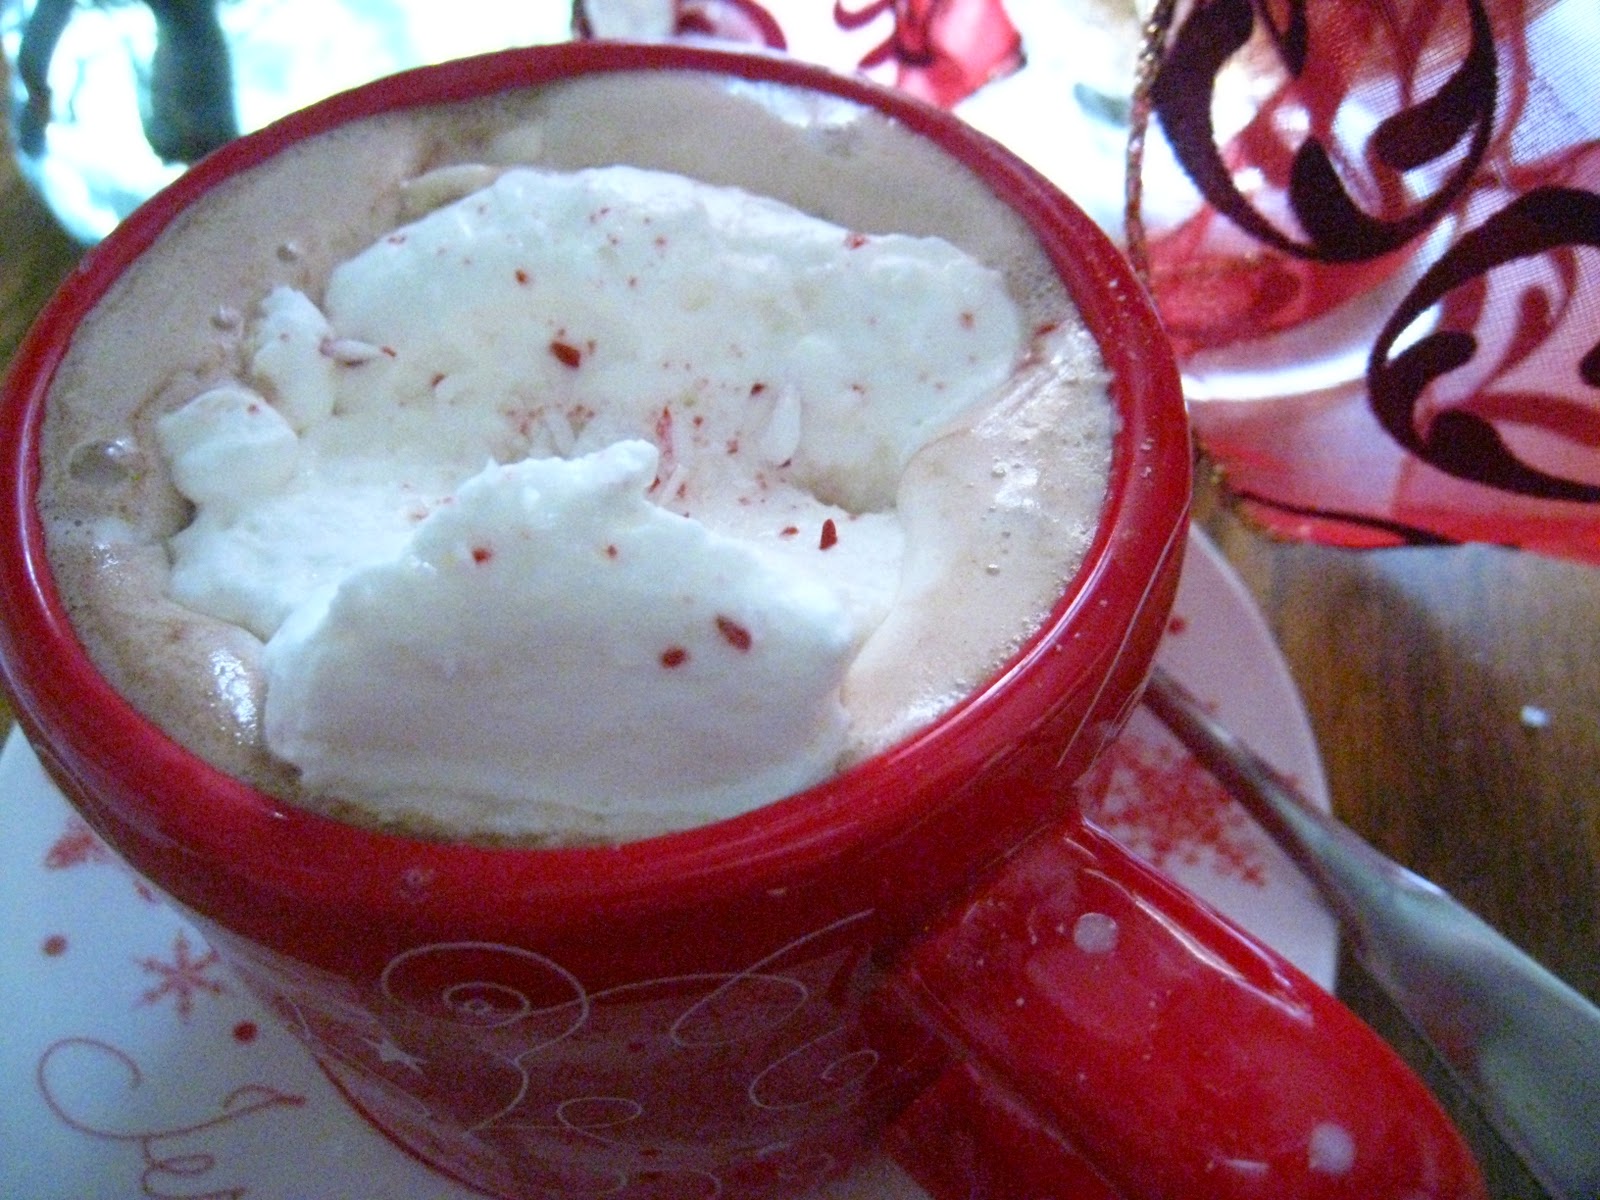
I pulled out all the stops: I molded the ring with my heart-shaped bundt pan, served all the food on our fine china (even for our Certain Little Someone!), and served hot chocolate topped with marshmallows to boot!
Here’s my dietary-adjusted version of Robin’s recipe. Feel free to try it or go for the original!
We all enjoyed this very much! (Thanks, Robin!) Even my DH said to be sure and note that he thought it was very good
Was it QUICK? Not exactly, considering it takes quite a while to cook up in the oven. I did, however, find it incredibly convenient that I could mix it up the night before and then just slide into the oven in the morning. While it cooked, I made the rest of the meal (the apples, home fries, and hot chocolate). 
It was definitely EASY, though, but very impressive (a perfect combination for impressing your in-laws if you are hosting them!). 
CHEAP, not so much. I found the sausage on sale for a great price, but even at that it was still just under $5 for the 2 lbs. For a special Christmas tradition, though, I consider it money well spent! (If I bought the healthy sausage I would like to buy, it would be even more expensive - maybe next year!)
Perhaps not super HEALTHY, although I’m not one to run from the saturated fats found in sausage, bacon and the like. When it comes to those foods, I’m more concerned about the nitrates and nitrites and other non-food ingredients that go into them. To be really healthy, it should be made from homemade sausage or sausage that is nitrate-nitrite-free and all natural. 
Merry Christmas Eve!

Dark Chocolate Peppermint Fudge

A couple weeks ago, I shared with you my exciting new fudge recipe find, and promised to blog about a conventional (non-allergen-free) version within the week. Well, I did make the fudge last week, and it turned out great, but I just kept forgetting to blog about it. Silly me!

Better late than never, right? So here we are, two weeks later, with a peppermint version of my new favorite fudge recipe. If you’re in need of a last-minute, super-fast Christmas treat for the fast-approaching holiday, this one’s for you!

I made mine dark chocolate, but you can use any kind of baking chocolate you desire. Just remember, the darker, the healthier!

I’ve already gone through all the reasons why this recipe is QUICK, EASY, CHEAP and relatively HEALTHY (especially with the dark chocolate!), so I won’t bore you with those opinions again. If you really want to read them, though, you can find them here!

Frosted Window Panes: A Wintry Confection

Last year, I shared with you one of my family’s favorite traditional Christmas cookies: Church Windows, a delicious - if decidedly unhealthy - confection made of chocolate chips and colored marshmallows. My Christmas baking list just doesn’t seem complete without them, and there’s simply no way to make them even remotely healthy, so I just make them the way they are and enjoy them! Once a year isn’t going to kill me.

One problem, though. Those colored marshmallows are hard to find! And I certainly did not have time this year to go traipsing around the state looking for them, so I set my mind to coming up with an alternative.

Am I ever glad I did! While colored marshmallows could not be found anywhere, regular marshmallows were on sale all over the place, and I had coupons to boot. Not to mention all the chocolate chips I’ve been snagging for great prices! Not things I normally buy, but this is Christmas! A little indulgence makes it more of the celebration it should be.  


So without shame, I set forth to make these wintry confections: Frosted Window Panes, the cousins of Church Windows. They are snowy white with a caramel-colored crust resembling an old wooden window frame. They are sweet and decadent, meant to be eaten in very small doses, even richer than their traditional counterparts.

So rejoice! Even if you cannot find those elusive colored marshmallows, you can still make these beauties:


I used amaretto cookie crumbs, but I realize that they, like colored marshmallows, can be hard to find, so any light colored hard cookie will do: pecan sandies for example, or shortbread cookies. 


These are so QUICK, one reason why they are a favorite at Christmas! When my family was visiting a week or two ago, I literally had about 15 minutes to make these, and I did! Then they chilled in the freezer while we went out, so that when we came back, we had a great Christmas treat to go with our conversation for the rest of the evening. 


They are so EASY, too. Sometimes the mixture doesn’t cooperate quite as well as it should, and you end up with misshapen hunks rather than nice round confections, but that doesn’t really matter. The taste is the important part!


Not CHEAP, sorry, although I guess between the white chocolate chips, marshmallows, cookies and other ingredients, it cost no more than $3. For the amount of cookies it makes, that’s pretty good although perhaps not exactly frugal. 


And definitely NOT HEALTHY! Not even remotely. But oh, so delicious…

Tempt my Tummy Tuesdays

Gifts From Your Kitchen: Artisan Bread

I’ve mentioned the Artisan Bread in 5 Minutes a Day bread-making method before: it’s my go-to method for baking bread now and I almost always have a bowl of dough in the fridge. I love its simplicity, but also its versatility: it can be made into sandwich bread, free-form “artisan” loaves, rolls, pizza, and even pita bread. It is easy to adapt, as well, to create different flavors with different grains.

When thinking about what gifts to give my friends this year, I wanted to go a healthier route than usual, without being a Scroogy BahHumbug! Although I love making decadent and delicious Christmas treats to share, the truth is everyone gets more than enough of those this time of year. I just wanted to do something fresh and different this year for a change of pace.

After some thought, I decided to put two of my new kitchen skills - homemade jam and artisan bread - to the test and prepare them for my friends as gifts. I’ve been wanting to share both of these with you, as well, so it gives me the perfect opportunity!

You can find the Master Recipe for Healthy Bread in 5 Minutes a Day here. I cannot take any credit whatsoever for the brilliance of this method - that goes entirely to the authors and developers! I do want to share with you my slight adaptations to the recipe just to show you how flexible it really is.

For one thing, I adjusted the ratio of whole wheat to white flour, mostly for the benefit of my DH. I like a good crusty whole wheat bread, but he prefers it a little lighter. For another, I omitted the vital wheat gluten because that’s an extra grocery item I just don’t need to buy, and because I wonder how healthy it really can be when one considers the ever-increasing occurrence of celiac disease (perhaps we are a little overloaded with gluten?). I also sometimes like to use whey, the liquid drained from yogurt, to make a small part of the liquid (about 1/4 cup or less) called for in the recipe. This increases the health factor and adds a bit of a sour-dough-like tang to the taste.

And with my slight adaptations…

TIPS:


*I generally use slightly less than 4 cups of water in the dough because otherwise it is just too wet to work with.

*You don’t have to use a pizza peel and baking stone: you can bake the bread in a regular old loaf pan if you want. I find I get the best results, though, by following their method exactly.

*I used to (and sometimes still do) take the bread out of the oven way too early. The top looks done well before the dough inside is thoroughly baked. The biggest sign of readiness is the bottom: it shouldn’t be gooey or undercooked at all. Check the bottom of the bread before removing from the oven.

*The dough really is almost impossible to handle the first day. I have found it necessary to plan ahead and mix the dough the day before I actually need to use it.

*To make my Christmas gift loaves, I baked 3 small round loaves at once on a large baking stone. I cut an X shape into the top of each, just to make it pretty. One batch of dough makes 6 small round loaves of the size you see in my pictures.

To present the bread as a gift:

When it is thoroughly cooled, place in a large plastic baggie (not the zippered kind). Tape the excess plastic on the bottom where it won’t be seen.

Wrap a pretty ribbon around the bread and tie it in a bow in front.

Line a basket with a Christmas tea towel and place the bread inside. Add jam or other condiments or treats as desired.

This is a QUICK method of bread-baking, with some caveats. Hands-on time is definitely minimal: 5 minutes a day or less as the title indicates. However, there is a LOT of resting and rising time, especially if you want to make loaf bread (flatbreads do not require the resting time, which is why I’ll make a foccaccia or the like when I’m in a hurry). Plus, as I mentioned, it’s really best to make the dough the day before you need to bake it, so some planning ahead is involved.

It is super EASY, though. There is something of a learning curve, even if you’ve made bread before, and I will admit I’m still learning more about this process. But anyone can do it! I love that there is no kneading involved, which is often where many would-be bakers trip up.

What could be CHEAPer? When you omit the vital wheat gluten, the other ingredients are so basic that the cost is minimal. I even like to use more expensive flours (like white whole wheat), but it’s affordable enough that I make a batch at least twice a month, sometimes every week. And as a gift? Unbeatable!

In fact, I’ll break the entire gift down for you, so you can see how affordable it can be:

Basket (purchased used at thrift store): $0.50-$1.00
Tea Towel (purchased a package of 5 on sale and with a coupon at Hallmark for a total of about $2.50. Similar deals can likely be found at Bed Bath and Beyond): $0.50
Loaf of Bread: approximately $0.25
Jar of Jam: $2 or less
TOTAL: approximately $3.75

This is a great price to give acquaintances and people you want to acknowledge at Christmas time, but don’t have a large budget to spend on them. Teachers, party hostesses, hair stylists, mail deliverers, doctors, etc. all would love a homemade gift like this!

It is very HEALTHY, too. I’ve actually been reading in different places recently that some research suggests using half white and half whole wheat flour might be gentler on your digestive system than using strictly whole wheat. The jury’s still out on that one, but it makes me happy to hear, since that’s what I usually do! The book contains a recipe for an entirely whole wheat bread if that is what you are looking for, but I have to admit I’ve never tried it.

Gifts From Your Kitchen: Jam

Yes, jam is a Quick, Easy, Cheap AND Healthy gift you can give to friends and family this Christmas! For the longest time, I never made jam because it seemed like such a laborious, lengthy, and difficult task. This summer, though, when seeking for a way to preserve all the delicious fresh local fruit I was purchasing, I discovered that jam-making is actually rather simple, even when processing it in a hot bath. 
And it doesn’t take all that long to do one batch, either. If you’re like me, you had images in your head of 50’s era housewives slaving entire days over the stove to can their jam. Nope. It definitely doesn’t take that long. 

To be honest, the hardest part of it all is the prep, which takes the longest. Once you actually start mixing up the jam on your stove, it all goes by amazingly fast, so you have to be prepared. I’ll walk you through my own personal method that I developed over the summer and am now using to make Christmas gifts for friends from church. 
It is entirely possible to make jam without any special equipment, but as I walk you through the process, I’ll link you up to the equipment that I am currently using (none of which is expensive) to make the process go a little more smoothly. 
Set Up

 You will need approximately 6 4oz jelly jars for a batch of jam. (I used these Jarden 7061000104 4 Oz Decorative Jelly Jars, and I paid next to nothing because I used my Swagbucks Rewards!) Clean them and place them in a pot of hot water to keep them nice and sterilized.

Set out a towel on the counter beside your stove. I set out my Ball Utensil Set on the towel so the implements are ready to use when I need them.

Place the lids in a small pan of hot water. Keep it simmering on very low heat until you need them.

I currently just use my stock pot for canning, but it has its limitations. It’s just not big enough for quart-size jars, and it’s certainly not big enough for the canning rack I picked up at a thrift store a month or so ago. One of these days I’m going to buy myself a canning pot like this: Back to Basics 21-1/2-Quart Steel Water-Bath Canner with Rack. In the meantime, though, I just use my stock pot and place a tea towel on the bottom before filling it with water.

You will definitely want to set the canning pot going first, and get it to a full rolling boil before you even start making the jam. Believe it or not, this part takes the longest! Once the pot is boiling, everything else goes pretty quickly!


Making the Jam
Now that you are set up, you can begin making the jam.

Ingredients:
4 cups fruit
1/2 cup sugar
Pomona’s fruit pectin
1/4 cup lemon juice

In the summer, I like to use fresh fruit from the farmer’s market, but for my Christmas gifts, I bought a package of frozen mixed berries ($2.49) from the grocery store. I supplemented with a cup of frozen blueberries from my freezer to make 4 cups of fruit altogether.

For the sugar, I used raw sugar, but you could use any kind of sugar, as well as honey. And yes, 1/2 cup is all you need. I’ve seen jam recipes that call for almost as much sugar as fruit, and seriously, that’s not necessary! All that sugar covers up the taste of the jam.

I like to use Pomona’s Low Sugar Pectin, 1 oz. Box for several reasons:

  1. It costs pretty much the same (or less) than the leading conventional brand.
  2. BUT it has entirely all natural ingredients. 
  3. AND you can make it with limited amounts of sugar (like 1/2 cup). 
  4. Furthermore, it works perfectly. My jam has set up beautifully each time I’ve used this product. 
Pomona’s pectin comes in two parts: a calcium powder that you mix with water in a small canning jar, like so:

 And the actual pectin powder that you mix with your sweetener (sugar, honey, etc.):

Have your calcium-water and pectin-sugar combo close at hand, and then put your fruit into a pot on the stove. Pour 2 tsp of calcium water and lemon juice onto the fruit, and stir. Bring to a boil, stirring and mashing the fruit as it heats:

 Once the fruit has come to a boil, add the pectin-sugar mixture. Stir and return to a boil. Allow to boil for a couple minutes, stirring all the while, until mixture thickens.

Now… it’s time to can!

Canning the Jam

Use canning tongs to remove the clean jars from the hot water, making sure they’re empty.

Place them on the towel you prepared next to the stove, then pour the jam through the funnel into each jar, leaving appropriate head space (the canning instructions that come with the kit will tell you exactly how much head space you need for each type of jam. I threw mine away - haha! - so I can’t tell you how much that is but it’s usually 1/4″ - 1/2″).

Carefully wipe the top rim of the jar so that it’s clean (to reduce the possibility of bacteria growing inside your jar of jam, which you DEFINITELY don’t want!).

 Use the magnetic wand to remove the lids from the pot:

Place the lid on the jar. Then, holding the hot jar with a towel in one hand, carefully screw the seal over the lid until it is tight.

Use the tongs to lower your jar into the boiling pot of water.

Process (allow to boil) for about 10 minutes, then remove from the pot with the tongs and set them back on the towel to drip-dry and cool. Let the jars sit for about twenty-four hours before disturbing them. You will hear popping sounds as the lids seal.


I almost always have a little bit of extra jam left, so I put it in an extra jar and refrigerate it. Even though it’s not processed, it will last in the fridge for a couple weeks, so we can enjoy it right away!

And that’s it! You now have cute little jars of jam to give as gifts!

Really, jam is so much QUICKer than you might think. Give yourself 2 hours to make one batch, but you probably won’t even need quite that much. Hands-on time - the time that’s actually spent  making the jam and not the time spent watching the water come to a boil - is literally about half an hour. I know Christmas is busy, so if you don’t have even a couple hours to spare in the next week or two, plan on making some next summer. It will keep until Christmas (and well beyond!) so you can get a headstart on your Christmas gifting.

It really is EASY, too. Seriously, I always thought that jam was tricky and difficult to make, but that could not be further from the truth. This summer, I made all different kinds of jam, and each batch was a success. This from a beginner! If I can do it, you can, too.

It is a great CHEAP Christmas gift. After my Swagbucks Rewards, I paid a grand total of $2.30 for the jam jars. Even if you don’t have Swagbucks or gift cards to use, one dozen jam jars only costs about $15.00. The berries cost about $3.00, and I only used a portion of the pectin, which costs less than $5 for the whole box. According to my calculations, the total cost for each jar of jam is less than $2, even paying full price for everything. If you are short on money, and have some time to spare, it’s definitely worth it! Your recipients will LOVE your homemade jam; I guarantee it!

It’s also very HEALTHY, especially if you use the all-natural pectin and low-sugar recipe. It’s still sweet, but it’s a nice change from the overload of chocolatey gooey sweetness that is gifted with abandon this time of year (not that I am totally against chocolatey gooey gifts, mind you! I have both given and received such gifts with great joy!).

Disclosure: This post contains affiliate links.

Put All Your Eggs in a Basket! Then Bake.

When it comes to holidays and days off, I always think big breakfast. I don’t know why that is, to be honest, because growing up I don’t think my mom really made anything big or fancy for breakfast on holidays and days off. She DID make her famous Sticky Buns for Christmas, but that’s all I remember.

At any rate, this time of year, I’ve been thinking a lot about yummy big breakfasts. I’ve already shared with you my idea for Festive French Toast, which was a delicious and easy adaptation of a traditional breakfast food.

Today, we’re going in a slightly different and slightly more complicated direction, one that’s definitely fit for a holiday! Holidays are meant to be special, so it’s only fitting to take a little more time and effort (and perhaps even expense) than you would on just any ol’ day.

Having said that, these little eggs-in-baskets still manage to fall more or less within my parameters of QUICK, EASY, CHEAP and HEALTHY. The big plus is that they are also elegant enough to serve to guests or to make any holiday special. Oh, and they’re delicious, too: always very important!

So go put your eggs in baskets! Then bake. And proceed to have a very happy holiday.

Eggs in Baskets
For each serving, you will need:
1 dinner roll
1 egg
1 tsp heavy cream
1 tsp grated Parmesan
salt and pepper
a sprinkling of mixed herbs (suggestions: parsley, chives, tarragon, thyme)

Slice the tops off the dinner rolls, then use a grapefruit spoon (or your fingers) to gently remove the middle of each roll. Your goal is to create enough room to put an entire egg in the space, but leave the shell of the roll intact. Place the rolls on a greased cookie sheet. Crack one egg into each dinner roll, then carefully pour the cream on top of the egg. Sprinkle each egg with salt and pepper, seasonings and Parmesan. Bake at 350F for about 20 minutes, or until the eggs are set and the bread is lightly toasted.

Serve with bacon, fresh fruit and yogurt.

I found this recipe to be very QUICK, actually. From beginning to end, it takes approximately half an hour. Perhaps that’s too much to spare on a regular weekday morning, but for holidays, evenings or days off, it’s just the right amount of time!

It’s super EASY, too. I will tell you a little secret: my DH actually did most of it! I made the rolls and prepped them for him, but he did the rest. And he said it was easy, so I think it’s pretty safe to say that it is easy indeed.

It’s also very CHEAP, especially if you make your own rolls and find the eggs at a good price. Sure, heavy cream is expensive, but you don’t need very much of it at all for this recipe (I currently get my cream at Costco for a great price. I don’t remember exactly what it is, but I’ve noticed that their price for 1 quart is the same as many stores’ price for a pint).

It’s HEALTHY, too, IF you make your own rolls. Of course, store-bought white flour dinner rolls would look much more elegant, but I kind of like the rustic beauty of my homemade oat and whole wheat rolls.

Find more holiday brunch ideas at:

Real Fudge. Real Easy.

Every year at Christmas-time, I search for a good fudge recipe, and every year, I am disappointed because there are basically only two options:

  1. Real” (or what I consider “real” because it’s made from scratch) fudge that requires a candy thermometer and a lot of work. 
  2. Fake” (or what I consider “fake” because it’s not made from scratch) fudge that uses chocolate chips, sweetened condensed milk, sometimes marshmallow cream, and ALWAYS an extra 2 or 3 cups of sugar on top of that already colossal mountain of sugar. 
The first option does not appeal to me because it is not quick or easy. 
The second does not appeal to me because it is not cheap and it is - most importantly - definitely NOT healthy! Geez Louise, I don’t consume that much sugar in several months, let alone one fell swoop!
I have succumbed to the second option on occasion (although I refuse to stoop to marshmallow cream), but have never been truly satisfied. I like making things from scratch with good quality ingredients. Not enough to try option 1, though, I’ll admit!

I am happy to report that this year, my search was finally successful! In other words: I have found option #3!

Fudge Option #3 boasts:
  1. real ingredients
  2. minimal sugar
  3. delicious fudgy flavor and texture
  4. and is very easy to make!
Curious? Unfortunately, at the moment I’ll have to send you to my other blog (my allergen-free blog, When Food is Dangerous), because this recipe seemed so easily adaptable to allergen-free ingredients (another plus in my book) that I had to give that a try first. Don’t worry, though: despite being allergen-free, the ingredients are all “normal” and ones you may even have in your pantry already. I encourage you to check it out and give it a try: Coconut Chocolate Fudge Bars
Aside from chilling time, this recipe comes together very QUICKly, perhaps half an hour of hands-on time, give or take a few minutes. Pretty good for a Christmas treat!
It’s also very EASY. Like I mentioned before, dealing with candy thermometers (not to mention the tricky task of adding egg to hot mixtures that some recipes require) and the like does not appeal to me in the least, so I’ve never tried “real” fudge. There’s no special make-it-or-break-it technique required for this fudge. Fool-proof!
It’s not exactly CHEAP, which you’ll understand when you see how much chocolate it calls for. This is the best time of year to make it, though, because you can find great deals on baking chocolate. I was able to get mine for less than $1 a box by stacking manufacturer coupons and Target coupons at Target. 
It may not be HEALTHY, but I’m a lot more comfortable making it and eating it than I was the “fake” fudge. The baking chocolate is a processed ingredient, but to me, it’s a step above chocolate chips in that regard. One day (maybe next year!) I might try this recipe by substituting cocoa, but we’ll see how that goes. In the meantime, I’m satisfied with this compromise! One thing I can say with confidence: it has a LOT less sugar than either option #1 or #2 (Did you notice there is no sugar in the recipe aside from what is in the baking chocolate? Sweet!)
Keep your eyes peeled, because, provided I can remember to get the ingredients this weekend, next week, I’ll be sharing with you a “conventional” (read: non-allergen-free) version of this recipe with a delicious and seasonal twist! 

Baby, it’s Cold Outside: Time for a Peppermint Mocha!

Is it frigid where you are? Is the wind whipping around your place like it is mine? If so, I have the perfect prescription to warm you up: a nice hot cup of Peppermint Mocha!

And you don’t even have to leave the warm and cozy comfort of your home to go get it at your favorite coffee shop, because you can make it yourself in your comfy cozy kitchen.

I have visited this idea before, but the recipe I shared then is only useful if you have these hot chocolate pods handy. I didn’t have any today, but I was seriously in the mood for a good peppermint mocha, so I had to come up with a different method.

There are essentially four elements necessary to create a peppermint mocha:

  • peppermint flavor
  • chocolate flavor
  • coffee or espresso
  • milk
The coffee and milk are easy, no problem there. Peppermint and chocolate are a little trickier! Once (a long time ago) I tried just putting a little dash of peppermint extract in my coffee. YUCK! That was NOT a successful experiment. Since then, I’ve seen recipes online that call for exactly that, but I can’t bring myself to try them because that awful taste is still in my mouth. I personally think that the peppermint extract (like vanilla extract) needs a “carrier”: something that will deliver the flavor without the yuck factor. Also, like vanilla extract and medicine, it needs a little sugar to help it go down.
Enter Peppermint Simple Syrup.
That’s the easiest way to get a deliciously sweet peppermint flavor without the overpowering sensation of heavy-duty mint. In order to make your peppermint mocha, you’ll need a little peppermint syrup. But don’t worry; it’s not hard and it won’t take long! And the good thing is, you can use this syrup in any hot or cold drink that could use a little extra holiday flavor: hot chocolate, hot tea, ginger ale, club soda, etc. etc..
By the way, simple syrup is essentially made of equal parts sugar and water. I like to use raw sugar, but you can use any kind (except powdered). I also cheat sometimes and use less sugar, just because that’s how I roll.
Peppermint Simple Syrup
1 cup raw sugar
1 cup water
1 tsp peppermint extract
Bring the sugar and water to a boil in a small saucepan, stirring to dissolve sugar. Reduce heat and add peppermint extract; simmer for at least 15 minutes, or up to 30 minutes. Cool slightly.
Simple, huh? And now that you have your simple syrup, you can continue with your main task, Peppermint Mocha. I’ve given you both stove-top and microwave instructions below, so you can choose your preferred method. Stove-top is green and microwave is red.
Simple Peppermint Mocha
2 TBSP peppermint syrup
3 TBSP cocoa
3 TBSP water
1 cup strong coffee or espresso
1 cup milk
Stir together cocoa and water in a small saucepan {in a glass microwaveable 2-cup measuring cup} until a paste forms. Add milk and bring to a simmer (not a boil) {microwave approximately 2 minutes, stopping after 1 minute to stir}; simmer for a few minutes. Remove from heat {from microwave}. Add coffee or espresso and peppermint syrup. Add more syrup to taste. Pour into two small mugs or one very large mug. Top with whipped cream if desired, and/or crushed peppermint candy or candy cane.
Once you have the simple syrup made, it’s a very QUICK process. And if you make one cup’s worth of simple syrup, you will have enough for quite a few more servings of peppermint mocha, saving time in the days to come when you get really crazy with the holidays.
It’s EASY, no question! (That’s why they call it “simple”!)
It’s certainly CHEAPer than buying it at a coffee shop! I think it’s also cheaper than other methods, which call for gourmet syrups, or packages of instant hot chocolate and other things. This recipe uses very basic ingredients that most people already have in their pantry.
It’s probably the HEALTHY-est version of peppermint mocha you will find anywhere. To be honest, in the past I’ve made it with a package of instant hot chocolate, and a candy cane or peppermint candy. Not healthy! Basic ingredients are not only cheaper; they’re also usually much healthier.
Did you like the mug and saucer set in my pictures? You can find them for yourself (or one for a friend) at Dayspring. They are only $12.99; a great price for a great gift! Dayspring has an entire line of additional dishes, and even kitchen accessories, in the same design, priced from $9.99 to $19.99. Some pieces are on sale right now, so check them out!
Disclosure: This post contains affiliate links.

Gifts From Your Kitchen: Christmas Ornaments

This year, I’m attempting to make more of my gifts than I have before, both to save money and exercise my creative juices.

These little cinnamon ornaments make the perfect gift for Sunday School teachers, school teachers, coaches, music teachers, friends, etc. etc. You get the idea! They’re also a great craft to make with the kids and get them involved in the giving spirit of the season.

Recipients will love them because they impart the most delicious cinnamon smell as they hang on the tree, year after year after year.

And the best part is: they cost next to nothing.

They DO take a LOT of cinnamon, considering one batch (resulting in about 6-8 ornaments, depending on the size) requires a full cup of the stuff. This is a good time of year, though, to find it on sale (don’t forget to use a coupon! There are coupons out there right now for McCormick, Spice Island and Frontier spice brands.) OR you can buy it in bulk at Costco or another warehouse store. One cup is only about a quarter of the container of cinnamon I had in my cupboard from Costco, and though I bought it quite several months ago and don’t remember the exact price I paid, the portion I used was definitely less than a dollar’s worth.

I made my own applesauce from apples that I bought at $0.99/lb, so again, less than $1 for the 3/4 cup of applesauce.

I used ribbon from my stash (which I buy on clearance after Christmas), and white glue from my stash (which I buy during back-to-school sales). My guess is that the most you’d end up paying for each of these ornaments is about $1: the perfect frugal gift!

Want to know how to make these little gems? Head on over to my guest post at Saving Naturally. Stephanie at Saving Naturally will be featuring a variety of make-your-own gifts as the season progresses, so continue to check her blog for more ideas.

Find more frugal gifts ($10 or less) at:

Festive French Toast


Ah, December: my favorite time of year! For so many reasons:

  • the end of one year, signaling the beginning of another
  • Christmas music!
  • Christmas shopping (I actually really enjoy that part!)
  • dreaming up Christmas lists
  • get-togethers with family and friends
  • special Christmas performances and concerts
  • … and, of course, all the Christmas flavors, and the food, delicious food!
How about you? Do you enjoy December?

It doesn’t really matter, I guess, because ready or not, here it is! And here we go, into the frenzied but fun mad rush of a holiday season, hanging on by the merest thread of our sanity. I love it!

To celebrate the beginning of the season, here’s a great recipe you can try any day of the week, for breakfast or dinner. If it’s just too much to think about in the midst of all the craziness, save it for Christmas Day breakfast.
But really, I promise: it is SO easy. All you need is some healthy bread (homemade or storebought, doesn’t matter, but make sure it’s whole grain), a few eggs, and some healthy eggnog (homemade or storebought: I paid way too much for a carton of the good organic stuff, but I just couldn’t bring myself to buy those cartons with all the HFCS, preservatives, coloring, flavoring and whatnot).
Seriously, it couldn’t be easier: follow these directions for French Toast (or make them as you usually do), except swap out the milk for eggnog instead. See what I mean? Easy! A simple switch and you have a festive, ready-for-Christmas flavor that takes the ordinary into the realm of extraordinary.
And perfect for December.

You can top them with real maple syrup or honey, or to make them even more special, try enjoying them with this Cinnamon Syrup (I use 1 1/2 tsp cornstarch instead of the flour, and about 3/4 cup of raw sugar instead of the sugars). (Another fun idea would be cranberry sauce - not the canned kind.)
And for a really decadent breakfast treat, whip some cream up with another dollop of eggnog. I used about 1/2 cup of cream and a tablespoon of eggnog. Top with a dusting of cinnamon.
This is just as QUICK as regular French Toast. Making the syrup and whipped cream yourself will add a little bit of time, but not much - 10-15 minutes at most.
It’s so EASY, too. Anyone can make French toast, and anyone can make Festive French Toast!
Eggnog is not exactly CHEAP, I’ll admit. I paid more than I care to say for a small carton of the organic variety, but to be honest, regular conventional eggnog is not that much cheaper. Even if I made it myself, it would still be a seasonal luxury. But that’s part of what makes it festive and fun!
HEALTHY really depends on the quality of the components you use. If you use regular old store-bought bread (especially white bread), Aunt Jemima-type syrup, conventional eggnog and whipped topping, it will most definitely NOT be healthy. However, if you use:
  • whole-grain bread w/o artificial ingredients (I used homemade oat bread)
  • maple syrup, honey, or homemade syrup
  • real whipped cream
  • and eggnog without artificial ingredients or extra sugar
it can be a relatively healthy meal when rounded out with plenty of fresh fruit.
Enjoy; and Happy December!


Interesting reads