Archives for July 2011

Menu Plan Monday - Conserving Resources

It’s once again time for Menu Plan Monday! This week, we’re starting to see the bottom of the barrel on some of our supplies, like flour, rice, pasta and meat. Unfortunately, there are 4 weeks between my monthly shopping trips instead of the usual 3, so I’m going to have to get a little creative and conserve our resources. Next week will be particularly challenging, but it will be less so if I am more careful in my planning for this week.

So here goes…

Breakfasts

  • Left-over Slow Cooker Steel-Cut Oatmeal (I froze the extras from last week.)
  • Granola/Cereal
  • Muffins
  • Pseudo French Toast (“pseudo” because it will have no milk and no egg - hardly worth calling “French Toast”!)
  • Better-than-Oatmeal Muesli

Lunches

  • Leftovers
  • Freezer Stash of Non-Allergenic Foods (for Certain Little Someone)
  • Egg Salad Sandwiches or Hard Boiled Eggs
  • Flautas (frozen left overs from last week)
  • Tomato & Cucumber Salad

Dinners

  • Lemon-Rosemary Chicken, Algerian Carrots, Spaghetti with Shaved Veggies
  • Baked Potatoes Stuffed with Turkey, Bacon, and Cheddar, Stone Fruit Salad, Cilantro-Scallion Bread (frozen leftovers)
  • Italian Chicken and Rice Skillet, Fresh Fruit
  • Vegan Overnight All-Day French Toast, Bacon, Berry Cherry Salad
  • Simple Savory Pork Roast, Wild Rice and Barley Medley, Carrots

Snacks

Additional Features

This is not just a menu plan, as wonderful as that in itself is. Oh, no. Some more features for the curious among you…

This Week’s New Recipe

I try to incorporate one new recipe a week into my menu. This isn’t really difficult for me since I rarely make the same thing twice.

  • Spaghetti with Shaved Veggies- There are several new recipes I’m trying this week, but this particular one might not go over so well with certain members of the household. Definitely an experiment!

Baby Food

  • Repeats: banana, peach, plum, chicken
  • New: Green Beans, Carrots

In My Kitchen Today

On Mondays, I spend some extra time in the kitchen, cooking ahead and making baked goods to last for the week and beyond. A large portion of the day is often dedicated to allergen-free foods for my Certain Little Someone.

What’s on your menu this week? Any new recipes you are trying?

Pickles 3 Ways: Freezer Pickles

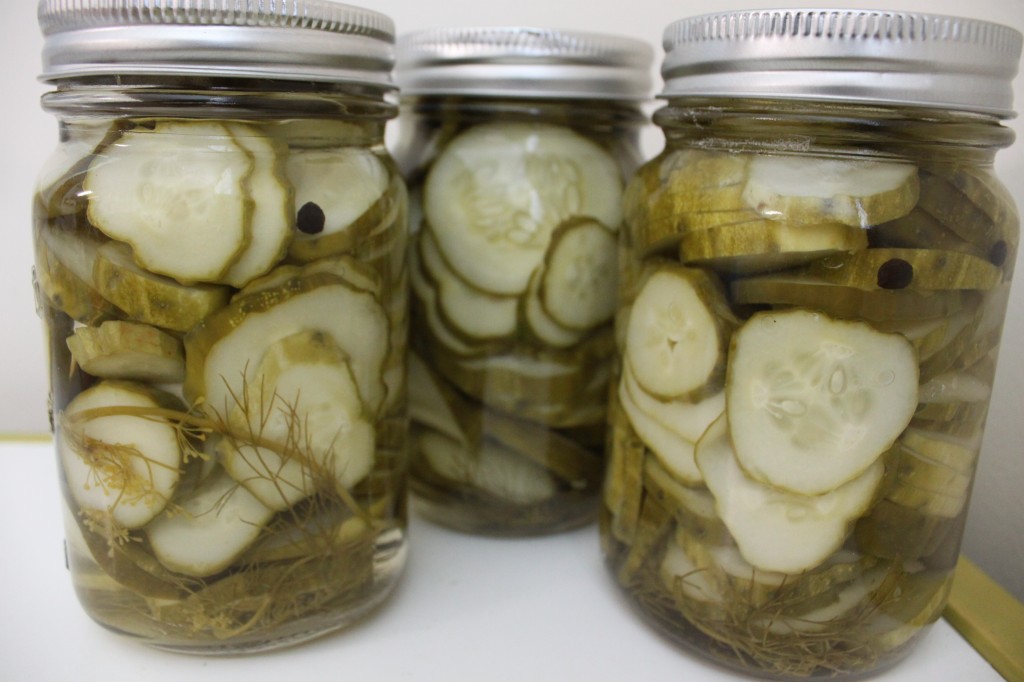
I mentioned in my initial Pickles 3 Ways post that I had 1/2 a peck of pickling cucumbers to work through, hence I experimented with canning, refrigerating and freezing them. To be honest, the freezing part was because I had literally run out of all my jars, both canning and otherwise, and had to do something with the rest of my pickles before they went bad.

So I quickly put together a batch of freezer pickles, and left them in the fridge for a few days according to the instructions. After the appropriate amount of time had passed, I took them out of the fridge and set them on the counter to begin the process of putting them in storage containers for the freezer.

And then… then my addled brain took me off in a different direction - something else vastly important no doubt - and I completely forgot about the freezer pickles on the counter. Until the next morning.

I could have kicked myself. Actually, I think I did. Several times! I hate throwing away food, especially those delicious looking little pickles. I had really been looking forward to discovering what they would taste like, freshly thawed from the freezer. Would they be mushy? Everybody says they’re yummy and crispy but how is that possible after months in the freezer? Alas, I will have to wonder eternally… or at least until the next time I attempt freezer pickles. Which might be never. We’ll see.

Probably, being mostly pickled by that point, they would have been fine, but I didn’t want to take any chances. I’m not usually very squeamish about things left out for a while… but overnight is a different story.

You, however, my friend, are much more disciplined and organized than I, and I know you will not make the same mistake, which is why I am sharing the recipe with you. I found the original recipe at The Meaning of Pie and tweaked it to suit my tastes, meaning mostly that I left out the majority of the hot stuff. If you like hot stuff in your pickles (eewww!) by all means add it back in, with my blessing.


Of the 3 methods I tried (canned, refrigerator and now freezer), the freezer method was my least favorite because:
  • It would take up too much room in my limited freezer space (if I had gotten that far. Ahem.)
  • It calls for a lot more sugar than the other recipes.

However, it is a super QUICK method, especially the initial mixing. Of course, like any pickles, they require a few days to pickle, but there’s just no way around that.

It’s probably the EASY-est, although refrigerator pickles are very easy, too. I am likely the only person in the world who can mess up freezer pickles.

It’s just as CHEAP as any other pickle method, too.

The additional sugar concerns me, and makes it not as HEALTHY as the other methods. My sweet tooth ensures that I have more than enough sugar already in my life; I don’t need to add it to foods that aren’t supposed to be sweet!

Have you ever unintentionally left food out overnight?

Read all the posts in this series:

Pickling 101

Fresh Pack Canned Pickles

Refrigerator Pickles

Freezer Pickles


Pickles 3 Ways: Refrigerator Pickles

Before we get started today, you may want to read Pickles 101 if you haven’t already.

I had heard about refrigerator pickles for quite some time now, but had resisted them because it sort of felt like cheating to me. Not that I mind cheating when it comes to cooking - at least as long as it’s an honest cheat, if that makes sense. It just seemed like refrigerating pickles was settling for less than the best.

Boy, was I wrong! It turns out that of the 3 methods I tried, refrigerator pickles were my favorite, hands down. Before I made them, the only time I ever ate pickles was on a sandwich, and that was it. Now I find myself grabbing the jar out of the fridge, and eating the pickles plain as a snack, something I never even considered before in my life! I even find myself craving them!

I still plan to continue making regular old canned pickles, just for the advantage of long-term storage, but these babies are going to be my go-to from now on. What’s not to love? They’re easy, cheap and incredibly delicious - so crisp with a satisfying crunch when you take a bite! Another advantage is that you can use any jars you have - I just recycled some old jam, molasses and store-bought pickle jars!

I will say that the dill flavor was not as strong as I would have loved, so next time I’m going to add a little more dill, and maybe some extra on the top. Be sure to cut the ends of the cucumbers before you use them.

That’s it! So QUICK!

And EASY, because you don’t have to bother with the canning equipment.

Homemade pickles are CHEAPer than store-bought. I paid a little over $1 for each jar, not bad!

Refrigerator pickles do have some sugar, so in that sense they’re not as HEALTHY, but I’m OK with 1/4 of sugar spread over several jars if it results in such a delicious pickle!

Read all the posts in this series:

Pickling 101

Fresh Pack Canned Pickles

Refrigerator Pickles

Freezer Pickles


Pickles 3 Ways: Fresh Pack Canned Pickles

Canned pickles are the first kind that I attempted, and I was pleasantly surprised at how easy they were. In fact, I’ve discovered in the past few years that canning in general is not as great a mystery or even as overwhelming an undertaking as it always seemed to be. It’s quite simple and can be done with the most basic equipment. And it doesn’t take a whole lot of time, especially if you’re working in small batches, like I usually do.

Of the 3 pickling methods I’m describing, canned pickles last the longest, so are the best for long-term storage. In terms of taste and texture, unfortunately, they’re my least favorite. However, when you stack them up against store-bought pickles, they still win in the taste department, so it’s still worth it to can them if you want pickles to last through the winter.

As with any canning endeavor, a little prep is essential. Before you can start pickling, you need to get your equipment ready:

Sterilize the jars and lids.

I like to use pint-size jars, because they fit in my stock pot for processing, and because we don’t go through pickles fast enough to warrant a larger jar. You can use any size you want, of course, but before you use them, you do need to be sure they are sterilized. You can run them through the dishwasher, but if your dishwasher is like mine, it is never empty! I usually set them in a pot of water and bring it to a slow boil. I do the same thing with the lids, but in a small pot; and I don’t boil them, just simmer gently.

Bring a large pot of water to boil.

This is the processing “bath”. If you have a canning pot, it’s useful, but right now I’m just using a plain old stock pot. I do put a hot pad in the bottom to provide a surface for the jars, but it’s kind of a pain.

Get your supplies ready.

The funnel and jar grabber in this canning kit are incredibly useful, and should be at the ready near the stove.

Prep your cukes.

It goes without saying that they should be thoroughly washed (I like to soak mine for a little bit.). Then you need to slice off the ends. After that, you can leave them whole, slice them into “spears” or rounds or whatever you want. The brine in the recipe below is enough to fill 6 or 7 quart jars, and each quart jar will fit 5-8 pickling cucumbers, so that will give you an indication of how many cucumbers you will need (or adjust brine amounts accordingly).


Now you’re ready to do some pickling!

I guess the whole process takes about an hour, depending on how many cucumbers you have and if you slice them or not, and in my opinion that’s pretty QUICK for a winter’s supply of pickles!
Pickles are one of the EASY-est things to can, as well, as there really isn’t any cooking involved.

I paid $10 for a 1/2 peck of pickling cucumbers, and $3 for the dill plants, plus $0.50 for the garlic. From that, I got 5 pint jars of canned pickles, 3 jars of refrigerator pickles, and I would have had several more jars of freezer pickles… but that’s a story for another day. My point being that I paid a little over a $1 for each jar of pickles, which is really CHEAP, especially considering I canned them the day I got them from the farmer’s market. That is about how much I’m willing to pay for store-bought pickles, and the quality - and taste - of homemade is infinitely better.

These are pretty HEALTHY. Of the 3 methods I tried, canning is probably the healthiest because it doesn’t use any sugar at all. However, there is a fermented method that would be even more nutritious, and if I can adequately get my nerve up, I might try it some time.

Have you ever pickled cucumbers? Have you ever tried the fermented (crock) method?
Read all the posts in this series:

Pickling 101

Fresh Pack Canned Pickles

Refrigerator Pickles

Freezer Pickles


Pickles 3 Ways: Pickles 101

Check out the links at Eat Local Eat Fresh... and add your own!

It only seems appropriate that I follow up Ice Cream Week with a series on pickles…. they go together so well, after all! Or at least so the old joke goes; I wouldn’t know, having never tried them together myself. And no, by the way, I am not pregnant. Just in case you are curious.

And before I go any further, I should probably make it plain that when I say “pickles” I mean dill pickles”. I cannot stand bread-and-butter pickles, so if anybody wants to read about them on my blog, they will have to do a guest post for me because those things are not going to pass through my kitchen. Just sayin.

Last year was my first attempt at making pickles, and I didn’t blog about it because I was very unsure of myself and the whole process. One year later, I’m convinced: making pickles is easy as pie. Easier, actually, because you know how tricky pie crust can be at times. AND homemade pickles are much better than store-bought, guaranteed, hands down, no question. I made probably 4 or 5 jars last year, and we enjoyed each and every one tremendously, and I was very sad when I had to resort once again to Vlasic and Mt. Olive.

This year, I was able to get a great deal on pickling cucumbers at the farmer’s market and I had to deal with them immediately, but I didn’t have enough canning jars for all of them, so I branched out and made refrigerator and freezer pickles as well. You get the benefit of my excess pickling adventure because now I can compare the 3 methods in light of my QECH philosophy and help you decide which way to go.

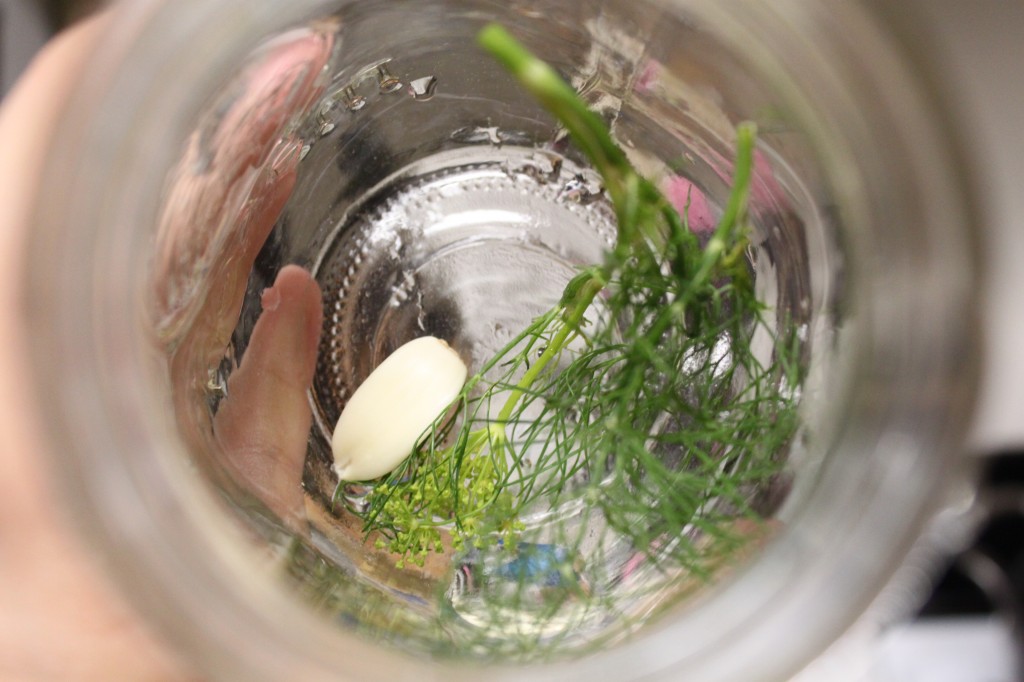
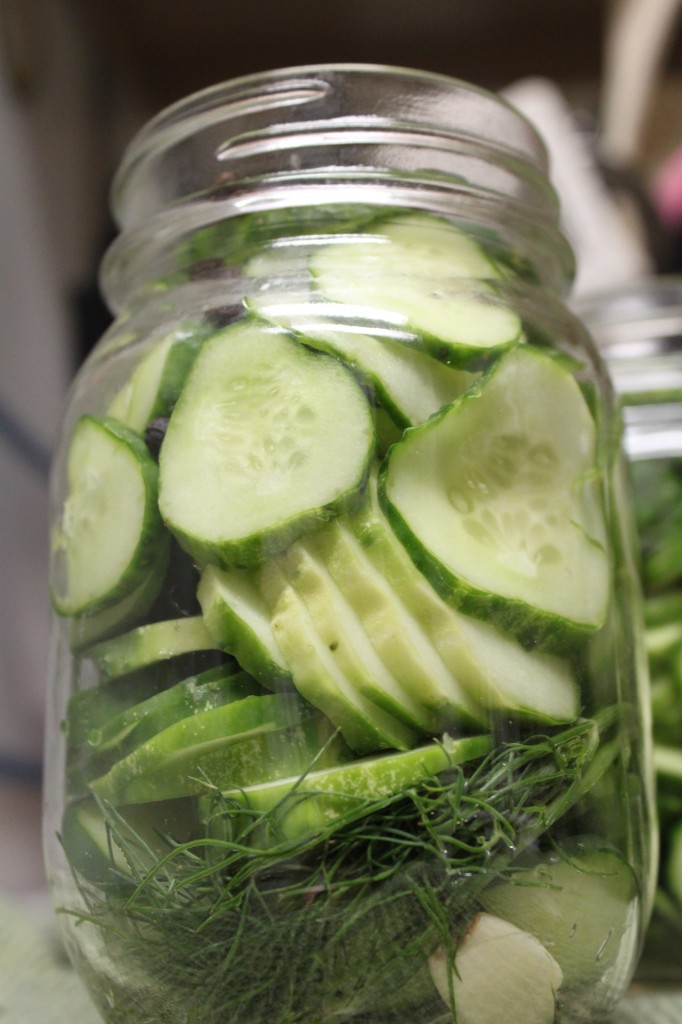
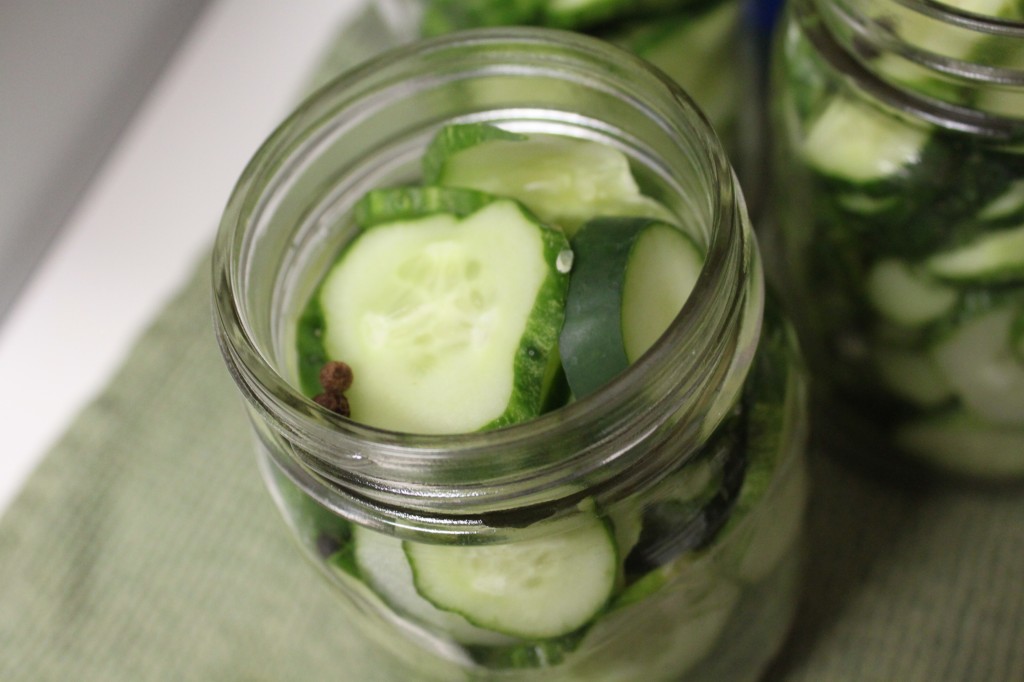
First, though, let’s talk about pickling in general. Each of the 3 methods has some things in common: No matter which method you choose, pickles are made by soaking sliced or whole cucumbers in a brine seasoned with dill and garlic.

I chose the Fresh Pack (canning) method first, followed by Refrigerator andFreezer. There’s also the fermented kind, which is called a few different names depending on where you’re reading about it, but I haven’t been brave enough to try it yet (although I believe it’s probably the healthiest of methods).

The ingredients for basic dill pickles - whether you can, refrigerate or freeze them - are basically the same.

Cucumbers

You will need pickling cucumbers, which are currently widely available in my area at farmer’s markets. Typical cucumbers are too large, and have too many seeds, which you don’t really want in your pickles. Pickling cucumbers are small, and should be dark and firm. If they are light colored and feel soft anywhere, they’re too ripe and won’t result in crispy pickles. Ideally, they should also have lots of warts.

Vinegar

Vinegar is part of the brine used to soak the cucumbers. Plain old regular 5% vinegar does the trick.

Salt

Regular table salt is not going to cut it for pickles, because of the iodine and anti-caking agents, which will do funny things to your pickles. Most experts recommend purchasing salt made especially for pickling - called, ironically, pickling salt - but I just can’t bear to spend extra money on an ingredient with only one use if another multi-tasking ingredient will do. The experts are divided, but plenty of people say that sea salt is just as good as pickling salt, so that is what I use, and I’ve been happy with the results. (Side note: you should be using sea salt instead of regular old table salt anyway.)

Dill Weed

You will need some fresh dill weed for the best flavor. I actually bought 3 little dill plants at my farmer’s market the day I made my pickles, which was just perfect timing. If the dill is starting to flower, so much the better!

Garlic

Garlic cloves add so much essential flavor to pickles, you really can’t make them without it. Just plain old garlic cloves will work well.

Black Pepper

I like to add black peppercorns to my pickles, too, but not everyone does, so this ingredient is optional.

Sugar

Sugar is essential to the refrigerator and freezer methods, unfortunately. It’s just part of the preservation process. I used my regular raw sugar that I use for everything, and it worked well.

Come back tomorrow to learn all about fresh-pack canned pickles!

Have you ever made pickles? What method/ingredients do you use?

Read all the posts in this series:

Pickling 101

Fresh Pack Canned Pickles

Refrigerator Pickles

Freezer Pickles


Menu Plan Monday - Business as Usual

Once again, it’s Monday. And besides all the other feelings and images conjured up by the mere name of the day, that means it’s Menu Time once again! This week promises to be about as normal as any week we ever have, which is rather nice, I have to say.

Last week, we didn’t really stick to our menu plan and instead ate fast food more than I care to admit, mostly due to the outrageous weather (I didn’t even feel like boiling water on the stove or setting the crock pot going; it was that hot!) and the yard sale I had on Saturday (no time or energy left for meal prep after that!). Hopefully we’ll do a better job this week sticking to the plan. We’d better, anyway!

Breakfasts

  • Slow Cooker Steel-Cut Oatmeal
  • Granola/Yogurt Parfaits (with homemade coconut milk yogurt)
  • Cereal (a great deal on Kashi at Giant a couple weeks ago)
  • Muffins
  • Better-than-Oatmeal Muesli

Lunches

  • Leftovers
  • Freezer Stash of Non-Allergenic Foods (for Certain Little Someone)
  • Egg Salad/Tuna Salad Sandwiches
  • Flautas (never got to them last week)

Dinners

Snacks

Additional Features

This is not just a menu plan, as wonderful as that in itself is. Oh, no. Some more features for the curious among you…

This Week’s New Recipe

I try to incorporate one new recipe a week into my menu. This isn’t really difficult for me since I rarely make the same thing twice.

  • Garlicky Grilled Potato Salad - this will not exactly be grilled, since I have no grill. Haven’t decided if I should pan-fry it or roast it. What do you think? **Didn’t get around to this one last week, so it’s on the menu once again.

Baby Food

  • Repeats: banana, peach, plum
  • New: Chicken!
  • New: Sweet Potato Fries

In My Kitchen Today

On Mondays, I spend some extra time in the kitchen, cooking ahead and making baked goods to last for the week and beyond. A large portion of the day is often dedicated to allergen-free foods for my Certain Little Someone.

What’s on your menu this week? Any new recipes you are trying?

Ice Cream in a {Ginger}Snap

Welcome to Ice Cream Week here at Quick and Easy Cheap and Healthy!

Ice cream is the topic of the hour, all week long. I’ve got some sorbets to share, plus some fun ice cream flavors I’ve been experimenting with, and some other ideas for what to do with all the ice cream you make.(Note: All the recipes are intentionally dairy-free; but with the exception of the sorbets can be made with regular old cow’s milk and cream should you desire.) Come back every day this week for a new recipe!

~~~~~~~~~~~~~~~~~~~

I suppose it would be more accurate to say, “GingerSnaps in Ice Cream” but it doesn’t have the same ring to it. And when it comes right down to it, the actual truth is that it is gingersnap dough in ice cream, which totally just doesn’t have a ring at all. And yes, you heard me right: cookie dough ice cream, but not the chocolate chip kind. Nope, the gingersnap kind!


I was inspired by Susan of mighty acorns, who guest posted for me a little while back, and commented on my FB page that her favorite ice cream flavor had bits of “gingernut biscuit” (which I translated into gingersnap, hopefully correctly) and ginger chew (which I unfortunately did not have on hand). She said that it was in a vanilla-flavored ice cream, but I decided to go over the top and make the ice cream itself gingersnap-flavored, too.

Once again, I used a coconut milk base (which actually makes a very delicious and creamy ice cream base, even if you’re not vegan or dairy-free), but of course you can swap in regular milk and cream instead.


The gingersnap dough really deteriorated after a week or so in the freezer, which may or may not be because I used rice flour. Just in case, be sure to enjoy the ice cream right away. Also, next time I try it, I might actually bake a batch of gingersnaps, cut them into chunks, freeze them, and then add them to the ice cream instead of the raw dough.

Also, the molasses flavor was really quite strong in these, so next time, I’ll probably cut it with honey to soften the intense flavor a bit. I love ginger, and molasses is its perfect foil… but sometimes you can have too much of a good thing!

This is not a super QUICK recipe unless you already have a batch of gingersnaps and just add them instead of the cookie dough, although it really doesn’t take long to whip up a batch of gingersnaps (It is my favorite go-to cookie recipe, after all.).

It has several steps, too, so it’s not super EASY, either. But you know what they say… no pain, no gain. Some things are worth it!

Homemade dairy-free gourmet ice cream is definitely CHEAPer than the same thing bought in a store. And that makes it totally worth it in my book.

I’ve said before, and I’ll say it again (because it’s true!), homemade ice cream is definitely HEALTHYer than storebought! You can make ice cream at home with pure ingredients, plus you can control the sugar level.

Dulce, Dolce, Doce. In a Word, Sweet.

Welcome to Ice Cream Week here at Quick and Easy Cheap and Healthy!

Ice cream is the topic of the hour, all week long. I’ve got some sorbets to share, plus some fun ice cream flavors I’ve been experimenting with, and some other ideas for what to do with all the ice cream you make.(Note: All the recipes are intentionally dairy-free; but with the exception of the sorbets can be made with regular old cow’s milk and cream should you desire.) Come back every day this week for a new recipe!

~~~~~~~~~~~~~~~~~~~

So far this week, I’ve posted some pretty healthy ice cream and sorbet recipes, most of them with minimal or no sugar, not to mention loaded with healthy vitamin- and mineral- rich fruits.

Not today.

Today, it’s time for a little decadence. What is life if you don’t live a little? This particular ice cream is inspired by my most-favorite-ever drink at Starbucks, the Cinnamon Dolce Latte. Thank goodness it’s only available for a limited time each year, because my wallet and my scale can’t handle anymore than that. If you’ve never had a cinnamon dolce latte, it’s a deliciously creamy drink that’s very sweet with a hint of cinnamon and caramel. The combination is luxurious, indulgent… and addictive!

In my head, I imagined a creamy cinnamon-flavored ice cream base with ribbons of dulce de leche swirled throughout. I got close. Very, very close. The ice cream base is creamy and cinnamon-flavored, but the dulce de leche didn’t exactly swirl in ribbons. I chalk that down to my impatience - I couldn’t wait until a.) the dulce de leche was cool enough, and b.) the ice cream was frozen enough, so the warm dulce de leche just melted into the ice cream. I am pretty confident, though, that if you are more patient than I, and have nearly-frozen ice cream, and very cold dulce de leche, that you will achieve Cinnamon Dulce Ice Cream nirvana.

Of course, I used dairy-free products because of my son’s allergies to milk, but you should be able to substitute regular heavy cream for the coconut cream (no need to whip), regular milk for the coconut milk beverage, and canned dulce de leche (available under the brand name Goya in the Hispanic section of many grocery stores, or the Nestle brand La Lechera here at Amazon.com) for the “leche de coco”.


Not the QUICKest ice cream in my repertoire, especially having to make the dulce de leche from scratch. I don’t begrudge one minute, though, once I’ve tasted it!

It’s also not the EASY-est… but once again, no regrets!

And again… not so CHEAP, at least compared to other homemade ice creams. But compared to store-bought dairy-free ice cream? Definitely cheaper, by more than half!

And… not really very HEALTHY, to be sure, although for as sweet as it is, there really isn’t a ton of sugar involved. The dulce de coco recipe calls for 3/4 cup, but then you use less than half the amount, so it’s really not a terrible amount of sugar. For an ice cream, recipe, anyway.


Ice Cream Even Baby Can Eat!

Welcome to Ice Cream Week here at Quick and Easy Cheap and Healthy!

Ice cream is the topic of the hour, all week long. I’ve got some sorbets to share, plus some fun ice cream flavors I’ve been experimenting with, and some other ideas for what to do with all the ice cream you make.(Note: All the recipes are intentionally dairy-free; but with the exception of the sorbets can be made with regular old cow’s milk and cream should you desire.) Come back every day this week for a new recipe!

~~~~~~~~~~~~~~~~~~~

Ice cream that baby can eat? Ice cream that is completely devoid of cream of any sort? Ice cream without sugar? Creamy ice cream? Ice cream that is all those things and also delicious?!?!

Why yes, my friends. And once again, you need go no further than the humble banana. (Maybe I should have called this Banana Week instead of Ice Cream Week!) Except this time, instead of just exploiting the banana’s attributes to make a regular ice cream even better - whether by flavor or by texture - we’re just going to use the banana. Just the banana, that’s it.

OK, you can add in some things if you want. For instance, cocoa comes to mind, or chocolate chips. Or maybe a big spoonful of peanut butter (or non-peanut substitute). Coconut, maybe? Some berries or berry syrup?

All right, now I’m getting a little bit ahead of myself. First, let’s make the “ice cream”.


Instead of the vanilla and nutmeg, consider other flavor combinations, such as:

  • dried ginger and candied ginger
  • cinnamon and cardamom
  • almond extract and coconut flakes
  • grated semisweet or dark chocolate
  • small chunks of fresh mango
  • a drizzle of honey or maple syrup
  • a tablespoon or two of peanut butter
  • a tablespoon of cocoa (you may want to add a little honey or sugar, too, to offset the bitter)

Take the simple to the sublime by topping it with:

Bet you never thought ice cream could be so QUICK!

Or so EASY!

Or so CHEAP!

Or so HEALTHY! I didn’t feel the least bit guilty offering it to my Certain Little Someone just now as a mid-morning snack.

Ice Cream Week Continues with Berry Sorbet

Welcome to Ice Cream Week here at Quick and Easy Cheap and Healthy!

Ice cream is the topic of the hour, all week long. I’ve got some sorbets to share, plus some fun ice cream flavors I’ve been experimenting with, and some other ideas for what to do with all the ice cream you make.(Note: All the recipes are intentionally dairy-free; but with the exception of the sorbets can be made with regular old cow’s milk and cream should you desire.) Come back every day this week for a new recipe!

~~~~~~~~~~~~~~~~~~~

Would you believe that this is yet another recipe whose pictures are on that blasted memory card that is who-knows-where?! I have yanked out my hair, searched through every possible hiding spot in this residence, even crawled around on my hands and knees and I can’t find it anywhere. Ugh. Oh well, here’s a picture from the source:


We’re coming to the end of berry season on the east coast here, but the good thing about sorbets is that they often start with frozen fruit anyway, so all you need is a bag or two of frozen berries from the grocery. However, if you happen to have some fresh local berries like I did earlier this month, then so much the better!

When I set out to make my berry sorbet (I used strawberries), I was actually kind of shocked at how much sugar (or corn syrup, for goodness’ sakes!) people threw into their sorbets. Most fruit is sweet enough on its own; it doesn’t need to be doctored up quite so much. Of course, the tart factor might be increased after some time in the freezer, but even so, I found this recipe to be plenty sweet enough, especially when I served it with a sprinkling of homemade granola and a few chocolate chips.

I used this no-sugar-at-all berry sorbet recipe, and it turned out great! It only uses a tablespoon of honey, which means that it is not even an indulgence. It calls for coconut water - I just used the bit of coconut milk left over from a can after I had refrigerated all the cream out of it. Of course, if you have coconut water, you can use it, or you can use plain water. You can try using milk or cream instead, but then it won’t technically be a sorbet anymore. And… we have again a banana in the ice cream! I really think the bananas help to make a nice creamy consistency, and the flavor goes very well with the berries in this recipe.

If your berries are already frozen, this is one of the QUICKest ice cream recipes around. You can even eat it immediately if desired, since all the main ingredients are frozen to begin with.

It’s also one of the EASY-est, especially since you don’t really even need an ice cream machine (although I think it helps with the texture, too).

It’s CHEAP during berry season, but otherwise, not so much. Frozen berries are available for a good price year-round at Trader Joes.

This is such a HEALTHY ice cream, you don’t even need to feel the list bit guilty about enjoying it! It’s an additional serving of fruits, after all!

Interesting reads