Archives for April 2012

Menu Plan Monday: Gettin’ in a Groove

menu plan monday

Notice I did not say “gettin’ my groove on”. Because nobody wants to see that. Awkward!

Nope, I’m gettin’ in a groove of menu planning here. For the first time ever, I actually mapped out a month’s worth of meals after my last OAMS trip. Not specific meals, mind you. No, I’m not organized enough for that. But I mapped out a general plan for all the types of meat I bought to make sure that it would last for a month. And then I filled in the gaps with meatless meals and leftovers. Now all I have to do when planning my menu is find specific recipes for the scheduled cuts of meat. So far, it’s working quite well, so I intend to continue the process when I do my next OAMS trip in a couple weeks.

Breakfasts

  • Sweet Potato Oat Muffins
  • 1-2-3 Granola
  • Choc-ocado Smoothies & Leftover Muffins
  • Pancake Apples
  • Muesli

Lunches

  • Leftovers
  • Egg Salad Sandwiches
  • PB&J (and Sunbutter & J!)

Dinners

  • Marinated Chicken Breasts, Steamed Carrots, Baked Potatoes
  • Creamy Lemon Pasta, Fruit
  • Savory Oven Pancake, Gingered Melon
  • Salmon Stir Fry
  • Quesadillas, Carrots, Fruit

Snacks

  • Nuts, Raisins, Cranberries
  • Popcorn

In My Kitchen Today

  • Artisan Bread Dough
  • Granola
  • Goat Cheese
  • Cookies


How to Get Canning Supplies for Cheap or Free

Around here, the growing season is just about to get off to a booming start. The threat of frost is typically gone by the beginning of May, and that’s around the same time the farmer’s markets start back up again, too. And you know what that means? It’s almost time to start canning, baby!

(Or you can dehydrate and freeze, too, but that’s another topic for another day.)

Remember the grasshoppers of the old ant and grasshopper fable? The ants worked hard all summer to store up food for the cold winter, while the grasshoppers played the day away. Guess who was hungry come the first winter storm? Yep, those lazy grasshoppers. I’m thinking those ants were on to something, so I’m gonna follow their example. After all, if I want local, nutritious produce throughout the winter months, it’s going to have to come from my pantry or freezer because around here, nothin’ but nothin’ grows mid-December to mid-March.

In the past, I’ve just kind of winged it (wung it?) come the growing season. I just picked up cans here and there, bought a few lids here and there, canned stuff as I had extras. This year, however, I’m going to be much more intentional about the whole process. I actually have a plan. (Why, yes, the earth is trembling! Whoa, people, she has a plan!)

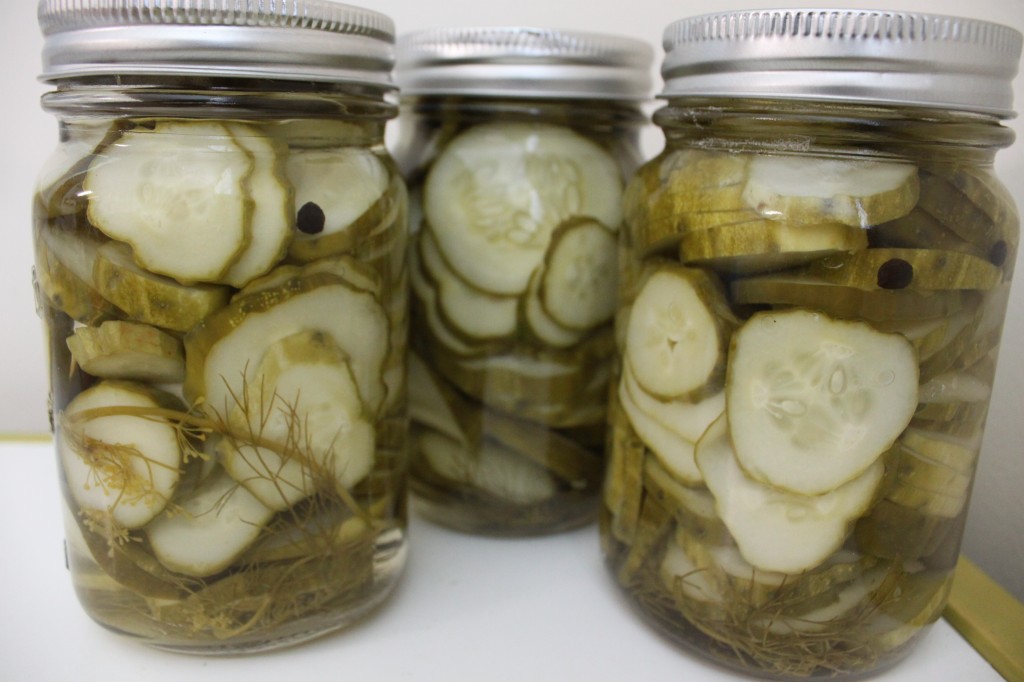
Part of my plan is having adequate supplies on hand for canning enough jam, apple butter, and pickles to last until next year at this time. I almost made it this year, so I know I can do it. I just need a few more jars. And guess what? I’m going to get them for free. Or at least for super cheap. Here’s my simple 3-step process for procuring free jars:

1. Search on Swagbucks

Swagbucks is a search engine that randomly awards you points for searching the internet. I don’t know about you, but I probably do at least - at the very least - 10 internet searches a day. If I get points for even a quarter of those searches, it adds up! And it adds up quickly! Plus, I can do other tasks, like watch short videos, answer surveys, or lots of other options, and earn points that way, too.

2. Buy Amazon.com Gift Cards

What does Swagbucks have to do with canning jars, you ask? This: once I’ve accrued 450 Swagbucks points (and this takes a couple weeks or less), I can redeem them for a $5 gift card to Amazon.com. I bet you can guess where this is leading.

3. Buy Canning Jars on Amazon.

With just 2 Amazon gift cards, I can purchase a case of 12 Jarden half-pint jelly jars. With 3 $5 gift cards, I can get a case of 12 Ball 16oz jars (and free shipping with Prime!). A case of 12 Ball 1-qt jars will set me back 4 $5 gift cards… but imagine all the pickles I could pack into one of those babies!

So there you have it… my cheapskate plan for acquiring all the necessary canning jars at little to no cost for me! I’ve actually already bought one set of half-pint jelly jars in this way, and I have a few gift cards lined up to purchase more. If you want to try your hand at canning, too, but can’t afford to buy all the supplies new, I have a few more suggestions on how to acquire them for nothing (or next to nothing).

Ask Around!

Last year, my mother-in-law very kindly gave me a whole bunch of used jars that she didn’t need. You never know who might have a collection of jars waiting for a new home! A couple things to keep in mind:

  1. Only use jars designed for canning. Store-bought jars are not guaranteed to survive the pressures of canning, and it’s not safe to attempt to use them. You need actual canning jars (the most common companies are Ball, Mason, and Jarden).
  2. Canning jars can be re-used, but inspect them carefully for nicks, chips and cracks. Discard any jars that are disfigured in any way, as they are not safe for canning.
  3. Do not re-use seals (the flat part of the lid that seals to the jar). Those must always be discarded after one use. A box of new seals will only cost you one $5 Amazon.com gift card! You can use the bands (the part that screws onto the jar) over and over again, as long as they are not bent or misshapen, and as long as they are not rusted. Eventually, they will bend or rust, and then they’ll need to be retired from active canning service.
  4. Canning pots and canning utensils can be re-used indefinitely without any danger.

Beg, Borrow, but Don’t Steal

If you know someone who cans (or used to), ask them nicely if you can borrow their equipment. You’ll still have to get your own jars, since they’ll probably want to use their own supply, but the pot and other utensils are easily borrowed for a day or two. Or suggest a canning party, and work together with your friend(s) to can a winter’s worth of food for everybody in one day!

Get Thrifty

Scour thrift stores and yard sales for second-hand canning equipment and jars, following the advice to ensure good quality. This is how I bought my canning pot and rack last year! Some people also have good success finding usable canning jars at second hand stores, but I’ve never had such luck. I’ve also found some great books with detailed canning and preserving instructions at thrift stores - those have been invaluable to me!

Do Without

Some things are absolutely essential when it comes to canning, like the jars and lids. Some things are really helpful, but not 100% essential. For example, I canned successfully for a couple years without a proper canning pot; I just used my large stock pot and put a towel in the bottom where I set the jars. It wasn’t a great method and I was really happy to find the canning pot and rack last year… but it worked! If you’re on a super tight budget, it can be done. Regarding other canning supplies, a funnel is very helpful when it comes to jam and sauces, but it’s not necessary for things like pickles. The magnetic lid-lifter is pretty affordable, but once again, not absolutely necessary. You really do need special canning tongs for lifting jars in and out of the hot water; otherwise that can be a pretty scary business.
Where do you get your canning supplies?
This post contains affiliate links.

Linking to:

Pennywise Platter

Simple Lives Thursday

Frugal Days, Sustainable Ways

Frugal Friday

My Favorite Recipes: Wheat-Free Vegan {Delicious} Oat Muffins

oat muffins

Recently, I was thrilled to find a great new (to me) blog called The Austerity Kitchen. Then I was bummed to find out that it was no longer publishing new material. I hate it when that happens! Thankfully, the authors posted a fabulous vintage oat muffin recipe before they moved on to greener pastures, and that same oat muffin recipe has since become my go-to muffin recipe.

There were two things I loved about The Austerity Kitchen: one, that it had vintage recipes; two, that those recipes came from times and places when certain foods were scarce and home chefs learned how to make do. My kind of recipes! I love that previous generations - who knew little about food sensitivities and allergies - can teach our generation about gluten(or wheat)-free and vegan cooking. Even if they were neither gluten-free nor vegan. Yup. Totally cool.

oat muffins in the tin

I did have to slightly adapt the recipe to make it completely vegan, replacing the egg with flax gel. In fact, this recipe is actually quite sturdy, and I’ve replaced both the egg and the fats with fruit or vegetable purees (banana, pumpkin, sweet potato, etc.) and it still turns out fabulous. Unlike most wheat-free vegan baked goods, they aren’t very crumbly. More crumbly, I suppose, then wheat-based muffins bound with egg, but not as crumbly as your typical wheat-free vegan product. I’ve also used all different kinds of sweeteners (molasses, honey, unrefined sugar) with equal success.

Here’s the basic recipe, with some suggested adaptations that have worked for me.

oat muffins w butter

Don’t you love those super QUICK instructions? They take almost half an hour to bake, but the mixing up time is minimal.

These are some of the EASY-est wheat-free vegan muffins I’ve had the privilege of trying. Hence they have become my favorite!

Oat flour is an excellent and CHEAP replacement for what flour if you have allergies or sensitivities. It can be gluten-free if you have gluten-free oats. But don’t waste money on store-bought oat flour: just grind old-fashioned oats 1/2 cup at a time in your coffee grinder, or dump the whole lot in your food processor.

These are very HEALTHY with lots of good fiber, minimal (and healthy) sweeteners, and extra vitamins from the fruits and vegetables (if you use them).

Do you have a go-to muffin recipe?


Menu Plan Monday: Back from Vacation

menu plan monday

I was quite pleased with the success of last week’s Vacation Menu Plan. Everything worked out very well, and we had plenty of food. We did make a last-minute change, because once we were there, my DH was stricken with a strong desire to grill hot dogs and roast marshmallows. SO not healthy, but he’s a pretty awesome hubby, so I like to make him happy when I can. Every once in a while, you know. So instead of ham & pasta casserole, we had hot dogs! The good thing is that the casserole is still frozen, so now I have a super easy dinner ready for tomorrow evening!

But I have to confess… I was a total ditz last week and completely forgot to share all the amazing ideas my readers offered for vacation meal planning! I asked on Facebook for some inspiration, and you totally delivered. For those of you who missed the discussion, here are some of the ideas for easy vacation meals:

  • meats frozen in marinade
  • slow cooker meals frozen in slow cooker liners (don’t forget the slow cooker!)
  • slow cooker meals, even if they’re not prepped and frozen
  • make-ahead breakfasts: burritos, egg-sausage muffins
  • spaghetti
  • bagels, eggs, fruit for breakfasts
  • frozen grilled chicken strips to use in sandwiches or salads
  • tacos
So now onto this week’s menu.

Breakfasts

Lunches

  • Leftovers
  • Egg Salad Sandwiches
  • PB&J (and Sunbutter & J!)

Dinners

Snacks

  • Nuts, Raisins, Cranberries
  • Popcorn
  • Real Food Puppy Chow (I did use Chex cereal instead of popcorn b/c my DH can’t eat popcorn.)

In My Kitchen Today

  • Artisan Bread Dough
  • Ham & Bean Soup
  • Cookies


Something from Nothing: Healthy Fats {Guest Post}

something from nothing graphic

I’m so excited to have my friend Stephanie, The Cheapskate Cook, guest posting for me here today. Her blog is one of my favorites, and I read each and every post. She always inspires me with her cheerful attitude and her ability to stretch a grocery budget beyond believable limits. Speaking of stretching… she has a great idea that will help us all stretch our own grocery budgets. I’ve only recently started doing this, and I can’t believe it took me so long!

When I was four years old, I learned to stretch. I was in a ballet class full of tutus, tights, and soft pink shoes; and we were all sitting on the floor, legs stretched out in front of us, trying to touch our noses to our knees. I gritted my teeth and, unlike when I try to stretch today, my nose eventually bounced off my knee. Of course, I was four, so I was much more elastic than I am now.

However, that day I learned that stretching isn’t always easy. It’s not a comfortable word. Usually it implies extra work and maybe even a little bit of pain. Little did I know how much I would have to learn to stretch over the years.

Many of us have had to learn to stretch a lot of things. We had to stretch our comfort zones when we grew up and took responsibility of our work, our bills, and our future. We had to stretch our skill set when we took that job. We had to stretch our patience when we had that kid (especially when that kid turned two). And most of us reading this blog have had to stretch our grocery budget.

Anne has given us a lot of resources here, and I’m thankful to learn with other people who are stretching their food in healthy ways. I remember when we had $35/week for groceries, and I learned how to stretch chickens across more meals than I knew was possible. Who could’ve imagined the mileage you could get out of those things? It was like the endless poultry. I’m still learning these tips and tricks, one of which I want to share with you today.

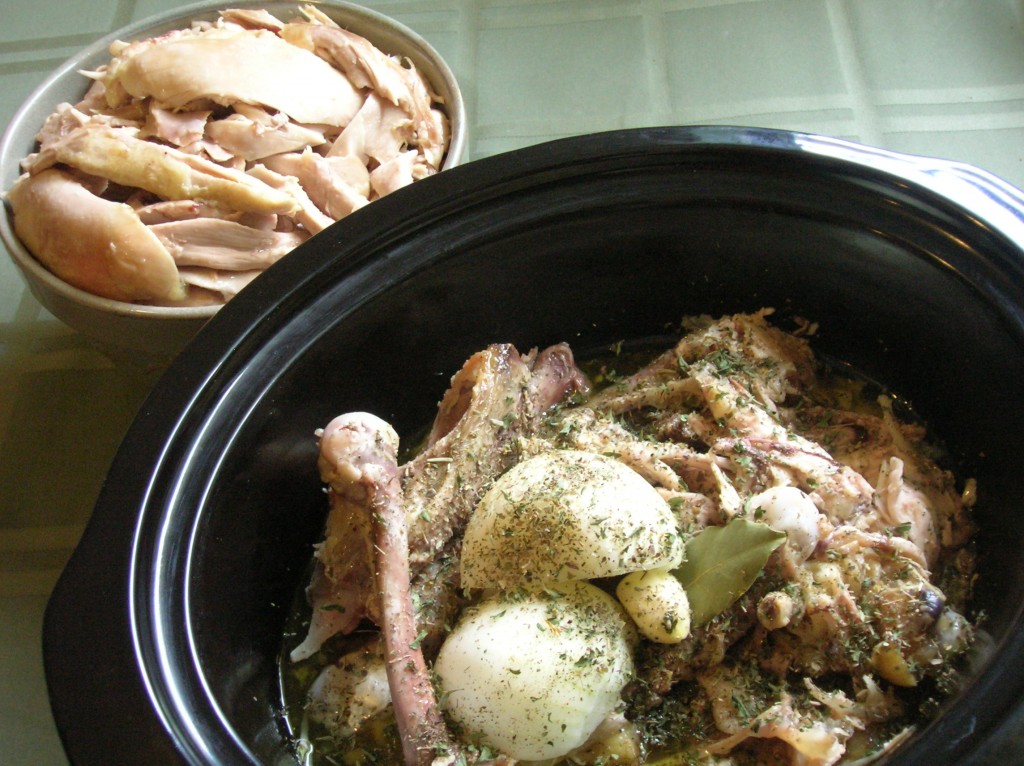
Many of you are already familiar with making your own chicken broth or stock from the bones of leftover chicken (if you aren’t, here is an easy stepping stone method you can try as you cook up the chicken in your crock pot. If you already make chicken stock or broth, here is a list of tips I’ve learned over the years to increase nutrition and ease.). I’ve been doing this for years, and I usually pour the stock into clean glass jars then store them in the fridge or freezer (jars that are frozen can only be about 2/3 full to prevent the glass from breaking). But before I put them in the freezer, I wait.

I wait because I’ve found a way to stretch the chicken just a little farther. After the stock sits in the fridge for a few hours, a layer of fat forms on the top. This fat actually helps seal your stock and keep it from spoiling, so I try to leave at least a thin layer of fat on the stock.

But as you can see from the photo, the layer is often really thick. So I scoop the excess into a small jar and use it throughout the week whenever I need to sauté vegetables or meat, or grease pans for savory dishes. Works great, adds flavor, and it’s a healthy fat. Using a dab of this chicken fat helps me stretch expensive ingredients like butter and olive oil. And you know I’m all about stretching.

Little practices like this make my frugal kitchen a little more real foods based, helps me waste a little less, and keeps my food flavorful and healthy. Stretching isn’t always fun, but a frugal, efficient kitchen is very rewarding.

When Steph and her husband got married, they lived in a renovated shed and had a grocery budget that matched. As a passionate whole-foodie, Steph was determined to continue eating healthy, minimally-processed foods on their shoestring budget. So The Cheapskate Cook was born.

You only have until tomorrow morning at 8am to get 38 awesome e-books for only $29 - that’s less than $1 a book! Some of them are valued at $10 and more; in fact, the total savings is over $300!! Go get it while you can!

Living Without a Microwave

Please welcome regular contributor Nancy of Real Food Allergy Free once again! Today, she is giving us some great tips for living without a microwave.

My brother recently called me a hippie. I had to laugh, because I am not a hippie! But when I say things like “We don’t have a microwave” I certainly see how it could look that way.

Last fall our microwave started sparking and smoking, and the interior of the microwave had burnt spots. That was the end of our convenient friend. My sweet husband was ready to run out the door to buy a replacement, until I told him I wanted to try to live without one. Money was tight so we agreed to see how long we could go before replacing it.

I’ve never understood how a microwave works. It looks like magic to me! Smart people tell me it radiates our food and changes the composition of the food. That doesn’t sound good to me. You can read Microwave Ovens: The Proven Dangers and The Hidden Hazards of Microwaves for more information.

Now, to be fair, there are plenty of articles written by smart people who say microwaves are absolutely safe. I am no scientist. I don’t know exactly how safe or unsafe microwaves are. My gut tells me to be skeptical of them, but if our microwave hadn’t died on its own, we would still be using one.

When our microwave was working, I told myself we hardly use it; I only use it to heat a mug full of water for my hot tea. The reality is we used it quite often. To me it’s kind of like sugary cereal. Eating an occasional bowl of processed cereal is not going to hurt anybody, but eating it every day is not good for you. If I have sugary cereal in the house, we eat it! It’s too easy to pour a bowl for breakfast, snack or dessert. It’s the same with a microwave. If it’s in the house, we’ll use it out of convenience.

In fact, we used it so much that after four months without a microwave, my husband and kids still look me straight in the eye and say they can’t heat something up because we don’t have a microwave.

My family may miss the microwave, but honestly, I have missed my microwave very little. Yes, it takes a little longer to heat something up on the stove or in the oven, but it really is just a little while longer.

I have found the only real downside of giving up a microwave is having more dishes to wash. We typically store our leftovers in food storage containers. In the past, when someone wanted something to eat, they would scoop out an individual portion, put it on their plate and then heat the plate in the microwave. Without a microwave you have to scoop it into a pan and heat it up on the stove top or the oven. This could mean dirtying up several pots and pans at each meal.

If you decide to try life without a microwave here are some tips for you:

1. Plan ahead

It would be ideal if we all had a menu plan that we actually followed. Every evening we would check the menu plan and defrost what we needed for the next day in the refrigerator.

2. Defrost with cold water

Since we live in a real world there will be times when we have forgotten to defrost the meat. My favorite trick is to submerge the meat into cold water. More smart people tell me it’s not safe to use hot water. Don’t tell, but I’ve done that too!

3. Buy a toaster oven

Many people who don’t own microwaves swear by a good toaster oven. They say it reheats things like pizza in a jiffy and is more energy efficient than a regular oven.

4. Add water to stove top cooking

When you are reheating leftovers on the stovetop, add a little bit of water so your food doesn’t dry out.


How about you? Do you have a microwave? What are your tips for living without a microwave?

Photo Credit: dougww

Nancy is a home-schooling mom of four beautiful children. Her youngest suffers with severe eczema. Part of her treatment plan is to avoid the top 8 allergens (dairy, egg, wheat, soy, tree nut, peanut, fish and shellfish). Nancy is passionate about the real food movement, but is also a real mom with a limited amount of time and money. Her blog, Real Food, Allergy Free, features fast, frugal and (mostly) healthy allergy-friendly recipes that even “normal” people would enjoy.

Menu Plan Monday: Vacation, Baby!

menu plan monday

This week’s menu is a little bit unusual because we’re going on a surprise mini-vacation! My brother-in-law rented a time-share for the week, but can only use it half the week, so he offered the rest of the time to us. Of course, we jumped at the chance for a budget vacation, and look forward to spending some time in historic Williamsburg, VA.

Thankfully, the condo where we’ll be staying has a fully equipped kitchen (plus a grill on the grounds), so we can save lots of money (not to mention eat healthier foods) by making it all ourselves. By which I mean making it all myself. Ahem.

Instead of dragging my entire kitchen with us, and cooking all vacation long, I’m making everything in advance, freezing it, and bringing the finished product (rather than piles and piles of ingredients) with us. Kind of like a mini freezer-cooking session.

Here’s my vacation cook-ahead plan:

  • Muffins and pancakes (regular and allergen-free) and syrup individually frozen (done!)
  • Granola (done!)
  • Bread for sandwiches (half done; still have to make the allergen-free version)
  • 7-layer dip (in progress - guacamole’s done -cheating w/ a Wholly Guacamole ready-made package, sour cream is culturing, beans are halfway done, still need to make pico de gallo and taco meat
  • a ham and pasta casserole ready to pop in the oven
  • chicken breasts, cubed and marinated, ready to skewer for “shish-kabobs”
  • snacks: real food puppy chow, chocolate chip cookies, Rice Krispies treats (Hey, it’s vacation!) - I may or may not get to all of those, we’ll see.
  • canned baked beans as emergency safe food for the boys when we go out to eat

Breakfasts

  • Dry Cereal (This doesn’t happen very often, people! But I have some on hand for one reason or another and need to get rid of it.)
  • Smoothies & Toast
  • Muesli
  • Oatmeal* (courtesy of my MIL)
  • Apple Cinnamon Raisin Granola* (I used half applesauce for the cup of “liquid” and added cinnamon, dried apples and raisins)
  • Pancakes
  • Banana Chocolate Chip muffins* (I used mashed banana to replace the egg and oil, and added a few chocolate chips)

Lunches

  • Leftovers
  • Baked Potatoes
  • 7-Layer Dip*
  • Ham & Cheese Sandwiches*

Dinners

Snacks

  • Nuts, Raisins, Cranberries
  • Popcorn
  • Real Food Puppy Chow (I did use Chex cereal instead of popcorn b/c my DH can’t eat popcorn.)
  • maybe Rice Krispies treats, we’ll see

In My Kitchen Today

  • AF Bread
  • Taco Meat
  • Ham & Pasta Casserole
  • Cookies or Brownies
  • Refried Beans (the beans are already soaked and cooked, just need to fry them up)
  • Grate Cheese
  • Coconut Milk
  • Coconut Yogurt
  • Broth


SRC Cream of Buckwheat Cereal

I’d never had Cream of Wheat cereal before, let alone Cream of Buckwheat! But when browsing through this month’s Secret Recipe Club assigned blog, Sustainable Cooking for One, I stumbled across Stephanie’s recipe for cream of buckwheat and determined to give it a try.

Why buckwheat? For one thing, it’s not related at all to wheat, so it’s safe for my wheat-allergic little guys. For another, it’s not a grain but it cooks and bakes up just like one, which is a really great quality if you’re trying to reduce your grain consumption. I am also intrigued by the fact that (according to Wikipedia), it was widely cultivated in American during the 18th and 19th centuries but was replaced by wheat, which responded better to chemical fertilizers. I always prefer to eat what previous generations ate because I consider them, in general, to be much healthier than our current generation!

I highly recommend that you check out buckwheat for yourself - it comes in a few different forms: flour, kasha (hot cereal/cream of buckwheat) and groats. The groats are the whole “grain” (fruit seed, actually), and are often available in bulk bins at health food stores. I personally prefer to buy the groats because I can grind them up to make either flour or hot cereal. I use my Vitamix to grind them up; if you don’t have one, you’ll probably want to grind them in small portions in a coffee grinder.

A word of warning, though: buckwheat can have a strong flavor if you’re not used to it, especially the flour. I really despised the flavor when I made buckwheat pancakes for my little guys (although they loved it!) from store-bought buckwheat flour, but when I grind it myself, it tastes SO much better. My suggestion is to mix it first with other flours or grains that you do enjoy before trying it straight.

You can also do the same with this cereal: try mixing it with steel cut oats if you’ve never had buckwheat before.

I modified Stephanie’s original recipe only slightly, using strawberries (what I had) instead of the berries she recommends, and significantly increasing the amounts in the recipe to make one large batch.

This is not as QUICK as instant oatmeal; but about the same time as steel cut oats.

It’s very EASY; you can skip the extra soaking step if you want, but it increases the cooking time.

Buckwheat groats are not as CHEAP as more common grains, but they’re definitely affordable.

And they’re very HEALTHY; buckwheat has great antioxidants and high levels of magnesium. It’s also an excellent source of fiber and protein, making it an excellent candidate for a healthy breakfast!

Be sure to browse around Sustainable Cooking for One for more great healthy recipe ideas, and tell Stephanie I sent you! And check out the Secret Recipe Club website to find out more about this regular monthly event and how to join in on the fun!


Menu Plan Monday: Easter at the End of a Shopping Cycle

menu plan monday

This month’s focus in “Eating Intentionally“* is on “Fighting the Food Police”. What does that mean exactly? Well, I’ll be getting to that soon. For now, I’m really focusing on finishing up Your Grocery Budget Toolbox, so I can send it off for editing, then formatting, then publishing… whew! It’s gonna be a fun ride! In the meantime, I’m not really doing a lot of blogging, but I’ll be back to it very soon. And we’ll tackle Eating Intentionally once again when I do.

I hope you all had a fabulous Easter! Last week, Baby Boy came down with Hand Foot and Mouth Disease, and kindly shared it with his brother. So we kept our Easter celebration to ourselves, which meant that at the last minute, I had to pull together an entire Easter dinner. Thankfully, I had been smart enough to buy a ham on sale when I did my weekly mini-trip last week, so I put it to good use.

Even though the bare cupboards and echoing fridge testify to the fact that we are on the last leg of our monthly shopping cycle, I still found plenty of food to whip up the rest of the menu: potatoes, carrots, muffins, and fruit salad. Most of the recipes I used are not actually on my blog (yet), so I’ll link you up to them in case they look yummy to you.

Baked Carrots

Ham, studded with cloves and cooked in the slow cooker on high for 4 hours with grated ginger and mashed garlic cloves

Fruit Salad - pineapples, bananas and cantaloupe topped with toasted coconut

Roasted Potato Stacks

Sweet Potato Oat Muffins - I swapped 1/4 cup mashed sweet potato for the egg, and added cinnamon.

And now for this week’s menu…

Breakfasts

  • Sweet Potato Oat Muffins & Smoothies
  • Gingerbread Granola (I used molasses for the sweetener, and added ginger and cinnamon for flavor.)
  • Strawberry Cream of Buckwheat Cereal
  • Steel Cut Oats
  • Pancakes

Lunches

  • Leftovers
  • Grilled Cheese Sandwiches
  • Egg Salad Sandwiches

Dinners

  • Dinner w/ IL’s
  • Beef & Gravy over Mashed Potatoes, Steamed Carrots
  • BBQ Pork Pizza, Fruit
  • Baked Eggs, Fruit
  • Creamy Lemon Pasta, Carrots

Snacks

In My Kitchen Today

  • Yogurt
  • Ricotta


*My concept of “Eating Intentionally”, and the 10 principles we are working through this year, come from the book “Intuitive Eating” by Evelyn Tribole and Elyse Resch. I highly recommend it - I don’t agree with everything in it, but it is a great read for anybody who has ever been on a diet and/or is considering going on a diet.
This post contains affiliate links.

Menu Plan Monday: Women’s Wellness Recap

menu plan monday

This month’s focus in “Eating Intentionally“* is on “Fighting the Food Police”. What does that mean? Come back later this week and find out!

We are almost finished with our Women’s Wellness series; we’ll be wrapping it up with a few more posts into next week. If you’ve missed any of them, here are the highlights:

Sneak in Exercise on the Cheap

Why You Need to Eat Fat

Emotional and Spiritual Health Amid the Chaos

Help Your Hormones with a Maca Mocha Smoothie

Why You Need the Sun

The Importance of Breakfast (and a recipe!)

Healthy Habits that Ease PMS Symptoms

Eat Breakfast and Eat Well with a Savory Oven Pancake

Get Cultured with Homemade Sour Cream/Creme Fraiche

And we’ve got a few more great posts coming up, including another guest post, and some delicious recipes, so stick around and don’t go anywhere! (That’s an order!)

And now for this week’s menu…


Breakfasts

Lunches

  • Leftovers
  • Freezer Stash of Non-Allergenic Foods (for Certain Little Someone)
  • Ham & Cheese Pocket Sandwiches
  • Beans & Rice

Dinners

Snacks

In My Kitchen Today

*My concept of “Eating Intentionally”, and the 10 principles we are working through this year, come from the book “Intuitive Eating” by Evelyn Tribole and Elyse Resch. I highly recommend it - I don’t agree with everything in it, but it is a great read for anybody who has ever been on a diet and/or is considering going on a diet.
This post contains affiliate links.

Interesting reads