Another Healthy Fat for Free! {Something from Nothing}

something from nothing graphic Once upon a time, thrifty agrarian folks - who were hearty and healthy and rarely suffered from conditions like heart disease, cancer, and diabetes - took great pleasure in the fruits of their labor and enjoyed it to the fullest, wasting not even a morsel or a speck. Especially bacon. They had no qualms about eating bacon every day for breakfast to their heart’s content… and they made sure to save every last drop of the rendered bacon grease to use for frying… or even drinking. (Don’t believe me? Check out this list of grandmas and grandpas who enjoyed their bacon.) For generations, they survived and thrived on bacon (and a few other things of course).

And then in the twentieth century, a new generation came along and declared that those old folks knew nothing. They were killing themselves eating all that nasty saturated fat! No, no, a healthy diet must include no fat at all. OK, maybe some fats, but only the healthy polyunsaturated kinds. Definitely no saturated fats ever. Oh, wait, no, maybe it’s the trans fats that are the problem.

And then heart disease sky-rocketed. So did diabetes. And cancer. And all sorts of other first-world diseases.

Hmmm. Maybe the old folks knew something after all.

Me? I figure they were on to something, and I aim to follow their example. If you’re not convinced, read Food Renegade’s primer on healthy fats. Or any number of well-researched and well-written books like The Good Fat Cookbook, In Defense of Food, Good Calories Bad Calories, or Why We Get Fat and What to Do About It.

Which is why I religiously save every bit of bacon grease when frying up bacon and keep a jar of it in my refrigerator at all times. It is absolutely my favorite way to save money and eat healthy.

Bacon Grease: A Free, Healthy Fat

In my book, Your Grocery Budget Toolbox (You can get the first chapter free simply by subscribing!), I talk about the importance of prioritizing healthy food so that you know where to spend your hard-earned money. I determined that for myself, healthy fats were of the utmost importance, because those unhealthy fats (that everybody says are so good for us… I’m talking about canola oil, vegetable oil, margarine and the like) can do a lot of damage and I want to avoid that if possible.

Unfortunately, healthy fats can be very expensive! To really get the good stuff (expeller-pressed, virgin, etc.), you almost need to spend an arm and a leg. Or at least your entire grocery budget. I’ve learned a few tricks along the way, and bacon grease is one of them.

How to Get Bacon Grease

I buy uncured, nitrite-free and nitrate-free bacon at Trader Joe’s for $3.99 a pound (Grass-fed would be better if you can afford it.) and fry the entire batch up at once. I make sure to fry it at low or medium heat so as not to burn the grease and get all kinds of little black specks in it, as it’s not quite so good (or good for you) then (although some people disagree with me on that). Once all the bacon is cooked, I give the pan and the grease a chance to cool off a little, then I pour the liquid grease through a mesh sieve into a jar. I let it cool completely, and then I store the jar in the fridge.

Some sources say the bacon grease will last a month; others say it will last indefinitely. Saturated fats are pretty stable (which is one reason why they are so healthy), so I personally think it lasts significantly longer than a month. At any rate, it doesn’t stick around here for too much longer than that because I use it for everything!

How I Use Bacon Grease

Although it has a very strong bacon flavor, bacon grease goes well with just about everything. (Bacon makes everything better, dontcha know?) Some of my favorite uses are:

  • frying eggs (Mmmmmm!)
  • sauteing vegetables
  • panfrying meat
  • greasing a pan
  • cooking green beans (I should have bought green beans at the farmers’ market today)
  • refried beans

Some other bloggers have other great ideas for using bacon grease:

Or maybe you’re in the mood for Bacon Grease Chocolate Chip Cookies?

Do you save your bacon grease?

Did you know you can also save chicken fat?

Sharing at Fight Back Friday, Frugal Friday, Friday Favorites, Homestead Barn Hop, Better Mom Mondays, Titus 2sday, Traditional Tuesday, Teach me Tuesday, Domestically Divine Tuesday, Healthy 2Day Wednesday, Women Living Well Wednesday, Works for Me Wednesday, The Mommy Club, Frugal Days Sustainable Ways, Allergy Free Wednesday, Simple Lives Thursday, Your Green Resource


Organize Your Home with Empty Shipping Boxes {Organizing on the Cheap}

I’m so happy you are here with us this week for 5 Days of Organizing - more than 20 bloggers will be bringing you daily inspiration for organizing every aspect of your life. And with back-to-school days breathing down our necks, we all need it!

Have you ever been frustrated by all the creative organization ideas you see in magazines and on blogs, only to realize that you simply can’t afford (or don’t want to spend the money) all those gorgeous bins, boxes, baskets and other containers? Me, too! I’ve learned to organize my home (uh, to a certain extent) without spending an arm and a leg, and I’ll be sharing my tricks with you all week long. Stick with me for great cheap organizing ideas!


You might want to scroll down to the bottom to enter the $50 Paypal cash giveaway, and then click on the footer image to find a whole bunch more giveaways (including one of Your Grocery Budget Toolbox by yours truly!).

So far this week, I’ve shown you my Yard-Sale Spice Cupboard Makeover, my Free Pantry Organization System, and my Dollar Tree Organized Sets.

Today, I’m going to share with you another favorite organizing trick that is absolutely free. Well, sort of. I guess it all depends on if you won a giveaway or did a little online shopping. In any case, whenever the UPS (or the USPS, or FedEx, I’m not picky) knocks on your door and delivers a package… save the box! No matter its size or shape, it will come in handy for containing and organizing something somewhere in your home.

Now, a little caveat: don’t get too carried away here, folks. If you win too many giveaways or do a little too much online shopping, you might find yourself overrun with more boxes than you can handle. And if you’re having trouble organizing the boxes that you are saving to organize with… well, then, you’ve got trouble, my friend. With a capital T.

My rule of thumb is this: if I have an out-of-the-way space to save the box indefinitely, I will. Sometimes I have smaller boxes hanging around the corners of my laundry room for quite some time. But if I don’t really have the space to keep the box, I just hold on to it for a few days until either I’m sick and tired of moving it around to get it out of my way or I have found a practical use for it elsewhere in the house. Then I use it or lose it.

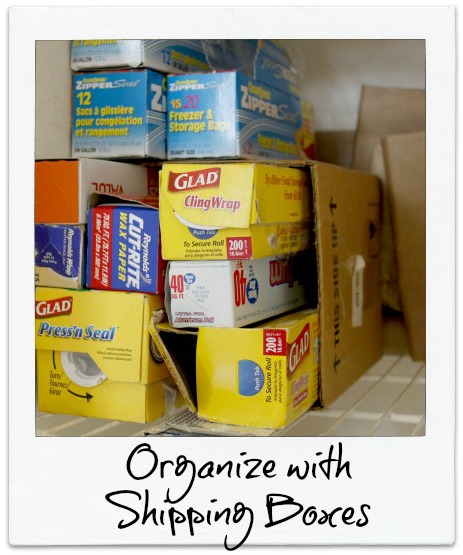
And how do I use these boxes? Well, pictured above you see one example. I used to have all those boxes of wraps (you know: foil, plastic wrap, wax paper, zip-top bags, etc.) piled in a heap on the floor of my pantry. I never knew how many of each I had and what I was out of, and frankly, it was a huge mess.

When I recently re-organized my pantry, tackling that disorderly heap was one of my first jobs! It was quite easy, really. The long boxes holding the wraps fit perfectly inside a rectangular box that had recently arrived. I set the box on its side on one of the pantry shelves, and now I can see easily how much foil or wax paper I have. What’s more, I can easily access each box without having to dig through a pile. Brilliant, really! And since I don’t care what it looks like, being in the pantry and not visible to the average visitor, I just left the box plain. But the beauty of a cardboard box is that you can quickly, easily, and frugally decorate it with some wrapping paper or scrap paper.

That’s not the only place I’ve used a cardboard box, though. Hardly!

Organize with Shipping Boxes

  • for off-season clothing storage (I have read that cardboard is actually a better storage solution for clothing than plastic because it allows the fabric to “breathe” - just be sure it’s not anywhere accessible to critters that can chew through the cardboard. Ew.)
  • for Christmas decoration storage
  • under the sink to contain all the junk that collects there.
  • under the bathroom sink to contain that 36-pack of toilet paper
  • as a depository for no-longer-wanted items - once it’s filled, it’s all ready to go to the Goodwill!
  • as a toy rotater - if your child has too many toys, box some of them up and hide them somewhere; in a month or two, bring out the hidden toys and hide some more.
  • book storage - if you simply don’t have any hidden place to put the boxes, cover them up with a table cloth and call it a nightstand/side table.
  • clothes your children have outgrown (if you’re saving them for baby)

That’s just scratching the surface of what these boxes can do! And since they come in all shapes and sizes, they can fit all kinds of different needs. Happy boxing!

Do you save shipping boxes?

Visit these blogs for lots more ideas on organizing your kitchen, your office, or your homeschool room!

a Rafflecopter giveaway

Sharing at Simple Lives Thursday, The Mommy Club, Your Green Resource

How I Organized my Pantry for FREE with Empty Jars {Organizing on the Cheap}

I’m so happy you are here with us this week for 5 Days of Organizing - more than 20 bloggers will be bringing you daily inspiration for organizing every aspect of your life. And with back-to-school days breathing down our necks, we all need it!

Have you ever been frustrated by all the creative organization ideas you see in magazines and on blogs, only to realize that you simply can’t afford (or don’t want to spend the money) all those gorgeous bins, boxes, baskets and other containers? Me, too! I’ve learned to organize my home (uh, to a certain extent) without spending an arm and a leg, and I’ll be sharing my tricks with you all week long. Stick with me for great cheap organizing ideas!


Psssstt! Scroll down to the bottom for your chance to win $50 in cash!

The pantry is one of those areas that’s just difficult to keep organized, because it’s intended for storage, but is constantly being used. If you’re anything like me, all day long, you’re opening the door and either putting something in or taking something out. It’s a recipe for disorganizational disaster! (Yes, I’m aware I just made up a word. The red squiggly line was a dead giveaway.)

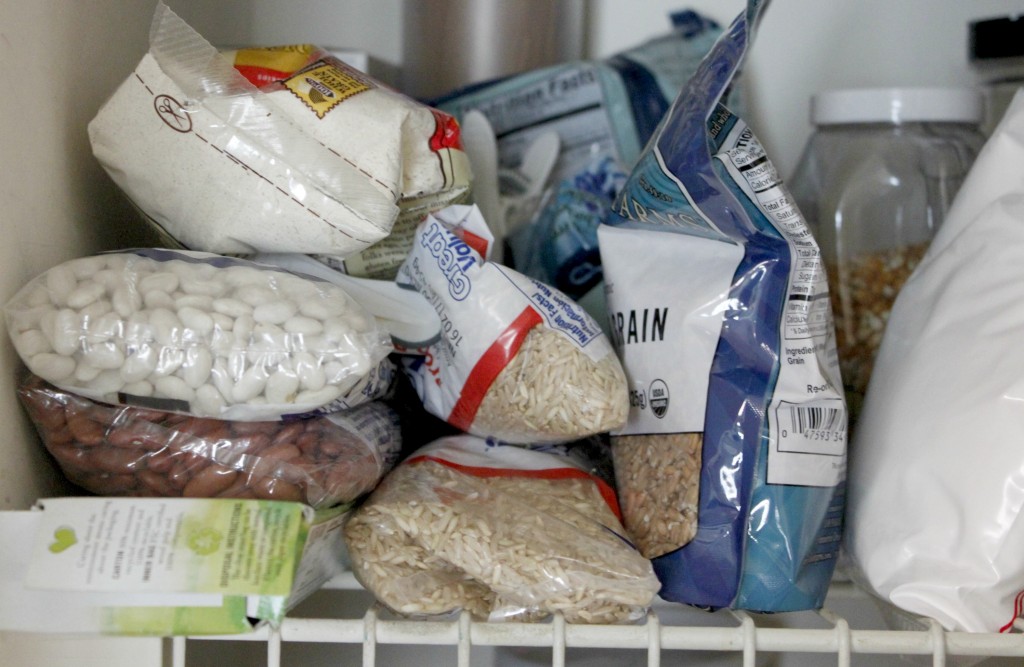
The pantry also rapidly becomes an unmanageable mess because of the packaging our food comes in, which is usually a temporary plastic or cardboard container. By “temporary”, I mean it was never intended to last beyond the life of the food it contains, and is therefore easily destructible. What’s worse is that all those temporary packages come in ALL different shapes and sizes. I suppose it would be boring if all the manufacturers decided to standardize their packaging just so we could all have neat cupboards… but it would also be awfully nice!

Of course, you could remedy this little problem by investing in a set of matching and stacking containers that fit neatly on your pantry shelves, like the Tupperware Modular Mates set or Anchor Hockings Square Glass version. The problem is, either one of those will set you back by quite a bit; and if you don’t have room in the budget for an *organizational products* line item, you will likely want to research cheaper options.

Well, guess what? I have a cheap option for you. How about FREE? Doesn’t that sound nice?

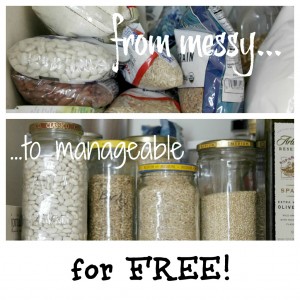
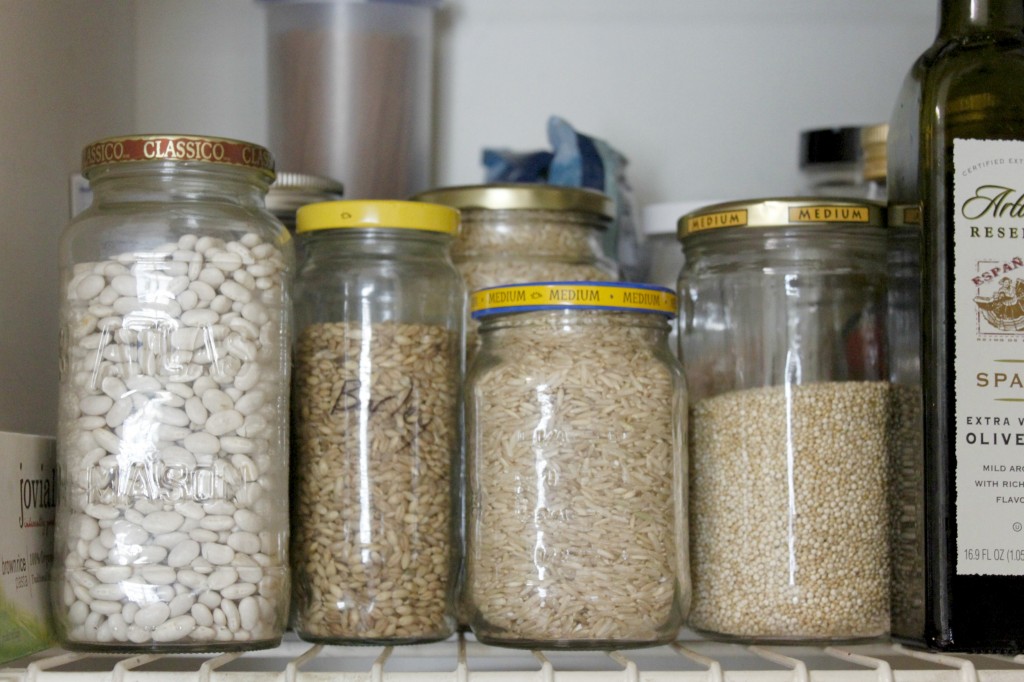
Make your very own customizable set of glass dry food storage containers simply by recycling the glass bottles and jars yourself instead of throwing them in the recycling bin.

The Benefits of Re-Using Empty Jars

  1. You save them from the landfill, or from going through the recycling process.
  2. You save money by not purchasing empty containers simply for the purpose of filling them.
  3. Plastic storage containers can leak chemicals into the food; glass is a safer option.
  4. Glass can go from freezer to fridge to pantry with ease, whereas plastic is a little less stable.
  5. Glass is clear, so you can see at a glance what each jar contains; you can also see at a glance what is in your pantry without having to shift piles of bags around.
  6. The glass jars, while of different sizes, are generally all round and therefore line up nicely in rows so that your pantry looks much neater and better organized.
  7. The glass jars are re-usable over and over and over again, and last MUCH longer than plastic.
  8. Glass is dishwasher-safe.

How to Organize Your Pantry with Empty Jars & Other Containers

  • Start out by saving every single glass jar that would otherwise end up in the recycling bin or trash can. Over time, as you develop your own personal system, you’ll learn which jars work really well and which ones you don’t really want to keep. You’ll get a feel for the sizes you use most often and the shapes that work best for you.
  • Wash them thoroughly and remove the labels by soaking them in warm water. If the label is really stubborn, you can usually remove it by applying a paste made of equal parts baking soda and coconut oil.
  • Store the empty jars in a handy location where they are easy to access when you need to fill them.
  • Whenever you buy bagged food from the store, pour it into one of your jars as soon as you come home.
  • If the food item is not readily identifiable (some grains, like barley, oats, wheat, and the like, can be difficult to differentiate), label the jar. (You can get as fancy as you want with this. I just use a Sharpie because it’s simple. And I like simple.)
  • You can “assign” specific jars to specific foods if you want; for example, if you come across a really large jar that’s perfect for your copious amounts of rice/oatmeal/wheat flour/etc. Or, when a jar empties, you can just wash it and return it to your stash of empty jars, ready for whatever food comes down the pike next.

What Jars Should You Save?

Unless you make ALL of your food completely from scratch, by which I mean you make your own coconut oil from coconuts (good for you!), then you likely already have a good number of jars in your pantry just waiting to be emptied and refilled. Speaking of coconut oil, oddly enough, Tropical Traditions is my favorite source for good quality glass storage jars. Not only do I love their raw honey, I love the perfect size of the raw honey jar! It’s great for making sour cream, or for storing a fresh batch of sunflower seed butter. And their quart jars of coconut oil are wonderful for storing different kinds of grains, or nuts, or flours, or seeds, or… just about anything! I think what I love most about their jars is that they are straight-sided and made of a very clear glass, which makes them perfect for storage purposes.

Other jars that you can use for pantry storage:

  • spaghetti sauce
  • jam
  • peanut butter
  • pickles (Leave them open in the sun for a day or so to get rid of the pickle smell. I have one de-pickling on my balcony as we speak!)
  • salsa
  • molasses

The sky’s the limit, really. If it comes in a jar, it’s fair game!

What to Store in Your Jars

The wonderful thing is that these jars can be used for liquid and dry goods, and in the refrigerator, freezer or pantry. So once again, the sky’s the limit! Whatever needs to be stored, chances are, a jar will fit your purposes. Pretty much any food that comes from the store in a plastic bag (or from a bulk bin) gets relocated to one of my empty jars, as does food I make from scratch at home (sour cream, yogurt, freshly ground flours, etc.). For example:

  • Grains (brown rice, wheat berries, barley, spelt, oat groats or steel cut oats, quinoa, etc.)
  • Beans
  • Flours (small jars are especially great for leftover bits of freshly ground flour that you don’t need in your recipe)
  • Nuts
  • Seeds
  • Dried fruits and vegetables
  • Chocolate Chips (ahem. very important.)
  • Whey
  • Yogurt
  • Sour Cream
  • Bacon Grease
  • Agar Flakes
  • Baking Powder
  • Baking Soda
  • Granola
  • Broth
  • Yeast
  • Flaxseed
  • etc. etc. etc.

Of course, these jars aren’t limited to the kitchen! They can find countless useful organization purposes all around the house, so there’s never really a good reason to throw one away.

Do you keep your empty jars? What is your favorite use for them?

Click on the box below to find all the great blogs and topics to help you get cleaned up and organized! I’m especially loving all the ones that focus on natural and healthy ways to keep you organized, as well as the budgeting and simplifying themes. Also, you can have a chance to enter multiple different giveaways, including a free copy of my own eBook, Your Grocery Budget Toolbox!

a Rafflecopter giveaway

Sharing at Teach Me Tuesday, Titus 2sday, Domestically Divine Tuesday, Women Living Well Wednesday, Works for Me Wednesday, Frugal Days Sustainable Ways, Raising Homemakers, Simple Lives Thursday, The Mommy Club, Your Green Resource

How I Organized My Spices With Yard Sale Finds {Organizing on the Cheap}

I’m so happy you are here with us this week for 5 Days of Organizing - more than 20 bloggers will be bringing you daily inspiration for organizing every aspect of your life. And with back-to-school days breathing down our necks, we all need it!

Have you ever been frustrated by all the creative organization ideas you see in magazines and on blogs, only to realize that you simply can’t afford (or don’t want to spend the money) all those gorgeous bins, boxes, baskets and other containers? Me, too! I’ve learned to organize my home (uh, to a certain extent) without spending an arm and a leg, and I’ll be sharing my tricks with you all week long. Stick with me for great cheap organizing ideas!


AND>>>>>> Scroll down to the bottom of the post for a cash giveaway!! You might win a little cash to do some organizing yourself!
I’m so glad I finally get the chance to share with you how I organized my spice cupboard. An embarrassingly long time ago, I invited you to help me figure out a cost-effective way to organize my spices, and you all certainly delivered! I got lots of great suggestions:

  • The spice rack (more of a small set of drawers) I was eyeing at a more expensive online store is available at Amazon for only $35, which was significantly cheaper than the one I had seen. I figured I could save up my Swagbucks Amazon gift cards to buy it, but unfortunately, I keep finding far more interesting things to spend my free money on!
  • Others suggested cheaper spice rack alternatives, like this SpiceStor Organizer Rack 20 Cabinet Door Spice Clips
    or Spectrum 43778 Scroll Wall Mount Spice Rack Boxed, or Swivel Store Organizer Storage System, all of which seemed like they would do the trick nicely.
  • Ami suggested I organize them in baby food jars in a drawer a la this example she found on Pinterest. Unfortunately, I have no spare drawer to use for spices, although I did spend a considerable amount of time trying to figure out how I could rearrange my drawers and cabinets to accommodate the concept. Alas, it was a no-go.
  • Rita and Kristine were the ones who really helped me out! Kristine had seen an idea on America’s Test Kitchen to organize all your spices in zippered plastic storage bags like these, then label them, and store them upright, organized alphabetically, in a container of some kind (like a basket or box). Rita had a similar thought, but recommended using small glass jars (like baby food jars, or 1/2-pint canning jars).

First, I tried Kristine’s idea, but I ended up ordering the wrong size of bags (they were way too small!) from Amazon, which set me back on my little project. I was all set to order a larger size, but then I started to get concerned about the effects of storing food long-term in plastic. The danger is probably minimal, but it was enough to worry me that I started leaning towards Rita’s idea of using jars.

So between the two of them, I came up with the idea to store spice bottles like these in some containers I had lying around the house. That way, all my spices would be contained in jars of the same size,which I could easily label myself, and those jars could then be contained in small boxes that I could easily pull in and out of the cupboard as I needed them. I hadn’t quite gotten around to ordering those spice bottles from Amazon, though, when I went yard saling one day and found this:

BINGO! Now, I wasn’t all that excited about the spice rack itself - I have hardly any wall space in my kitchen for one thing, and for another I kind of thought it was dog ugly. It is now awaiting a chance to be spray-painted and repurposed as a rack for my nail polish bottles and other manicuring supplies (that as a busy mommy and blogger, I almost never use by the way). But the bottles were exactly what I wanted, and for a fraction of the price! A set of the 6 spice bottles on Amazon would be $6, which is not a bad price at all, but twice the number of bottles, and for only $2?! And new!… or at least still in the packaging! You bet I snatched those babies up.

I took them home, ran them through a cycle in the dishwasher, dried them thoroughly, and poured my spices into them. I didn’t have the time then (and haven’t taken the time since) to beautify them with pretty labels, but one day I will get around to that. For the moment, though, I’ve just written the name of the spice on the neck of the bottle with a Sharpie. Works for me!

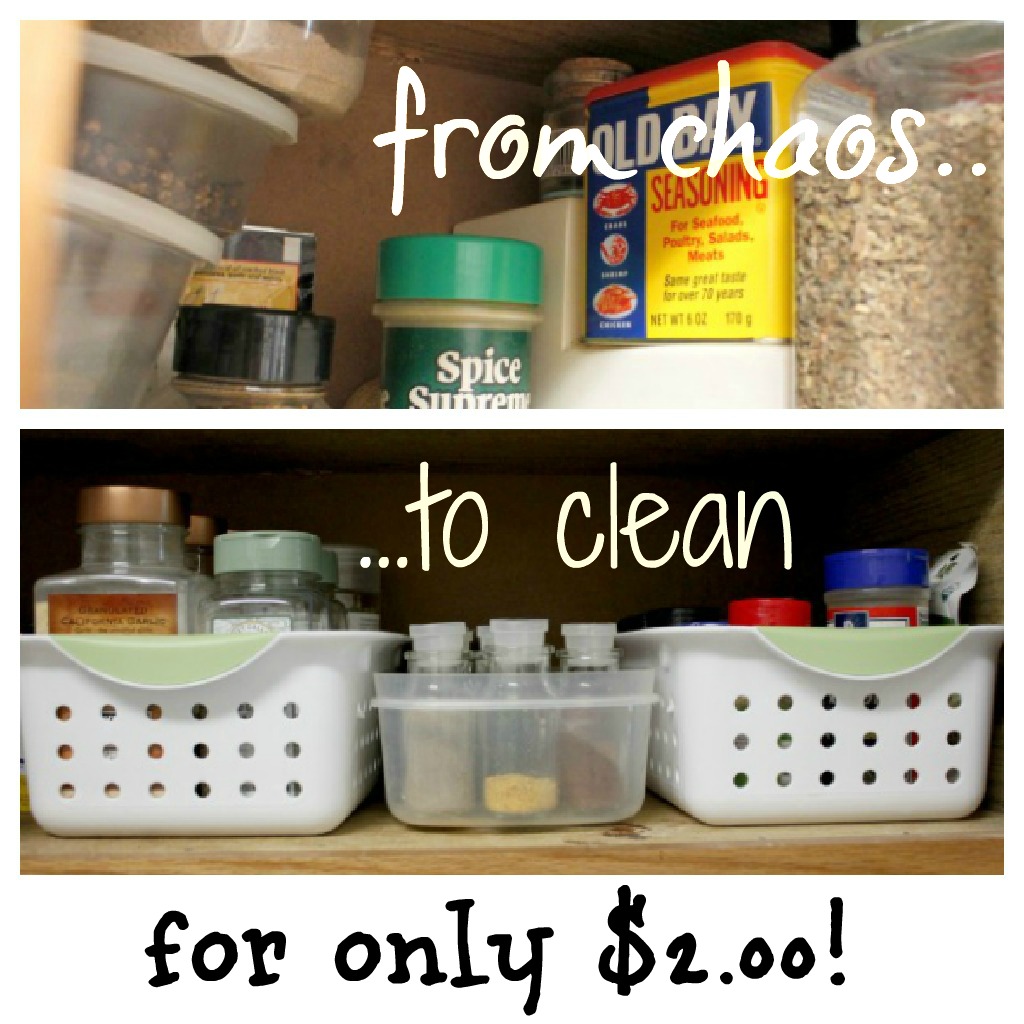
So here you see the finished product, my cheaply organized spices, thanks to a yard sale find:

On the left, you see a basket containing my large jars of bulk spices, the ones I use most often: granulated garlic, cinnamon, oregano, etc. I opted to keep them in their original containers, because pouring them into smaller jars would just be too time-consuming, and I would have to do it far too often for it to be an ideal situation for me.

On the right, you see more spices that I kept in their original containers. Eventually, I will get another set of spice bottles and finish the transfer, but for now, I left these spices in their original plastic bottles. Most of them are spice blends (like lemon pepper) that I don’t use too often, and most of them are a relatively uniform size that fits nicely into the container.

In the middle is the box where I put the spice bottles. These spices mostly came from plastic bulk containers or even bags. These are the ones that I typically buy “loose” so I need a neat and organized place to put them. The glass jars fit the bill perfectly!

As for the boxes that I used to hold all the bottles, I originally had bought them at the Dollar Tree, I believe (more on that later this week!), for another purpose. Having served their original purpose, they needed a new home, and found a perfect fit in my spice cupboard! The box in the middle is a Rubbermaid container that used to contain brown sugar. I don’t buy brown sugar anymore, so the little plastic box needed a new job. Now it holds spices, which is a much more worthy endeavor.

How to find cheap organizing ideas at yard sales:

  • Have a list, at the very least a mental one. Know what you need and what you’re looking for. Are you trying to organize your bathroom cupboards? Or your linen closet? Do you need boxes? If so, what size? Or would bottles fit the bill better? Maybe even bowls? Is the storage going to be visible? Then you will want it to be pretty. Is it going to be in the closet? Then, pretty is not quite as important.
  • But don’t get stuck in a box. Literally. Although I had mentally settled on the idea of using spice bottles, I was willing to consider any other workable option. As I was yard-saling, I kept my eyes peeled for ANYthing that might potentially work in a spice cupboard. I was beyond thrilled when I actually found the exact thing I was looking for… but that doesn’t always happen! Sometimes I end up finding something better, just by being a little more creative and open.
  • Know your price point. I knew that the glass bottles on Amazon were $1 apiece, so there was no way I would pay more than that at a yard sale, especially if it were used.
  • Don’t be afraid to haggle. My personal rule of thumb: if I don’t like the price, I offer half what they are asking, but I’m willing to pay 75% because typically, that’s what their rebound offer will be (although, usually, they just take whatever I offer). In the case of my spice bottles, I took the $2 and ran! No need to haggle with that one!
  • Be prepared to wait, or have a plan B. Some things I will just keep looking for at thrift stores and yard sales until I find something that will work. Other times, my need is more immediate, so if I don’t find what I need right away, I’ll go to my plan B. I was not in a huge hurry (obviously) to finish organizing my spice cupboard, but I also knew in the back of my mind that if I ever got completely fed up with it, I just needed to place an order on Amazon and be done with it.
  • Clean the items thoroughly. Depending on what it is, run it through the dishwasher or washing machine, or just give it a good scrub. No need to obsess about it, but it is a good idea to wash away whatever it might have collected at its previous home.

Other cheap organizing ideas with yard sale finds:

  • I found a big pourable Tupperware container for a couple bucks that I use to store the oatmeal that I buy in bulk.
  • I keep books that we don’t use very often (and don’t fit on my bookshelves) in 2 large trunks that I bought at yard sales for less than $10 each. Those trunks also double as a side table in our living room! I’ve used the trunks previously to store extra linens as well.
  • I’ve found those hanging canvas shelves (the kind you use for shoes and sweaters) at thrift stores and yard sales, and I have several of them in different closets throughout the house.
  • I’ve also bought several under-the-bed storage boxes at yard sales for one or two dollars each. I’ve seen plenty of other sizes of plastic storage boxes like those at yard sales, too, although those sizes don’t usually work well for me.

What yard sale treasures have you found that have helped you organize your home or life?

Visit these blogs for lots more ideas on organizing your kitchen, your office, or your homeschool room! Just click on the image below (And by clicking below, you can access even more great giveaways!).

a Rafflecopter giveaway

Sharing at Better Mom Mondays, Homestead Barn Hop, Teach Me Tuesday, Titus 2sday, Domestically Divine Tuesday, Women Living Well Wednesday, Works for Me Wednesday, Frugal Days Sustainable Ways, Raising Homemakers, Simple Lives Thursday, The Mommy Club, Your Green Resource

Ideas to Reduce Food Waste

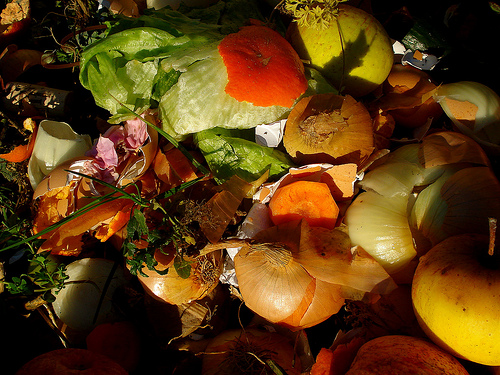
Still life on composter
Typically, as an accompaniment to Food Waste Friday, I like to share with you a frugal idea for your kitchen that helps you save money and reduce waste. And today, I actually had a great post planned with one of my most favorite frugal waste-reducing ideas… but then I got busy blog surfing and found sooo many more cool ideas! So I switched gears and decided to share those cool ideas with you. My own cool idea can wait until next week.

So here you have it… some great ideas for reducing food waste in your kitchen!

Celery Leaf Pesto - Usually, I dump my celery leaf into my stock pot, but I haven’t been making much stock this summer. I’ve also wanted to try my hand at dehydrating it, but haven’t gotten around to it. This recipe sounds delicious and super frugal - my kinda recipe!

Regrow a Pineapple - I’ve heard of regrowing celery and romaine lettuce, but pineapple? Apparently, it’s possible! It does take a couple years for fruit to grow, and will likely bear only one pineapple, but hey! Plant enough of them, and you’ll have your own tropical oasis.

Preserve Kale in the Freezer - I’ve dehydrated kale before to preserve it, but I am thinking this pureed ice cube method will be more appropriate for my purposes. Mostly, I prefer to hide kale in other things because none of us are super fond of it.

Red Wine Vinegar - I wish I drank wine, so I could make use of this tip! For some reason, I just think it’s the coolest thing ever. Save up your bits of leftover wine to make your very own custom red wine vinegar.

Use the Entire Ear of Corn - Not just the kernels, but the cob, the silk, and the husks, too!

Vegetable Powder - Made from dehydrated veggies, this powder can be used to flavor all kinds of dishes. Buy extras or seconds of produce at the farmers’ market, and turn it into this cheap and healthy “spice mix”!

Frozen Wine - Yet another leftover wine idea.

Save Seeds for your Garden - Save the seeds from this year’s harvest to start your garden next year!

Leftover Cure - Save all those last little bits of leftovers in a container reserved for just that purpose. Simple idea, but brilliant!

Sharing at Friday Favorites, Freaky Friday,Fight Back Friday, Frugal Friday, The Better Mom Mondays, Homestead Barn Hop

The Best Short-Term AND Long-Term Storage for Fresh Herbs

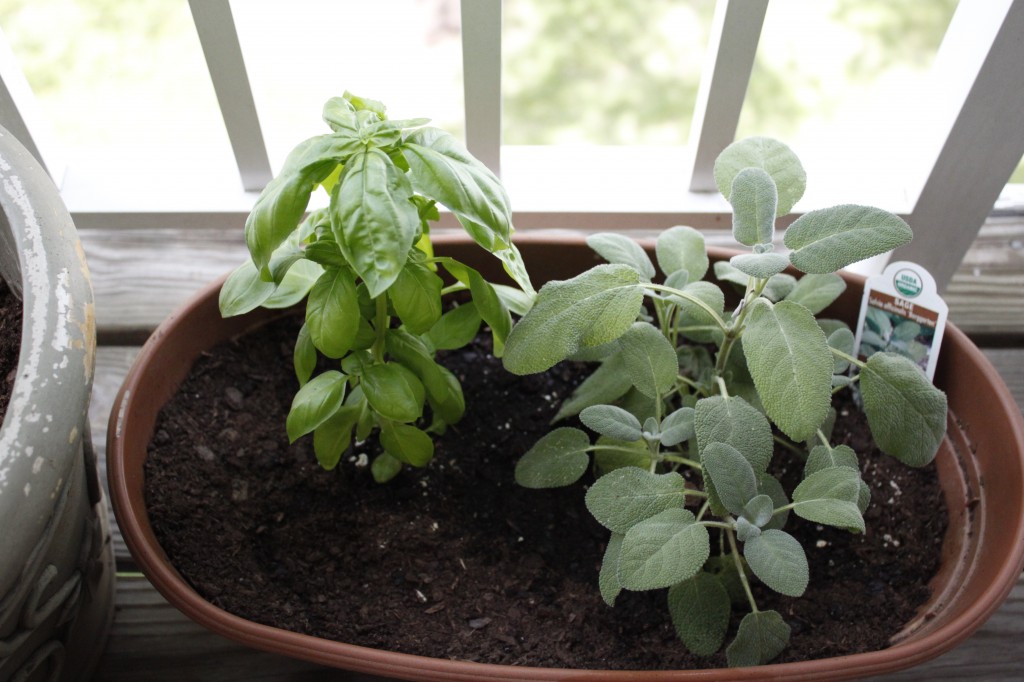
Honestly, the best way to keep herbs fresh for the longest period of time is to keep their roots firmly planted in the soil, where they will be nourished and happy for several months at least.

But if you, like me, cannot keep a dill plant alive to save your life, then you might benefit from these tips. (Oh, don’t worry; I will persevere in my yearly attempt to kill grow dill, but so far, I haven’t managed to keep it growing for longer than a couple weeks. Yeah, that was probably the record.) And, thankfully, these tips will also apply to a large number of other herbs, if you are also very good at killing those (Or if you just don’t have room for potted herbs. Or if it’s the winter and herbs would die anyway.)

I offer you my two favorite solutions for fresh herb storage (aside from the so-fresh-its-still-alive variety) that I have just hit upon this summer (all hail the mighty Pinterest!).

Short-Term Refrigerator Storage

OK, so this tip has been around a while, and I may have even tried it once or twice back in the day, but then I guess I forgot about it. The past few times I have purchased a bunch of fresh herbs, I tried the method where you stick it in a jar of water and either leave it on the counter at room temperature or put it in the fridge.

Maybe I did something wrong, but that didn’t work for me. Leaving it on the counter was a total disaster: the bunch of cilantro I was trying to keep fresh wilted the first day, and completely withered away the second day. Sadness. Good thing I only wasted $0.69!

I’ve tried the half-full glass of water in the fridge on multiple occasions, but you know what always happens? I bet you do know, because I bet the same thing happens to you (especially if you have those wired shelves, like me, instead of flat plastic or glass shelving) - inevitably, the glass tips over and spills the water everywhere. Annoying.

Plus, I find that even if I do manage to keep the jar or glass upright, the herbs don’t stay fresh for much longer than a few days. How am I supposed to use up a huge bunch of cilantro in that amount of time? Well, I guess I probably could if I put my mind to it. But I usually don’t.

Enter my now-favorite tip that I have (re)discovered:

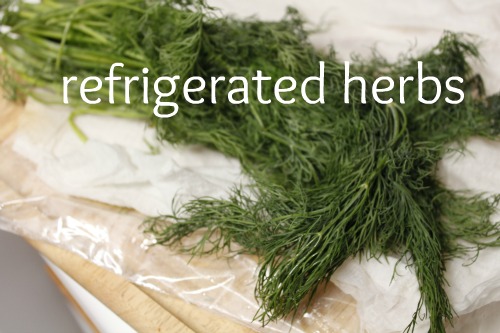
Wrap a damp paper towel around the fresh herbs and place in a zippered plastic bag.

Press out all the air and seal it shut. Refrigerate.

It’s like magic! The dill in that picture is a week old and is still fresh and yummy. I used some for dinner tonight, and have enough for a few more dinners. A couple of the fronds at the end froze just a bit in the fridge, but for the most part, it’s still in fabulous condition. I am now going to store all my fresh herbs in this manner! From hereon and henceforth.

But… I probably won’t actually get around to using all that dill in the next week. So, I need a long-term storage solution.

Long-Term Freezer Storage

I’m no stranger to freezing herbs; I have done it on many occasion. I’ve tried just sticking the herbs straight up into little freezer baggies. I’ve tried freezing them in a little water in ice cube trays. I’ve tried pureeing them and freezing them in ice cube trays. All of those methods will work to one extent or another.

But now… I’ve taken the ice cube tray to a whole new level and added oil! Many thanks to The Gardener’s Eden for this fabulous idea! So far, this is my very favorite way to freeze herbs for later use. It won’t work for every use, but you can try freezing them in water or broth instead if you prefer. In any case, this is a delicious and super simple way to freeze herbs.

How do you store your fresh herbs?

Sharing at Freaky Friday, Fight Back Friday, Homestead Barn Hop, Titus 2sday, Traditional Tuesday, Healthy 2Day Wednesday, Works for Me Wednesday, Allergy-Free Wednesday, Women Living Well Wednesday, Frugal Days Sustainable Ways, Real Food Wednesday, Whole Foods Wednesday, Simple Lives Thursday, Your Green Resource

It’s Peach Season! {Food Waste Friday}

FoodWasteFriday
One of my biggest pet peeves is throwing away food. I could kick myself every time I dump food down the drain or in the trash: it’s just a complete and total waste! And I hate waste. Which is why I am so thrilled to link up to The Frugal Girl on her weekly feature where she posts a picture of all the food she had to throw away for the week, and invites other bloggers to do the same. The idea is to feel some accountability - who wants to admit they threw away all that money to the whole world? - to help you avoid throwing away food in the future.

So in the picture above, you see what I threw away this week:

  1. about half a cup of homemade rice milk
  2. about 1/4 cup of rice
  3. 1 piece of fish

I learned something this week: I need to make 2 cups of rice milk at a time instead of 4 cups. Four cups generally go bad before I get around to using them, but I’d definitely use up 2 cups within a few days. I use rice milk in all cooking and baking for My Certain Little Someone.

I am not exactly sure why I had only 1/4 cup of cooked rice left over… it came from a container of rice that had actually been frozen, being extras cooked on purpose for that very reason. I should have just thrown that last 1/4 cup into the blender when I made the rice milk. But then again, it would have been wasted anyway, so whatever. Odds and ends are the hardest to use up!

And then there was that lonely piece of fish that nobody wanted to eat 3 days after the fact. Once again, this fishy little food remnant came from a container of leftovers that had intentionally been frozen. We ate up his companions, but alas. One little fishy still remained.

What this picture does not show is the carnage left over from my rampage through the snack cupboard. I am slowly organizing all my kitchen cabinets as I have some spare time (ha!), and this week, I hit on the snack cupboard. Goodness gracious, there were some ancient snacks in there, like half-licked lollipops and such. I tossed them all! But it was all junk to begin with, so I don’t really regret the loss. Too much.

But on a happier note… it’s peach season! I loooovvveee peach season. I look forward to it almost as much as strawberry season. Last week at the farmers’ market, I was able to pick up a peck of seconds peaches for $3.50! Woot! And then this week, they had baskets of “small” peaches for $3 less than the regular price, making them only $5. Sheesh, I don’t care how small my peaches are! Especially if they cost less!

So we are eating a lot of peaches around here. (Not that we mind.) If you find yourself with an overabundance of peaches (and I hope you do!), here are some suggestions for enjoying them:

  • Can them. Canning is absolutely my favorite way to preserve peaches because it keeps their color and texture (mostly) intact. That’s kinda hard to do. Dehydrating and freezing peaches can really turn them brownish blackish, which is just not pretty. And thankfully, canning peaches is super easy, as I explain in my eBook, Your Grocery Budget Toolbox. One of the easiest things to can, in fact! I’ve already canned one quart jar this year, and I hope to can quite a few more.
  • I have frozen peaches before. And they look fine… until you thaw them. Then they turn into a pile of brownish blackish mush. Ick. Apparently a little splash of lemon juice before freezing can help with that, but I haven’t tried it.
  • Ginger Peach Shortcakes are an excellent use for peaches. Even better than strawberry shortcake (and I can’t believe I’m saying that!).
  • Peach Sorbet is the bomb. Nothing beats the smooth and creamy texture. And the flavor. I am trying to figure out how I can squeeze my ice cream maker into the freezer because I seriously want to make this ice cream tomorrow!
  • I always make a couple batches of peach jam during peach season. It’s very much like strawberry jam in the method, although the ingredient amounts might vary slightly.
  • There’s apple crisp, there’s strawberry crisp, and then there’s peach crisp. In a league of its own. Follow this method - 1-2-3- Fruit Crisp! - for any fruit you have on hand.
  • Peach fruit leather is also quite delicious, one of my favorite flavors of fruit leather, in fact. There are lots of tutorials on the web, you can try this one: Weelicious Peach Fruit Leather.

Or, of course, you can just eat each peach one by one, bite by delicious bite. The taste of summer!

How do you like to eat your peaches?


Beans, Bananas, and Food Waste {7 Days, 7 Tools: Build a Better Grocery Budget}


In 3 days, my new eBook, Your Grocery Budget Toolbox, is scheduled to be released! All this week, I will be giving you sneak peeks of what you will find in the book, and whet your appetite for more. Because trust me, there’s a lot more. Your Grocery Budget Toolbox is over 150 pages long, each page loaded with all the tools you need to build a better grocery budget. Join with me this week (subscribe so you don’t miss a single post), and share with your friends (use the buttons to the left)… I have a feeling they’d appreciate a little grocery budget makeover, too.

Today is Friday (did you know that?) and on Friday, of course, we have “Food Waste Friday”. Which fits in perfectly with our week-long series about Your Grocery Budget Toolbox, because food waste is a huge money drain! Waste not… want not! So in the spirit of Chapter 8: Taking it to the Next Level, let’s carry on with Food Waste Friday!

FoodWasteFriday
I have no food waste picture to share with you today. But that does not mean I had no food waste. On the contrary, unfortunately. Remember this Black Bean Chili with Avocado Mousse?

Quick and Easy Cheap and Healthy: Black Bean Chili with Avocado Mousse

Lovely, isn’t it? Yes, well, I made an entire crock-pot-ful of black bean chili, scooped out an extra-large portion to take this lovely picture, and left the rest in the crock pot. All. Night. Long.

Three days later, I am still kicking myself. I think my shins are permanently black and blue. And I could not bear to take a picture of such a travesty, so you will just have to imagine those poor little black beans all forlornly cast into the trash can so as not to clog up the garbage disposal.

Thankfully, I managed to remember to put the photographed portion in the fridge - how smart of me, she snorts ironically - and was able to feed myself and my starving children lunch the next day. We all enjoyed it. But we couldn’t have seconds.

But… I have good news to report! Last weekend, I bought a half-peck of over-ripe bananas for just $1.50, on top of the several pounds of perfectly ripe bananas I had bought at Trader Joe’s. Bananas, my friend, are easily preserved, so believe-you-me I do not ever pass them up when they are marked down. Never. It’s kind of a rule of mine.

frozen banana cubes

frozen banana cubes

Normally, we manage to eat them up before they even begin to turn brown, because we are banana fiends like that. But this time, I had to get creative, because there was no way we were going to eat all those bananas before they turned to complete and total mush. Here’s what I did (and it did not involve banana bread!):

  • Sliced some of them into 1/2″ thick rounds and flash-froze them.
  • Made a smoothie or two.
  • Turned some of those frozen bananas into Banana Ice Cream. Wow, that was really good, and totally hit the spot! Me and The Boys enjoyed it immensely.
  • Whipped up a batch of Allergen-Free Banana Brownies (by the way, this was the easiest recipe I found online for banana brownies without wheat, egg or dairy, just in case you’re looking for one.), which The Boys have been gobbling up like there’s no tomorrow. (It’s nice to have such friendly little fellow chocoholics around!)
  • I also whipped up a batch of these Banana Blondies (minus the walnuts), and have been gobbling them up like there’s no tomorrow. Well, there won’t be any blondies tomorrow, that’s for sure. Not at the rate I’m going!
  • I couldn’t let some overripe bananas pass me by without making a batch of these Wholesome Banana Donuts. Usually, one thinks of donuts as crappy junk food, but not these! They’re full of wholesome ingredients, so I don’t feel the least guilty eating them for breakfast. Between the four of us, we polish off the entire batch in about two minutes.
  • Made a batch of Oat Muffins, replacing the egg with one mashed banana. (Bananas make a great egg replacer in quick bread recipes!)
  • After all that, I still had bananas left, if you can believe it! Those last couple bananas were really looking punicated, so I peeled them and whirred them in my Vitamix at about 7-9 on the variable dial until they were a smooth puree. Then I poured them into an ice cube tray and froze them. Now I have pureed banana that I can either throw as-is into a smoothie or thaw to use in a recipe.

If you’re looking for more banana inspiration, read 5 Things to Do with Nasty Bananas… If you Dare!

The moral of the story? Don’t pass by marked-down produce, whether it’s at the farmers’ market or the grocery store (my bananas happened to be at a local produce stand). Almost any kind of mildly damaged produce can be redeemed in one way or another. In fact, just today, I bought a half-peck of seconds peaches at the farmers’ market and am dreaming of all the wonderful things I will do with them. That will be another post for another day…

What is your favorite trick for using up over-ripe bananas?

Your Grocery Budget Toolbox

on Facebook

on Pinterest

This post contains affiliate links.

Sharing at Frugal Friday, and The Mommy Club

How Not to Waste Your Fresh Local Produce

FoodWasteFriday
One of my biggest pet peeves is throwing away food. I could kick myself every time I dump food down the drain or in the trash: it’s just a complete and total waste! And I hate waste. Which is why I am so thrilled to link up to The Frugal Girl on her weekly feature where she posts a picture of all the food she had to throw away for the week, and invites other bloggers to do the same. The idea is to feel some accountability - who wants to admit they threw away all that money to the whole world? - to help you avoid throwing away food in the future.

So in the picture above, you see what I threw away this week:

  1. pork bones and other remnants
  2. chicken broth
  3. summer squash

I should have put the pork bones in the freezer to save them until I had a chance to make broth, but no. I left them in the fridge like a dum-dum, and there they sat for 2 weeks or more, waiting in vain for me to broth-ify them. *sigh*

Then there was the broth (made with chicken bones that I did put in the freezer once upon a time) that got shoved to the back of the bottom shelf of the refrigerator, which spells certain death in the perishable food world. I have no idea how old it is, so I say better safe than sorry.

And finally, the saddest tale of all, the beautiful little summer squashes that I bought at the farmers market 2 weeks ago. I just forgot about them, can you believe it? By the time I realized they were too far gone, I couldn’t really face it, so I left them in the fridge a few more days. Ahem. So the next week, when I bought squash at the farmers’ market, I took it home and shredded it and put it in the freezer. No more rotting squash for me!

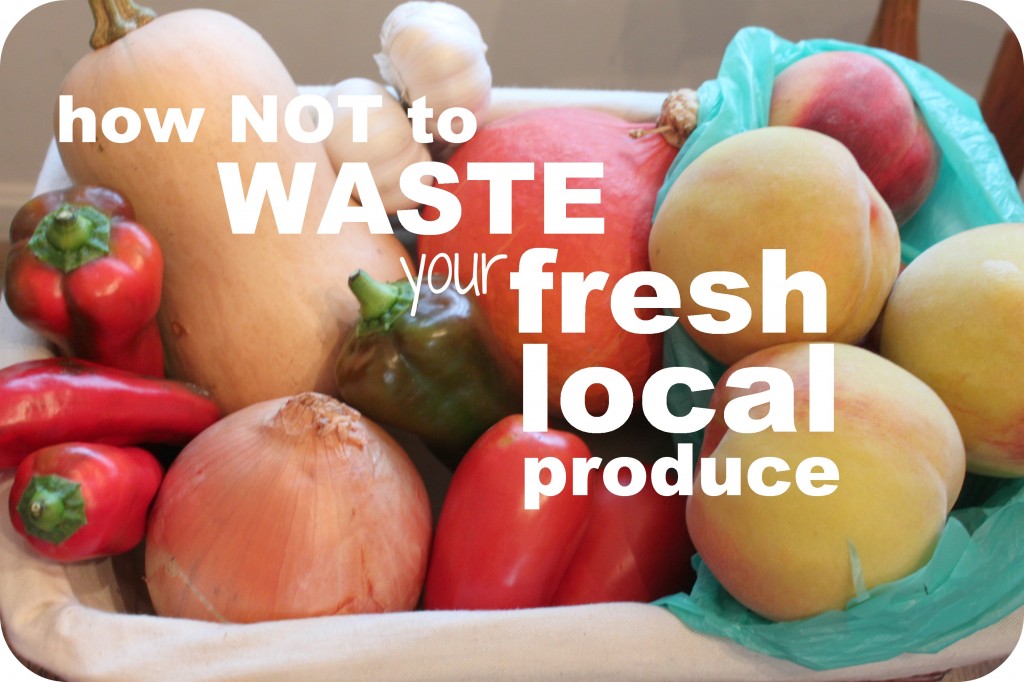
The good thing is that I am learning! Over the past month since the farmers’ market opened up, I’ve realized a few important habits I needed to develop in order to make the most of the fresh local produce I bring home every week.

Here’s what to do with the random fruits and veggies you pick up at the farmers’ market or in your CSA box before they end up in the compost pin or the trash disposal.

  • Make a plan. If you just wing it - which is what I like to do - it ain’t gonna happen. You’re going to end up with spoiled produce every time. Incorporate your fresh fruits and veggies into your menu plan instead of just assuming you will eat them at some point.
  • First eat the produce that deteriorates more quickly. Berries and green beans are right up there on this list! When you make your menu plan, incorporate these short-lived fruits and veggies into the earlier days so they at least have a fighting chance.
  • Freeze what you won’t eat before it goes bad. Almost any fruit or vegetable can be frozen, and it’s super easy, too. Most veggies benefit from some blanching or parboiling before freezing, but most fruits can be frozen as is.
  • Store the produce properly. When stored properly, many fruits and vegetables will last longer than you might think. I stumbled across a fabulous blog post that shows you how to store almost any kind of produce.
  • Invest in special produce storage containers. I really love the Tupperware Fridge Smart System, but others swear by the Debbie Meyer Green Bags. My Fridge Smart containers really do a fabulous job of extending the life of my produce.
How do you use up your fresh produce before it goes bad?

What to do With Wilting Greens

FoodWasteFriday
One of my biggest pet peeves is throwing away food. I could kick myself every time I dump food down the drain or in the trash: it’s just a complete and total waste! And I hate waste. Which is why I am so thrilled to link up to The Frugal Girl on her weekly feature where she posts a picture of all the food she had to throw away for the week, and invites other bloggers to do the same. The idea is to feel some accountability - who wants to admit they threw away all that money to the whole world? - to help you avoid throwing away food in the future.

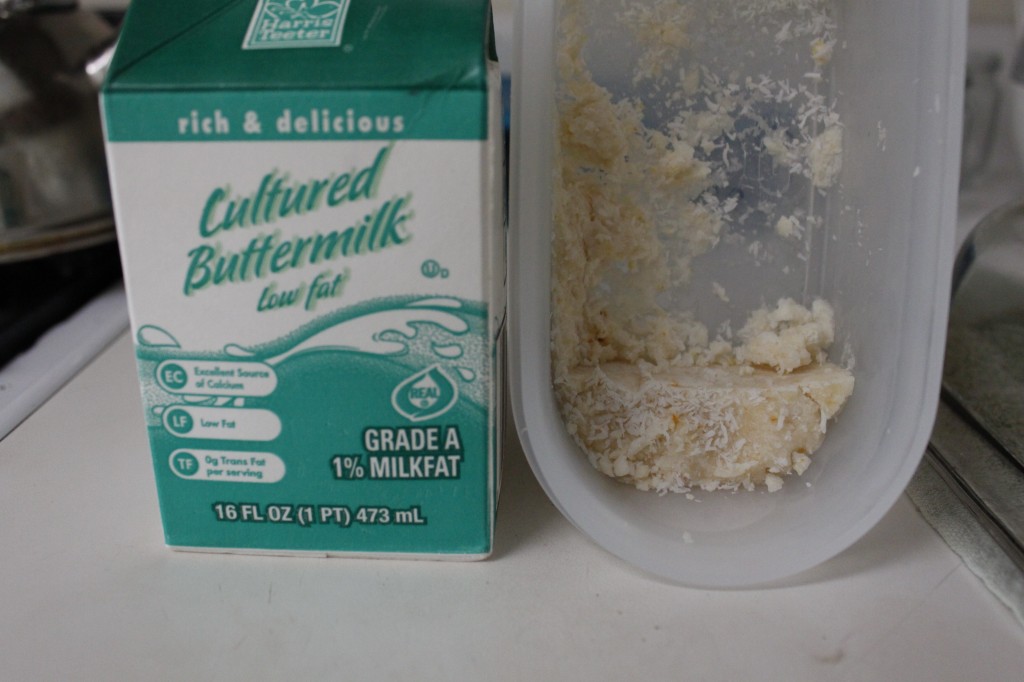
buttermilk and fudge
So in the picture above, you see what I threw away this week:

  1. half a carton of buttermilk (Expired May 2! Oops.)
  2. a few pieces of leftover coconut cream fudge that were, um, a couple weeks old (at least)

This is unfortunately only part of the story. I was gone all last week because my dad had open heart surgery (amazing how the body can heal from such a thing!) and the guys were left to fend for themselves. (Not entirely true: I made most of their food ahead of time, or otherwise planned easy-to-fix meals.) Since I am generally the one who manages the food inventory, nobody else paid attention to the various and sundry containers lying around the refrigerator. When I got home, I did have to throw away a few things that had escaped everyone else’s notice.

One thing I managed to salvage was the remainder of a bag of mixed greens I had bought at the farmers’ market a week before I left. The greens were just starting to wilt; they weren’t yellowing or getting slimy, so they were still in decent shape. I picked out enough of the best leaves to make myself a delicious salad for lunch, and I stuck the rest in the freezer to throw into a future pot of broth.

So if you find yourself with an excess of greens - any kind, from arugula to spinach! - don’t dump them down the garbage disposal. Instead, inspect them briefly, and if they are only wilted (no slime or browned leaves), consider using them in any of the following ways:

  • steamed or sauteed (If you like that sort of thing. Me? No, thank you!)
  • chopped up and added to scrambled eggs, omelets, or frittatas
  • as toppings on a pizza
  • added to soup
  • used in broth
  • dehydrated (it doesn’t take long in a dehydrator, a couple hours at most) and crumbled into soups like you would herbs
What is your favorite use for wilting greens?

Those who plan menus generally tend to waste less food. Not into menu planning? You might want to read Stephanie Langford’s eBook, “Plan It, Don’t Panic” for inspiration. Right now, it’s on sale 25% off with the code CHALLENGE25, making it only $3.74. Or you can just go for a bundle of all 3 of her books at 50% off (that’s only $19!) with the code BUNDLE50!

Sharing at Frugal Days, Sustainable Ways

Interesting reads