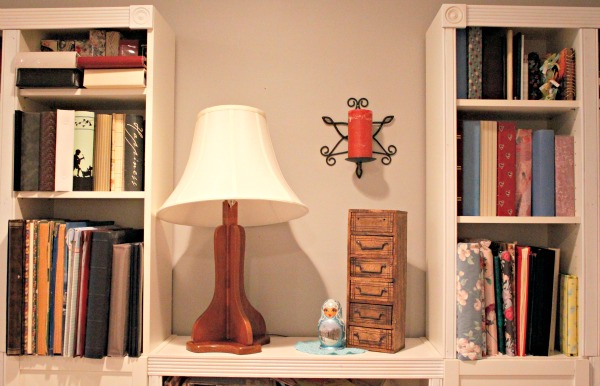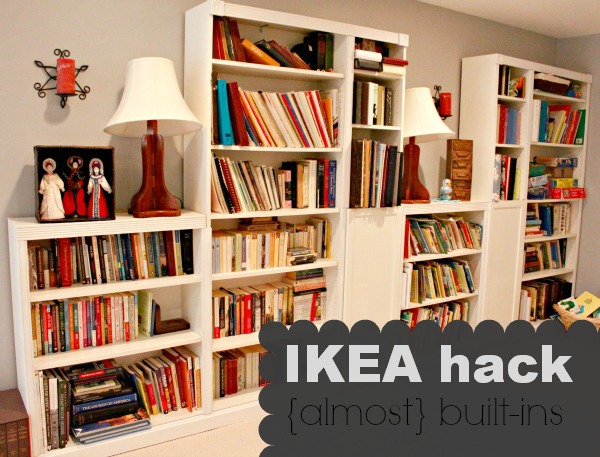
My IKEA Hack: {Almost} Built-Ins

Although we came by our current residence in a rather haphazard manner, we have enjoyed it tremendously. It’s so much bigger than our previous space, plus it has a HUGE back yard that The Boys love to play in. Besides which, it’s right off the main road, so the location is absolutely perfect.

However, it does have one drawback. (Can’t have everything, right?) Being a basement apartment, it is seriously lacking in storage space. Each bedroom has a closet, and there is a small storage unit under the stairs, but that’s about it. There’s no linen closet, no coat closet, and no laundry room (only a laundry closet) and I’m realizing that I relied heavily on those rooms for storing all sorts of things in our previous residence.
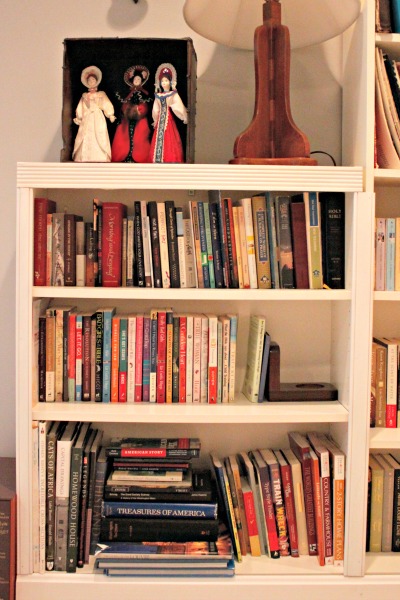
I’ve had to get seriously creative with storage here, and I’m going to show you some of the cheap ideas I’ve been able to employ. By far my favorite is this first one: our first-ever IKEA hack that was pretty darn successful if I do say so myself. We used IKEA’s line of “Billy” bookshelves and added some trim from Lowe’s to finish off the look. The result was a beautiful set of shelving that looks beautiful but cost much less than it would have elsewhere… plus it holds all our books! (I have no idea where we put all those things in our previous apartment, to be honest!)

Our IKEA Hack: Billy “Built-Ins”

We used the following Billy bookshelves:

As you can see, the shelves themselves cost around $350, considerably less than similar shelving found elsewhere. In addition to the shelving, the molding and trim (and the spray paint) cost another $60-75, bringing the total cost to a little over$400. Not bad, I think!

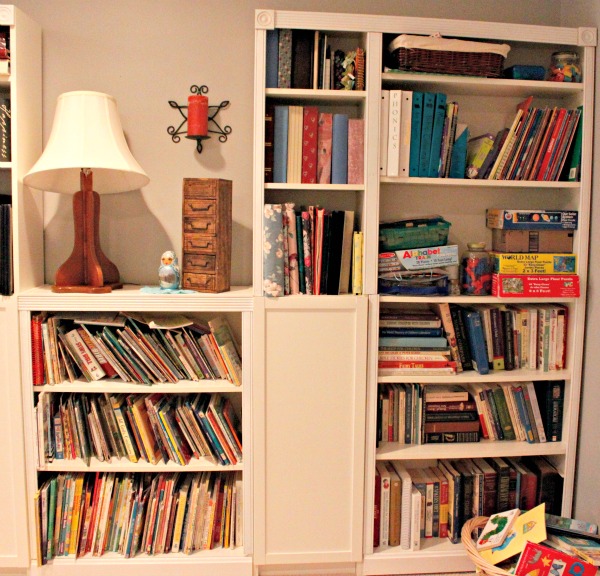
This is the first shelf in our set-up and contains our non-fiction collection.

We set them up in a sequence like this: short - tall - narrow, with the narrow shelves having doors on the bottom. (I love the doors because we can shove all the kids’ games in there and hide the mess!) We had wanted the shelves to extend all the way to the ceiling, and we thought we had measured enough space to include the shelf extenders. That would have added another $100 to the total cost, but as it turned out, for some reason the extenders were about an inch too short to fit. I’m sure we could have cut them to fit if we had wanted to bother (and they would really have looked like built-ins, then), but we didn’t. We just returned them and saved ourselves some moolah!

This tall shelf holds most of my sheet music and my fiction collection.

To finish off the look, we used the following pieces of molding and trim, cut, painted (with white spray paint), and attached by my DH himself:

  • 4 rosette medallions for the top corners
  • wide ribbed molding for the top shelves
  • 2.5″ wide molding, which we used wherever two shelves adjoined vertically (If it weren’t for the doors, we would have needed more of this.)
  • 1.5″ wide molding, which we placed along the vertical edges of all the shelves
  • baseboard along the bottom (except for where the doors are)

All our photo albums go in the top shelves of the narrow units.

I honestly can’t remember how many lengths of each type we bought from Lowe’s because it’s been a couple months. Besides which, it seems like we underestimated the amount we needed, and my DH ended up going back at least once to pick up more. (Moral of the story? Buy extra, and return what you don’t use!)

My DH worked really hard on this project in his spare time over the course of several evenings- maybe a week or two. Because he had to return to get more molding than he had initially purchased, it dragged on a little longer than it would have otherwise. And then it took me just about forever to sort and organize all our books, which had been packed in approximately a zillion different boxes!

The kids books are easily accessed by the little people, and the games are hidden behind the doors.

We are quite pleased with the finished product, and it’s definitely the focal point of the room where it sits, which we have dubbed “the library”. It’s really not a room, actually: it’s a super-wide hallway (read: rather nebulous waste of space that doesn’t immediately have an obvious purpose) that brings you from the living room into the master bedroom, and I can’t think of any better use for it than this (despite my DH’s campaigns for a ping-pong table!).
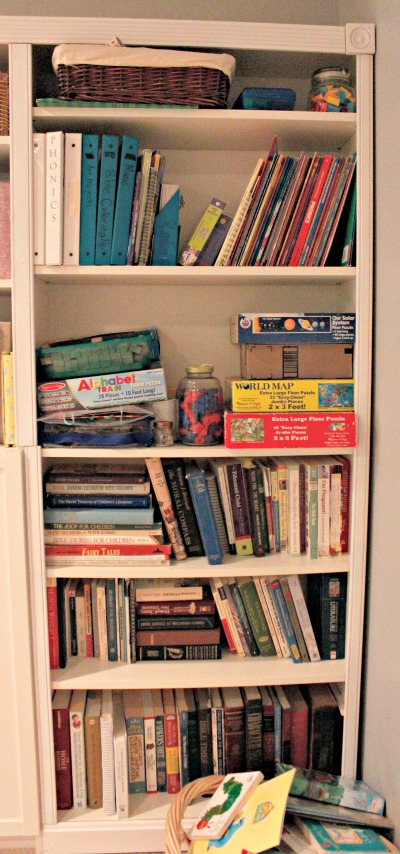
This tall shelf holds educational materials and reference books (dictionaries, medical books, college textbooks, etc.).
Frugal and Easy Essential Oil Storage {From an Upcycled Spice Rack}

Since joining Young Living Essential Oil’s distributor program in order to get a great discount on their oils, I have been slowly amassing my essential oil stockpile. It’s exciting, but it presented a new problem: where to put them.

Enter the spice rack I purchased at a yard sale a while back for the measly little price of $2.00! I’d been hanging on to it for a while, intending to freshen it up a bit for a new purpose (not being useful for containing spices, in my opinion), but hadn’t gotten around to that little task yet.

As soon as I started pondering how I should handle my essential oil storage situation, I immediately thought of that old spice rack! It was perfect for the task on multiple levels:

  • It was just the right size to hold the bottles.
  • The open shelves make accessing the bottles easy!
  • I had a spot on my bathroom wall where it would fit perfectly.

However, it was quite ugly. That dark brown stain is not exactly my thing.

So I set out to beautify it with an “almond” colored spray paint. Easy task, yes? Well, unfortunately, either me or my can of paint was struggling because the paint came out all drippy and splotchy instead of in a smooth, even coat. I followed the instructions on the can exactly so I would like to say it wasn’t me… but it had been a long while since I’d spray painted anything.

Whatever the case, my final coat of paint resulted in a strange crackled texture that I found to be appalling initially. But the longer I looked at it, the more I liked it! It kind of gave an antiqued textured look to the spice rack, which was rather serendipitous in my opinion. I had originally planned to apply some sort of filigreed rub-on transfer to the shelves as a decoration, but I think I actually like this sort of shabby chic look better.

I have no idea how you can replicate this look yourself (ha!), but at any rate, I do think a coat of spray paint in the color of your choice will dress up an old spice rack (you can find them at thrift stores and yard sales all the time) to store your own essential oils (or any other small bottle that needs storage, like nail polish… or spices).

Think essential oils are out of your price range? Think again! Read how I afford essential oils here.

How I Organized TWO Closets For $20!

The organizational bug hits me at random intervals throughout the year (much to my DH’s dismay), but it always arrives punctually between Christmas and New Year’s. Something about the influx of new stuff into the house fills me with an overpowering urge to purge out as much of the old stuff as possible.

This year was no different. The Boys’ closet had been bothering me for quite some time, because the little rolling closet organizer you see pictured above on the left had been serving us well for 4 years, and was ready to be retired. It started out as the receptacle for cloth diapers, baby toiletries, wash rags and the like, then slowly morphed into an organizer for little boys’ socks and shoes.

Um, yeah. That last part didn’t work out so well. As it turns out, little boys require sturdy sock-and-shoe organizers that can withstand a certain amount of rough handling. That little fabric organizer cart just did not cut it; the fabric shelves were slowly being ripped apart, and the socks and shoes got all mixed up with each other. Orphan boy socks were becoming something of an epidemic around our house, and I was determined to do something about the situation before I lost all my hair to frustration. (I would rather lose my hair for genetic reasons or something at least remotely romantic. Not to mere frustration.)

So I replaced that little Munchkin Baby Care Cart organizer thing-y with a set of sturdy plastic drawers: two small drawers for socks, two big drawers for shoes. Also, I found an unused lined basket from elsewhere in the house to contain their hats, gloves, and ties, which had previously been mixed in randomly with the socks and shoes. A big sigh of satisfaction and my hair was saved.

But I wasn’t done. Oh, no! My DH kindly asked if I wanted him to bring that old organizing cart down to the trash, but I said, “Give me a day. I bet I can figure out another use for it.” He looked at me skeptically (I don’t blame him!), but let me have my way.

Sure enough, the next day, I found a perfect use for that old cart! First, I fixed it up a little bit with some good old-fashioned needle and thread:

Almost as good as new!

Then I turned my attention to a sadly neglected corner of our walk-in closet (which, by the way, is very oddly shaped like a funky “L”) that I had hitherto been studiously avoiding. Another sigh, but this one was not of satisfaction! Piles and piles of pictures and photo albums were piled helter-skelter on the shelves, and boxes containing memories of all kinds were stacked on the floor. One shelf was dedicated to my DH’s sweaters and jeans because there was no more room in the dresser (Now, I wonder whose clothes were filling up all those drawers in the dresser?! Surely not mine!), but the poor guy just had them all piled up on top of each other in a big heap that was far from accessible. Grab one pair of jeans and the entire contents of the shelf came tumbling down.

I set out to rescue him from that dire fate, and neatly folded all the sweaters and jeans into compartments on the once-again stable little cart. I was also able to place his shorts and sports uniforms from another ill-used closet shelf into the cart, killing another bird with my little stone. And now that the shelf was empty, I was able to neatly organize all the photo albums and memory boxes that had previously littered the floor. Those big brown boxes on the right contain my wrapping and scrapbooking supplies (like stickers, tags, markers, ribbon, etc.) and had been on the floor in a different part of the closet, so moving them up onto a shelf freed up some room on the floor so I could organize my collection of boots more neatly.

Another sigh - this one of complete and total satisfaction! In one afternoon’s work, I:

  • organized The Boys’ closet
  • repaired the rolling cart
  • organized my DH’s clothing in the closet
  • organized my photo albums, memory boxes, and wrapping/scrapbooking supplies
  • organized my boots.

All for $20, which was the cost of the plastic drawers that replaced the rolling cart in The Boys’ closet. Not a bad day’s work, I say!

Do you have any organizing projects for the new year?

Interesting reads