Archives for March 2010

Something from Nothing, Or Vegetable Stock

There is nothing so frugal as taking something you would throw away, and instead turning it into something you can use. Like vegetable peelings, for example. Most people dump them in the trash or down the disposal, because, really, what else are you supposed to do with them? Or, for those green thumbs among us, they add them to the compost pile (which is an excellent option for anyone who can). However, there is another use for that miscellaneous collection of apple and carrot peelings that swirl down the drain to the hum of the disposal. I’m talking about stock.

No, not stock options; the kind of stock that is used to make broth or gravy or sauce. Normally, stock is made from the bones remaining after the rest of the meat has been cooked (a whole chicken, for example, or a bone-in roast). Some vegetables and seasonings are usually added to increase the flavor and nutritional content. Sometimes the word stock is used interchangeably with broth, but technically, stock is made from bones while broth is made from the actual meat. Most people purchase their broth in boxes, cans, or cubes at the grocery store and use it in any recipe that calls for stock or broth.

Purchasing broth, however, is neither healthy nor cheap. Most varieties of store-bought broth contain MSG, a major no-no for anyone interested in more healthful foods. In fact, most store-bought broths contain a lot of sodium, period, more than any person needs for good health. On top of that, I find store-bought broth to be rather expensive, especially considering I can make it for nothing at home.

Yes, you heard me. Nothing. Nothing comes from nothing, you say? I beg to differ! Remember those vegetable peels I was talking about? Instead of swirling them down the drain, put them to good use. If you have some left-over meat with bones, so much the better, but they’re not absolutely necessary.

I know, I know, it sounds disgusting. But it’s not, I promise. (Well, it is better if you leave out the potato/sweet potato peels because they add a really earthy kind of flavor that you may not like.) But we all know that the peel of vegetables and fruits usually contain high concentrations of nutrients, sometimes more than the fruit or vegetable itself. Unfortunately, they are often hard to chew, or don’t work well with the dish we are making: putting them in a broth solves that problem and makes good use of the hidden nutrients.

Making vegetable stock is more of a procedure than a recipe. It requires 3 main categories of ingredients, and an optional fourth (which takes it from vegetable stock to meat stock). There are a variety of methods and ways people choose to make their stock, but this is what I do. Do as I do, or do a quick google search and find some more ideas. Whatever you do, don’t throw away those vegetable peels! They’re valuable!

Making Vegetable (or Meat) Stock: A Basic BluePrint
I.Vegetable Peelings
Whenever I peel vegetables and fruits, like apples and carrots, I save the peels in a freezer-safe container or bag. Once I have about 4 cups worth, I am ready to make my stock. For the healthiest stock, use organic produce, but if that’s not always an option for you (it’s definitely not always an option for me, unfortunately), consider using only the skins from the “clean fifteen“. Or at the very least, scrub and wash the non-organic produce very well before using the skins.

I tend to use a lot of carrots and apples, so those peels are often in my stash, but the possibilities are endless. Really, pretty much any root vegetable is perfect for the task. Wilted lettuce leaves are great additions. Cores and ends of most produce can also be used. I always try to have some celery and celery leaf, as well as onion and garlic (including skins) on hand, because they add so much flavor to the stock. I’ve even heard of people using remnants like avocado pits in their stock… pretty much anything goes, it seems! I do avoid including potato peelings, as I mentioned above, and citrus peelings because they tend to add bitterness.

II. Water
I use 6-8 cups of water for every 4 cups of vegetable peels.

III. Seasonings
The sky’s the limit as far as creativity here, but generally speaking, I use a bunch of peppercorns, a few allspice berries, several whole bay leaves, and salt to taste. Depending on my mood, I might add a bit of rosemary, thyme, or other herbs that I like. If I don’t have actual celery or onion, I’ll add celery seed or granulated/dried onion. I also love to throw a bit of dried lemongrass into my stock as well.

IV. Meat Bones (optional)
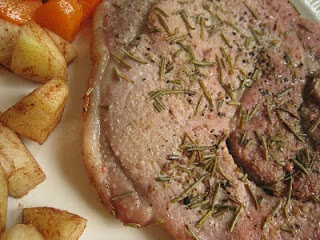
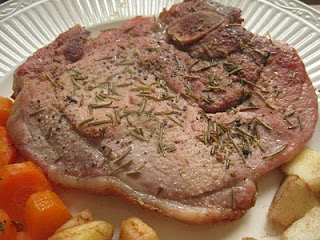
Whenever I prepare bone-in meat (such as a whole chicken or turkey, or a bone-in roast beef or even pork), I save the bones and freeze them just like the vegetable peels. Then when I have enough ingredients in my stash, I add the bones to the above ingredients and proceed as normal.

Procedure
Stock can be made on the stove top or in the slow cooker. The slow cooker is my favorite, but if I dont’ have time to wait for it, or it’s being used for something else, I’ll use the stove top method.

Place the vegetable peels (and bones if using) in a large stock pot, or in a slow cooker. Add water and seasonings. For the stove top method, bring to a boil. Once boiling, reduce to a simmer, and allow to simmer for an hour or so. For the crockpot method, I like to use the “low” setting for 6-8 hours. I find mine gets too hot if I use the high setting, so I prefer the low.

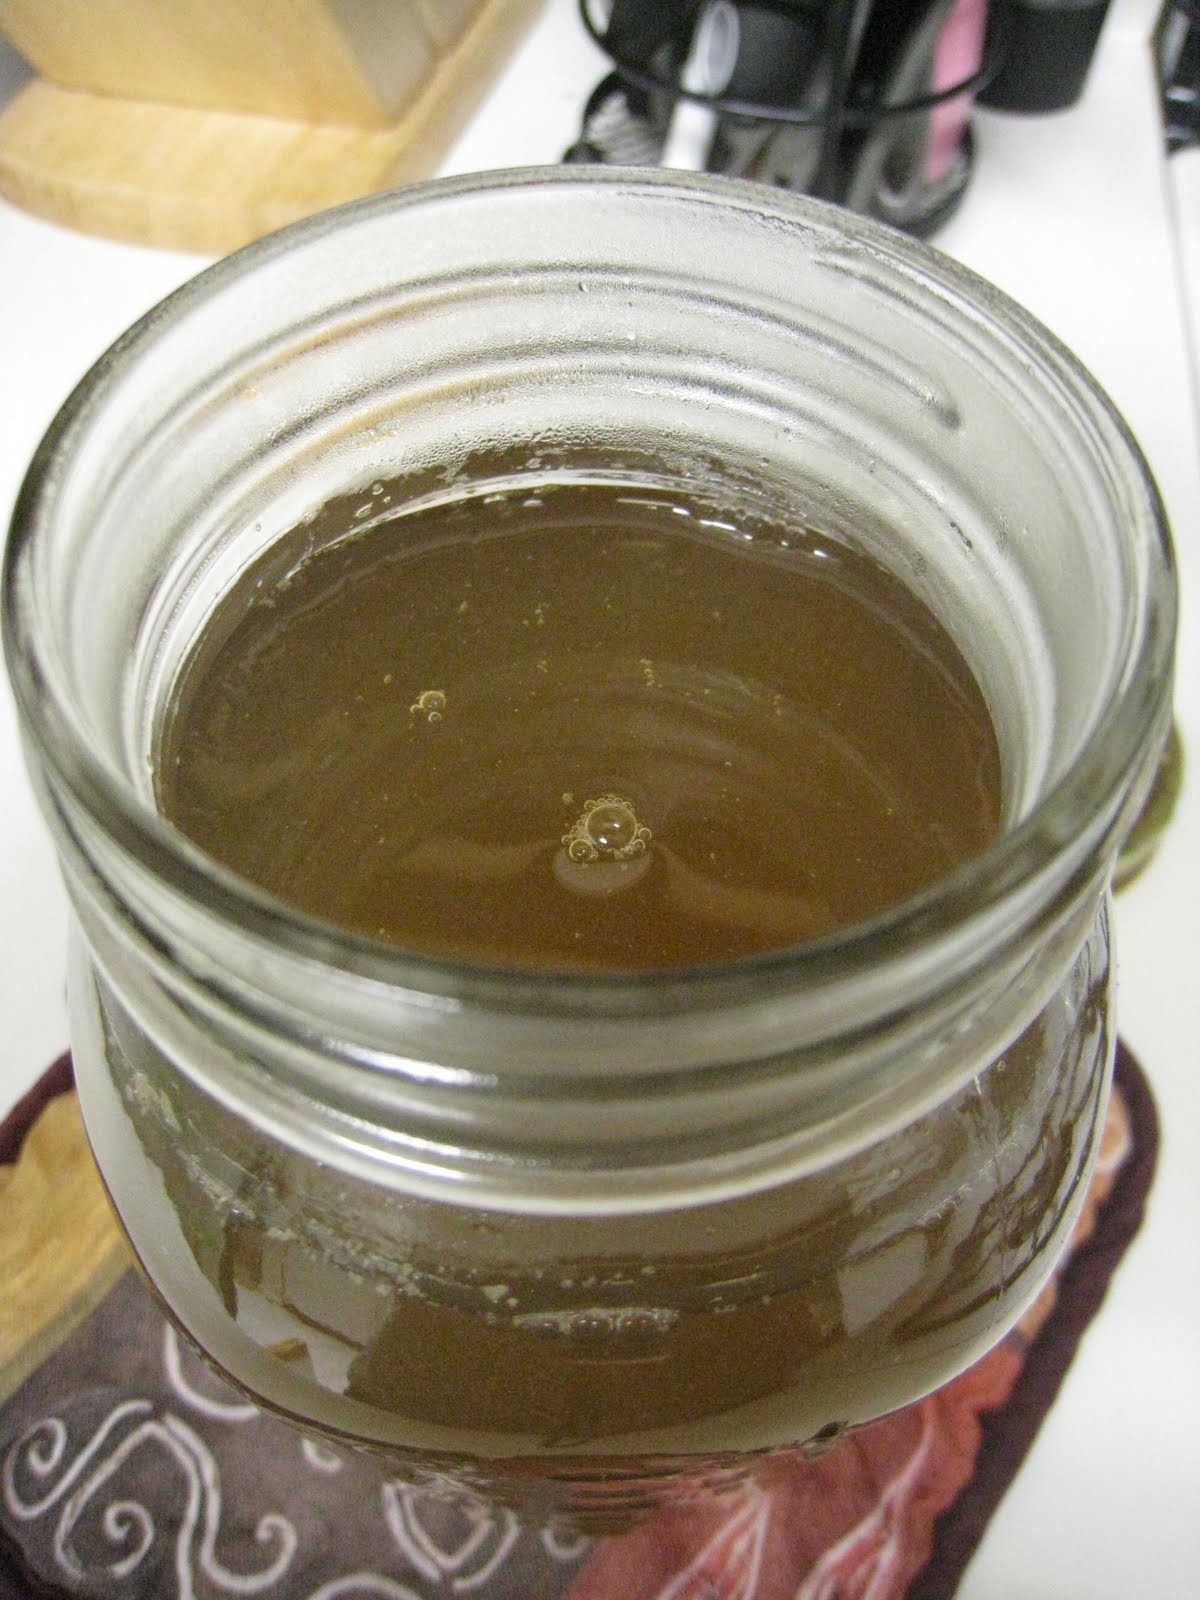
Once the stock has simmered and reached its full flavor potential (taste tests may be required. Add seasonings as needed.), drain through a colander into a bowl. Allow the broth to cool before storing in the refrigerator. (For meat stocks, there is no need to scrape off the fat before refrigerating, as some stock recipes direct. Traditionally, the fat is removed just before using in the recipe, which is easier, anyway, because at that point, the fat will be solid and easily removed.)

Uses
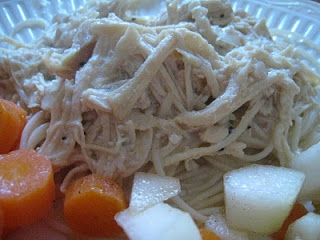
If I’m going to use this stock for broth in a soup, I doctor it up if necessary with some seasoning first. But I don’t hesitate to use it for any other purpose that broth and stock are typically used for, especially sauces and gravies, or in casseroles.

Storage
I store my stock in canning jars or pitchers in the fridge. I try to use them within 2 weeks, although I think their shelf life is longer than that.

It may not be as QUICK as stirring granules into hot water, or pouring from a can, but you have to admit the hands-on time is minimal. If you use the slow cooker, you can either make your broth during the day or overnight, and very little is required from you in the way of preparation.

Isn’t that so EASY? I personally think it’s one of the easiest steps a person can take into creating a more frugal and healthy lifestyle.

It’s definitely CHEAP - I don’t think anyone can argue with me there. Pretty much as cheap as it gets.

And so HEALTHY, too. As we’ve already discussed, using up those peels, cores and ends allows us to make full use of a vegetable’s health potential. Using bones also adds calcium and other minerals, very necessary in a healthy diet. Extra bonus - no MSG, and only as much sodium as is needed to taste, which I guarantee is not as much as they put in those cans.

Pork Chop Pork Chop, Greasy, Greasy… oh. wait.

It is a pork chop, but it’s not greasy. In fact, no grease anywhere! Just a pork chop, some herbs and a broiler oven. It doesn’t get any simpler than this, and when it comes to food, in my experience, the simpler the better.

When my DH and I were on our honeymoon, we stayed in a B&B in North Carolina for a couple days. As a memento, we picked up a cookbook that featured recipes from B&Bs all over the country. Not only did we pick it up, we paid for it and brought it home and it has become the best memento I’ve ever purchased on a trip! The recipes range from good old classics to regional favorites to gourmet dishes with fancy ingredients. Over the four years since we’ve been married, I’ve tried quite a few recipes from this cookbook, although most of them have been breakfast or dessert recipes.

Lately, though, I’ve been abandoning my usual internet and blog recipe searches for more old-fashioned cookbook browsing. There’s something about flipping through the pages of a cookbook that just can’t compare to the most sophisticated recipe search engine. And this cookbook, in particular, is fun to flip through, because it’s organized by B&B and not by recipe. So on one page, you have a recipe for pancakes and on the next you have … pork chops! The non-greasy kind.

What I love about this recipe is its simplicity. There aren’t even any measurements, just ingredients. No lengthy instructions, no special equipment, no gourmet stuff. Just pork chops, herbs, and a broiler oven.

Non-Greasy Pork Chops
pork chops
garlic salt or powder (add a little salt if you use the powder)
freshly ground black pepper
fresh or dried rosemary

Preheat broiler. Place the pork chops on a cookie sheet and sprinkle liberally with the garlic salt, pepper and rosemary. Broil, 4-5 minutes on each side, taking care not to overcook.

Dinner on the table in 20 minutes or less? That’s QUICK! To be honest, I did have to broil my pork chops a bit longer than the recipe says, but I have a quirky oven that doesn’t always cooperate, so I will blame it on that.

Can it get any EASY-er? I think not!

How about CHEAP? Pork has been going on sale a lot lately, at least around here. I’ve seen pork chops as low as 1.29/lb. I can’t remember exactly how much I paid for the pork chops I used for this recipe, but I know for sure it was less than $2/lb. That’s pretty cheap.

Pretty HEALTHY, too. As I said earlier, when it comes to food, the simpler the better. Generally speaking, the fewer the ingredients (and by ingredients I do not mean packages and boxes, I mean actual ingredients) the better.

Something from Nothing, Or From Humble Bread Crumbs to Elegant Dessert

I love the movie “Sound of Music” but my absolute least favorite song ever is “Something Good”. You know, that song where the Captain and Maria drone on and on about nothing? As in, “Nothing comes from nothing. Nothing ever couououououould……” I always thought it was the most boring song ever on a musical, which is saying something because there are lots of songs on lots of musicals and a lot of them have boring potential. However, that one holds the “THE Most Boringest” title in my mind. What’s more, the song is not even true. It sounds true: nothing comes from nothing. But I am here to prove to you that it is definitely not true.

OK, so maybe sort of true, because we’re starting with bread crumbs, which is definitely something. However, these bread crumbs came from old stale bread, which is generally considered trash or compost. And trash is comparable to nothing, right? Work with me here; I know my logic is stunning at times.

Actually, in my house, stale bread is never considered trash, because I know what a true treasure in disguise it is. From the humble dry bread can come a multitude of amazing edibles, including, of course, bread crumbs (Don’t ever buy those, by the way. They are SO simple to make and cost, well, practically nothing.), but also meat loaf or meat ball filler, croutons, stuffing, even bird food if nothing else. I save all the “heels” from my loaves of bread and any bread that gets stale before it is used up, and I freeze them in a plastic zippered bag. When the bag is full, I usually make bread crumbs, but if I don’t happen to need bread crumbs, I like to make more fun and exciting things.

Like this absolutely delicious chocolate bread pudding. It’s actually more like a soft, moist, elegant cake, delicious and pretty enough to serve even to distinguish guests. It’s really something. And it came from nothing!

So don’t throw away your stale bread. Not only can it be used for such staples as toast and bread crumbs, it can also be magically turned into a deliciously yummy dessert. This chocolate bread pudding is even worth buying a loaf of bread and watching it go stale! Yes, that good.

You can find the original recipe here. I’ve significantly health-fied it by reducing sugar, switching the shortening out for butter, and using homemade whole wheat bread crumbs instead of store-bought white bread slices.


This pudding can be eaten on its own, but it’s even better garnished with some berries and whipped cream or ice cream. This recipe will serve 6.

You have to allow an hour for bake time, but the prep is pretty QUICK, probably about 15 minutes or less, so very little hands-on time.

It’s very EASY, also. Using a water bath sounds complicated but is actually very simple. I just place a cookie sheet in the oven, and then put the baking dish on top of it. I pour water into the cookie sheet, and that’s it! It’s also a very useful technique for cheesecakes.

Such a CHEAP dessert. The base of it is the bread crumbs, which would otherwise be trashed. It does take 2 cups of milk, but if you really wanted to save money and have a slightly less rich dessert, you could use a mixture of milk and water. Or use powdered milk for baking.

It is dessert, but it’s a fairly HEALTHY one. The sugar is really the most unhealthy thing about it, and I reduced that by half from the original recipe. I also used bread crumbs from homemade whole wheat bread, so they are significantly healthier bread crumbs than the typical white bread fare. Each serving (without the whipped cream) is about 230 calories.

Chicken with a Tang

Spaghetti is never on the menu around here, because my DH can’t have tomato sauce. Stinks, doesn’t it?! For most people, spaghetti is a good old standby for dinner, reliable, easy, quick, and cheap. Don’t feel sorry for me, though, because I’ve been forced to get creative, and that’s always a good thing. I’ve learned how to make all kinds of different sauces for spaghetti noodles, some of them good, some of them… well, not.

This one is one of the more successful ones: creamy and tangy with lots of flavor, and pretty healthy to boot. It’s also very quick, especially if you have shredded or cubed chicken on hand. (Hint: Buy whole chickens when they’re on sale, cook them in your crockpot all day, and store the shredded chicken in the freezer to use for quick weeknight dishes like this. Added bonus: use the bones to make some yummy chicken broth.)

Tangy Yogurt Chicken
2 boneless skinless chicken breasts, cooked and shredded
2 cups chicken broth or stock
1 tsp lemon pepper
1/4 cup flour
1/2 cup plain yogurt

Whisk together chicken broth, lemon pepper and flour in a saucepan over medium heat, stirring until thickened. Blend in yogurt and stir until smooth. Add shredded chicken, stirring to combine.

You can serve this sauce over some healthy spaghetti noodles (I like Barilla Plus; whole wheat is even better) or over mashed potatoes, baked potatoes, or even rice.

See what a great QUICK recipe this is? No time at all, especially if the chicken is already prepped and ready to go.

Very EASY, also, I think just as easy as the typical tomato sauce… but a lot more fun!

Just as CHEAP as regular spaghetti, especially if you use homemade chicken broth, which costs next to nothing.

Pretty HEALTHY, especially with the use of yogurt. Add a little lemon juice for extra tang… and vitamin C!

Menu Planning: QECH Meals for Crazy Hectic Weeknights

I wasn’t a huge fan of meal planning until recently, as recently as the past 5 or 6 months. Prior to that, I found planning meals a week in advance to be too constricting for our unpredictable schedule. I had an epiphany, though, sometime last year, while reading through various blogs on the subject, that just because I had made a meal plan for the week didn’t mean I had to follow it through to a T. Aha! she said, as the light bulb blinked brightly above her head! Since that time, I’ve found that meal preparation really is so much easier when I have a blueprint (namely, a weekly meal plan) to work from. I don’t stress out if I don’t follow the blueprint exactly; in fact, 9 times out of 10, I adjust the plan at least slightly as the week progresses. It’s something of a dichotomy that a structured plan allows me more flexibility. I know: hard to believe, right? But definitely true.

I have to admit that I am not as structured or detailed in my meal planning as others are, which is not to say that I never will be, only that I am not now. I only plan 5 dinners for every week, not breakfasts, lunches or weekends. At this point in my life ,this is working well for me: currently, my Certain Little Someone and I are the only ones who eat breakfast and lunch at home, and since we almost always eat different things, it’s more work than it’s worth to plan those out in advance.

Generally speaking, though, lunches are typically either leftovers, soup, or occasionally sandwiches of some kind for me and my DH, while our Certain Little Someone gets to eat yummy things from his frozen stash of pre-prepared safe foods, augmented with fresh fruits and vegetables. For breakfast, whenever I make pancakes, french toast or the like, I freeze the extras and put them in my DH’s lunchbox for him to eat at work since he goes in pretty early. Sometimes I send him with quick-cooking oats, or dry cereal and milk as well. The Certain Little Someone once again eats breakfast from his frozen stash of safe pancakes, muffins, and the like, or occasionally oatmeal or grits. For myself, I generally fix myself whatever I’m in the mood for in the morning. Perhaps that will be my next step in meal-preparedness!

My biggest hurdle in menu planning has been the 3 most difficult days of our week, which happen to fall right in the middle of the week. Those days are so busy that we don’t really have time to prepare and eat a typical big dinner. My solution for those nights has been what I mentally refer to as the “Magic 3”: Soups, Breakfasts, and Sandwiches. Each week, I plan a soup, a breakfast, and a sandwich of some kind on those 3 hectic days. Not only does it save me time and stress, it saves me money too, since those meals are cheaper than the typical dinner based around a cut of meat.

Soups
Soups are actually a relatively recent addition to my cooking repertoire. I’ve dabbled in them before, but it’s only been in the past couple months that I’ve really begun preparing soups regularly and in earnest. I’m discovering how wonderful soups are, though: they warm you up in cold weather, but are often light enough for those hot summer evenings when you don’t want to eat a heavy meal. They’re also incredibly flexible, and once you have a basic framework, you can adjust according to whatever you happen to have on hand. Unfortunately, they are often not super filling, so I try to serve them with fresh home-made bread, biscuits or muffins. I try to make the soups themselves as filling as possible with lots of protein and carbs. Of course, most soups also have plenty of vegetables, which makes them a very healthy choice also.

Soups are a great choice for a hectic schedule because you can set them going in the crockpot in the morning, and you will have a delicious, well-flavored soup ready to eat in the evening. They also are very economical, being based largely on water or stock of some kind.

As I mentioned, I haven’t been making soups for very long, so I don’t have a huge repertoire, but some soups I like to make are:
Bean soup (black beans are my favorite, but I also have made yummy soups with kidney, pinto and navy beans)
Chicken Rice Soup (I usually use rice instead of noodles, because brown rice is nutritionally superior, and my Certain Little Someone can’t have wheat-based noodles)
Beef Stew
Potato Soup (either creamy or not, always garnished with a bit of bacon!)

One day soon, I’m going to experiment with new-to-me ingredients like lentils and barley, but I haven’t gotten around to that yet. Also, I once made a lemongrass chicken soup that was soooo yummy, and I need to find the recipe for it so I can make that again.


Breakfasts
I’ve been doing breakfast for dinner for a long time now, and have blogged about it before. Most traditional breakfast meals are incredibly quick and easy, and yet very filling: perfect for a crazy weeknight dinner! They’re also inexpensive because the proteins are more of a side dish than the main thing: eggs, bacon, sausage, etc. You can even finish off a loaf of stale bread by turning it into French toast, which makes it an unbelievably frugal meal. I typically serve the breakfast meal with a side of fruit salad or some variety of fresh cut fruit.

My favorite breakfasts-for-dinner are:
French Toast
Waffles
Pancakes
Frittatas (not as cheap as some, because it requires a lot of eggs and plenty of cheese and/or bacon or sausage)
Scrambled Eggs/Omelets
Eggs and my Grandma’s Biscuits
Breakfast Burritos
Oven Pancakes
All-Day French Toast (as opposed to Overnight French Toast - concept is the same, refrigerate for 8-12 hours then bake in the oven)
Egg “McMuffins” (made with homemade English Muffins, fried egg, cheese, and bacon)

Sandwiches
Sandwiches being loosely defined here as some sort of bread served with some sort of filling. The possibilities are literally endless! The main qualification is that it should be able to be eaten without the benefit of utensils, a hand-held, on-the-go if necessary meal. Sandwiches are a cheap meal because they are based largely on a type of bread, which is pretty inexpensive. Their health factor depends entirely on what they are made of: I always use whole-grain breads and I avoid over-processed fillings (like deli meat and fake cheese). I always serve some kind of fruit, if only a banana, with the sandwich, to help create an even healthier meal. Of course, fresh cut broccoli and carrot sticks make great sandwich accompaniments as well.

Some of my favorite “sandwich” dinners are:
Quesadillas
Wraps
Tuna Melts (or crab melts, or chicken melts… you get the idea!)
Grilled Cheese
Hamburgers or Turkey Burgers (with homemade buns)
Pork Carnitas (served in homemade tortillas)
Individual Pizzas

Tonight is sandwich night, so I’m going to serve BBQ Pork (which has been simmering in the crockpot all day, complete with homemade BBQ sauce) on homemade hamburger buns, with homemade French fries (from real, fresh potatoes!) and fresh fruit.

A Little Spice is Nice

Image by Free-StockPhotos.com

Dried herbs and spices are a great quick and easy, cheap and healthy way to liven up otherwise plain and boring dishes. They add a surprising amount of useful nutrients to your diet, and of course lots of flavor! Once you know what spices generally go well with what foods, it’s easy to experiment and change up your favorite recipes to create more enticing aromas and flavors.
Unfortunately, though, spices can be expensive, especially if you shop for them at a grocery store or a specialty shop. However, there are less expensive sources for herbs and spices that are readily available to anyone and are suitable for any home cook. Here are my top 5 places to buy herbs and spices at reasonable prices (hey, that rhymes!):
1. Amish Market
OK, so perhaps this isn’t easily accessible to everyone, but if you happen to live anywhere within an hour or two of an Amish community, it’s worth going once a year or so to their markets. Certain Amish brands and farms sell herbs and spices by weight in both small and large quantities. My DH and I just returned from a weekend trip to Lancaster, PA, where I stocked up on cinnamon sticks, granulated onion, celery seed, cumin, bay leaves and more. I spent only $1.00 or $2.00 on each package and was able to fill up my existing spice containers and have plenty left over.
2. Badia Spices and Herbs
Badia, an Hispanic brand based in FL, is available in many grocery stores and at Walmart Supercenters. They sell spices and herbs both in small quantities for less than $1.00 or in larger containers for equally inexpensive prices. This is great for spices and herbs (like saffron, for example) that you use very rarely or only on occasion, because you can buy a small quantity and use it before it loses its flavor and potency.
3. Warehouse Club Stores
My local Costco sells real vanilla and organic herbs and spices at phenomenal prices. The catch is that they come in large quantities, so I only buy the items I use a lot. I usually purchase my cinnamon, vanilla, whole black pepper and some Italian herbs at Costco because I use those items pretty much every day, and I go through a whole container in less than a year.
4. Trader Joe’s
Trader Joe’s sells smaller quantities of the most common herbs and spices at a fraction of the usual grocery store price. Because they are a smaller grocery store, they only carry the most common of spices, though, but it is a great source for those spices you use a lot. Oddly enough, though, I’ve found that Trader Joe’s is absolutely the best source for saffron, which can be sometimes over $10 at the grocery store, but I have found it in the past for $5 or less at Trader Joe’s (I don’t know what their current price is as I haven’t bought it in a while). Aside from Costco, Trader Joe’s is also the least expensive source I’ve found for real vanilla.
5. Grow Your Own
Even if you only have a balcony, like me, you can still easily grow a wide variety of herbs in pots or in a small kitchen garden. Most herb plants are easy to maintain and will thrive all summer long, even all year long if you have a nice sunny window inside. I wasn’t very good about it this past summer, but I like to dry herbs throughout their growing season so I have them on hand during the winter. Some fresh herbs can also be frozen. Plants are widely available in spring, anywhere plants are sold. I especially like to pick mine up at local farmers’ markets.

This post is part of Frugal Fridays at Life as Mom.