You know, because I like things to be EASY. So trust me, while this cake is certainly not as easy as paying someone else to do it, it’s certainly cheaper, AND it’s definitely a lot easier than it looks. And that, my friends, is what I’m all about: make a good impression without a lot of effort. wink, wink
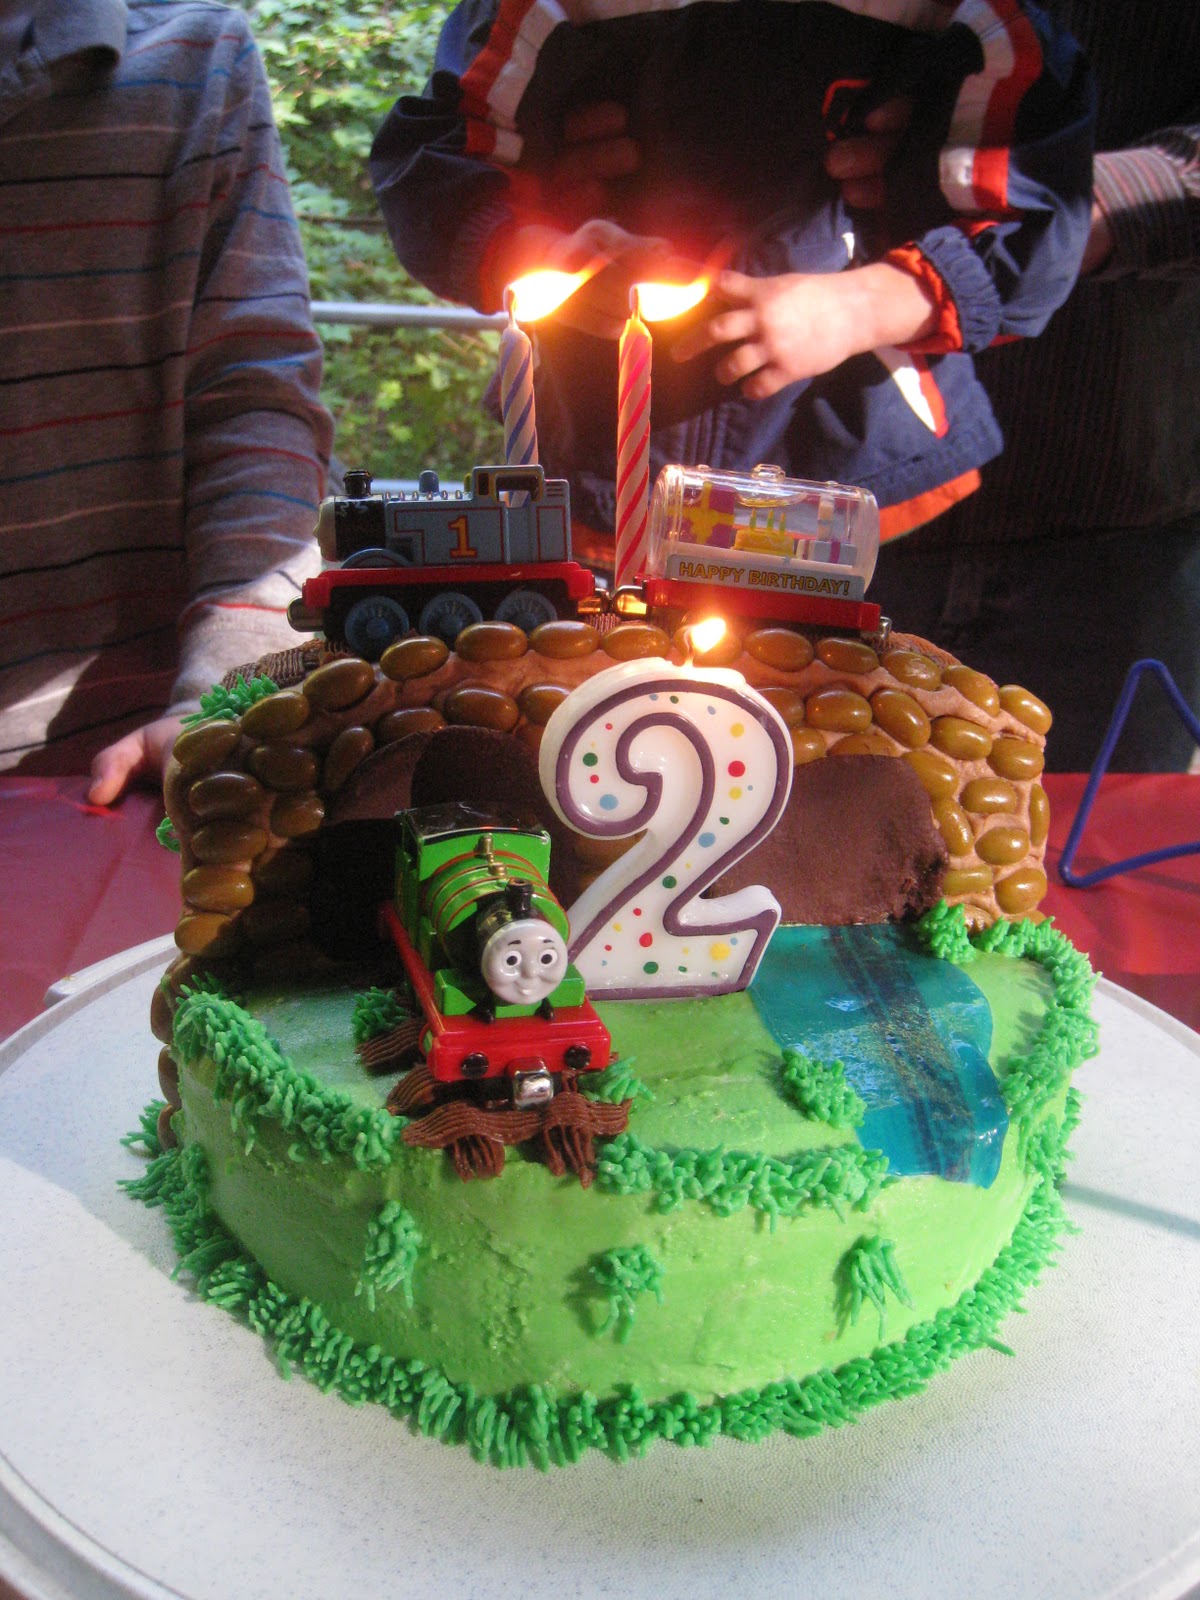
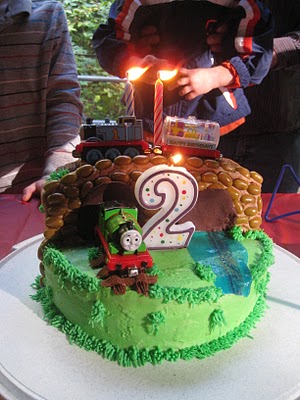
Just in case you’re dying to know how to make a Thomas cake just like this, here’s how I did it. I was inspired by this picture, and developed it from there.
Oh, and yes, there is powdered sugar in the frosting, which those of you who follow me know is completely against all my principles, but… it’s a birthday! And a birthday cake! And you can’t make a birthday cake without powdered sugar frosting. At least I don’t even want to try, because, you know, I want it to be easy!
Dairy-Free Decorator’s Frosting
1/2 cup non-hydrogenated palm oil shortening
3 cups powdered sugar
1 tsp vanilla
approx. 3 TBSP water
Combine shortening, sugar and vanilla with electric mixer. Add water 1 TBSP at a time until desired consistency is achieved (it should be fairly thick for decorating, but not so stiff that it can’t flow easily through a decorating bag and tip).
To make this Thomas cake, you will need about 1 1/2 recipes of the frosting.
I used this recipe, which made 3 layers, which was exactly the right amount for this cake design. The original cake that inspired me actually only used 2 layers, though, so that’s definitely a possibility if you don’t want to make 1 and a half (or 2) cake recipes.

Place one round cake layer on your serving plate. Tuck strips of wax paper underneath to catch any stray frosting or other drips (don’t tuck them too far under the cake, because you’ll have to remove them later from the finished product). Spread a thin layer of jam on top of the cake (you want enough that the layers will stick together, but not so much that they will slip and slide off each other), and top with the next layer. Cut the third layer into two equal parts. Spread a thin layer of jam on half of the second layer, and top with one of the parts. Spread another layer of jam and top with the final half of the third layer.
Using a knife in a smooth back-and-forth motion, coat the entire cake with a thin layer of white frosting. It’s OK if crumbs get stuck in this frosting. This is the “crumb coat”, and after it sets and hardens for a little while (maybe 30 minutes, depending on frosting consistency), you will have a nice smooth surface for the actual decorative frosting.
Using a gel food dye, color the remaining frosting a light green color for the grass. (You’ll need to make a second full or half batch for the rest.) Spread a thick layer of frosting all around the bottom portion of the cake. When you’ve finished spreading the frosting, you can make it appear smoother by dipping the knife in water and smoothing it over the frosting, repeating over the entire surface. Don’t do the grass yet.

To make the “tunnels”, I melted a small amount of chocolate (Trader Joe’s melting wafers), and poured it carefully into the outline of a tunnel opening I had drawn on wax paper. The size of the tunnel will vary depending on the height of your cake layers, so you will need to measure this. Mine ended up being about 2″ tall and about as wide. I set the wax paper on a plate in the fridge for it to harden quickly.
Take an additional half batch of frosting and add 1 TBSP of cocoa to it. Frost the higher portion of the cake, including the entire back side, which you can see here.
Press your cooled and hardened chocolate tunnel openings into the front of the higher cake portion. You can apply a little extra chocolate frosting to help them adhere better if necessary.
I used caramel apple jelly beans for the “stones” on the “viaduct”, but you can also use chocolate rock candy (available in specialty candy stores). Press them gently into the frosting all along the front of the higher cake portion, forming arches around the tunnel openings.
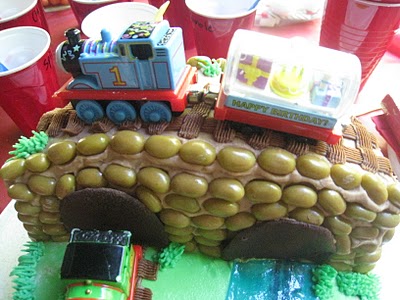

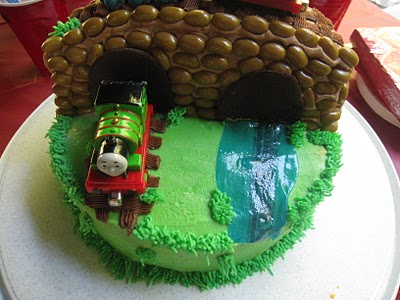
Add another TBSP of cocoa to the remaining chocolate frosting. Use decorator tip #47 and a frosting bag to pipe the tracks, both on the top of the “viaduct”, and on the lower surface of the cake, coming out of one of the tunnels. You can alternatively use fruit leather - choose an apple variety or any that will be a dark brown-sh color, and cut into strips for the tracks. That will add pleasing texture and flavor.
Take a blue fruit roll-up (yes, I know, full of very bad things. Birthday, remember, birthday!) and use a sharp paring knife to shape the sides like a winding river. Place it on the green surface of the cake so that it is flowing out of the other “tunnel”.

Wow! Very impressive!!
Thanks!
This is so cute! I love making special cakes for the kids' birthdays. What a great job you did!
Thanks! I've had a lot of fun so far making his birthday cakes; it's a great creative outlet.
That's adorable! Great job :)!
Do you think butter would work in place of the shortening? I know you were going for completely dairy free, but I just need lactose free, which is achievable using butter.
Faith @ Storms Stories recently posted..Julian: 10 months
Yes, a lot of people use butter. It won’t be quite as white, but that’s not a big deal, especially if you’re going to color it anyway.