Archives for June 2011

Better than the Box: Red White and Blue Jello

It’s been years since I’ve bought a box of instant jell-o.

It has also been years since I’ve made jell-o.

I did buy a box of gelatin once, but it sat in my cupboard literally for a couple of years, for two main reasons:

  1. I was a little scared of working with gelatin, thinking it might be kind of tricky, not easy at all.
  2. I was put off by the instructions for jell-o on the box that called for an entire box of gelatin and half a carton of juice, not to mention the extra sugar. Hello, $3 for a dessert that isn’t even all that healthy?!

In short, it didn’t seem worth the effort and cost for a dessert that wasn’t even anywhere near my top 10. So I never made jell-o.

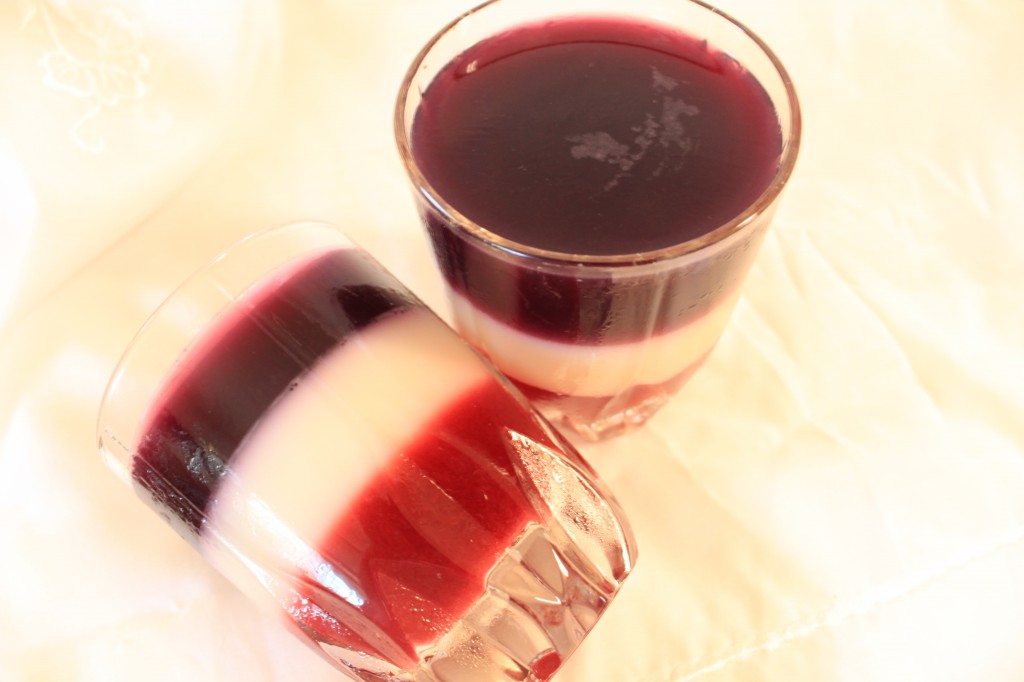
Then, I found this super easy 4-ingredient recipe for berry jell-o at Wholesome Cook. Cute beyond words! I pinned it (on Pinterest) immediately and purposed to make it at the earliest opportunity.

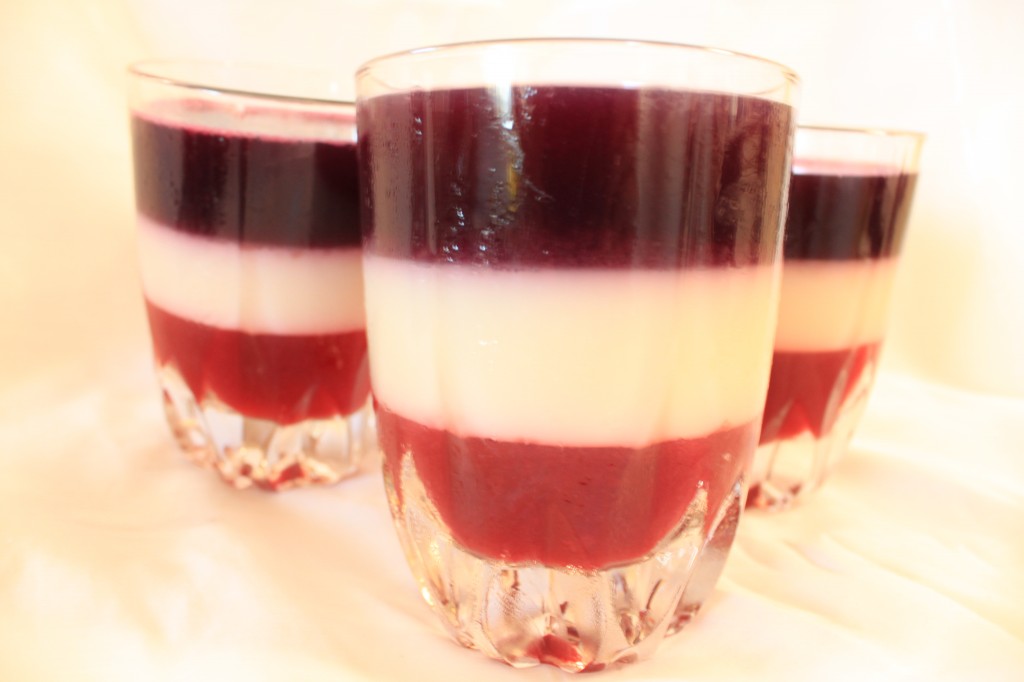
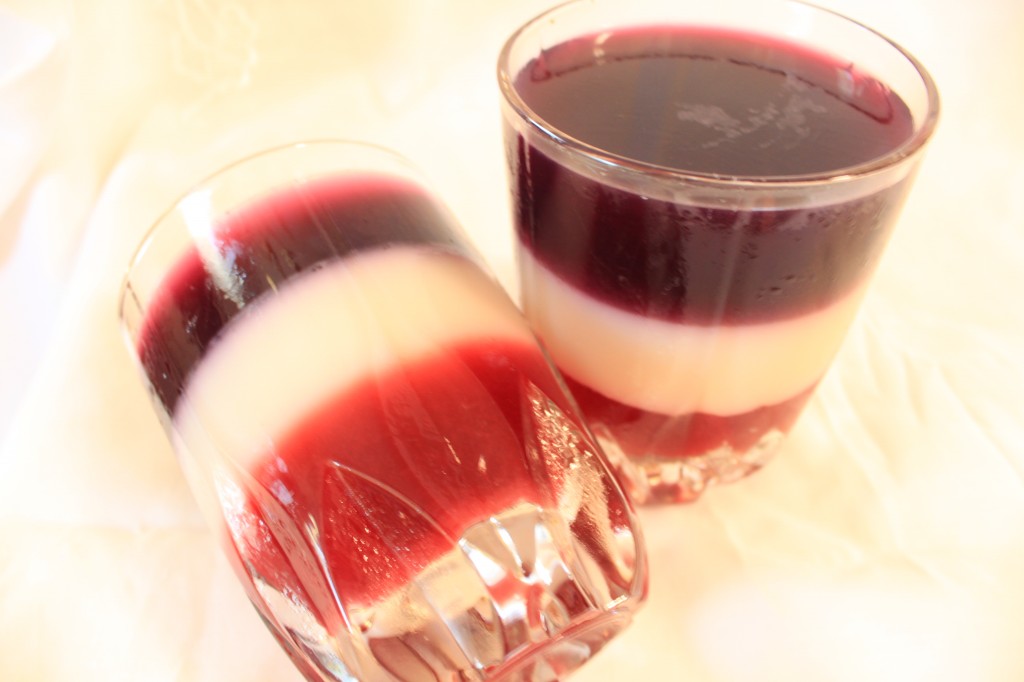
My first attempt was a total failure, but that was probably because my gelatin was old. I replenished my gelatin supply, and attempt #2 was very much a success! Not only that, but I followed her instructions for “stripey” jell-o and turned it into the perfect Fourth of July dessert for kids and adults alike.

The fact that these are red white and blue treats, deliciously cold and perfect for summer weather, might be enough; but I will admit the flavor is a little lacking. They’re good, but don’t expect a burst of berry flavor anywhere. Next time, I will try making it without straining out the berries and see if that makes a difference. If all else fails, I will just use juice. It’s still better than the box!

Homemade jell-o is really very QUICK actually. It might take a little longer to set, but I don’t think the actual mixing process is any more lengthy than the kind in the box.

It was so EASY it makes me wonder why anybody ever felt the need to make a box mix for jell-o in the first place. Really, it wasn’t any more difficult than using a mix, and it certainly doesn’t require all those artificial colors, flavors, preservatives and sugar!

One thing for sure: it’s not as CHEAP as using a box. This is one thing that homemade ends up being more expensive. Each store-bought box is available for around $1, store brands sometimes less. For each flavor of jell-o I made (which is technically 1 batch), I spent around $1.50, even with the going in-season rate for berries. I think that minimal cost difference is definitely worth it when you consider the health savings!

This is so much HEALTHY-er than the box it’s practically not even in the same realm. Made with actual fruit instead of artificial flavors and colors, and only 1 TBSP of sugar! It’s not even an indulgence, really. Now, I just have to test it with my Certain Little Someone to make sure the gelatin doesn’t cause his beef allergy to react. Then I’ll be thrilled to have a new QECH treat to make for him!
Feeding Baby: Fiction vs. Fact

(Click on the picture to watch a video of Baby Boy enjoying his First Food!)


What to feed baby for his or her first food is a loaded question these days. Ten years ago, nobody thought twice about it; they just started spooning out the cereal when baby hit 4 months.

Thankfully, these days we know better. I am certain that almost a century of feeding babies non-nutritious rice cereal long before they are ready has paid a toll in a variety of ways, including increased occurrence of certain diseases, obesity, digestive issues, and eating disorders. Can I prove it? No. It is difficult to prove exactly what is the cause of the current terrible state of health here in the US. I believe that how we feed our infants has played an important part, though, and I am happy to see that the tide is turning.

You’ll find a lot of conflicting information, online and in real life, about what exactly to feed baby when. Not much of it is accurate, and some of it is merely a matter of opinion, open to interpretation and individual practice. I’ve sorted through the myriad of common claims, and come to my own conclusions, but instead of merely sharing my own opinion (which is just one more voice adding to the confusion) I’ll point you to some trusted reliable sources that can help you determine when and what to feed your baby, and most importantly, the reasons why.

Fiction: Start baby on solids at 4 months. In the old days, mommies started them even sooner, as early as 6 weeks or even a month. These days, 4 months is a typical starting point. On the other extreme, there are parents who wait until baby is 9 months or older.

Fact: Six months is a great age to start baby on solids. And not before. Most babies (I’m sure there are exceptions, but just to be safe, I think 6 months is a good rule) have simply not developed enough physically to begin solids prior to 6 months. Dr. Sears, the most balanced pediatrician in the public limelight today, highly recommends waiting until 6 months, and gives his reasons in this article, “6 Reasons to Wait”. You’ll note in his article that of all the physical developmental milestones he mentions, only one is typically reached by 4 months; most are achieved by 6 or 7 months. As for the other extreme, I think 6-8 months is a perfect window of opportunity for introducing solids; after that, you run the risk of nutrient deficiencies and an outright rejection of solids (I have seen the latter happen), especially the closer you get to the one-year landmark. On the whole, though, waiting longer is preferable to jumping the gun.

Fiction: Start with rice cereal. The reason behind this advice is that it is easily digested by baby, even younger babies, and it is not very allergenic.

Fact: Rice cereal has very little nutritional value. Brown rice cereal is a little better, but there are much better choices out there, like fruits, vegetables and even meat. Dr. Greer, a member of the AAP Committee on Nutrition, explains why other foods are preferable to rice cereal from a nutritional standpoint in this excellent article from Pediatric News. By the way, even though I knew all this already, I did go ahead with a half-hearted attempt at feeding my Certain Little Someone rice cereal; only because I didn’t want to be “weird”, and as a first-time mom, everybody was all up in my business about every little decision I made regarding his care. He hated it. After the first swallow, he wouldn’t touch it, so after a few days, I gave up and started with some real food, which he absolutely loved. This time around, I have no such compunction about what others think: I will feed my baby what I believe to be the best food for him!
Fiction: Feed baby vegetables first; hold off the fruit for later. The thinking is that baby will develop a sweet tooth if you give them the fruit first.

Fact: Breast milk is sweet. So is formula. Baby already has a sweet tooth. And the sugar in fruit is more helpful than harmful. Even nutritionists agree that it doesn’t really matter if you start with veggies or fruits first, as long as you eventually offer both. A good compromise is to start with sweeter veggies, like sweet potatoes or carrots, which is what I did with my Certain Little Someone (after the rice cereal fail), and now with Baby Boy.

Fiction: Avoid highly allergenic foods until baby is at least 1. The idea is that if you hold off highly allergenic foods, baby might not develop allergies to them.

Fact: There’s nothing you can do to prevent a child from developing allergies. Take it from the mama of two food allergic kiddos. And another fact: if you’ve been breastfeeding, your child has already been exposed to the proteins of the food you eat. So if they are allergic to something, they will already have exhibited the symptoms. It’s taking a while for the word to trickle down, but new food allergy recommendations suggest that there is no reason to wait on allergenic foods like cow’s milk or eggs simply because they are allergenic.

Fiction: Start with purees. After all, baby doesn’t have teeth, right?

Fact: You can offer baby soft foods that haven’t been pureed. I don’t 100% espouse the Baby Led Weaning theory, but I have adopted some of its ideas. There are definite benefits to offering baby soft foods in a stick (or french-fry) shape that he or she can hold and eat independently. Things like sweet potato french fries, or well-cooked noodles are great ideas for beginning baby foods. Besides which, there are foods that are naturally soft enough (like avocado, ripe peaches and ripe pears) for an infant to eat raw and unpureed from the beginning.

Based on my own conclusions drawn from the wide variety of methods and formulas I’ve read, here’s my basic plan for feeding Baby Boy:

  1. Pureed and seasoned fruits and vegetables, both raw and cooked.
  2. Also soft foods in a french-fry shape that he can explore eating on his own
  3. Meats, pureed with some homemade broth, starting with chicken
  4. Since he is allergic to dairy, I won’t be offering him any dairy products, but I will offer him some non-dairy yogurt (probably coconut milk if he’s not allergic to that).
  5. If he proves not to be allergic to eggs, I will offer him mashed egg yolks early on, then scrambled whole eggs later.
  6. Closer to the age of 12 months (maybe as early as 10 months; we’ll see), I will begin offering grains. Probably not Cheerios, though! I haven’t thought extensively about it, but I think oatmeal will be one of his first grains at some point.

One thing that hasn’t changed is the recommendation to hold off on foods like nuts, seeds, and raisins because of choking hazards. Baby has to grow some teeth and molars before he or she is ready for those (usually by the age of 2). And I do abide by the recommendation to avoid honey until the age of 1, and sugar in any form until the age of 1 as well.

So, what was Baby Boy’s Very First Food? Here you go:

Read the next installment in this series: a discussion on the pros and cons of making Baby’s Food yourself. Is it worth the investment of time and energy? Are there ways to make it easier?

How to Eat QECH-Style While on Vacation

The elements of a perfect vacation:

  • spending time with family
  • relaxing and having fun
  • eating good food

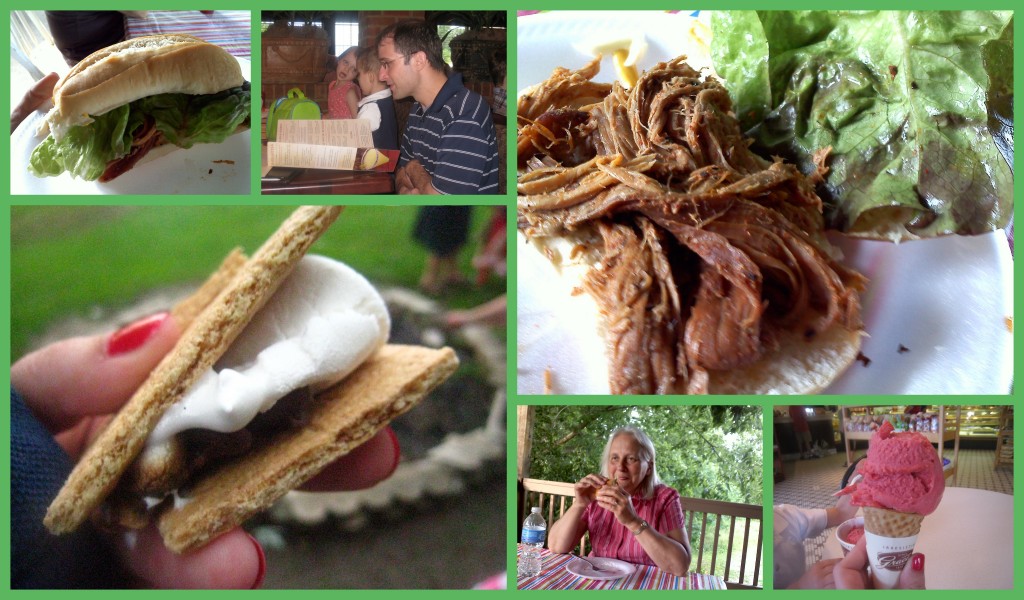
All these and more were present in abundance during my recent vacation with my family. We rented a huge house in Kentucky, and spent 5 days seeing the nearby sights (namely, the Creation Museum), popping into the pool when the rain stopped for a moment, playing games (daily Wii and Dutch Blitz tournaments), watching movies, and pigging out to our hearts’ (and tummies) content.
Good times!


Thanks to my sister, Jennifer, and her capable organizational and cooking skills, we also enjoyed a great variety of tasty, healthy, homemade food throughout our vacation (not counting the random assortment of very unhealthy snacks like Oreos and potato chips that also abounded) without busting our budget.
Besides the unavoidable costs of lodging and airfare (or exorbitant gas prices), food is one of the biggest expenditures on the average vacation. A family of four can easily spend $20 on every meal, even at the cheapest fast food joint. Add that up, and for a weeks’ vacation, you’ve spent $300 or more on food alone. Eat anything more than value meals and that price ratchets up considerably.
I highly doubt any of you spend anywhere near that much on a weeks’ worth of groceries, at least I hope you don’t (unless your family is much larger than 4). If you’re interested in (or require by necessity) a leaner food budget for your vacation, there are definitely ways to cut costs, and yet still have fun and relaxation. For 10 adults (occasionally more) and 4 kids (double that number for a few meals), we spent somewhere between $200 and $300 on groceries for the week (not counting extra snacks for the fun of it, and not counting what I spent on additional allergen-friendly foods for my Certain Little Someone). This cost was divided between 4 family units and 4 or 5 individuals, making our personal budget approximately $50. Not bad, considering that’s what I usually spend on groceries for the week, anyway.

Your vacation likely looks different from mine, but here’s what we did for food and how we did it.
1. Rent a house (or hotel room or time-share) with a kitchen. Even if the kitchen only has a fridge and a microwave, you can prepare most of your food in-house, without resorting to constant eating out at restaurants.
2. Develop a menu that features easy basic foods that can be quickly prepared. You don’t want to spend all of your vacation in the kitchen, and you don’t want to bring (or buy) all kinds of specialty ingredients either. My sister did a fabulous job creating a menu with easy-to-make and easy-to-please foods. Some items on our menu:

  • spaghetti
  • pulled pork on rolls
  • lunchmeat sandwiches
  • eggs & bacon (yes, breakfast, too!)
  • tacos
  • tuna sandwiches

3. Create a shopping list from your menu. Figure out what foods you can bring from your own pantry that you don’t have to buy (condiments and basic spices, for example), or what might be available at your vacation home (ours already had some very basic spices and oil, plus some condiments and other items in the fridge).
4. Determine the best place to buy the items from your shopping list and bring what you can. There was a Walmart and Sam’s Club about 15 minutes from our vacation rental, so we bought most of the food there. We also were able to pick up a few things in the weeks preceding our vacation, taking advantage of sale prices and coupons for items like pasta sauce, tuna, cereal, and snacks. If you are driving and not flying, it’s a great idea to bring as much as you can with you so that you can get the best price possible.
5. Share the cooking and cleaning burden. We didn’t have a set schedule or rotation for who cooked and cleaned when, but that’s certainly an option. We all just chipped in so that no one person was responsible for cooking all the food for everyone. It is vacation after all; no one wants to be stuck in the kitchen the whole time!
6. Plan ahead, and budget for, meals at restaurants. What’s vacation for if you don’t enjoy a meal out once or twice? Our vacation happened to coincide with Father’s Day, so we treated the dads among us to a meal out. We also planned in advance to order pizza in for one dinner.
7. Bring snacks, food and drinks for the road. This is one area where I could definitely improve. We don’t have a cooler, although we now have a vehicle large enough to bring one, so we can’t really bring anything perishable. I did bring all our snacks for the road, but it would have helped our budget tremendously to have been able to pack some sandwiches and the like for at least one meal on the road.
8. Bring coupons for nationwide restaurant chains. If you’re going to be driving over a couple days, you probably won’t be able to pack all the food necessary for your meals. I know I wouldn’t want to try to keep foods fresh for any longer than one day, especially in hot weather. It’s likely that you’re going to have to pick up some food somewhere along the way, so be prepared! I brought along all our current restaurant coupons, and we were able to eat at Denny’s for less than $10!

Where I Buy Organic & Specialty Foods {without breaking the bank or the budget}

It goes without saying that organic and specialty foods generally cost more than their conventional counterparts… that is because they are worth more! I cannot complain about their higher cost because I am well aware of their higher value.

However, I often think it would be really nice to be able to afford all the organic (and local, grass-fed, free-range, etc. etc.) foods that I want to feed myself and my family. As it is, I do what I can and try to prioritize (according to nutritional and budgetary impact) what foods I do buy in their organic and un-processed state.

One store that helps me do this on a regular basis is a local organic market called MOM’s {MOM’s Organic Market}. They boast that they have the lowest price on “all same brand packaged products of any natural food store”, and at least in my area, it’s definitely true. There are 3 natural food stores within driving distance of my home, and MOM’s is by far the cheapest (and the most easily accessible, which makes it a win-win!).

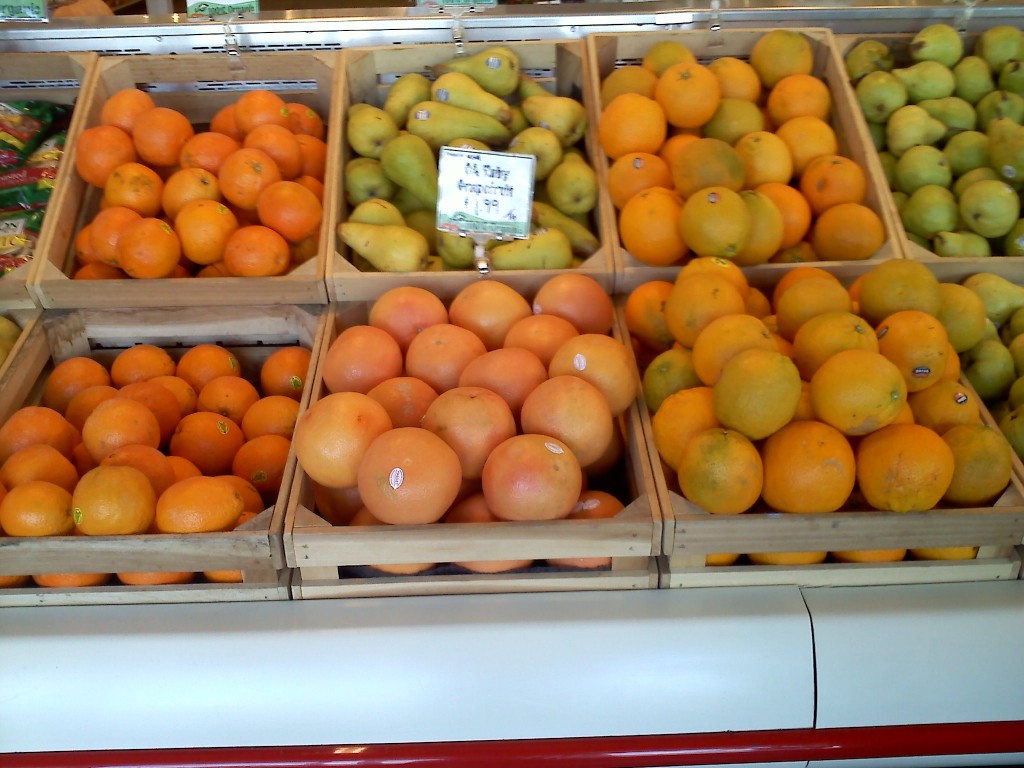
When you enter the door at MOM’s, you are greeted by a gorgeous array of fresh organic produce:

You can help yourself to a sample or two, and enjoy taking home organic produce at very reasonable prices. Occasionally, they will have seasonal fruits and vegetables at better prices than conventional! Some of the produce is local, and it’s all definitely organic.

Adjacent to the produce section is their bulk section where you can buy dry goods at a substantially lower price than the packaged versions. I’ve just recently started purchasing herbs, spices, and some other items from the bulk bins, having previously been nervous about cross-contamination regarding allergens. (Well, I’m still a little nervous about that, but so far so good. The prices are enough to keep me trying!)

What I really love about MOM’s is that they are always well stocked with So Delicious coconut milk products, like the beverage, coffee creamer (a godsend now that I’m dairy-free while nursing!), yogurt, kefir and ice cream. Even though other grocery stores carry them, I almost always go to MOM’s when I need to stock up on those items, because I know I can rely on them to have them in stock (98% of the time anyway! So Delicious stuff is pretty popular!).

What else do I generally buy at MOM’s? Here are some of the things I buy there on a regular basis:

  1. Wheat-free grains They have the best prices that I’ve seen (except maybe Wal-Mart, but I think even they are comparable, and MOM’s has a wider selection) of Bob’s Red Mill and Ener-G brand wheat-free/gluten-free flours, which are essential for baking for my Certain Little Someone. In particular, I always buy tapioca starch and potato starch there, as well as occasionally sorghum flour, garbanzo bean flour, and brown rice flour.
  2. Local Pastured Eggs They are the only source in my town for these! And they cost $4.29 for a dozen, which I think is reasonable.
  3. Bulk Herbs and Spices This is not my only source for herbs and spices, but it’s definitely on my list, and one I use frequently. I like that they are all organic, and I can buy small amounts for spices I don’t use very often.
  4. Organic Whole Milk Except for when Harris Teeter puts it on sale, MOM’s has the best price for organic milk, even better than Costco.
  5. Bulk Grains and Specialty Foods By “specialty foods” I mean things like wheatberries (which I don’t buy yet because I don’t have a grain mill yet, but I will someday!), sucanat, raw sugar, nutritional yeast (a cheese replacement for vegans and those allergic to dairy and soy products), and the like. They also carry beans, nuts, and a variety of granolas.
  6. Essential Oils They have absolutely the best price I’ve seen anywhere for essential oils, which I don’t buy very often (because they last a long time), but when I do buy them, I go to MOM’s.

They also have a great price for local raw organic honey, and I always check at MOM’s whenever I need a specialty food item for my Certain Little Someone, because I know they are likely to have it (like allergen-free, healthy canned soups to take with us on vacation, and certain snacks).

Where do you like to buy organic and specialty foods? Do you have a local organic market?

Pitch a Slider to Dad

But first: this is my 300th post, can you believe it?! Wow! I had no idea when I started this blog that I had that much to say.

Secondly: my 2 year blogiversary is coming up this weekend, so stay tuned for a couple of really cool giveaways!

And thirdly: wait. There is no third. On to the sliders then!

Father’s Day is, of course, coming up this weekend, and one way to show Dad he is special (in a good way) is to make him a special meal. Grilling always comes to mind because of the association of guys and grilling, but I am grill-less, so alas, I have no grill recipes for you. Steak is another thing that comes to mind, but we don’t eat that around here very much because it’s expensive. (At least the good steak is, and what’s the point of throwing away money on tough rubbery steak?)


Here, then, is a perfect Dad’s Day meal if you are grill-less and penniless like me: sliders. (Feel free to play up the cheesy baseball references. )

Cue the soundtrack:

Now we’re ready to start. This is not so much a recipe for the perfect slider filling (although I will tell you what I put in mine, and give you some more ideas), as much as it is a trick to make them as easily as possible.

In fact, I’ve started making these once every week or two , because I’ve discovered how quick and easy (and cheap and healthy, yada yada) these are. More reasons why I make them:

  • They freeze beautifully.
  • They are easier to keep than a loaf of bread. Nine times out of ten, I end up with a stale hunk of bread after we’ve had a meal or two with the rest of the loaf, but with sliders, I can easily take the portion I need and keep the rest frozen until I need it again.
  • They look cuter than regular sandwiches.
  • Instant portion control!
  • I think we end up using less bread dough in the end by making it into sliders, because I really think it goes farther.
  • Baking the dough in smaller portions takes less time, both in rising and in actual baking.

In short, it’s a win-win all around. I think my DH secretly feels these are a little bit too girly for him, but when I feel them with something manly like beef, he doesn’t mind. In fact, he’ll polish off several in one sitting (so much for portion control. Oh well, it works for me and that’s the more important thing, since I’m the one who gains the weight in this household.).

I use my artisan bread dough to make my sliders, which should be no surprise to you if you’ve read my blog for any length of time at all. I cannot recommend this bread-making method highly enough for anyone who wants healthy fresh bread, but doesn’t want to invest a great deal of time into it. A few minutes to mix up the dough, then just let it sit on the counter for a few hours (or more - sometimes I let it sit overnight). Keep in the fridge, and for the next two weeks, you have bread dough at the ready for pizza crusts, rolls, flatbreads, and loaves of bread. A loaf of bread still requires quite a bit of resting and baking time, but rolls, pizza crusts, flatbreads - and sliders! - take very little time to rise and bake (less than an hour all told). Find the instructions for artisan bread dough here.

The last batch of artisan dough I made, I was thrilled to be able to use a kitchen scale for the first time to measure out the ingredients. At the FitBloggin’ conference in May, I was given an EatSmart Kitchen Scale , something I have been wanting for a looooooong time! I was SO excited to pull it out for my artisan bread dough, and I was not disappointed with the results.

Well, to be honest, I was disappointed at first, because the dough was more liquidy than I had ever seen it and I was sure it wouldn’t work. Actually, these turned out to be the best tasting bread I’ve made with the artisan recipe yet, so something was working right!

I’m excited to try even more recipes with the scale (I’ve also had great success with gluten-free recipes!), and you’ll hopefully be seeing more metric measurements here in the future (don’t worry, I’ll still give you cups and TBSPs!).

Hopefully, once I’ve got more practice under my belt, I will be able to share with you what I’ve learned about how to use a scale and the metric system in your baking.

But back to the sliders. If you’re not convinced about the merits of artisan bread dough, don’t worry: pretty much any bread or roll recipe will work in the same way. The trick is more in how it’s baked than how it is mixed together and what the exact ingredients are.

Enough already, you say vehemently! OK then, so what is this trick to making sliders?!

Easy. A muffin tin! That’s it. All you have to do is portion out your dough into a muffin pan (fill each cup about halfway), let it rest for 15-20 minutes, then bake it for another 15-20 minutes at 450F.

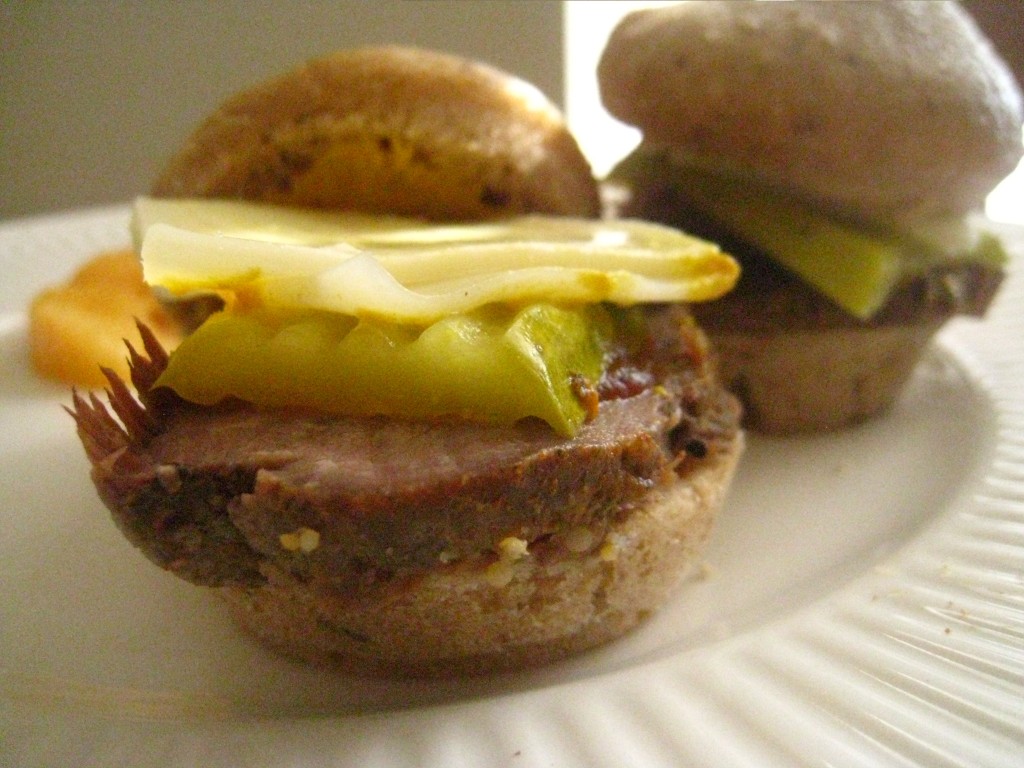
And voila! Perfect little slider buns. (Awww, so cute!)

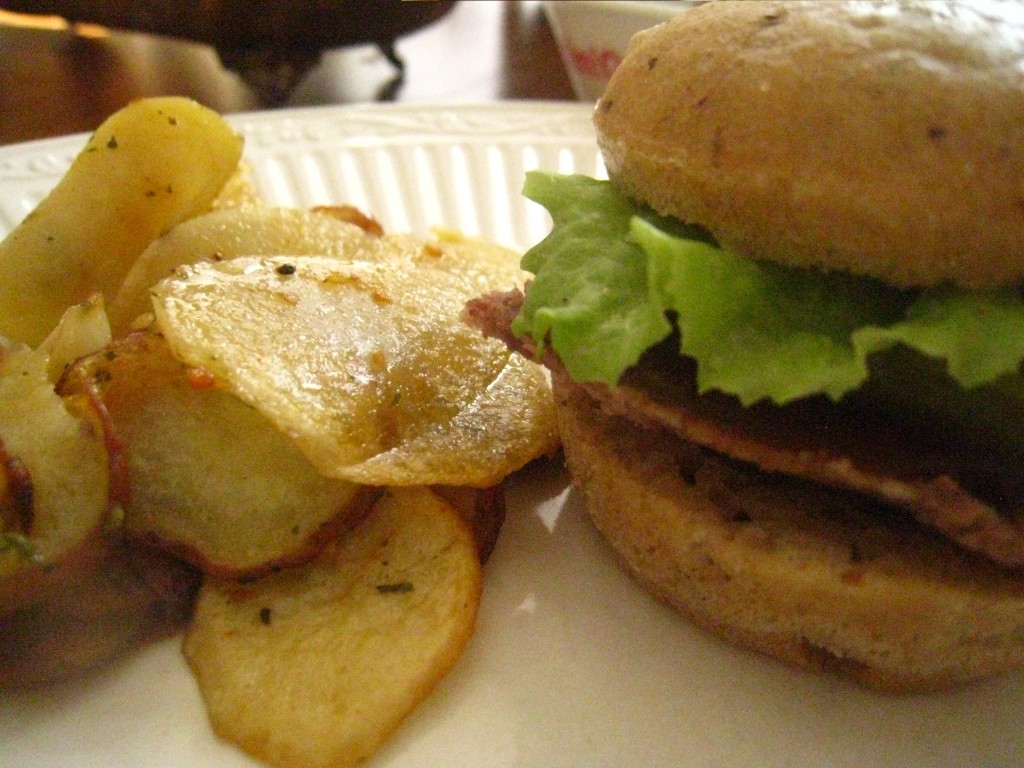
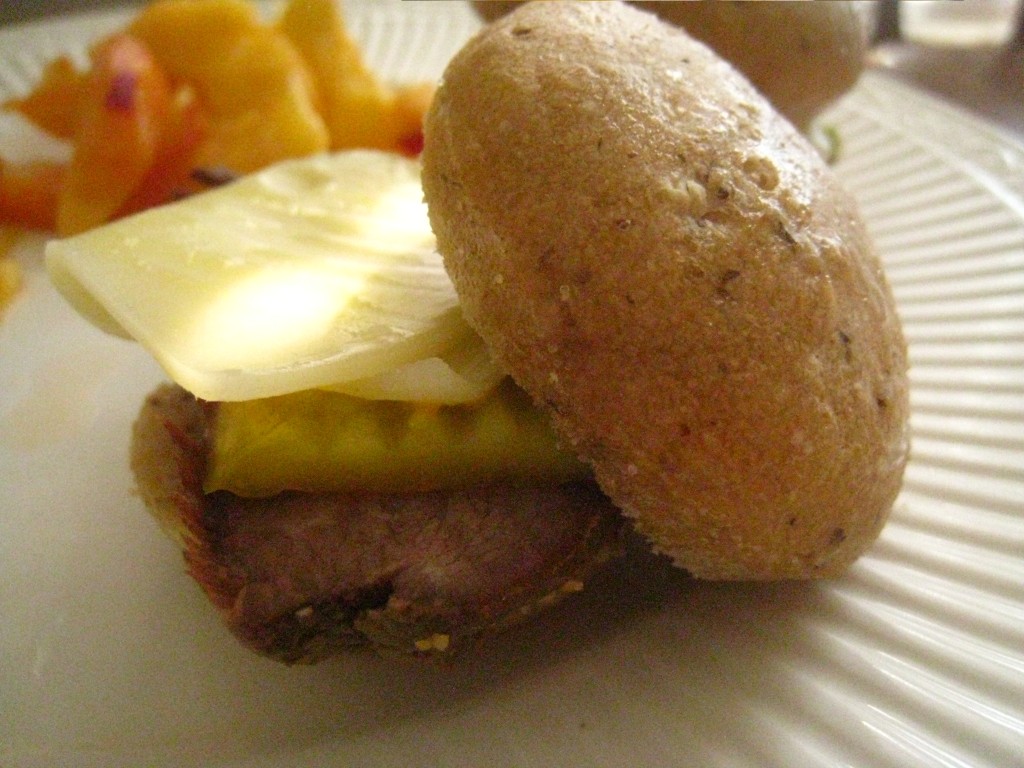
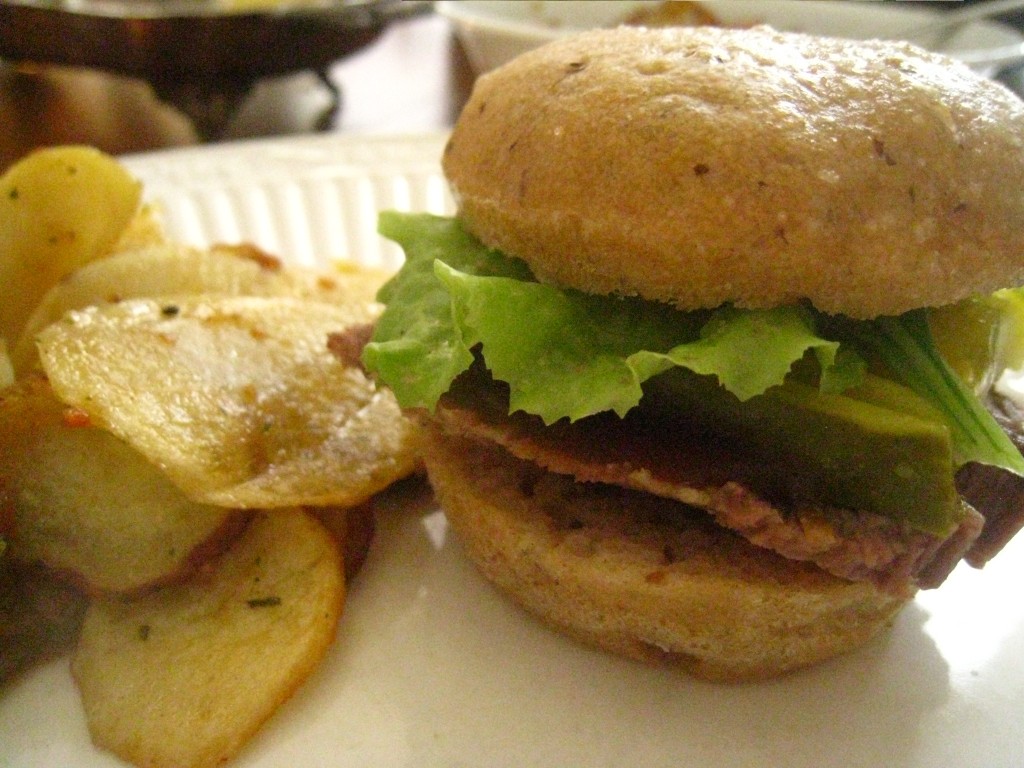
Once they’re cooled down a bit, you just remove them from the pan, slice them in half horizontally, and fill them with whatever you desire. Most recently I made roast beef sliders (sure to be a hit with Dad if he’s a beef-eater like my children’s father!), using up some leftover roast beef. I layered the following on the bottom piece of the roll:

  • thick slice of roast beef
  • 1 TBSP of homemade BBQ sauce (I will have to blog about that one soon!)
  • a dill pickle “hamburger slice”
  • half a piece of provolone (or whatever cheese I had at the time)
  • a piece of lettuce from my garden
  • a swirl of spicy brown mustard on the “lid”

Of course, you can put in your slider whatever your little heart (or Dad’s heart) desires. Pretty much anything that goes in a sandwich can go in a slider, just in smaller (and cuter) portions. Some suggestions:

  • pulled pork
  • shredded beef
  • chicken salad
  • tuna salad
  • lunchmeat and cheese
  • BLT
  • crab salad (especially good for a luncheon with guests)
  • etc.

So, to recap:

Sliders are QUICK because they take less time to rise and bake than traditional loaves of bread. They also defrost more quickly, and are quicker to utilize than bread. They’re great for weeknight meals, or lunchboxes.

Sliders are EASY-er to bake than loaves, at least in my opinion. Free-form artisan loaves can be tricky to shape and bake properly, but with the muffin tin, all you have to do is plop the dough into the tin. It does help, I think, to cut a small slit in the top of each slider before baking, otherwise you get a Hershey-kiss-like effect.

Homemade sliders are so CHEAP! Flour, water, yeast, and salt. Pretty basic!

If you use at least half whole grains, and appropriate fillings (veggies like lettuce, tomato, cucumbers, etc.), they can also be very HEALTHY.


Hearth and Soul Hop at the 21st Century Housewife

Secret Recipe Club: “Clifford” Bars

It’s time again for the Secret Recipe Club, the part of the show where the bloggers come out and sing their favorite song. Um, I mean blog about their favorite recipe from another blog that has previously (and secretly) been assigned. Which is even more fun.

I was thrilled to be assigned to This Chick Cooks, This Chick being the fabulous Katie, who delivers lots of amazing culinary concoctions on a regular basis, my favorites being the ones that are inspired by store-bought treats and eats.

I’ve made a few of her recipes before and loved them; I even blogged about my allergen-free version of her Better-Than-Nutrigrain Bars, which were fabulous (and I need to make those again; just thinking about them makes me drool a bit).

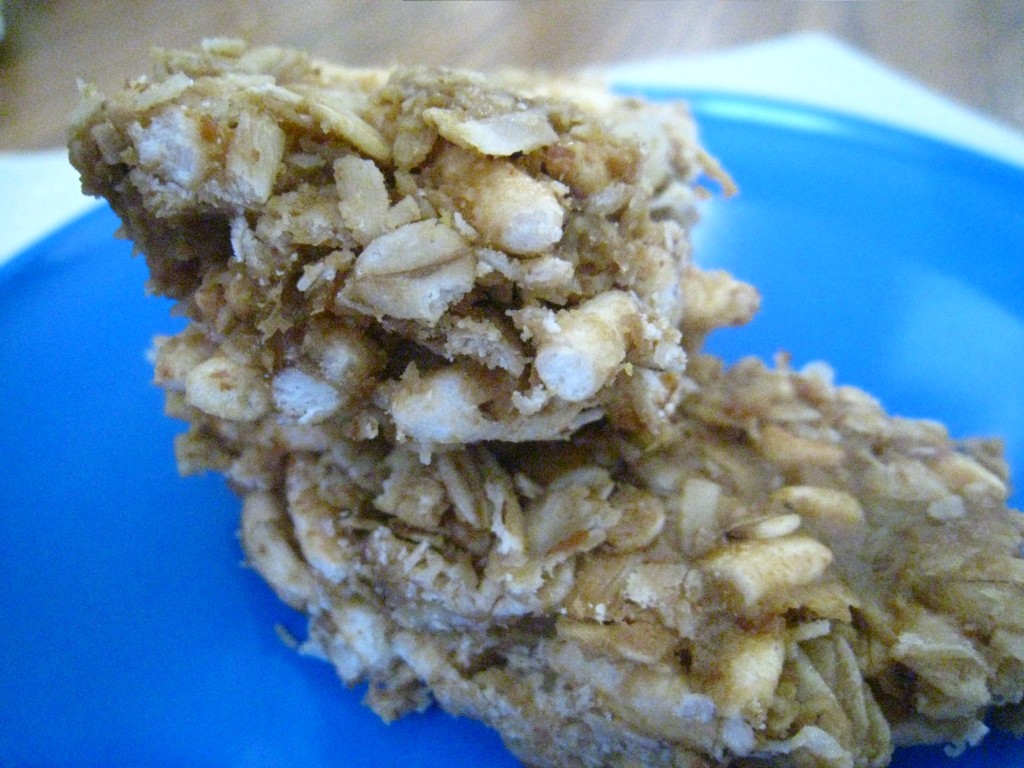
This time around, I kind of went the same route, choosing another granola-bar-like recipe, her Homemade Clif bars, and adapting it to be allergen-free. I just eliminated the nuts, and switched out the peanut butter for sunflower seed butter, so it’s easy enough to make those changes if you desire.

Oh, and apparently, to a toddler, “Clif bars” just doesn’t cut it. No. They are “Clifford” bars. I am not sure why since they are neither big nor red nor a dog, but… that is what my Certain Little Someone called them and so that is what they are.


The fact that these are no-bake makes them so QUICK! A nice alternative to traditional granola bars.

They are also super EASY!

It is definitely CHEAPer to make these than to buy their counterpart at the store, that’s for sure.

And, they are relatively HEALTHY as well. I feel good about giving them as a snack for my Certain Little Someone, especially if they take the place of a cookie or other sugary snack, because of the added nutritional elements like the dried fruit and whole grains.


Gifts from the Kitchen: Scone Mix in a Jar

We often think of scones as a British food, I guess because it’s a very British-sounding word. But when Brits say “Scone” they mean something very different from what we as Americans mean when we say “scone”. A British scone is very much like an American biscuit (although a British biscuit is very much like an American cookie or sweet cracker).

And to think, we speak the same language.

I don’t really know if the American scone has a counter-part in English cuisine, and I’m not sure why they’re always cut in triangles, or why we think they are British. There’s a lot regarding scones that confuses me, as you can see.

All of that aside, as Americans, we enjoy eating scones and pretending to be very British, because it is a lot of fun. And because you can make scones in so many yummy different flavors, kind of like biscuits and cookies.

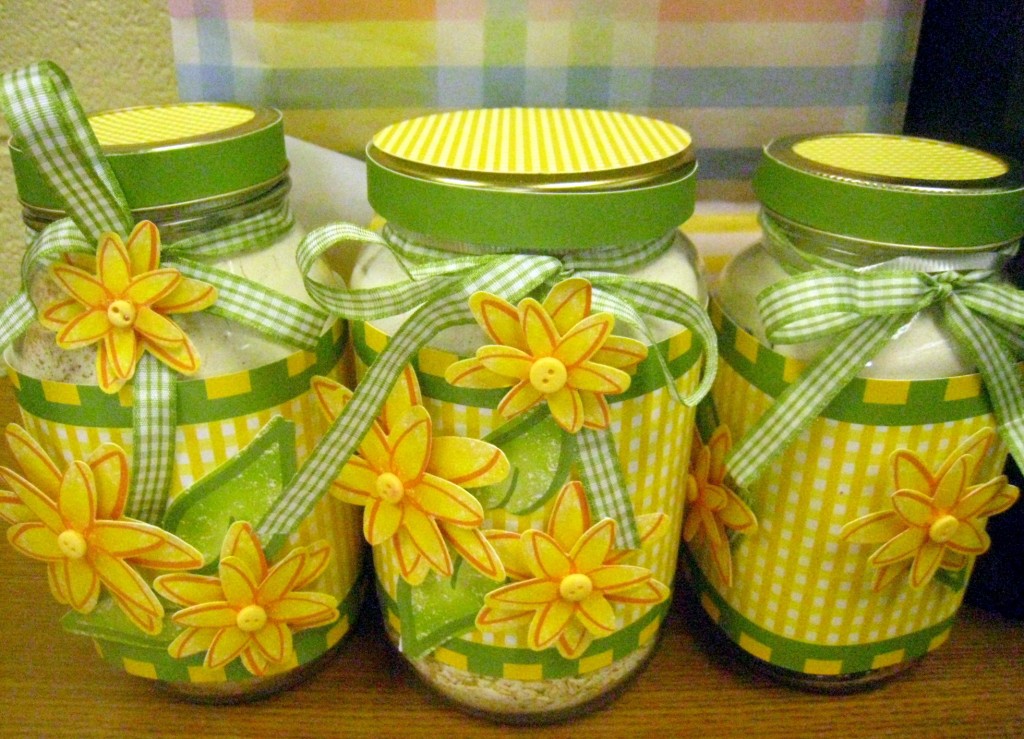
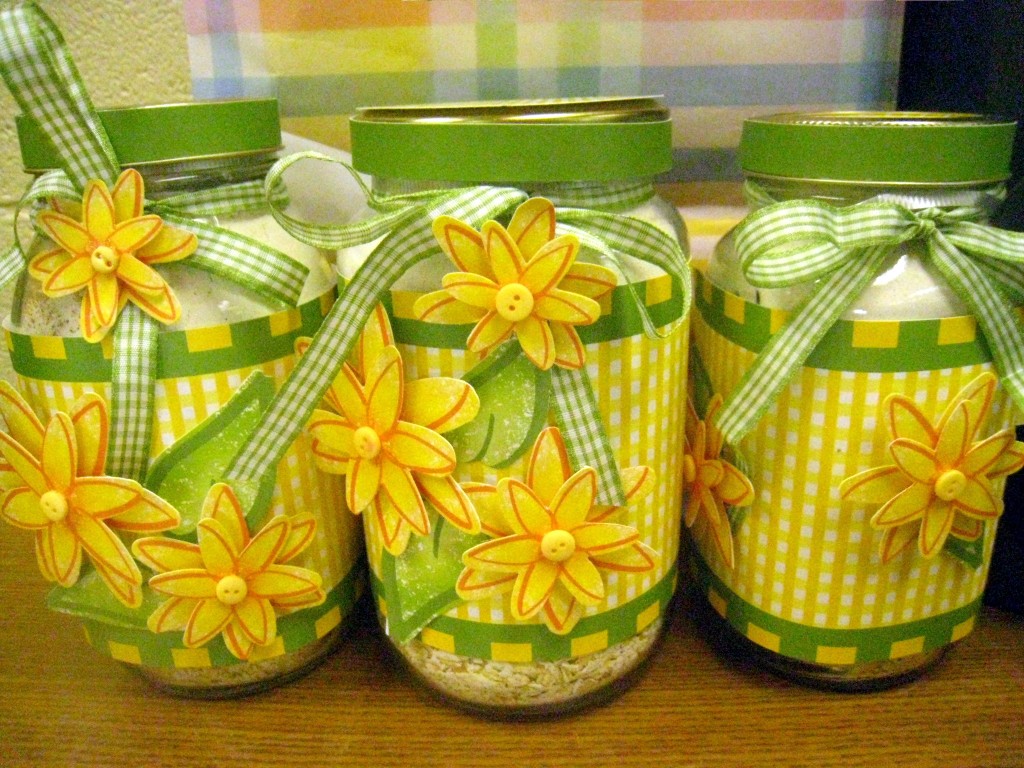
At a tea party recently, where we were pretending that high tea was something we did on a regular basis with our pinkies in the air, I made some scone mix in a jar to give away as door prizes. Scones were on the menu, made by the fabulous Touche Touchet Bakery in town, and it just seemed fitting to offer my guests a way to bring the experience home. Plus, it was cheap (Shh! Don’t tell the prize winners!).

Whether you are hosting your own tea party, or you do have high tea regularly, here’s how to make your own scone mix in a jar (original recipe from Savings Lifestyle). Give it as a hostess gift or as a favor, or even as a present for a tea-loving friend.

To make this or any kind of mix-in-a-jar, you will need a quart-size canning jar, and wide-mouth jars are best because it’s easier to get all the ingredients in and out. A case of 12 wide-mouth canning jars costs about $25, making each one just over $2.


A QUICK gift - and a QUICK way to make scones! Keep some of the dry mix handy for your own scone preparation.

So EASY, even the most non-cook can do it.

A very CHEAP gift (which is why I chose it).

And pretty HEALTHY, too, with the whole grains, raisins, and no sugar.

Lisa's Gluten-Free Advice and Healthy Living

Preserving the Bounty: Turning Berries into Jam

Of the many wonderful things you can do with strawberries, jam is one of the best. It’s kind of hard to decide, because there are so many delicious delicacies like strawberry shortcake, or strawberry ice cream, or strawberry syrup, or strawberry lemonade, or… Like I said, hard to decide.

Good thing it’s strawberry season, huh? Too bad the strawberry patches have suffered this year for a variety of reasons from flooding to heat waves. Thank goodness there are still enough strawberries to go around!

I’ve visited the topic of berry jam before, but now that we’re at the threshold of a delicious new berry season that will last us well into July (depending on where you are) with raspberries, blackberries and blueberries, I think it’s a topic worth revisiting.

If you’ve never made jam before and you’re not sure you want to try, please repeat after me:

Jam is not hard.

Jam does not take long.

One more time (let me hear it this time, folks!):

Jam is not hard.

Jam does not take long.

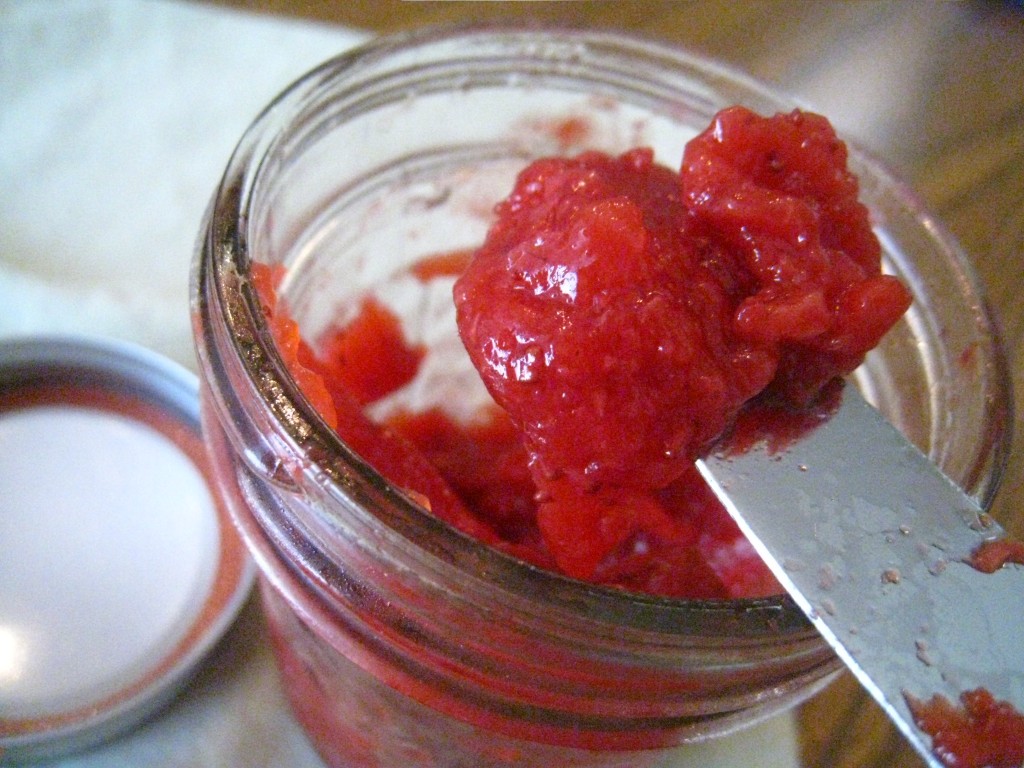
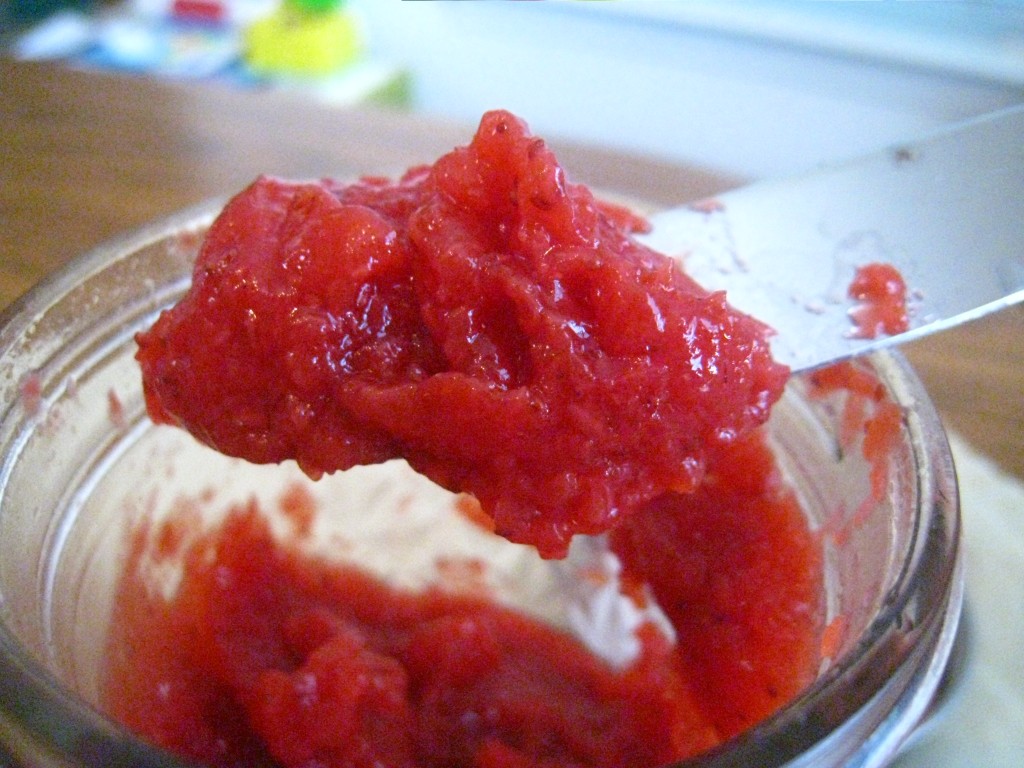
If you want specifics, it takes an hour or less from beginning (fresh dirty berries) to end (beautiful jars of bright red jam). If you’ve heard horror stories from seasoned cooks about jam that just won’t set - or whatever other complaint you may have heard - erase them from your memory, because I’m a total newbie, and every single one of my batches thus far has set without any particular effort or stress on my part.

If you can follow directions, you can make jam.

You will, however, need some equipment, or at least, equipment will make it easier. You can certainly improvise with what you have, but there are certain things that just make canning easier. Here are my recommendations:

Ball canning utensil set (with a wide-mouth funnel, tongs for picking up hot jars, magnetic seal lifter, and bubble remover/headspace measuring tool)

40z Jelly jars, or 8oz jelly jars (Must have both lids and rings; it’s a big no-no to use one-piece lids in canning and preserving. Also, you can re-use jars and rings, but not the lids. If you have jars from before, just purchase extra lids. )

a large stock pot or canning pot (Jam jars will fit in most stock pots, but for other canning, you’ll need a huge canning pot)

Pomona’s Pectin (my favorite) or Ball no-sugar pectin or Sure-Jell no-sugar pectin

Everything else you should already have in your kitchen.

So let’s get started…

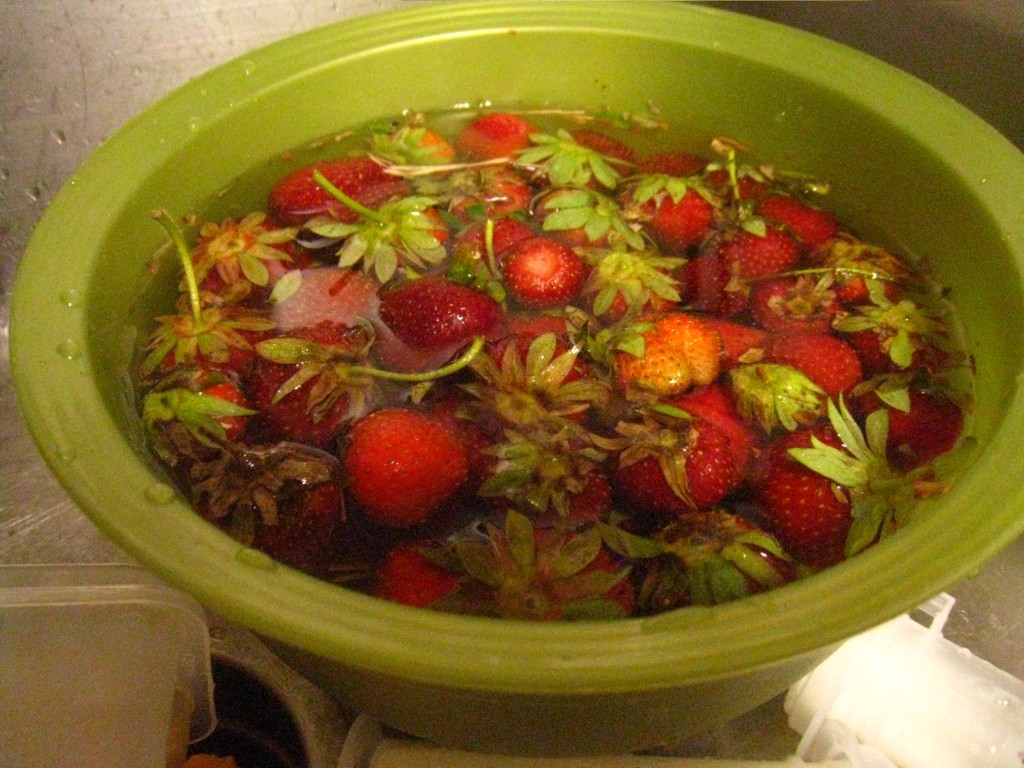
Begin by cleaning approximately 2 lbs of berries.


I put mine in a large bowl, filled it with water, and allowed them to soak while I set up the stovetop:

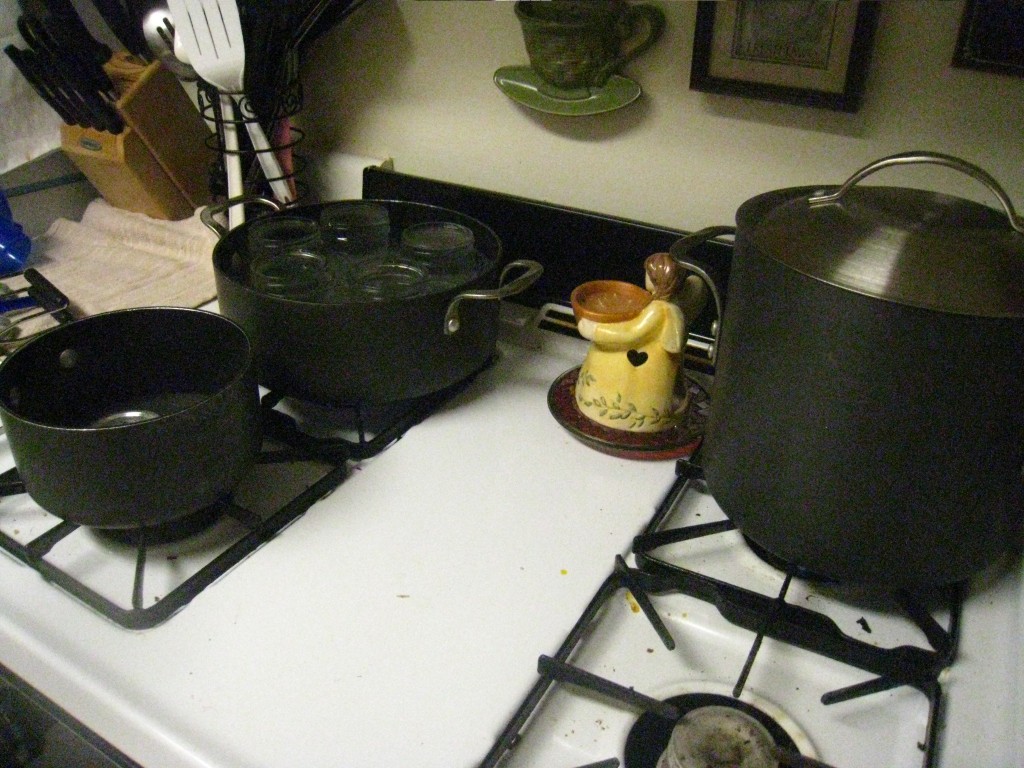
The stock pot (with a hot pad on the bottom to hold the jars in place) filled with water and set to boil, another large pot filled with hot water and clean jars, and a small pot with the lids on a low simmer to keep them clean and sterilized. The last burner will hold the actual pot of jam.

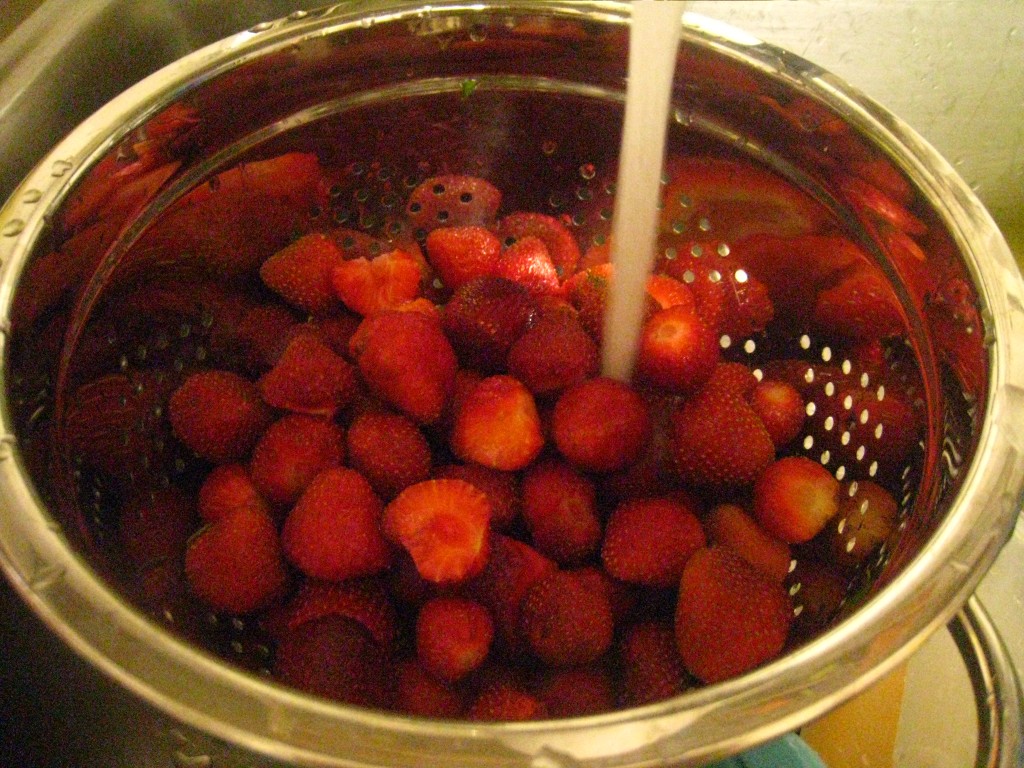
Back to the berries now: As you remove them from the soaking bowl, remove the stems and place them in a colander. Once they’re all in the colander, rinse them well with running water.

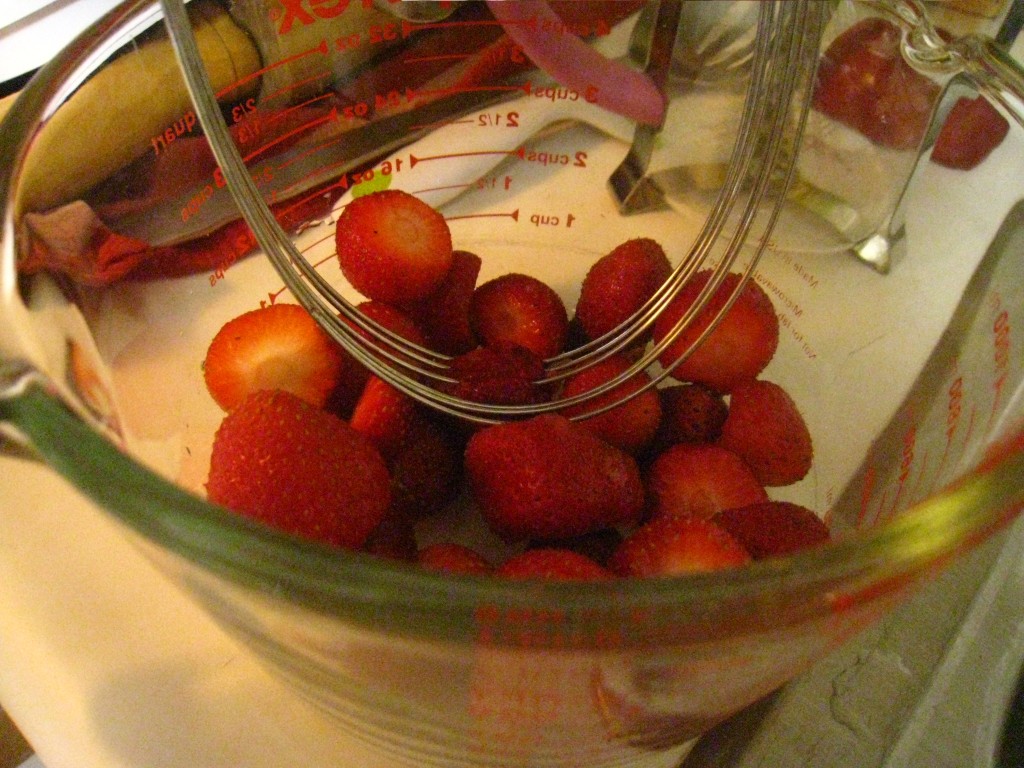
Put the freshly cleaned berries into a 4-cup measuring cup and smash them (with a fork, with a pastry blender, with a potato masher, whatever works. Just try not to use a blender unless absolutely necessary because that will interfere with the setting of the jam).

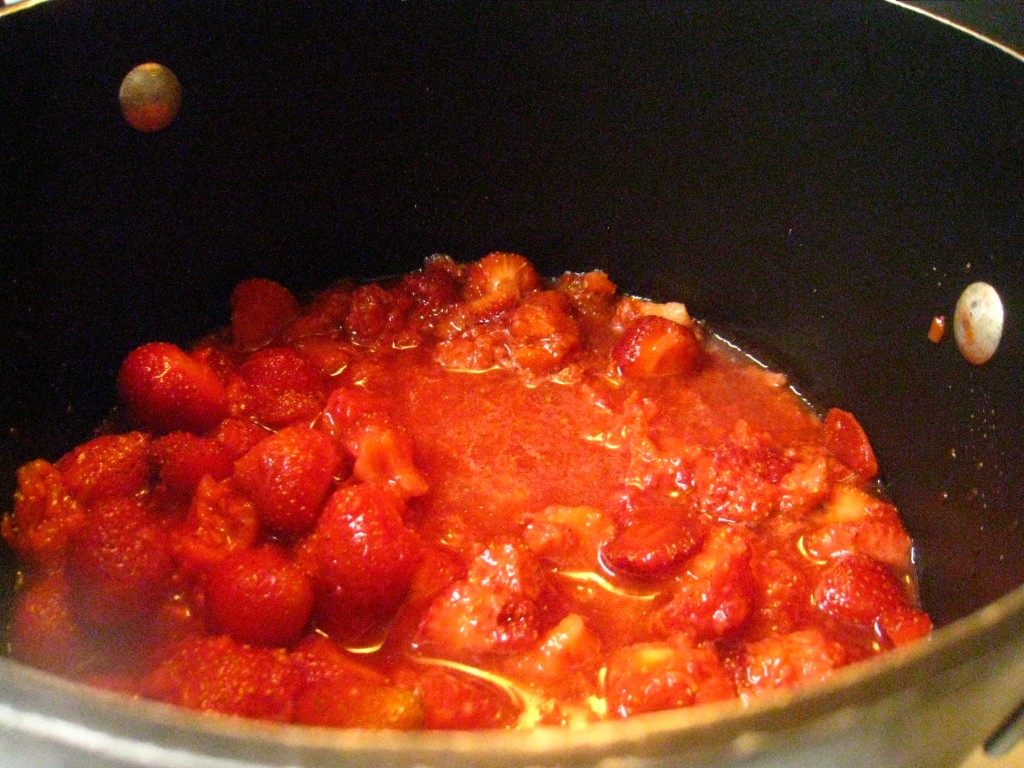
At this point, you will need to follow the instructions for whichever pectin you buy. For Pomona’s Pectin, pour the 4 cups of mashed berries and required amount of calcium water into a pot and bring to a boil.

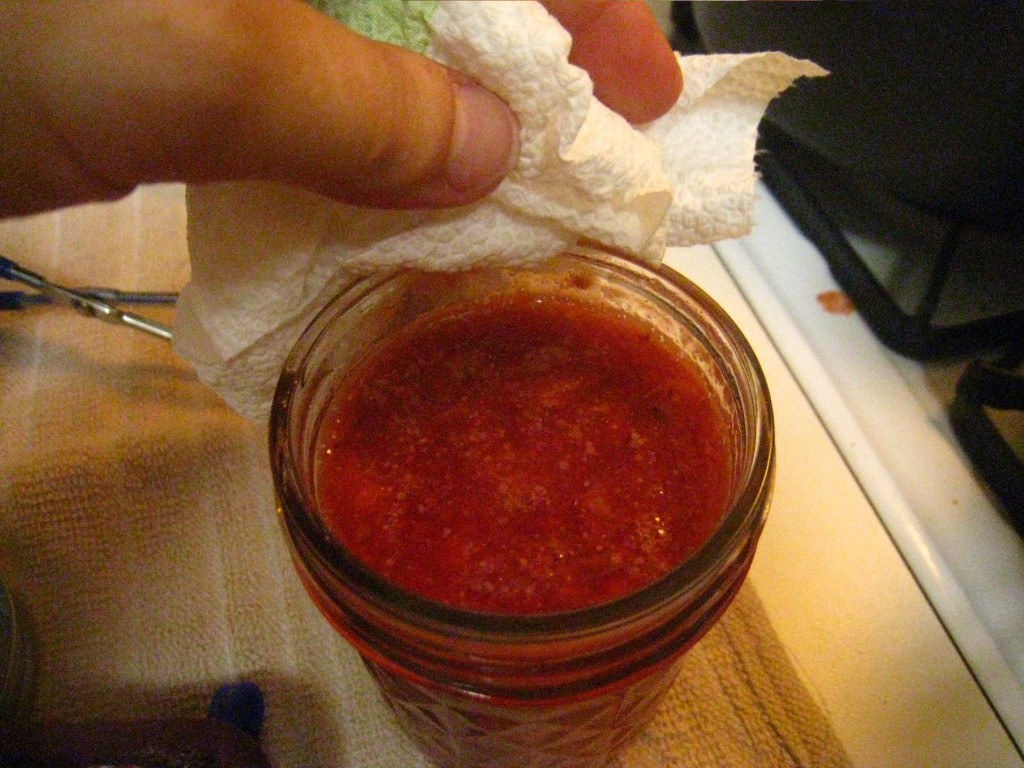
Add the 3/4 cup sugar and required amount of pectin, and return to a boil. Using the jar tongs, remove the jars, one at a time, from the sterilizing water, and fill them with the jam mixture, leaving 1/4″ headspace at the top. Wipe the top of the jar with a towel or paper towel (this helps keep things clean to prevent food poisoning).

Use the magnetic seal lifter to remove the lids from the simmering water and place them onto the jar. Top with the ring and tighten just a bit (not completely). Use the jar tongs to place the jars on top of the hot pad in the boiling water (it should be a full rapid boil). Cover and boil for 10 minutes (the amount of time depends on altitude, check pectin package for instructions). Using the tongs once again, remove the jam jars from the boiling water and set on a towel to dry. Leave undisturbed for 24 hours. You will probably hear a ping or pop from the jars, indicating that they are sealed. Label the jars with contents and date and store in the pantry. Refrigerate once opened.

I always have one jar that doesn’t quite get full to the top. That’s OK. I don’t bother processing that one in the water; I just put it straight in the fridge and use it up within a few weeks.

Once again, repeat after me:

Jam is not hard.

Jam does not take long.


In fact, jam is pretty QUICK: an hour or less, start to finish (not a day-long process like I once thought).

Jam is very EASY with the right equipment.

Jam is CHEAP, even after the initial investment for the jars and other equipment. I paid less than $2/jar for delicious, fresh (REALLY fresh - strawberries picked that day!) strawberry jam with minimal sugar and no additives. Can you say that about the average jar of store-bought jam with who-knows-what inside?

Making jam at home is HEALTHY because you can control the ingredients and sugar level.

Linking up at Simple Lives Thursday and

Strawberry Patch Memories

Did I ever tell you that when I was ten years old, I had my own strawberry patch? No? Well, I did. I fondly recall those days! I even picked out the strawberries from my mom’s seed catalogs (guided by her, of course; she helped me pick ones suited for our area, which was Carroll County, MD). My mom (or maybe my dad or my brothers) did the hardest part of tilling the ground for the patch and preparing it for planting, but I am pretty sure that I was heavily involved in the planting and tending. I remember being surprised at how the strawberry plants spread so quickly!

I know for sure I was heavily involved in the picking of the strawberries, although the funny thing is…. I don’t remember having a huge abundance of strawberries! Maybe my little strawberry patch didn’t do so hot. Hmmm. I will have to ask my mom about that.

I do know that with the strawberries I did pick, my mom promptly taught me how to make a fresh strawberry pie, using a recipe from a local farm. I made so many of those pies, I pretty much perfected the recipe, at least as much as a ten-year-old can perfect a recipe! I haven’t made strawberry pie since leaving home, though, probably because I was a little bit burnt out on strawberry pie.

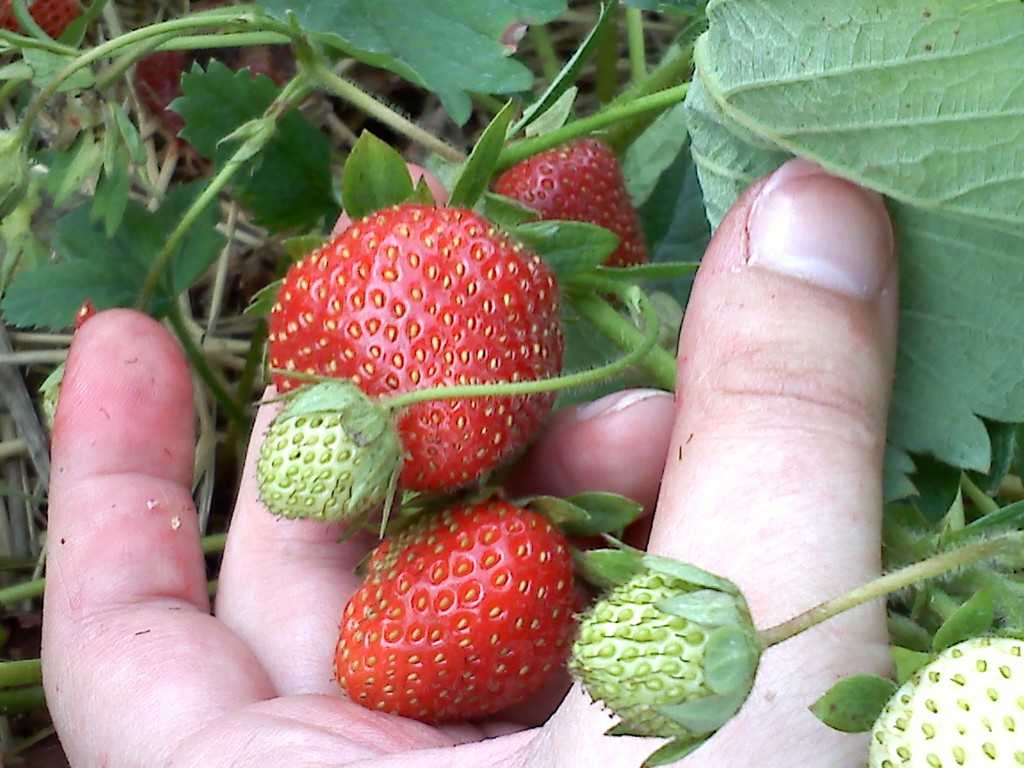
But not strawberries. Oh, no. I could never be burnt out on strawberries! Especially strawberries fresh from the farm, kissed by the sun. Mmmm Mmmm! Simply can’t be beat.
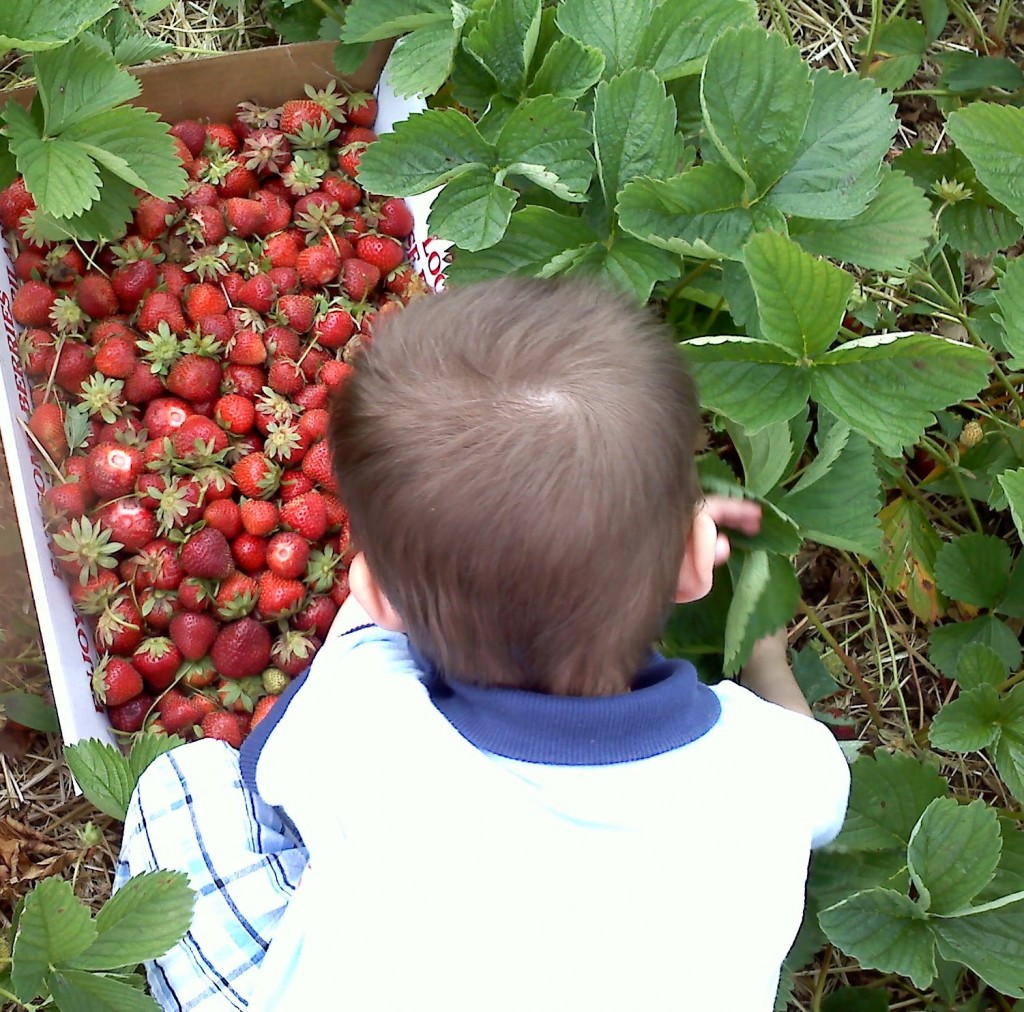
 

sun-kissed berries

Today, we (myself, my Certain Little Someone, Baby Boy, my DH, and three of my sisters) went to a local pick-your-own farm, and between us picked just about 20 pounds of strawberries. I took my half home and turned it into jam, sorbet, and frozen strawberries, leaving a few in the fridge to nibble on and to share. Strawberry season doesn’t last super long - look in your area and see if you can go pick some strawberries in the next couple of weeks.

Larriland Farm, the closest pick-your-own farm to us, has all kinds of fruits and vegetables available for picking throughout the growing season. It all kicks off with strawberries, but in the past I’ve picked raspberries (including black raspberries), peaches and apples there, as well. I’ve always been incredibly pleased with the fruit and the picking there, although the strawberry selection was a bit down this year due to the unseasonal heat wave that hit this past week.

There were still plenty of delicious ripe berries, though, definitely worth the trip. All the helpers there were extremely courteous, and gave tips and pointers regarding the best berries to pick. The price was $2.49 for less than 20 lbs, which is a great price; but if you picked more than 20 lbs, it dropped to $1.99/lb. We were just a few ounces shy of the 20 lb mark, but since it had started to rain and we weren’t all that thrilled about going back into the field to pick more, the kind cashier gave us the 20lb price - woot!
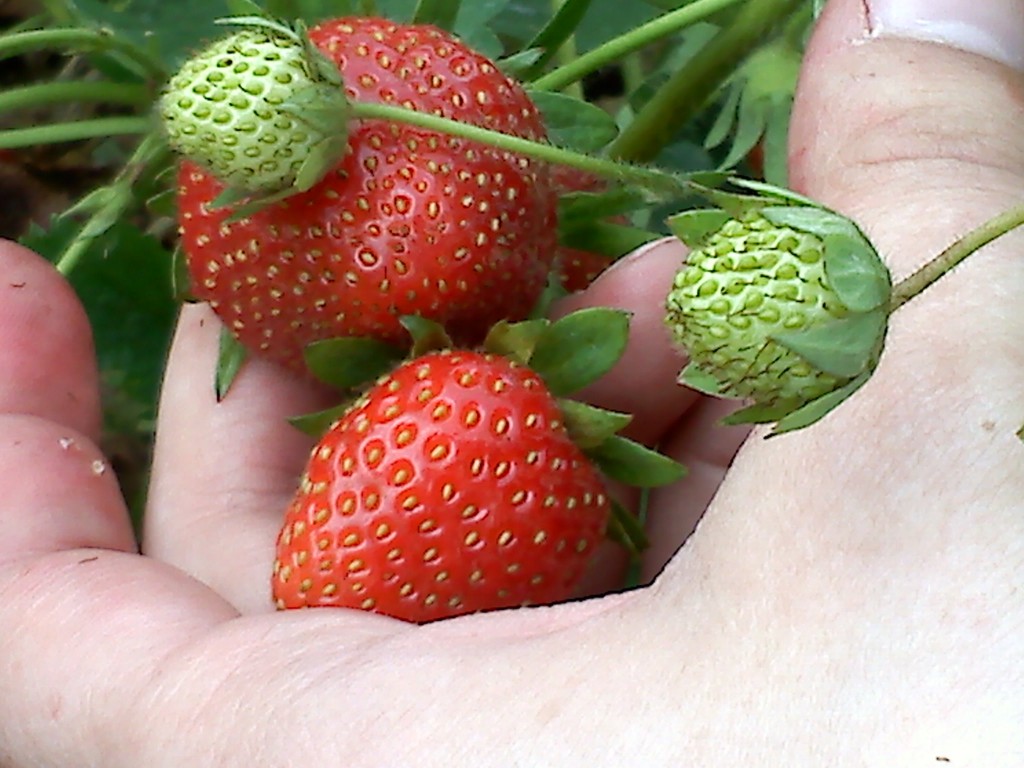
We came home, itchy and hot from our time in the sun and in the berries, but pleased with our trip and with our success.

Do you have any pick your own farms nearby? What do you like to pick?

Iced Tea: Your Way

Today is actually breezy and cool but this past week has been one long heat wave with temps in the 90s and more. Perfect for sitting in the shade, shooting the breeze… and sipping iced tea.

I’m not even going to pretend that I know how to make the perfect pitcher of iced tea, because I am well aware that there about as many methods of making iced tea as there are people. I will show you a yummy twist on sweet tea that I think you will enjoy, but first let me share my readers’ favorite ways to make iced tea:

Marika likes to make hers “old school”: black tea over ice with no sweetener.

Mary Jo changes hers up by using Celestial Seasonings berry teas in the summer, brewed this way: ‎4-6 teabags in about 5 cups water, bring to almost boil and turn off to steep, add 3/4 cup sugar and cold water to equal 1 gallon.

Missy gets fancy by pureeing frozen peach slices (she also suggests strawberries, blueberries, or mango chunks) and adding the puree to already chilled tea.

Ann and Shalene follow the classic method of boiling 6 tea bags in a saucepan of water, bringing to a boil, then adding water to fill a gallon pitcher.

Amy at A Little Nosh does a slight variation by putting the tea bags straight into the pitcher and pouring the boiling water over them, then adding ice and/or cold water to fill the pitcher.

When Shalene has time, she likes to make sun tea by placing 10 tea bags in a gallon container full of water and setting it outside in the sun to brew.

Heather puts the microwave to work with 1 cup of water and 3 tea bags for 2 minutes, then adding to a gallon of water.

Recommended brands include Lipton and decaf Luzianne. My readers must mostly be Northerners because sweet tea was not a favorite! I am from Maryland, which is decidedly undecided about whether it is the North or the South, and my iced tea reflects that: sweet but not too much so. “Real” sweet tea is too sweet for me, I usually only add about 1/4 cup or 1/2 cup at the most to my pitcher of tea.

And now… if you want to try something different with your tea, here’s my variation!


To be honest, I never measure when I make tea, so those water, sugar, and vanilla measurements are approximate. I know I fill a 2 qt pitcher, and I know I give one good squeeze of the vanilla bottle, and I know my sugar scoop is a scant 1/4 cup (I use one scoop worth for myself, and 2 when I’m making it for company). I also like to use half sugar and half honey.

If you like to leave out the sweetener until serving, I recommend using TrueVia or liquid Stevia instead of sugar substitutes like Equal or Splenda, which are chemicals not easily digested by your body.

Homemade iced tea is so QUICK, there is really no point in purchasing those chemical-laden powders (that don’t taste like real tea anyway), or bottled teas like Lipton.

It is so EASY, too, especially since you make it to your own taste, not somebody else’s. I admit that it actually can be more difficult than it should be to make iced tea for company since everybody has a very individual taste when it comes to their tea, but if they don’t like it the way you drink it, oh well. The more left over for you!

Making iced tea from your own stash of tea is so much CHEAPer than buying it made or even buying the powder, especially considering it’s the real deal! Even organic tea is not that expensive.

Tea is very HEALTHY for you. I haven’t seen any studies that compare the relative healthiness of cold vs hot tea, but I imagine they are similar since the tea itself is usually hot brewed to start with in both. No matter what kind of tea you use - black, green, white, red, or herbal - it will be full of antioxidants that will help your body fight off disease. Just keep the sugar to a minimum, and avoid the artificial sweeteners.