Archives for May 2012

What To Do With 20 Pounds of Strawberries!

strawberries

It’s strawberry season, y’all! Time to go find a pick-your-own farm near you and get busy! The farm we go to - like many PYO farms, I imagine - offers a cheaper price per pound if you buy more than a certain amount. In the case of strawberries, that’s 20 pounds. So naturally, I had to pick 20+ pounds of strawberries! Why pay $2.59 a pound when I can pay $2.09?

And as much as The Guys and I love strawberries, there’s no way we could plow through 20 pounds of them before they went bad. After all, strawberries start to deteriorate almost as soon as you’ve picked them off the plant, so they have to be eaten rather quickly.

That was fine with me, though. At any rate, my entire purpose in picking strawberries was to preserve them so we could enjoy them for the 10 months of the year when they are not in season, so 20 pounds was perfect for me!

So what did I do with all those berries? I spent a decent portion of the weekend “putting them up” as the grandmas would say, and this is what I did:

  • I froze probably about 10 pounds of strawberries following these directions for freezing berries. I sliced about half of them and just packed them into freezer bags without bothering to flash freeze them. The rest I left whole and those I did flash freeze. My plan is to see which method I prefer as I use them throughout the rest of the year. (My opinion at the moment is that slicing them takes up a lot less space, but might render them less accessible.)
  • I dehydrated about a pound of strawberries, which wasn’t much, especially because they shrink considerably as they dry! To dehydrate, I sliced each strawberry into about 3 slices and laid them on a dehydrator tray. Once I set it going, the drying process took probably 4-6 hours. I’m not 100% sure because I got busy doing other things and going places and I don’t really know for sure how long it took. I do know that we all left the house for the evening, so I turned off the dehydrator and then forgot to turn it back on. Ugh! I had to throw out the strawberries that hadn’t dehydrated completely, which thankfully was not too many. Next time around, I will definitely dry more strawberries… and I won’t run off, leaving them unattended, either!
  • I also made some jam. I experimented this year with jam made from home-made pectin. That’s another post for another day. I also made two batches of jam using Pomona’s pectin, one which I froze, and one which I canned.
  • I made smoothies for breakfast one morning using the Straw-nana Berry Smoothie recipe from Spring Into Smoothies (Pssst! Spring Into Smoothies is available FREE to all my subscribers!)
  • I gave away some of the strawberries. What good is all that bounty if you don’t give some away?
  • I made this delicious Sour Cream Strawberry Ice Cream. Oh. My. It was sooooo gooooood. I didn’t have quite enough sour cream, so I used part plain yogurt, and wow! The most delicious ice cream ever! I also only used half a cup of (unrefined) sugar, and it was perfectly sweet. (Of course, the berries were picked ripe, so they were nice and sweet already.)
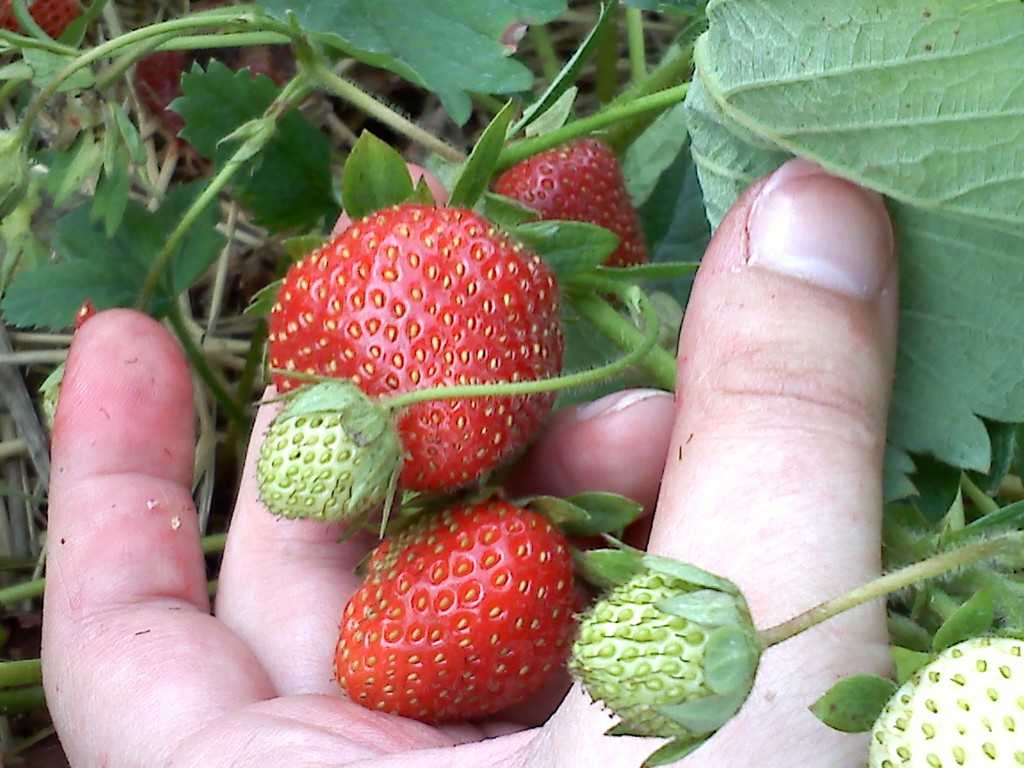
And that, my friends, is what you do with twenty pounds of strawberries!
What would you do with twenty pounds of strawberries?
Sharing at Frugal Friday

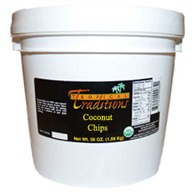
Tropical Traditions Coconut Chips & Coconut Milk Recipe

You probably already know that Tropical Traditions is famous for its Virgin Coconut Oil. (Curious about coconut oil? Click here.) And if coconut oil was the only thing available at Tropical Traditions, it would be totally worth it. Check out this video with all the uses of coconut oil if you don’t believe me.

LinkedTube

But as much as I love Tropical Traditions’ coconut oil, I’m not here to talk about that today. Today I want to focus on one of their other amazing coconut products: coconut chips.

Tropical Traditions generously sent me a gallon of their Coconut Chips to try, and I started digging in right away. I wasn’t exactly sure what to expect, to be honest. I’m familiar with coconut flakes, coconut shreds, desiccated coconut, and the like, but coconut chips? Wasn’t real sure exactly what that was.

It turns out that coconut chips are basically like coconut flakes, just a little bit larger. I was expecting a thicker, crunchier piece of coconut, but it’s actually rather thin. Tropical Traditions recommends using their shredded coconut or coconut flakes rather than the chips for baking, but I personally think these coconut chips would also work in any dried-coconut-based recipe, like these Orange Chocolate Macaroons. The texture would probably be different, but I think it would work. You could also try this recipe for Gluten Free Coconut Fudge Cupcakes.

What did I do with my delicious coconut chips?

Well, first of all, I ate them plain. Yummy!

Then I added them to a trail mix I made:

  • dried cranberries
  • raisins
  • sunflower seeds
  • chocolate chips
  • chopped walnuts,
  • and, of course, coconut chips

Dee. Lish. Us! And perfect for on-the-go snacking.

I also used the coconut chips to make home-made coconut milk for my Certain Little Someone. This is how I did it (in my Vitamix):

  • I placed 1 cup of coconut chips in the bottom of the Vitamix.
  • I poured 2 cups of boiling water over the chips, and let them soak for a while as I puttered around the kitchen doing other things.
  • I then put the lid on the Vitamix, turned it on, set it on variable 10 and then High. I let it run for 2-3 minutes to pulverize the coconut chips.
  • I strained the milk through a mesh sieve lined with a tea towel, and squeezed out the tea towel thoroughly after it had cooled some.

That’s it! I then used that homemade coconut milk to make some yogurt for the same Certain Little Someone. He loved it!

If you order by clicking on any of my links and have never ordered from Tropical Traditions in the past, you will receive a free book on Virgin Coconut Oil, and I will receive a discount coupon for referring you.

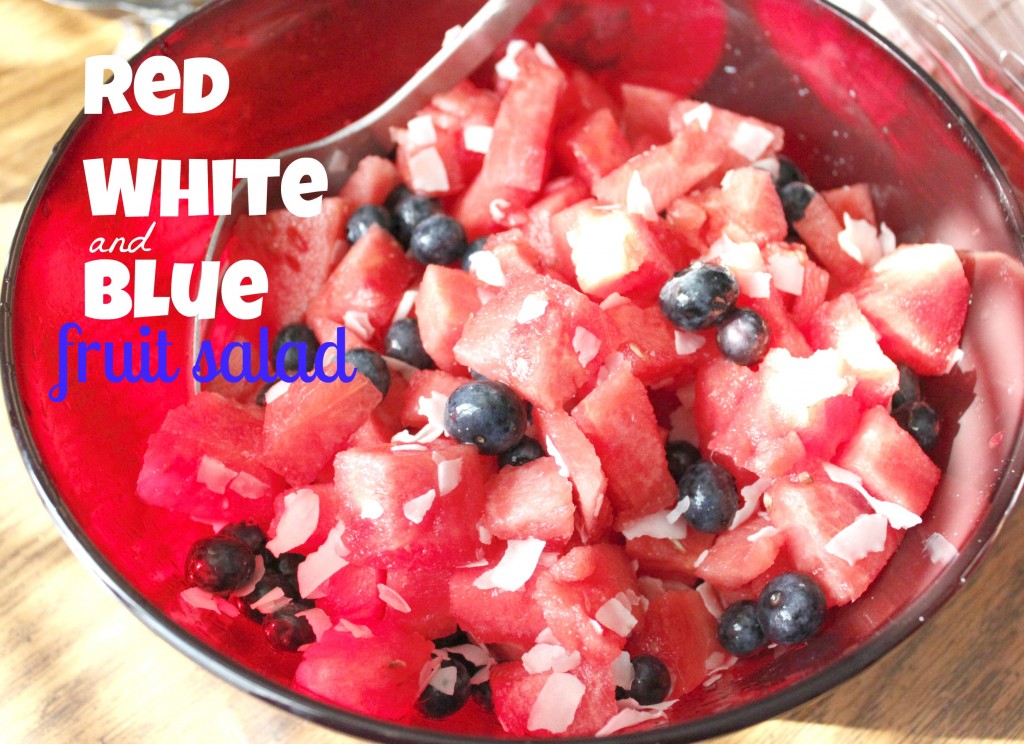
Red White and Blue Fruit Salad

Red White and Blue Fruit Salad #fourthofjuly #celebrationThis recipe is not late for Memorial Day. Nope. It’s right on time for Flag Day, and a little early for Independence Day. I’ve got you covered for your summer patriotic celebrations. (And you can use it for Memorial Day next year, too.)


A QUICK and EASY side dish for any summer celebration!

CHEAP when watermelons and blueberries are in season.

And so HEALTHY: watermelon has more lycopene than tomatoes, did you know that? That gorgeous red color means something healthy’s going on! And let’s not forget the antioxidant power of blueberries, and the healthy fats and fiber from the coconut.


Menu Plan Monday: Memorial Day

menu plan monday
This month’s focus in “Eating Intentionally“* is on “Respecting Your Fullness“, which means exactly what it sounds like it means. How are you doing with respecting your fullness? This is one thing that I have really struggled with: I eat until my plate is empty, or I eat mindlessly while doing something else, or I just keep eating because I’m enjoying the food. But the past week or two, I’ve really been concentrating on it, and I’m learning what “full” feels like, and I’m developing the self-control to STOP when I get to the full point. And it’s been showing up on the scale, too, which is a nice side benefit!

And since today is Memorial Day, I can’t let the opportunity pass to say THANK YOU to all those who have been willing to give their lives for our freedom, and to those who did indeed sacrifice everything. It is a humbling thought indeed to consider that strangers have willingly sacrificed all so that we can continue living in freedom.


Breakfasts

  • Peanut Butter Sunflower Seed Butter & Jelly Smoothies
  • Strawberries n “Cream” Oatmeal (the cream being yogurt)
  • Pancakes
  • Oat Muffins
  • 1-2-3 Granola

Lunches

  • Leftovers
  • Ham Sandwiches (made with nitrate-free lunchmeat, and this allergen-friendly bread)
  • Egg Salad Sandwiches
  • Mixed Greens Salad

Dinners

Snacks

In My Kitchen Today

Are you looking for some menu inspiration? Amazon.com has some great super cheap digital cookbooks available. You can access them through your Kindle or through Amazon’s free Kindle apps (for smart phones, tablets, laptops and other digital devices). These titles are only available at these low prices until the end of May, so get them while you can:

*My concept of “Eating Intentionally”, and the 10 principles we are working through this year, come from the book “Intuitive Eating” by Evelyn Tribole and Elyse Resch. I highly recommend it - I don’t agree with everything in it, but it is a great read for anybody who has ever been on a diet and/or is considering going on a diet.

This post contains affiliate links.

What to do With Wilting Greens

FoodWasteFriday
One of my biggest pet peeves is throwing away food. I could kick myself every time I dump food down the drain or in the trash: it’s just a complete and total waste! And I hate waste. Which is why I am so thrilled to link up to The Frugal Girl on her weekly feature where she posts a picture of all the food she had to throw away for the week, and invites other bloggers to do the same. The idea is to feel some accountability - who wants to admit they threw away all that money to the whole world? - to help you avoid throwing away food in the future.

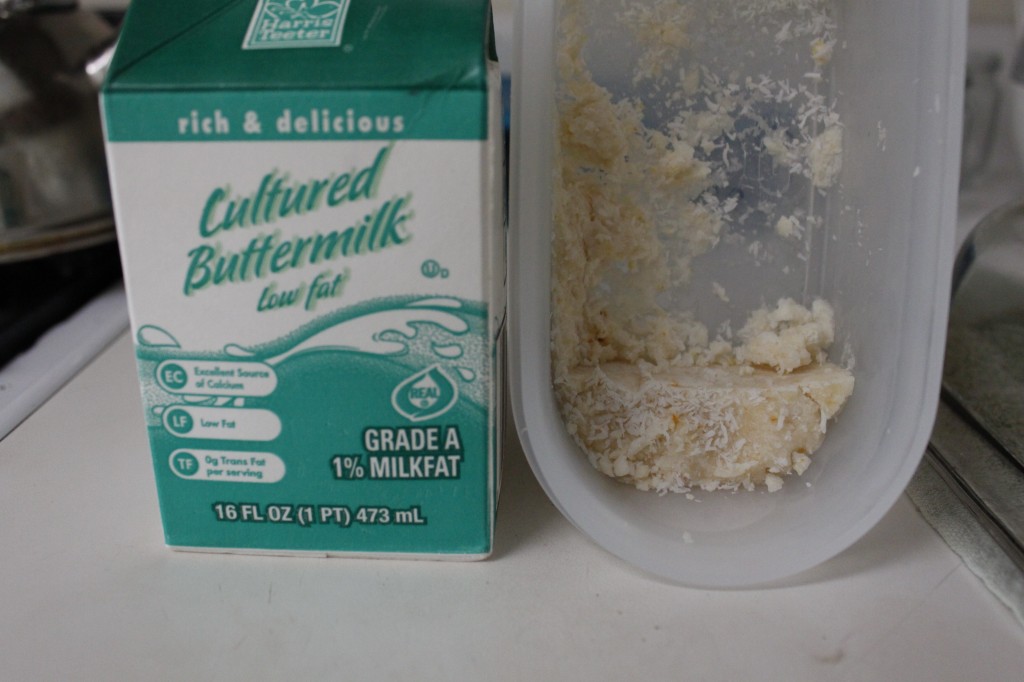
buttermilk and fudge
So in the picture above, you see what I threw away this week:

  1. half a carton of buttermilk (Expired May 2! Oops.)
  2. a few pieces of leftover coconut cream fudge that were, um, a couple weeks old (at least)

This is unfortunately only part of the story. I was gone all last week because my dad had open heart surgery (amazing how the body can heal from such a thing!) and the guys were left to fend for themselves. (Not entirely true: I made most of their food ahead of time, or otherwise planned easy-to-fix meals.) Since I am generally the one who manages the food inventory, nobody else paid attention to the various and sundry containers lying around the refrigerator. When I got home, I did have to throw away a few things that had escaped everyone else’s notice.

One thing I managed to salvage was the remainder of a bag of mixed greens I had bought at the farmers’ market a week before I left. The greens were just starting to wilt; they weren’t yellowing or getting slimy, so they were still in decent shape. I picked out enough of the best leaves to make myself a delicious salad for lunch, and I stuck the rest in the freezer to throw into a future pot of broth.

So if you find yourself with an excess of greens - any kind, from arugula to spinach! - don’t dump them down the garbage disposal. Instead, inspect them briefly, and if they are only wilted (no slime or browned leaves), consider using them in any of the following ways:

  • steamed or sauteed (If you like that sort of thing. Me? No, thank you!)
  • chopped up and added to scrambled eggs, omelets, or frittatas
  • as toppings on a pizza
  • added to soup
  • used in broth
  • dehydrated (it doesn’t take long in a dehydrator, a couple hours at most) and crumbled into soups like you would herbs
What is your favorite use for wilting greens?

Those who plan menus generally tend to waste less food. Not into menu planning? You might want to read Stephanie Langford’s eBook, “Plan It, Don’t Panic” for inspiration. Right now, it’s on sale 25% off with the code CHALLENGE25, making it only $3.74. Or you can just go for a bundle of all 3 of her books at 50% off (that’s only $19!) with the code BUNDLE50!

Sharing at Frugal Days, Sustainable Ways

{FREE eBook} Spring Into Smoothies All Summer Long

I am so grateful for each and every one of you, my readers, and I am excited to have another chance to share my appreciation with you. Some friends and I put our heads together and came up with an eBook for you, and you’re going to love this one!

The weather is just starting to get hotter, as we’re heading into summer in the next month or so. Oatmeal -so warming and welcoming in the cold of winter - just doesn’t cut it anymore in the hot weather of the summer months. Smoothies are the way to go instead! Nourishing, refreshing, and fast, they’ll fill you up with everything you need to start your day… without heating up the kitchen.

They also make great snacks, and even desserts! Best of all, each smoothie from Spring Into Smoothies is made with only the healthiest ingredients, so you don’t have to feel the least guilty about enjoying one… even if it reminds you of a Reese’s peanut butter cup. Or apple pie. Or a creamsicle.

Thankfully, you can get your hands on these recipes simply by subscribing to my blog! If you subscribe already, you will see the link to download the free eBook at the very bottom of the email. For new subscribers, you will need to complete the subscription process; then, when you receive the first regularly scheduled post (they usually arrive around 8:00 am Monday through Saturday), you will find the link at the very bottom of the email. If you have questions about the process, feel free to ask.

Many thanks to the following ladies who participated in Spring Into Smoothies:

Nikki @ Christian Mommy Blogger (She did all the formatting and technical stuff, by the way!)

Jami @ Young Wife’s Guide (She designed the cover!)

Erin @ The Humbled Homemaker

Rachel @ Day2Day Joys

Mindy @ The Purposed Heart

5 Ways to Get More Out of Your Kitchen Scraps


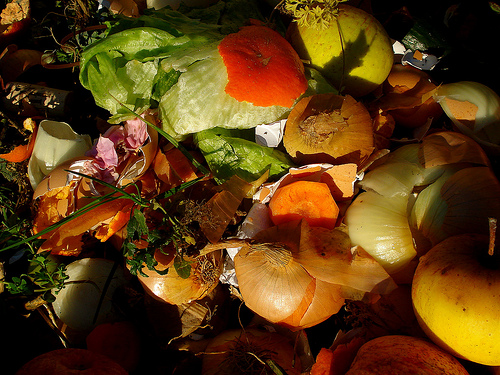
Still life on composter

Today I’m participating in the Ultimate Blog Swap. You’ll find me posting over at Adventures in Life, Love, Librarianship about building your digital cookbook library for FREE, and I’m excited to welcome Kate from Modern Alternative Mama to Quick and Easy Cheap and Healthy:

A few weeks ago, I was looking at my grocery budget in despair. The amount I’d decided on a year ago and the method of working with what I bought were just not making it anymore. My kids are bigger now and I have another eater (and man, can that baby eat!). My husband’s starving all the time because he goes to the gym five days a week, which he didn’t a year ago. Something had to be done.

Money concerns aside, one thing I decided I needed to do was to get more out of what I was already buying. There has to be use for all those things I’m throwing away, right?

And in many cases, there is! Here are five “kitchen scraps” and how you can put them to good use:

Bones, Gristle, and Skin

I always buy bone-in, skin-on meat (or almost always). When we finish a meal, the scraps go into the Crockpot or a stock pot to make stock. It doesn’t matter if it’s only a pound of bones or less, I still use it. It might make a quart of stock, but who cares?

If I cut up a steak to marinate for stir-fry, I roast that small amount of bones and use those too. I pretty much always have a pot or two of stock going in my kitchen! I strain it every day or two and add any new bones and re-fill the pot. It might keep going like this for a week before I actually throw the bones out. That’s several quarts of stock I wouldn’t have had otherwise. (And I use my stock to make gravies or sauces to stretch the meat further. Once I managed to use a single pound of ground beef to feed all five of us for breakfast and lunch!)

Citrus Peels

It always seems like such a waste to throw out those beautiful peels! Luckily there are a couple ways to use them. If you’re baking or cooking something that features citrus, use the zest in the dish along with the juice, even if it doesn’t call for it. The zest adds a depth and richness of flavor.

If you don’t need it for this, you can use a vegetable peeler to pull the zest off in strips and dry it an oven on low or in a dehydrator. You can also choose to keep the pith (the white part) with the zest and just chop it up and dry the whole thing. The dried peels can be used to make tea, herbal medicines, or potpourri.

Root Veggie Scraps

If you cook as much as I do, you constantly have carrot peels, onion ends, and celery ends around your kitchen. Right? Don’t throw them away! If you make stock constantly like I do (see above), toss them straight into the pot. I’ve been known to peel my carrots directly over my stock pots. If you make stock less often, save them in a bag and tuck them in the fridge or freezer until you’re ready to do it. I never use whole carrots, onions, or celery in stock anymore unless they’re on the verge of going bad anyway. Floppy, pale celery gets tossed into the pot too, rather than thrown out!

Fruit and Veggie Pulp

Do you juice foods? Sometimes I make apple-carrot juice to use as a smoothie base. When I’m not just using plain yogurt, anyway. That leaves me with pulp, though. I also use juiced lemons and limes a lot…more pulp. There has to be a use for this, right?

Toss it in with your baked goods. If it’s really moist, reduce the other liquids a bit. It’ll give it a unique flavor (for something strong like lemon; less so for apple or carrot) and extra nutrition. If you aren’t baking, toss it into a soup or tomato sauce, if it’s savory enough that you wouldn’t notice. I “got rid” of a bunch of shredded zucchini and carrot pulp this way when no one wanted it.

Leftover Mashed Potatoes

Okay, this isn’t exactly a “scrap” like the others, but it’s something I seem to have around in my kitchen a lot. I found recently that they make a great replacement for bread crumbs in meatballs or meatloaf. It’s a great way to use up mashed potatoes when you have not quite enough for one serving (nowhere near enough for a meal!). Plus, it’s completely grain- and gluten-free, so it’s a safe and frugal substitute for many on special diets.

If you’re not making meatballs anytime soon, you can also toss them into soups to thicken them, or use them to give baked goods a tender texture.

Using up all the little bits that you already have in your kitchen can save so much money over time, and it allows you to be really creative in using what you have. Try it out – you might come up with a totally unique meal just by using up scraps!

What’s your favorite way to use “scraps” or leftovers in your kitchen?

Visit Life Your Way to see all of the Ultimate Blog Swap participants!

Linking up at Frugal Days, Sustainable Ways

Menu Plan Monday: Home Again Home Again

menu plan monday
This month’s focus in “Eating Intentionally“* is on “Respecting Your Fullness“, which means exactly what it sounds like it means. One aspect of this means resisting the urge to clean your plate. (If you really must clean your plate, then put less on it to begin with.) Instead of using the clean plate as a cue that your meal is over, pay attention to what your tummy is telling you! How are you doing with respecting your fullness?
Breakfasts

  • Oatmeal
  • Smoothies
  • Muesli
  • Oat Muffins
  • 1-2-3 Granola

Lunches

Dinners

  • Crock Pot Chicken, Rice, Carrots, Fruit
  • Chicken Leftovers, Pasta, Fruit
  • Sausage, Home Fries, Melon
  • Fish
  • Spaghetti

Snacks

  • Nuts, Raisins, Cranberries
  • Happy Vegan Chocolate Chip Cookies (made with a mixture of Oat, Buckwheat and Sorghum flours to be wheat-free)

In My Kitchen Today

  • Oat Muffins

*My concept of “Eating Intentionally”, and the 10 principles we are working through this year, come from the book “Intuitive Eating” by Evelyn Tribole and Elyse Resch. I highly recommend it - I don’t agree with everything in it, but it is a great read for anybody who has ever been on a diet and/or is considering going on a diet.

This post contains affiliate links.

Healthy Today Wednesday {Week 53}

Welcome back to Healthy 2day Wednesdays!

Rachel of Day2Day Joys and I are so excited to be joining you again.

day2day joys
Link up to any of our blogs with your favorite healthy post!
Top three this week:
Since you were one of the three “chosen”… you’ve been Facebooked and Tweeted by me!

I love the idea of giving birth in a birth center; I only wish one was closer to me! Leigh Ann shares in a guest post at The Humbled Homemaker about her birth center experience and why she chose that route.


Now that I have a Vitamix, I can’t wait to give bean brownies another go, using this Grain-Free Brownie Recipe from the Small Footprint Family.


Did you know you can turn baking soda into washing soda? It sounds so simple, I am going to have to try it! Thanks, Nature’s Nurture!


Rules for this Link-Up:

        • Share an idea, tip, recipe, things to avoid, something new to try, natural remedy, alternative medicine, going “green” tips, etc. that will help us to remain or become more healthy!
        • If this is your first time participating read more info & get button here.
        • Comment on another participant’s post.
        • Add button or link back to that day’s link up.
        • Spread the word so we can learn more ideas on keep our families healthy; feel free to share on Facebook or Twitter.
        • Ideas: homebirths, natural remedies, an interesting article, something eco-friendly, a review, natural cleaner, alternative or holistic approaches to health, how to’s, the list goes on & on!
        • If you are adding a recipe, make sure the ingredients do not include white flour, refined sugar, processed products, packages products (unless it is clearly stated or pictured that it is organic or all natural) and the like. We are looking for whole food recipes that are beneficial to our health!
If you’re not participating today, I hope you’ll come back & join in next week!

Upcycle an Oatmeal Canister

I love turning trash into treasures. Egg containers, coffee cans, empty jars and bottles… none of them are safe from me! I love figuring out new ways to use them instead of just throwing them all away. Join me at Homemaker’s Challenge today where I show you how to turn an empty oatmeal canister into a toilet paper dispenser that will beautify your bathroom (really!).

Sharing at Frugal Days Sustainable Ways