Archives for September 2012

What Carbs I’m Still Eating {Get Healthy & Fit, Week 4}

Welcome back to the Get Healthy & Fit series here at Authentic Simplicity! Joining me are 18 other bloggers, all desirous of improving their health and raising their level of fitness. We each have a different goal in mind and a different plan to reach that goal; and you can follow each blogger’s progress here. Follow along on Twitter and Pinterest as well!

I discussed my personal goals at length the first week, but to sum up, this is what I’m hoping to do in the course of these 12 weeks:

  • Kick my sugar habit
  • Lose approximately 10 lbs. and a few inches
  • Fit in my clothes
  • Develop sustainable habits like eating more proteins and fewer carbs

Low-Carb Vs. No-Carb

After reading Gary Taubes’ Why We Get Fat and What to Do About It, I decided that going low-carb was a permanent lifestyle change I needed to make. But even though he came close to recommending eliminating all carbohydrates and starches entirely, I knew I didn’t want to go that direction.

For one thing, I can’t do that permanently. There’s no way I can deprive myself for the rest of my life of all starches! That just wouldn’t be fun, and eating is supposed to be fun as well as functional. My whole goal here is to develop new habits that I can sustain indefinitely, so on that score alone, going no-carb is out of the picture.

Then there is the issue of nutrition. If we focus too closely on the carbs-sugar-weight connection, we might lose sight of the big picture. The fact is, carbohydrates - the right kind of carbohydrates - have health benefits, too.

What Makes Good Carbs Good

So I’ve been telling you over and over that carbohydrates raise insulin levels which increases fat storage. That is true. But not all carbs are created equal! The “good” carbs actually help maintain a healthy weight in 3 different ways: by increasing the rate at which your body burns fat, by reducing the size of stored fat cells, and by releasing glucose into the bloodstream more slowly so that less insulin is released.

Bad carbs - refined sugars and flours - increase the amount of insulin your body releases, which is what you don’t want. Eventually, your body will lose its sensitivity to the insulin, kind of like you lose your sensitivity to loud noises when you are constantly exposed to them (think of a train track that practically runs through your backyard - after a while you don’t even notice it). Good carbs, on the other hand, help your body to maintain a high level of insulin sensitivity.

What are the Good Carbs?

So how do you differentiate between the good and bad carbs?

Fortunately, the bad carbs are easy to spot: they’re made from refined flours and sugars and are far too easily digested and absorbed by your body.

The good carbs are called “resistant starches” because they “resist” digestion. They are typically full of fiber and protein, not just carbs (hence the phrase “empty carbs”).

Some good carbs you’ll want to include in your diet:

  • Beans
  • Lentils
  • Split Peas
  • String Beans
  • Whole, Unprocessed Grains (I’m actually giving away some whole millet right now!)
  • Sourdough Bread
  • Bananas
  • Mangos
  • Cooked & Cooled Potatoes & Pasta

Another great thing about these resistant starches is that if you eat them with “bad” carbs (or prior to eating the bad carbs), the good carbs will help reduce the negative effects of said bad carbs. I wouldn’t go whole hog eating bad carbs, but it’s nice to know for those occasions when it can’t be avoided (like your kid’s birthday for example!).

The Caution

First of all, I’m only speaking of naturally occurring resistant starches. Manufacturers have, of course, found a way to insert their own man-made “resistant starches” into their processed foods, and I don’t consider those to be any healthier than other processed foods available. I’m sticking with God-made whole foods!

Secondly, it’s important to keep things in balance. Overall, I think starches - resistant or not - should play a much smaller role in the modern diet than they currently do. Healthy fats, proteins, vegetables (and fruits, too, even if they are carbs!) should form the bulk of the overall diet. But when carbs are consumed… make them good carbs.

To that end, later today, I’ll be posting a great recipe for a healthy good carb snack you’re gonna love!

For more information on good carbs, read these articles:

  • Beans Seen to Discourage Diabetes
  • What are Resistant Starches?

This Week’s Update

I saw some progress on the scale this week, which is exciting! Here’s hoping my weekend didn’t totally blow it all away (I only weigh on Fridays). The other stats remain more or less the same.

Here are my current stats that I will update every Monday:

Weight: 134.2 (down 2.4 pounds from my starting weight)

Waist (inches): 30-31

Butt: 40-41 (same)

Hips: 40-41 (trending downward)

Find out how the other ladies are doing with their weight loss efforts and other goals by clicking on the image below.

What do you think causes weight gain: excess fat, excess carbs, or just too much food in general?

Sharing at Homestead Barn Hop, Better Mom Monday, Titus 2 Tuesdays, Tiny Tip Tuesday, Titus 2sday, Traditional Tuesday, Teach Me Tuesday, Domestically Divine Tuesday, Healthy 2Day Wednesday, Allergy Free Wednesday, Women Living Well Wednesday, Works for Me Wednesday, Frugal Days Sustainable Ways, The Mommy Club, Delicious Dishes, Keep it Real Thursday, Simple Lives Thursday, Homemaking LinkUP, Life in Bloom, Thought-Provoking Thursday, Fight Back Friday, Simply Natural Saturday
Simple Preschool: Reading

Join me every week as I show you how me and my 4-year-old Certain Little Someone do simple preschool at home.

No curriculum, no pressure, but lots of learning!

Reading is a natural extension of phonics. You won’t get too far in the phonics instruction before you naturally start to blend the sounds together to form words. And it doesn’t take a genius, or even an expert, to instruct young children in the art and science of reading English. It doesn’t even really require any special curriculum or equipment. It just takes a patient person who already knows how to read English and can follow a few simple steps.

First Things First

The first step to reading is learning the alphabet and the primary sound of each letter (for example, for the letter “g” I would first teach the hard g sound - as in goat). Once your child has these sounds down, they can start blending them. And blending is the beginning of reading.

To begin with, you’ll want to blend one consonant with one vowel. You can go one of two ways: put the consonant first, or put the consonant last. There are pros and cons to each method.

If you start with the consonant, you end up with blends like “ma”, “fi”, “ju” and the like. These blends are a great jumping point to blend into words - if he can read “ma” easily, all he has to do is add a consonant to the end to form a word like “map” or “mat”. The main problem with this is that those blends do not follow the basic rules of English phonetics. Technically, a syllable that ends in a vowel typically makes the long sound and not the short sound (for example: ta-ble, ci-ta-tion). The other problem is that the majority of phonics curriculums and available worksheets do not use this blending method, so you’re almost on your own when it comes to supplementary materials.

A more popular method with many is to teach blending with a final consonant, thus creating “word families”. For example: “an” can be turned into a multitude of other words like “can”, or “fan” or “pan” with the addition of an initial consonant. This is more consistent with the rules of phonics, but it’s not as intuitive when it comes to actual reading. The child almost has to read backwards in order to blend together a word using this method, because they have to identify the rime (the ending phoneme, such as “-an” or “-am”) before then adding the onset (the initial consonant sound) to it.

I’ve done it both ways, and in my opinion, it’s easier for the child to turn a beginning blend into a word than it is to use the onset and rime/word family method. It may not be 100% phonetically accurate, but hey! They’re not learning syllabication yet, so it’s no big deal. By the time they do get around to learning syllabication, they will have forgotten that they used to say “ma” “me” “mi” “mo” “mu” with short vowels.

Add the Final (or Initial) Consonant

No matter which way you choose, stick to it. And once the child is comfortable reading those word parts (whether “ma” or “am”), begin adding final or initial consonants, blending them together as you do. It’s helpful to start out with consonants that can be stretched, like “m” or “n”, and the like: “mmmmmm…ap”, for example.

Spend a looonnngggg time on this step, until the child is very comfortable with it. Within the context of what we call “CVC” (3-letter short vowel) words, you can explore a lot of concepts, like rhyming. You can make up silly words if you want, too!

At this point, you can also start reading through very simple early readers, beginning with books that have fewer than 5 words on a page with some pictures to catch the eye and the interest of a little one. See the bottom of this post for resources and my personal recommendations.

Onward and Forward

Once your child has mastered the basic idea of blending, then it’s just a matter of giving them opportunities to blend each new sound they learn into words. Following the Phonics progression I mentioned a couple weeks ago, just incorporate each of those new sounds into words and then give them books with those more advanced sounds.

Punctuation

While true English grammar education doesn’t start for another year or two, it is essential to teach a few basics of punctuation that will aid in reading. It’s not necessary to devote a great deal of time to these; just explain what their purpose is and what they are called.

Periods are like stop signs: they tell us when the sentence ends. We always pause when we come to a period, and our voice falls.

Question marks mean a question is being asked. It also means the end of a sentence, but this time the voice rises at the end.

An exclamation point also indicates the end of a sentence (note, by the way, that both question marks and exclamation points contain a period), and means that we should read it with excitement!

Quotation marks mean someone is speaking, and this is what they said.

A comma is just a way to separate lists of words.

Those are the basic punctuation elements a child will encounter in early reading, and there’s no need to get anymore involved than that.

Sight Words

I mentioned sight words in my post about Phonics, but just wanted to remind you here that they are an essential element of learning to read. Drill a few of them every day, and don’t insist on your child sounding them out (Have you ever tried sounding out “the”? Yeah, doesn’t work.). If they forget what it is, just remind them. Eventually, they will remember on their own.

Fluency, Expression, and Comprehension

It’s not enough to be able to read the words. The words must be read fluently, with good expression and understanding on the part of the reader.

Fluency involves practice. And more practice. And then a little bit more practice. Read, read, read, read, read. And then read some more. This process might take years, so relax, and don’t try to force it. Just keep doing it.

Expression should be encouraged from the very beginning. Nobody likes to listen to a dull monotone voice reciting a story! At first, just re-read what your child read with excitement and appropriate expression in your own voice, then give them a chance to do the same. Eventually, they’ll get it, but if not, prod them a little more firmly. Say at the start of the reading session that you would like to hear some good expression as they read, and insist upon it. Also model good expression whenever you are reading aloud to your child (which you should do every day!).

Comprehension does not come easily to some children. The best way to encourage comprehension as they read is to ask questions as the story goes along. In the beginning, since the stories are so basic, the questions might seem inane or just plain dumb. But just because it seems obvious to you doesn’t mean that the child grasped it - it could be he was concentrating so hard on reading accurately that he didn’t pay attention to the meaning of the words. Ask questions after every reading session and explain anything your child doesn’t understand. As reading skills improve, so will the comprehension.

Resources

The Bob Books are great for pre-schoolers.

A Beka Book also has excellent readers for young children in their K4 and K5 curriculums. They have a lot of overlap, too, as far as ability and level of reading, so if you get a complete set, you’ll have lots of options for every stage.

Modern Curriculum Press has sets of readers that are organized by the different types of phonics sounds the children will encounter in the stories. These are more advanced, though. Very good for advanced K4 students later in the year, or for K5.

Primary Phonics Readers are very much like the Bob Books, and excellent for young students.

McGuffey’s Primer is a classic that is best for K5 students. It moves pretty quickly, although it starts out with very basic words.

The Victory Drill should be started as soon as a child can easily read CVC words. You can follow the instructions that come with the book or you can devise your own method of using it. At any rate, have the child read through portions of it every day. At the beginning, one column will suffice. As they get older, they’ll be able to read an entire page in a minute or less.

Explode the Code - I have heard very good things about this program, but I don’t have personal experience with it.

Phonics Pathways - You could probably teach reading with just this book alone. An excellent resource!

Other posts in this series:

Phonics-Phonics, Part 2-Reading-Reading, Part 2-Handwriting-Math-Days of the Week-Bible-“Other”

Why We Get Fat {Get Healthy & Fit, Week 3}

Welcome back to the Get Healthy & Fit series here at Authentic Simplicity! Joining me are 18 other bloggers, all desirous of improving their health and raising their level of fitness. We each have a different goal in mind and a different plan to reach that goal; and you can follow each blogger’s progress here. Follow along on Twitter and Pinterest as well!

I discussed my personal goals at length the first week, but to sum up, this is what I’m hoping to do in the course of these 12 weeks:

  • Kick my sugar habit
  • Lose approximately 10 lbs. and a few inches
  • Fit in my clothes
  • Develop sustainable habits like eating more proteins and fewer carbs

Why I’m Reducing Carbs

My decision to cut back on carbs as a permanent lifestyle change was made in large part as a result of reading “Why We Get Fat & What To Do About It” by Gary Taubes. I checked it out of the library this summer, and while I already knew much of the information contained therein, it was presented in such a way that my mind was kind of blown. Taubes put all the different puzzle pieces of my knowledge about nutrition and dieting into a complete picture that was, for me, paradigm shifting.

For example, I already knew that:

  • Fat is good. So is protein.
  • Fat does not make you fat.
  • Sugar is bad. Very bad.

What I did not know (or had never considered) was that:

  • Eating too much does not make you fat.
  • Eating too much of the wrong thing makes you fat.
  • Eating too much sugar (even simple carbohydrates) makes you fat.
  • Too much sugar leads to all the diseases we associate with obesity (heart disease, diabetes, etc.)
  • The “calories in-calories out” dieting equation does. not. work.

While reading the book, I found myself saying, “Yeah, yeah, I knew that already… but I had never thought of it in quite that way before!”

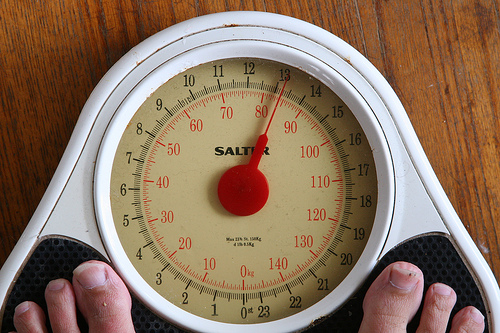
Scale-A-Week: 21 February 2010

And the Paradigm Shifts

How does the average person try to lose weight? By cutting calories, right? Or by exercising to compensate for excess calories.

Taubes says that is complete and total bunk. OK, those are my words, but that’s basically what he is saying in the book. Here’s the thing: the more you exercise, the more you want to eat. And the less you eat (in an attempt to reduce calories and lose weight), the less energy you have to expend in exercising. See the problem? The one cancels out the other. You cannot function properly while simultaneously attempting to reduce the calories you consume while increasing the calories you expend. It’s like a see-saw - the one goes up while the other goes down and vice versa. The two cannot work independently. If you expend more energy, you need to take in more energy.

Taubes spends a great deal of time explaining this concept and proving its veracity from all different angles: sociological, physiological, historical, biological, and scientific. He analyzes all the data available on weight-loss studies and finds that over and over and over again, they repeat the same message: the amount of food eaten is not the issue; it’s the type of food eaten.

He builds a very strong case that carbohydrates - especially simple carbohydrates like refined sugars and flours - are entirely responsible for excess weight gain in any person. In the words of an expert he quotes: “Carbohydrates drive insulin which drives fat.” Carbohydrates raise insulin levels, and the insulin signals fat storage.


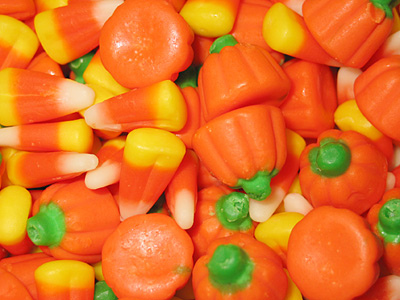
Candy corn and candy pumpkins closeup

What Makes A Person Fat?

To sum up: Fat doesn’t make you fat. Eating too much doesn’t make you fat. Sugars (and simple carbs that turn into sugar) make you fat.

Let me repeat that again, because it’s too important to miss: Sugar makes you fat. Simple carbohydrates make you fat.

He goes a step further and sets out to prove rather convincingly that you can eat as much protein and fat as you want without consequence, as long as you limit (or potentially completely eliminate) simple carbs. He strongly advises (and I concur) that you do not want to starve yourself or go hungry in an effort to lose weight. If you’re hungry, you need to eat. But if you’re going to eat, make sure that it’s largely composed of protein and fat (and non-starchy vegetables).

Did I just feel your paradigm shift? Yeah, I know, that’s what happened to mine, too. I highly recommend you read Why We Get Fat & What to Do About It! and get the full scoop, as well as all the scientific and historical data to back up these claims. Gary Taubes also wrote Good Calories, Bad Calories, which is on my to-read list.

Note: Taubes comes very close to recommending eliminating carbs completely, including fruits and starchy vegetables. I just don’t think that’s sustainable over the long haul, so I’m choosing to limit those foods to meal times in small portions. I also believe they have nutritional value that compensates for the carbohydrates. And I am very leery of any dietary movement that focuses too closely on one aspect or another of nutrition and health (like digestion, for example). I try to keep the whole elephant in mind.

This Week’s Update

As for my progress this week… it’s not great. I had such a crazy week and while I did my best to make good choices while on the run and eating at other people’s mercy… I definitely consumed a lot more carbs and sugar than I had been recently. Consequently, the measurements didn’t budge too much. And I was too tired every night to exercise except maybe once or twice. I’m hoping to get back into my groove this week, since I should be back to a more “normal” routine (whatever that is!).

Here are my current stats that I will update every Monday:

Weight: 135.6 (UP half a pound!)

Waist (inches): 31 (same, with a little fluctuation up and down)

Butt: 40.5 (same)

Hips: 40.5 (down half an inch!)

Find out how the other ladies are doing with their weight loss efforts and other goals by clicking on the image below.

What do you think causes weight gain: excess fat, excess carbs, or just too much food in general?

Sharing at Homestead Barn Hop, The Better Mom, Titus 2sday, Titus 2 Tuesday, Teach Me Tuesday, Women Living Well Wednesday, Works for Me Wednesday, Frugal Days Sustainable Ways, The Mommy Club, Healthy 2Day Wednesday, Real Food Wednesday, Whole Foods Wednesday, Your Green Resource, Simple Lives Thursday, Life in Bloom, Thoughtful Thursday, Fellowship Friday, Weekend Bloggy Reading, I’m Lovin’ it Friday, Fight Back Friday, Favorite Product Friday

My Simple Preschool - Phonics Part 2

Join me every week as I show you how me and my 4-year-old Certain Little Someone do simple preschool at home.

No curriculum, no pressure, but lots of learning!

Last week, I discussed in detail my approach to teaching phonics throughout the preschool years (and into kindergarten), but I realized I left out a few important details. So here are a few important details that I must mention.

Drill, Baby, Drill

I cannot say this often enough: just like math facts, the phonics sounds must be drilled incessantly until they are internalized. Incessantly. My Certain Little Someone drilled the alphabet every single day of school for the entire K3 year, and he’s still drilling it every day this year. He probably will for most of K4 and the beginning of K5 as well. If these sounds are not internalized, learning has not been fully accomplished.

I follow a particular pattern when reciting drills, and in the pre-school years, the drills are always accompanied by flash cards that contain both the letter and a key picture (i.e., a zebra for the letter “z”). For the alphabet sounds, we flip through the alphabet flash cards, and say this:

  • A says “a”, “a”, alligator. (for very young children, you can just point and say, “a”, “a”, “alligator”)
  • B says “b”, “b”, bear.
  • Etc.

For the other phonics sounds, which are usually made up of a combination of letters, we follow this pattern:

  • First we name the letters (for example - S, H)
  • Then we say the sound they make (“sh”) twice
  • Then we say the key word (“shoe”)
  • For example: S - H- “sh” “sh” shoe

I like to get into a rhythm so that it’s kind of like a chant. If it gets boring, I change it up by reducing or increasing the volume (i.e., whispering or shouting), crouching down or reaching up high, using a different tone of voice, etc.

I generally drill each new set of sounds (digraphs, blends, etc.) daily for at least a few weeks. After that, I reduce the frequency, but keep them in the rotation. Each day, we drill several sets of sounds. (I keep each set of flash cards separate so they can be drilled individually.)

Worksheets

There are plenty of worthy experts who will tell you that phonics worksheets are pointless at best and detrimental at worst. I disagree. I am not an expert, but my common sense suggests that practical experience is necessary in the process of internalizing the phonics elements and rules the children are learning. Because phonics and reading involve written letters, I think worksheets are a valuable resource in helping them apply what they have learned. Worksheets might not be so useful in other subjects, but I think they are very important in phonics and spelling.

Of course, I’m not suggesting that worksheets take the place of instruction and more active educational activities. Not at all! But a well-chosen worksheet can enhance a phonics lesson and help cement different sounds and patterns in a child’s mind.

A good worksheet will help a child develop visual and aural discernment. It will require him or her to differentiate between different sound patterns as they are written and as they are heard. For example, it might ask the child to circle all the instances when the written sound “ph” occurs in a list of words. This helps the child isolate “ph” as a separate unique sound within a word full of other letters and sounds. It’s a very useful tool in training the eye. A similar exercise can be done with pictures containing certain sounds and asking children to identify particular sounds in one way or another. For example: circle all the pictures of words that start with the sound “b”.

Phonics workbooks and worksheets abound! It seems like even grocery stores carry basic phonics and math workbooks that you can use to supplement your child’s phonics instruction. Of course, not all of them are worth the money you spend on them; make sure the pages contain meaningful activities (and accurate phonetic sounds as well! It irritates me when workbooks and worksheets use the word “orange” to illustrate the sound “O” makes. In that word, the “o” goes with the “r” and cannot be isolated, so it’s a terrible choice to illustrate “o”. Similar issues exist with other letters.).

Also, you can find phonics worksheets all over the internet with just a simple Google search. The benefit of those is that they are free!

Unfortunately, you will find that once you get past the alphabet and some of the very basic sounds, the number of available worksheets reduces dramatically. So you may want to consider making your own simple worksheets. I’ve made lots of worksheets just using Microsoft Word and very basic graphics and images. Once you’ve seen a few phonics worksheets and workbooks, you’ll have a pretty good idea of the types of activities that work best, and you can just apply those ideas to each individual sound that you are focusing on.

Games

I touched on this briefly in my post last week, but I want to emphasize that phonics learning should be fun. Playing simple games will help! The games can be as simple or as fancy as you like - as you know, I like to keep things simple, so that’s what we do.

Here are a few basic game ideas that my students and My Certain Little Someone have enjoyed:

  • Use a timer to complete a certain task, such as matching up upper-case and lower-case letters. Reward the student with a sticker or similar small prize if the task is completed on time.
  • The basic idea of the game “Memory” can be applied in all sorts of ways - create sets of cards that are either the same (two cards with the same phonics sound) or go together (like the phonics sound - “ch” - on one card, and a picture that goes with that sound - chair - on another); place the cards upside down and proceed to play Memory!
  • Ask the child to complete an action (clap his hands, jump, stand, or sit) when you say a word with a specific sound. Then say a whole bunch of words, some with the sound, some not. Be sure to go slowly enough that he or she has time to respond.
  • Play “I Spy” with a sound - see if you can spy different items around the room (or in a book) that contain the sound in question.

Get Physical

Boys especially will benefit from any kind of physical activity that goes along with the phonics lesson. I should know, because I had a majority of boys in every single Kindergarten class I taught! And they were some active boys, let me tell you! We did a lot of moving around during every lesson, but especially in Phonics class.

Some fun movement ideas:

  • When reciting phonics drills, make it a little more exciting by adding hand motions, like a cheerleader waving pom-poms. Jumping or marching in place also work. Keep the motions consistent across the board so that it doesn’t add any confusion.
  • Write letters in the sky as you learn them.
  • Form letter shapes with your body.
  • Incorporate movement into phonics games (see above).

Sight Words

Sight words go more with reading I guess, but I always teach them during the phonics lesson. Some words in the English language (like “the”) cannot be decoded because they don’t follow the phonics “rules”, and/or they are used so often that learning them by rote is more beneficial than learning to decode them. I don’t particularly care for the most popular list of sight words because it includes a lot of words that either can be easily decoded or don’t need to be learned until they can be decoded. Here’s my own (far from comprehensive!) list in the approximate order I like to teach them:

  • a, an, the
  • in, it, is
  • and
  • I, my, mine
  • do, to, so
  • this, that, then
  • there, their
  • you, your
  • does
  • these, those
  • say, says
  • etc.

There are a lot more words that can and should be taught as sight words, but those are the essential ones for beginning readers.

Teaching sight words is mostly a matter of drilling the words by sight. You can also play games with them (see the above list for some ideas) and employ other creative methods of reviewing them, but it should be a relatively small part of the phonics lesson.

Resources

Teachers Pay Teachers Free Downloads - TPT is an awesome website that consists of content created entirely by actual teachers. This link directs you to the catalog of free downloadable worksheets, eBooks, and other activities, but they also have a lot of similar content available at a cost. You can see samples before you purchase to make sure it’s worth the money you will spend. I’ve gotten lots of great resources from this site.

Printable Preschool Pack Resources - Many amazing home-schooling (and school teachers, too) moms offer up their printable worksheets to the rest of us for free! This list is the best of the best (note that these are not all phonics, but they all include letter sounds to one degree or another).

Alpha-Bites - ideas for introducing each letter of the alphabet in a variety of creative ways

Phonetic Flip Chart - Create your own (super cheap!) flip chart that allows your child to practice blending different sounds and words. The example shown is for 3-letter (CVC) words, but the idea can be adapted to any kind of word!

Sight Word Ideas - Teach sight words in creative ways.

Follow my School Ideas Pinterest Board for even more resources!

Other posts in this series:

Phonics-Phonics, Part 2-Reading-Reading, Part 2-Handwriting-Math-Days of the Week-Bible-“Other”

How to Kick a Sugar Habit! {Get Healthy & Fit, Week 2}

Welcome back to the Get Healthy & Fit series here at Authentic Simplicity! Joining me are 18 other bloggers, all desirous of improving their health and raising their level of fitness. We each have a different goal in mind and a different plan to reach that goal; and you can follow each blogger’s progress here. Follow along on Twitter and Pinterest as well!

I discussed my personal goals at length last week, but to sum up, this is what I’m hoping to do in the course of these 12 weeks:

  • Kick my sugar habit
  • Lose approximately 10 lbs. and a few inches
  • Fit in my clothes
  • Develop sustainable habits like eating more proteins and fewer carbs

I truly believe that the most effective way to lose weight - and to keep it off - is to reduce your sugar consumption. Drastically, if necessary. I’ll talk more next week about why I believe that is true, but this week, I’m going to focus on how to kick the sugar habit.

How to Kick a Sugar Habit

If there’s one thing I’ve learned in life about habits and choices, I’ve learned that you can’t eliminate one habit without adding in another. If you really want to begin making good choices and developing healthy habits, instead of focusing on “I CAN’T have/do such-and-such unhealthy habit”, you need to focus on the habit you WANT to develop: “I CAN have/do healthy habit XYZ instead.” If you don’t replace the bad habit with a good one, you’re going to create a vacuum that will be filled by something. And that something is only going to be good if you are intentional about it.

To that end, instead of eliminating sugar from my diet, I am replacing sugar with other things.

Protein

Instead of choosing carbohydrates for snacks - granola bars, fruit, cookies, etc. - I am focusing on protein-rich snacks that fill me up and give me long-lasting energy. At meal time, I focus on enjoying plenty of healthy proteins and fats, as well as vegetables, while eating carbs in moderation.

What I’m finding is that this protein-rich diet keeps me full for a much longer period of time, and significantly reduces my cravings for sweet stuff. I can get through a whole day without eating anything sweet, like a cookie or chocolate, which used to be an impossible feat for me. And it’s not because I suddenly have awesome will-power! It’s because I just don’t want it as much anymore.

Stevia

I’ve never been a big fan of calorie-free sugar replacements like sucralose, saccharin and the like. Food made in a laboratory is not my thing.

Stevia, however, is a sweetener I can enjoy because it is natural and comes from a plant just like sugar does. Unlike sugar, stevia does not affect your insulin levels, an effect that leads to weight gain. Stevia also has been safely used in Japan since the ’70s, and has a proven track record there.

A word of caution: not all stevia is created equal! Most of the stevia on the market today has added sugars and fillers that render it pretty much just as useless as regular old cane sugar. For the most part, I stick to liquid glycerine-based stevia products, like NuNaturals or SweetLeaf. I also have a stevia plant in my little garden, and as soon as I have some time, I’m going to make my own liquid stevia with it.

So far, I have mainly used stevia in my beverages and in raw foods. I haven’t experimented with it much in baking, mostly because I am afraid it will affect the flavor.

All Things in Moderation

Since my goal is to cultivate habits that I can sustain in my daily life, I am not going to eliminate sugar completely. If I’m at a special event, I enjoy a little bit of dessert. If I crave chocolate, I have a little bit. Like I said earlier, I’m finding that I don’t even want sugar as much as I used to, even at special occasions. But I don’t forbid myself to have sugar at all, because that would be impossible to maintain over the long haul.

Raw Honey

To that end, I also use raw honey (and occasionally palm sugar) as sweetener in my smoothies or oatmeal. Raw honey is so good for you that despite its high sugar content, I am comfortable with enjoying small amounts of it every day.

I still use regular honey in baked goods as well, and very occasionally some sucanat. The latter are showing up less and less frequently as time goes on, and I don’t really miss them much.

The bottom line is this: has increasing protein in my diet and reducing sugar/refined carbs helped out with the weight loss at all? I think so! In fact, I’ve seen the most significant change in my measurements since implementing these new habits.


Here are my current stats that I will update every Monday:

Weight: 135 (down 1.5lbs)

Waist (inches): 31 (same, sometimes goes down to 30)

Butt: 40.5 (down half an inch)

Hips: 41 (down 1 inch)

Find out how the other ladies are doing with their weight loss efforts and other goals by clicking on the image below.

Do you have a sugar habit you want to kick?

Sharing at Natural Living Monday, Homestead Barn Hop, Better Mom Monday, Works for Me Wednesday, Women Living Well Wednesday, Frugal Days Sustainable Ways, Healthy 2Day Wednesday, The Mommy Club, Fight Back Friday,

I cleaned out the fridge. Yikes. {Food Waste Friday 9/14}

FoodWasteFriday
One of my biggest pet peeves is throwing away food. I could kick myself every time I dump food down the drain or in the trash: it’s just a complete and total waste! And I hate waste. Which is why I am so thrilled to link up to The Frugal Girl on her weekly feature where she posts a picture of all the food she had to throw away for the week, and invites other bloggers to do the same. The idea is to feel some accountability - who wants to admit they threw away all that money to the whole world? - to help you avoid throwing away food in the future.

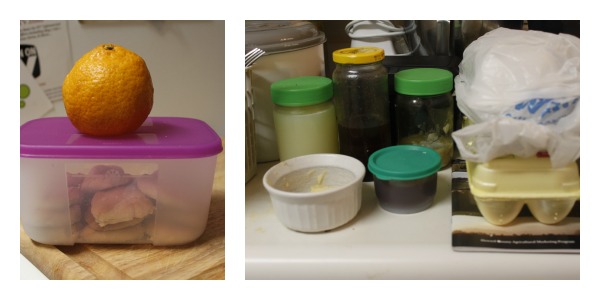
  • 1 clementine
  • half a batch of a coconut cookie fail
  • a jar of whey
  • 1/2 cup of leftover homemade syrup (Seriously? Since when does that go bad around here?!)
  • a few tablespoons of “schmaltz” (chicken fat)
  • 1/4 cup leftover homemade bbq sauce
  • 1 tsp butter
  • 1 cracked egg (I was afraid it would be rotten like this one I read about last week, so I turned on my disposal, and dropped that bad boy whole down the drain so I didn’t have to see anything.)
  • leftover zucchini stuff from a church function

OIoioi. Not good, people, not good. At least it was small portions of everything, for the most part. And some of it was “secondary” waste, like the whey and the schmaltz. I have decided that if I save the schmaltz again, it’s going in the freezer because it doesn’t last nearly long enough in the fridge. Lesson learned!

Don’t you just hate wasting food? Here’s a tool I use every day all day in my kitchen that keeps more food from going down the drain unnecessarily.

How’d you do with food waste this week?

Don’t Waste a Drop!

I have a money-saving tip for you today that is so basic I fear most of you already know it. But just in case someone like me is out there who is a little slow when it comes to this kind of stuff… well. This is for you! (And for those of you who are already all over it, you’re my hero. Really.)

When it comes to food waste and frugality, we don’t really need to get fancy. Honestly, it’s mostly about using it up someway somehow so that it doesn’t end up wasted in the trash.

To that end, there’s nothing fancy here: just a simple tool and a simple trick that will keep you from wasting even a drop of precious food.

Here goes: what you need is a small silicone spatula like this one by OXO.

A wide spatula will not do the trick, you need a narrow one like this (or an even narrower spatula like this). None of the other utensils in your drawer will do the trick either; it really has to be silicone and it has to be narrow. It definitely can’t be a regular old spoon or knife, because those utensils will still leave precious food behind.

This small investment will save you lots of money in the end, because you are going to use this spatula to scrape up every last bit of batter, dough, sauce, dip, nut butter, and any other scrape-able substance in your kitchen as you go throughout the day.

I guarantee you will be surprised by how much pancake batter is clinging to the sides of your mixing bowl! It’s enough to make at least one more pancake. Ditto with muffin batter and cookie dough. There’s usually enough for at least one more of whatever it is you’re baking.

And I bet there’s enough peanut butter in the jar to make one more sandwich, and enough honey in the bottle to drizzle over your morning oatmeal or stir into your tea. And probably enough sour cream to make your Ranch dressing into a dip.

Enough salsa for a couple more chips. Enough hummus for a few more carrots. Enough yogurt to start a new batch. Enough smoothie out of the blender to fill your cup to the brim. Maybe even enough egg salad for one more sandwich.

Convinced? Waste not, want not! Go get thee a narrow spatula and waste no more. (Oh, better get two. I guarantee one will always be dirty.)

Sharing at Fellowship Friday, Frugal Friday, Feasting in Fellowship Friday, Natural Living Monday, Homestead Barn Hop, Better Mom Monday, Works for Me Wednesday, Women Living Well Wednesday, Frugal Days Sustainable Ways, The Mommy Club, Frugal Thursday Rewind

My Simple Preschool - Phonics

Join me every week as I show you how me and my 4-year-old Certain Little Someone dosimple preschool at home.

No curriculum, no pressure, but lots of learning!

You’ll have to forgive me, but phonics is a subject about which I am quite passionate. Phonics and reading - the two can hardly be separated - are dear to my heart. Yes, dear to my heart. I know that’s weird, but it’s true. In my Kindergarten-teaching years, phonics was the subject that I absolutely loved to plan and schedule and teach teach teach. By the time my students graduated from my class, I wanted to be sure they were fully grounded in the basic workings of the letters and sounds of the English alphabet!

All the sounds. Not just the individual alphabet letters, but their combinations and how they work together to create all the sounds that we use in English. And you know what? Once you start breaking it down, it’s not nearly as complicated as it might seem. And it’s a lot more reliable than we often think. Sure, there are plenty of exceptions - English is famous for that! - but there are also plenty of dependable rules and phonograms that can be taught at a very young age.

And the best part is this - you don’t really need a curriculum! Any mom can teach her child how to read and spell by teaching phonics in a logical progression. Supplemental accessories like flash cards, worksheets, and basic reading books can be very helpful, but really, an entire curriculum is not essential at all.

The Goal of Phonics Instruction

The main goal of phonics instruction is actually two-fold: to learn to read, and to learn to spell. Teaching phonics in and of itself is almost a means of killing both those birds with one stone, but you have to teach it thoroughly. Good phonics instruction includes at least the following elements:

  • Identifying letters and groups of letters and associating them with their corresponding sounds
  • Isolating those sounds visually, aurally and orally
  • Manipulating those sounds to form new (or even nonsense) words, or rhyming words
  • Recognizing patterns, similarities, and differences in letter groups and words.

Basic Phonics Lesson Plan Structure

Each phonics lesson should include elements of these different abilities in order to thoroughly teach the sound in question to the child. This is my basic lesson plan for each new sound:

  • See The Sound/Say the Sound - using flash cards, written letters, or manipulatives to show the letter or group of letters that makes the sound. I demonstrate the sound and ask the child to repeat it.
  • Hear the Sound - say different words containing the sound either at the beginning, middle or end. Most words are familiar to the student, but I also try to throw in some new words to increase their vocabulary and sharpen their listening skills.
  • Read the Sound - the child reads the sound both separately and combined into words (as soon as reading skills are developed).
  • Make or Write the Sound - if a child is capable of writing, listening and dictating exercises can be performed during this section of the lesson. Pre-writing children can practice forming the sound themselves either in sand (contained in a small box) for individual letters, or by using letter tiles (or other manipulatives) to put together individual letters that form the sound in question.

Sample Phonics Lesson

Let’s say we’re learning the sound “SH”. Here would be a sample lesson:
  • I write an “S” and an “H” beside each other in the same color on a piece of paper (or whiteboard/chalkboard). I tell my Certain Little Someone that these letters have their own individual sounds when they are by themselves, but when they are beside each other, they work together to create a new sound. That sound is “SH”. I ask him to repeat that sound after me.
  • I then say a bunch of different words: ship, shine, dish, wash, push, etc, emphasizing the “SH” sound and drawing it out. I ask him to think of other words that start or end with “SH” (this skill develops later; he doesn’t do very well with it because he’s not quite 4 yet, but many kindergarteners have enough access to their vocabulary that they can do this well.).
  • Then we play some kind of game that helps him to differentiate between “SH” and other similar sounds like “CH”. For example, I ask him to hold up the “SH” flashcard high above his head if he hears “SH” in the word, but if he doesn’t hear “SH”, he should put the flash card on his lap or on the table. Then I say a list of words like: share, train, cheese, shop, etc.
  • I write words or phonograms (groups of letters/parts of words, for example “ash” or “sho”) for him to read and blend together.
  • For kindergarteners who know how to write, I would dictate words and ask them to write them correctly on a whiteboard or chalkboard. There are lots of different games to be played here as well, and different listening skills that can be applied to different sounds. My Certain Little Someone is still learning how to write, though, so we’re not here yet. Instead we do some kind of activity with manipulatives like letter tiles, where he puts together the right letters to form the sound we’re learning.

Sequence

That’s the basic plan for each individual lesson. This is the progression I developed over time that seemed to flow most naturally for my students:
  • Consonants - m, s, r, f, n, l, b, g, j, v, w, z, d, p, c, t, k, qu, x, h, y (Yes, there is a reason for going in just that order. I adapted it from Montessori.)
  • Vowels - a, e, i, o, u
  • CV Blends - ma, fe, do, etc AND/OR am, ef, od, etc. Follow the same progression of consonants above. Younger children require a lot more time on this step than older children. This step should be repeated until a child can see a CV blend and say the blended sound without sounding out.
  • CVC - Once a child is comfortable with the CV blends, add a final consonant (or initial consonant) to form short-vowel words, like cat, dog, etc.
  • Digraphs: sh, ch, th (voiced and unvoiced), wh, ck
  • Long Vowels - introduce orally first, w/o regard to spelling
  • CVCe - I call it the “Magic E” that transforms a short vowel into a long
  • Vowel Digraphs - ai, ay, ea, ee, ie, ie (one says “I”, the other says “E”), oa, oe
  • Consonant Blends - S blends (sc sk sl sm sn sp st), L blends (bl, cl, fl, gl, pl, sl), R blends (br, cr, dr, fr, gr, pr, tr), W blends (dw, sw, tw)
  • 3-Letter Consonant Blends - shr thr, scr, spr, str, spl, squ
  • Diphthongs - aw, au, ew (and ue), ow (and long ow), ou, oo (long and short - moon, book), oi, oy
  • Phonograms - ang, ank, ong, onk, ung, unk, unc, ing, ink, and, ond, ind, ild, old, oll, all, al
  • R-Controlled Vowels - ar, er, ir, or, ur
  • Advanced Phonograms - aught, ought, ight, eigh,
  • Alternate Consonant Sounds - c-“s”, g-“j” (also dge), y-“i”, y-“e”
  • Silent Consonants - gn, kn, wr, mb
  • Suffixes -s, -es, -ing, -er, -or, -ed (It makes 3 different sounds “d”, “t”, “ed”), le, -ly, -ful, -ous, -tion, -sion, -ssion, -ture, -sure,
  • Advanced Consonant Digraphs - gh, ph, wh (h), ch (k), sch, chr
  • W- Controlled Vowels - wa, war, wor
  • Alternate Vowel Sounds - o (u), ou (u), ou (long u), ey (ay), ea (short e), ea (long a), ear (er), ear (air)
  • Contractions - n’t, ‘re, ‘s, ‘ve, ‘s (has), ‘d, ‘ll, ‘m, ‘s (us)
  • Prefixes - a-, al-, re-, pre-, en-, un-, in-, dis-, etc.
Clearly, once you get to a certain point along this path, the emphasis shifts from reading to spelling because the child will be perfectly capable of reading those sounds… but not necessarily capable of spelling them in all their different formats. It’s essential to teach all of these spellings individually and to learn when each one is used so that the child will eventually be able to spell the English language successfully. Let’s the the “long a” sound for example. It’s not just represented by an “a”. Long A can be spelled in any of the following ways:
  • ai (rain)
  • ay (way)
  • eigh (weigh)
  • ea (steak)
  • a_e (late)
  • ey (grey)
  • a (at the end of a syllable, like la-ter)
  • ei (rein)

See what I mean? But I found that my kindergarteners, if they were expressly taught each separate sound, quickly learned to differentiate between them and could also successfully spell words using each of these sounds when I dictated them.

Phonics Resources

Some great resources for teaching Phonics:

Phonics A to Z - This is the bomb- diggity for phonics resources. Not only does it thoroughly explain the intricacies of English phonetics, and how to teach them, it offers charts with examples, and lots of different teaching activities and games.

Phonics Pathways - It follows a slightly different progression from the one I outlined above, but it’s just as effective.

The authors of both the above books have written other helpful books as well, but those 2 are my favorite.

Next week, I’ll share how we do apply newly acquired phonics skills to reading! If you missed it, last week, I shared my preschool philosophy and our little homeschool corner.

I hope you enjoyed this little peek into my brain and into my passion for educating the little ones. I know I usually talk about food and other less mentally-intensive topics, but I couldn’t resist the opportunity to talk about one of my favorite subjects of all time. Come back tomorrow for more of the same-old same-old!

Other posts in this series:

Phonics-Phonics, Part 2-Reading-Reading, Part 2-Handwriting-Math-Days of the Week-Bible-“Other”

Make Your Own Dairy - Ghee

One of my resolutions this year was to make more of my own dairy products: cheese, butter, sour cream, and the like. And while I’ve actually conquered quite a few of the items on my list, so far, I’ve only shared Sour Cream and Homemade Yogurt with you here. It’s about time to make another item on my list, so today I will show you how to make ghee.

What’s Ghee?

Ghee is butter that has been boiled down to remove the milk solids, leaving behind only the fat. It has a caramel-esque flavor that, if possible, improves upon the amazingness that butter already is.

What Do You Do With Ghee?

Anything that you would do with butter! It’s particularly useful for frying because it has a higher smoke point than butter does. I have used it instead of straight butter in some baking recipes, too, but because it’s pure fat (all the sugars and water have been cooked out), it can be a little more greasy, so you do have to make some adjustments when baking.

Why Ghee?

For one thing, the amazing flavor. It just can’t be beat, and you don’t know what I’m talking about until you’ve actually tasted it. Yum!

For another, it lasts a really long time. If you’ve made it successfully, it should last indefinitely in the fridge and for several months (at least) room temperature.

As you can see, it is extremely stable, which is the most desirable quality when it comes to fats. Unstable fats = free radicals = disease. Always choose stable (saturated) fats.

Ghee is often tolerated by those intolerant to lactose - but test it carefully first! Don’t make any assumptions. Also, some people with dairy allergies can tolerate ghee. (Not my Certain Little Someone, sadly. We tried it.)

Ghee is digested more readily than butter, making its nutrients more readily available to the body. Like other saturated fats, it also aids the body in the absorption of vitamins and minerals from foods eaten together with it.

In traditional Indian Ayurvedic medicine, ghee is said to be useful for maintaining healthy skin and eyes, and is good for enhancing memory and brain function. (Gimme some more of that stuff!!)

Why Make Your Own Ghee?

If you’ve ever priced ghee in the store, the answer to this question is quite obvious. For example, at Amazon.com, Purity Farms 13-oz container of ghee is $8.31 right now. I could make that same amount myself with farm-fresh butter for less than $5 (Right now, I could make it for $3.50, the sale price of butter at my local farm.).

And it is brain-dead easy. Seriously.

Don’t believe me? Here’s the short version of the instructions:

Melt butter. Simmer it. Simmer more. A little more. OK, done.

Oh, you need a little more than that? All right, here ya go:

How to Make Ghee

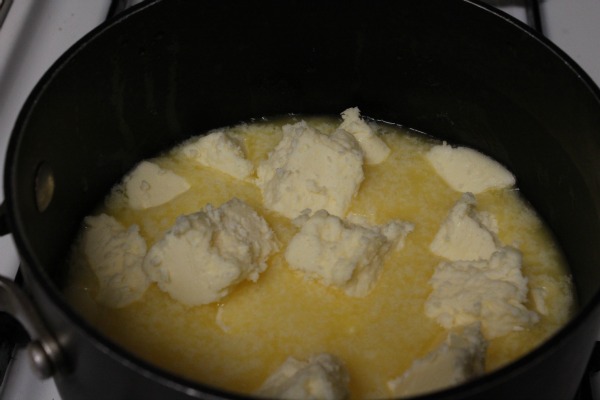
Chop unsalted butter into cubes and place in a large heavy-bottomed saucepan over low heat.

Melt the butter over low heat. Don't stir.

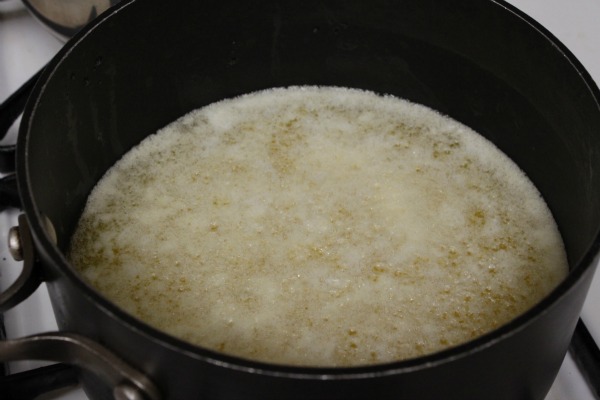
Simmer the butter over low heat. No need to stir. Just keep an eye on it.

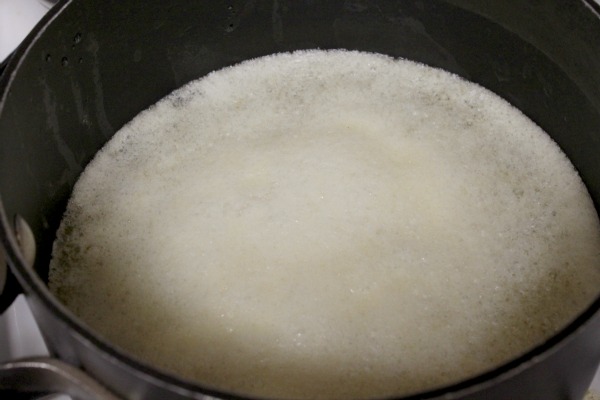
Keep simmering the butter on low heat. Don't stir. Don't raise the heat. Just keep simmering.

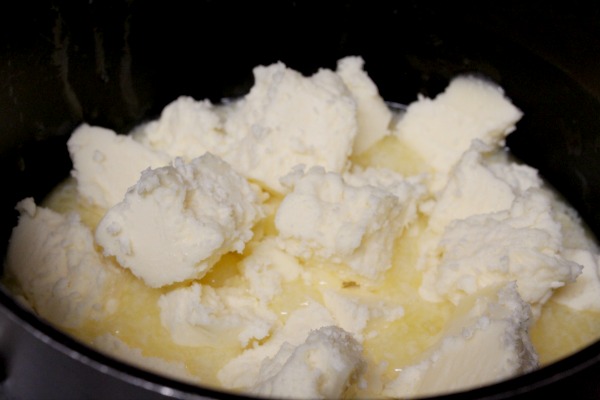
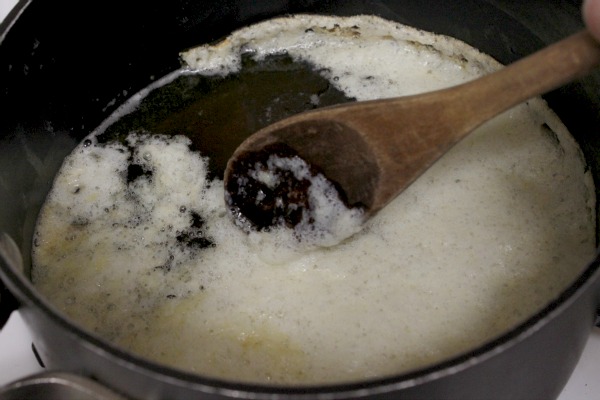
The foam that develops on the surface is the water cooking out of the butter. The milk solids should be settling on the bottom of the pot. In between the two is the rich golden ghee.

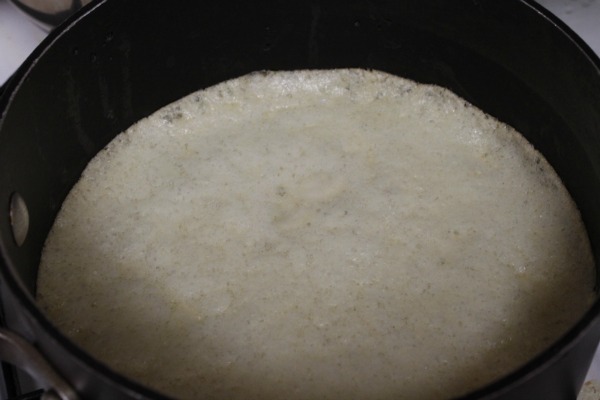
Very gently, so as not to disturb the milk solids on the bottom of the pan, skim the foam off the top.

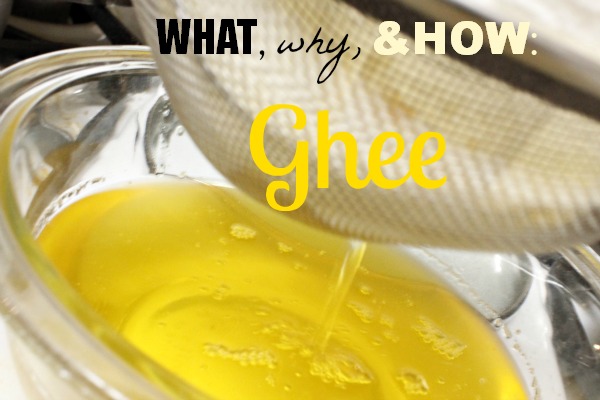
When the liquid under the foam is a nice golden color and smells like popcorn, the ghee is done. Let it cool slightly, then pour it through a mesh strainer lined with cloth or paper towels into a bowl. Be sure no particles are left in the liquid.

And that’s ghee! Told ya it was easy. The hardest part is discerning when it’s finally done, but honestly, if you err on the side of caution it will be fine. It might not last quite as long or be quite as “pure”, but it’s still butter and it will still taste good. However, if you let it go too long, it will definitely burn, so you don’t want that to happen. Hence the reminder to keep the heat on low! The whole process should take about half an hour or so, more if you’re making a larger batch.

You can make as little or as much as you want. I’ve made as little as 1/2 a pound of butter, and as much as 2 lbs. and both were fine. Clearly, you’ll have to watch a smaller batch even more carefully so as not to burn it.

Sharing at Titus 2sday, Traditional Tuesday, Teach me Tuesday, Domestically Divine Tuesday, Healthy 2Day Wednesday, Women Living Well Wednesday, Works for Me Wednesday, The Mommy Club, Frugal Days Sustainable Ways, Simple Lives Thursday, Your Green Resource, Frugal Friday, Feasting in Fellowship Friday, Natural Living Monday, Homestead Barn Hop, Better Mom Monday,

Get Healthy Get Fit - 12 Weeks to Develop Good Habits

I’m not into dieting. At best, I think it’s pointless, and at worst, detrimental. Any pounds lost on a temporary diet change will eventually return when the regular diet returns. The evidence suggests that our bodies don’t respond well to deprivation, and that dieting sets up a harmful cycle that will do more harm than good in the end.

But I am into developing good habits: healthy habits that can be maintained over the course of the days and weeks (and special occasions) that make up our lives. I’ve allowed some very unhealthy habits to creep into my life in the past couple years, and I’m starting to see the consequences of those now-ingrained choices.

The fact of the matter is that motherhood and pregnancy changes you. Emotionally, mentally, spiritually, and yes, physically, you will never be the same person again. In my case, the sweet tooth that I succumbed to far too often during my first pregnancy has never gone away and has begun to show up on my person in the form of undesired extra deposits of fat.

Time to Kick the Sugar Habit

It’s time for me to kick the sugar habit! Pregnancy is not currently an excuse for me, and neither is breastfeeding, so I’ve got to reign in my sweet tooth for real. Otherwise, I will never fit quite comfortably into my pre-baby clothes (or size) again!

My growing desire to develop more discipline in this area coincided with an invitation to join 18 other bloggers in a 12-week “Get Healthy Get Fit” series. Each of us have different goals and plans for achieving these goals, but in the end, we all want to improve our health and develop some healthy habits to help us make better choices going forward.

My Get Healthy Goals

One consequence of the excess sugar I’ve consumed is weight gain that I want to stop before it gets any worse. Weight gain is like a boulder that’s rolling down a hill - it only gains speed as it goes, and I don’t want that weigh to pile on any faster! I would really like to lose the excess weight that I’ve gained since having children, about 10 pounds.

Here are my current stats that I will update every Monday:

Weight: 136.6

Waist (inches): 31

Butt: 41

Hips: 42

Honestly, I don’t really have specific numbers that I’m looking for other than an approximation of about 10 pounds weight loss; I just want to be able to fit comfortably again in my clothes. I hope I can lose 3-5 inches in the butt and hips area, but those numbers are much slower to go down than the others, at least for me!

I also want to develop good dietary and exercise habits that will help me keep those pounds off and keep me healthy as I get older. Developing good habits now will help me maintain better health as I get older, because, let’s face it - I’m not getting any younger, that’s for sure!

The Plan: The 5 Healthy Habits I Want to Develop

  1. Reduce sugar and carbs. All the evidence points to sugar - and by extension, carbs, especially refined carbs - as the culprit in weight gain and a host of other diseases. As one expert put it: “Carbohydrates drive insulin, and insulin drives fat.”
  2. Eat more whole grains and other healthy carbs. And I mean “whole”. I’m trying to limit my intake of flour and flour-based foods, even whole grain flours, and am focusing more on grains served in their whole form. Quinoa, brown rice, barley, and more, are all delicious served whole and make great side dishes at meal times. And when it comes to non-grain carbohydrates, like fruits and starchy vegetables (think potatoes), I’m going to stick to meal times and smaller portions of those. I don’t think it’s a good idea to eliminate these foods completely, because that is not a sustainable habit over the long run.
  3. Increase protein consumption. I’ve already started that - check out my recent post on protein-rich snacks. Protein will increase energy and lasts longer than refined carbs.
  4. Eat more vegetables. Vegetables provide lots of healthy vitamins and minerals and I’ve always been really bad about eating adequate amounts of them. My aim is to keep a supply of greens in my fridge at all times and have a salad once a day: That will give me a good veggie boost! Vegetables will also help keep my digestive system moving even as I reduce the amount of carb-based fiber.
  5. Exercise regularly. I learned recently that exercise doesn’t help you lose weight. That was kind of a mental revelation, but I realized that practical experience had already taught me that. However, exercise has benefits beyond weight loss, and I think it’s a good habit to maintain. Personally, I prefer Pilates, but I’ve been hearing recently about HIIT (High Intensity Interval Training) that also helps to regulate your hormones - including insulin - so I’m considering experimenting with that as well. But fast-paced exercise and I don’t get along too well so we shall see if that actually happens!

Every Monday, I’ll update you on my progress, and share with you what I’m learning along the way. I’ll also direct you to resources I find helpful as I come across them.

Feel free to join the other bloggers in the Get Healthy Get Fit Series, and check out their plans and progress, too! We certainly would love your moral support as you cheer us on. We also have a Pinterest board you can follow because we will all be posting tips and information around the internet and from our own blogs there. Be inspired to get fit yourself! You can also follow our conversation on Twitter with the hash tag #healthymomseries. See you there!

What healthy habits have you struggled to develop?

Sharing at Homestead Barn Hop, Better Mom Mondays, Titus 2sday, Traditional Tuesday, Teach me Tuesday, Domestically Divine Tuesday, Healthy 2Day Wednesday, Women Living Well Wednesday, Works for Me Wednesday, The Mommy Club, Frugal Days Sustainable Ways, Life in Bloom, Fellowship Friday, Frugal Friday, Feasting in Fellowship Friday