How to Win Your Child’s Heart

How to Win Your Child's Heart

How to Win Your Child’s Heart -

Image(s) courtesy VintageHolidayCrafts.com

You hear a lot in various circles these days about the importance of “winning your child’s heart” … but what does that mean exactly? And more importantly, is it even a Biblical concept?

I’ve been contemplating both of those questions for a little while now, and I’ve arrived at some satisfactory conclusions for myself. (I’ve also realized how terrible I have been in this department!)

free-vintage-valentine-card-boy-and-girl-dont-give-me-the-brush-off

Image(s) courtesy VintageHolidayCrafts.com

I’ll start with my thoughts on the latter question:

Is “winning your child’s heart” a Biblical concept?

Well, certainly the Bible does not command us to do as such, at least not in the way it commands us to discipline, train, and teach our children. I haven’t found a verse yet that says, “Go win your child’s heart!” But here are some verses and Biblical principles for your consideration:

  • Obedience springs from a heart of love. John 14:23 Jesus answered and said to him, “If anyone loves Me, he will keep My word; and My Father will love him, and We will come to him and make Our home with him.
  • God instructs children to give their hearts to their parents. Proverbs 23:26 My son, give me your heart, and let your eyes observe my ways.
  • Our Heavenly Father pursues us. I John 4:9 We love Him because He first loved us.
  • Parents are to engage with their children in a loving manner. Matthew 18:5, 6 “Whoever receives one little child like this in My name receives Me. “But whoever causes one of these little ones who believe in Me to sin, it would be better for him if a millstone were hung around his neck, and he were drowned in the depth of the sea.” and Ephesians 6:4 And you, fathers, do not provoke your children to wrath, but bring them up in the training and admonition of the Lord.
  • Jesus rebuked the disciples for disregarding children, and made a point of reaching out to them. Matthew 19:13, 14 Then little children were brought to Him that He might put His hands on them and pray, but the disciples rebuked them. But Jesus said, “Let the little children come to Me, and do not forbid them; for of such is the kingdom of heaven.”

Win Your Child's Heart

Image(s) courtesy VintageHolidayCrafts.com

How to Win Your Child’s Heart

I think it’s safe to say that it’s a Biblical concept, so now what about the question of how exactly to go about it? I’m embarrassed to admit this one has stumped me for some time. The best I could come up with until recently was that I needed to spend more time with my children. Relationships are built on time, right? But that didn’t seem to be cutting it for my love-hungry Certain Little Someone, and I could sense a building anger and frustration in his heart that worried me. We could spend the whole day together doing all kinds of fun things, but it was like his love tank still wasn’t quite full.

As I pondered the problem, I lightbulb went on in my (admittedly dim-witted!) head: “Winning someone’s heart” is exactly what goes on in a courtship! Now, clearly, at some point this analogy totally breaks down, but there are a lot of similarities that are applicable to the parent-child relationship.

Win Your Child's Heart

Image(s) courtesy VintageHolidayCrafts.com

I mean, think about it. Exactly what happens when a young man has an eye on a girl and sets out to woo her? As I imagined a courting couple, I began to develop a clear picture of what it would look like to win my child’s heart (minus the googly eyes and raging hormones):

  1. I must spend time with him. This is where it all starts. Time - copious amounts of time - spent together, doing whatever. What’s being done doesn’t matter so much as the actual fact of spending time together. Typically, a couple falling in love can’t wait until the next time they get to see each other or talk on the phone because they just love spending as much time as possible with that person.
  2. Time together is a good starting point, but it’s not enough: What’s even more important is the interaction that takes place during the time spent together. For one thing, a courting couple will generally participate in activities they don’t necessarily enjoy simply for the sake of spending time with the other person. This means, I must sometimes play games and other activities I do not enjoy simply because my son enjoys them and I want to spend time with him. This is hard for me because I’m a girly-girl and both my boys are ALL. BOY. Playing outside is something I just do not love to do - never have - and yet, I must do it if I want to win their heart. My Certain Little Someone, in particular, absolutely loves the challenge of trying to hit a baseball with his big foam bat and literally could spend HOURS practicing this skill. I have never ever enjoyed baseball in any form, and it’s sheer torture for me to throw him the ball over and over and over and over… and over … and over again! (It’s probably also sheer torture for him to try to hit my wild throws, poor guy!) But I’m learning that this is something very important to him that I need to do - with a good attitude - whenever I can, just to show him that I love him.
  3. I must speak kindly, gently, and respectfully to him. A fledgling courtship will break up pretty quickly if harsh words are exchanged! And yet, harsh words escape my mouth so often when speaking to both of my sons. Harsh words and harsh tones build walls and drive wedges between people; they don’t win hearts and they don’t build relationships, and they certainly don’t win a child’s heart! I find my boys respond to me so much better when my words are spoken in kind tones. And when they are misbehaving and require correction, I still must guard my tongue and my tone of voice and make sure my words are respectful and loving even as I discipline them in one way or another.
  4. I must praise his success… and his effort! Flattery will get you nowhere, but well-worded sincere praise can secure a heart better than anything else. Just think of how a courting couple compliments each other on just about everything. I have never seen a child who didn’t blossom when praised, and it’s common knowledge that the more you praise a little one, the harder they try to please you and earn that praise. Whether they experience success in behavior, academics, sports, or some other endeavor, I need to pay attention to it, notice it, and praise them for it. And even if they don’t succeed, if they tried their best, I want to notice and praise that, too.
  5. I must see his potential. One of the quickest ways to a person’s heart (besides food, of course) is to notice not so much what they are but what they can be. See the person hidden deep inside (sometimes pretty deep) and seek to draw it out by making the other person aware of it. This is particularly an area I need to improve in with my children! I’m oh-so-quick to see their faults and failings that I overlook their potential to be more. I don’t want to tromple on their potential; I want to bring it out!

WaysYou Can Win Your Child's Heart I could go on, but I think you get the general idea! What it comes down to is this: a courting couple is generally on their best behavior, treating the other person in the best way they can in a concerted effort to win their heart. Parents can do the same thing for their children, but it’s a lot harder because it has to be balanced with the need to train and disciple them. It’s also a lot harder because in the parent-child relationship the heart-winning is usually one-sided; whereas in a courtship, as long as there’s mutual interest, both parties have their best foot forward.

And clearly, the analogy falls all to pieces at some point, because in a courtship there’s that added element we’ll call “romance”. Obviously, that doesn’t come into play here!

But I’m taking a cue from the lovelorn and making a concerted effort this Valentine’s Day (and all year long) to win my child’s heart so that they will more willingly accept my instruction and discipline.

What steps do you take to ensure you win your child’s heart?

BundleoftheWeek.com, 5 eBooks for $7.40!

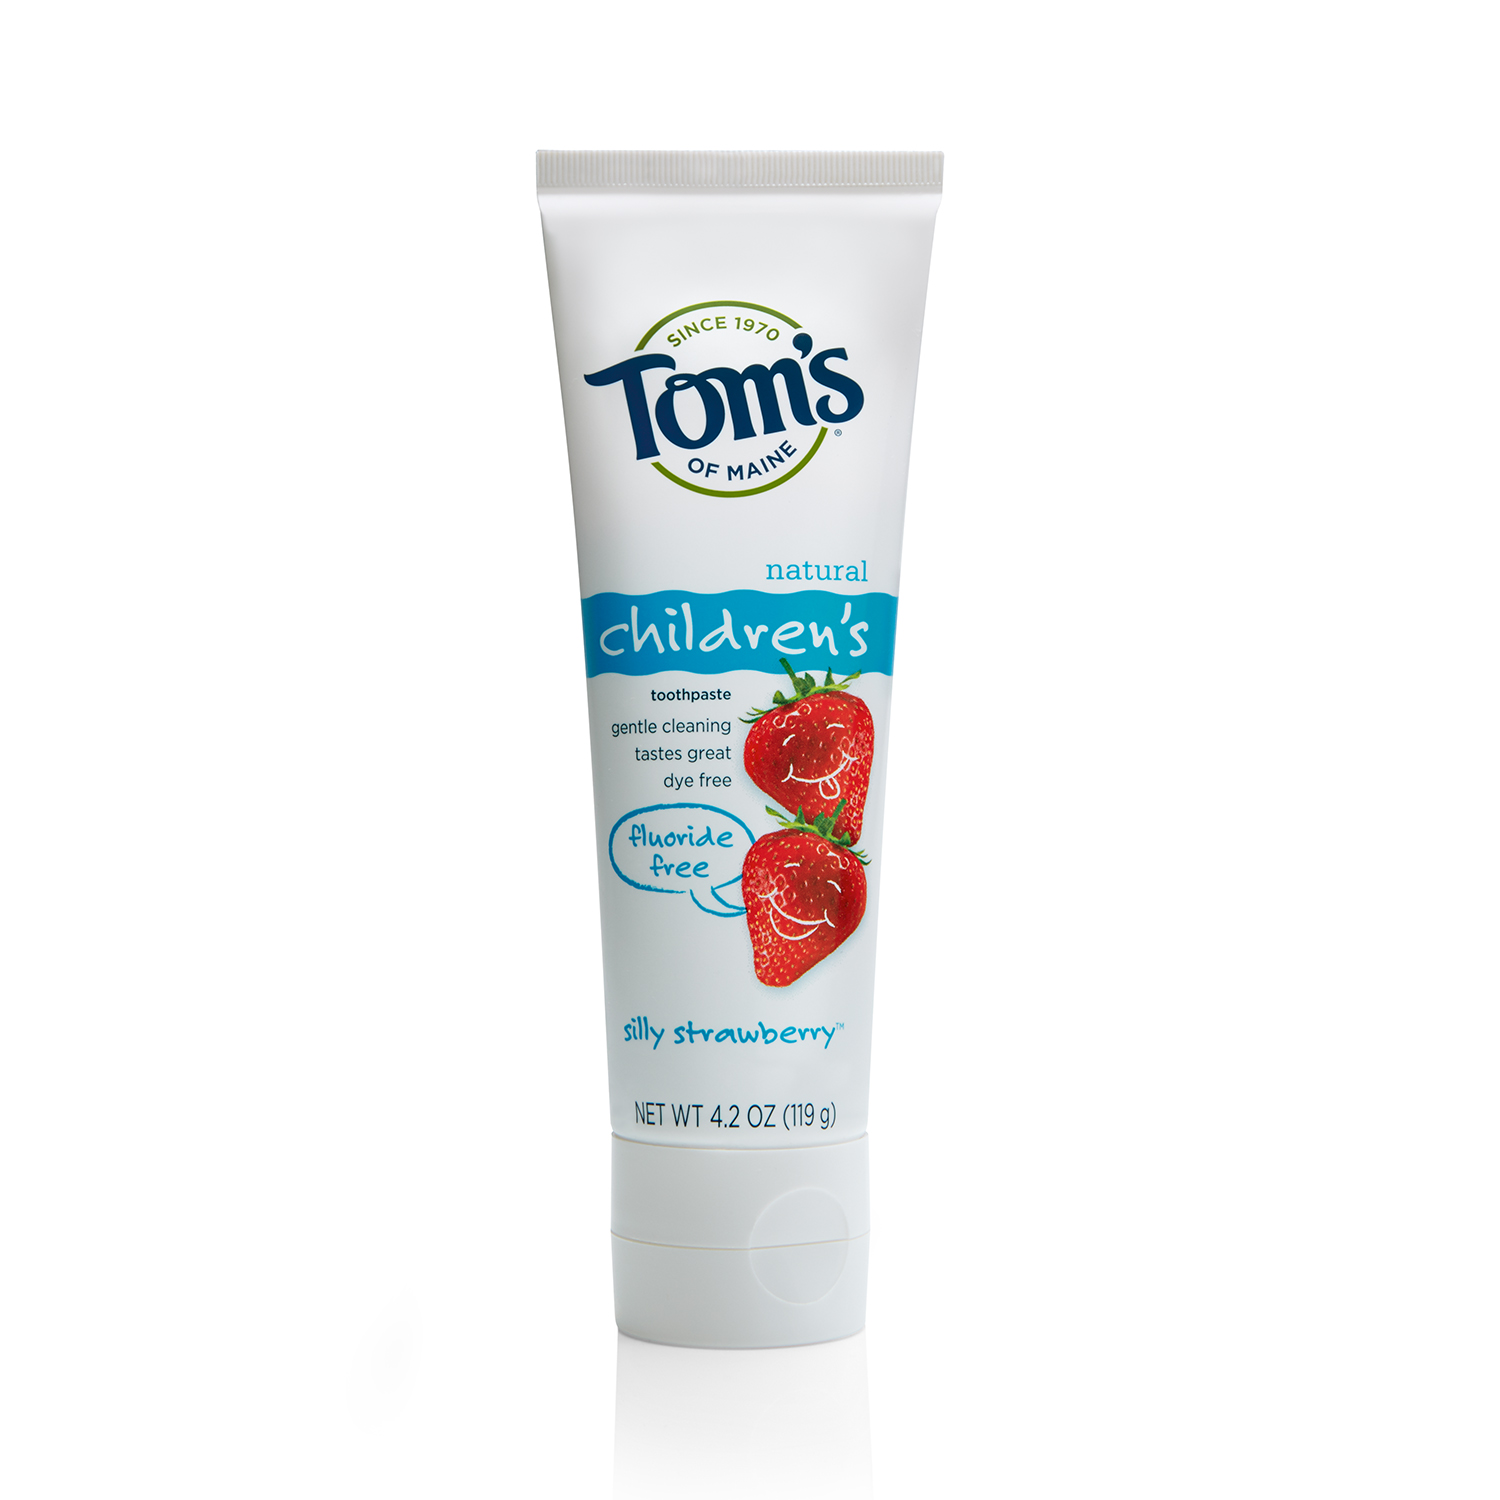
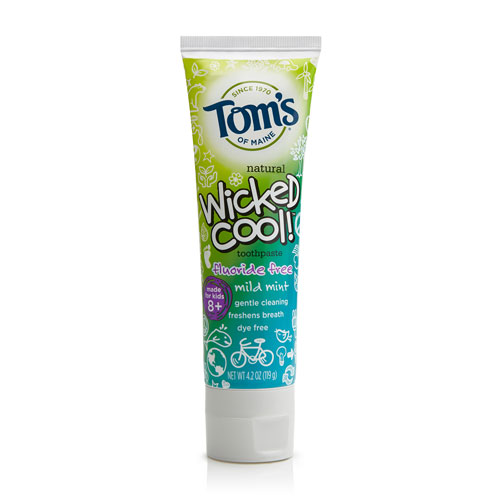
Brush Teeth with An All Natural, Affordable Toothpaste

This is not a sponsored post. Tom’s of Maine gave me some product to try, but all opinions are my own. This post does contain affiliate and referral links. Thank you for supporting Authentic Simplicity!

Although you know that healthy teeth have more to do with diet than oral hygiene, you still want to keep them clean, yes? (Ain’t nobody wants to catch wind of stinky breath, ya know?) And cleaning said teeth with toothpastes laden with nasty chemicals seems counter-productive, yes?

But natural toothpaste is so expensive, yes?

No.

Thankfully, affordable yet natural (even fluoride-free!) toothpaste is available at just about every grocery store, as well as the ubiquitous Walmart and Target. I’m talking about Tom’s of Maine, whose line of kids’ toothpastes I was recently able to try.

What I Like About Tom’s of Maine

  • Availability: You can find their products in just about any store, or online at Amazon.com or Vitacost.com. Some other highly recommended natural toothpastes are a little more obscure and harder to come by, so it’s nice to know there’s an option close at hand.
  • Affordability: The Silly Strawberry Kids’ Toothpaste which I tried is currently $2.61 at Vitacost (normally $5.17). A pack of 3 is currently $7.83 at Amazon.com. If you want to pick it up at Walmart, you’ll find the price to be somewhere around $3.00.
  • Skin Deep Rating: EWG’s Skin Deep Database rates products based on their safety and environmental impact. Tom’s of Maine’s kids’ toothpastes get a rating of “2″, which is an excellent rating.
  • Natural Flavors: One thing that I despise about most kids’ toothpastes is the artificial flavors they all contain. My kids love that fake flavor, but I cannot abide it! My Certain Little Someone is very particular about the flavor of his toothpaste, and has turned his nose up at other natural brands. At first, he didn’t take to the Silly Strawberry flavor (which comes from actual strawberry juice!) but it wasn’t long before he adjusted, and then he loved it as much as any of the other fake ones. Now the Wicked Cool Mint flavor, which comes from actual mint leaves, is definitely not his favorite, but that’s no surprise since he doesn’t even like peppermint candy canes!
  • Transparency: I love how Toms of Maine is very transparent in detailing the ingredients in their products so you always know what you’re getting. Their Ingredients List details what ingredients they use in their products and from what those ingredients are derived (a very important detail!).
  • Fluoride-Free: Fluoride-free toothpaste is hard to come by for children past the toddler stage, so I love that Toms of Maine makes fluoride-free versions of all their children’s toothpastes.
  • What’s Missing: Tom’s of Maine uses no artificial flavors, preservatives, fragrances, or colors.

What I Don’t Like

Honestly, there’s not a lot I don’t like about Tom’s of Maine, although some of their ingredients (sodium lauryl sulfate) are not *quite* as natural and unprocessed as I would prefer. However, the alternatives are a lot pricier and extremely difficult to find, which makes Toms of Maine an excellent choice.


BundleoftheWeek.com, 5 eBooks for $7.40!

Upcycle Your Christmas Cards - Christmas Card Ornaments

upcycled christmas card ornaments text

Now that Christmas is over, I’m sure you have a plethora of Christmas cards you don’t really know what to do with. At least I know that’s what happens to me every year! The photograph ones I keep in a photo album, but the actual Christmas cards are not so easily dealt with: they’re so pretty, you hate to throw them away… but what can you do with them?

This year, I hit upon a creative solution: Every year at Christmas, I like to help my boys make some ornaments they can give as gifts to various family members. One year it was cinnamon ornaments, and another year they were made with salt dough. I feel like the whole process teaches them the joy of giving as well as the joy of creating, and family members (grandparents especially!) love to receive their little handmade treasures - a total win-win!

This past Christmas, I took on an ambitious project for their ornament gifts; and in the end, their role was minimal (probably shoulda waited ’til they were a little older), but I loved the final result anyway! What I particularly love about this project (which I originally found on Pinterest , of course) is that it is made of recycled materials. In particular, it makes use of Christmas cards, which are so beautiful… but so plentiful. You can only use them for gift tags so much, and then even that gets a little old, ya know? I was thrilled to find this unique and creative usage for all the Christmas cards I’d been hoarding in a little box.

Christmas card ornament

This isn’t as simple of a craft as I usually undertake, and I actually did have to buy some items specifically for this project (never happens!), but I love the result. I might make some more next year and give them as gifts myself!

Upcycle Christmas Cards into Christmas Card Ornaments

christmas card ornament 3

Christmas Card Ornaments

Summary: Upcycle your old Christmas cards into these beautiful ornaments.

You will need:

  • Mason Jar Rings
  • Christmas Cards
  • Acetate Sheets (I found a pad of “mock” acetate at Michaels)
  • Hot Glue Gun & Glue
  • White Glue
  • Foam Adhesive Stickers
  • Glue Dots
  • Sharp Scissors
  • Glitter
  • Ribbon

Instructions

  1. Choose a Christmas card with a picture or motif that will fit within the frame made by a Mason jar ring. Place the jar ring on the card, and trace around the edge of the ring with a pencil. Cut out the circle you traced, and glue the picture to the back of the ring.
  2. Cut out one or two small details from the remainder of the card (or from complementary cards), and attach them to the circle with a foam sticker to create a 3D effect.
  3. Place the ring down on a sheet of acetate paper. With the hot glue gun, glue all around the edge of the ring, adhering it to the acetate. Allow it to cool and dry completely, then trim the paper and the dried glue close to the edge of the ring.
  4. Pour some glitter onto a plate. Drizzle some glue around the outer edge of the acetate, then place the ornament face down in the glitter. Shake off the excess glitter and allow to dry.
  5. Cut out one or two more small details from a Christmas card, and affix them to the front of the acetate sheet with a glue dot.
  6. Tie a ribbon around the ring, creating a loop at the top so it can hang. (You might need to secure the ribbon with just a bit of hot glue.)

christmas card ornament 2

BundleoftheWeek.com, 5 eBooks for $7.40!

Real Food on a Tight Schedule

5 ways to save time in the real food kitchen Usually, I’m talking about real food on a tight budget, but today we’re talking about being tight on a different sort of commodity: namely, time. We are all short on time, yes?

I’ve been transitioning from a work AT home mom to a working AWAY from home mom for the past few months, and it’s not been without its challenges on many levels. Sticking to a real foods diet has been a little more stressful in terms of preparation, and I’m finding that too much of my at-home time has been spent slaving away in the kitchen when I could be spending time with my family.

I’ve slowly been figuring all this out, though, and I’ve come up with a few strategies that have cut down my kitchen time without sacrificing the quality of the food I serve.

1. Keep it Simple, Sister

This has always been my mantra, and even more so now. I’ve had to pull myself out of the mental box that says, “all meals must include a main dish and several prepared sides”. That’s simply not true! Here are some ways to simplify your menu (particularly your dinner menu):

  • Try one-dish meals or casseroles (I’m partial to stir-fry’s myself!). If they are well balanced with the appropriate amounts of proteins, carbs, and fruits or veggies, then you don’t need to have any additional accompaniments to the meal. Just make sure you have enough of it to satisfy everybody’s hungry tummy!
  • Forget prepped and cooked side dishes. There’s nothing wrong with a simple sliced apple or a pile of freshly chopped veggies (although I do like to experiment with different kinds of yummy apple side dishes!). Clearly, I still prepare more involved side dishes, but I’m learning that the fact my family eats fruits and vegetables is more important than the way they are served.
  • Think outside the box when planning meals: try an assortment of finger foods or a cold plate instead of an actual “dinner”.

2. Process Your Groceries

When you get home from grocery shopping (or from the farmers’ market), immediately prep all the food that you can. Obviously, some things cannot be sliced or chopped or otherwise prepped ahead of time, but do process whatever you possibly can. This will save enormous amounts of time when you’re getting ready to put dinner on the table.

Here are some foods I try to prep ahead of time whenever I can:

  • pineapples (won’t keep for long, but they don’t last for long around here anyway, so that’s not a problem)
  • kefir or yogurt (when you bring milk home, set a batch going right away)
  • rice, pasta, or other grains (cook them up and store in the freezer)
  • beans (soak and then cook in the crock pot)
  • winter squash (cook it in the crock pot, puree, and refrigerate or freeze)
  • onions (chop and freeze - thawed onions aren’t great in raw dishes but work perfectly for anything cooked)
  • meat (separate it into portions that will work for your recipes/meal plan; you can also brown ground meat for use in recipes like spaghetti and the like, or fry up bacon)

3. Take Ten

Build ten minutes into your night or morning routine to take care of various kitchen chores like:

  • culturing kefir, yogurt, sour cream, and anything you like to ferment
  • feeding your sourdough starter
  • defrosting meat (or whatever you need for the next day that is in the freezer)
  • soaking beans
  • cooking broth (or anything, really) in the crock pot

4. Utilize Your Tools

Make friends with your crock pot, your food processor, and your Vitamix (if you have one) because those babies will make your life a lot easier and will save you so much time! I actually don’t have a food processor, although I want to get one eventually, but I use my crock pot and my Vitamix all the stinkin’ time. I don’t know what I would do without either one!

  • The crock pot might take longer to cook something, but it’s completely hands off for the most part so it saves time in that regard. If you cook soup on the stove top, it might take less time, but you have to be present and constantly checking on it to make sure the pot doesn’t boil over or the liquid evaporate too much. A slow cooker cooks slowly (funny, huh?) and safely so that you can let it do its thing while you do yours. You can let it go overnight, or you can let it go all day, whichever is more convenient for you.
  • Crock pots are not just for roasts! As I mentioned before, I cook my pumpkins and other winter squash in it all the time. I also use it to make broth on a regular basis. I have used it to make granola, and steel cut oats, too. I’ve even baked bread in it!
  • And a Vitamix is not just for smoothies. Sure, it makes a mean smoothie, but it does a lot of other stuff, too. It will puree anything you need pureed, which seems to happen an awful lot in real-food-cooking for some reason. It’s also great at making your own sauces - savory sauces, sweet sauces, fruit sauces, any kind of sauce! It will even cook the sauce for you! I also occasionally use my Vitamix like a food processor, especially for grating carrots or potatoes. It works so fast and is so effective!

5. Have a Meal Plan

This is the oldest trick in the books, and for good reason: it works! I have to admit I struggle with consistency with this one, but there is no denying that food prep goes a lot more smoothly - and quickly - when I’m working from a menu. My favorite menu planning tool is Plan to Eat, an online program I highly recommend, and consider to be totally worth it in terms of how much time and money you save when using it. (By the way, that’s my referral link, and you can try it for free for 30 days.)

Above all, keep in mind that some things in life are more important than real food. I’ve learned to make concessions along the way; for example, I keep a bag of flour in the cupboard for those occasions (that occur on a regular basis) when I simply don’t have time to grind my grain. I also am not ashamed to buy store-bought healthy (ish) treats for my kids when I don’t have time to make cookies from scratch. We eat out at least once a week, and although we try to eat at healthier restaurants and make healthier choices when dining out… it’s still eating out and it’s still not very healthy! But it’s a necessary break for all of us, and one we look forward to, and so we consider it worth it. Your concessions might look different, but don’t be ashamed of them or embarrassed by them.

How do you serve your family real food when time is short?

BundleoftheWeek.com, 5 eBooks for $7.40!

A Redeemed Jack-O-Lantern

As much as I love to cook up a good pumpkin and throw it into just about everything, I’ve found that there are other - non-culinary - uses for those big fat squashes that might not be edible, per se, but are just as much fun.

This Redeemed Jack-O-Lantern, for example. I found the instructions in the files left by the previous K3 teacher in my classroom, and found further inspiration in the fabulous children’s book, The Pumpkin Patch Parable (that right there is an affiliate link), written by one of my favorite authors, Liz Curtis Higgs (That is not. An affiliate link, I mean.). Instead of glorifying death and fear, it celebrates life and hope; and it radiates faith. That’s my kind o’ pumpkin!

How a Jack-O-Lantern is Redeemed

  1. Choose a big fat pumpkin, the best you can find. No bitsy pie pumpkins this time around! “… just as He chose us in Him before the foundation of the world…” Eph 1:4
  2. Use a sharp knife to cut a lid out of the top of the pumpkin, making it large enough for you to fit your hand in comfortably.
  3. Scoop out all the icky yucky slimy junk stuck inside the pumpkin. It kind of reminds one of all the yuckiness (aka, sin) that resides in each of our hearts. “What comes out of a man, that defiles a man. For from within, out of the heart of men, proceed evil thoughts, adulteries, fornications, murders, thefts, covetousness, wickedness, deceit, lewdness, an evil eye, blasphemy, pride, foolishness. All these evil things come from within and defile a man.” Mark 7:20-23
  4. Throw away the icky yucky slimy junk. (If your frugal heart cannot bear to part with the seeds… save them discreetly! The eliminating of the yucky junk is an essential element of the redemption illustration.) “If we confess our sins, He is faithful and just to forgive us our sins and to cleanse us from all unrighteousness.” I John 1:9
  5. Take a star-shaped cookie cutter and place it on the pumpkin in the general approximation of where it would have eyes if it were a face. Use a hammer to tap the cookie cutter into the pumpkin, and remove the star shaped piece of pumpkin to reveal a star-shaped eye. Repeat for the second eye. (Note: Plastic cookie cutters work, but metal cookie cutters work better. And if you have neither, just use a sharp knife and free-hand it.) Because our sin separated us from God, He had to redeem us. He sent His Son Jesus to earth to live a perfect life and be the perfect sacrifice for our sin. He announced the arrival of His Son on earth with, among other things, a very special star. “Now after Jesus was born in Bethlehem of Judea in the days of Herod the king, behold, wise men from the East came to Jerusalem, saying, “Where is He who has been born King of the Jews? For we have seen His star in the East and have come to worship Him.” Mat 2:1-3
  6. Use the sharp knife to cut a cross-shaped piece where a nose would be on your pumpkin’s face. God’s redemption plan culminated in the death of Jesus on the cross and His subsequent resurrection. “Without shedding of blood there is no remission.” Heb 9:22
  7. Use a fish-shaped cookie cutter (What? No such thing in your house? Just use a knife.) and a hammer to punch out the mouth of the pumpkin face. No Bible verse here, but a little bit of Christian history: the persecuted early church used a fish as a symbol whereby they identified one another. Hence it is now a symbol of our belief and faith in Jesus Christ as our Redeemer.
  8. Place a tea light candle (I like the fake ones from the dollar store) inside the pumpkin and watch the light shine through the pumpkin’s face. “Let your light so shine before men, that they may see your good works and glorify your Father in heaven.” Mat 5:16

And that’s how a pumpkin (and a person) is redeemed.

BundleoftheWeek.com, 5 eBooks for $7.40!

Safety Online

I was provided a year’s subscription to Covenant Eyes in exchange for this post, but all opinions and thoughts are my own. This is not a commercial; just my thoughts about a very real problem each of us faces in our world today. CovenantEyes.com Good and evil run on parallel tracks and they both arrive at the same time.

I heard a sermon once where the pastor repeatedly quoted that statement until it was stuck in my brain forever, and I’ve since repeatedly thought how true of a statement it was! The internet is a perfect illustration of its truth: it can be both good and evil.

The Internet Can Be Good

Very good. In fact, I make a little spare change for myself and my family via my little enterprises on the internet. I know many have established entire businesses and careers online to support themselves, and I think it’s so wonderful that they can stay home with their families (both mom AND dad!) and still earn a living. That’s a beautiful thing, in my opinion.

I’ve also learned SO much from the internet: my blogging friends have inspired me time and time again with fresh ideas and challenges on all sorts of fronts, and of course, there’s Google, which is always ready to help you find the answers to burning questions of any level of importance.

I use the internet all the time in planning for my preschool class; I’ve found it to be indispensable!

The internet helps me manage my household, decorate the house, decorate birthday cakes, raise my children, love my husband, keep up-to-date with friends and family, keep up-to-date (to the extent I want) with world events, and find fabulously new recipes.

BUT….!

The Internet Can Be Evil

Very, very evil. Men love darkness rather than light because their deeds are evil, and the internet provides the dark cover of what appears to be a cloak of secrecy that encourages all manner of evil deeds to take place.

Like cyber bullying for example.

Or trapping victims in an online web in order to perpetrate crimes in person.

Or porn. Or any other manner of deviant immoral behavior.

The internet can be evil indeed.

Arm Yourself for Battle

Thankfully, there are ways to reap the benefits of the internet without succumbing to the dangers. Just arm yourself and your family with a the right tools, and you can do battle with confidence!

One important step my family took recently was to install a filtering and monitoring service on all our devices: PC, laptop, phones, and tablets. This service, offered by Covenant Eyes, is completely customizable and adjustable to the particular needs of your family, and gives us a great peace of mind as The Boys get older and are exposed to the internet more and more. I highly recommend that every family take this proactive step to protect themselves against the dangers that can be found online.

There are, of course, other measures families can take, most of them involving a lot of time, attention, and discernment on the part of the parents. My DH and I have discussed at length how we will approach our growing boys’ time online as they get older, and there are various strategies we’ve heard about and read about that we’ll probably implement at one point or another. But ultimately, it comes down to how we train them. I am reminded more and more recently of the instruction God gave to the Israelites to teach their children about His commandments when they were at home, when they were on their way somewhere, when they wake up and when they go to sleep. Our goal right now is to fill our sons’ minds with the Word of God so that when they are older, the Holy Spirit can use it to give them wisdom to know what is right and the courage to do it.

What about you? How do you protect your family from online dangers?


BundleoftheWeek.com, 5 eBooks for $7.40!

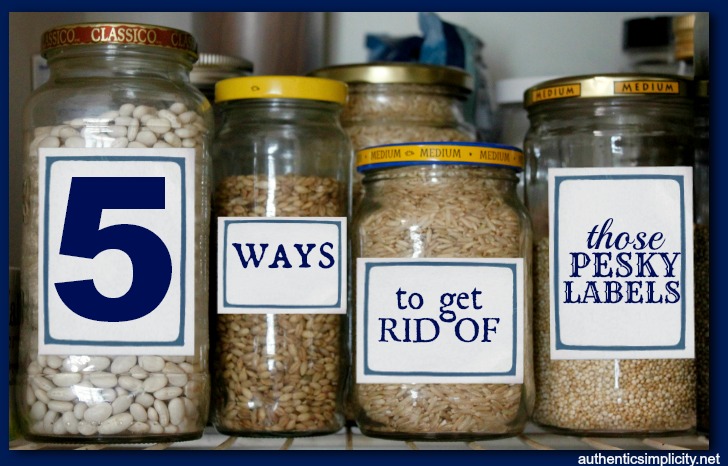
5 Ways to Remove Labels

This post contains affiliate links and other assorted money-making madness.

Remove labels from jars You know how I love to keep my pantry (which I actually don’t really have right now…) organized with glass jars, right? I waxed eloquent about it in this post: How I Organized My Pantry for Free with Empty Glass Jars. If you open up my fridge or any of my cupboards, you’ll see dozens of glass jars hard at work containing all our food.

But those pesky labels can really drive me crazy! Some come off quite easily… others not so much. I’ve had more than my fair share of label scrubbing, and I’ve learned a few tried-and-true methods for removing them with minimal fuss.

1. Soak in Warm Water

This should be the first step in any case. Sometimes (Ok, most of the time), I skip the “soak” part and just hold the jar under running water. Sometimes (Ok, quite frequently), I run the jar - with the label- through the dishwasher. In any case, the whole point is that I get the label on the jar thoroughly wet with warm or hot water, and that is the first step in the label-removal process. If you’re lucky, this will be all you have to do! Some labels just slip right off after a good washing. Usually, you won’t be that lucky, though, so on to the next step.

2. Scrape the Label

Sometimes the label just needs a little help coming off the jar, in which case you’ll want to employ some kind of scraping tool. I’ve used all sorts of things: plastic knives, fake credit cards (the kind they send you in the mail hoping to lure you to sign up), and who knows what else. But my favorite tool is a sturdy pan scraper like these I found on Amazon. They are the ultimate label scrubber-offer, so everybody should have one. (Cuz I said so.)

At the very least, the scraper will help you get rid of the paper label itself, so that all you will have left is sticky gunk. Sticky gunk is no good, so hang on to that scraper (cuz you’re gonna need it) and try one (or more!) of the following options:

3. Use Coconut Oil & Baking Soda

Combine equal parts coconut oil and baking soda (say, 1 TBSP of each) in a small container until you have a paste. Smear the paste all over the sticky residue and let it sit for 15-20 minutes or so. Scrub it off, and hopefully the label and sticky residue will come off, too. If not, repeat the process until it does. And don’t forget to use the scraper!

4. Use Peanut Butter

Smear it all over the sticky stuff and let it sit for a while. Scrub it off and repeat if necessary. You can use the scraper again to help get off some of the more stubborn sticky yuckiness.

You can also use any other heavy fat (like shortening, or other nut butters) with similar success.

5. Use Lemon Essential Oil

Nowadays I usually skip options #3 and #4 and go straight for the big guns. Lemon Essential Oil* is the bomb-diggety when it comes to removing that sticky gunk left behind by all those labels. All you have to do is drip one little drop right onto the jar. Rub the drop into all the sticky gunk, then scrub it off under hot running water. Magic! You might have to repeat this process once or twice with really stubborn stickiness, but it is far more effective than either of the other 2 options. Oh, and don’t forget the scraper! It can come in handy here, too.

*Lemon Essential oil comes in a 15ml bottle for less than $15 (just over $11 if you are a distributor), and that bottle can have as many as 400 drops in it. You can use Lemon Essential Oil all over the house in all kinds of cleaning applications, so you definitely get your money’s worth out of it.

BundleoftheWeek.com, 5 eBooks for $7.40!

How to Bake With Stevia {Without Affecting Flavor}

How to Bake with Stevia Extract Almost a year ago, I wrote a post about how to convert sugar measurements to stevia for cooking and baking. All of the information in that post is true and accurate, but since then I’ve fine-tuned my routine a bit and developed a method for baking with stevia that doesn’t affect the texture or flavor of the final product. I’ve baked all kinds of things this way, and it seems to work across the board with all different kinds of recipes, so for the most part, this is how I bake with stevia.

1. Use Half the Amount of Sugar

The first step is to reduce the amount of sugar called for in the recipe by at least half. Now, for most conventional recipes, I already reduce the amount of sugar by as much as half anyway. So for the purposes of baking with stevia, I reduce the amount of sugar I would personally use by half.

For example:

  • A recipe calls for 1 cup of sugar. I think that sounds like a little bit too much sugar going on for that particular recipe, so I would probably only use 3/4 cup at most.
  • Since I’m going to also be adding stevia, I can reduce that 3/4 cup even more, and use 1/2 cup or less of sugar.
  • Most recipes can handle this without drastically affecting the final texture, but there are some recipes that for whatever reason will not work well with the reduced sugar. In those cases, I usually just forego that particular recipe!

If you’re starting with a recipe that’s already inherently fairly healthy and/or has been healthified, you can just reduce the sugar by half and move on to the next step.

2. Replace the Remaining Half of Sugar with Stevia

Now you can follow the conversion chart to replace the remaining amount of sugar the recipe requires.

For example:

  • The original recipe calls for 1/2 cup of sugar. You’ll put 1/4 cup of sugar in your batter.
  • You’ll add 1/4 t. of stevia to replace the remaining 1/4 cup of sweetener.

3. Proceed As Directed

Just finish up the recipe the way it’s written. You shouldn’t need to make any other adjustments unless you want to.

And that’s it! You’ve just significantly reduced the sugar in your baked goods without sacrificing taste or texture! It’s even better if you use a “healthier” sugar like coconut sugar or sucanat.

Stevia Plant

the stevia plant before processing into extract or powder

Where to Buy Stevia (Plus Also What Kind to Use)

I like to use liquid stevia (you can find either glycerin- or alcohol-based varieties), which is essentially an extract of stevia (like peppermint or vanilla extract). The powdered stevia goes through more processing and often has a bitter after-taste, so I stay away from it. (Plus, a lot of powdered stevia contains additional sugars which totally ruins the point.)

I usually get my stevia from one of the following sources:

  • Trader Joe’s (oh how I love Trader Joe’s!)- I *think* it costs around $7, but I’m not positive. I’ve had the same bottle for probably 6 months now, so I can’t remember exactly how much I paid. I do remember thinking it was an excellent price.
  • MOM’s - Mom’s Organic Market is a local chain and their stevia is actually a private label so I’m not sure the original manufacturer. I do know that their stevia tastes a lot better than other brands I’ve tried (NuNaturals, for example, which I like, but the stuff at Mom’s is better), so I’m thinking it’s probably from a more expensive brand that I haven’t tried yet, ha! The good news is that it is also priced very well (once again, not remembering the price, but remembering the impression that it was a great deal).
  • No access to either one of those stores? No worries! If your local health food store doesn’t carry reasonably priced stevia (and most of them don’t), you can order it online from Vitacost or Amazon (those are affiliate links right there). I ordered mine from both places before I was able to start purchasing it locally.

BundleoftheWeek.com, 5 eBooks for $7.40!

De-Odorize Stinky Carpets Easily and Naturally

I had never experienced stinky carpets in my life until recently… and whew! Not an experience I cared to repeat! And then… repeat it again I did. For some reason, our carpets (I don’t know if it’s because we’re in a basement apartment or what) seem to be particularly prone to collecting odors. What seems to happen is that moisture seeps into the carpet and never properly dries, thus creating a mildew-y nasty smell that can be tricky to eliminate.

Thank goodness for Google! I knew vaguely that baking powder was supposed to help with this problem, but wasn’t exactly sure how to go about it. Of course, every article I read had a slightly different approach to it, and some were more detailed than others, so in the end I kind of pulled my own method together based on what I read.

The first stinky carpet episode required several treatments (yes, it was that bad! The problem was that a drink had spilled underneath the couch, so we couldn’t find from whence the smell was emanating until it was really bad.). The second stinky carpet episode was significantly improved after just one treatment, and although it could probably use one more, I haven’t had the time to actually do that yet (on my lengthy to-do list…). So instead of actually doing it, I’m writing a blog post about how to do it. (Ha!)

The magic ingredient is baking soda. Yep, that’s it! I buy it in a big bag at Costco because I use it for all kinds of cleaning purposes. You’re gonna need a big bag for this particular project, too, because it uses up a LOT of baking soda.

I also added some Purification essential oil, which really helped a lot as well. You can add Purification or any essential oil, or you can just use the baking soda straight up.

How to DeOdorize Stinky Carpet

Here’s the process for de-stinkifying (that’s a word right?) your carpet:

  1. If moisture is involved (in my case, the first time it was), soak up as much of it as you can with rags.
  2. If you want to use essential oils (I recommend Purification), add a few drops to your baking soda (depending on the amount of carpet you want to cover, you’ll probably be using several cups of baking soda).
  3. Liberally (I mean liberally!) sprinkle pour baking soda over the affected area. Spread the baking soda around with your hands or a spoon (or a spatula, whatever gets the job done!) until all the stinky carpet is covered. Don’t be afraid to push the baking soda down into the carpet a bit; that will help it be more effective.
  4. Let it sit overnight.
  5. When you’re ready to clean it up, first use a broom and a dustpan to brush up as much of the baking soda as possible. Don’t try to vacuum it all up or you’ll run the risk of ruining your vacuum cleaner.
  6. When you have only a thin layer of baking soda left, vacuum it up.
  7. Once all the baking soda is removed, do a “sniff test”. Get your nose right up to the smelly spot on the carpet and take a whiff. Is it still stinky? Then repeat the process.
  8. Repeat as necessary until all odor is gone.

And there you have it folks: Better than Febreze or any other chemical-laden toxic carpet cleaner. Plus also, cheaper! Yeah, baby, that’s what I’m talkin’ ’bout.

BundleoftheWeek.com, 5 eBooks for $7.40!

How to Get Rid of Mildew Smell in Laundry

image by raymortim

Please tell me I’m not the only one who (far too often, I might add) leaves laundry - clean laundry - in the washing machine a li-i-i-ttle bit too long (you know, like, never more than 12 hours or so… or a day or two… or… I’ll stop there) in the washing machine so that the once-clean laundry is now a rather smelly mess. In fact (should I even admit this?) I am at this moment washing a load of laundry for the third time. Yes, the third time. And, no, it hasn’t gone through the dryer yet.

Whew! SO happy I’m not the only one! Thanks for ‘fessin’ up. When I first had the idea to write this post, I felt a little bit like that dream everybody always talks about - you know, the one where you’re going about happy-as-a-lark in public with only your you-know-whats on? Or less? (Although I confess I’ve never actually had that dream - thank goodness. My only recurring dream is the one where I lose all my teeth. I really hate that one because I am afraid it’s prophetic. But I digress…)

So anyway… since I’m not the only one who absent-mindedly leaves her laundry in the washing machine for so long that it gets dirty again, I figure somebody out there is going to find this post useful, because here in this post I will reveal my secret for overcoming the nasty smell. And the people rejoice! (Notice I did not say my secret for overcoming the absent-mindedness because I haven’t figured that one out. Not yet.)

photo by Alvimann

The Vinegar Trick

Now I’m thinking you all probably have already heard about the vinegar trick, am I right? The “Vinegar Trick” is really pretty simple. All you do is throw in some vinegar (1/2 a cup-ish) to your load of laundry and run it through the cycle again. Easy peasy lemon squeezy.

The Vinegar Trick is all I ever needed when I had a top-loading washing machine, and it worked every single time. Now that I have an HE front-loading washer, though, things are different. For one thing, the musty smell collects a LOT faster. I can’t leave laundry in there for any length of time, it seems, without sniffing that faint but disgusting odor when I go to switch out the clothes into the dryer. For another, the smell is awfully persistent! And stronger! I don’t know what it is about HE machines (I thought they used less water?!) but I’ve read online that my experience is not uncommon.

So I’ve had to up my game a little, and now I have a whole routine going to help me kick that mildew smell where it hurts.

Side note: Some people say that using vinegar in an HE machine will ruin it, but I’ve heard from countless HE users that they’ve added vinegar to their laundry on a regular basis and haven’t had any trouble whatsoever with their machines. That’s good enough for me, but you may want to consider carefully before you try it yourself.

Get Rid of Mildew Smell in Your Laundry

This is the procedure I follow whenever I’ve let the laundry sit in the washer just a little bit too long.

  1. Set your washer to use Hot water. Most clothes can handle it, at least on occasion.
  2. Pour vinegar into the fabric softener/bleach receptacle. (Mine is on the upper right hand corner.)
  3. Add a few drops of Purification essential oil. (This is what kicks this process up a notch and really knocks out the mildew smell.)
  4. For really bad stink, I also throw in a cap-ful of the Extreme 18X laundry detergent sample that comes with my soap nuts.
  5. Run your washer on the Heavy cycle.
  6. Repeat as necessary. (Hopefully, one time’ll do it!)

Stink be-gone!!

BundleoftheWeek.com, 5 eBooks for $7.40!