How to Clean Carpet Stains Naturally{Plus Quickly, Plus Easily}

Note: This post contains referral links. Thanks for your support of Authentic Simplicity! Clean carpets quickly and easily with oxygen bleach. Fact: For 5 out of the 7 years I’ve been married, I’ve lived in apartments with nasty carpet.

Fact: It’s not my fault. (I swear!) The carpet in the first apartment was incredibly cheap (as was everything in that apartment, come to think of it), and seemed to collect stains like some people collect coins. And for some reason that I cannot comprehend for the life of me, apartment complexes seem particularly determined to floor all the dining rooms in their unit with carpet. I would take linoleum from the ’70’s over carpet in the dining room. Any. Day. (Of course, that would have nothing to do with the fact that I have 2 small boys who, every meal, end up with more food on the floor than in the tummy.)

The carpet in our current apartment is actually of very high quality, but it appears to have been around since the dawn of the house itself (say, 20 years?), and has apparently experienced its fair share of toddlerhood spills and other merriment. Oh yeah, and it started out as a lovely off-white color, I’m sure, but has long since faded to a dingy sort-of-something-color. I’m determined to cover it up with rugs, but so far all I’ve managed is a second-hand rug in the dining room. Hey, anything to cover up the handiwork of my two little blessings!

At any rate, I’m way more familiar with carpet stainage than I really actually care to be. And I am so beyond thrilled to be able to share with you the solution I have hit upon within the past year, because it’s one of those things that actually works. A lot of the solutions I see online for X-Y-Z and this-and-that tend to work for everybody else but me. (Anybody else have that problem?) So when something actually works (and works every time!) for me, I want to shout it from the rooftops.

So here’s my online rendition of the rooftop shout:

Clean your carpet stains with Oxygen Bleach!

(Hey, at least I didn’t use all caps.)

It’s really actually quite easy. Take a spray bottle and put a tablespoon or two of oxygen bleach in the bottom. (I never was a good one for specific measurements - I honestly just dump some until I think I have enough.) Fill the bottle the rest of the way with warm-ish water (never was good at temperatures either) and shake until the oxygen bleach dissolves (being sure to replace the nozzle on the spray bottle first, of course).

Spray the stain liberally with the oxygen bleach mixture and let it sit for a few minutes. (I don’t time it exactly, either. Bet you’re surprised by that.) Come back with a white rag and rub at the stain until it disappears.

And the amazing thing? It will disappear. Right before your very eyes. Like magic. I actually find it oddly entertaining, and am always secretly excited when I spot a new stain that needs to be cleaned.

This stuff has not failed me yet, and I’ve attacked many a stain with it. However, your mileage might vary - it depends on your carpet, the stain, and you. I also recommend testing just an unobtrusive corner of your carpet first to make sure you won’t ruin the color. I’ve only ever used this spray on nondescript beige-ish colors, so I’m not sure how it would react with a colored carpet.

Note: Do not use the oxygen bleach you can buy at the dollar tree. I don’t know exactly what’s in it, but it smells like chemicals and is blue (and sometimes pink, which is kind of funny), so I don’t trust it. Get the pure white unadulterated stuff from places like Tropical Traditions or Amazon.com.

How to Clean Your Shower Fixtures Easily!

You know how I love it when I discover the simplest way to accomplish a task. It’s even better when the simplest method is the most effective! And what really puts the cherry on top is when it also happens to be an all-natural, chemical-free solution.

Well, my friends, here’s one of those things that is all of the above: a simple, effective, all natural way to clean your shower head! I’m giving you the precise details on how to clean your shower head today over at Home Made Simple.

Natural Living in a Regular Family {Raising Healthy Families}

Welcome back to the Raising Health Families series, join us each week as we take a look at different ways to keep your family healthy and vibrant in a not-so-healthy world.

read more about positively real media here

Written by Sara from Your Thriving Family

Many of us are trying to eat real food and get back to natural products, for what we believe to be the best for our families. The wall we sometimes hit, unfortunately, can be our well-meaning and loving extended family.

How do you continue along your journey and keep the peace with the extended family? Natural Living in a Regular Family, is about finding the balance and putting relationships first. Click on over for finding the grace in what goes in and on your family.

Next week is learn about the power of tea and some great homemade recipes.

The BEST Homemade Dishwasher Detergent {In My Humble Opinion}

OK folks. First of all, before we get to the good stuff (i.e., the dishwasher detergent recipe… if you want to call it that), I have a disclaimer. Actually two.

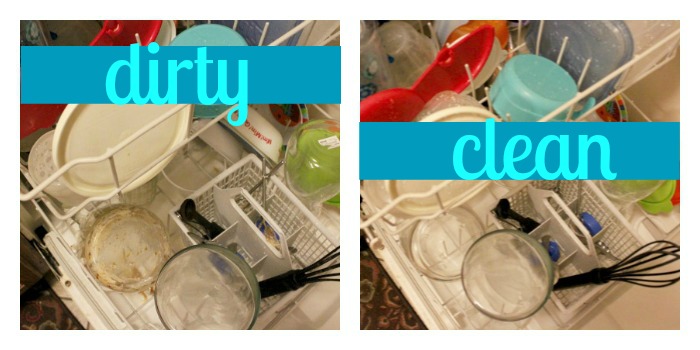
Disclaimer #1: Those are not my dishes in the above picture. That is not actually my picture. The reason being that my kitchen has absolutely NO natural light and the only pictures I could take of my dishwasher were dull, lifeless and dark. Not a pretty start to the blog post, so I borrowed a photo from a gentleman named David Locke. Thanks, David!

Disclaimer #2: Just because *I* think it is the best dishwasher detergent recipe EH-VEHR does not necessarily mean that you will agree. You will just have to try it and see!

Now… on to the good stuff. This post has actually been a long time coming; in fact, I think I’ve been tweaking my dishwasher routine for as long as 2 years! This is what I’ve settled on and it works the best of any concoction I have tried. This homemade dishwasher detergent even works better than store-bought natural detergents I have tried (the one exception being Ecover)!

I was originally inspired by Jillee of One Good Thing’s “Dishwasher Triple Threat”. The simplicity of her system and the fact that there was no mixing, stirring, clumping, or any other difficulties involved in the procedure totally appealed to me! However, I wanted something that was totally chemical-free, so I took her basic recipe and started tweaking.

What I eventually came up with was this:

See the terrible pictures I get in my kitchen?!

Super Simple Homemade Dishwasher Detergent

Ingredients

  • 1 tsp. oxygen bleach
  • 1/8-1/4 tsp liquid castile soap
  • 3-5 drops lemon essential oil

Instructions

  1. Place the ingredients in the main detergent cavity of your machine. Operate the dishwasher as usual.

A few notes:

  1. Do not use either too much oxygen bleach or too much liquid castile soap. The one will leave your glasses cloudy, and the other will gunk up your plastic. (Don’t ask me how I know.)
  2. Make sure your oxygen bleach does not have any added chemicals to it. I’ve personally been using Tropical Traditions Oxygen Bleach.
  3. Dr. Bronner’s Citrus Orange liquid castile soap is a great choice for this!
  4. Do thoroughly rinse your dishes before putting them in the dishwasher.
  5. You can try adding vinegar as a rinse aid for even better results. I’ve heard mixed reviews about whether or not this is actually helpful, and I haven’t actually tried it myself because the rinse aid dispenser on my previous machine didn’t work (and I haven’t tried it with my current one yet).
  6. I do use Lemi-Shine in conjunction with this recipe on occasion (no rhyme or reason really, just when I feel like it!). It’s particularly good if you have hard water.
  7. Lemon essential oil is truly the best oil to use. I’ve tried others - even other citrus oils - and they just don’t cut it like the lemon does.
  8. I don’t even measure anymore, I just eyeball everything. I’m just careful not to put too much of any one ingredient in there.

The million-dollar question is, of course, does this concoction really work?! My short answer is “Yes!”.

These are my dishes, and this is my dishwasher.

My long answer is this:

Like I said, if I use too much oxygen bleach or castile soap, either the glass or the plastic gets cloudy and filmy. And to be perfectly honest, certain types of glass can end up cloudy in any case (which is why I occasionally use Lemi-Shine, which helps). My Pyrex bowls and measuring cups always come out sparkling clean, but my drinking glasses (especially one particular kind) can get cloudy. I’m not sure if the reason is because of their cylindrical shape (making them more difficult to rinse out thoroughly, perhaps?) or the type of glass they are made with, but I will admit that I occasionally just wash them by hand. However, I will also say that with the exception of Ecover (of which I’ve only used samples), which I mentioned earlier, all the natural dishwasher detergents I have tried have left my dishes with the same exact cloudy residue (and were stinkin’ expensive to boot!).

In my experience, if you consistently want dishes that have absolutely no residue on them, you will have to compromise with some chemicals. Here are some options that may or may not be better than just plain old Finish or Cascade:

  • The oxygen bleach at The Dollar Tree (LA’s Totally Awesome Oxygen) works perfectly, even by itself. However, it smells like chemicals and I couldn’t find out exactly what they added to the oxygen bleach, so I stopped using it. If you’re comfortable with mystery chemicals that may or may not have been approved even by the FDA for dishwasher use, then go for it (keeping in mind that the FDA has outlawed certain chemicals for use in dishwasher detergents).
  • Dawn (or presumably other mainstream dishwashing liquid) works very well in place of the liquid castile soap and doesn’t leave behind any residue.

For myself, I’ve been very pleased with this recipe, and have been using it consistently for 6 months or more. Dealing with some cloudiness on certain types of dishes, or occasionally re-washing dishes by hand, is totally worth it to me since I am satisfied that our dishes have been cleaned without the use of any potentially harmful chemicals. It’s a trade-off, and one I’m personally willing to make. If you’re mostly interested in saving money rather than reducing chemical exposure, then I recommend going with options I mentioned above. But if reducing chemical exposure is important to you, I think you will be excited to give this dishwasher detergent a try!

The other burning question on your mind is, “Is it cost effective?”. A valid question! Here’s what I figure:

  • I pay about $10 locally for a 16oz bottle of Dr. Bronner’s liquid castile soap, which has approximately 384 uses with this recipe. That means it’s about $0.03/use.
  • Tropical Traditions oxygen bleach currently costs $16.75 for 6 lbs, which comes out to 576 uses, once again about $0.03/use.
  • Using Young Living Essential Oils Lemon Oil at the distributor price of $11.25 ranges anywhere from $0.08-$0.17/use, depending on how many drops in the bottle and how many drops you use each time. (And, of course, you can use the health store lemon essential oil which is cheaper. I’ve used both, and I can see a significant difference with the YLEO! The dishes get much cleaner, and one or two drops usually suffice.)
  • Bottom line: It comes down to a maximum of $0.23/use. That’s figuring on the high end with the essential oils, when in all likelihood, the total figure is probably closer to $0.15/use. Compare that to Ecover, which is currently available on Amazon.com for $0.27/use. If you use your dishwasher once a day, then that’s a savings of at least $15/year (or as much as $45!), and it doesn’t take any more time or effort.

If you’re interested in a super simple, cost-effective, all-natural way to clean your dishes in the dishwasher, then you should definitely try this method! And when you do - let me know! Did it work for you?


Stock Your Natural First Aid Kit for the Summer! {Raising Healthy Families}

Raising Healthy Families
read more about PRM here


Welcome back to the Raising Healthy Families series! Join us each week as we take a look at different ways to keep your family healthy and vibrant in a not-so-healthy world.

Written by Krissa Jeldy of More Than Mundane

summer first aid

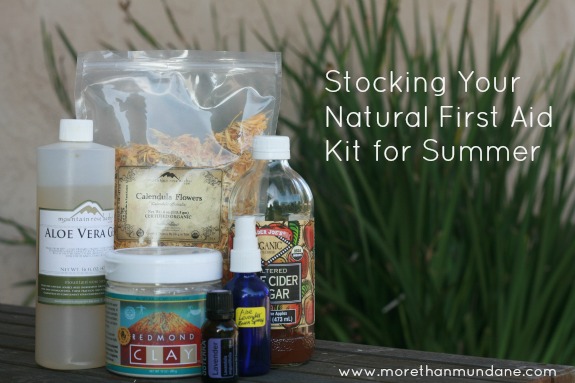
Summer is right around the corner and now is the perfect time to start planning and preparing your natural first aid kit for summer. Discover safe and effective ways to heal sunburn, relieve bug bites, and care for cuts and scrapes. Head on over to More Than Mundane to learn how to prepare a natural first aid kit for summer.

Go Play in the Dirt! {Raising Healthy Families}

Raising Healthy Families
read more about PRM here


Welcome back to the Raising Healthy Families series! Join us each week as we take a look at different ways to keep your family healthy and vibrant in a not-so-healthy world.

By Susan Vinskofski of learningandyearning.

Go Play in the Dirt. It's Good for your Health! @learningandyearning

Did you realize that our health is intimately connected to soil? It plays a role in our mental health as well. Read learningandyearning’s Go Play in the Dirt! It’s Good for your Health to learn more about a very special bacteria found in soil which boosts serotonin in our brains. The post has lots of ideas for getting dirty, too! As if you needed help with that.

4 Books I’ve Been Reading (That I Highly Recommend)

First of all, can I just say that I love my Kindle? (Actually… what I really love is my Kindle app on my tablet… but my Kindle makes it possible to enjoy my Kindle app… so I love my Kindle!) I’ve been thoroughly enjoying my Kindle in the last few days, and have actually devoured quite a few brand-spankin-new eBooks in the past 24 hours. I’ve been toting my Kindle everywhere - to the living room, to the dining room, to the kitchen, to the bedroom, and, of course to the bathroom (where else does a busy mom find time to read?!).

Whether or not you have Kindle, too (my friend Erin wrote a very helpful post about reading digital books without an e-reader), you can benefit from the ever-growing digital library of wisdom out there that is far more accessible (and takes up a lot less space) than its old-fashioned hard-covered, paper-backed ancestor. In particular, there are 4 recently published digital books that I have been perusing the past couple days and highly recommend to you!

Cloth Diaper Guide
1. Confessions of a Cloth-Diaper Convert

Whether you’ve been cloth-diapering (or CD-ing, as the lingo goes) since before it was popular or are pregnant with your first little one and curious about the possibility, you will learn something in The Humbled Homemaker’s brand new eBook, published just a few weeks ago. I promise. Erin leaves absolutely no stone un-turned and shares every little shred of knowledge she has learned in her years of researching (and using!) cloth diapers. I totally wish I had access to this book when I was researching cloth diapers, because I would have avoided some mistakes along the way that led to the demise of my first set of CD’s. Confessions of a Cloth Diaper Convert is currently available right here via PDF for $9.95 (But the price is going up soon, so get it while you can!).

2. Accidentally Green

Accidentally Green is a memoir of one woman’s journey from “normal” to “green“… almost by accident! Wherever you are on your journey to improve your health and your environment, you will identify with the questions, obstacles, and issues that provoked Hillary to discover “new” and better ways to eat, clean, shop, heal, and just plain live! I found myself empathizing with Hilary at times, and admiring her at others. Her determination to research the best for her family is inspiring to me and encouraging as I continue on my own journey to simplify our family life without sacrificing what is authentic and real. As someone who strives to make EVERY decision in life based on the Word of God, I also really appreciated her Biblical perspective. This quick read is available for just $2.99 via PDF, Kindle, and Nook.

IB 300x250 ad 2 Affiliate Program 3. Intentional Blogger


Can you believe that when I first started my own blog, I had never actually read one before? I had only heard of them. It makes me laugh to think about the earliest beginnings of my blog when pretty much me, myself, and I were the only ones who ever visited it. And then when I started it up again - in earnest and for reals - I still had absolutely no earthly idea what the heck I was doing. I didn’t even know for the first year that I could actually monetize it beyond Google Adsense. Crazy, right? Too bad I didn’t have LeighAnn and Nikki’s new (as of yesterday!) eBook, Intentional Blogger, then! I would have started out right instead of making a zillion mistakes along the way and falling flat on my face more than once. Huh! If I had read their book first, I might even be a mega-blogger today (Haha!)!!

Clearly, I’m in the place where I’m supposed to be… but if you’re a blogger at any stage, I really think you need to read this eBook. Packed - and I mean PACKED - with resources, you’ll have everything you need to take your blog to the next level (whatever that is). And I love their emphasis on focusing on God and what HE wants from your blog. You won’t be a success without that determination as your guiding focus. And since it’s a brand new eBook, you can currently get this book for $12 (25% off the price) by using the code “LAUNCH25” at checkout. (Only for a limited time.) Alternatively, if you subscribe to the authors’ newsletter, you can get 50% off the purchase price until 8am April 26 (which is Friday morning). Buy Intentional Blogger here.

Easy Peasy Chores @ GoodOldDaysFarm.com 4. Easy Peasy Chores

This last one is more of a tool than a book you sit down and read. But WHAT a tool it is!! Busy mamas everywhere have been needing this resource for a loooonnngggg time. I can remember back when I was growing up, and my mom organized our chores using index cards in a little file box. She would have loved this system! Alina has broken down all the possible chores that need to be done in your home into simple tasks that even the children can help with. Whether you want to organize the tasks by person, by room, by zone, or by day of the week, you can do so with this - truly - easy peasy system. There’s an initial cost for printing out the cards and purchasing the supplies, but Alina’s even got some great ideas to help you get started with minimal out-of-pocket expense. I am SO excited to get The Boys (ages 4, 2, and, um, 33) and myself started on this house-cleaning system, especially now that I’m teaching again and my boys are going to school with me. Anything that simplifies my life excites me, and I’m pretty sure you’re going to find this resource exciting, too! It’s only $15.99, and it’s worth every stinkin’ penny. (It would honestly be worth even more.) You can buy the Easy Peasy Chores system for yourself here.

PS> Several of these books will be available in an eBook bundle sale coming up next week. $30 for almost 100 eBooks, all of them just as good as the ones I mention below. It’s not a hard choice to make… $16 for Easy Peasy Chores today? or $30 for Easy Peasy Chores PLUS 96 other books, ecourses, printables, planners, etc etc?! Yeah, like I said, not a hard choice. It’s coming on Monday, so stay tuned!

PSS>My very own eBook - Your Grocery Budget Toolbox - is in the same eBook bundle. Yippee!

PSSS> The very last one I promise. I’m a total cheapskate, but even I have to say that this bundle deal is gonna be kickin awesome and totally worth it. $30 is a lot to spend on books all at once, but it’s WAY more than books. Stick around and I’ll be telling you more about it here on the blog, on FB, and on Pinterest.

PSSSS> Oops. Really the last one. I forgot to mention that there are more than $140 in bonuses that come with each purchase of the book. Seriously, this is a no-brainer.

How to Cook With Your Kids And Maintain your Sanity {Raising Healthy Families}

kids-and-kitchen


It’s no surprise that when you commit to preparing healthier food for your family, you also commit to spending at least a little more time in the kitchen. And if you’re following this series on Raising Healthy Families, you’re probably doing it with kids.

Stephani from The Cheapskate Cook is no stranger to making dinner with a toddler clinging to her shin. However, over the years she’s learned a few simple but intentional ways to take the fight out of kids versus kitchens, and she tells all in her post, Peace on Purpose: Managing Kids & Cooking.

Detox Your Cleaning Supplies {Raising Healthy Families}

Positively Real Media Network

Written by Hilary Kimes Bernstein of Accidentally Green

Welcome back to the Raising Healthy Families series. Today we’ll take another look at how to keep our families healthy in a not-so-healthy world.

Unfortunately, many commercial cleaning products are toxic. But the great news is that you can make your own effective, safe cleaners. Before you start your spring cleaning routine this year, choose your supplies carefully.

Detoxing Your Cleaning Supplies

Please check out Accidentally Green’s Detoxing Your Cleaning Supplies to learn more about toxic cleaning supplies and non-toxic, homemade options.

When to Pack What When Moving {Tips for the DIY Move}

When to Pack What When Moving #whentopackwhat #packingschedule #moving

**UPDATE! Scroll down for a printable .PDF checklist to make your pack-up even easier!***

When faced with the daunting task of packing up every single one of your belongings in order to move (across town, across country, doesn’t matter), it’s easy to feel overwhelmed and have no idea where to start. I’ve moved a few times; I know the feeling! You have no idea when to pack what when you’re moving.

This past move, I had less than 3 weeks to get everything we owned packed up and ready to go, and I do believe I did a decent job of it. My DH felt like we had a few too many odds and ends that were moved as-is (by which I mean, not packed into boxes) when it came right down to it, but honestly, I’m not sure how most of that could have been packed in a box anyway. And I will freely admit that packing up the random stuff in the kitchen was down to the wire! But hey, I was working on a super-tight deadline, so I’m thinking I did pretty well.

28 days. 10 minutes a day. You can do this.

A little de-cluttering might be helpful before you get started on your packing. Check out my inexpensive guide to de-cluttering all the hot spots in your house in just 10 minutes a day! Dedicate an entire morning to working through the guide and you’ll get halfway through your packing before you’re even started. Read more about it here.

When to Pack What When Moving

I’m figuring most people have about a month to move, maybe more, maybe less. I’ve come up with a 4-week schedule to help you focus your packing so you can have everything ready to go come moving day without stressing yourself out or feeling overwhelmed in the meantime.

When to Pack What When Moving #whentopackwhat #packingschedule #moving

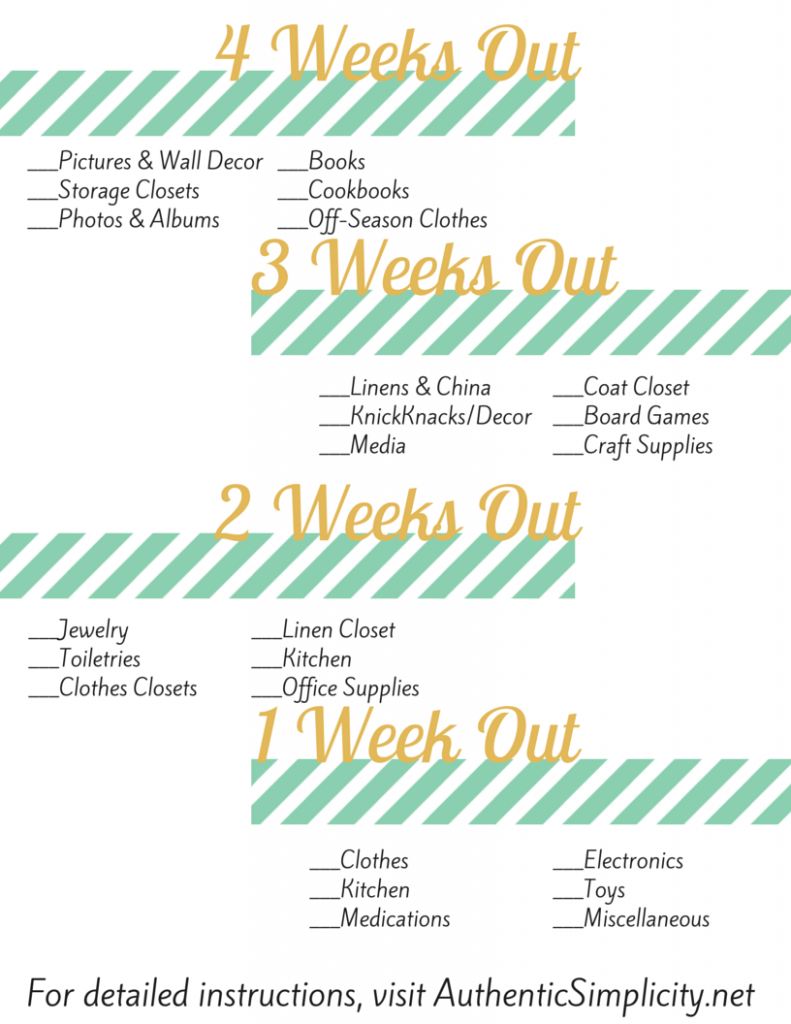
FOUR WEEKS OUT

  • Pictures and Other Wall Decorations - Although those are the things that make a house a lovely place to live, the truth is you can live for a few weeks without them. Into the box they go, first thing!
  • Storage Closets - If it’s already packed in a box, then you’re in luck! Job’s already done. If not, though, this is the time to pack ’em up.
  • Photo Albums & Scrapbooks - Nobody looks at these anyway except on special occasions, so this is an easy one to get out of the way.
  • Books - Chances are you won’t be doing a lot of reading in the next few weeks. Just sayin’.
  • Cookbooks - Any recipe you need is online anyway. (Plus you won’t be doing a lot of cooking either.) (Just sayin’.)
  • Off-Season Clothes - Hopefully, these are boxed up already, but if not, now’s the time to do it.

THREE WEEKS OUT

  • Table Linens & Fine China - Really, dining on fine china and table linens is the last thing you need to be doing about this time in your life. Stick to the bare table and the everyday stuff.
  • Vases, Decorative Bowls, and Other Assorted Fragile KnickKnacks - Take the time to pack these carefully, and get started now!
  • DVD’s/CD’s/Video Games - You might want to keep a few out if there are some that your clan plays on a regular basis and simply cannot live without. But chances are, their entertainment needs can be satisfied by the various digital options out there for the next few weeks.
  • Coat Closet - Keep one in-season coat and one set of accessories (hats, gloves, scarves, sun glasses, etc.) for each person, but pack up the rest. Choose wisely, though. I wrongly assumed that my lighter jacket would suffice since it was the beginning of March. WRONG!
  • Board Games/Puzzles/Toys - Don’t pack up the bulk of the toys yet, especially if your kids are little. But definitely pack up the board games and puzzles and anything they don’t use on a regular basis.
  • Craft & Sewing Supplies - I promise, you’re not going to have time to use them until you’re settled in your new place.


TWO WEEKS OUT

  • Jewelry - Keep out a few key pieces that you can wear with just about anything, and pack the rest.
  • Toiletries - Leave out the bare essentials for the entire family to use for the next two weeks (current tube of toothpaste, bottle of shampoo, etc.), and pack up the rest.
  • Knick-Knacks - Do you still have any knick-knacks out? Time to pack them up!
  • Clothes Closets - Go through all the closets and pack up anything you don’t use on a daily basis: dress clothes, accessories, fancy shoes, extra purses, etc., etc.
  • Linen Closet - Pack up everything except one set of sheets and towels per person. (You might want to leave out some blankets to serve as padding for the furniture on moving day.)
  • Kitchen - Pack up as much as you can that you do not use on a daily basis. We’re getting down to the wire here, so start simplifying your daily cooking life if you haven’t already. Forget about baking bread, roasting meat, and cultivating yogurt for now. Pack all those supplies up!
  • Office Supplies - Paper, envelopes, pens, pencils, stapler, hole puncher, etc., etc. Only leave out the absolute essentials (like a few pens or pencils).

ONE WEEK OUT

  • Clothes - It’s time to start packing them up. Start by filling a suitcase with items you’ll need when you’re actually moving and before you’re settled in your new place. Then make sure you have enough clothes to last the next few days (consider adding some extra wash cycles in there), and then pack the rest. Leave a box open for each person in the family to pack clothes in as they come out of the wash (and as they come out of the woodwork during the move).
  • Kitchen - Break out the paper supplies and pack up every single thing. Close your eyes, take a deep breath, and order takeout. You’ll survive.
  • Medicines/Remedies - Keep the essential ones handy and with you during the move. Pack the rest.
  • Electronics - If you can’t quite bear to pack it all up just yet, downsize to one or two items (i.e., use your laptop for everything - gaming, watching TV, surfing the internet, listening to music, etc., and pack up all the other fun stuff).
  • Miscellaneous - Trust me, there’s going to be a LOT of miscellaneous junk that just appears out of nowhere when you start packing. You’re going to have a lot of it,no doubt, at this point, so just pack it as you come across it.
  • Toys - Have your kids each choose one set of toys they want to keep out for the next few days, and pack the rest. Keep a bag handy to pack up the toys they chose to save on moving day.

TWO DAYS OUT

  • Curtains/Draperies - Run these through the washer and dryer. If you don’t have blinds, some of them might need to wait until the last day for privacy’s sake, but try to do this ahead of time if you can. Don’t forget to pack up the rods and other hardware.
  • Food - Especially all the cooking/baking supplies. Anything that can be eaten as it is can stay around for another day or two, but the rest has got to be packed up. Give away frozen and refrigerated items if you are moving too far away to bring them with you in a cooler.
  • Clothes - Put the last of the clothes through the washer and dryer and pack up everything but what you’ll need for the next couple days. (Make sure you have some grungy outfits set aside for moving day!) Keep a hamper or mesh bag handy to dump in dirty clothes to wash as soon as you’ve relocated.
  • Laundry Room - Pack up everything but what you need to wash a few more loads and/or clean up the place.

MOVING DAY

  • Food - It’s time for the rest of the food to be either packed up, thrown out, or given away. Refrigerated, frozen, all of it!
  • Sheets & Blankets & Towels - First thing in the morning, start washing all your sheets and blankets and towels and pack them up as they come out of the dryer (or use them as padding for furniture and stuff).
  • Random Assorted Junk - Trust me; it’s gonna be there. Have a few bags or boxes handy and chuck stuff in them as you find it.
  • Furniture - Take apart the furniture so it can be easily moved.
  • Cleaning Supplies - Clean the house so that the new residents can move right in, and then put all the cleaning supplies in buckets or caddies for moving.
  • Clothes - Put the last of the clothes in those open boxes, then tape them shut. If you don’t have time to do another load, put the dirty clothes in the hamper or mesh bag as I mentioned earlier.
A note for moving day: keep personal items like important files, your suitcases, your purse, and anything else that you want to keep close, in your vehicle. Pack that up first so that those helping you move don’t accidentally put it in the moving truck. Also, leave a little space in your vehicle for those other random things that just don’t end up in the truck like they’re supposed to!
And that’s it! I’m sure I’ve missed something (knowing me, something major!), but this list should get you started if you - like me - are staring in dismay at all the stuff crammed into your living space.
If you want to keep this list handy, here’s a FREE printable .PDF file for you! Print it out, check off each item as you finish packing it up, and don’t miss a thing. I only put basic categories on this file, though, so keep this blog post pinned or bookmarked so you can get more detailed instructions as you work.

When to Pack What When Moving #diymove #packing


Need More Help With Your DIY Move?

Check out my other posts: