12 Ways to Enjoy Whole Grains {Get Healthy $ Fit Series}

Welcome back to the Get Healthy & Fit series here at Authentic Simplicity! Joining me are 18 other bloggers, all desirous of improving their health and raising their level of fitness. We each have a different goal in mind and a different plan to reach that goal; and you can follow each blogger’s progress here. Follow along on Twitter and Pinterest as well!

I discussed my personal goals at length the first week, but to sum up, this is what I’m hoping to do in the course of these 12 weeks:

  • Kick my sugar habit
  • Lose approximately 10 lbs. and a few inches
  • Fit in my clothes
  • Develop sustainable habits like eating more proteins and fewer carbs

Last week, I showed you how you can easily and relatively quickly cook any whole grain. Now the question is: what to do with it? If you’re only used to consuming those grains in the form of flour, you might feel a little stuck once you have a heaping pile of cooked whole grain, wondering what in the world to do with it now!

I’m here to the rescue. Not too long ago, I was in the same boat you are, but I quickly learned how versatile and delicious whole grains can be.

Keep a batch of cooked grain in the freezer and then defrost it and turn it into any of the dishes below.

10 ways to use whole grains

Easy Uses for Whole Grain

  • Use whatever whole grain you have in place of the rice when you make rice pudding.
  • Use a whole grain to make a fun variation of rice pilaf.
  • Make a quick breakfast hot cereal by combining cooked whole grains with enough milk (any kind), cooking and stirring it until it’s smooth and creamy. Add sweetener and spices as desired.
  • Toss some cooked grain into a pot of soup towards the end of the cooking time.
  • Serve it straight up as a side dish, drizzled with olive oil and sprinkled with fresh or dried herbs. Salt and pepper to taste.
  • Make a pasta-like salad by combining cooked grains and diced veggies (steamed if you want), and drizzle with any kind of dressing. Add in some fresh herbs for extra flavor. If you need specific recipes, here is a whole bunch of whole grain salad recipes.
  • Turn the above side dish into the main event by adding some protein in the form of meat, beans, seeds, cheese, or eggs.
  • Add half a cup or a little more of whole grain to a bread recipe for extra texture and crunch.
  • Use it in meatballs and meatloaf in place of the bread crumbs.
  • Give a fresh new twist to risotto by using a different grain instead. Try this recipe for barley risotto.
  • Combine mashed beans or sweet potato with cooked grains to make delicious veggie burgers, like these quinoa and sweet potato cakes.
  • Take your stir fry to the next level by introducing new grains instead of rice or rice noodles.

This Week’s Update

Yikes! This week I was very bad and it showed up on the scale. I was crazy busy and did not take the time to seek out truly healthy foods.

Here are my current stats that I will update every Monday:

Weight: 134.2 (up half a pound)

Waist (inches): 30-31

Butt: 39-40

Find out how the other ladies are doing with their weight loss efforts and other goals by clicking on the image below.

How do you cook whole grains?

Read more inspiring and informative posts at these link-ups: Motivation Monday, Mom’s Monday Mingle, Homestead Barn Hop, The Bulletin Board, Better Mom Mondays, Natural Living Monday, Tip Me Tuesday, Trivium Tuesday, Mom’s Library, Titus 2sday, Teach me Tuesday, Hip Homeschool Hop, Titus 2 Tuesday, Delicious Dishes, Open Call Tuesday, Tiny Tip Tuesday, Healthy 2Day Wednesday, Frugal Days Sustainable Ways, Works for me Wednesday, Women Living Well Wednesday, Real Food Wednesday, Whole Foods Wednesday,Allergen-Free Wednesday, Encourage One Another, Life in Bloom, Thought-Provoking Thursday, Simple Lives Thursday, Homemaking Link-Up, Tastetastic Thursday, Keep it Real Thursday, Frugal Thursday Rewind, Homeschooling on the Cheap, Fellowship Friday, Fight Back Friday, Feast in Fellowship Friday, Frugal Friday, I’m Lovin’ It, Weekend Bloggy Reading, Snacktime Saturday, Show & Share Saturday, Weekend Whatever

How to Cook Any Whole Grain {Get Healthy & Fit, Week 6}

Welcome back to the Get Healthy & Fit series here at Authentic Simplicity! Joining me are 18 other bloggers, all desirous of improving their health and raising their level of fitness. We each have a different goal in mind and a different plan to reach that goal; and you can follow each blogger’s progress here. Follow along on Twitter and Pinterest as well!

I discussed my personal goals at length the first week, but to sum up, this is what I’m hoping to do in the course of these 12 weeks:

  • Kick my sugar habit
  • Lose approximately 10 lbs. and a few inches
  • Fit in my clothes
  • Develop sustainable habits like eating more proteins and fewer carbs

Although I’m going low-carb, I’m not eliminating carbs entirely. Instead, I’m almost completely eliminating sugar from my diet (replacing it largely with stevia), and focusing on the healthiest carbohydrates possible. To that end, when it comes to grains, I am trying to minimize the amount of flour (any kind) I consume, and instead eating the grain in its entirety.

This is kind of new territory for me, to be perfectly honest. I’m familiar with whole-grain flours, but eating the actual grain whole is another matter altogether. I’m finding, though, that there are delicious ways to enjoy whole grains at any meal, and that cooking whole grains is a lot easier than it seems.

How to Cook Whole Grains Quickly and Easily

Most people cook rice and other grains in a 1:2 or 1:3 (depending on the grain) grain-to-water ratio. Rice, for example. The recipe on a package of brown rice generally suggests cooking 1 cup of rice in 2 cups of water. The problem with this is that depending on a lot of different factors, some of them beyond your control, the water will cook off or absorb more quickly than the rice does. Or, alternatively, the rice will be done before all the water is absorbed, and you’re left with mushy rice. Neither scenario is appreciated during the dinner rush hour!

Furthermore, this process takes at least 40 minutes, and the same is true for almost any grain. Although I try to keep ahead of the game and have an extra batch of rice (or other grain) cooked up in the freezer, it still takes forever to cook grains with this method.

Here’s where I owe a huge thanks to my readers! When I posted about my method of cooking rice a while back, I asked my readers for their favorite method of cooking rice, and I got some great responses. A couple people mentioned a method I had never heard of, and it intrigued me so much I had to give it a try. It worked so well that now I typically cook my rice in such a way, and I also cook all other whole grains in the same fashion.

What I love about this method is that it takes less time than the more common method. I don’t know the science of how all that works, but I know it’s true! You can easily cook a grain in half the time by following this simple method.

Oh, you want to know what the method is? I guess I shouldn’t make you wait any longer, huh?

How to Cook Any Whole Grain

Cook It Like Pasta

Honestly, I can sum up the instructions in one simple phrase: cook it like pasta. Fill a big ole pot with water, and bring it to a boil. Add your grains, leave the lid off, and let it boil away until the grain is tender.

That’s it. It typically takes about 20 minutes, sometimes a little more (only when I’m in a hurry, of course!), depending on the grain and other factors.

But if you need more specific instructions, here ya go:


Once your grain is cooked, you can do whatever you want with it! You can turn it into a dish for breakfast, lunch, or dinner, limited only by your imagination. If you’re not familiar with cooking with whole grains as an ingredient, just imagine that every grain is rice, and then fix it like you would rice. Nine times out of ten, it will work just as well.

But if you need more inspiration, I will be sharing with you some ideas for preparing whole grains next week! Be sure to subscribe if you aren’t already, so you can get that post delivered to your inbox or reader.

This Week’s Update

Woot! The numbers on the scale continue to go down! Little by little! The other measurements, unfortunately, are progressing at an agonizingly slow pace. I am thankful that at least they continue to trend downward for the most part.

Here are my current stats that I will update every Monday:

Weight: 133.6 (3 lbs total weight loss so far!)

Waist (inches): 29-30

Butt: 39-40

Find out how the other ladies are doing with their weight loss efforts and other goals by clicking on the image below.

How do you cook whole grains?

Read more inspiring and informative posts at these link-ups: Motivation Monday, Mom’s Monday Mingle, Homestead Barn Hop, The Bulletin Board, Better Mom Mondays, Natural Living Monday, Tip Me Tuesday, Trivium Tuesday, Mom’s Library, Titus 2sday, Teach me Tuesday, Hip Homeschool Hop, Titus 2 Tuesday, Delicious Dishes, Open Call Tuesday, Tiny Tip Tuesday, Healthy 2Day Wednesday, Frugal Days Sustainable Ways, Works for me Wednesday, Women Living Well Wednesday, Real Food Wednesday, Whole Foods Wednesday,Allergen-Free Wednesday, Encourage One Another, Life in Bloom, Thought-Provoking Thursday, Simple Lives Thursday, Homemaking Link-Up, Tastetastic Thursday, Keep it Real Thursday, Frugal Thursday Rewind, Homeschooling on the Cheap, Fellowship Friday, Fight Back Friday, Feast in Fellowship Friday, Frugal Friday, I’m Lovin’ It, Weekend Bloggy Reading, Snacktime Saturday, Show & Share Saturday, Weekend Whatever,

How to Use Stevia Plus A List of Stevia Recipes

Welcome back to the Get Healthy & Fit series here at Authentic Simplicity! Joining me are 18 other bloggers, all desirous of improving their health and raising their level of fitness. We each have a different goal in mind and a different plan to reach that goal; and you can follow each blogger’s progress here. Follow along on Twitter and Pinterest as well!

I discussed my personal goals at length the first week, but to sum up, this is what I’m hoping to do in the course of these 12 weeks:

  • Kick my sugar habit
  • Lose approximately 10 lbs. and a few inches
  • Fit in my clothes
  • Develop sustainable habits like eating more proteins and fewer carbs

Types of Stevia, and Which Ones to Use

I’ve mentioned before that I’m using stevia more and more as a sweetener, and I’ve almost completely eliminated sugar (cane sugar) from my diet. I don’t eat sugar at all at home, and I try to keep my consumption of it minimal when I’m eating elsewhere. Personally, I think it’s the best thing anyone can do for their health!

Stevia is a great replacement for sugar because it doesn’t raise the glycemic levels, which is good news for people like me who are purposely reducing carbs and sugar for that very reason. Of course, food manufacturers see the money available here, and are doing everything they can to profit from this trend, which inevitably results in a watered down, less-than-healthful product.

Consequently, you’ll see all kinds of stevia sweeteners popping up in stores everywhere, but not all of them are created equal. Real Food Forager and Kitchen Stewardship both have done a lot of research about stevia and have written great posts about the different kinds and which ones you should use. Since my information on stevia largely comes from them, I will direct you to their work instead of attempting to reinvent the wheel.

Suffice it to say, your best bet with commercially available stevia is the liquid form, preferably glycerin-based rather than alcohol-based. Powdered stevia (with the notable exception of the SweetLeaf brand) is often highly processed with added chemicals and sugars, which, in my opinion, makes it a less desirable option. I do still occasionally use it, but mostly because I received a whole package of different types of stevia in a giveaway, and I hate to waste them! (You know how I feel about food waste!)

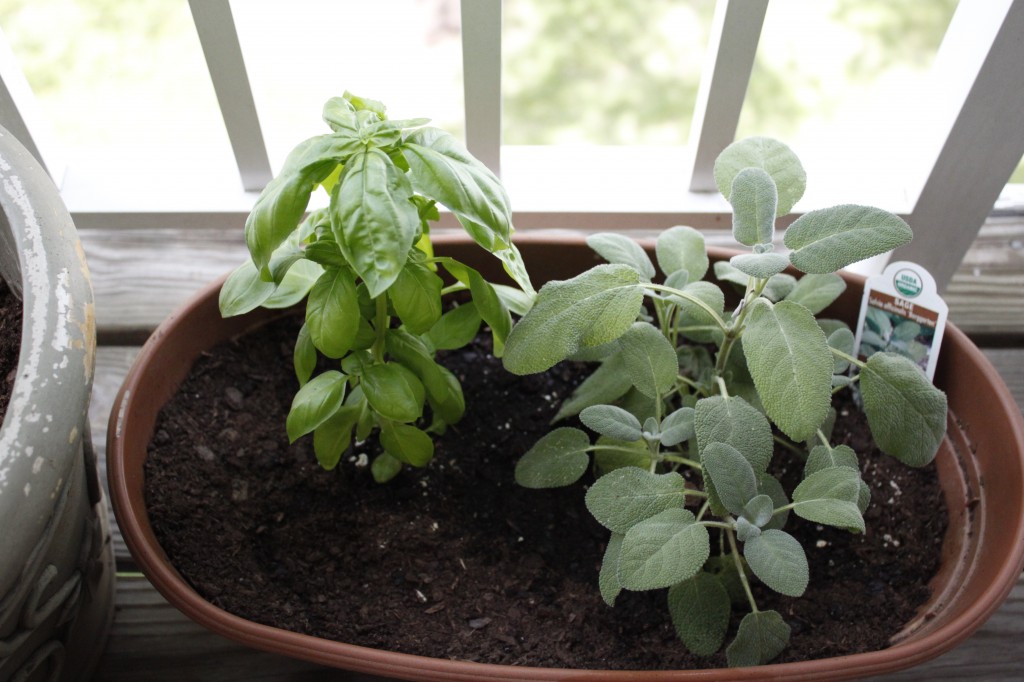
In an ideal situation, you could grow your own stevia and make your own stevia liquid from that. I was actually attempting to do exactly that this year, but something happened to my plant and the whole thing turned black. I am thinking it was a little cold snap we had, but since none of my other plants were affected, I’m not really sure. I still plan to order some dried stevia online and make my own liquid, which is also an option if you’re not up to growing your own stevia.

Stevia Plant

How to Use Stevia

Since stevia is a LOT sweeter than sugar, you only have to use a few drops of it per serving. As you can imagine, this complicates the process of baking, where the ratio of dry to wet ingredients is important. I also find that stevia - even liquid stevia - can negatively impact the taste of the finished product unless you use the more highly processed powdered stevia products that act as a one-to-one sugar replacement. My personal opinion is that I don’t really like baked goods made with stevia alone, so when I do bake with it, I usually prefer to use part stevia and part other sweetener (such as honey or palm sugar).

I use my stevia all the time in beverages and raw foods, though. You have to play with it a bit to find your personal level of desired sweetness, but I find that 5 drops is the perfect amount in my cup of coffee.

Other easy uses for stevia that don’t require a recipe:

  • Oatmeal
  • Yogurt
  • Smoothies
  • Tea
  • Lemonade
  • Dips (I love to mix peanut butter, plain yogurt, cocoa, and a little bit of stevia for a great apple dip!)
  • Whipped Cream

I also have used liquid stevia with good success in vinaigrettes and other dressings, as well as tomato sauce. I just add a few drops until I get the desired level of sweetness.

Stevia Recipes

If you’re not familiar with stevia, it’s best to start with recipes that have already been adjusted rather than attempting to substitute your favorites. Once you’ve experimented with it, you’ll get a better handle on how to work it into your regular recipe repertoire (hey, say that 3 times fast!).

To get you a head start, here are some great recipes (most of them I’ve tried myself, but some of them are on my to-try list) that use stevia:

This Week’s Update

Unfortunately, there was an upward trend on the scale this week, which I am blaming entirely on Aunt Flow (Dad-Blast that woman!). The measurements continue to creep downward every so slowly.

Here are my current stats that I will update every Monday:

Weight: 135 (up almost a pound)

Waist (inches): 30-31

Butt: 40

Find out how the other ladies are doing with their weight loss efforts and other goals by clicking on the image below.

Sharing at Homestead Barn Hop, Mom’s Monday Mingle, The Bulletin Board, Better Mom Mondays, Motivation Monday, Open Call Tuesday, Delicious Dishes, Teach Me Tuesday, Titus 2sDay, Hip Homeschool Hop, Tiny Tip Tuesday, Titus 2 Tuesday, Tip me Tuesday, Trivium Tuesday, Healthy 2Day Wednesday, Allergy-Free Wednesday, Works for Me Wednesday, Women Living Well Wednesday, Frugal Days Sustainable Ways, Real Food Wednesday, Whole Foods Wednesday, Keep it Real Thursday, Tastetastic Thursday, Homemaking Link UP, Simple Lives Thursday, Thought-Provoking Thursday, Life in Bloom, Frugal Thursday Rewind, Fellowship Friday, Fight Back Friday, Feast in Fellowship Friday, Frugal Friday, I’m Lovin’ It, Weekend Bloggy Reading, Snacktime Saturday, Show & Share Saturday, Weekend Whatever

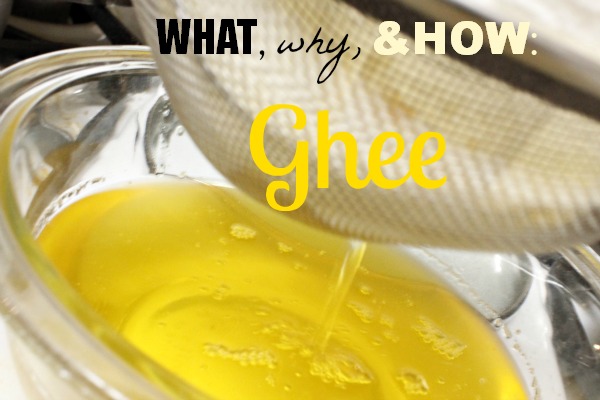
Make Your Own Dairy - Ghee

One of my resolutions this year was to make more of my own dairy products: cheese, butter, sour cream, and the like. And while I’ve actually conquered quite a few of the items on my list, so far, I’ve only shared Sour Cream and Homemade Yogurt with you here. It’s about time to make another item on my list, so today I will show you how to make ghee.

What’s Ghee?

Ghee is butter that has been boiled down to remove the milk solids, leaving behind only the fat. It has a caramel-esque flavor that, if possible, improves upon the amazingness that butter already is.

What Do You Do With Ghee?

Anything that you would do with butter! It’s particularly useful for frying because it has a higher smoke point than butter does. I have used it instead of straight butter in some baking recipes, too, but because it’s pure fat (all the sugars and water have been cooked out), it can be a little more greasy, so you do have to make some adjustments when baking.

Why Ghee?

For one thing, the amazing flavor. It just can’t be beat, and you don’t know what I’m talking about until you’ve actually tasted it. Yum!

For another, it lasts a really long time. If you’ve made it successfully, it should last indefinitely in the fridge and for several months (at least) room temperature.

As you can see, it is extremely stable, which is the most desirable quality when it comes to fats. Unstable fats = free radicals = disease. Always choose stable (saturated) fats.

Ghee is often tolerated by those intolerant to lactose - but test it carefully first! Don’t make any assumptions. Also, some people with dairy allergies can tolerate ghee. (Not my Certain Little Someone, sadly. We tried it.)

Ghee is digested more readily than butter, making its nutrients more readily available to the body. Like other saturated fats, it also aids the body in the absorption of vitamins and minerals from foods eaten together with it.

In traditional Indian Ayurvedic medicine, ghee is said to be useful for maintaining healthy skin and eyes, and is good for enhancing memory and brain function. (Gimme some more of that stuff!!)

Why Make Your Own Ghee?

If you’ve ever priced ghee in the store, the answer to this question is quite obvious. For example, at Amazon.com, Purity Farms 13-oz container of ghee is $8.31 right now. I could make that same amount myself with farm-fresh butter for less than $5 (Right now, I could make it for $3.50, the sale price of butter at my local farm.).

And it is brain-dead easy. Seriously.

Don’t believe me? Here’s the short version of the instructions:

Melt butter. Simmer it. Simmer more. A little more. OK, done.

Oh, you need a little more than that? All right, here ya go:

How to Make Ghee

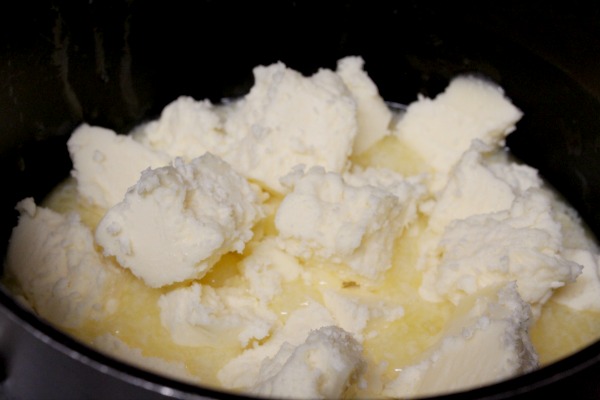
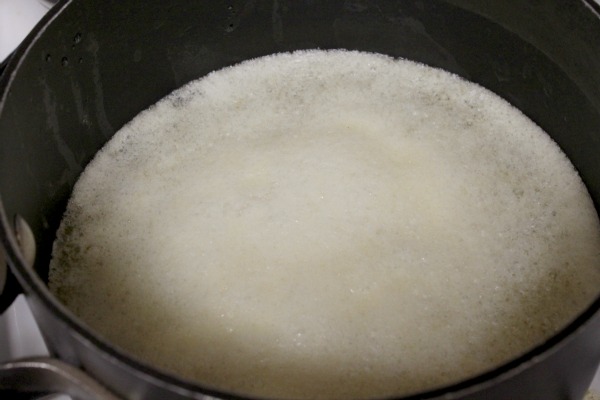
Chop unsalted butter into cubes and place in a large heavy-bottomed saucepan over low heat.

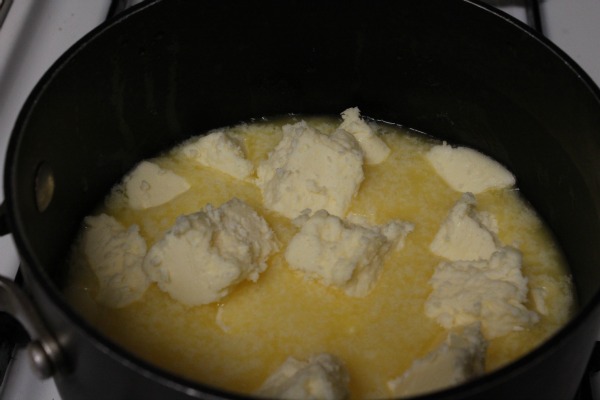
Melt the butter over low heat. Don't stir.

Simmer the butter over low heat. No need to stir. Just keep an eye on it.

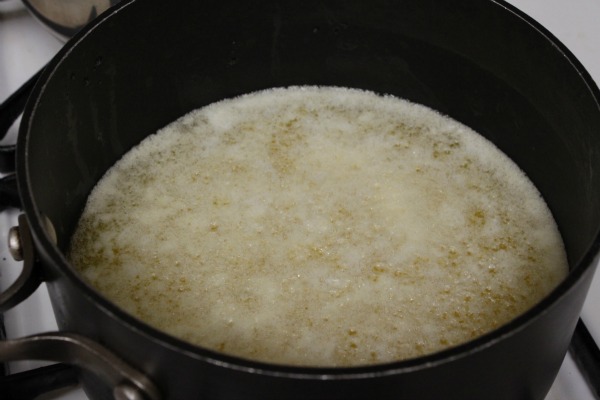
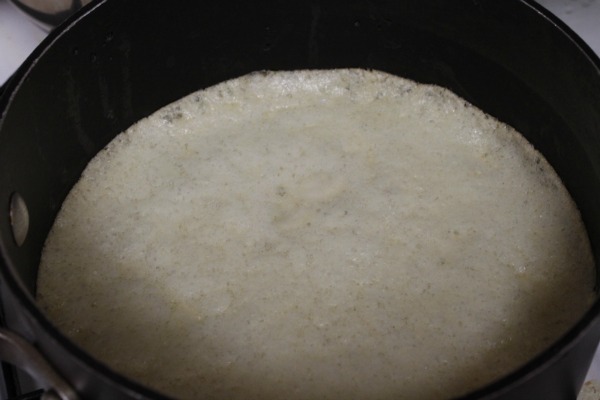
Keep simmering the butter on low heat. Don't stir. Don't raise the heat. Just keep simmering.

The foam that develops on the surface is the water cooking out of the butter. The milk solids should be settling on the bottom of the pot. In between the two is the rich golden ghee.

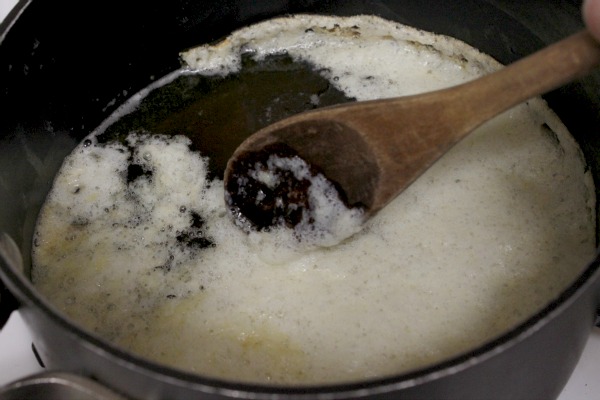
Very gently, so as not to disturb the milk solids on the bottom of the pan, skim the foam off the top.

When the liquid under the foam is a nice golden color and smells like popcorn, the ghee is done. Let it cool slightly, then pour it through a mesh strainer lined with cloth or paper towels into a bowl. Be sure no particles are left in the liquid.

And that’s ghee! Told ya it was easy. The hardest part is discerning when it’s finally done, but honestly, if you err on the side of caution it will be fine. It might not last quite as long or be quite as “pure”, but it’s still butter and it will still taste good. However, if you let it go too long, it will definitely burn, so you don’t want that to happen. Hence the reminder to keep the heat on low! The whole process should take about half an hour or so, more if you’re making a larger batch.

You can make as little or as much as you want. I’ve made as little as 1/2 a pound of butter, and as much as 2 lbs. and both were fine. Clearly, you’ll have to watch a smaller batch even more carefully so as not to burn it.

Sharing at Titus 2sday, Traditional Tuesday, Teach me Tuesday, Domestically Divine Tuesday, Healthy 2Day Wednesday, Women Living Well Wednesday, Works for Me Wednesday, The Mommy Club, Frugal Days Sustainable Ways, Simple Lives Thursday, Your Green Resource, Frugal Friday, Feasting in Fellowship Friday, Natural Living Monday, Homestead Barn Hop, Better Mom Monday,

Another Healthy Fat for Free! {Something from Nothing}

something from nothing graphic Once upon a time, thrifty agrarian folks - who were hearty and healthy and rarely suffered from conditions like heart disease, cancer, and diabetes - took great pleasure in the fruits of their labor and enjoyed it to the fullest, wasting not even a morsel or a speck. Especially bacon. They had no qualms about eating bacon every day for breakfast to their heart’s content… and they made sure to save every last drop of the rendered bacon grease to use for frying… or even drinking. (Don’t believe me? Check out this list of grandmas and grandpas who enjoyed their bacon.) For generations, they survived and thrived on bacon (and a few other things of course).

And then in the twentieth century, a new generation came along and declared that those old folks knew nothing. They were killing themselves eating all that nasty saturated fat! No, no, a healthy diet must include no fat at all. OK, maybe some fats, but only the healthy polyunsaturated kinds. Definitely no saturated fats ever. Oh, wait, no, maybe it’s the trans fats that are the problem.

And then heart disease sky-rocketed. So did diabetes. And cancer. And all sorts of other first-world diseases.

Hmmm. Maybe the old folks knew something after all.

Me? I figure they were on to something, and I aim to follow their example. If you’re not convinced, read Food Renegade’s primer on healthy fats. Or any number of well-researched and well-written books like The Good Fat Cookbook, In Defense of Food, Good Calories Bad Calories, or Why We Get Fat and What to Do About It.

Which is why I religiously save every bit of bacon grease when frying up bacon and keep a jar of it in my refrigerator at all times. It is absolutely my favorite way to save money and eat healthy.

Bacon Grease: A Free, Healthy Fat

In my book, Your Grocery Budget Toolbox (You can get the first chapter free simply by subscribing!), I talk about the importance of prioritizing healthy food so that you know where to spend your hard-earned money. I determined that for myself, healthy fats were of the utmost importance, because those unhealthy fats (that everybody says are so good for us… I’m talking about canola oil, vegetable oil, margarine and the like) can do a lot of damage and I want to avoid that if possible.

Unfortunately, healthy fats can be very expensive! To really get the good stuff (expeller-pressed, virgin, etc.), you almost need to spend an arm and a leg. Or at least your entire grocery budget. I’ve learned a few tricks along the way, and bacon grease is one of them.

How to Get Bacon Grease

I buy uncured, nitrite-free and nitrate-free bacon at Trader Joe’s for $3.99 a pound (Grass-fed would be better if you can afford it.) and fry the entire batch up at once. I make sure to fry it at low or medium heat so as not to burn the grease and get all kinds of little black specks in it, as it’s not quite so good (or good for you) then (although some people disagree with me on that). Once all the bacon is cooked, I give the pan and the grease a chance to cool off a little, then I pour the liquid grease through a mesh sieve into a jar. I let it cool completely, and then I store the jar in the fridge.

Some sources say the bacon grease will last a month; others say it will last indefinitely. Saturated fats are pretty stable (which is one reason why they are so healthy), so I personally think it lasts significantly longer than a month. At any rate, it doesn’t stick around here for too much longer than that because I use it for everything!

How I Use Bacon Grease

Although it has a very strong bacon flavor, bacon grease goes well with just about everything. (Bacon makes everything better, dontcha know?) Some of my favorite uses are:

  • frying eggs (Mmmmmm!)
  • sauteing vegetables
  • panfrying meat
  • greasing a pan
  • cooking green beans (I should have bought green beans at the farmers’ market today)
  • refried beans

Some other bloggers have other great ideas for using bacon grease:

Or maybe you’re in the mood for Bacon Grease Chocolate Chip Cookies?

Do you save your bacon grease?

Did you know you can also save chicken fat?

Sharing at Fight Back Friday, Frugal Friday, Friday Favorites, Homestead Barn Hop, Better Mom Mondays, Titus 2sday, Traditional Tuesday, Teach me Tuesday, Domestically Divine Tuesday, Healthy 2Day Wednesday, Women Living Well Wednesday, Works for Me Wednesday, The Mommy Club, Frugal Days Sustainable Ways, Allergy Free Wednesday, Simple Lives Thursday, Your Green Resource


What Spelt Is, Why You Should Use It, How to Use It, and Where to Buy It


As I’ve mentioned a few times recently, I’ve been on a spelt kick lately, using it to make my Grandma’s Biscuits, as well as pizza crust (recipe coming next week), among other things. I thought I’d take the time to explain a little more about spelt for those of you who are curious and might want to try it for yourselves.

The What

Spelt is one of wheat’s long-lost cousins (einkorn and emmer are some of the others), having been cultivated for thousands of years prior to the twentieth century, when wheat took over as the grain of choice. According to the World’s Healthiest Foods, spelt was one of the first grains to be used in making bread way back in the day.

Although I only have experience with the whole grain (and grinding it myself), apparently spelt flour, like wheat flour, is available in both whole and “white” (not whole) varieties. If you can, use the whole grain and grind it yourself with a grain mill or Vitamix for maximum nutrition.

The Why

Personally, the biggest reason I chose to use spelt is because I found that My Certain Little Someone could tolerate it, whereas he reacts strongly with hives and wheezing to wheat . But even if he did react to spelt, I would still consider using it in addition to my freshly ground whole wheat flour for the rest of the family because of its superior nutritional profile.

Why should you give spelt a try? Here’s what I’ve learned in reading about the benefits of spelt around the web:

  • Many people who are allergic to wheat can tolerate spelt (like My Certain Little Someone). Mind you, this means people who are allergic to the proteins in wheat, not people with celiac disease who cannot properly digest the gluten. Spelt does contain gluten, so it’s not generally recommended as a wheat substitute for those avoiding gluten. Also, people who are sensitive to wheat (but not necessarily allergic) find that spelt is a great substitute. Warning: Rebecca Wood suggests that if you have sensitivities to wheat, you might eventually develop sensitivities to spelt as well if your digestive system is compromised in anyway.
  • Its taste is very similar to wheat, except perhaps better. Of all the wheat-free flours I’ve experimented with (and I think I’ve pretty much experimented with all of them), spelt is my favorite in terms of flavor. Honestly, I can’t tell much of a difference between spelt and wheat, except that it has perhaps more of a “nutty” flavor, for lack of a better word.
  • Despite its slightly different structure, spelt behaves very much like wheat in baking. Because it does have gluten, it’s very good for baking bread, which requires gluten for the best rise and texture.
  • While spelt’s thick hull makes it difficult to harvest and process as quickly as wheat, it also makes spelt more resistant to pests and diseases. That means spelt is easier to grow organically, or at the very least, with fewer pesticides and other chemicals.
  • Spelt contains considerably more protein and fiber than its cousin wheat, which makes it a much healthier carbohydrate.
  • Wheat is gaining notoriety as being difficult to digest. Spelt has no such problem. In fact, spelt is digested more readily by the body, and its nutrients are therefore more effectively used by the body.

Whether for reasons of health (as in the case of allergies and sensitivities) or nutrition, spelt is an excellent grain to incorporate into your diet.

The How

Really, there is no special way to use spelt; you can use it just like you use wheat flour. You can replace wheat with spelt 1:1, or you can replace part of the wheat in your recipe with spelt. Do remember, though, that if you are using storebought spelt flour, it comes in a whole grain or white variety. So make sure you’re comparing apples to apples, and use whole grain spelt in recipes that call for whole wheat flour, and white spelt in recipes that call for unbleached all-purpose flour. Otherwise, you might have to make some adjustments to accommodate the differences brought on by using a whole grain flour.

Some people do suggest that you might need to reduce the liquid in a whole wheat flour recipe by about 25% when using spelt flour. So start out with 75% of the suggested liquid amount, and add additional liquid until you have the desired consistency.

Also, spelt does not need to be mixed or kneaded as long as wheat does, particularly when it comes to making bread. The gluten in spelt is not quite as robust as the gluten in wheat, so it can’t handle too much force. Charlotte Bradley has more information on baking with spelt here.

The Where

Spelt is getting easier and easier to find, but it is still often relegated to the aisles of health food stores. But the major flour brands do carry spelt: King Arthur Flour, Bob’s Red Mill, and Arrowhead Mills.

Purchasing directly from the manufacturer’s website can be pricey, though (as can buying it at a health food store), so here are a few alternatives:

In addition, I recommend scoping out the bulk foods section of your favorite health food store or supermarket to see if they have comparable prices on the spelt berries. When you compare the cost of shipping, it might be cheaper to just purchase it there.

So have I convinced you to give spelt a try? Or are you already a big fan?

This post contains affiliate links.

Sharing at Simple Lives Thursday, Your Green Resource, The Mommy Club, Friday Favorites, Freaky Friday,Fight Back Friday, The Better Mom Mondays, Homestead Barn Hop, Traditional Tuesday, Titus 2sday, Teach me Tuesday, Women Living Well Wednesday, Works for Me Wednesday, Whole Foods Wednesday, Frugal Days Sustainable Ways, Real Food Wednesday, Encourage One Another, Healthy 2Day Wednesday

The Best Short-Term AND Long-Term Storage for Fresh Herbs

Honestly, the best way to keep herbs fresh for the longest period of time is to keep their roots firmly planted in the soil, where they will be nourished and happy for several months at least.

But if you, like me, cannot keep a dill plant alive to save your life, then you might benefit from these tips. (Oh, don’t worry; I will persevere in my yearly attempt to kill grow dill, but so far, I haven’t managed to keep it growing for longer than a couple weeks. Yeah, that was probably the record.) And, thankfully, these tips will also apply to a large number of other herbs, if you are also very good at killing those (Or if you just don’t have room for potted herbs. Or if it’s the winter and herbs would die anyway.)

I offer you my two favorite solutions for fresh herb storage (aside from the so-fresh-its-still-alive variety) that I have just hit upon this summer (all hail the mighty Pinterest!).

Short-Term Refrigerator Storage

OK, so this tip has been around a while, and I may have even tried it once or twice back in the day, but then I guess I forgot about it. The past few times I have purchased a bunch of fresh herbs, I tried the method where you stick it in a jar of water and either leave it on the counter at room temperature or put it in the fridge.

Maybe I did something wrong, but that didn’t work for me. Leaving it on the counter was a total disaster: the bunch of cilantro I was trying to keep fresh wilted the first day, and completely withered away the second day. Sadness. Good thing I only wasted $0.69!

I’ve tried the half-full glass of water in the fridge on multiple occasions, but you know what always happens? I bet you do know, because I bet the same thing happens to you (especially if you have those wired shelves, like me, instead of flat plastic or glass shelving) - inevitably, the glass tips over and spills the water everywhere. Annoying.

Plus, I find that even if I do manage to keep the jar or glass upright, the herbs don’t stay fresh for much longer than a few days. How am I supposed to use up a huge bunch of cilantro in that amount of time? Well, I guess I probably could if I put my mind to it. But I usually don’t.

Enter my now-favorite tip that I have (re)discovered:

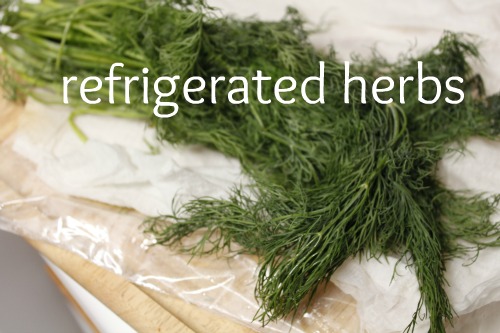
Wrap a damp paper towel around the fresh herbs and place in a zippered plastic bag.

Press out all the air and seal it shut. Refrigerate.

It’s like magic! The dill in that picture is a week old and is still fresh and yummy. I used some for dinner tonight, and have enough for a few more dinners. A couple of the fronds at the end froze just a bit in the fridge, but for the most part, it’s still in fabulous condition. I am now going to store all my fresh herbs in this manner! From hereon and henceforth.

But… I probably won’t actually get around to using all that dill in the next week. So, I need a long-term storage solution.

Long-Term Freezer Storage

I’m no stranger to freezing herbs; I have done it on many occasion. I’ve tried just sticking the herbs straight up into little freezer baggies. I’ve tried freezing them in a little water in ice cube trays. I’ve tried pureeing them and freezing them in ice cube trays. All of those methods will work to one extent or another.

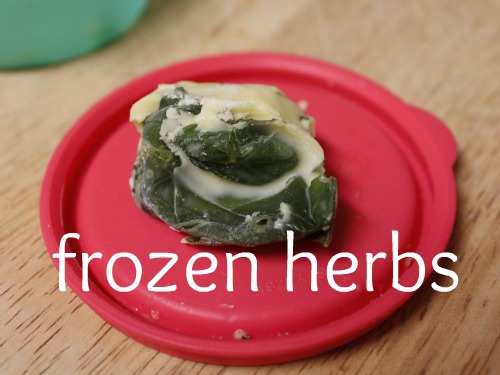
But now… I’ve taken the ice cube tray to a whole new level and added oil! Many thanks to The Gardener’s Eden for this fabulous idea! So far, this is my very favorite way to freeze herbs for later use. It won’t work for every use, but you can try freezing them in water or broth instead if you prefer. In any case, this is a delicious and super simple way to freeze herbs.

How do you store your fresh herbs?

Sharing at Freaky Friday, Fight Back Friday, Homestead Barn Hop, Titus 2sday, Traditional Tuesday, Healthy 2Day Wednesday, Works for Me Wednesday, Allergy-Free Wednesday, Women Living Well Wednesday, Frugal Days Sustainable Ways, Real Food Wednesday, Whole Foods Wednesday, Simple Lives Thursday, Your Green Resource

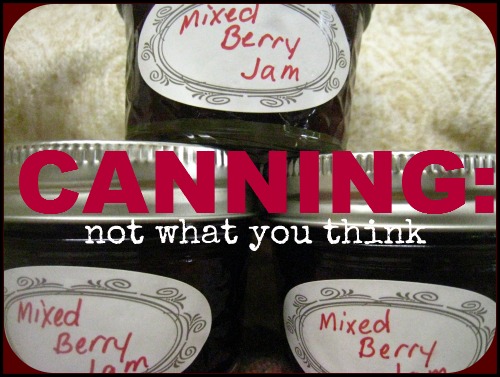
Canning - It’s Not What You Think!

Does the whole idea of canning scare you? Or do you feel like it’s just time-consuming? Or perhaps you think you just don’t have the skills necessary to can successfully.

A few years ago, that’s exactly how I felt: scared, apprehensive, and unsure about the whole concept of preserving at home by canning. But I took a deep breath, jumped in and started… and found, to my surprise, that canning was not at all what I thought it was!

If you’re still hesitant to experiment with canning, read my guest post today at Keeper of the Home that will reassure you about the ease and safety (not to mention the expense) of canning.

And be sure to come back on Thursday, because I’m going to have a nice little giveaway featuring one of the products I mention in that post!

Sharing at Works for Me Wednesday, Women Living Well Wednesday, Titus 2sDay, Allergy Free Wednesday, Whole Foods Wednesday,Traditional Tuesday, Real Food Wednesday, Frugal Days Sustainable Ways, Healthy 2Day Wednesday

Preserving with my Vitamix

I knew when I was saving up for my Vitamix that it would help me save time and money by enabling me to quickly make certain foods that I didn’t used to make, like sunflower seed butter or coconut milk. What I didn’t anticipate was how it would save me time and money by enabling me to more quickly accomplish tasks I was already doing, like shredding and puree-ing fruits and vegetables in order to preserve them.

At my most recent OAMS trip, I happened across a whole bunch of seconds produce at a local produce stand, especially some tomatoes and zucchini that were in excellent condition. We had just come off a very busy week of VBS and I didn’t have a great deal of time or energy, but I did want to take care of the veggies before they went completely bad. I did a quick little Google search to see if my Vitamix could be put to use for me, and sure enough! It could!

For most fruits and vegetables, I like to chop or puree them before freezing because then they are more usable when I need them. I do occasionally freeze jalapeno peppers and the like in their entirety, because they defrost very quickly. But for the most part, I like to be able to pull the veggies out of the freezer in a usable state. Out of the freezer, into the pot. Simple and quick! Plus, a lot of veggies change texture in the freezer and are not as easy to chop up when they are defrosted as they are when they are fresh.

Unfortunately, this prep work does take a bit of time, so I have been known to put off the task until it was too late. Those seconds tomatoes purchased at the produce stand for half price or less suddenly don’t seem like such a good deal when they’re leaking tomato juice all over the counter 3 days later because I didn’t feel like taking the time to prep them for the freezer.

Vitamix to the rescue!

Puree

The Vitamix is a blender, so naturally, it blends fruits and veggies into purees quite nicely. Any old blender will do the trick with most fruits and vegetables (especially cooked ones), but I will say that I burned out quite a few cheaper blenders by expecting a little bit too much of them in this department.

I was actually kinda floored by how quickly the Vitamix decimated (in a good way of course) my tomatoes. I cleaned them, peeled them (with the aid of some hot water), chopped them in quarters and squeezed out the seeds, then dumped the whole pile into the Vitamix. Turned it on, and I had several cups of tomato puree in (literally) seconds. I poured it into a bag and put it into the freezer to make into a fresh tomato sauce or some other yummy dish at some point in the future. It probably took me about 10 or 15 minutes to get from whole tomatoes to a freezer bag full of tomato puree.

Tomatoes aren’t the only things that can be quickly pureed in the Vitamix, of course. These fruits and veggies (and more) can be pureed in the Vitamix in a matter of seconds by setting the speed somewhere between 5 and 10 (depending on the fruit or vegetable and the desired thickness or smoothness):

  • Bananas - I like to pour the puree into ice cube trays and freeze it to use for recipes that call for mashed banana. No time for banana bread today, but you have a couple browning bananas? This is a quick way to save those bananas before they go completely bad.
  • Cooked Pumpkins, Winter Squash and Sweet Potato - You might need to add a little water (or broth, depending on if you want it for a sweet or savory use) to the blender for a really smooth puree. The puree can be used in all kinds of baked goods (Pumpkin Chocolate Chip Blondies are a big favorite!), or even soups and casseroles.
  • Apples - You can puree either cooked or raw apples in the Vitamix, although I personally prefer cooked. Raw applesauce will definitely need some lemon juice, and should be eaten or frozen right away. It goes brown very quickly! When I do make raw applesauce, I like to add some other fruit with it, like berries. The resulting texture and color is more pleasing.
  • Peaches - Like apples, they brown easily, so I personally don’t freeze them, pureed or otherwise. I do, however, like to make some yummy peach sorbet, and the Vitamix makes quick work of the puree.

Dry Chopping

The Vitamix can be used as a food processor for a variety of fruits and vegetables by utilizing either the Dry Chopping or Wet Chopping method. The Wet Chopping method requires you to cover the produce with water, then process them for one or two seconds at the highest speed. The Dry Chopping method is simply a matter of turning the blender on at a low speed (somewhere between 1 and 5, depending on the food in question), then dropping large chunks of the vegetable or fruit into the opening in the lid, allowing the blade to slice through it.

“Dry Chopping” is, I guess, something of a misnomer, because it’s more like shredding or mincing. If you want pieces that are diced or larger, you’ll probably want to use another tool or just do it by hand. But I’ve found the Dry Chopping method to be perfect for the following:

  • Celery - I always buy the organic celery at Trader Joe’s, which comes in a package of two. I never use up both of them before they start to yellow and turn, and I always tell myself that I need to freeze them up before that happens. But of course, I never do, because chopping up celery takes a really long time! I managed to rescue a good portion of my celery this time around, simply by dry chopping it in the Vitamix. You don’t even need to cut the celery in chunks before chopping it; just drop the entire stalks in one or two at a time and watch it chop away! I do recommend chopping only one or two stalks at a time, then cleaning out the container before continuing, just to make sure you get any strands off the blade before you have a tightly knotted mess on your hands! I freeze the resulting chopped celery to use in broth, soups, and casseroles.
  • Onions - This will help eliminate the tears! All you have to do is peel the onion, cut off the ends, and chop it into large chunks, then let the Vitamix do the mincing for you. Easy peasy.
  • Zucchini - Seeing as we are smack dab in the middle of the crazy zucchini season, this one comes in super handy! Shredded zucchini freezes beautifully and is perfect for making baked goods or tossing into pasta salads, onto pizza, or into casseroles.
  • Carrots - I don’t always run my carrots through the Vitamix, because I usually prefer to eat them in larger pieces. But the shredded carrots also work well in a variety of dishes, like this simple pasta salad that we had for dinner tonight.

I was going to make a video for you as I chopped away at my veggies, but my kitchen wasn’t clean I ran out of time. Instead, I’ll share with you the ones I found:

The second video shows you how to chop onions using the Wet Chopping method. Either Wet or Dry Chopping works for onions.

I’m sure there are many more veggies that can be chopped in such a manner, but these are the ones that come to mind.

As for the “preserving” part, all I did with my freshly pureed and chopped produce was pack it away in freezer bags and freezer-safe containers and pop it in the freezer. Done!

This post contains affiliate links, but is not sponsored in any way by Vitamix or any other brand. I just get a little enthusiastic about my Vitamix.

Sharing at Works for Me Wednesday, Women Living Well Wednesday, Titus 2sDay, Allergy Free Wednesday, Whole Foods Wednesday, Traditional Tuesday, Real Food Wednesday, Frugal Days Sustainable Ways, Healthy 2Day Wednesday , Simple Lives Thursday

Apple Pectin: How to Make It, How to Use It, and Why I Don’t

Fall Sunday 2010

For the past few years, I have enjoyed making my own jam. I love that it’s healthier than storebought jam because I use fresh local fruit and very little sugar (sometimes I even use honey!). I also love that it’s very easy to make and doesn’t take a great deal of time.

Last year, feeling comfortable with the whole jam-making process, I decided to step it up a notch and try my hand at homemade pectin.

What Homemade Pectin Is

Pectin, as I’m sure you know, is what holds the jam together. Pectin is what causes the jam to “set” and become more solid than liquid. Pectin comes from fruit, and apples are particularly rich in pectin.

Most people are familiar with store-bought pectin that comes in powder form and is sold in little boxes. Sometimes people do without any specific source of pectin at all and just boil the living daylights out of their fruit to release the pectin inside it. And sometimes people make their own pectin by boiling the living daylights out of apples.

How to Make Homemade Pectin

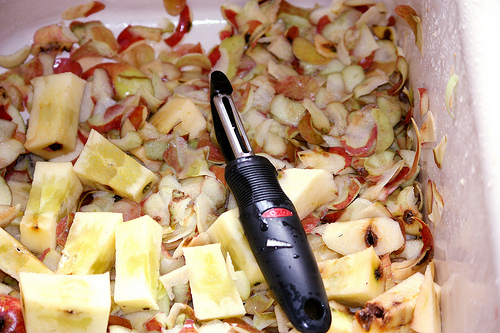
The process of making your own pectin is actually quite straightforward: simply cover a large amount of apple “leavings” (peels and cores) with water and then boil for several hours. Strain through a lined mesh sieve and store the remaining liquid in the freezer or in processed jars. If you would like more specific instructions, please see Fig Jam and Lime Cordial’s excellent tutorial on homemade pectin here.

How to Use Homemade Pectin

Using homemade pectin is not nearly as straightforward a matter as making it. That’s because the amount of pectin found in fruit varies greatly, and homemade apple pectin does not come with a chart to tell you how much you should use.

Another element of jam-making adds even more trickery to the issue, and that is sugar. You have to have the proper ratio of sugar to pectin if you ever want your jam to set.

Furthermore, you’re going to need a little bit of lemon juice, which is also essential to the gelling process.

And, of course, how much you use of each of these ingredients depends entirely on how much fruit you have and what kind it is.

Complicated much, yes?! Once again, I will refer you to Fig Jam and Lime Cordial and their Jam Making Primer. But to sum up, when making jam with your own homemade pectin, you need to combine the appropriate amounts of fruit, pectin and lemon juice into a pot and bring it to a full rolling boil. Once the fruit has softened, add the appropriate amount of sugar and bring it back to a boil. Boil the living daylights out of it until it sets. If it doesn’t set, add more sugar or pectin and boil it some more.

Why I Don’t Use Homemade Apple Pectin

Homemade apple pectin seemed like such a frugal and healthy idea - an all natural, chemical free alternative to store-bought pectin that I could make from apple scraps I would normally throw away. Brilliant, right?! Once I read about it, I was determined to give it a go. After excitedly bottling up and freezing several jars of homemade apple pectin during the peak of apple season last fall, I was anxious to try my hand at jam made completely 100% from scratch with the onset of berry season this year.

Imagine my dismay when my experiment was a complete and total flop. Oh, my jam “set” just fine. After I had almost completely boiled it away, that is. And added way more sugar than I usually do. And slaved over a hot stove for much longer than I usually do. And got spattered by hot bubbling jam more than ever before.

I decided that I would never bother with homemade apple pectin again. Why? Oh, let me just count the reasons why:

  1. Making the pectin was easy, but it was kind of time-consuming. And it took up valuable real estate in my freezer.
  2. I had to boil the jam for. ev. er. Usually, jam takes me about an hour, start to finish. With the apple pectin, it was easily twice that long.
  3. I started with four cups of mashed fruit, the typical amount used in an average batch of jam made with store-bought pectin. Typically, that amount will yield 3-4 pint jars of jam. How many pints did I get from my batch made with homemade pectin? One. Just one.
  4. The pectin I usually use requires only 1/4-1/2 cup of sugar (I usually use unrefined sugar) or honey. I can’t remember exactly how much sugar I used with the apple pectin, but it ended up being considerably more.
  5. I had to boil the fruit down for so long that I highly doubt any nutritional value is left.
  6. Also because of the lengthy boiling time, the resulting jam tastes cooked rather than fresh.
  7. Getting the jam to set when using apple pectin is much more tricky than when using store-bought pectins, because you have to get the ratio of pectin, sugar and acid just right or it won’t work. And you have to test it to see if it’s set, which is, in my opinon, a waste of good jam!

To sum up:

It’s not QUICK - it takes forever!

It’s not EASY - it involves a lot of work and a more knowledge of jam-making than I possess.

It’s not CHEAP - the pectin might be practically free, but if my yield is less than a quarter of what I would get otherwise, it is not at all worth it.

It’s not HEALTHY - all the nutrients are boiled away, so you’re mostly left with concentrated sugar held together by fruit juices and some pulp.

What I Use Instead

My one experience with apple pectin was enough to convince me to return to my favorite old standby, Pomona’s Pectin. Pomona’s Pectin is incredibly easy to use, is all natural, and requires only 1/4-1/2 cup sugar for most recipes. It also works with all kinds of sugar alternatives, including stevia and honey. I have never had a batch of jam fail in all the time I’ve been using Pomona’s Pectin, and it sets up very quickly - within a minute! No constant boiling, stirring, and testing for a proper set.

I wish Pomona were paying me to say this, but she’s not. The honest truth is: I LOVE THIS STUFF!

What kind of pectin do you like to use?

Sharing at Titus 2sday, Traditional Tuesdays, Homestead Barn Hop, Healthy 2Day Wednesday, Women Living Well Wednesday, Whole Foods Wednesday, Works for Me Wednesday, Real Food Wednesday, Frugal Days Sustainable Ways, Tastetastic Thursday, Simple Lives Thursday