French Toast Casserole with Streusel Topping

French Toast Casserole with Streusel Topping #breakfast #wholefoods #nutfree

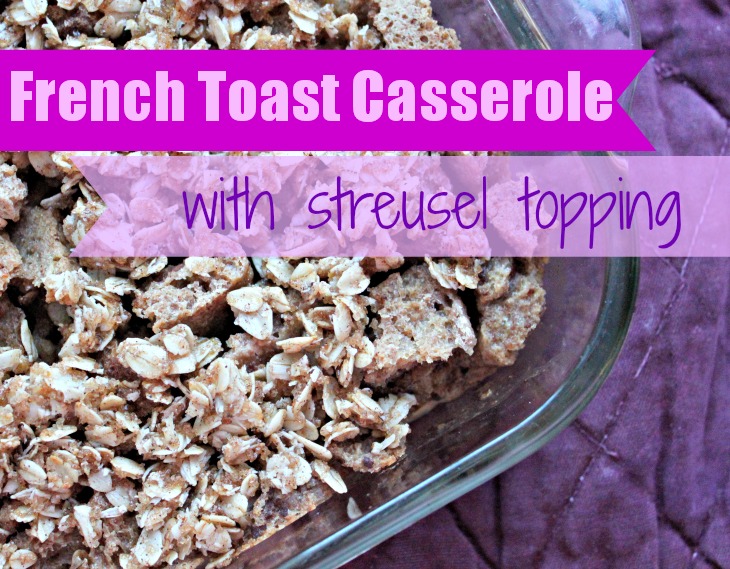
Delicious Breakfast - French Toast Casserole with Streusel Topping

On holidays and weekends, one of my favorite things to do is fix my family a slightly more involved breakfast than usual (read: something besides toast and a smoothie). It’s a plus if said breakfast is deliciously decadent without really being decadent. And it’s a total plus if said deliciously decadent breakfast is made with the leftover bread that accumulates over time in my freezer.

This breakfast is all of these and more. My DH even called it “epic” and he’s not one to effuse over his food. I’m thinking the cinnamon syrup is what pushed him over the edge this time.

French Toast Casserole with Oatmeal Streusel #breakfast #nutfree #wholefoods

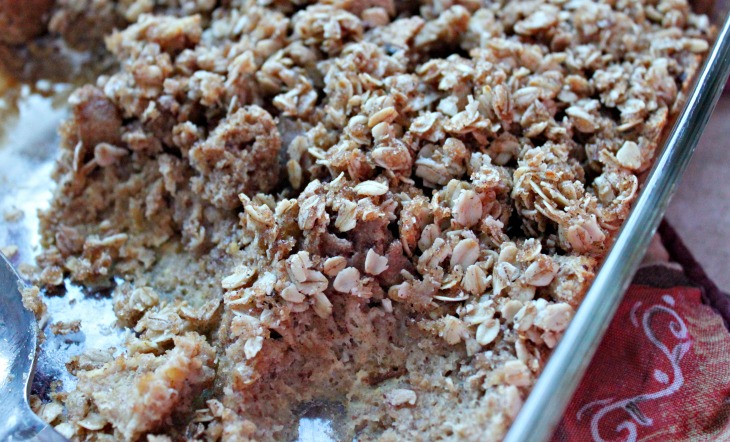
Delicious French Toast Casserole with Oatmeal Streusel Topping and Cinnamon Syrup

If you don’t keep your bread ends in your freezer… well, you should! You can make a lot of things with leftover bits and pieces of bread, and this recipe is one of them. Other recipes include:

Chocolate Bread Pudding

Bread Crumbs

Easy Peasy Cheese Ball

Chicken Zucchini Stuffing Casserole
French Toast Casserole with Oatmeal Streusel #breakfast #wholefoods #nutfree

BundleoftheWeek.com, 5 eBooks for $7.40!

5 Creative Ideas for Leftover Meat

5 ideas for leftover meat Got some leftover meat and no idea what to do with it? I’ve got an idea for you! No more boring casseroles or lame pasta dishes: Here’s some creative fun you can have that will turn your hunk of “meh” into “YUM!”.

5 Creative Ideas for Leftover Meat

1. Spring Rolls

This is probably one of my favorite leftover options. Literally any kind of meat - and it doesn’t have to be Asian-flavored - can be rolled up in a rice paper wrapper, fried or baked, and served with a dip. Certainly you can make them Asian flavors if you want, but why not go with Mexican or BBQ, if that’s what you’ve got? Mexican spring rolls can be served with salsa, and BBQ spring rolls with (what else?) barbecue sauce.

If you’ve never played with spring roll wrappers before, here’s my super brief tutorial:

  • They come fresh or dried. Many regular grocery stores carry both types, but I usually buy mine at the Asian store. The fresh ones are more expensive and can be found in the produce or freezer section, while the dried ones are usually somewhere near the rice noodles and that kind of thing.
  • The fresh ones (which I’ve never actually used) are pliable and ready to be used. Just place a couple tablespoons of the filling (whatever you want!) on to one side of the wrapper, and fold up the closest edge to cover the filling. Fold the sides up, then roll the whole thing all the way to the other edge. Dip your fingers in water to seal the edge.
  • Dried wrappers need to be briefly soaked in water before using. Once they’re pliable (but not too much so, or they’ll rip) fill them in the same way I described above. No need to seal with water, though.
  • Fry them up on the stove top (make sure your oil is hot enough or the seal won’t stick).
  • OR bake them in the oven following these directions.

I’m totally serious, by the way, that just about any thing can be wrapped up in a spring roll! Don’t feel like you need a special recipe or anything: if you’ve got shredded BBQ meat, for example, just plop some of it on the wrapper, top it with a sprinkle of cheese (or maybe some cole slaw?), wrap it up and cook it!

2. Stir Fry

Again with the Asian influence, but seriously. Stir fry is the way to go! Especially if you also have leftover veggies - even better!

Once again, you don’t have to worry about sticking to an Asian flavor of some kind, although practically any cooked meat can morph into Asian cuisine via stir fry. Just follow this great tutorial from AllRecipes.com , keeping in mind that pre-cooked meats and veggies will not need nearly as much time as is prescribed in the article.

A stir fry is also great because it can also utilize any leftover starch (noodles or rice, for example) that you may have. Get rid of those leftovers in one fell swoop!

flatbread sandwich thins3. Sandwiches

Now, I’m not talking about a boring ol’ meatloaf sandwich with a hunk of nasty cold meatloaf shoved between two slices of plain ol’ bread. No way. Not how I roll.

What I’m talking about is creativity, and it starts with the bread. If you want your leftover sandwich to appeal to the masses (i.e. your starving leftover-hating family), it’s going to have to have some charm to it. Thankfully, the possibilities are practically endless:

  • biscuits
  • English muffins
  • flatbread
  • muffins (why not?)
  • waffles (Yes! Truthfully my favorite sandwich bread.)
  • pita bread
  • croissant
  • bagel
  • etc.

You get the idea. Now top it with some fancy (or not so fancy) cheese, a little bit of sauce and maybe some crunchy shredded veggies for good measure, and you’ve got some gourmet leftovers goin’ on!

sausage zucchini pizza4. Pizza

Everybody knows that everybody hates leftovers, right? BUT! Everybody loves pizza, right? So there ya go. Turn the leftovers into pizza and everybody’s happy.

And it’s so easy, too! Pizza crust is a yeast bread, but it doesn’t require all that bothersome kneading and rising stuff, so even a novice can manage it. I usually make either my Spelt Pizza Crust or my Honey Whole Wheat Pizza Crust, but you can make any kind of pizza crust you desire.

Then top it with a sauce of some kind, and it most certainly does not have to be pizza sauce. (I guess technically it doesn’t even need sauce… but it’s nice if you have it.) If you have a sauce that went with the meat when you first ate it, then that’s perfect! Whatever it is, it will work. If not, try Ranch dressing, or BBQ sauce, or a basic white sauce or cheese sauce.

Next, slice or shred the meat and sprinkle it over the sauce. Top with veggies and cheese like you would any pizza, and bake as usual. No complaints on leftover night!

ham fruit pasta salad5. Salad

Here you have two options. You can go with a green salad or a starch salad, and you can get as creative as you want with either one.

Personally, a green salad seems kind of like a boring option, so since we’re looking at creative ideas here, let’s talk about the “starch salad”. I say “starch salad” because you can use just about any kind of starch as the main component:

  • potato (and voila! you have potato salad!)
  • bread (panzanella anybody?)
  • pasta
  • whole grains such as rice, barley, and the like
  • quinoa

Cook the starch as you normally wood, then add your meat and whatever vegetables you like. To finish off your leftover magic, whip up a simple vinaigrette to bring it all together. My “Not Your Grandma’s” Ham & Pasta Salad is a great example that can get you started.

There you go, friend! Five fun ideas for leftover meat that will please your palate and your hungry family. Here’s to NO WASTE!


BundleoftheWeek.com, 5 eBooks for $7.40!

Upcycle Your Christmas Cards - Christmas Card Ornaments

upcycled christmas card ornaments text

Now that Christmas is over, I’m sure you have a plethora of Christmas cards you don’t really know what to do with. At least I know that’s what happens to me every year! The photograph ones I keep in a photo album, but the actual Christmas cards are not so easily dealt with: they’re so pretty, you hate to throw them away… but what can you do with them?

This year, I hit upon a creative solution: Every year at Christmas, I like to help my boys make some ornaments they can give as gifts to various family members. One year it was cinnamon ornaments, and another year they were made with salt dough. I feel like the whole process teaches them the joy of giving as well as the joy of creating, and family members (grandparents especially!) love to receive their little handmade treasures - a total win-win!

This past Christmas, I took on an ambitious project for their ornament gifts; and in the end, their role was minimal (probably shoulda waited ’til they were a little older), but I loved the final result anyway! What I particularly love about this project (which I originally found on Pinterest , of course) is that it is made of recycled materials. In particular, it makes use of Christmas cards, which are so beautiful… but so plentiful. You can only use them for gift tags so much, and then even that gets a little old, ya know? I was thrilled to find this unique and creative usage for all the Christmas cards I’d been hoarding in a little box.

Christmas card ornament

This isn’t as simple of a craft as I usually undertake, and I actually did have to buy some items specifically for this project (never happens!), but I love the result. I might make some more next year and give them as gifts myself!

Upcycle Christmas Cards into Christmas Card Ornaments

christmas card ornament 3

Christmas Card Ornaments

Summary: Upcycle your old Christmas cards into these beautiful ornaments.

You will need:

  • Mason Jar Rings
  • Christmas Cards
  • Acetate Sheets (I found a pad of “mock” acetate at Michaels)
  • Hot Glue Gun & Glue
  • White Glue
  • Foam Adhesive Stickers
  • Glue Dots
  • Sharp Scissors
  • Glitter
  • Ribbon

Instructions

  1. Choose a Christmas card with a picture or motif that will fit within the frame made by a Mason jar ring. Place the jar ring on the card, and trace around the edge of the ring with a pencil. Cut out the circle you traced, and glue the picture to the back of the ring.
  2. Cut out one or two small details from the remainder of the card (or from complementary cards), and attach them to the circle with a foam sticker to create a 3D effect.
  3. Place the ring down on a sheet of acetate paper. With the hot glue gun, glue all around the edge of the ring, adhering it to the acetate. Allow it to cool and dry completely, then trim the paper and the dried glue close to the edge of the ring.
  4. Pour some glitter onto a plate. Drizzle some glue around the outer edge of the acetate, then place the ornament face down in the glitter. Shake off the excess glitter and allow to dry.
  5. Cut out one or two more small details from a Christmas card, and affix them to the front of the acetate sheet with a glue dot.
  6. Tie a ribbon around the ring, creating a loop at the top so it can hang. (You might need to secure the ribbon with just a bit of hot glue.)

christmas card ornament 2

BundleoftheWeek.com, 5 eBooks for $7.40!

Maty’s All Natural {And Effective} Cough Syrup {Plus Giveaway!}

This is a sponsored post. Thanksgiving will be here in just one short day, and then in one short month… Christmas! Wow, it’s coming up fast!

And somewhere in the midst of all the festivities, another not-so-joyous season will creep in unwelcome and unannounced: I am speaking of flu season, of course. And even if you don’t get the flu, chances are you’re going to catch one of the many colds flying around this time of year, so now’s a good time to stock up on your remedies.

But forget those antihistamines, NSAID’s, and any other cold meds that line the drugstore shelves - you won’t need them. Trust me, there are a multitude of effective and safe natural remedies that quickly relieve cold symptoms while helping your body to heal faster without side effects.

Safe Natural Remedies from the Drugstore

As you know, I like to use essential oils whenever possible in treating various illnesses in my family. I also employ time-honored home remedies and the occasional homeopathic medicine when I find it useful. I also always like to keep a few ready remedies on hand for those winter illnesses that are sure to come: cough syrup and chest rub, for example. Sure, I could make them myself - I have before - but in this busy time of year, I like to have something on hand I can trust.

A frank little side note here: to be perfectly honest, I don’t always find the homemade remedies to be as effective as some store-bought ones. Just sayin.

An effective - but natural and safe - remedy I make sure to always have on hand this time of year is cough syrup. Tiger Cub in particular seems susceptible to coughs whenever he has a cold, sometimes with coughing fits that keep him up at night and make him miserable. I’ve found that while raw honey itself is only partially effective, a honey-based mixture like Maty’s All Natural Cough Syrup knocks the cough out almost instantly.

Check out the ingredients in this cough syrup:

  • buckwheat honey
  • zinc
  • grapefruit seed extract
  • celtic sea salt
  • lemon peel
  • lemon balm
  • apple cider vinegar
  • cinnamon
  • cayenne pepper

This stuff packs a punch! (And yeah, I have most of those ingredients in my kitchen, but do I have time to whip up my own cough syrup? Uh, no. Not hardly!) As a matter of fact, Tiger Cub has a cold right now, and last night his cough was keeping him awake: as soon as I gave him a spoonful of Maty’s Cough Syrup, his cough stopped and he slept soundly! In fact, I didn’t hear him cough again until earlier this evening, and once again, when I gave him a spoonful of Maty’s Cough Syrup it stopped the cough in its tracks!

Here’s some more information about Maty’s from the founder:

In 1996, my daughter Maty was born with severe heart defects. And to make matters worse, she was also born without a spleen. By age five, Maty underwent three complex heart surgeries.

For those first few years of her life, it was a challenging time for our family. We were constantly in and out of doctors offices. Although her heart was mended, she was left with difficult medical issues and a weakened immune system. Her condition made her vulnerable.

Desperate to help my little girl, I devoted my time to finding natural remedies that would help her get and stay healthy. And it soon became my passion. I started reading everything and anything to do with natural ways of healing. I took classes in natural healing and even got certified as a holistic health practitioner.

And along the way I discovered natural remedies that really worked and started using them on my family. Whatʼs even better is that I was now equipped with modern knowledge of healing and incorporated that into these old time remedies to make them even better. I bottled some of these remedies up and gave them to family and friends to help them get healthier. And they became popular.

Your Chance to Win

If you want to give Maty’s a try, enter our giveaway! The winner gets to choose one full-size version of any of Maty’s popular products:

  • All Natural Cough Syrup

  • All Natural Kids’ Cough Syrup

  • All Natural Baby Chest Rub

  • All Natural Vapor Rub

  • Breathe Better Nasal Ointment

This giveaway is only open to US residents and will end Sunday, December 1 at midnight.
a Rafflecopter giveaway

BundleoftheWeek.com, 5 eBooks for $7.40!

5 Things I Buy at Whole Foods

As I mention in my book, Whole Foods can be a difficult place to shop if you’re on a really tight budget… BUT if you know what you’re looking for, and if you go armed with adequate resources, you can score some great real foods deals there.

First of all, let me say that not everything you can buy at Whole Foods is healthy! They carry a lot of processed stuff that might be organic and GMO-free, but it’s still processed and it’s still not that great for you. Furthermore, Whole Foods is definitely in it for the money, so profit will trump principle on occasion. Bear that in mind, and shop wisely.

Frankly, for all those reasons, I don’t really buy a whole lot at Whole Foods, but I do make a regular stop there during my monthly grocery shopping trip and pick up a few items. Which items, you ask?

These items:

1. The Friday Deal

Each Friday, Whole Foods holds a one-day sales event with one item at a great rock-bottom price. I don’t religiously stop there every Friday for their one-day deal, but I do try to pay attention so I know what exactly is on sale and if it’s worth stopping by or not. During blueberry season, they had organic blueberries for $1.99/lb, which around here is a fantastic price for conventional, let alone organic! I stocked up on the blueberries, and also on strawberries when they had a similar sale. The Friday deal in my area this week happens to be grass-fed ground beef for $4.99/lb, which is the lowest I ever see it, so again, I’m stocking up.

I have to say I’ve always been impressed by how well stocked they are with their one-day deals! I’ve gone late in the afternoon before, and they’ve still had plenty of the sale items left, which I really appreciate.

tuna pasta salad

2. Pole-Caught Tuna

I recently read that the best tuna in terms of sustainability and healthfulness is “pole-caught tuna” (more info in my post here), and was kind of bummed that 1.) I had no clue what that was and 2.) I had no clue where in the world to find it. After a bit of research, I discovered that Whole Foods carries pole-caught tuna… for only $1.49! Considering you pay at least that much for regular old junky tuna, that price is pretty awesome. Read more about Whole Foods’ seafood sustainability policies here.

3. Meat

While not all their meat is the ultimate in healthfulness (grass-fed, etc.), Whole Foods uses a “5-Step Animal Welfare” rating system on all their meat packaging that indicates how the animal was raised and treated throughout their life. Since that in turn can affect the healthfulness of the meat, it’s important information to know. And while their “Step 1″ rating is probably only a step above the meat you can find in any other grocery store, it is at least an improvement… and sometimes it’s all I can afford! It’s just as affordable as meat sold anywhere else, and Whole Foods states that farms have to meet close to 100 standards to achieve even the Step 1 rating, so that is at least a small comfort to me. And when I can manage it or when it’s on sale, I like to buy their higher-rated meats as well.

4. Kerrygold Cheese

Whole Foods charges less than $3 for a 7oz package of Kerrygold grass-fed cheese, which is a really good price. Costco might have a better price, but you have to buy it in a significantly larger package, and if that package goes bad before you can use it… then it’s not such a great deal.

5. A Sweet Treat

OK, so I haven’t actually bought this yet, but my sister has, and I’ve enjoyed her generosity as she has shared it with me. She loves the bakery grab bags - a paper bag with several day old pastries for only $1.50! I’m not dumb enough to think that Whole Foods baked goods are significantly better than any other baked goods… but boy are they yummy!

What do you like to buy at Whole Foods?

BundleoftheWeek.com, 5 eBooks for $7.40!

My IKEA Hack: {Almost} Built-Ins

Although we came by our current residence in a rather haphazard manner, we have enjoyed it tremendously. It’s so much bigger than our previous space, plus it has a HUGE back yard that The Boys love to play in. Besides which, it’s right off the main road, so the location is absolutely perfect.

However, it does have one drawback. (Can’t have everything, right?) Being a basement apartment, it is seriously lacking in storage space. Each bedroom has a closet, and there is a small storage unit under the stairs, but that’s about it. There’s no linen closet, no coat closet, and no laundry room (only a laundry closet) and I’m realizing that I relied heavily on those rooms for storing all sorts of things in our previous residence.

I’ve had to get seriously creative with storage here, and I’m going to show you some of the cheap ideas I’ve been able to employ. By far my favorite is this first one: our first-ever IKEA hack that was pretty darn successful if I do say so myself. We used IKEA’s line of “Billy” bookshelves and added some trim from Lowe’s to finish off the look. The result was a beautiful set of shelving that looks beautiful but cost much less than it would have elsewhere… plus it holds all our books! (I have no idea where we put all those things in our previous apartment, to be honest!)

Our IKEA Hack: Billy “Built-Ins”

We used the following Billy bookshelves:

As you can see, the shelves themselves cost around $350, considerably less than similar shelving found elsewhere. In addition to the shelving, the molding and trim (and the spray paint) cost another $60-75, bringing the total cost to a little over$400. Not bad, I think!

This is the first shelf in our set-up and contains our non-fiction collection.

We set them up in a sequence like this: short - tall - narrow, with the narrow shelves having doors on the bottom. (I love the doors because we can shove all the kids’ games in there and hide the mess!) We had wanted the shelves to extend all the way to the ceiling, and we thought we had measured enough space to include the shelf extenders. That would have added another $100 to the total cost, but as it turned out, for some reason the extenders were about an inch too short to fit. I’m sure we could have cut them to fit if we had wanted to bother (and they would really have looked like built-ins, then), but we didn’t. We just returned them and saved ourselves some moolah!

This tall shelf holds most of my sheet music and my fiction collection.

To finish off the look, we used the following pieces of molding and trim, cut, painted (with white spray paint), and attached by my DH himself:

  • 4 rosette medallions for the top corners
  • wide ribbed molding for the top shelves
  • 2.5″ wide molding, which we used wherever two shelves adjoined vertically (If it weren’t for the doors, we would have needed more of this.)
  • 1.5″ wide molding, which we placed along the vertical edges of all the shelves
  • baseboard along the bottom (except for where the doors are)

All our photo albums go in the top shelves of the narrow units.

I honestly can’t remember how many lengths of each type we bought from Lowe’s because it’s been a couple months. Besides which, it seems like we underestimated the amount we needed, and my DH ended up going back at least once to pick up more. (Moral of the story? Buy extra, and return what you don’t use!)

My DH worked really hard on this project in his spare time over the course of several evenings- maybe a week or two. Because he had to return to get more molding than he had initially purchased, it dragged on a little longer than it would have otherwise. And then it took me just about forever to sort and organize all our books, which had been packed in approximately a zillion different boxes!

The kids books are easily accessed by the little people, and the games are hidden behind the doors.

We are quite pleased with the finished product, and it’s definitely the focal point of the room where it sits, which we have dubbed “the library”. It’s really not a room, actually: it’s a super-wide hallway (read: rather nebulous waste of space that doesn’t immediately have an obvious purpose) that brings you from the living room into the master bedroom, and I can’t think of any better use for it than this (despite my DH’s campaigns for a ping-pong table!).

This tall shelf holds educational materials and reference books (dictionaries, medical books, college textbooks, etc.).

BundleoftheWeek.com, 5 eBooks for $7.40!

Take a Staycation… One Day at a Time!

Except for the occasions when we’ve joined one or the other of our families for a “real” vacation, my DH and I have mostly enjoyed “staycations” throughout our married life. This year is no different, except that instead of taking one whole week to enjoy our staycation, we’re spreading it out through the summer. My DH’s work schedule is kind of erratic, so we take our little mini staycations whenever he has a day off during the week. Our goal is to go somewhere one day a week throughout the summer, but in reality, it will probably be slightly less than that. Still, we plan to pack our summer full of fun and exciting memories despite the fact that we’re not truly “going on vacation”.

Just in case you are in a similar boat (no time off, no money, no inclination for a real vacation), here are some ideas to help you enjoy your summer anyway! And on the cheap, too, of course, because that’s how I roll.

Family Self Portrait taken at Maymont Estate in Richmond, VA

1. Scout Out NearBy Tourist Spots

We are lucky to live in an area where we are approximately 2 hours away from a whole host of hot tourist spots: Washington DC, Baltimore, Annapolis, Richmond, Gettysburg, the Shenandoah Valley, and more. Day trips to places like Williamsburg or the Eastern shore are not out of the question. Not to mention the whole host of local, lesser-known historic towns and spots that boast all sorts of free or nearly-free touristy fun, like historic home tours, botanical gardens, zoos and the like. So we can literally spend the whole summer being tourists in our own town without visiting the same place twice.

You may or may not be so blessed, but I bet if you take the time to look at your area through the eyes of a tourist, you’ll find more options than you thought possible for stay-at-home fun, entertainment, and even learning. Chances are, the city (or big town) nearest to you has a website (or possibly even an app) with all sorts of tips on the best sites for tourists to see. Find favorite local spots like restaurants, historic homes, parks, recreation, museums, and more.

Don’t forget to think outside the immediate area as well. Decide how far you’re willing to drive for a day trip (maybe an hour? Two? Three, perhaps?) and widen your scope to check out what’s available in that radius.

Depending on what sort of things your family likes to do, you might enjoy any of the following types of tourist spots:

  • national/state parks
  • museums
  • historic homes
  • gardens
  • nature preserves
  • zoos
  • amusement parks or entertainment parks
  • historic old town centers
  • scenic drives
  • natural sites (like caverns, waterfalls, and the like)

He found a car just his size at the local coffee shop car show.

2. Visit Favorite Local Haunts

Let’s switch gears a little bit and get hyper-local here. Whether or not you’re already plugged into the local scene, make it a priority to visit all of your town’s hot spots this summer. I’m talking about the ice cream parlor that has lines out the door every day through the season, or the pizza joint that everybody knows about and has been to at least once. What’s the favorite playground or park that all the mommies know about? The coffee shop that’s crowded on Saturday mornings because of the uh-may-zing donuts and fresh lattes they carry? (Or maybe, as in my case, the local coffee shop that hosts a car show every Saturday morning? Now that’s a fun - and free - summer activity!)

If you don’t know where these local favorites are, you can find them simply by giving a little shout-out on Facebook. Your friends should be able to point you in the right direction. Or if your town newspaper/magazine hosts a “Best of” contest every year, check those out.

Cheap Fun: Train Rides at the Mall

3. Plan a Day of Fun

You don’t even need to “get away” for your day-by-day staycation! Really, all you need to do is plan a day around activities that are enjoyable to everyone in your family, and just a little different from your usual routine. Think about what your perfect relaxing day would look like, and make it happen!

Here’s an idea for a “Staycation Schedule”:

  • Sleep in.
  • Enjoy brunch at a leisurely hour.
  • Go to a local pool for the afternoon (or play water games in your back yard). AND/OR go to the mall and get cheap carousel rides or train rides, or play in the mall’s playground.
  • Make everybody’s favorite food for dinner as a family.
  • Go to the town’s free outdoor concert or movie (many towns host these on a weekly basis through the summer).
  • Finish the day by “camping” in your own backyard. Borrow a tent if you don’t have one, or put sleeping bags in the living room!

A day trip to a lavender farm, sponsored in part by a daily deal my sister bought.

4. Check Daily Deal Sites

Sites like Groupon, Eversave, Living Social (and/or the local version in your area - around here, we have Specialicious) are a great source of good deals on local entertainment. You’ll get vouchers for at least half off to such local places as:

  • restaurants
  • bowling
  • mini golf
  • local events
  • concerts
  • sporting events
  • classes
  • pool/water parks
  • and lots more!

Using deal sites like this might make summer fun activities affordable for your family when they wouldn’t be otherwise. We’ve used these deal sites to get half priced entry to the local water park, which The Boys absolutely loved! It’s not something we’d pay full price for, but half price was totally do-able, and definitely worth it.

Playing in the sandbox at the local botanical gardens.

5. Attend Local Festivals & Events

It seems like there’s always a festival nearby around here. Some of them cost, some of them don’t. Some of them are worth it, some of them are not! The county fair is always free, and is always fun for the kids - animals to pet, shows to watch, and exhibits to enjoy. Other festivals celebrate local crops or industries, or even just townships. Do a quick Google search by combining your town or county’s name with the word “festival” and you’re sure to find some fun events to attend this summer.

BundleoftheWeek.com, 5 eBooks for $7.40!

Oxygen Bleach, My New Favorite Household Cleaner {PLUS Giveaway!}

Oxygen Bleach has recently become my most favorite household cleaning ingredient. When I first started using oxygen bleach, I bought the cheap stuff at the dollar store; and while it was effective, I quickly realized that it was not pure oxygen bleach. Since I couldn’t figure out exactly what was added to it, I opted to be safe rather than sorry, and go for the good stuff.

Thankfully, around that time, Tropical Traditions offered to send me a big container of their oxygen bleach. I jumped at the chance, of course! And I am so glad I did! Since then, I’ve had the opportunity to try another natural brand of oxygen bleach, and I have to say the Tropical Traditions Oxygen Bleach was of significantly higher quality. It cleaned better and left less residue behind.

What do I do with my oxgyen bleach? The better question is, what don’t I do!? But here are a few of the household uses I have found for my bucket of oxygen bleach:

Clean carpets quickly and easily with oxygen bleach. Oxygen bleach has become just as essential to me as vinegar and baking soda in my selection of household cleaning supplies, and that’s saying something! To compete with those workhorses means a product has to be multi-purpose, effective, inexpensive, and easy to use, and oxygen bleach is all of those things. To be fair, it does cost more to purchase than either vinegar or baking soda, BUT you typically only need to use a tablespoon or less at a time, so it lasts forever. My big container from Tropical Traditions probably lasted a good six months.

Tropical Traditions Oxygen Bleach Giveaway

So you have the opportunity to win your own container of Tropical Traditions’ Oxygen Bleach! Lucky Ducky You! Please fill out the Rafflecopter below to enter the contest. This contest is only available in the US. This contest ends at midnight, Sunday, July 14, 2013.

And now for some legalese before the giveaway begins:

  • If you order by clicking on any of my links and have never ordered from Tropical Traditions in the past, you will receive a free book on Virgin Coconut Oil, and I will receive a discount coupon for referring you.
  • Tropical Traditions provided me with a free sample of this product to review, and I was under no obligation to review it if I so chose. Nor was I under any obligation to write a positive review or sponsor a product giveaway in return for the free product.

If you are not familiar with Tropical Traditions, here’s some info about this great company that provides high-quality food and household goods for those seeking to avoid chemicals and other additives:

  • Tropical Traditions: The Best Place to Get Virgin Coconut Oil
  • How to Use Coconut Oil
  • What is Virgin Coconut Oil?

Note: If you’re having trouble accessing the giveaway below, try entering via my Facebook page.

a Rafflecopter giveaway

BundleoftheWeek.com, 5 eBooks for $7.40!

4 Books I’ve Been Reading (That I Highly Recommend)

First of all, can I just say that I love my Kindle? (Actually… what I really love is my Kindle app on my tablet… but my Kindle makes it possible to enjoy my Kindle app… so I love my Kindle!) I’ve been thoroughly enjoying my Kindle in the last few days, and have actually devoured quite a few brand-spankin-new eBooks in the past 24 hours. I’ve been toting my Kindle everywhere - to the living room, to the dining room, to the kitchen, to the bedroom, and, of course to the bathroom (where else does a busy mom find time to read?!).

Whether or not you have Kindle, too (my friend Erin wrote a very helpful post about reading digital books without an e-reader), you can benefit from the ever-growing digital library of wisdom out there that is far more accessible (and takes up a lot less space) than its old-fashioned hard-covered, paper-backed ancestor. In particular, there are 4 recently published digital books that I have been perusing the past couple days and highly recommend to you!

Cloth Diaper Guide
1. Confessions of a Cloth-Diaper Convert

Whether you’ve been cloth-diapering (or CD-ing, as the lingo goes) since before it was popular or are pregnant with your first little one and curious about the possibility, you will learn something in The Humbled Homemaker’s brand new eBook, published just a few weeks ago. I promise. Erin leaves absolutely no stone un-turned and shares every little shred of knowledge she has learned in her years of researching (and using!) cloth diapers. I totally wish I had access to this book when I was researching cloth diapers, because I would have avoided some mistakes along the way that led to the demise of my first set of CD’s. Confessions of a Cloth Diaper Convert is currently available right here via PDF for $9.95 (But the price is going up soon, so get it while you can!).

2. Accidentally Green

Accidentally Green is a memoir of one woman’s journey from “normal” to “green“… almost by accident! Wherever you are on your journey to improve your health and your environment, you will identify with the questions, obstacles, and issues that provoked Hillary to discover “new” and better ways to eat, clean, shop, heal, and just plain live! I found myself empathizing with Hilary at times, and admiring her at others. Her determination to research the best for her family is inspiring to me and encouraging as I continue on my own journey to simplify our family life without sacrificing what is authentic and real. As someone who strives to make EVERY decision in life based on the Word of God, I also really appreciated her Biblical perspective. This quick read is available for just $2.99 via PDF, Kindle, and Nook.

IB 300x250 ad 2 Affiliate Program 3. Intentional Blogger


Can you believe that when I first started my own blog, I had never actually read one before? I had only heard of them. It makes me laugh to think about the earliest beginnings of my blog when pretty much me, myself, and I were the only ones who ever visited it. And then when I started it up again - in earnest and for reals - I still had absolutely no earthly idea what the heck I was doing. I didn’t even know for the first year that I could actually monetize it beyond Google Adsense. Crazy, right? Too bad I didn’t have LeighAnn and Nikki’s new (as of yesterday!) eBook, Intentional Blogger, then! I would have started out right instead of making a zillion mistakes along the way and falling flat on my face more than once. Huh! If I had read their book first, I might even be a mega-blogger today (Haha!)!!

Clearly, I’m in the place where I’m supposed to be… but if you’re a blogger at any stage, I really think you need to read this eBook. Packed - and I mean PACKED - with resources, you’ll have everything you need to take your blog to the next level (whatever that is). And I love their emphasis on focusing on God and what HE wants from your blog. You won’t be a success without that determination as your guiding focus. And since it’s a brand new eBook, you can currently get this book for $12 (25% off the price) by using the code “LAUNCH25″ at checkout. (Only for a limited time.) Alternatively, if you subscribe to the authors’ newsletter, you can get 50% off the purchase price until 8am April 26 (which is Friday morning). Buy Intentional Blogger here.

Easy Peasy Chores @ GoodOldDaysFarm.com 4. Easy Peasy Chores

This last one is more of a tool than a book you sit down and read. But WHAT a tool it is!! Busy mamas everywhere have been needing this resource for a loooonnngggg time. I can remember back when I was growing up, and my mom organized our chores using index cards in a little file box. She would have loved this system! Alina has broken down all the possible chores that need to be done in your home into simple tasks that even the children can help with. Whether you want to organize the tasks by person, by room, by zone, or by day of the week, you can do so with this - truly - easy peasy system. There’s an initial cost for printing out the cards and purchasing the supplies, but Alina’s even got some great ideas to help you get started with minimal out-of-pocket expense. I am SO excited to get The Boys (ages 4, 2, and, um, 33) and myself started on this house-cleaning system, especially now that I’m teaching again and my boys are going to school with me. Anything that simplifies my life excites me, and I’m pretty sure you’re going to find this resource exciting, too! It’s only $15.99, and it’s worth every stinkin’ penny. (It would honestly be worth even more.) You can buy the Easy Peasy Chores system for yourself here.

PS> Several of these books will be available in an eBook bundle sale coming up next week. $30 for almost 100 eBooks, all of them just as good as the ones I mention below. It’s not a hard choice to make… $16 for Easy Peasy Chores today? or $30 for Easy Peasy Chores PLUS 96 other books, ecourses, printables, planners, etc etc?! Yeah, like I said, not a hard choice. It’s coming on Monday, so stay tuned!

PSS>My very own eBook - Your Grocery Budget Toolbox - is in the same eBook bundle. Yippee!

PSSS> The very last one I promise. I’m a total cheapskate, but even I have to say that this bundle deal is gonna be kickin awesome and totally worth it. $30 is a lot to spend on books all at once, but it’s WAY more than books. Stick around and I’ll be telling you more about it here on the blog, on FB, and on Pinterest.

PSSSS> Oops. Really the last one. I forgot to mention that there are more than $140 in bonuses that come with each purchase of the book. Seriously, this is a no-brainer.

BundleoftheWeek.com, 5 eBooks for $7.40!

Mother’s Day Gift Idea

This post is sponsored by South Hill Designs Independent Consultant Katie Parsons.

Mother’s Day is just around the corner - it might be a month away yet, but that’s just enough time to find the perfect gift for the perfect mom! And I have the perfect gift idea for you: a personalized, custom necklace from South Hill Designs.

South Hill Designs helps you create necklaces that tell your story. You start with a silver or gold locket and then fill it with carefully chosen items that reflect the people and things you love best. There are flat hammered metal coins with words like “Faith”, “Family” or “Blessed” that form the backdrop for your life-story-in-jewelry. Fill the remaining space in the locket with charms that identify your heritage (small flags), your hobbies and passions (a red high heel, anyone?), birthstones of the people you love, or symbols of your faith. Top it all off with a “droplet” that dangles from the chain and you have a lovely, personalized necklace that’s unique to you alone.

Are you seeing why this would be such a perfect gift for Mother’s Day?! My own necklace is a silver locket with a tin that says “family”, filled with an emerald birthstone for me and my DH (we were both born in May), and two little boy charms with the appropriate birthstones, plus an ichthys to represent our faith. I love it and wear it all. the. time!! It’s like keeping my family with me throughout the day no matter where I am or what I’m doing.

If you agree with me that this would be the perfect Mother’s Day gift, you should check out Katie’s Facebook Party for April. Follow the instructions for ordering and you can get shipping for only $4! Katie’s got some great ideas for filling your lockets to impress and honor the moms on your list.

Mother’s Day isn’t the only perfect time for South Hill Designs, though. You can give personalized necklaces for birthdays, Christmas, and just-because! Or you can get one for yourself… or two, or three.

BundleoftheWeek.com, 5 eBooks for $7.40!