Super Fast and Simple Football Cake

I think it’s kinda funny that I am writing a Super Bowl post, because I have absolutely no interest in the Super Bowl. Not even this year, when the local team actually has a shot at the big game. The honest to goodness truth is that I could care less about football.

In fact, this cake has nothing to do with the Super Bowl. I actually made it for Tiger Cub’s second birthday a couple weeks ago, and am just now getting around to posting it, but I figured that was pretty good timing with the Super Bowl only a few weeks away. Around here, football fever is reaching an all-time high as the local fans get their hopes up, so it seems very fitting all around.

If, like me, the Super Bowl is not your thing, then perhaps you could find another use for this fun and simple cake. Maybe a child’s birthday? Father’s day? Little boy baby shower? Whatever the case, football is a fun theme and a super easy cake to make.

Trust me. I don’t do hard cakes. This is pretty much as easy as they come.

The Cake

My standard birthday cake recipe hitherto has been one variation or another of the Wacky Cake because it doesn’t require eggs or butter. Up until recently, The Boys were allergic to those things, so I avoided them. My favorite version is the Mocha Wacky Cake - just double the baking time for this cake. If you prefer not to have a mocha flavor, just use water instead of the coffee.

But really, you can use whatever chocolate cake recipe you want. The more important thing is how you bake it.

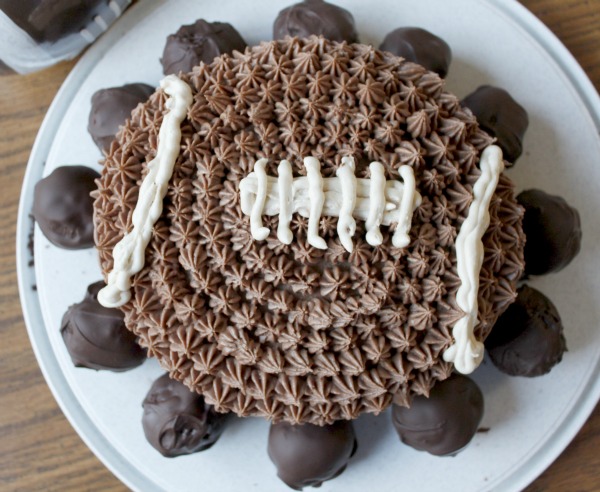
To make the football shape:

  • Bake your cake recipe in 2 round pans.
  • When the cakes are removed from the pans and completely cooled, cut a 1″ wide strip out of the middle of each layer so that you have 4 half circles.
  • Slide two half circles together until they meet to form the bottom layer.
  • Frost the bottom layer liberally, then top with the remaining two half circles.
  • Voila! You have just made a football-shaped cake!

Told ya it was easy.

The Frosting

The frosting is also easy because you do not have to fool with food coloring. Because, as Matthew McConaughey said so eloquently in The Wedding Planner, “Chocolate’s already brown.” Simply add a tablespoon of cocoa powder to the frosting recipe found here (or use your own favorite chocolate frosting) after you reserve about 1/4 cup of frosting for the laces.

Cover the cake in a thin layer of frosting to seal in the crumbs. Allow it to set until it’s firm to the touch. Then fill a decorator’s bag with your frosting, fitted with a star tip. If you’ve never piped stars before, here’s a video I found that illustrates the process:

Pipe stars to cover the top of the cake. If you’re not into stars (although I think they give a nice professional finished look to the cake), just swirl the frosting on with a knife. You can frost the sides, too, if you want. I only didn’t because I was running out of time, but next time I probably would.

Once the football is covered with chocolate frosting, take the reserved plain frosting and place it in a decorator’s bag with the round tip. Pipe the lacing onto the top of the football.

The Cake Balls

Now you know I can’t bear for any food to go to waste. Remember those strips of cake cut out of the middle of the circles? There was no way I was going to throw away that deliciousness. Nope! I turned it into cake balls.

You can do the same: all you need is a little bit extra frosting and some chocolate chips to melt. Here’s the process.

  • Simply crumble the strips of cake into a bowl, then stir in frosting until you have a mixture that can be formed into balls. (You should get about a dozen.)
  • Place the balls on a cookie sheet and freeze until firm.
  • Melt 1 cup of chocolate chips with 1 TBSP of palm shortening (or other oil) over low heat until smooth.
  • Dip the frozen balls into the melted chocolate and then place on a sheet of wax paper to set.

If I’d had time, I would have experimented with piping helmet details onto the balls with white chocolate or frosting to turn them into little mini football helmets, but I ran out of time. If you give that a try, let me know! And take a picture so I can see. I think it would be super cute!

So there you have it… a super simple football cake for the Super Bowl, or your next birthday party. Fun and easy - I love it!

How do you feel about the Super Bowl?

BundleoftheWeek.com, 5 eBooks for $7.40!

The Easiest Allergen-Free Birthday Cake Ever!

easy allergen-free birthday cake

Can you believe that my Certain Little Someone (who is getting woefully Bigger and Bigger each day, and is not so Little anymore) requested to have the same birthday cake at his fourth birthday party that he had for his second birthday party? Apparently, it made a big impression on him! Or maybe the spectacular fail of his third birthday cake made an even deeper impression (*snort*). In any case, I obliged and made him a replica of his second birthday cake decorations, but I did update the actual recipe a bit.

Since his second birthday, I have been blessed to discover the wonders of spelt, and I knew that I just had to make his birthday cake out of spelt flour. Finally, a yummy-tasting, staying-together, not-so-crumbly cake that everyone - including the birthday boy - could enjoy. Yes!

I am happy to be over at Baking Whole Grains today, sharing my super easy and almost-healthy allergen-free birthday cake recipe.

Find other interesting and informative posts at: Tip Me Tuesday, Trivium Tuesday, Mom’s Library, Titus 2sday, Teach me Tuesday, Hip Homeschool Hop, Titus 2 Tuesday, Delicious Dishes, Open Call Tuesday, Tiny Tip Tuesday, Healthy 2Day Wednesday, Frugal Days Sustainable Ways, Works for me Wednesday, Women Living Well Wednesday, Real Food Wednesday, Whole Foods Wednesday, Allergen-Free Wednesday, Encourage One Another, Life in Bloom, Thought-Provoking Thursday, Simple Lives Thursday, Homemaking Link-Up, Tastetastic Thursday, Keep it Real Thursday, Frugal Thursday Rewind, Homeschooling on the Cheap, Fellowship Friday, Fight Back Friday, Feast in Fellowship Friday, Frugal Friday, I’m Lovin’ It, Weekend Bloggy Reading, Snacktime Saturday, Show & Share Saturday, Weekend Whatever, Motivation Monday, Mom’s Monday Mingle, Homestead Barn Hop, The Bulletin Board, Better Mom Mondays, Natural Living Monday, Tip Me Tuesday, Trivium Tuesday, Mom’s Library, Titus 2sday, Teach me Tuesday, Hip Homeschool Hop, Titus 2 Tuesday, Delicious Dishes, Open Call Tuesday, Tiny Tip Tuesday,

BundleoftheWeek.com, 5 eBooks for $7.40!

An UNO Birthday: The Cake

UNO birthday - cake

The cake is, after all, the most important part of the whole shebang. Decorations are nice, and everybody loves food, but the cake is the real show-stopper. Or it should be.

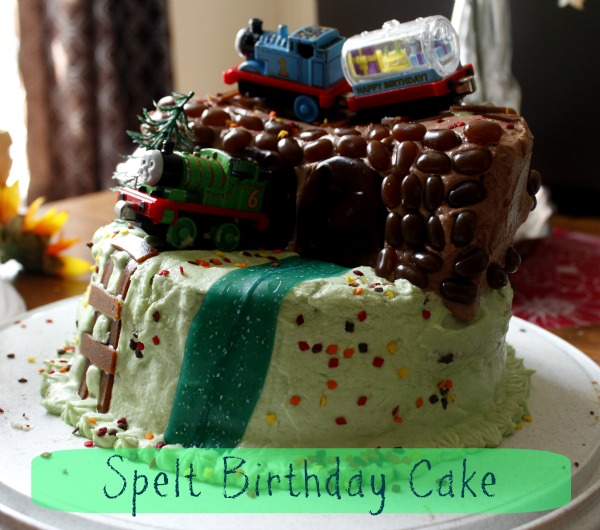
I wouldn’t exactly call this particular birthday cake a “showstopper”. It’s cute and all, but it doesn’t scream, “LOOK AT ME!”. My previous decorated cake attempts were all a lot more spectacular (the rainbow fish cupcakes, the Thomas Aquaduct, and the race car) than this one, which was sort of a let-down.

But I couldn’t handle too much more than this, coming off of Christmas and all, and having very little time to prepare. Quick and Easy was my main concern, and Cheap was right behind it.

Healthy was also of concern - I wanted to finally make a cake with natural food coloring! I’ve been intending to for years, but never have actually done it. With this simple design, I figured it was the right time.

So, with all those things in mind, here is what we ended up with.

UNO birthday cake

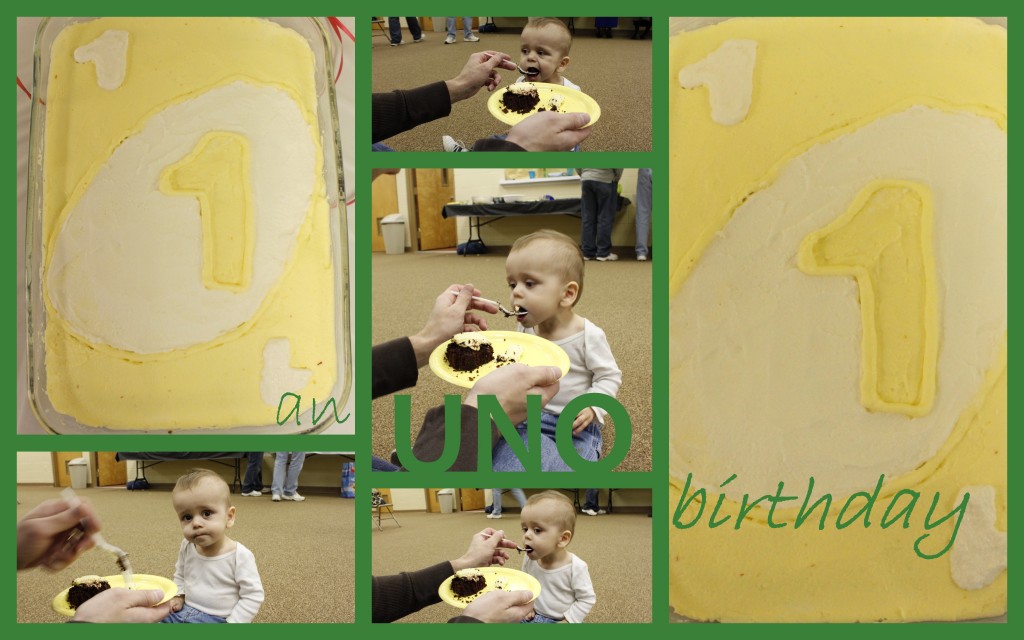
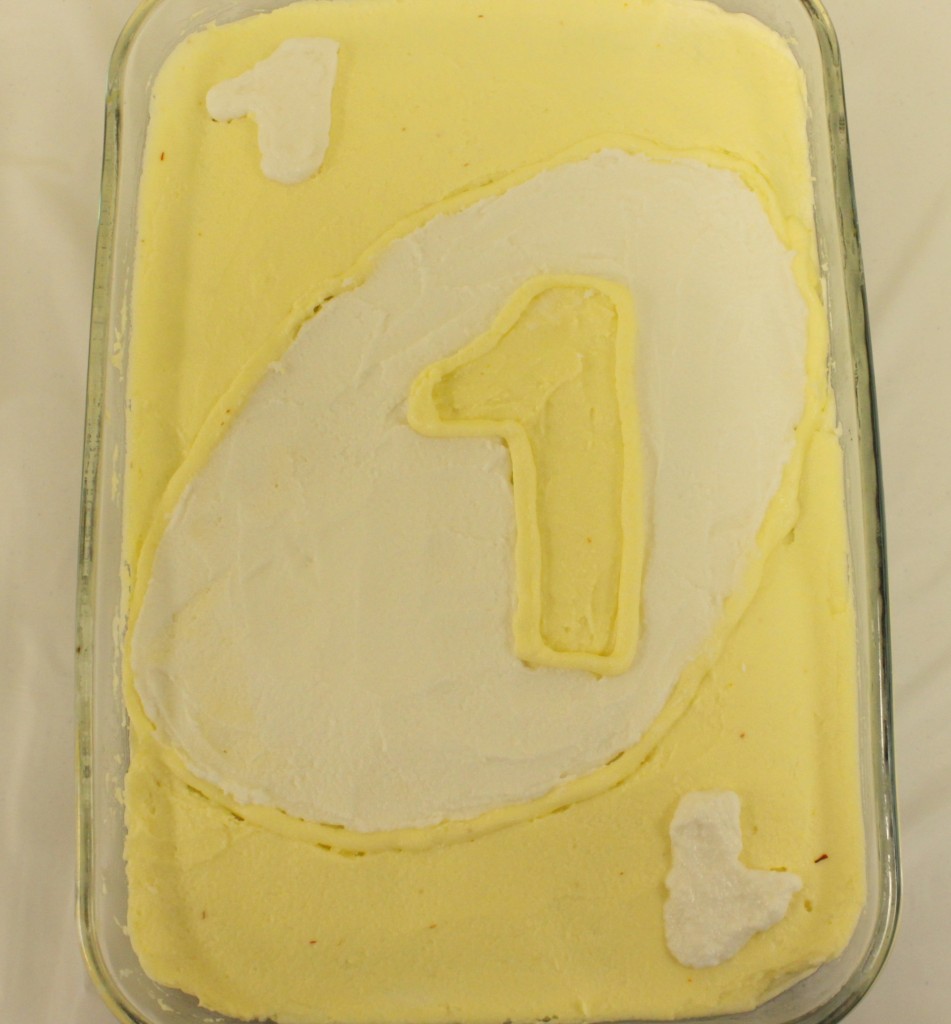
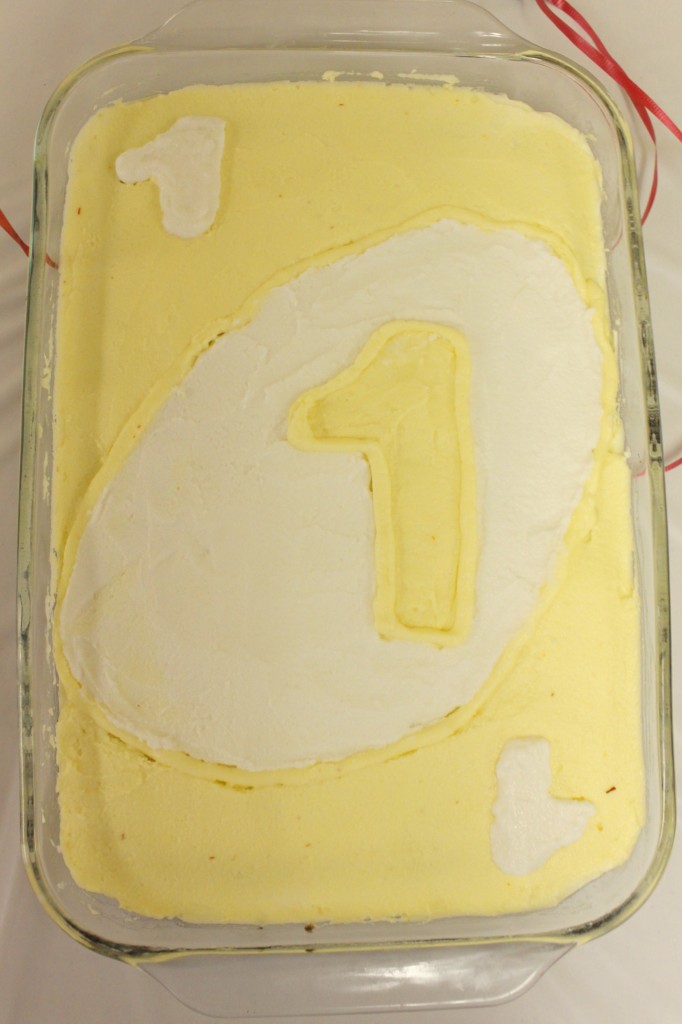
Of course, it’s patterned after an UNO card with the number 1. It was very easy. I used 2 batches of homemade dairy-free decorators frosting, tinting one of them yellow with saffron.

Let’s talk about saffron for a second. Saffron is one of - if not the most - expensive spice due to its labor-intensive and tedious method of harvesting. At a regular grocery store, you can spend as much as $20 for only a small amount. The small bottle I have (which has lasted me for quite some time since I rarely cook with saffron) was actually purchased at Trader Joe’s for a much lower price. I don’t remember exactly how much it was, but I can tell you it was less than $10. And it is still available there, as I have seen it on recent trips. I wouldn’t have used saffron as my coloring agent except that I happened to have it on hand. Another option for yellow coloring is turmeric, which is not quite as expensive.


To color the frosting, I replaced the 3 TBSP of water called for in the recipe with saffron-dyed water. To color the water, I placed some saffron in a small bowl and crumbled it in my fingers. Then I poured 3 TBSP of hot water over it, swished them all together and let it sit for a while until the color deepened. Don’t worry if it looks orange; that’s actually a good thing, and indicates a stronger yellow color. I probably didn’t put as much saffron in the water as I should have, hence my very pale yellow. I would recommend a good well-filled teaspoon worth of saffron for a stronger yellow. Mine was probably more of a half teaspoon.

To make the design, I first frosted a 9×13 single-layer cake with one thin layer of yellow frosting. I let it set for a little while to create a “crumb coat” so I could avoid picking up crumbs in the actual design. Once the crumb coat was set, I used a toothpick to trace out the slanted oval, stretching from a couple inches down from the top right corner all the way to a couple inches above the bottom left corner. Then I traced out a large UNO-style number one in the center of the oval.

Next was my big mistake. I really should have piped everything with the star tip, but I had most recently used my frosting decorator bag with meringue frosting, and I was concerned that there would be some egg protein left behind. Not good for my allergic little guys! So I just spread the yellow frosting on the background areas with a knife, smoothing it the best I could. (To get it really smooth, I could have dipped the knife in water between each stroke on the frosting, but I didn’t take the time to do that.) Then I just did the old ziploc-bag trick to pipe the outline for the “1″ in the center, and the oval. I finished up by frosting the oval plain white, and then piping in some small “1″s in the upper left and bottom right corners.

Of course, any UNO-themed color can be used to make this card (blue, green, or red), and any number can be used (up to 9 anyway!). Or you could do a Wild Card for someone whose age should remain a secret!

UNO birthday cake 1

As for the cake itself, I used a new allergen-free recipe at Back to the Kitchen, and wasn’t 100% pleased with the result. It was probably my fault, though. I made my own GF flour blend, but didn’t have any potato starch, so just did without. I think that was probably a big mistake. Looking back, I think that my most successful cakes all had potato starch as part of the flour blend. Plus, I accidentally set the temperature on the oven a little too low, so the cake cooked up funny: it was kind of hard on the bottom. Not overcooked, just sort of… hard. It was weird.

Consequently, I had my DH whip up a batch of Rice Krispies treats (using Erewhon Cocoa Rice Crispy cereal, so it was at least a tiny bit healthier than you-know-the-usual-kind) for all the non-allergic guests to enjoy since the cake was kind of a bust, at least in terms of taste and texture. You know what? Next time, I just might decorate the Rice Krispies treats instead. That’s what the Cake Boss does! Then everybody will be happy. Not healthy, but happy.

Read the Rest of An Uno Birthday Series:
The Food
The Decorations
Linking to Lunchbox Love

Ingredient Spotlight

BundleoftheWeek.com, 5 eBooks for $7.40!

An UNO Birthday: The Food

UNO party food

The decorations were the easy part of Baby Boy’s UNO themed birthday. The next item on the checklist - the food - was a lot trickier.

Let me count the reasons why:

  1. It was right after Christmas, so we weren’t exactly loaded with cash if you know what I mean.
  2. I wanted all the food to be safe for both him and his brother and their allergies.
  3. I also wanted it to appeal to all the guests at the party.
  4. I didn’t have a huge amount of time to prepare it because I only officially settled the date of his party less than a week in advance! Oy!
Yes, you are right. I needed the food to be Quick, Easy, Cheap and Healthy (or at least safe). It’s all sounding very familiar, isn’t it?
Thankfully, I am used to this driving need for QECH food - as if you couldn’t tell - so it didn’t take me long to come up with a menu. And a time for the party. This is of ultra-importance: if you don’t have a lot of money to feed a crowd, then don’t plan your party during a meal time. If you do, your guests will expect a full meal and it would be rude not to provide one for them. But if you plan the party in between meals, say at 3pm, a buffet of snacks will suffice.
And so we had a small buffet of snacks. On the menu:

Tortilla Chips, Salsa and Guacamole

The guacamole (not pictured) was a big hit, possibly because of my addition of cumin, and possibly because I followed my sister’s recommendation to use fresh rather than dried cilantro. Both add a lot of flavor.

I used canned diced tomatoes for the salsa because it’s not tomato season around here, and I didn’t want to risk mealy tomatoes (blech!) in my salsa. In the summer, it’s fresh tomatoes all the way, baby. I do still have some frozen peppers from the farmers’ market this past summer, so a couple of them went into this salsa. The freezer is like a time machine sometimes! Fresh peppers in December… mmmm. This is a very basic salsa recipe, and how I usually make it.

UNO Veggie Tray

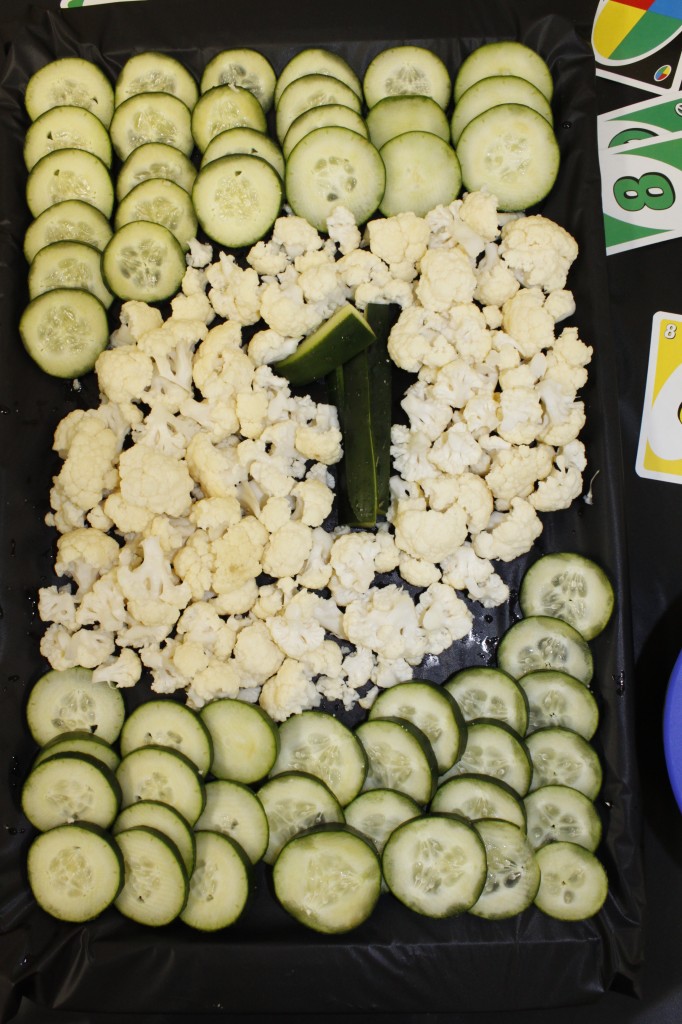
UNO veggie tray Following the success of my Christmas tree-shaped veggie tray, I was inspired to try my hand at an UNO-card shaped veggie tray. You can be the judge of how successful I was, but honestly, I wasn’t 100% satisfied. It was OK, but not great. I’m open to suggestions on how to make it a little more obvious about what I was going for!

Here’s how I did it:

  • Wrap a cookie sheet with a large piece of black plastic (from a plastic table cloth), securing it in back with tape.
  • Set it in a “portrait” orientation (vertical).
  • Slice 1 1/2 large cucumbers in thin rounds. Cut the remaining 1/2 cucumber in sticks.
  • Cut the florets off about 3/4 of a head of cauliflower.
  • In the middle of the “tray”, shape a number 1 using the cucumber sticks.
  • Surround the “1″ with the cauliflower florets in a slanted oval.
  • Overlap the cucumber rounds above and below the cauliflower oval to finish out the card shape.
Homemade ranch dip is my usual accompaniment of choice for a veggie tray, but alas, my children are allergic to dairy, and I have not found a suitable dairy-free and soy-free way to make ranch dressing yet. So I opted for bean dip, instead, which was actually quite yummy! Since then, I’ve used the dip as a spread on sandwiches and wraps, and it’s equally tasty that way. I used Annie’s Eats White Bean Dip, except with pinto beans that I soaked and cooked instead of the canned cannellini beans.

Wild Card Fruit Tray

I was also not 100% satisfied with the final look of this one, at least in part because I couldn’t find any blueberries anywhere! I know it’s out of season, but typically you can find them somewhere, even if at a price. So I used red grapes, which were kind of purple-ish and therefore the closest thing I could find.
The Dollar Tree had a perfect little oval shaped plastic tray that worked pretty well to form the slanted oval shape found on UNO cards. The UNO wild card design I was working from (from a deck probably at least 10 years old) is just a slanted oval divided into four equal parts, each one a different color (in the pattern you see here.). The newer design actually has WILD written across the middle in big letters, which would clearly make it more obvious, but I’m not sure what you’d use to do that. Anyway, here’s how I made my Wild Card Fruit Tray:
  • Cover a cookie sheet with part of a black plastic table cloth, and secure in the back with tape.
  • Place an oval tray at a slant, centered lengthwise, on the cookie sheet (oriented “portrait” style, once again).
  • Mentally divide the oval into 4 equal parts: in the top left, place chopped strawberries; in the top right, grapes (or blueberries); in the bottom left, chopped pineapples; in the bottom right; green grapes (or kiwi).
To round out the menu, I also had planned a deli meat tray (for meals at home, I always buy nitrate-free uncured meats, but I wasn’t about to spring for enough of that to feed a whole crowd!), and bought a whole pound of ham. Alas, the party was held elsewhere because we didn’t have enough room in our apartment to fit everyone, and I left the ham at home. So now we are feasting (ahem!) on nasty store-bought deli ham. Oh well. I suppose we’ll live!
I also served potato chips because they are a big favorite of my Certain Little Someone, and I was pretty sure the rest of the guests would be just as happy to eat them as well.
With the exception of the bean dip, all of the things I made for this menu - the guacamole, salsa, bean dip, and fruit trays - came together very QUICKly the morning of the party. The beans did have to be soaked and cooked the day before, but very little of that was hands on time.
It was all EASY, certainly. Not exactly gourmet stuff, here!
This menu was relatively CHEAP. My goal was to spend less than $30 on the food, and I’m honestly not sure if I succeeded or not. The week of the party was so crazy, and I was just buying stuff randomly here and there when I had the chance, that I don’t even know exactly how much I paid. The produce was kind of expensive because it was mostly out-of-season, but in-season produce isn’t exactly conducive to finger foods (a hunk of raw parsnip anyone?). I’m guessing my total was between $30-$40. Not too shabby.
It was relatively HEALTHY, as well. With the exception of the potato chips, and would-be deli lunchmeat, it was fairly healthy spread. I didn’t even mind that my Certain Little Someone had 4 plates full! Some may quibble that the fruit was neither in-season, nor local, nor organic, but such folks likely have a much larger purse than I, and can afford to feed the starving hordes such luxury.
Read the Rest of An Uno Birthday Series:
The Decor
The Cake
Sharing with Tastetastic Thursday.

Cast Party Wednesday Miz Helen’s Country Cottage

BundleoftheWeek.com, 5 eBooks for $7.40!

An UNO Birthday - The Decor

Benjamin bday collage

Last weekend was my Baby Boy’s first birthday, can you believe it? An entire year has passed since he was born! And as you can imagine, planning a birthday in the midst of all the holiday mayhem was, to say the least, challenging.

My friend Leigh Ann of Intentional by Grace came to my rescue with a simple but fun first birthday theme that she had come across on Pinterest for her own child’s first birthday. The idea was so charming, I had to steal it (my apologies to Leigh Ann, who had the idea first!). And many thanks to the awesomely creative people who come up with these ideas in the first place. I am totally in your all’s debt! (And so are my kids, because Mommy could never come up with such cool stuff from her own head!)

The birthday theme idea, of course, was based on the game UNO. You know, for the number one. (In case you were unaware, “uno” means one in Spanish. Just in case you needed to know that.) As it happened, I had an old box of UNO that was missing quite a few cards (not to mention that someone put a new box of UNO in my stocking!), so I took that as a heaven-sent serendipitous sign that the UNO party was just meant to be.

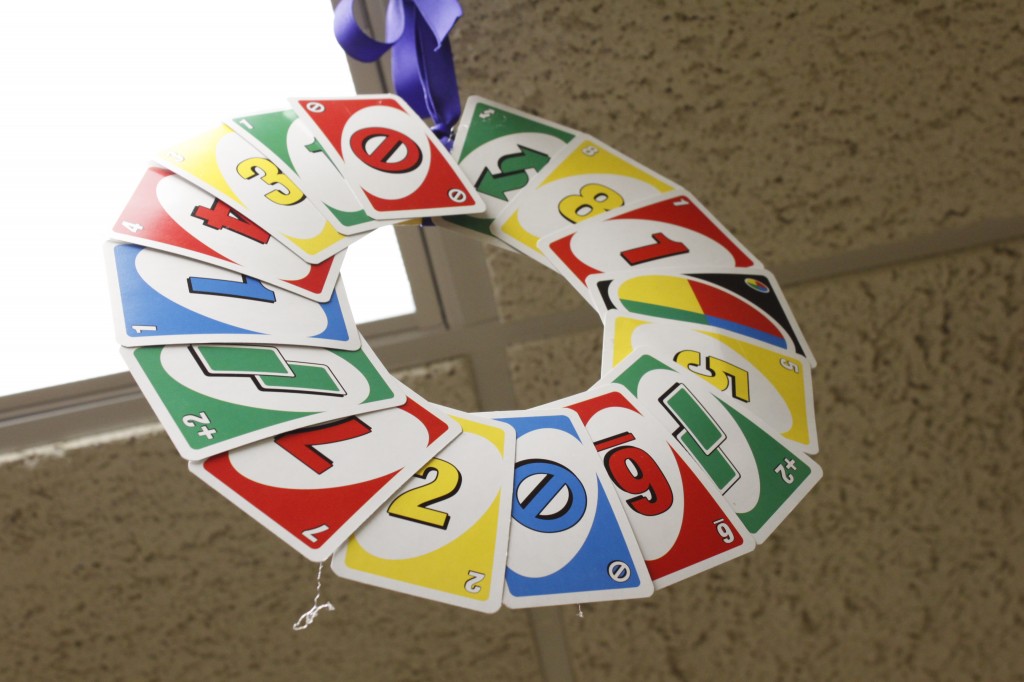
One thing I LOVE (L-O-V-E!) about this theme is that the decorations are so terrifically cheap (a good thing considering the state of our bank account right after Christmas!). I used random supplies I had around the house to throw together some fun decor that was bright and cheerful and just screamed “party!”. All the decorations were made with that same a-few-cards-short-of-a-full-set! Add to that non-investment, 2 paper plates, a long string of curling ribbon, a stick of hot glue, and some random pieces of tissue paper (oh, and 2 pieces of felt), and you have the sum total of the items needed for UNO party decor.

The other thing I love is that it has a built-in color scheme: red, blue, green and yellow (plus a little black). Easy peasy. No thinking necessary.

Oh, and by the way, this party theme is not just for one-year-olds! Any kid, or even adult, who loves games or numbers would have a blast with this party theme!

UNO wreath

This UNO wreath was a last minute inspiration that I literally whipped up in 2 minutes. And then I still had a ton of UNO cards, so I whipped up another one in a couple more minutes. This one’s a no-brainer, people. Take a large sturdy paper plate, and fold it in half. Cut out the inner circle, leaving the outer ring to form your wreath shape. Knot a ribbon around the top, then tie it into a bow. Lay the plate flat on a table, and use hot glue to attach UNO cards to the plate to form the wreath. I tried to match up the top left corner of each card to the top right corner of the previous card, slanting each one at a slight angle.

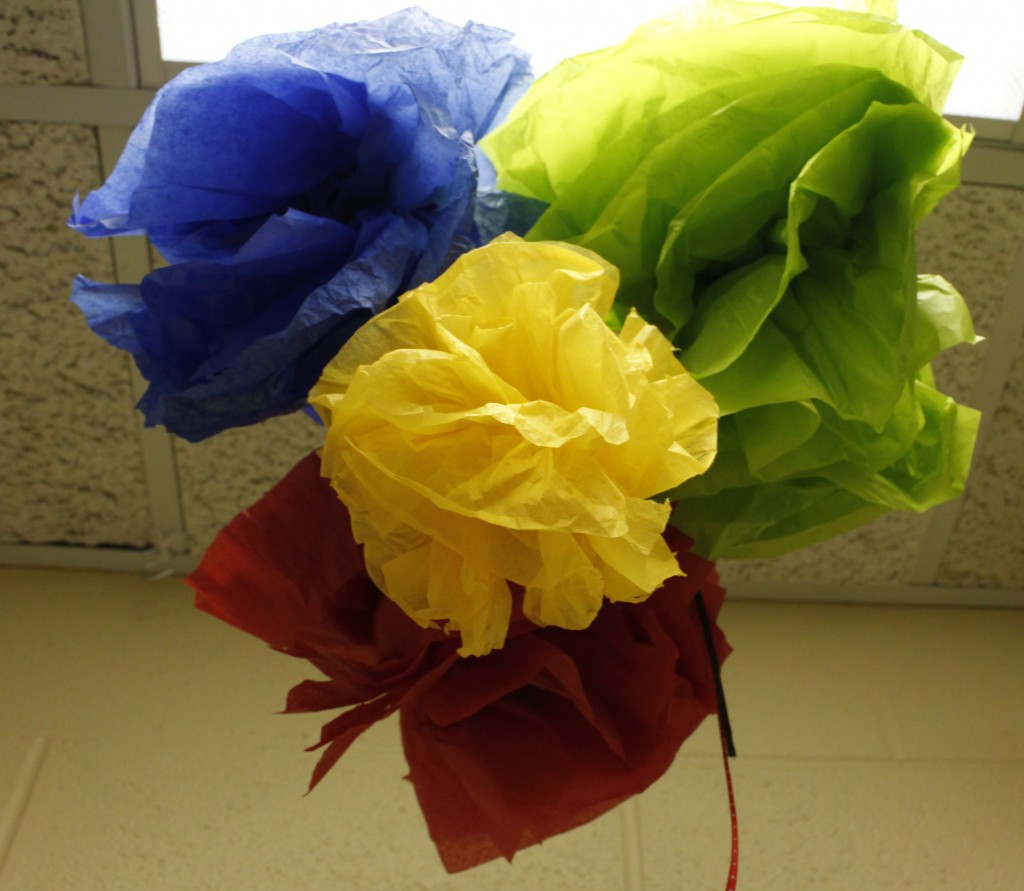
tissue paper pompom cluster I made these tissue paper pom-poms using up some tissue paper languishing in my present-wrapping-box. I will spare you my own garbled attempt to explain how to make them, and direct you to this great picture tutorial instead. I used the colors from the UNO theme - red, blue, green and yellow. Black would be a nice addition, but I didn’t have black. I could have hung these up individually, but my DH and I decided to hang them together in a cluster above the birthday cake to draw attention there. It was a great choice! The cluster had more impact than individual pom-poms would have, I think.

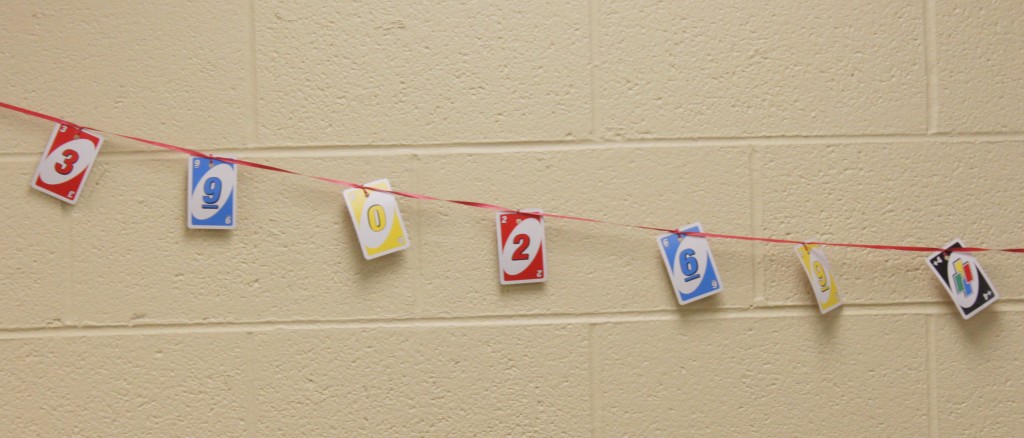
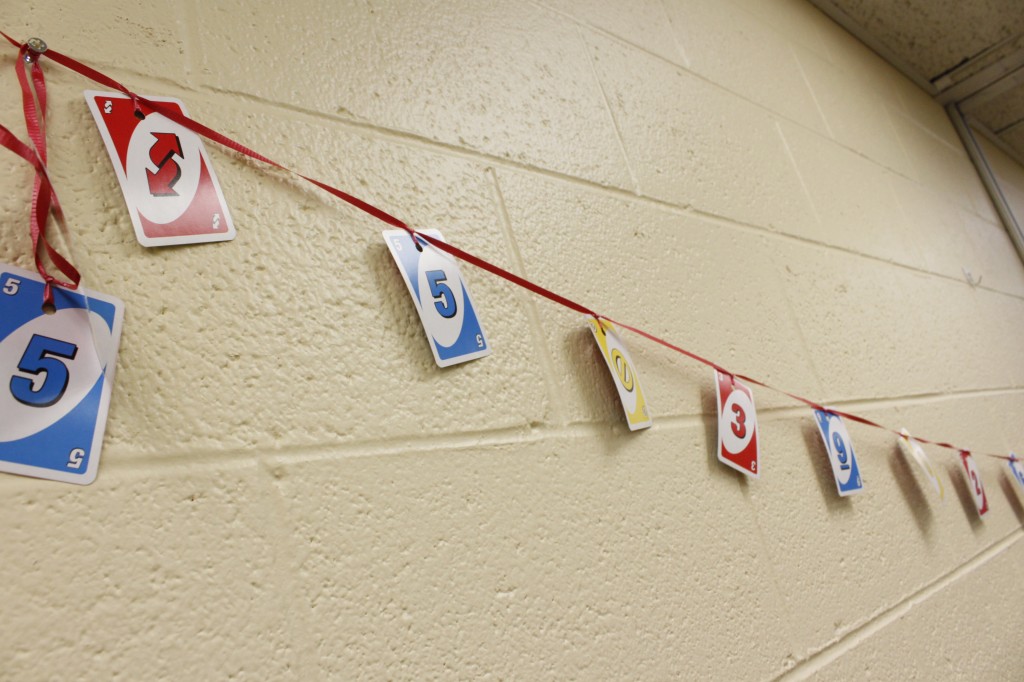
UNO garland To make an UNO garland, you’ll need to start with a tremendously long piece of curling ribbon (I used red because it’s what I had.). To secure the cards to the ribbon, you’ll want to tie a knot on each one. To do this, start with a long piece of curling ribbon. Punch a hole in the top of an UNO card, and thread the ribbon through it, leaving about 6″ or so on the left for hanging. Tie a knot and pull it taut just above the card. Then thread another card through the ribbon, once again tying a knot. Keep adding the cards one at a time, tying the knot for each one, until you come to the other end of the ribbon, once again leaving about 6″ or so for hanging. Voila! An UNO garland!

another UNO garland

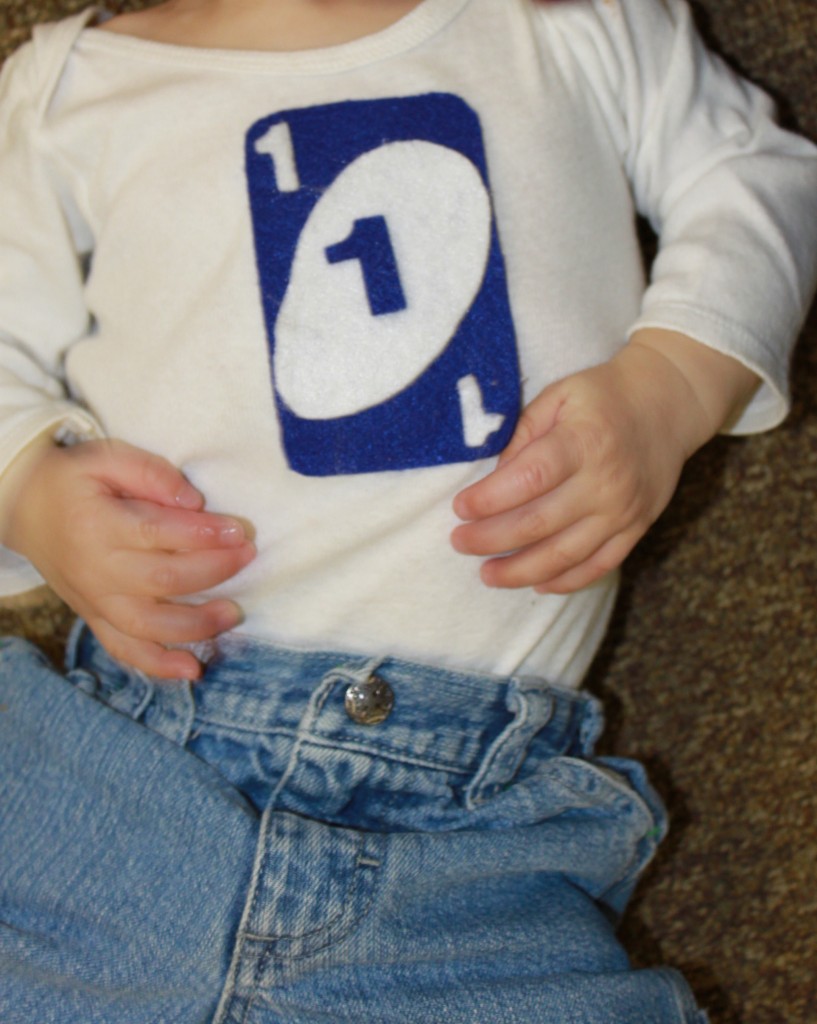
Even the birthday boy was part of the decor! Check out his designer onesie:

UNO onesie I used two pieces of felt (Warning: do not try to use peel’n'stick felt. It doesn’t stick. Just so you know.), one blue and one white (you couldn’t tell that yourself, could you?!). I cut a rectangle to fit the front of his onesie out of the blue felt and attached it via the adhesive on the back of the peel’n'stick felt. Bad decision. I should have hot-glued it on, because it wouldn’t stay put once we got to the party. Lesson learned! Thankfully, the white felt was not peel’n'stick! I cut out a slanted oval to fit in the center of my blue rectangle and attached it with hot glue (And it stuck. Like glue.) I also cut out some mini little “1″s from the white felt and glued them to the top right and bottom right corners. Then I cut a larger “1″ (all of them attempting to replicate the UNO font) out of the blue felt and stuck it to the white oval. To this day, I do not know where it is. *Sigh* If you want a more permanent onesie, of course, you can skip all the gluing, and use iron-on backing and/or sewing it to secure around the edges. I was just going for the effect that day, so it wasn’t a really big deal that it wasn’t a permanent design.

Ain’t he a cute little model?!

UNO model

Not shown (because I don’t have a picture) are the table decorations, which consisted mostly of black plastic table cloth, scattered with all my leftover UNO cards (yes, I still had more!). I considered running the UNO cards through our shredder to make confetti, but I ran out of time. It made more impact anyway, I think, leaving them whole.

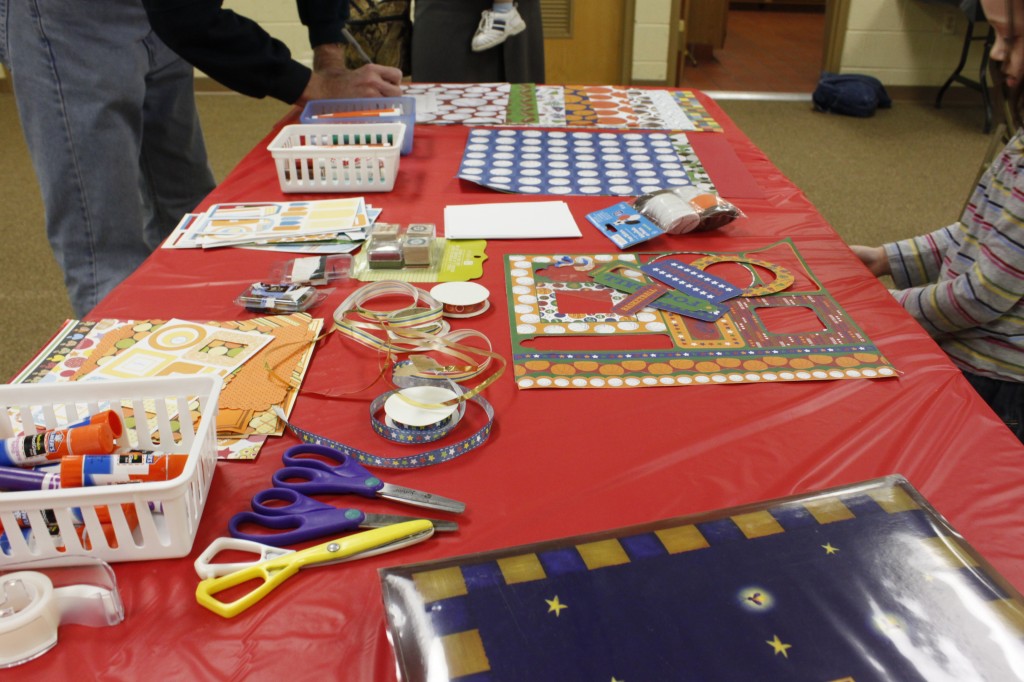
scrapbooking Because, of course, there is no way Baby Boy will remember his first birthday years from now, we (all the guests at the party) made a scrapbook for him. Each person decorated one page and wrote a personal note to him for his birthday. The pages all have an empty spot where I can insert pictures from the party (I predict I will finish this in time for his 21st birthday party). I did the same thing for My Certain Little Someone’s first birthday, and I wanted Baby Boy to have the same special scrapbook.

Each piece of UNO decor was awfully QUICK, I can tell you that! The tissue pom-poms were the hardest part, but once I figured out how to make them, the process went more quickly. I made the garland while watching TV one night, and it was done before the show was over, so it didn’t take all that long.

Everything was super EASY, I assure you. OK, a slight learning curve on the pom-poms, but easier than other things I have done.

We’ve already covered how CHEAP these decorations were.

And HEALTHY as long as you don’t try to eat them.

Read the Rest of An Uno Birthday Series:
The Food
The Cake

BundleoftheWeek.com, 5 eBooks for $7.40!

{Not-So-Healthy} Birthday Cake Decorating Ideas

Don’t forget to enter the giveaway for $50 in Cherry Tree Soaps products!

Every year, the AWANA program at my church hosts a Cake Decorating contest, and all the parents kids get busy making delicious concoctions that are as pleasing to the eye as they are to the tummy. Since the youngest age in AWANA is 3, and my Certain Little Someone will not reach that milestone for a few months yet, I haven’t participated in the contest in the past except as an occasional judge. I do, however, enjoy tasting them in the cake-eating party that follows the judging.


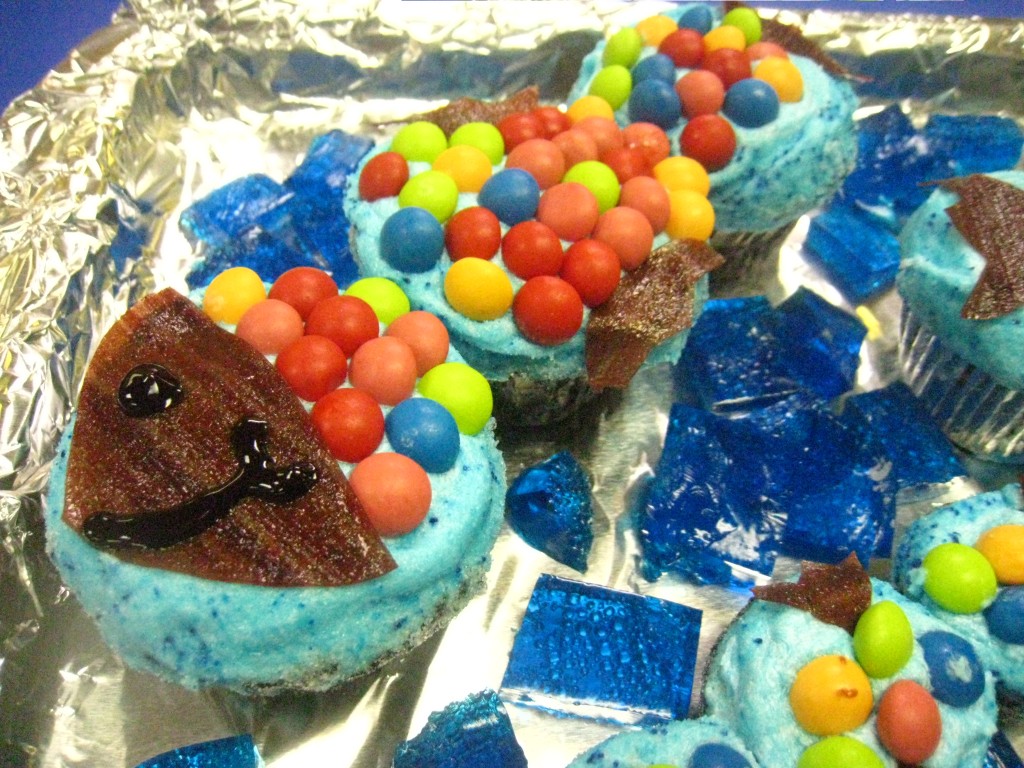
Aquarium

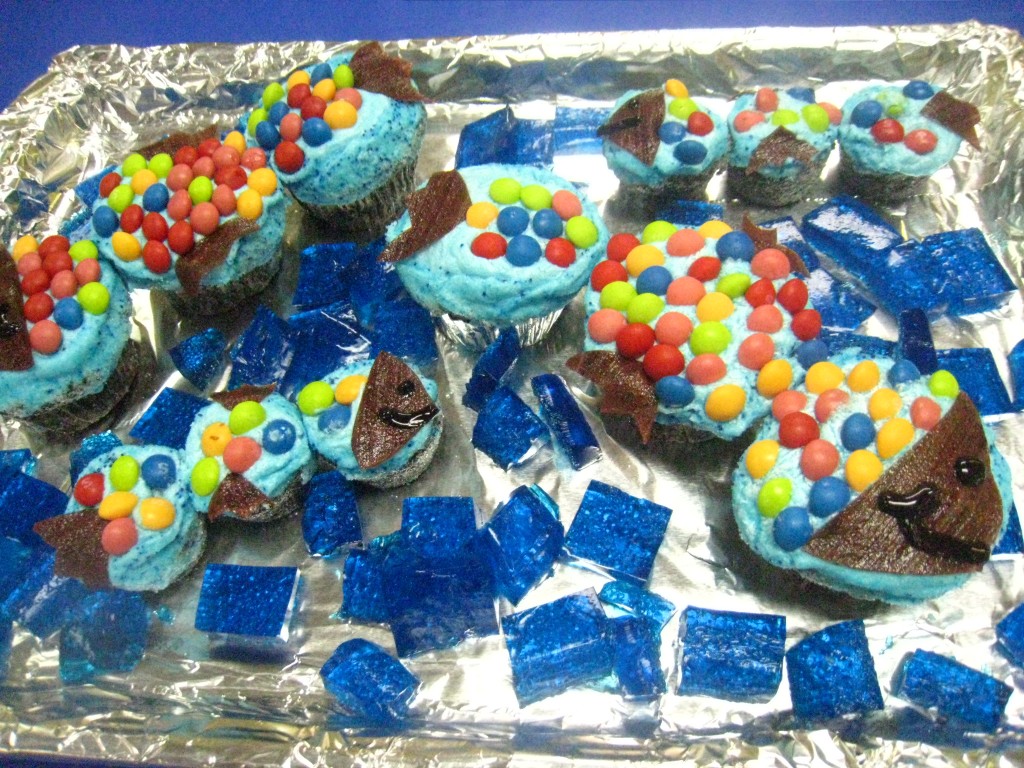
This year, I did submit a cake (or rather cupcakes) to the contest (there’s an adult category), mostly so that my Certain Little Someone would not feel left out, and would have some allergen-free cake of his own to enjoy. I even let him help me decorate. !! Probably a mistake. I really have no words to express how I felt when blue frosting was smeared all across the carpet of my dining room floor. OK, that’s a lie. I did have words. Words they probably heard all the way in Africa, something along the lines of, “WHATINTHEWORLDAREYOUDOING?!?!?!?!? STOPSMEARINGTHEFROSTINGINTHECARPET!!! AAAGGGHHHH!!! {sob}”. (The sob was me, by the way. My Certain Little Someone was remarkably unaffected by the entire incident. Oh, to be 2 again!)

Since my Certain Little Someone is dairy-free and so am I, I didn’t even bother trying to make a healthy frosting. Most healthier frostings rely heavily on the qualities of milk and butter to achieve the right texture and taste, so I’ve given up for the moment on even attempting anything other than basic decorator’s frosting.


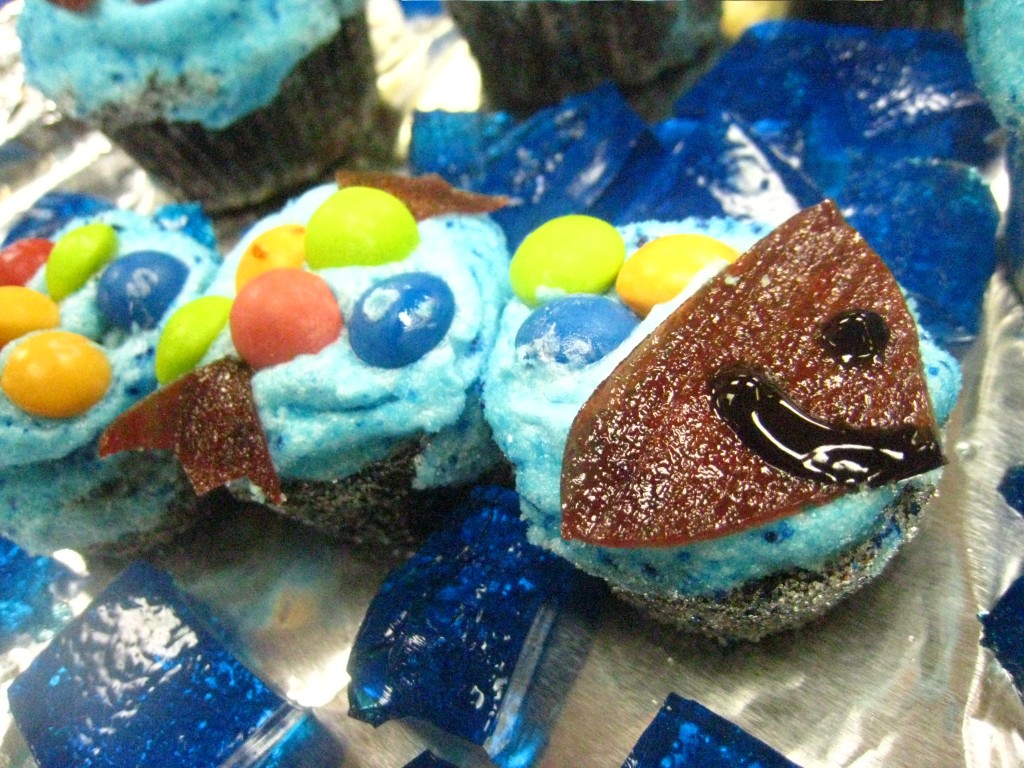
Baby Fish

One thing I really regret is using food coloring to make these cakes. Next time I decorate a cake, I’m going to try my hand at natural food dyes - either store-bought or made from highly pigmented foods like blueberries and the like.

Also, I didn’t have time to experiment, so I just used plain old jell-o to make the “sea” in my cake. I really wanted to try out this low-sugar all-natural jell-o recipe in the future, but I simply didn’t have time to experiment this past weekend when I was making these cupcakes.


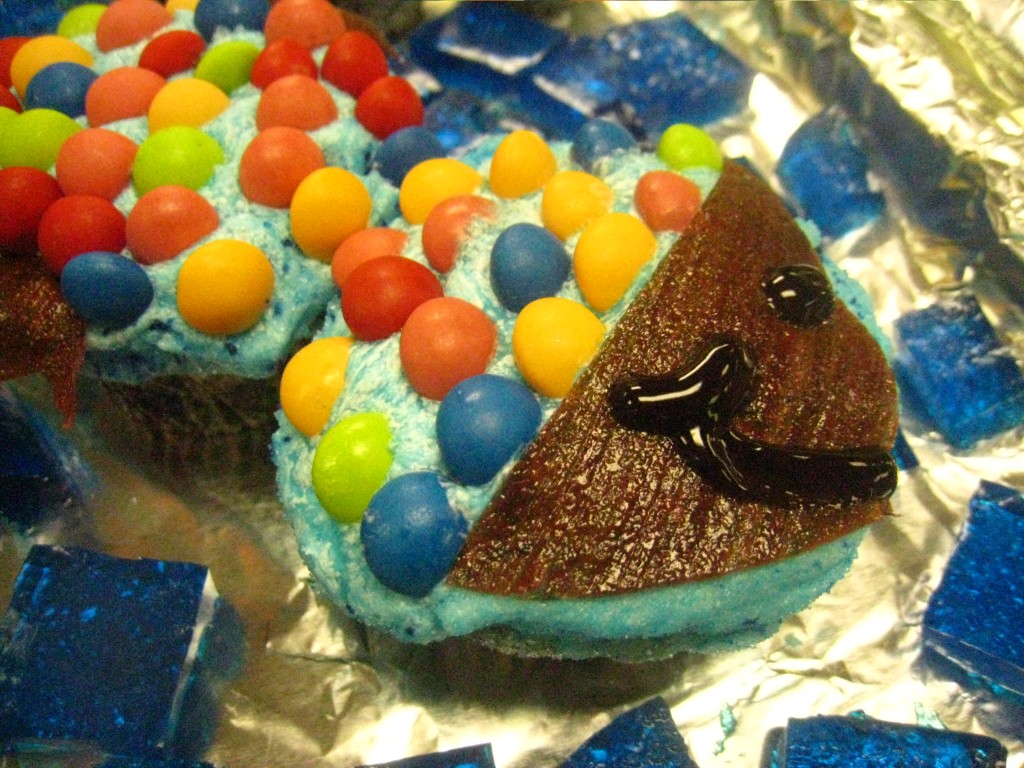
Mommy Fish

Was there anything healthy in these?,” I hear you asking incredulously. Well, yes. A little. I used palm shortening in the frosting, a step above run-of-the-mill shortening. And the cupcakes are made with mostly whole (non-wheat) grains, raw sugar, and coconut oil. And the fish faces and fins are made with all-natural fruit roll-ups without any coloring and all that junk.


Daddy Fish

In case you’re curious, here’s how to decorate these cupcakes (original idea from Good Housekeeping):

You will need:

1 batch cupcakes (half baked in regular size tin, half in mini-muffin tin)

1 batch decorator’s frosting (see recipe below), tinted blue

1/2 cup blue sugar (see instructions below)

2 fruit roll-ups

1/2 package Skittles candy or M&Ms

1 small tube black gel frosting

1/2 batch Jell-O “Jigglers” recipe (or homemade jello)

Line a cookie sheet with foil. Frost all the cupcakes smoothly with the blue frosting. Roll the edges in the blue sugar, and place the cupcakes in the pan in rows of 3. Cut rounded triangles from the fruit roll-up for the faces and fins, making jagged zigzag edges on the fins. Place them on the cupcakes, then fill in with Skittles or M&Ms (Hint: Start with the farthest edge of the cupcake, placing the candies upright on their edge, then placing the next row in front of the first, and so on, to achieve the scaled look). Use the tube of decorating gel to add an eye and mouth to each fish. Fill in the pan around the cupcakes with cubes of jello for the water.


Colored Sugar

Place desired amount of sugar in a bowl; add food dye. Stir until evenly coated. If using a liquid dye, spread the sugar on a sheet of wax paper until dry. If using gel, mix it in thoroughly with the sugar using the back of a spoon or a fork.

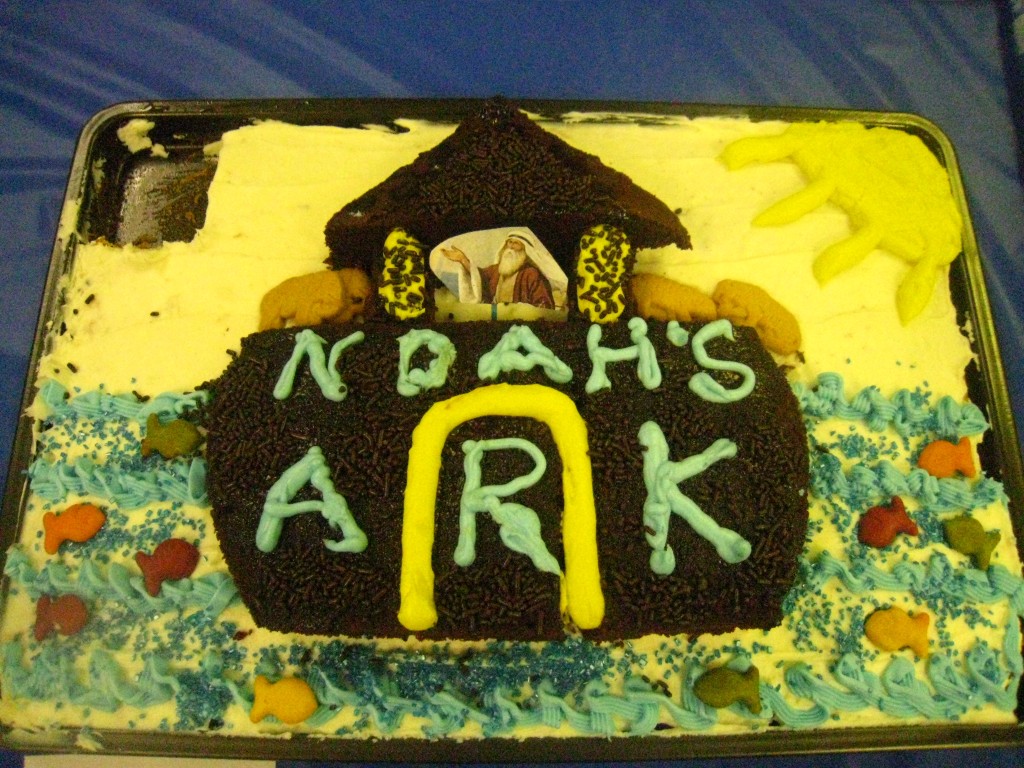
Here are some more of the cakes that were submitted to the Cake Contest, if you want some inspiration for your next birthday cake:


Watermelon Cake


Noah’s Ark
Sunflower Cake
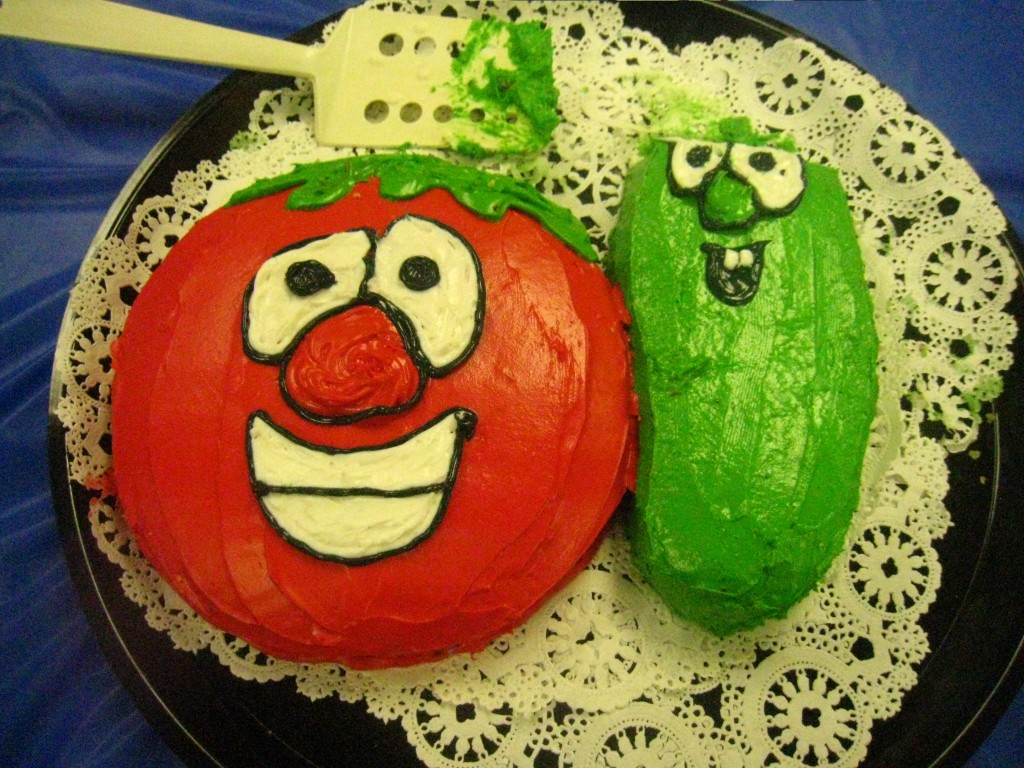
Veggie Tales: Bob and Larry
Carousel

Now, I know I said in the title of this post that these are not HEALTHY, and it’s true. However, making and decorating a cake at home is far HEALTHY-er (and CHEAP-er!) than purchasing it from a bakery. I don’t know if you’ve ever looked at the list of ingredients used at commercial bakeries, but it often seems worse than a box mix or packaged cake to me! Anything you make at home has got to be healthier than that!

BundleoftheWeek.com, 5 eBooks for $7.40!