A Sparkling New Year: Make Your Own Sparkling Cider

If you want champagne, I can’t help you, because I don’t know how to make champagne. But if you prefer the non-alcoholic sort of bubbly, well then, you’ve come to the right place.

It’s actually incredibly easy to make your own sparkling cider! All you need is apple cider syrup and seltzer water.

Apple cider syrup? “What’s that?“, I hear you ask. I’ll tell you. It’s essentially boiled down apple cider. That’s it. Apparently, according to Foodie With Family, the early colonists boiled down their cider to preserve it throughout the winter and beyond following the apple crop season. They could have cider anytime, simply by reconstituting their apple cider concentrate.

There are a lot of applications for apple cider syrup, and it’s gaining momentum in foodie and food blog circles, and in my opinion, it’s worth keeping some jars of this stuff in the house year-round! Foodie with Family suggests a variety of usages, some of which I’ve tried, but I’m going to share with you her favorite, which is seriously the bomb.

But first, let’s make the cider syrup. Most of the posts I’ve read about it involve using large amounts of apple cider and boiling it away - on high! - for hours. Number one, I don’t have hours to babysit the stove. Number two, I don’t want the stove on high for hours. Solution? I just make less at a time. Works for me.

Honestly, though, it doesn’t really matter how much you start with, as long as it’s at least about 2 cups. The point of boiling it is to reduce it, so you want to start with enough so that you can substantially reduce it. From there, you can boil several gallons at a time if you have a large enough pot. And apparently it can be processed and stored in the pantry, but I just keep mine in the fridge.

Here’s how you do it:

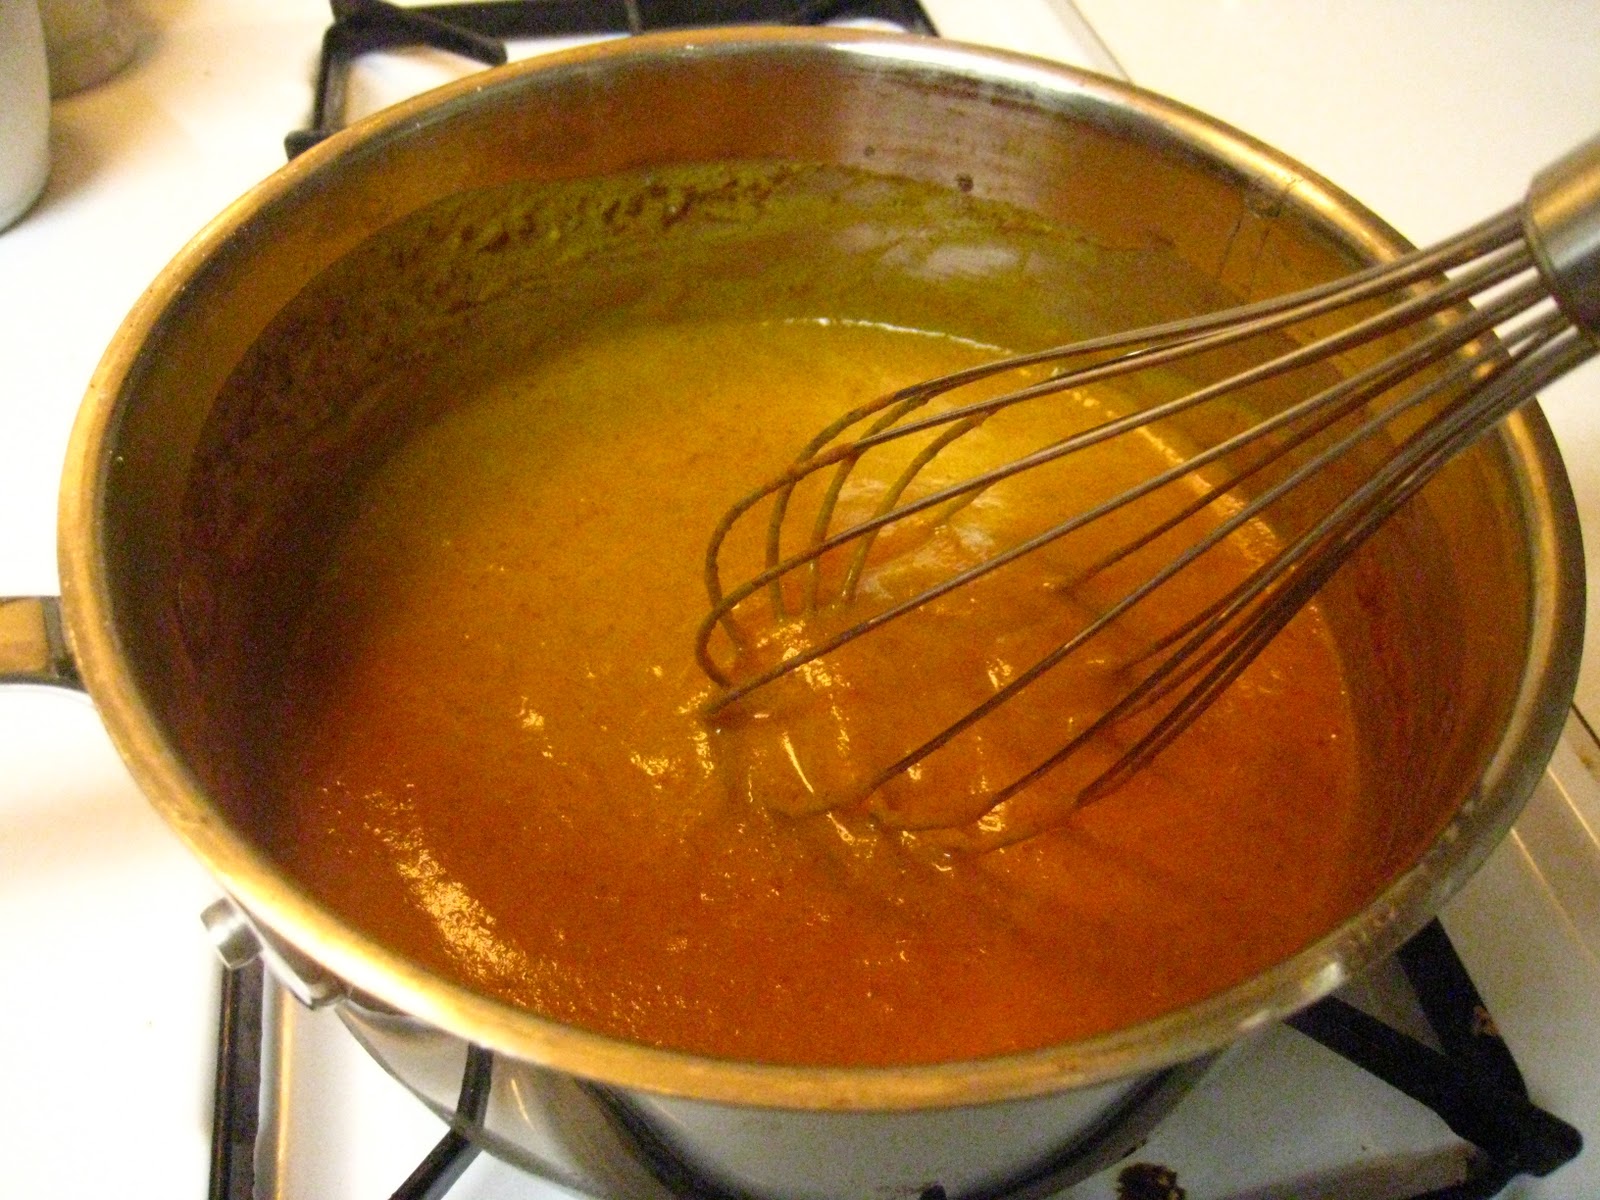
Pour at least 2 cups of apple cider into a large pot on the stove over high heat. Use a ruler, or mark a wooden spoon, to note the level of your apple cider before it begins to boil. Bring to a boil and allow it to boil undisturbed until it is reduced in volume to one seventh of the original amount. (I didn’t twist my brain in circles trying to calculate exactly how much one-seventh was or is. I just looked for a syrupy texture that was quite a bit less than what I started with.) The ruler or marked wooden spoon will help you determine when it’s boiled long enough. Be careful, though: it goes very quickly from syrup to sludge, so the first few times you make it, watch closely until you get a good feel for the timing and the proper texture. You’re looking for an almost honey-like consistency, a slight thickness, but still pourable.

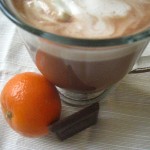
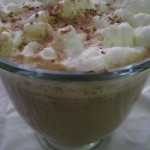
Once you have your apple cider syrup, making sparkling apple cider is a breeze! All you have to do is stir 1 TBSP of the cider syrup into a glass of cold seltzer water. Serve it over ice, if desired. I sprinkled a few fresh cranberries into mine for visual interest.

Once you have a batch of apple cider syrup made, the sparkling cider itself is so QUICK. And the great thing is you can make the cider syrup any time, even a month before you need it.

It’s very EASY, too. There is a trick to boiling the cider the right amount of time, but once you’ve mastered that it’s no big deal. And once that’s made, even a kindergartener could fix a glass of sparkling cider! If you wanted your kindergartener in the kitchen unattended, which I wouldn’t. Just sayin’.

It’s CHEAPer than buying those over-priced bottles of sparkling cider and grape juice. A huge bottle of seltzer water is usually less than $1 at my grocery store, and I can usually get a whole gallon of cider for $4. According to my calculations, a gallon of cider reduced by 7 is 2.25 cups, which is 36 TBSP-sized servings. That makes it about $0.11 a serving. Add that to the seltzer water, at $0.13/serving, and it’s less than $0.25 for each glass of sparkling cider. Compare that to the bottles of cider that only have 3 servings and go on sale for $2.50-$3! (Now, unpasteurized organic apple cider is a lot harder to come by - usually only available at farmer’s markets during apple season - and more expensive, about $6 or so. The beauty is that it can be reduced to syrup and preserved for the rest of the year!)

It’s much HEALTHY-er than some store-bought versions. Although Martinelli’s Sparkling Cider is all natural with no added sugars, the same cannot be said for other varieties, which often contain high fructosed corn syrup and other evils.

Sharing at Katherine Martinelli’s DIY Blog Hop.

BundleoftheWeek.com, 5 eBooks for $7.40!

Another Christmas Tree Tray - Veggies This Time!

Here’s yet another last-minute Christmas tray to bring to any festivities this weekend. Yesterday, I brought you a Christmas tree fruit tray. Today, it’s a Christmas tree veggie tray! Same concept, different produce.

Easy peasy.

This one I also found on Pinterest (naturally), originally from the Betty Crocker website. Here’s another Christmas tree veggie tray, also from Betty Crocker, if you’d like something a bit different, or if you have different tastes in veggies. And if you’re looking for yet another creative Christmas-tree-shaped appetizer tray, try this cheese cube Christmas tree from Cabot.


Serve your Christmas tree with a bowl of homemade dip on the side. Unfortunately, I have no specific dip recipe for you (I was in too much of a hurry to take measurements), but I can tell you how I made my Ranch-like version of dip: I dumped equal parts cream/yogurt cheese (homemade from yogurt) and plain yogurt in a bowl and mashed it together well until it was creamy. Then I stirred in garlic powder, freshly ground black pepper, dill, parsley, chives, and a bit of salt until it tasted right. Then I refrigerated it for a couple of hours before serving.

Just as QUICK as any other vegetable tray!

And just as EASY, but with so much more presentation!

It’s CHEAPer than the fruit tray, because these veggies are cheaper than those fruits.

And it’s very HEALTHY, too, nothing but veggies! (Well, except the pretzel sticks, which I don’t normally buy, but didn’t have time to come up with anything more creative. Carrot sticks? Celery sticks? Right shape, wrong color. Let me know if you come up with something!)

Sharing with Real Food Wednesday, and…
day2day joys

BundleoftheWeek.com, 5 eBooks for $7.40!

Festive Holiday Fruit Tray

Christmas tree fruit tray

I’m loving Pinterest this Christmas season! It’s given me some great ideas for Christmas presents, Christmas decorating, Christmas wrapping, Christmas baking, Christmas cooking… and Christmas celebrating.

Some of these ideas take a little more work, which makes me question if it’s a good thing or not. Or at any rate, it makes my DH question! Me? I love all the holiday craziness. Bring it on, people!

But if you’re really frazzled, and don’t have the wits or time to come up with a dish for the holiday party this weekend, I’ve got your back. This particular Pinterest-inspired fruit tray is dead easy and perfectly brainless. A little on the pricey side this time of year, but whatever. Totally worth it.


For an extra touch, you can use a star cookie cutter to cut a star shape out of a pineapple wedge, or piece of cantaloupe. If you have a large enough pear or apple, and a metal cutter, you could use that as well. Place that at the top of the tree. (I just went without.)

This is so QUICK to put together. I washed all my fruit and sliced the apples at home, then brought it all to the function I was attending (my piano students’ Christmas recital). I formed the tree probably in 5 minutes or less.

Such an EASY, yet festive and creative, fruit tray to bring to any holiday function! Party-goers will love it, and you will have put very little effort into it (yeah, baby, that’s what I’m talkin’ about!).

It is NOT CHEAP this time of year! Unless maybe if you live in Florida or California. The apples aren’t expensive, but the grapes and berries. Oh my! I never pay that much for those fruits, since I usually only buy them in season. Oh well, totally worth it for a Christmas splurge.

It is very HEALTHY, though. Nothing but fruit!

Growing Home

BundleoftheWeek.com, 5 eBooks for $7.40!

Last Minute Mother’s Day Brunch Inspiration


Not one who plans ahead? Frantically searching for a last-minute mommy brunch idea? Here you go, just for you!

And do I have a treat in store for you tomorrow… my very own DH is going to blog about the Mother’s Day Lunch he has planned for me, his mom, and his sister-in-law (with a little help from his brother and father). Come back tomorrow!!

And…

HAPPY MOTHER’S DAY!

BundleoftheWeek.com, 5 eBooks for $7.40!

Fit for a Princess: a British-Inspired Menu

It seems the world is all a-twitter (and a-Twitter!) over the upcoming royal nuptials, and I can’t say as I blame anybody. Being the product of the eighties that I am, I was one of those star-struck girls who could pore over picture books of Princess Di for hours. When she died, I seriously thought it was some kind of terrible hoax the first few hours, until it became painfully clear that it was true and definitely no hoax.

If I were Kate, I’d be more than a little scared (terrified?), stepping into those shoes and following that tragic history, so… Here’s to a better life for her and her prince! If you are joining the millions of non-Brits celebrating The Royal Wedding, here are a few Brit-inspired foods you may want to try:

English Toffee

Honey Whole Wheat English Muffins

English Roast Potatoes

Lavender's Blue Dilly Dilly Carrots

Lemon Ginger Tea Cake

Cucumber Tea Sandwiches

Mulled Cider

Chocolate Orange Coffee (inspired by Terry's Chocolate Orange)

Gingersnaps

BundleoftheWeek.com, 5 eBooks for $7.40!

Have a Cupcake: Birthday Celebration Honey Lime Dressing

If you’ve been following along this week, you know that I planned and executed a cupcake-themed mini birthday party for my mother-in-law and sister-in-law last week and am detailing the results here. Yesterday, I told you about the main dish, Crunchy Chicken Salad with Cilantro Vinaigrette, and today I will tell you about one of the side dishes, Fruit Salad with Honey Lime Dressing.

You can’t beat a light and citrusy fruit salad for spring entertaining: it’s light and refreshing and reminds one of beautiful green and bright spring days. It was the perfect accompaniment to the aforementioned chicken salad and rounded out the luncheon perfectly (together with parmesan crisps and crudites).

I have to admit I jumped at the chance to make a fruit salad dressing. You see, my DH is kind of a little… resistant… when I get to tampering with his food. Plain and simple is the way he likes it. That means fruit salad is made of fruit and nothing else. Me, on the other hand, I get bored out of my mind fixing something the same way every time, all the time. I mean really, where’s the fun in that?! We compromise by me almost always making the fruit salad plain (although he’s OK with the occasional twist, like my Harvest Fruit Salad or Stone Fruit Salad) when it’s just us, but exercising my creative juices when we entertain.

Well… perhaps not all that creative: honey and lime isn’t exactly a ground-breaking combination. It is, however, delicious and easy and perfect for almost any fruit combination. I used a combination of apples, pears, bananas and grapes, which is what I had. Pineapples or mandarin/orange segments would add a pleasant tang, and dried cranberries or pomegranate seeds would add color and texture. Kiwi or honeydew melon would be tasty additions that also add another layer of color. A little shaved or shredded coconut is always welcome in a fruit salad, too.

Fruit salad is a super QUICK side dish any day, and using a dressing like this ratchets it up a notch when you have company without adding a great deal of extra time.

It’s very EASY, too! A tip to make squeezing the lime even easier: microwave it for 10-15 seconds, then roll it under the palm of your hand on the counter, applying pressure until you feel it become more flexible. Slice in half and squeeze out all the juice! Another tip: get the zest before squeezing out the juice.

It’s pretty CHEAP, although neither (healthy) honey nor lime are exactly inexpensive. One lime is not likely to break the bank, though, usually costing well under $1.00. If you’re lucky enough to live in citrus-growing land, then the cost is practically nothing!

It’s a very HEALTHY recipe, especially if you use the right honey: raw organic honey. I buy mine at Trader Joe’s and use it only for fresh (not cooked) recipes like this. If it’s cooked, the advantage of being raw and unprocessed is negated, so I just buy regular organic honey (also from Trader Joe’s) for any baking or cooking I do with honey. Read this really old -but useful- post for more information about raw honey.

BundleoftheWeek.com, 5 eBooks for $7.40!

Have a Cupcake: Birthday Celebration Main Dish {Cilantro Chicken Salad}

chicken salad with cilantro dressing

For my MIL and SIL’s birthday celebration, I wanted to have a menu that featured light, fresh foods that tasted like spring, whether or not the weather was cooperating. In fact, I really wanted to have a picnic, but the weather was definitely not cooperating with that dream!

Originally, my idea was to have chicken salad sandwiches, but when my batch of artisan bread dough uncharacteristically failed on me (or I failed it? one cannot exclude that possibility), I had to go to plan B. As often happens, plan B was even better than plan A and I should have just gone straight there in the first place.

This chicken salad actually surpassed all my expectations. I will admit I was a tiny bit apprehensive at the combination of ingredients (even though I was the one who came up with the combination, flinging things from the cupboard into the bowl with hardly a second thought), but my apprehensions were unfounded. After spending a day in the fridge getting to know one another better, those ingredients combined to create some pretty amazing results! Unfortunately, I meticulously wrote down every ingredient and the measurements I used on a scrap piece of paper… and in my efficiency, threw away said scrap piece of paper. *Sigh* This is my best approximation.

If you have leftover or cooked chicken, this is a super QUICK recipe, perfect for a spring or summer weeknight dinner or lunch. It’s also, as you can see, perfect for entertaining as well, and sure to please your guests.

Pouring vinaigrette from a bottle might perhaps be EASY-er… but you have to admit this is pretty easy!

Overall, it’s very CHEAP, although I did have to buy the limes expressly for this salad. I’ve found that Trader Joe’s has the best price for limes, although now that I say that I can’t remember exactly what the price is! {ahem}

Alot of chicken salads have gobs of mayonnaise, or worse, Miracle Whip, but not this one. Instead, it’s chock full of nutritious, wholesome and HEALTHY ingredients and provides a wide range of nutrients, including healthy fats, fiber, and vitamins like vitamin C.

Sharing at The Local Cook’s Salad Recipes Link-Up and…

Hearth and Soul Hop at Premeditated Leftovers

BundleoftheWeek.com, 5 eBooks for $7.40!

Have a Cupcake: Birthday Celebration Menu & Decor

You know what’s really kind of cool? My mother-in-law and my sister-in-law both have their birthdays on the same day! Since I am the only other adult female on this side of the family, it falls to me to plan their birthday celebrations, something I enjoy very much every year. In the past, I’ve had the whole family over for a meal, complete with cake and ice cream of course, but our current dining room is simply not large enough to accommodate everyone comfortably. The past few years I’ve had to get creative in finding ways to celebrate their birthdays, some years with more success than others.

My challenge this year was to:

  • create an easy but delicious menu
  • decorate simply but beautifully
  • find a fun excursion/activity that was inexpensive and enjoyable to both birthday girls
  • spend $30 or less! (I hope they’re not reading this. If you are, it’s not because I’m cheap, I swear! Just trying to stay in the birthday budget!)

I hope I can say without boasting that I do believe I was mostly successful in achieving all my objectives, and that both ladies enjoyed themselves, and hopefully felt special on their birthdays. Just in case you want some ideas to help you plan a birthday celebration, my next few posts this week will detail the celebration, including recipes, of course!

First off, the menu, a breezy, springy, lightly spicy affair:

  1. Crunchy Chicken Salad with Cilantro Dressing
  2. Fruit Salad with Honey Lime Dressing
  3. Parmesan Crisps
  4. Vegetables with Dip
  5. Sweet Tea
  6. Lemonade

There was no dessert on the menu… more on that later!

Most of the food - the chicken, dressing ingredients, parmesan and fruit - I either had on hand or purchased with my grocery budget money. I did spend about $5 extra on some of the vegetables, the limes and the lemonade, bringing my overall spending to about $35 for the whole birthday event.

I always feel that dressing the table is an easy way to make guests feel special, although I’ve learned not to go overboard because sometimes, for some reason, it just makes some people uncomfortable. (If the table is overdressed, they feel like they are underdressed.)

I kept it pretty and elegant but simple by using a pretty lacy white table cloth (which I should have ironed!), light green cloth napkins, my fine china, and drinking glasses. For an extra special touch, I accordion-folded the napkins, then arranged them in a circle on the plates and topped them with the salad bowl.

The center piece was equally simple, yet elegant: a unique silver tray (which I left unpolished on purpose because I liked the slightly tarnished look), 3 simple glass tealight holders filled with different colored tealights, set on another light green napkin, with some accordion folds on either side.

I added a fun element to the whole display with these adorable little paper cupcakes, inspired by Keri of Pressed Down Shaken Together. She calls them “popcakes”, which is just perfect and oh-so-cute!

I didn’t spend a dime on any of the party decor, because everything I used came from a closet or cupboard in my house.

Check out my cupcake-themed gift idea!

Find more ideas for entertaining here:


BundleoftheWeek.com, 5 eBooks for $7.40!

Fall Fest 2010: Autumn Dinner Party

I love having guests for dinner! I love everything about it: the fellowship and conversation most of all, but also all the preparation involved. Planning and executing the menu are probably my favorite things, but I also love decorating for my guests, too. This time, especially, because the excitement of having guests over for dinner prompted me to do something I haven’t done in a long time: create a centerpiece for my dining room table!

Parents of toddlers will understand, I’m sure, why I just don’t bother with a centerpiece most of the time. Before my Certain Little Someone came along, I always had a pretty little seasonal something in the center of the table, if only a candle of some kind. It’s been a while, so I had fun allowing my creative juices run in a direction other than food for once.

Not that the food was neglected, naturally. We had a delicious autumn-inspired menu to go with the table decor, which I will tell you about in a minute. First, though, my super simple, super cheap, but warm and cozy autumn centerpiece:

It’s an all natural display of autumn’s splendor, which is my favorite kind of decorating. There’s just something so simply elegant about arranging creation into a delightful design. I think it speaks to the soul, but I’m probably making too much of it.

Here’s how I did it, in case you’re interested.

You will need:
1 pie pumpkin
1 small oval or round basket, just large enough to fit the pumpkin
a couple sheets of newspaper
a basketful of freshly fallen autumn leaves (not dried)
a few decorative pumpkins and gourds
turbinado sugar
tealight candle

After cooking the pumpkin, scoop all the flesh out of the shell (You will need a pumpkin with a really hard shell. To be honest, I’m not sure exactly which variety of pumpkin has this type of shell, because for me it seems to be hit or miss. Sorry.). Use an old toothbrush to really get all the pumpkin goop off the inside of the shell:

Save the pumpkin flesh and seeds for consumption.

Allow the pumpkin shell to dry on the counter top for at least several hours, until no moisture whatsoever remains.

Place a few pieces of crumpled newspaper in the bottom of the basket to give a little lift.

Place most of the leaves in the basket on top of the newspaper, being sure to cover it. Save the prettiest leaves for later.

Fill the pumpkin with turbinado sugar (brown rice or another brownish grain would probably work well, also). Push a tealight candle (either in a small glass holder or by itself) into the sugar to stabilize it. Place the pumpkin and candle in the basket on top of the leaves.

Artfully arrange the prettiest leaves around the perimeter, leaving some to hang over the edge a little.

If you have an appropriately colored and designed runner or placemat, place the whole basket in the center of the runner or placemat. Arrange a few small pumpkins and gourds decoratively around the basket. Voila!

You can also place a few more pretty leaves strategically around the placemat as well, which I did after I took this picture.

Then, all you have to do is remember to actually light the candle when it’s time for dinner. Which I did not. Oh well, I am enjoying the pretty tableau now as I write this post.

As for the food, this was our very autumnal menu (a little too heavy on the pumpkin perhaps, but nobody complained!):

Savory Pumpkin Pasta (I panfried a lb of boneless skinless chicken breast, and added it to the pasta, together with some crumbled dried sage leaves just to up the ante a little.)

Artisan Bread with Honey Butter (Disclosure: clicking on the link will take you to Amazon.com, and I will receive a small commission on any resulting purchases in the next 30 days.) (I was in a hurry when I baked the bread, and unfortunately it was a tad under-done. It also did not have as much flavor as usual; not sure what happened there. Oh well, the honey butter was good!)

Better than Fruit Salad (I doubled it, and only used apples and pears, no peaches or nectarines. Very autumnal flavor that way!)

Steamed Carrots (exciting, huh?!)

Salad (which my friend brought to share. Yum!)

And for the dessert… (drumroll, please)….

Pumpkin Mousse Parfait
adapted from All You magazine
1 cup pureed sweet winter squash, such as Hubba Hubba or Buttercup
1/2 cup whole milk
1/2 cup raw sugar
1/4 cup honey
1″ piece of ginger root, chopped, or 1 tsp dried ginger
2 tsp cinnamon (or just go for a whole tablespoon!)
1/2 tsp freshly ground nutmeg
1/4 tsp salt
1 tsp corn starch
1 tsp water
1 cup heavy whipping cream
2 tsp vanilla extract
1 cup gingersnaps, crumbled
1/3 cup semi-sweet chocolate chips or wafers, melted

Place squash, milk, sugar, honey, ginger root, spices and salt in a heavy saucepan. Cook, whisking constantly, until sugar dissolves. Stir corn starch into water and whisk into pumpkin mixture. Bring pumpkin mixture to a boil, continuing to whisk constantly.

Reduce heat and simmer, still whisking, for about two more minutes. You should have a pudding-like texture. Pour pumpkin mixture through a fine mesh strainer into a large bowl.

Cool completely. Whip heavy cream and vanilla until firm peaks form. Fold a small portion of whipped cream into pumpkin pudding mixture, then gently fold remaining whipped cream until there are no more streaks.

Spoon a small portion of pumpkin mousse into each serving container (clear glass bowl or drinking glass). Top with crumbled gingersnaps. Drizzle with melted chocolate. Repeat. Top with whipped cream if desired.

This is a great QUICK dessert recipe, especially if you make the pudding mixture a day ahead. All you have to do the day you serve it is assemble the parfait, which takes 10 minutes max.

It’s also very EASY. Even the pudding mixture is uncomplicated and easy enough for anyone to do.

It’s pretty CHEAP, except I did have to pay through the nose for the gingersnaps. Urgh. I did not have any molasses on hand, and no way to get any in time to make the dessert, so I had to pick up some store-bought gingersnaps. Again I say, Urgh! You can use pretty much any kind of crumbled cake or cookie in the parfait; it doesn’t have to be gingersnaps. Granola would also be delicious.

It’s pretty HEALTHY for a dessert. I even bought a very healthy brand of gingersnaps, that only had one potential icky ingredient (possible soybean oil, which I do not like to use.). I think next time I might try to reduce the sugar, but I didn’t want to gross out my guests if it wasn’t quite sweet enough to serve as dessert. It definitely helps to start with a sweeter squash. You could use whipped topping instead of whipped cream, but whipped cream is a much healthier option (no chemicals or hydrogenated oils or other fake ingredients).

Oh, and be sure to call it “Pumpkin Mousse Parfait”, not “Squash Mousse Parfait”. That rose by any other name stuff? Not true.


BundleoftheWeek.com, 5 eBooks for $7.40!

It’s a Salad! No. It’s a Casserole! No. It’s …. a … Baked Potato?


I had company over for dinner last night, which was fun. I love company! I made arrangements for them to arrive at 6:30, forgetting until the day before that I have a piano lesson to give at 6:00. Oops. That meant I had to have everything at least prepped before 6:00 so that it would be ready as close to 6:30 as possible.

When having company over for a casual dinner or party, I like to do make-your-own meals and/or desserts. It’s easier for me, and my guests can fix their dish exactly the way they like it. This is easy to do with things like mini-pizzas, tacos, hamburgers and other things. This time I chose to do a baked potato bar.

I chose a baked potato bar because:
*It’s filling and requires less meat, so it’s less expensive than serving, say, boneless chicken breasts.
*It’s easy, so there’s very little danger of last minute “uh ohs” resulting in quick dashes to the grocery store. (Thankfully, I’ve never had to do that, but there’s always that fear!)
*It’s fun.
*It offers an opportunity to be creative (I love being creative!)
*I bought a bunch of potatoes on sale at the grocery store. (I confess, that is probably the #1 reason!)

Fully Loaded Baked Potato (es)

Start with some nice, large baking potatoes, approximately one per serving (assume 2 servings per person and then throw in a few extra). Scrub them and prick them with a fork. I followed the tip in this recipe for baking them. Slice off one end of the potato, like this:


Rub the potatoes all over with olive oil, sprinkle them with sea salt and then set them up on end in the oven like this:


Don’t they look like little potato soldiers? I had to use a pan, but if your potatoes are big enough, you can set them right on the rack. Just be sure to place a pan or foil underneath to catch the dripping oil. Alternatively, you can prop them up in a muffin pan (in that case, you don’t need to slice off the end).

Many people bake their potatoes wrapped in foil but I have read in multiple places that baking them in foil is counter-productive. The moisture is trapped inside the foil and makes the skins soft instead of crispy (and the crispy skin, to me, is the whole point of baking them).

Bake the potatoes at 400 for about an hour. I was able to set these going at 5:30 and go about my business (i.e. give a piano lesson) while they were baking, and they were ready when my guests arrived at 6:30.

You can do approximately a million things for topping the potatoes. I decided to have:

*seasoned ground beef
*a variety of cheese (cheddar, mozzarella, goat, parmesan)
*crumbled bacon
*pepperoni
*Ranch dressing
*BBQ sauce

I also provided some seasoned salt and freshly ground black pepper. Other seasonings and spices can be brought to the table as well for extra flavor.

I knew I wouldn’t be able to brown the ground beef before the guests arrived, so I cooked it all afternoon in the crockpot with some Grill Mates Roasted Garlic & Herb seasoning and enough water to cover the bottom:


Throughout the day, I did have to periodically break up the ground beef as it cooked. When dinner time came, I drained it in the colander, added back in about 1/4 cup of the juices and then mixed in a few tablespoons of plain yogurt (sour cream would also work well) just to make it a little creamier and add an extra tang of flavor.

I put all the potatoes and toppings into bowls that more or less matched and coordinated to make a nice presentation for my guests. I have a large set of Corningware so that came in handy for this purpose. Unfortunately, I completely forgot to take pictures at that point, you’ll have to imagine it!

For sides, I served Watermelon Mint Salad (that’ll have to be a recipe for another post!), Mixed Vegetables, Dinner Rolls and Homemade Cinnamon Applesauce. Check the next post for the dessert menu!

There is a potato under all that! 

Whether you’re entertaining or just preparing a family dinner, this is a QUICK option. You do have to account for the 45 min to an hour that the potatoes require for baking, but you can shorten that time by pre-cooking them for a few minutes in the microwave. You can bake them entirely in the microwave, but they won’t have that yummy baked potato taste. As far as the toppings go, if you are smart and freeze grated cheese, all you have to do is pull it out of the freezer. I also cook an entire package of bacon at one time and keep it in the freezer to pull out for dishes like this. Crumbled goat or feta cheese takes a few seconds to prep and adds a lot of nice flavor. Healthy bottled versions of Ranch and Blue Cheese dressing are great as well. All of these things take minimal time.

EASY, too. Once the potatoes are baked, and the sauce and/or meat (if you choose to have them) are cooked, all you have to do is set everything out on the table and let your family or guests help themselves. When I serve this to my family, I don’t worry as much about sides either, I figure we can just have 2 or 3 different kinds of loaded potatoes and call it a meal!

Since potatoes are the base of the meal, rather than a meat, it’s very CHEAP, also. I totaled up the cost of what I used:

1.5 lbs ground beef @ 4.47 for 3 lbs = roughly 2.25
3-4 lbs potatoes @ .99 for 5 lbs= .75
4oz of cheddar cheese @ 1.00 for 8oz = .50
a portion of mozzarella cheese @ 5.00 for 2 lbs = let’s say 1.00
for small portions of Ranch dressing, BBQ sauce, parmesan cheese, goat cheese = .75-1.00

Apart from the sides, this meal cost around $5.50 and served 4 adults and a baby for one meal, and then 2 adults and a baby for lunch the next day. Not bad, eh?!

Hmmm…. without the BBQ sauce or Ranch dressing, I would describe it as a HEALTHY and well-balanced meal. The potatoes provided carbohydrates, the meats provided protein and iron, and the cheese provided all the goodness of dairy. The Ranch dressing was a healthier kind without any high fructose corn syrup, hydrogenated oils, or other additives, so that’s not bad either. The BBQ sauce had HFCS but I didn’t have time to make my own, so…. Oh well! I think it’s probably pretty high in calories, though, so I think one serving with a side or two of fruits and/or vegetables would suffice for a good, healthy meal.

BundleoftheWeek.com, 5 eBooks for $7.40!