Festive Holiday Fruit Tray

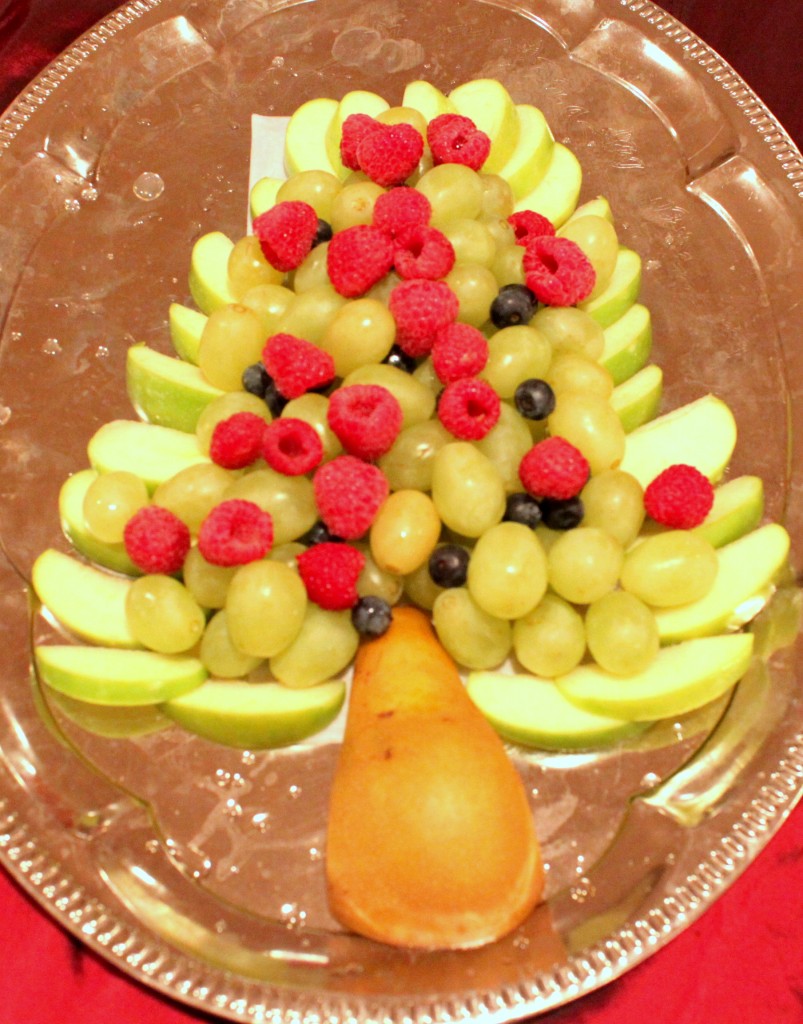
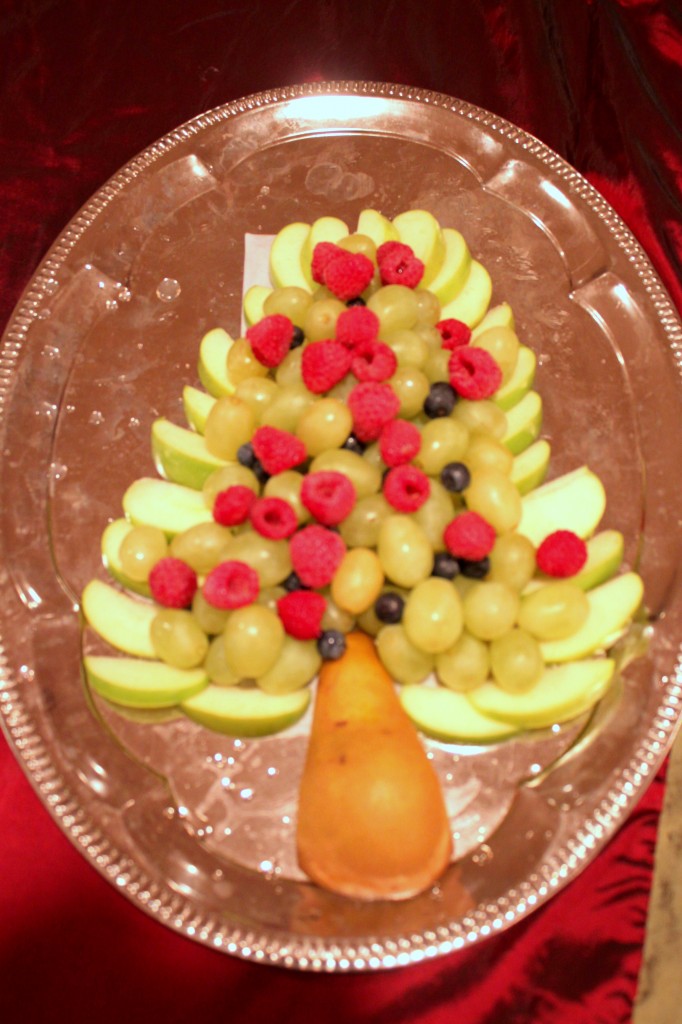
Christmas tree fruit tray

I’m loving Pinterest this Christmas season! It’s given me some great ideas for Christmas presents, Christmas decorating, Christmas wrapping, Christmas baking, Christmas cooking… and Christmas celebrating.

Some of these ideas take a little more work, which makes me question if it’s a good thing or not. Or at any rate, it makes my DH question! Me? I love all the holiday craziness. Bring it on, people!

But if you’re really frazzled, and don’t have the wits or time to come up with a dish for the holiday party this weekend, I’ve got your back. This particular Pinterest-inspired fruit tray is dead easy and perfectly brainless. A little on the pricey side this time of year, but whatever. Totally worth it.


For an extra touch, you can use a star cookie cutter to cut a star shape out of a pineapple wedge, or piece of cantaloupe. If you have a large enough pear or apple, and a metal cutter, you could use that as well. Place that at the top of the tree. (I just went without.)

This is so QUICK to put together. I washed all my fruit and sliced the apples at home, then brought it all to the function I was attending (my piano students’ Christmas recital). I formed the tree probably in 5 minutes or less.

Such an EASY, yet festive and creative, fruit tray to bring to any holiday function! Party-goers will love it, and you will have put very little effort into it (yeah, baby, that’s what I’m talkin’ about!).

It is NOT CHEAP this time of year! Unless maybe if you live in Florida or California. The apples aren’t expensive, but the grapes and berries. Oh my! I never pay that much for those fruits, since I usually only buy them in season. Oh well, totally worth it for a Christmas splurge.

It is very HEALTHY, though. Nothing but fruit!

Growing Home

BundleoftheWeek.com, 5 eBooks for $7.40!

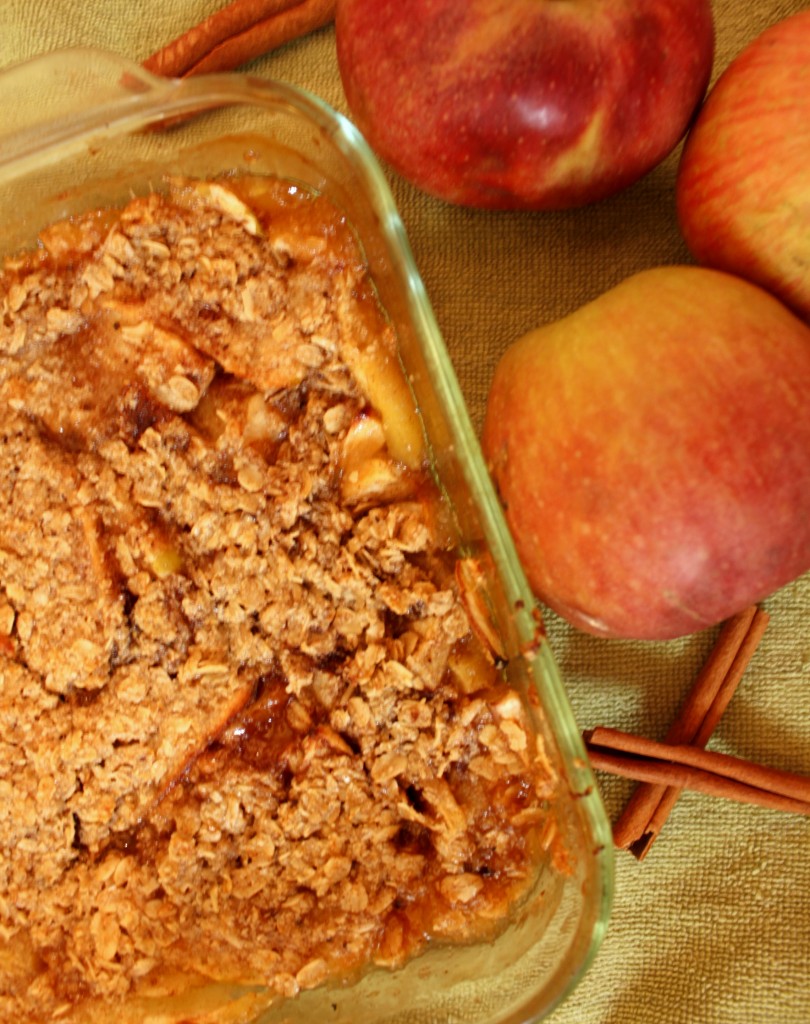
1-2-3 Fruit Crisp!

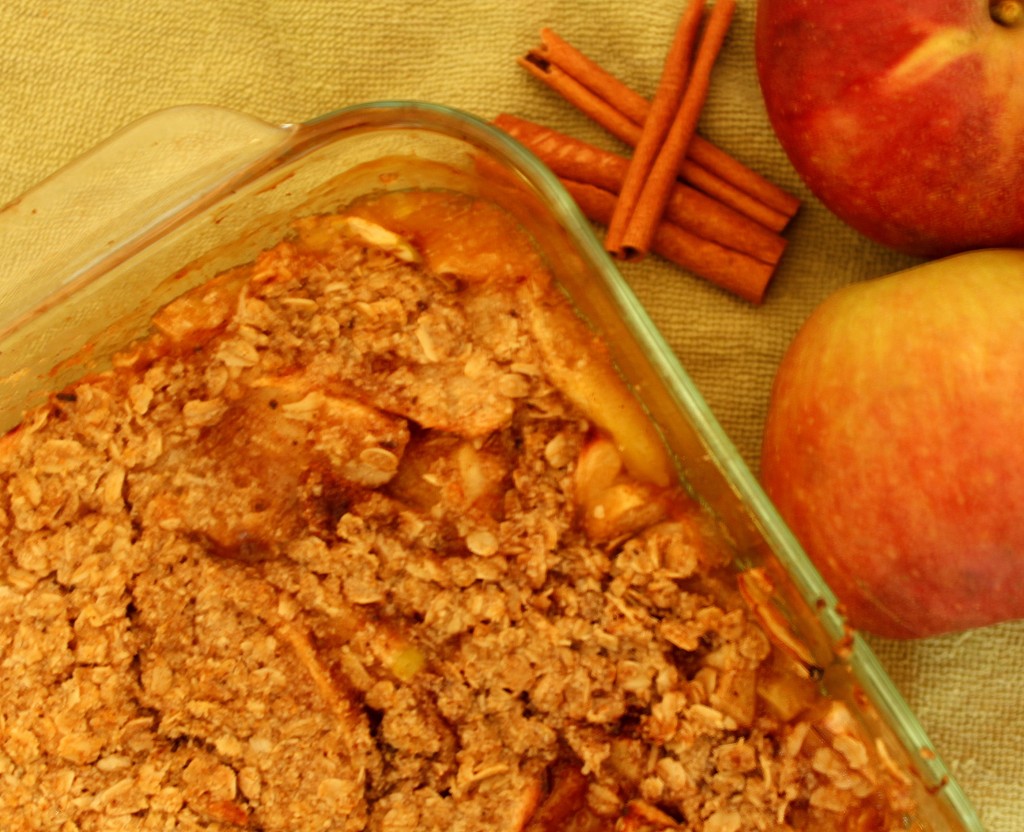
fruit crisp

If October is the month for pumpkins, then November is the month for apples, or at least that seems to be the way it goes around here. A little over a week ago, in fact, I got a 1/2 bushel basket full of seconds apples, so for a week straight I was cooking nothing but apples. Or so it seemed anyway. In my apple-cooking/preserving spree, I made sure to save a few pounds of the crunchy little spheres to make some fruit crisp for dessert.

I have always thought that I am not at all a fan of cooked apples. And that’s still true. But I have discovered another layer of truth, and that is this: I like apples that are really really cooked. Cook them ju-u-ust until they’re about to turn into applesauce, and there you go: cooked apple perfection. None of that rubbery lumpy apple chunky stuff for me - I shudder at the thought! Give me a bowl full of mushy apple crisp, and I’m a happy girl. I’ll lick the bowl clean, in fact.

In the past, when I set out to make a fruit crisp, I always googled fruit crisp recipes, and sorted through them until I found one that I liked, or made a combination of all of them. With this last crisp, though, I read through The Cheapskate Cook’s apple crisp recipe and method, and decided I really liked her approach. She simplifies and demystifies the whole process, and furthermore, gives you permission to change it up just the way you like it.

Which is just the way I like it.

Who needs a recipe, really? It’s just a combination of 3 different elements: fruit, sugar and seasonings, and a streusel-like topping. No great mystery there.

So here you go. A fully customizable, perfectly simple formula for fruit crisp anyway you like it. (Except rubbery. Please don’t make rubbery fruit crisp.)

1. The Fruit

Go with any fruit you want, really, with the exception of citrus (Grapefruit crisp, anyone? No? Didn’t think so.), and perhaps other more exotic fruits, like starfruit. I have never made starfruit crisp, so I can’t vouch for its success. (But wait! A quick Swagbucks search reveals that someone else has indeed made starfruit crisp. See? Fully customizable!) Oh, and melon is probably not a great idea. Yuck.

Some more traditional fruit options include:

  • Peaches/Nectarines
  • Pears
  • Plums
  • Apples (Natch.)
  • Berries (YUM! Nothing beats a berry crisp in the summer!)
  • Cherries

Even better is a combination of fruits! Take any of the above and mix them together for a delicious flavor combination. Or, you can add in some fruits that may not stand very well on their own as a fruit crisp, but would work well together with others, like bananas, pineapple, or mango.

How much fruit do you need? Well, how much fruit crisp do you want? I’m being totally serious here. Start with the number of servings you want and work from there.

  • For a single serving, use a ramekin.
  • For dessert for a small family, use a square pan.
  • To bring to a potluck or family Thanksgiving, use 1 (or 2 or 3…) 9×13 pan.

You will need to at the very least cover the bottom of your dish with your fruit, but it’s better to fill it at least halfway, or up to 3/4 full.

Once you’ve got your dish picked out and filled with fruit, move on to element #2.

2. Sugar and Spice

This is not a precise science, folks. If you want a super sweet fruit crisp (for shame!), then dump a 1 cup or so of sugar on there. But if you want a lightly sweetened dessert that lets the flavor of the fruit shine through (good for you!), then sprinkle approximately 1/2-3/4 cup of sugar over the top of the fruit. Even better? Drizzle the same amount of honey or maple syrup and you have a delicious dessert with no refined sweeteners!

To be honest, I didn’t even measure my honey when I made it. I just drizzled all over until it looked like enough, and I would estimate it was about 1/2 cup or maybe even less. And it was perfectly sweetened! Part of it depends on the sweetness of your fruit. If your fruit is really ripe and of a sweeter variety, you will need less additional sweetener. Taste a piece or two of your fruit before you decide how much sweetener to add.

Sweetener choices:

  • Sugar (the less refined the better: raw or sucanat, for example)
  • Stevia
  • Honey
  • Maple Syrup

I would not recommend molasses because the flavor would be over-powering, but if you wanted to have a ginger-bread-esque taste, you could use a few tablespoons of molasses together with your other sweeteners.

Once you’ve drizzled an adequate amount of sweetener over your fruit, then you can sprinkle in some spices. Spices make everything nice! Some spices that go particularly well with fruit are:

  • Cinnamon (of course!)
  • Nutmeg
  • Ginger
  • Cardamom
  • Ground cloves
  • Star anise
  • Lemon, lime or orange zest
  • Mint (goes well with some berries)

You don’t want to use too much of any of these spices in your crisp. One or two teaspoons total of spice is plenty, depending on how large your dish is. (For a single serving, just a sprinkle will suffice.)

3. The Crisp = 1 part Oats, 1 part Flour, 1 part Fat

And it’s as simple as that? For a single serving, a tablespoon or two of each element will suffice. For a large pan, you’ll need a cup of each. And of course, if the crisp is your favorite part of the dish, by all means use more than that! Just keep the ratio the same.

I’ve successfully used both brown rice flour and sorghum flour to make a gluten-free crisp - in fact, no one will notice it’s gluten-free. You can also use 100% whole wheat flour in your crisp and even the most die-hard pastry lover will enjoy it.

Cold butter is the best fat for the crisp, but I’ve also used palm shortening and/or coconut oil for my food-allergic Certain Little Someone. They’re a little more greasy, but still quite yummy.

You’ll also want to add a little bit more sweetener (a few tablespoons of sugar should do it), and another little sprinkle of whatever spices you used on the fruit to give the crisp some flavor.

Stir together the dry ingredients, then cut in the fat with a pastry blender, a fork, a couple knives, or a blender.

4. 1+2+3= Fruit Crisp!

Evenly spread your crisp topping over the fruit in your pan. Bake at 400F until it’s done. I know, so specific, right? The thing is, it depends on what fruit you’re cooking, so just pay attention. After about half an hour, check on your crisp. The fruit should be tender enough to pierce with a fork, the crisp topping should be lightly browned, and the juices should be developed into a bubbly syrup all around the edges. (Yum, I’m getting hungry just picturing it!)

When all that has come to pass, remove your crisp from the oven and cool slightly before serving. It’s great as is, but it’s even better when topped with ice cream or whipped cream.

fruit crisp

Wasn’t that QUICK? Approximately an hour, start to finish, including baking time.

Using a formula like this just makes it so EASY, doesn’t it?

When using fruit in season, it’s a great CHEAP dessert. Except for berries, which are kind of expensive even in the summer. But apple crisp is definitely a frugal dessert choice!

And it’s so HEALTHY. I love Steph’s ideas for making it even healthier: leaving the skin on the fruit, using whole grains, using unrefined sweeteners, and limiting those. As they say in Russia, Na zdorovye! (To your health!)

For more in this series, check out:

1-2-3 Soup!

1-2-3 Granola!

What fruit do you like to use in your crisp?

Find more great recipe inspiration at $5 Dinner Challenge, Traditional Tuesdays, Real Food Wednesday, Ultimate Recipe Swap, and…


Tempt my Tummy TuesdaysHearth & Soul Hop

BundleoftheWeek.com, 5 eBooks for $7.40!

Simple Sides: Mango Summer Salad

I don’t know about you, but I’ve been loving these Simple Sides this month! In case you missed it, Steph the Cheapskate Cook shared her Tomato Bruschetta the first week, and I brought my Melon Citrus Salad last week. Next week, you’ll meet Nancy from Real Food, Allergy Free and her side dish, but this week, it’s Mary from Barefeet in the Kitchen.

Here’s what she says about her favorite simple side dish:

In the summertime especially, I’m a huge fan of fresh fruit in our salads. Whether it’s a Strawberry Spinach Salad, Spring Salad with Poppyseed Dressing,Red Wine and Honey Salad with Fruit, or Cashew Chicken Salad with Grapes, there is often fruit in our salads or in the dressings.

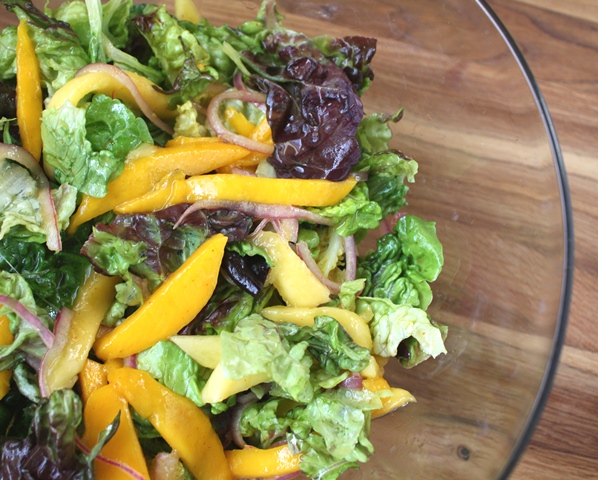
Crisp lettuce, sweet mango slices and sharp red onions combine to make this a deliciously simple summer salad. With a light and slightly spicy dressing, this salad was a hit with my family.

Read the rest of her post to get the recipe for her Mango Summer Salad.

And don’t forget to join us next week for one more Simple Side!


BundleoftheWeek.com, 5 eBooks for $7.40!

Simple Sides: Refreshing Melon Salad

Welcome back to Simple Sides! Every Thursday this month, some bloggy friends and I will be bringing you super simple and delicious side dishes to get you through the dog days of summer. Last week, Steph The Cheapskate Cook shared with us her Tomato Basil Bruschetta. In the next couple weeks you’ll hear from Mary at Barefeet in the Kitchen and Nancy from Real Food Allergy Free, but today you’re stuck with me.

I hope you don’t mind. Hopefully you won’t be disappointed.

Not much compares with fruit for its simplicity in preparation, which is probably why my mind often goes in that direction when seeking a quick side dish that won’t heat up my kitchen. If you browse through my meal plans, you’ll realize quickly that fresh fruit is featured frequently every week, usually multiple times. My DH can’t tolerate very many raw vegetables (none, actually), but he can eat quite a variety of raw fresh fruits, which is one more reason they show up at our table on a regular basis.

I often just chop up whatever fruit is in the fridge into a take-it-or-leave-it conglomeration, but I also like to come up with intentional creations that take into consideration flavors, textures and colors. There are a few such standbys that serve me well (like Stone Fruit Salad, or Honey Lime Fruit Dressing), but now and then the urge strikes to try something new and perk up the taste buds with some additional, unexpected flavor.

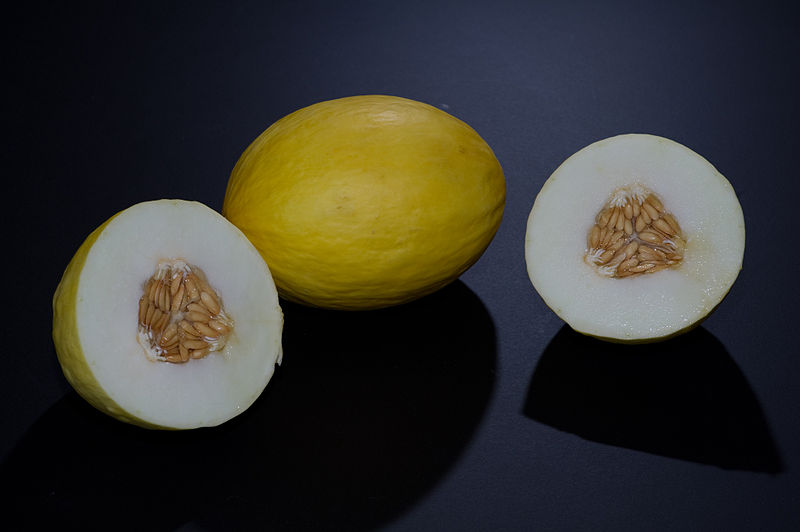
This was the position I found myself in a couple weeks ago, when I had a strange new melon I had bought at the Farmer’s Market. I think it was a canary melon, at least it looked alot like this:

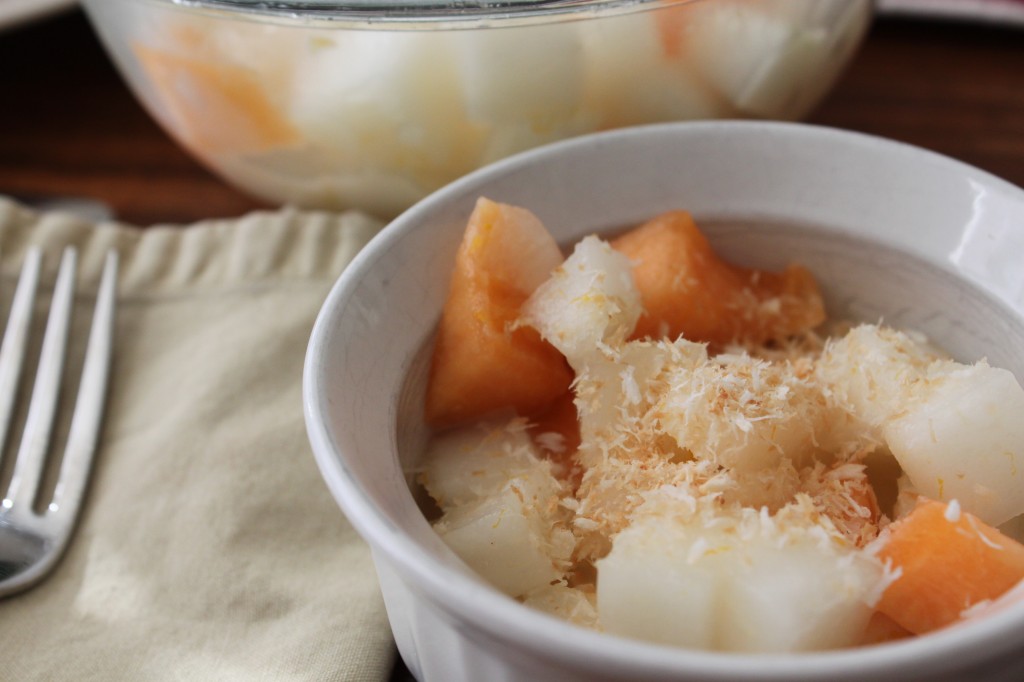
At only $2.00, I figured it wasn’t that much of a risk if we didn’t love it, but thankfully, even that $2.00 was not a waste. The flesh tasted like a mild honeydew melon and had a pleasantly smooth texture. Its fragrance was fresh and inviting, which may be why the thought of combining it with citrus was tempting.

In my search for melon inspiration, I found a recipe originally intended for casaba melon, but easily adapted to other melons. I was hooked by the combination of ingredients far removed from my typical honey-based fruit dressings; in fact, there was no sweetener involved at all, which is of course a huge plus in my book. I was also quite pleased that it was naturally allergen-free, requiring no adaptation to make it suitable for my Certain Little Someone.

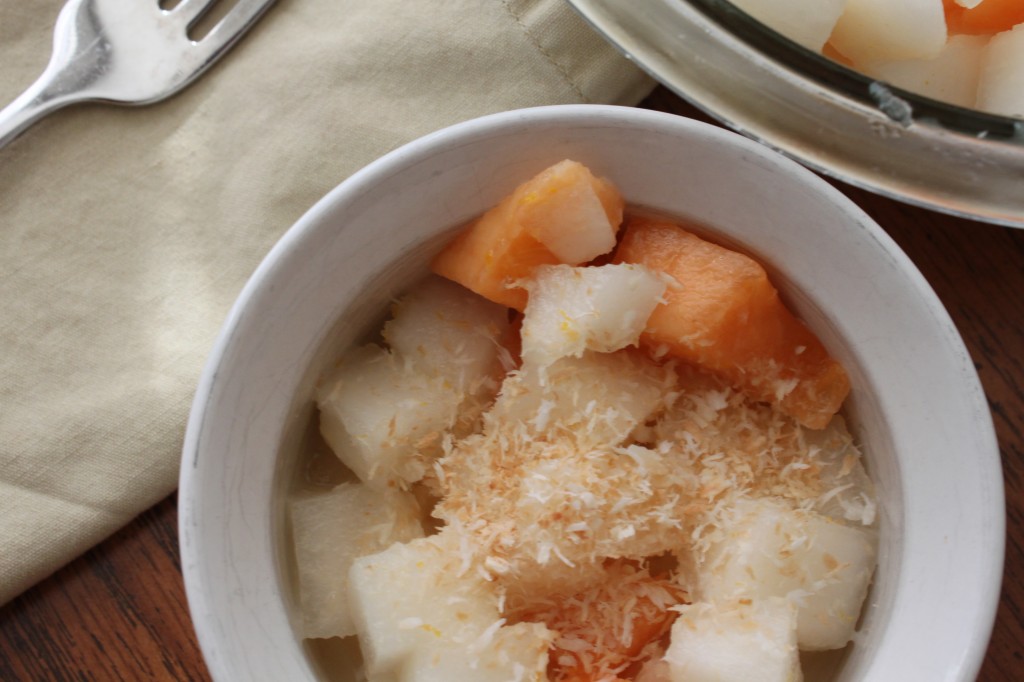
The original recipe calls for the juice and zest of a lime combined with coconut milk (Let’s hear it now: “Put the lime in the coconut, the lime in the coconut….”), which is a pairing I love, but alas, I had no limes. I did, however, have a bag full of clementines I had found on sale, so I switched out the lime with a clementine.

An inspired choice, truly. The lighter tang of the clementine joined perfectly with the mild flavor of the melon, highlighting it but not overpowering it, and adding a delightful touch of extra flavor. And despite the lack of sweetener, the resulting fruit salad was deliciously sweet just as it was.

And the best part? No oven was turned on in the process of making this fruit salad.

How QUICK was that? OK, so refrigeration can take a while, but here’s a time-saving tip: Make this salad first before starting the rest of your meal, and it will be ready to go when you are.

So EASY, too, except maybe chopping the melon. Here’s another tip: Chop your melon when you buy it, and store it in a container made specifically for the purpose of storing produce (I like Tupperware’s FridgeSmart series), so it’s ready to eat when you want to eat it. Be sure to use it within a few days, though.

Let’s break down the cost and figure out how CHEAP it is (or isn’t): I bought the melon for $2.00, as I said, and I used about half of it or so. I have recently discovered that Bloom carries Goya canned coconut milk for $0.99 a can (Trader Joe’s carries the lite version for the same price), and this recipe uses less than half a can. I used a clementine from a bag that cost $2.99 and contained 10-12 clementines, and the cost of the shredded coconut is negligible. That brings our total for this dish to less than $2.00, not too bad!

It’s certainly very HEALTHY! Combining the fruit with the coconut milk is a stroke of genius, because the fat in the coconut helps your body to absorb the many nutrients found in the melon and citrus fruits.

BundleoftheWeek.com, 5 eBooks for $7.40!

Have a Cupcake: Birthday Celebration Honey Lime Dressing

If you’ve been following along this week, you know that I planned and executed a cupcake-themed mini birthday party for my mother-in-law and sister-in-law last week and am detailing the results here. Yesterday, I told you about the main dish, Crunchy Chicken Salad with Cilantro Vinaigrette, and today I will tell you about one of the side dishes, Fruit Salad with Honey Lime Dressing.

You can’t beat a light and citrusy fruit salad for spring entertaining: it’s light and refreshing and reminds one of beautiful green and bright spring days. It was the perfect accompaniment to the aforementioned chicken salad and rounded out the luncheon perfectly (together with parmesan crisps and crudites).

I have to admit I jumped at the chance to make a fruit salad dressing. You see, my DH is kind of a little… resistant… when I get to tampering with his food. Plain and simple is the way he likes it. That means fruit salad is made of fruit and nothing else. Me, on the other hand, I get bored out of my mind fixing something the same way every time, all the time. I mean really, where’s the fun in that?! We compromise by me almost always making the fruit salad plain (although he’s OK with the occasional twist, like my Harvest Fruit Salad or Stone Fruit Salad) when it’s just us, but exercising my creative juices when we entertain.

Well… perhaps not all that creative: honey and lime isn’t exactly a ground-breaking combination. It is, however, delicious and easy and perfect for almost any fruit combination. I used a combination of apples, pears, bananas and grapes, which is what I had. Pineapples or mandarin/orange segments would add a pleasant tang, and dried cranberries or pomegranate seeds would add color and texture. Kiwi or honeydew melon would be tasty additions that also add another layer of color. A little shaved or shredded coconut is always welcome in a fruit salad, too.

Fruit salad is a super QUICK side dish any day, and using a dressing like this ratchets it up a notch when you have company without adding a great deal of extra time.

It’s very EASY, too! A tip to make squeezing the lime even easier: microwave it for 10-15 seconds, then roll it under the palm of your hand on the counter, applying pressure until you feel it become more flexible. Slice in half and squeeze out all the juice! Another tip: get the zest before squeezing out the juice.

It’s pretty CHEAP, although neither (healthy) honey nor lime are exactly inexpensive. One lime is not likely to break the bank, though, usually costing well under $1.00. If you’re lucky enough to live in citrus-growing land, then the cost is practically nothing!

It’s a very HEALTHY recipe, especially if you use the right honey: raw organic honey. I buy mine at Trader Joe’s and use it only for fresh (not cooked) recipes like this. If it’s cooked, the advantage of being raw and unprocessed is negated, so I just buy regular organic honey (also from Trader Joe’s) for any baking or cooking I do with honey. Read this really old -but useful- post for more information about raw honey.

BundleoftheWeek.com, 5 eBooks for $7.40!

Fall Fest 2010: Harvest Fruit Salad

A looooooonggggg time ago, I posted a recipe for a fruit salad that I loved to make. That was back before I really knew anything about blogging, back when I had one faithful reader! Since then, my blog has definitely improved (at least, I think it has!), and so has this recipe. There’s nothing wrong with the original, but I’ve settled on a way to make it that suits me and my family… and is still Quick and Easy, Cheap and Healthy! And it’s still one of my favorite ways to serve fruit for dinner - it’s dressy enough to serve to guests, but easy enough to make for a family weeknight dinner.

And… it’s perfect for fall!


Apples, especially, but also pears, are abundantly available this time of year. Combine that with some cinnamon and you have all the flavor of an apple pie without all the work. So many people rave about Honeycrisp apples - and they are delicious apples, I agree! - but I love Crispin apples, too, which is what I used in my fruit salad today. You can use pretty much any apple, but the best ones are the sweet and crisp varieties. A firm, crisp pear is also your best bet, to match the crunch of the apple. I always use raw honey in this salad, read here (another post from the archives!) for some reasons why.

The quantity of ingredients below will make approximately 2 servings. It’s so easy to double, though; just double the fruit. You may or may not need to double the honey and cinnamon - let your taste guides be the judge!

The New and Improved Better than Fruit Salad
1 apple (any crisp and sweet variety)
1 firm pear
1 tsp raw honey
1/2 tsp cinnamon
1 TBSP dried cranberries (optional)

Wash and chop the apple and pear. Place in serving bowl. Stir in honey until all pieces are coated. Stir in cinnamon until well distributed. Gently toss in cranberries. Chill until ready to serve.

Don’t worry about coating the apples with lemon juice. I never do with this recipe, because the honey seems to do the trick as long as I refrigerate it in a covered dish and serve within a few hours.

I love it when I can offer you a recipe that is truly QUICK, EASY, CHEAP and HEALTHY all at once! Add it to your menu repertoire, and you won’t be sorry!

Find more great Holiday-Worthy salads at:

BundleoftheWeek.com, 5 eBooks for $7.40!

Simple and Sweet, A Nice Summer Treat

Yes, I know, it’s not summer yet. It feels like it, though, at least around here. I don’t know about you, but temps in the 90s make me think summer. Thank goodness watermelon is now available so I can do something about those summery-thoughts.

This is such a great easy summer side dish, and with the soon-to-be readily available bounty of watermelon, it will be super cheap, too. All you have to do is chop some watermelon and mint and mix them up together, and refrigerate them if you have time. I like to use fresh mint, but if I don’t have any, dried mint works as well. It’s best to refrigerate the salad for a few hours, but if you don’t have the time, don’t sweat it.

Simple Sweet Watermelon Salad
For each serving,
1 cup cubed watermelon
1 tsp fresh chopped mint

Mix the watermelon and chopped mint together until the mint is spread evenly throughout. Refrigerate for several hours to blend flavors, serve cold.

That was QUICK. Hardly any time at all - you can prepare it in the morning to refrigerate all day, or you can just prep it and refrigerate it while you are fixing the rest of your dinner.

EASY, too. It really doesn’t get any easier than this, which is a good thing with the lazy dog days of summer already here fast approaching.

Very CHEAP, also, especially if watermelon is in season and you have a mint plant.

And no question that it’s very HEALTHY, as well. Most people think of tomato as the best source of lycopene, an antioxidant, but actually, watermelon often has even higher levels than the tomato. Mint is also another good cancer-fighter, and helps the digestive tract to run smoothly, easing stomach aches and settling indigestion.

BundleoftheWeek.com, 5 eBooks for $7.40!

Super Simple Strawberry Syrup

I was dumb the other day and left strawberries sitting on the counter instead of putting them back in the fridge. Agh! What was I thinking?! Apparently, I wasn’t! So now instead of nice, plump, juicy fresh strawberries, I was left with half a pound (yes, half a pound!) of slightly shriveled, mildly dehydrated, far-from-fresh strawberries. Blech. But I couldn’t bring myself to throw them out, and I didn’t feel like making a smoothie, so I racked my brains for something I could do to save the strawberries. I still hadn’t had breakfast yet, so I opted for strawberry syrup to top my French Toast.

Am I the only one who does brain-dead things like leaving food out on the counter all night long, by the way? I hope not!

A Tasty Recipe for No-Longer-Fresh Strawberries
1 cup sliced berries
1/2 cup apple juice

Place the berries and apple juice in a pot on the stove, and bring to a boil over medium-high heat.

Once boiling, turn heat down to low and allow to simmer, occasionally stirring and breaking up pieces with a wooden spoon.

When strawberries are softened and mixture is slightly thickened, remove from stove and let it stand for about a minute before using.

QUICK enough for breakfast! I’d say probably about 10 minutes or so was all it took, start to finish. And the strawberries simmered on the stove while I fixed my French toast, and everything was ready to eat at the same time.

Very EASY, easy enough for morning brain (if you’re a night owl like me!). Even easier would be pre-sliced frozen strawberries if you happen to have them.

Since I used strawberries otherwise destined for the trash, it was pretty CHEAP, too. But at any rate, it’s still pretty inexpensive because I usually try to pay $2 or less per pound of strawberries.

And HEALTHY, of course. Apple juice serves the same purpose as sugar would in this recipe; it sweetens and thickens the syrup just slightly. The good thing is, it’s a lot better for you than sugar would be!

This recipe is incredibly versatile, also. You can use any berry you want or have on hand. I’ve thought of several different things you can do with the syrup:

~as topping for French toast, pancakes or waffles
~on ice cream or banana sorbet
~on a slice of plain cheesecake
~mix with plain yogurt
~mix with lemonade for restaurant-style strawberry lemonade

BundleoftheWeek.com, 5 eBooks for $7.40!

Peachy Keen

Ahhhh, vacation! Or rather, “staycation”. We had fun this week, visiting local haunts and spending time with family, relaxing a little bit, and enjoying ourselves a lot.

One thing we did, which my sister declared she could do for hours, was pick peaches at Larriland Farms in Woodbine, MD. I don’t know if I could do it for hours (I have a hard enough time figuring out what to do with the peaches we picked in one HALF hour, let alone many hours!), but it was fun for sure! And once we got home, the real fun began: I had to figure out what to do with a 1/2 bushel of fresh peaches. I was pleasantly surprised at how quickly we worked through the half bushel without hardly any effort.

Here’s my Certain Little Someone thoroughly enjoying his first peach-picking experience. He LOVES peaches, and he had a lot of fun picking them (although he was very sure he would much rather eat them! We had to keep his little hands off the box of freshly picked peaches.).


In case you are inspired to stop by your local farm and pick some peaches (they’re in season now, so it’s the time to go!), here’s what we did with our peaches to give you a few ideas:

1. We ate them fresh. (Duh!) There’s just nothing like a fresh-from-the-tree summer peach. It’s like a dessert but with absolutely no guilt. Mmmm…

2. We gave some away. All our near-by family members were blessed with our bounty (and aren’t you all appropriately grateful? ;).

3. Peach Crumble Pie When I was eating allergen-free foods because I was nursing my son, I made this recipe a lot because I could make the topping with corn flakes. It was a quick and easy recipe that non-allergic people could actually enjoy (meaning it was normal and not weird like many gluten-free, egg-free, dairy-free, etc.-free recipes), so I would especially make it when we had company or had to bring a dish to special events. It’s really easy. Just peel and slice peaches and lay them in the bottom of a pie pan or round cake pan until the bottom is covered. You should have about 2 layers of peach slices. Then make a mixture of 3/4 cup of flour, 1/2 cup sugar, and 1 tsp cinnamon. Cut in 1/2 cup butter. (Alternatively, use 1 cup crushed cornflakes instead of flour, and melt butter before adding.) Spread mixture evenly over peaches and bake at 350 for 30 min.

4. Peaches with Whipped Cream Take plain fresh peaches to the next level by topping them with a dollop of real whipped cream, lightly sweetened with a drizzle of honey. Heavenly!

5. Peach Oven Pancake This is such an easy breakfast; the only thing is you have to plan ahead for the baking time.

6. Freeze. I haven’t actually done this yet, but it’s on the docket for this evening. I’m going to peel and slice the peaches and then lay them on a baking sheet lined with wax paper and freeze them. When they’re frozen, I’ll bag them up in freezer bags, ready to be used whenever I want some fresh peach!

I also made some Peach Shortcakes to bring to a bridal shower. I was inspired by the recipe at Baking Bites, a fun blog with lots of great recipes. There was nothing wrong with the recipe, but of course, I made some changes, because how boring is it to make a recipe exactly as written?! The main change is that I did not grill the peaches only because I have no grill (one of the many drawbacks to living in an apartment). Also, I altered a couple ingredients to make it just a tad bit healthier, because that’s what I do.

Here’s my version:

Ginger Peach Shortcakes
1 cup whole wheat flour
1 cup regular all-purpose unbleached white flour
1/2 cup “healthy” sugar (so there’s no such thing as healthy sugar, but at least a healthiER kind)
1 TBSP bkg powder
1/4 tsp salt
1/3 cup butter, chilled and cut in pieces
1 6oz container yogurt (I used homemade.)
Some milk
1 tsp vanilla extract
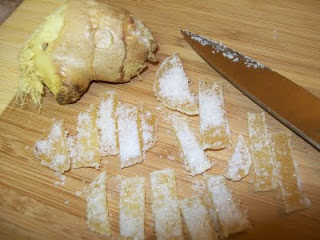
1/4 cup candied ginger, diced
6 medium peaches
2 TBSP butter, melted
1 tsp cinnamon
1/2″ piece of ginger, peeled and sliced
1/2 cup whipping cream
1 TBSP honey
nutmeg, grated

Mix the flours, baking powder, sugar and salt until well blended. Cut in the butter with a pastry blender:


Place the yogurt in a liquid measuring cup and add enough milk to measure a scant 1 cup. Mix together thoroughly, and add to the dry mix. Add the vanilla, and stir gently until well blended. If necessary, add some more milk, just a little at a time. Be careful not to overmix, because then the shortcakes will be tough. The dough should be pliable and just a tiny bit sticky.

Carefully mix in the diced candied ginger. (This picture is - obviously - before I finished dicing.)

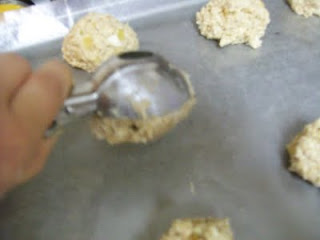
Using an ice cream scoop so as to create even, well-shaped shortcakes, drop the dough onto a lined cookie sheet.


Bake at 400 for approximately 15 minutes.

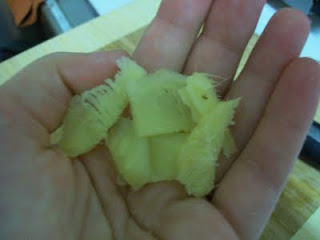
Peel and slice the fresh ginger.


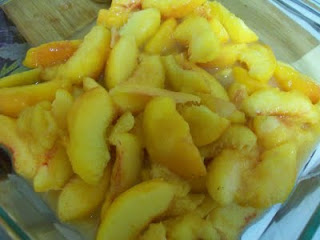
Peel and slice the peaches, and mix them with the melted butter, sliced ginger and cinnamon. Place them in a square baking pan and warm them in a 350 oven for about 10 minutes just to soften them a bit and blend the flavors.


Whip the cream until soft peaks form, then drizzle in the honey. Continue whipping until you have stiff peaks.

Now it’s time to assemble the shortcakes (or alternatively, to allow your guests to assemble their own).

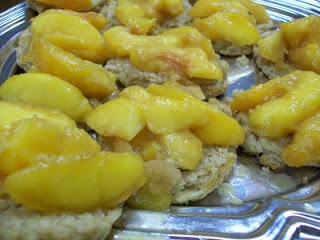
Slice the shortcakes in half and place the bottoms on your serving plate. Top each shortcake bottom with several peaches:


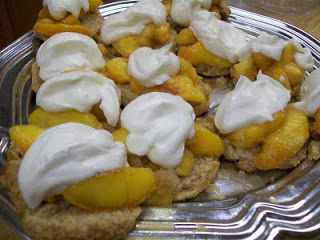
Place a generous dollop of whipped cream on each short cake.


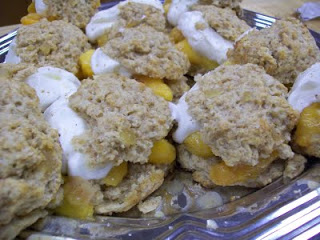
Grate some nutmeg, just to add a nice touch and a hint of flavor and finish up with the tops of the shortcakes.


Despite the lengthy ingredient list and instructions, it really is a QUICK recipe. The shortcake batter mixes up quickly and only takes 15 minutes to bake. To save time and cut steps, you could use pre-diced candied ginger and frozen peach slices without sacrificing any healthiness.

It’s also pretty EASY. This is a slightly fancified version of your basic shortcake, that’s it. (And shortcake is easy, if you’ve never made it before. Shortcake is basically fancified biscuit.)

It’s CHEAP. At least mine was, because I happened to get the candied ginger when my grocery store was featuring a triple-coupon sale. I had a coupon for any Asian Gourmet item, and the candied ginger ended up being free. You can also get candied ginger fairly inexpensively at Trader Joe’s if one is near you. Fresh ginger is dirt cheap (mere cents for a 2″ piece), and in-season peaches are very cheap as well. The shortcake/biscuit batter is made with very basic ingredients that don’t cost much.

It’s also HEALTHY, as desserts go. Now if you eat it for breakfast (I won’t tell anyone, promise!), I wouldn’t necessarily call it healthy because of the sugar, but as a dessert, it’s great. I love to make desserts with fresh fruit because I feel like it’s at least a little bit healthy. Whole wheat flour adds some fiber and other nutrients; and using real butter and whipping cream eliminates unnecessary and unhealthy trans fats and other undesirables. Peaches are also a good source of fiber as well as vitamin A, and ginger has been used for centuries to heal everything from motion sickness to heartburn.

BundleoftheWeek.com, 5 eBooks for $7.40!

What one melon said to the other…


I’m sorry, we “can’t elope” tonight…


**courtesy laugh**
OK, moving on!I almost always have a cantaloupe in the fridge because it’s one of few fruits DH can eat without a lot of prep (i.e. peeling, etc.) so we eat it alot. Most of the time, I just chop it up and we eat it plain or add it to a fruit salad. Occasionally, we’ll even eat slices straight off the rind, like watermelon. But that gets old, so I’ve experimented with different “treatments” and usages for cantaloupe to vary things a little.I actually more or less developed this recipe on my own, but then I found a very similar one in a magazine that sort of validated my efforts! I use either lime or lemon, depending on what I have on hand. Other variations include making a simple syrup with sugar, water and mint and marinating the cantaloupe in that, but I think this version is healthier, with a little more flavor.

I like to grow herbs on my deck, and mint is one of them. It’s so easy to add to a cup of iced tea or to fruit salads, or even some meat dishes. The flavor and smell are refreshing and strong.

This recipe is QUICK. In fact, doesn’t get much quicker than this. You have to “marinate” it in the fridge for a while, so it’s better to do it in the afternoon, but other than that it doesn’t take too much of your time.

It’s so EASY. If you can chop cantaloupe, you can make it!

It’s definitely CHEAP, especially if you buy the cantaloupe on sale for $1.50 or $2.00. Very little honey and lime are used, and if you have a fresh mint plant, the cost is minimal.

It’s HEALTHY, too. Cantaloupe has beta carotene, as well as vitamin C, potassium and folate. Beta carotene is an antioxidant and can be converted by the body into vitamin A. Mint also is a great source of vitamins A and C, so you get a double whammy with this dish!

(Scroll down for printable recipe)

Honey Lime Can’t Elope (sorry, couldn’t resist!)
1/2 a medium-sized cantaloupe
1 TBSP honey
juice from half a lemon or lime, or to taste
1 TBSP fresh chopped mint, or 1 tsp dried mint

1. Chop the cantaloupe into small cubes, or use a melon ball-er (great for a special occasion).

2. In a separate bowl, mix the honey, lemon or lime, and mint. I don’t like a strong lemon taste, so I just use a little. And a little goes a long way.

3. Carefully stir the honey lime mixture into the cantaloupe until all pieces are thoroughly coated. Cover and place in refrigerator for at least an hour to allow flavors to blend and absorb.

4. Before serving, drain the juice.


Sharing at Katherine Martinelli

BundleoftheWeek.com, 5 eBooks for $7.40!