I swear, it’s like having Christmas every month! Only the presents are all new friends and new foods to try… my kind of Christmas!

Just in case you’ve forgotten, the Secret Recipe Club, created by Amanda of Amanda’s Cookin’, is a group of bloggers who are assigned a blog from which to secretly browse and choose a new recipe to try, then write a post about it at the appointed time. My assignment this month was Gluten Free A-Z, written by Judee, who creates all kinds of gluten-free vegetarian dishes using healthy ingredients.
I was particularly pleased to find that many of her recipes were also dairy-free and egg-free, a plus for my Certain Little Someone who is allergic to both those things, plus wheat, and 4 other foods. It was easy to find several recipes on Judee’s blog to try, but I settled on her samosas. (I admit I was lured in by the tag line of “Quick, Easy and Delicious”!)

Back in the days when I taught other people’s children instead of my own, I had a co-worker whose mom occasionally would make huge batches of samosas and send them in with him to share. All of us teachers looked forward to those randomly occurring events and would devour the samosas almost instantly, leaving not even a trace of a crumb behind. I admit this version only faintly hints of those delicious treats, owing mostly to its gluten-free properties, as well as the fact that I didn’t have any cumin seeds or curry powder (I know, seriously. Who tries to make samosas without those ingredients? Um, me! In my defense, I thought I had curry powder before I started cooking and was halfway through before realizing I didn’t.)
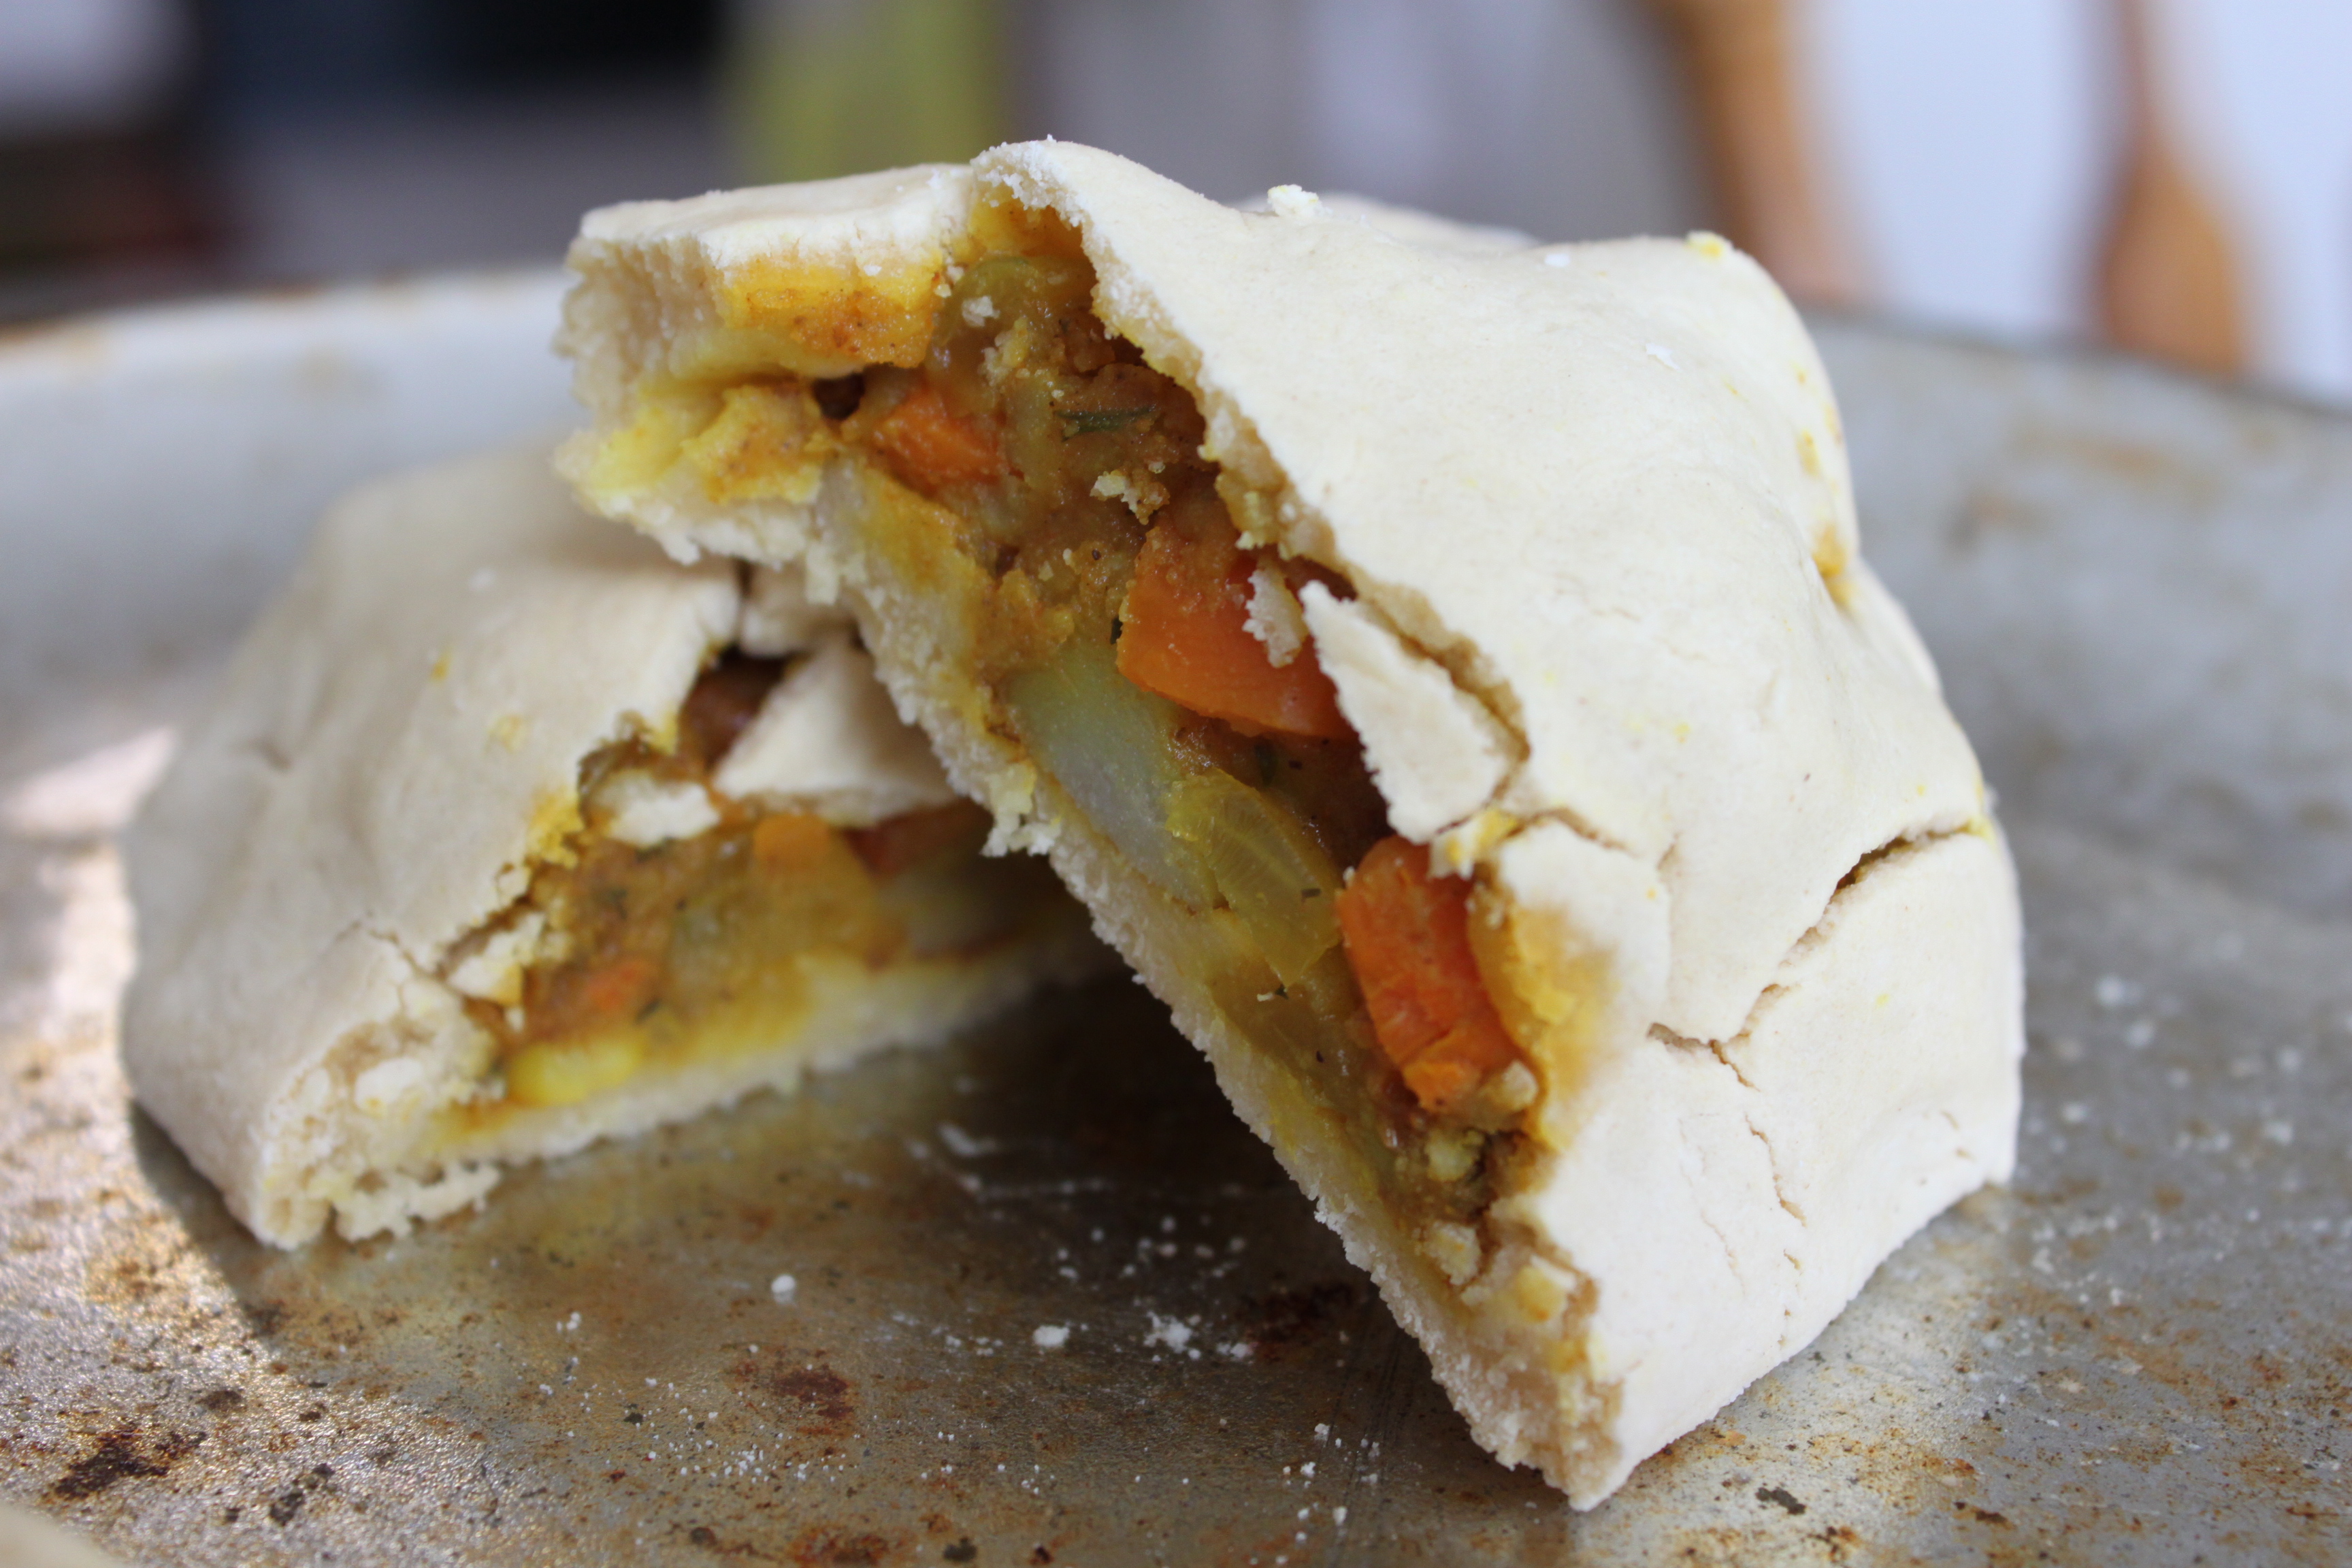
The end result was a resemblance of the original, and tasty in its own right, but not authentic by any means. And I’m OK with that. I’m all for authenticity, but one’s insistence on that wears thin after a few years of dealing with allergen-free substitutes. The crust was kind of hard on the top surface, but surprisingly flaky and soft underneath; and the filling was mild (due to the lack of appropriate spices) and intriguingly sweet with just a hint of Indian flavor. With the proper ingredients, it would have been perfect. Ahem.
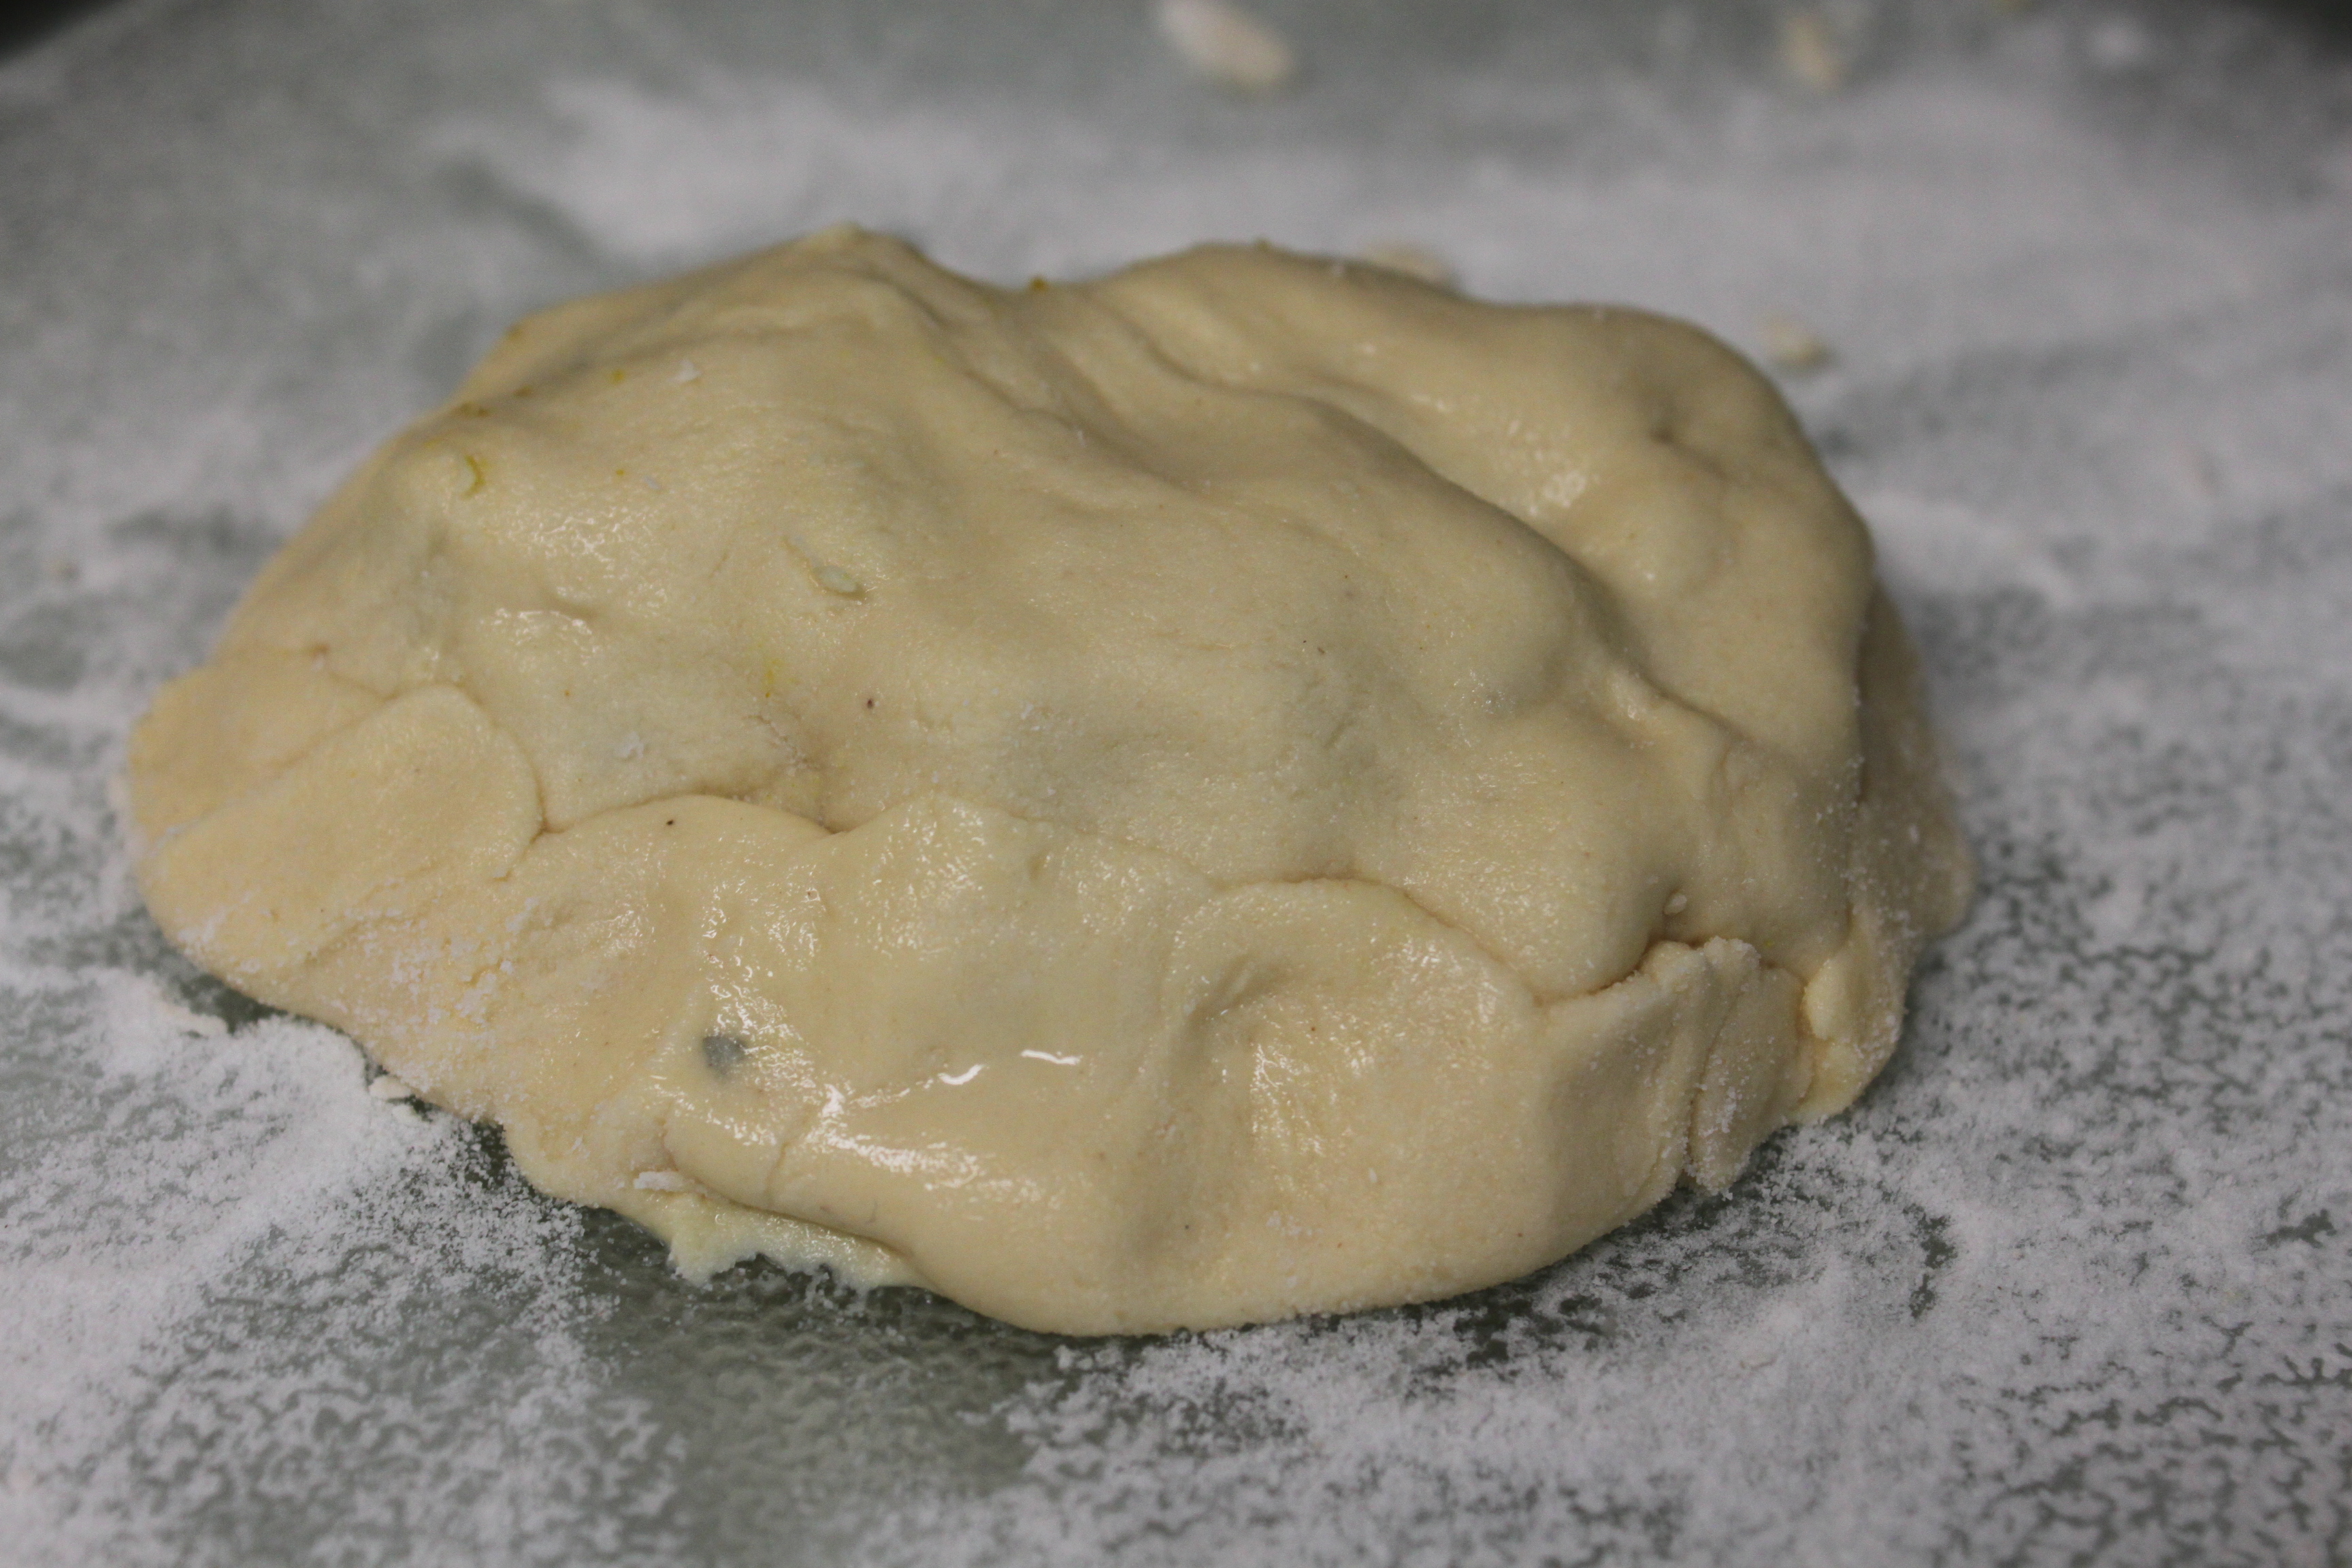
The pastry crust was rather difficult to work with, which is why I suspect Judee said she was still on the lookout for a good pastry recipe. In the end, it worked out pretty well, even better than I expected, but it did require gentle handling, lots of rice flour sprinkles, and wet fingertips. And of course, like a good little gluten-free egg-free dairy-free pastry recipe, it cracked all over the place on top while it baked, and I thought that brushing some water on top would solve that problem. It did, but then the water dripped down and sealed the dough to the pan, so that when I went to remove it, I had to bull-doze through the samosas and cracked the crust anyway.
Judee doesn’t specify which GF flour to use, but I thought it appropriate to use at least some chickpea flour, since it’s a flour native to India and therefore, would seem to fit right in. You can use whatever wheat flour or GF flour blend you desire.
{Scroll past the pictures for a printable version of the recipe.}

Assemble ingredients before beginning, so you have everything at hand when you need it.


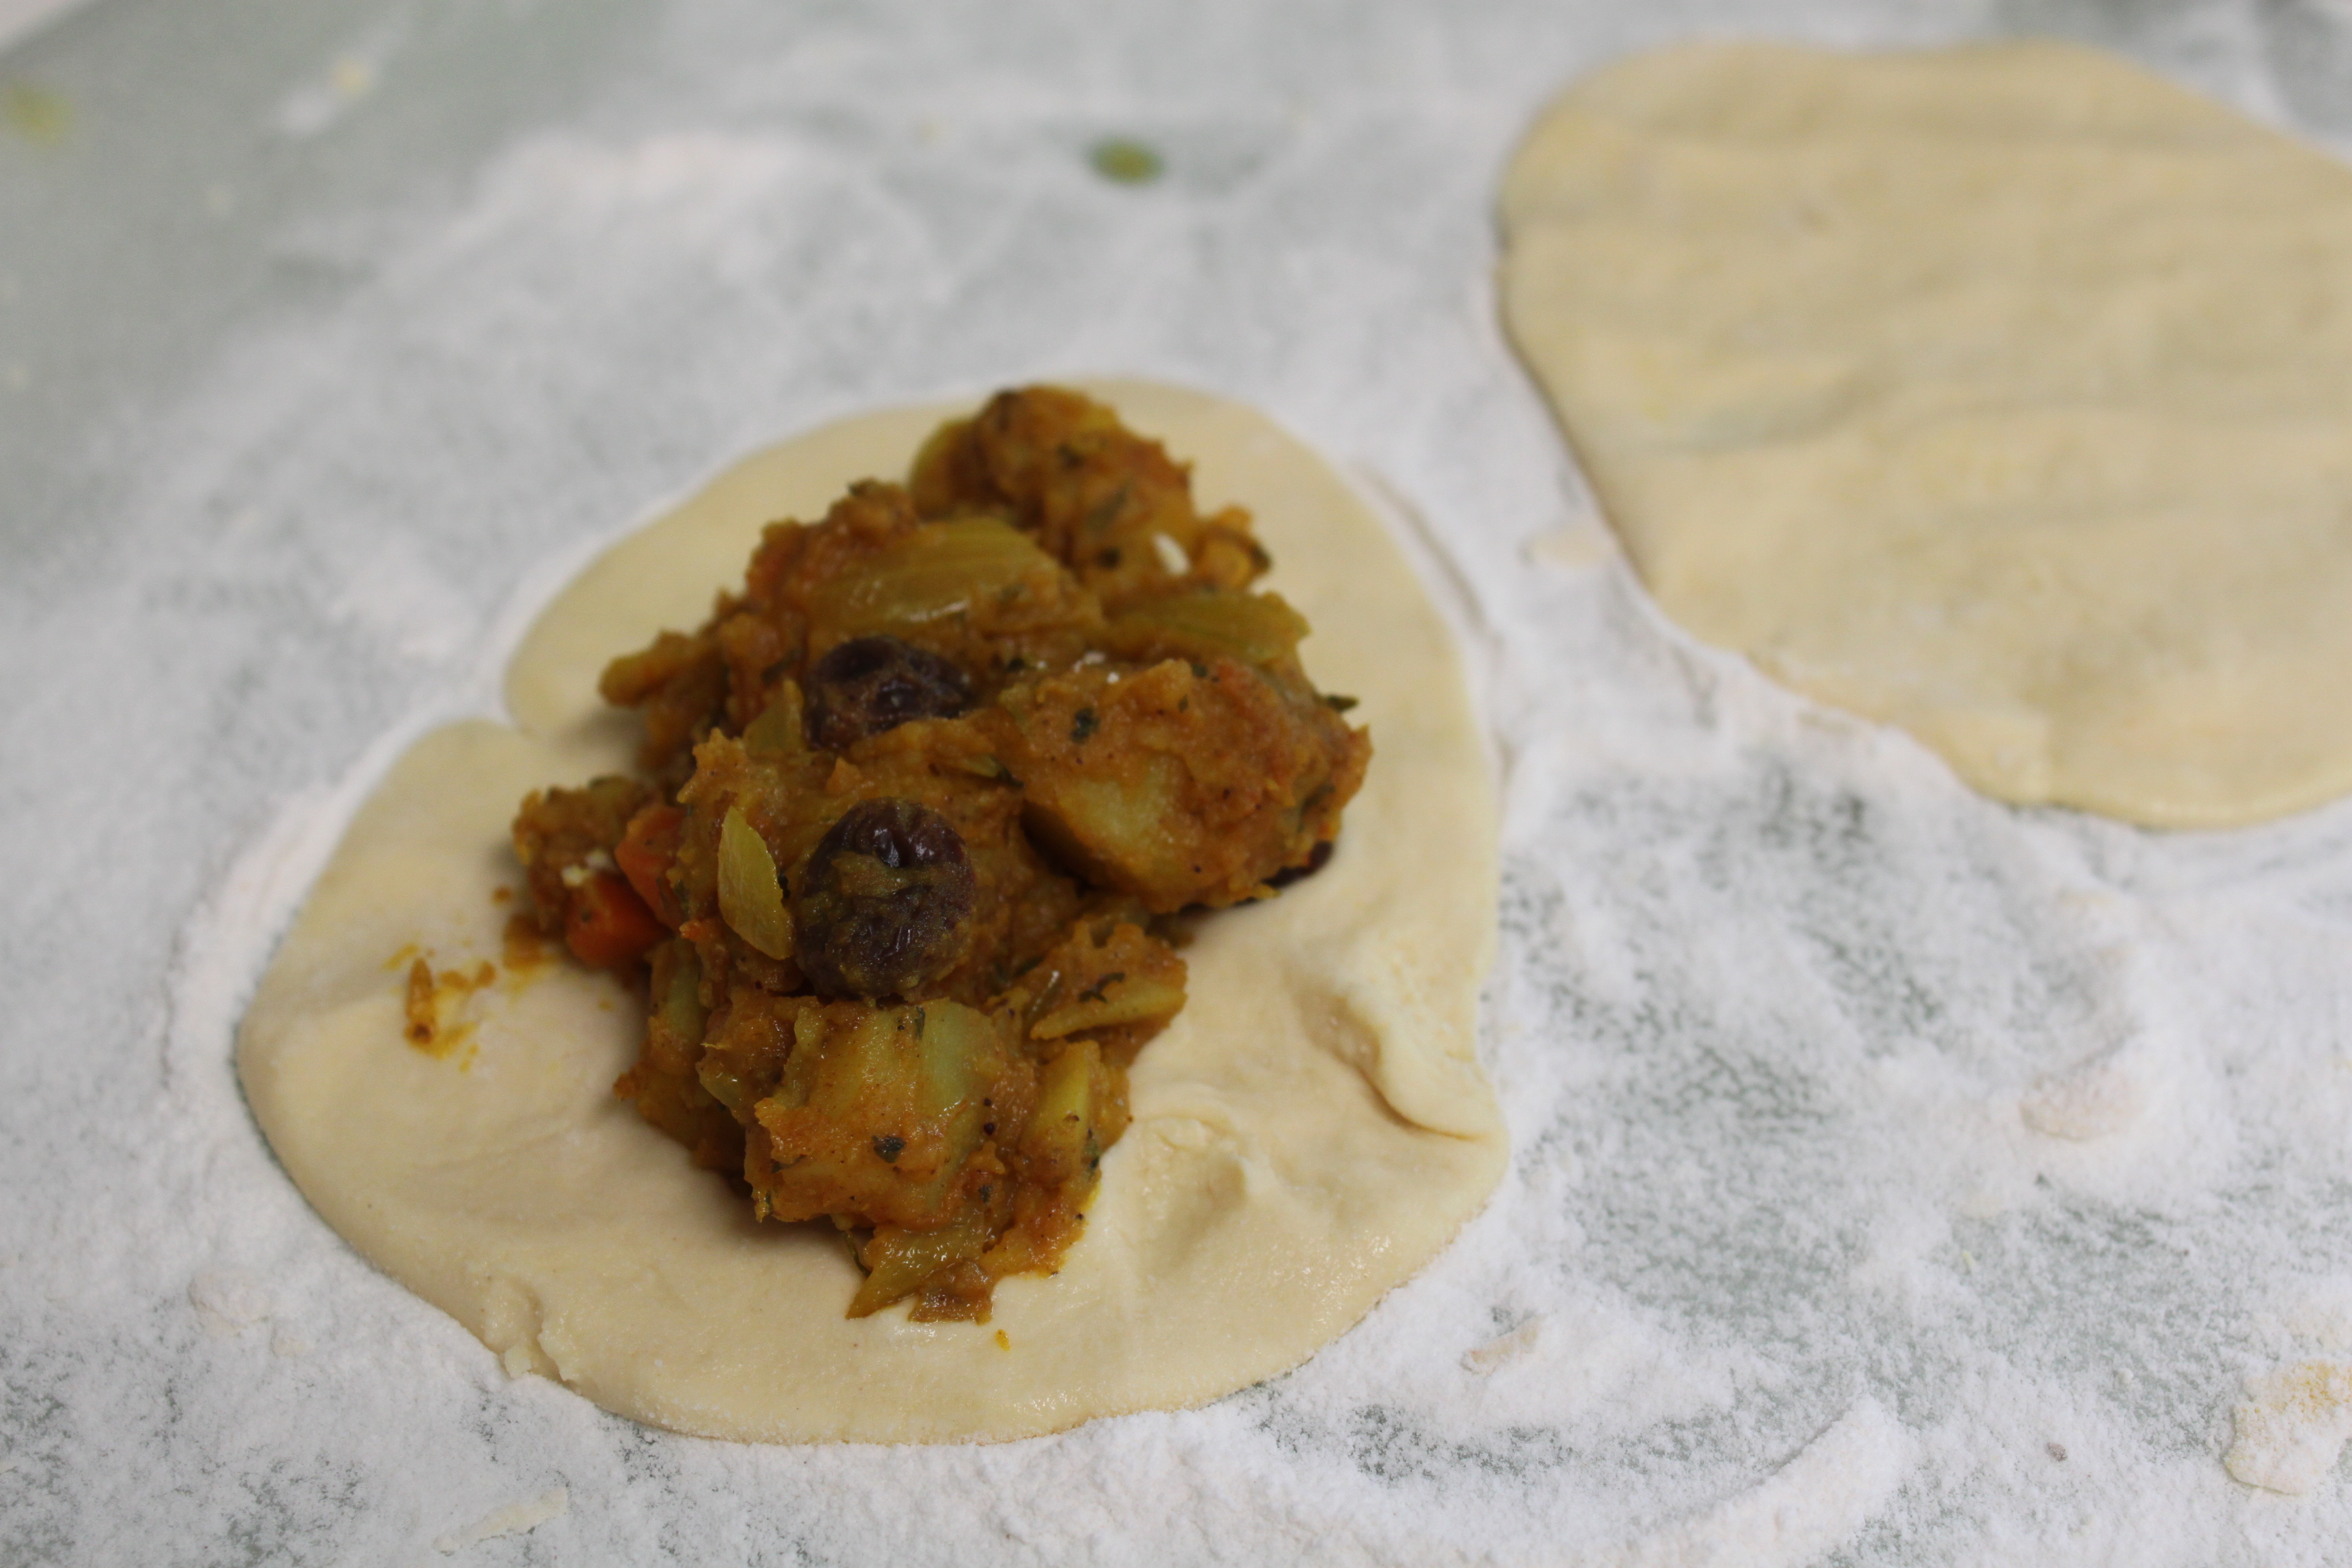
Place the extra circle on top of the filling.
Gluten-Free Vegan Samosas
Ingredients
For the crust:
- 1 cup chickpea (garbanzo bean, or besan) flour
- 1 cup brown rice flour
- 1/2 cup tapioca starch
- 1 cup coconut milk yogurt
- 1/2 tsp salt
For the filling:
- 2 medium potatoes, cooked and cubed
- 1/2 cup chopped carrots, steamed
- 1 TBSP cumin seeds, toasted
- 1/2 cup onion, chopped small
- 3/4 cup tomatoes, chopped small
- 1 clove garlic, minced
- 1 TBSP grated fresh ginger
- 1 tsp turmeric
- 1 tsp curry powder
- 1 tsp cumin
- dash of cayenne pepper
- 1 TBSP fresh chopped cilantro (or 1 tsp dried)
- 2 TBSP olive oil
- 2 TBSP raisins, soaked for 20 minutes
Instructions
For the crust:
- Mix all ingredients together until it forms a soft ball. Refrigerate if too soft to handle. Divide dough into 8 balls. Divide each of those balls in half and roll each half into a circle.
For the filling:
- Mash potatoes and mix with the carrots. Set aside.
- Mix together remaining ingredients except for raisins. Heat additional oil in frying pan, and add onion mixture, sauteeing until vegetables are softened. Remove from heat, and mix together the sauteed vegetables with the mashed potato mixture. Stir in raisins.
To assemble:
- Place 1/4 cup of filling in the middle of pastry round. Use a spatula to lift another pastry round and set it gently on top. Working gently with the dough, fold it up around the filling, pressing the seam carefully closed with wet fingers. Carefully move each samosa onto a greased baking sheet and bake for 20-25 minutes at 350F until browned.
Despite the lengthy ingredient list and instructions, it doesn’t really take as long as you would think, but it’s not the QUICKest recipe I’ve ever made either.
I wouldn’t classify it as EASY, especially with the gluten-free and dairy-free substitutions.
It makes a great CHEAP non-meat-based meal that I would include in my recipe rotation if it weren’t for the fact that my DH doesn’t really like Indian spices (I know, seriously. What’s his problem, anyway?).
It’s definitely HEALTHY, with all those nutrient-packed veggies and antioxidant-rich spices. Even the crust is made with wholesome ingredients, so it’s a win all around in that department!
All in all, I was pleased with the success of my first attempt at samosas, gluten-free flour issues and all! They are much easier than I ever would have thought, even if they don’t come close to the “real” thing. I will definitely be making these again - even if my DH won’t enjoy them, my Certain Little Someone and I will have them all to ourselves at lunch time!

Check out what the other Secret Recipe Club bloggers were up to this month:


