A Sparkling New Year: Make Your Own Sparkling Cider

If you want champagne, I can’t help you, because I don’t know how to make champagne. But if you prefer the non-alcoholic sort of bubbly, well then, you’ve come to the right place.

It’s actually incredibly easy to make your own sparkling cider! All you need is apple cider syrup and seltzer water.

Apple cider syrup? “What’s that?“, I hear you ask. I’ll tell you. It’s essentially boiled down apple cider. That’s it. Apparently, according to Foodie With Family, the early colonists boiled down their cider to preserve it throughout the winter and beyond following the apple crop season. They could have cider anytime, simply by reconstituting their apple cider concentrate.

There are a lot of applications for apple cider syrup, and it’s gaining momentum in foodie and food blog circles, and in my opinion, it’s worth keeping some jars of this stuff in the house year-round! Foodie with Family suggests a variety of usages, some of which I’ve tried, but I’m going to share with you her favorite, which is seriously the bomb.

But first, let’s make the cider syrup. Most of the posts I’ve read about it involve using large amounts of apple cider and boiling it away - on high! - for hours. Number one, I don’t have hours to babysit the stove. Number two, I don’t want the stove on high for hours. Solution? I just make less at a time. Works for me.

Honestly, though, it doesn’t really matter how much you start with, as long as it’s at least about 2 cups. The point of boiling it is to reduce it, so you want to start with enough so that you can substantially reduce it. From there, you can boil several gallons at a time if you have a large enough pot. And apparently it can be processed and stored in the pantry, but I just keep mine in the fridge.

Here’s how you do it:

Pour at least 2 cups of apple cider into a large pot on the stove over high heat. Use a ruler, or mark a wooden spoon, to note the level of your apple cider before it begins to boil. Bring to a boil and allow it to boil undisturbed until it is reduced in volume to one seventh of the original amount. (I didn’t twist my brain in circles trying to calculate exactly how much one-seventh was or is. I just looked for a syrupy texture that was quite a bit less than what I started with.) The ruler or marked wooden spoon will help you determine when it’s boiled long enough. Be careful, though: it goes very quickly from syrup to sludge, so the first few times you make it, watch closely until you get a good feel for the timing and the proper texture. You’re looking for an almost honey-like consistency, a slight thickness, but still pourable.

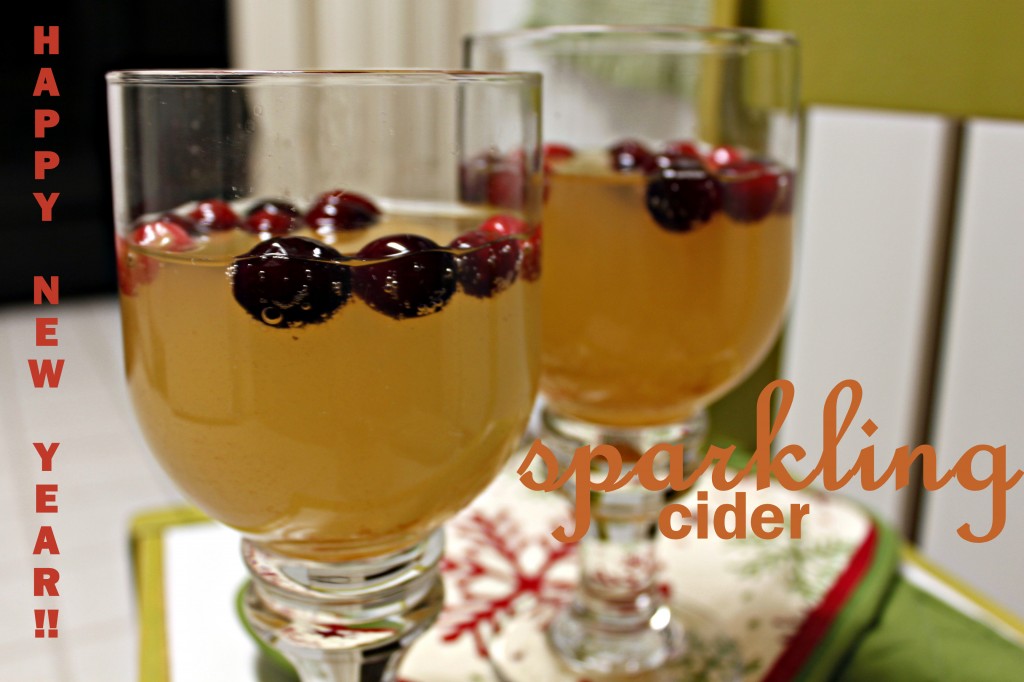
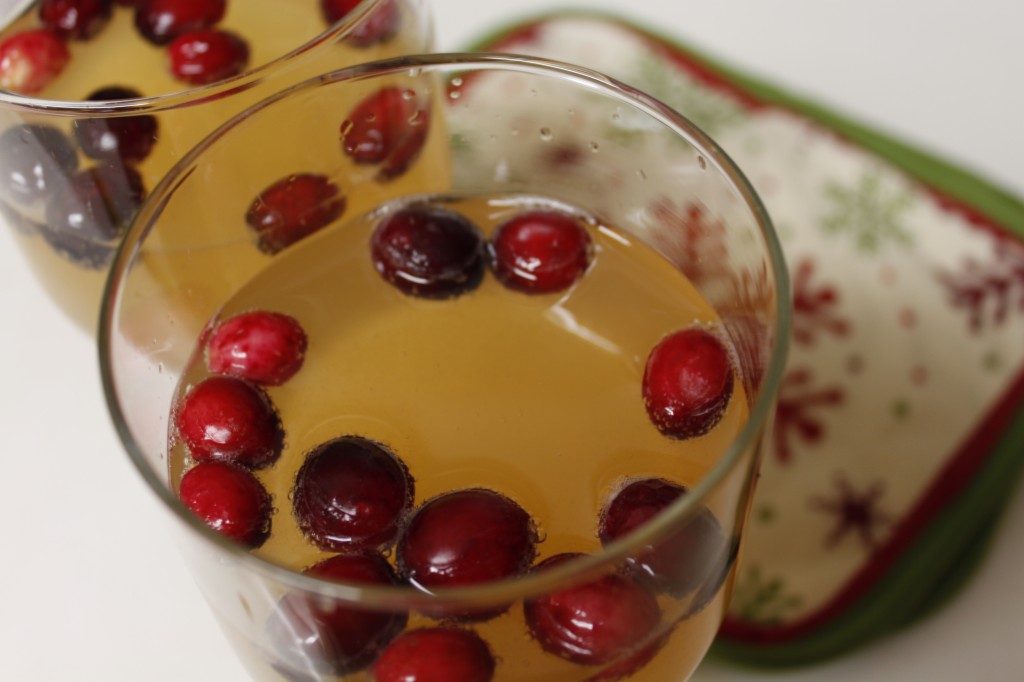
Once you have your apple cider syrup, making sparkling apple cider is a breeze! All you have to do is stir 1 TBSP of the cider syrup into a glass of cold seltzer water. Serve it over ice, if desired. I sprinkled a few fresh cranberries into mine for visual interest.

Once you have a batch of apple cider syrup made, the sparkling cider itself is so QUICK. And the great thing is you can make the cider syrup any time, even a month before you need it.

It’s very EASY, too. There is a trick to boiling the cider the right amount of time, but once you’ve mastered that it’s no big deal. And once that’s made, even a kindergartener could fix a glass of sparkling cider! If you wanted your kindergartener in the kitchen unattended, which I wouldn’t. Just sayin’.

It’s CHEAPer than buying those over-priced bottles of sparkling cider and grape juice. A huge bottle of seltzer water is usually less than $1 at my grocery store, and I can usually get a whole gallon of cider for $4. According to my calculations, a gallon of cider reduced by 7 is 2.25 cups, which is 36 TBSP-sized servings. That makes it about $0.11 a serving. Add that to the seltzer water, at $0.13/serving, and it’s less than $0.25 for each glass of sparkling cider. Compare that to the bottles of cider that only have 3 servings and go on sale for $2.50-$3! (Now, unpasteurized organic apple cider is a lot harder to come by - usually only available at farmer’s markets during apple season - and more expensive, about $6 or so. The beauty is that it can be reduced to syrup and preserved for the rest of the year!)

It’s much HEALTHY-er than some store-bought versions. Although Martinelli’s Sparkling Cider is all natural with no added sugars, the same cannot be said for other varieties, which often contain high fructosed corn syrup and other evils.

Sharing at Katherine Martinelli’s DIY Blog Hop.

BundleoftheWeek.com, 5 eBooks for $7.40!

New Year’s Brunch

After staying up late to usher in the new year, New Year’s Day is the perfect day for a brunch. And since you will probably be rolling out of bed at 10:00am (or later), you won’t want to spend the whole day fixing a gorgeous brunch. This is an all-in-one, easy to make, breakfast and lunch in one fell swoop, being equal parts French toast, grilled cheese, and scrambled eggs. Oh, yeah, with bacon thrown in. It’s a twist on the traditional Monte Cristo sandwich, which is made of French fried bread with turkey meat and cheese inside.
I have made regular Monte Cristos before, but my DH mentioned the other day that he really enjoyed the Monte Cristos he had eaten at a local restaurant his co-workers love. When he was describing the sandwich as being filled with eggs and cheese, I was curious because I’d never heard of such a thing before. Since he only worked until 11:00am today (New Year’s Eve), I wanted to surprise him with a yummy brunch when he came home from work, so I tried my hand at my own version of Monte Cristo Breakfast Sandwiches. Yum!
This recipe makes 2, but you can easily double it for larger quantities.
Monte Cristo Breakfast Sandwiches
3 eggs, divided (not separated)
4 TBSP milk (divided)
1/2 tsp Garlic and Herb seasoning blend
1/4 tsp ground black pepper
2 slices cheddar cheese
2 slices bacon, cooked
4 slices bread (a thick, heavy bread is best)
Beat 2 eggs together with 2 TBSP of milk, the seasoning blend and pepper. Fry in a small frying pan until thoroughly cooked. Set aside.
Beat the remaining egg together with 2 more TBSP of milk until thoroughly blended. Heat a greased griddle or frying pan over medium heat. While pan is heating, collect your ingredients near the stove, because you will have to move quickly to assemble the sandwiches: bread, cheese, bacon and eggs should all be nearby.
Soak the bread slices in the egg/milk mixture like French toast. Lay them in the frying pan for about 30 seconds or less, just long enough to cook the egg on one side. Flip them over and layer the cheese, bacon and eggs on two of the slices. Top with the remaining slices. Flip once or twice more (carefully) until thoroughly cooked and warmed through.
Remove to serving plates, and if desired, sprinkle with powdered sugar (I opted out of the powdered sugar on mine, for obvious reasons!)
It’s slightly more involved than French Toast or scrambled eggs would be by themselves, but it’s still QUICK.
It’s very EASY, too. The hardest part is working quickly enough to assemble the sandwiches before you burn the French toast, but if you have everything handy, even that is easy.
It’s more expensive than French toast, grilled cheese or scrambled eggs would be on their own, but for a special brunch, it’s a pretty CHEAP yet hearty option.
It packs a LOT of calories but it’s still pretty HEALTHY. If you eat it as a brunch, that’s two meals together, so you can afford the extra calories. If you prefer, you can use turkey bacon to reduce the calorie and fat count even further. If you really wanted to, you could scramble the eggs with water instead of milk, but as you know, I don’t consider milk (even whole milk) to be unhealthy. Be sure to use healthy whole grain bread, also (I used homemade whole wheat bread). And serve it with a sizable portion of fresh fruit to make a complete and balanced meal.

BundleoftheWeek.com, 5 eBooks for $7.40!

Easy Peasy Cheesy New Year’s Appetizer

I am pretty sure my family is not the only one whose New Year’s Eve repast consists mostly of hors doeuvres and finger foods. When you’re staying up until midnight to usher in the New Year, you need to snack on something, right? And it’s better (or so one thinks) to nibble here and there all night long than to fill yourself up on a big meal and then nibble some more on top of that.

My offering for the New Year’s nibbling-fest is neither exciting nor new: it is a simple humble cheese ball. I have admired and enjoyed others’ cheese balls through the years, but I never attempted one myself until I brought one to a Christmas party a couple weeks ago. Since it was more or less a success, and I still had 2 packages of cream cheese in the refrigerator, I decided to make another for my contribution to the New Years’ selection of appetizers.

The vast majority of cheese balls (or logs, if you prefer) are rolled in nuts, but since I was out of nuts and my DH can’t eat them anyway, I had to scratch my brain for a few minutes to come up with an alternative: seasoned bread crumbs! It’s so simple, but it’s so delicious; in fact, I think I prefer the bread crumbs to chopped nuts, because they blend in better both in texture and in taste. Unfortunately, removing the nuts also removes some of the health value of this appetizer, but one must make trade-offs somewhere, especially when it comes to diets limited for health reasons.

There are at least a million varieties of cheese ball recipes (as you will discover if you google cheese ball recipe), but almost all of them have one thing in common: they’re based on 2 8oz bricks of softened cream cheese. As long as you have those items and a few seasonings and spices in your cupboard, you are good to go. I sort of made mine up as I went a long, and here’s what I ended up with:

Easy Peasy Cheesy Ball
2 8oz bricks cream cheese, softened
2 TBSP grated Parmesan cheese
1 tsp oregano
1 tsp basil
1 tsp thyme
1/2 tsp garlic powder
1/2 tsp onion powder
1/2 tsp freshly ground black pepper
1/2 cup bread crumbs

Place all ingredients, except the bread crumbs, in a medium bowl and stir together until well blended (if the cream cheese is soft enough, you can do this with a wooden spoon). Spoon the mixture onto a large sheet of wax paper:

Use the wax paper to help you shape it into a ball:

Pour the bread crumbs onto the other end of the wax paper:

Roll the cheese ball in the bread crumbs until it is completely covered and no cheese is showing through. You can also continue shaping as you go so that you have a nice round ball. The bread crumbs will help you shape it up firmly.

This is what it should look like:

Refrigerate for a couple hours or until ready to serve. Serve with crackers, crudites, squares of toast, pita bread triangles, etc.
This is a very QUICK recipe, perfect for a busy or even a lazy day. It does need to chill for an hour or two, but the actual mixing and shaping takes very little time.
It is certainly EASY, no doubt about that! You don’t even have to pull out the mixer for this one.
CHEAP depends on how much you pay for the cream cheese and the crackers (or whatever you serve with it). I never pay more than $1.00 for cream cheese: I watch for it to go on sale and I use coupons. I often buy the store brand, which works just as well as the famous Kraft Philadelphia kind. As for crackers, I usually never buy them, but this time around, I pretty much got them for free: my grocery store was having a special midweek sale where certain crackers were only $0.99. On top of that, I had a $1.00 coupon, so I ended up paying nothing for them! Using bread crumbs instead of nuts also greatly reduces the cost.
HEALTHY is relative… Many recipes I saw for cheese balls called for products like processed cheese food (why they tack food on the end of that I don’t know - a misnomer if there ever was one!), or powdered dressing mixes, both of which I consider to be very UNhealthy. I purposely made mine without those ingredients, so it’s healthier in that sense. I also didn’t add any Worcestershire sauce or soy sauce, which would greatly increase the amount of sodium. On the other hand, I don’t think that cream cheese is the healthiest dairy product available, being one of the more processed cheeses. And as I mentioned before, removing the nuts removes a lot of nutritional value: healthy fat, protein and fiber, to name a few. I did use homemade bread crumbs from homemade bread, so at least they’re healthy bread crumbs! To sum up, it is a slightly healthier version of less-than-healthy appetizer. I am hoping someone else brings a vegetable tray I can load up on to make the difference!
More appetizing appetizers at:
Check out Life as Mom for more New Year’s Munchies ideas!
Find more dips at Katherine Martinelli.

BundleoftheWeek.com, 5 eBooks for $7.40!