The Easiest Allergen-Free Birthday Cake Ever!

easy allergen-free birthday cake

Can you believe that my Certain Little Someone (who is getting woefully Bigger and Bigger each day, and is not so Little anymore) requested to have the same birthday cake at his fourth birthday party that he had for his second birthday party? Apparently, it made a big impression on him! Or maybe the spectacular fail of his third birthday cake made an even deeper impression (*snort*). In any case, I obliged and made him a replica of his second birthday cake decorations, but I did update the actual recipe a bit.

Since his second birthday, I have been blessed to discover the wonders of spelt, and I knew that I just had to make his birthday cake out of spelt flour. Finally, a yummy-tasting, staying-together, not-so-crumbly cake that everyone - including the birthday boy - could enjoy. Yes!

I am happy to be over at Baking Whole Grains today, sharing my super easy and almost-healthy allergen-free birthday cake recipe.

Find other interesting and informative posts at: Tip Me Tuesday, Trivium Tuesday, Mom’s Library, Titus 2sday, Teach me Tuesday, Hip Homeschool Hop, Titus 2 Tuesday, Delicious Dishes, Open Call Tuesday, Tiny Tip Tuesday, Healthy 2Day Wednesday, Frugal Days Sustainable Ways, Works for me Wednesday, Women Living Well Wednesday, Real Food Wednesday, Whole Foods Wednesday, Allergen-Free Wednesday, Encourage One Another, Life in Bloom, Thought-Provoking Thursday, Simple Lives Thursday, Homemaking Link-Up, Tastetastic Thursday, Keep it Real Thursday, Frugal Thursday Rewind, Homeschooling on the Cheap, Fellowship Friday, Fight Back Friday, Feast in Fellowship Friday, Frugal Friday, I’m Lovin’ It, Weekend Bloggy Reading, Snacktime Saturday, Show & Share Saturday, Weekend Whatever, Motivation Monday, Mom’s Monday Mingle, Homestead Barn Hop, The Bulletin Board, Better Mom Mondays, Natural Living Monday, Tip Me Tuesday, Trivium Tuesday, Mom’s Library, Titus 2sday, Teach me Tuesday, Hip Homeschool Hop, Titus 2 Tuesday, Delicious Dishes, Open Call Tuesday, Tiny Tip Tuesday,

BundleoftheWeek.com, 5 eBooks for $7.40!

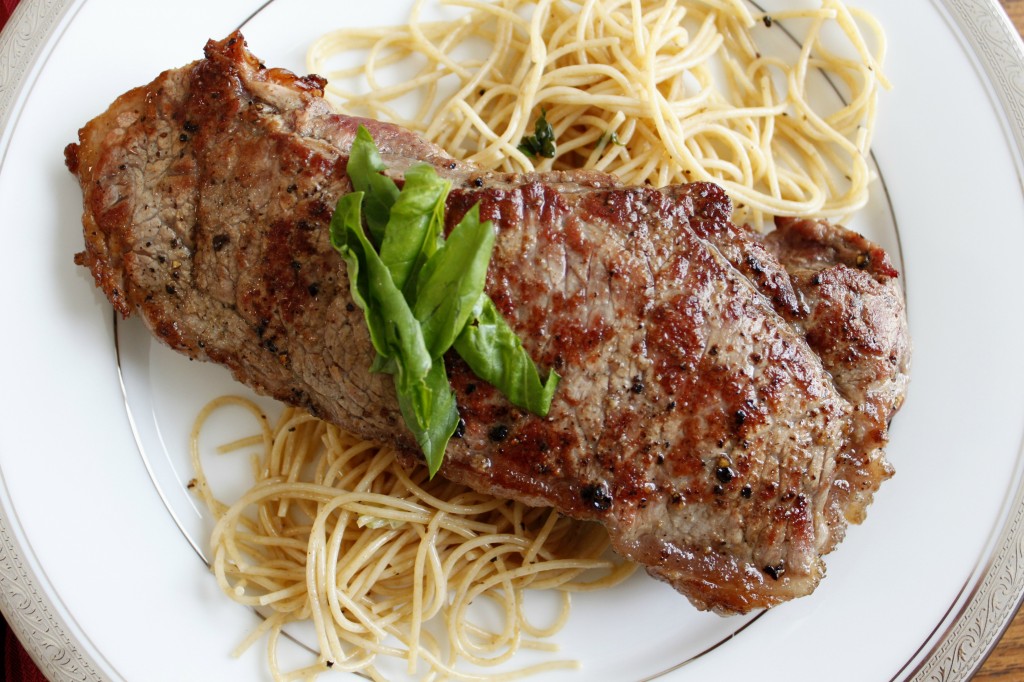
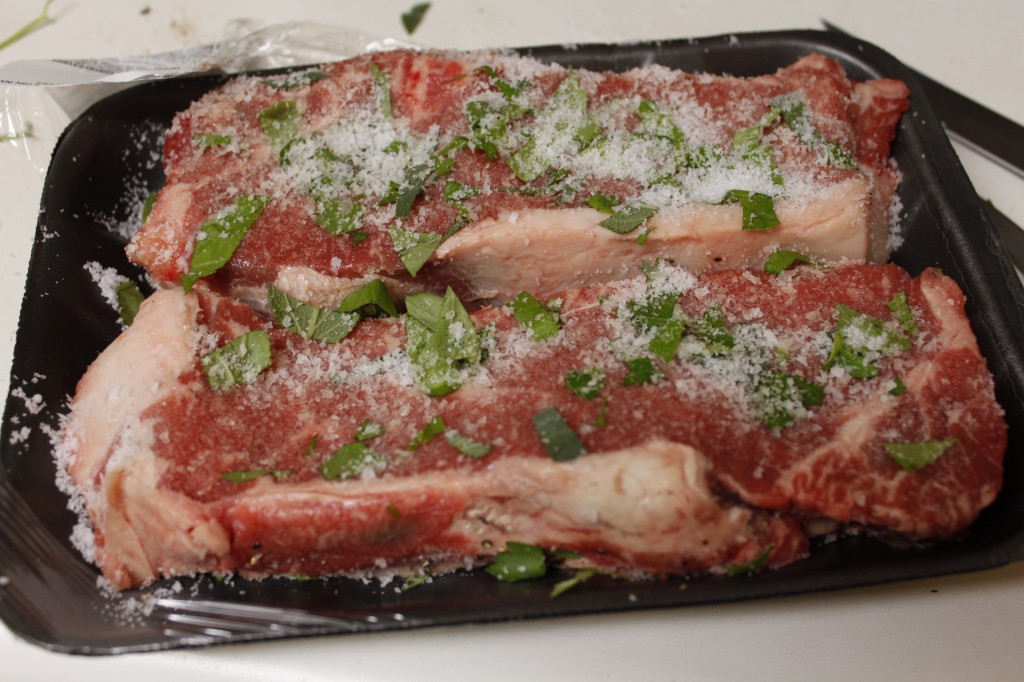
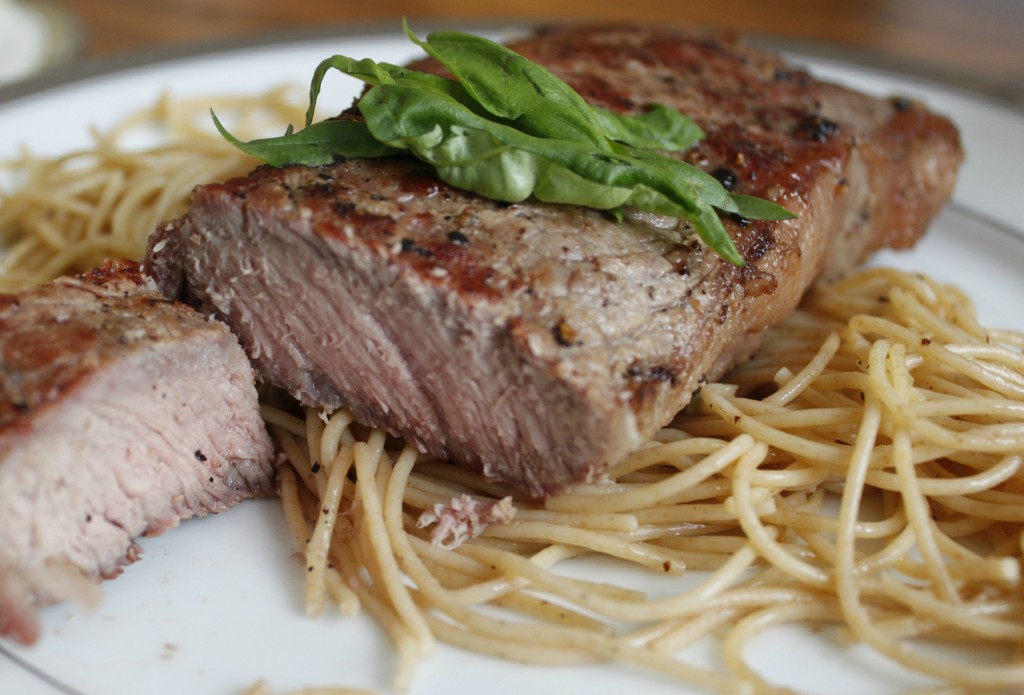
The Easiest Way to Prepare Steak - Salt “Marinade”

My DH has had some fun this summer, grilling on our little itty bitty charcoal grill. We had never had one before; I’m not sure why, to be honest! We just never got around to buying one, I guess because it’s a little awkward when you live in an apartment. But around Father’s Day, my DH determined that he was going to get one of those little cheap-o charcoal grills at Target by hook or by crook. Thankfully, neither hook nor crook was necessary, as his brother happened to have an extra one on hand. Still a cheap-o little charcoal grill, but one that had only been used once, and was in great condition. And FREE! Can’t beat free!

One of the first things we (by which I mean my DH) grilled was New York Strip Steak. Now, I know what you’re thinking. El Cheapo grilled steak? And New York Strip Steak at that?!

Yes, I know. It was highly out of character for me. But it was for Father’s Day. My DH is a great dad and he loves steak, so I decided to treat him with fancy schmancy steak in our not-so-fancy-schmancy grill. (Note to the mommies out there: this is a very sneaky way to get your husband to make his own Father’s Day dinner without him hardly even realizing it. Shameless, I know!)

And yes. I know. It’s July, and Father’s Day was a month ago. What can I say?

But it doesn’t have to be Father’s Day to enjoy grilling steak. Any old day is perfect for grilled steak. And what I love about this recipe is its speed - no need to think ahead and marinate for hours on end. For one thing, that’s not necessary with a good steak. For another, marinating for hours on end will not get you any better results than this simple salting method. I guarantee. Why take all day when 25 minutes will do?


This is a great QUICK meal for any hot summer night!

Steaks are EASY to cook, especially on the grill!

CHEAP? Um. No. Not even close! Especially since I bought Safeway’s Open Nature beef, which is not as good as grass-fed beef, but much better than regular old beef… and costs quite a bit more, too!

If you can get grass-fed beef, this is a very HEALTHY meal. I know that vegetarians would beg to differ with me, but if you’re an omnivore like me, you understand!

Sharing at Simple Lives Thursday, Tastetastic Thursday, Titus 2sday, Traditional Tuesday, Healthy 2Day Wednesday, Women Living Well Wednesday, Whole Foods Wednesday, Works for Me Wednesday, Real Food Wednesday, Allergy-Free Wednesday
BundleoftheWeek.com, 5 eBooks for $7.40!

Celebrate the Fourth with S’Mores in a Jar


Healthy 2Day Wednesday is taking a break to celebrate the Fourth of July. We’ll be back next week!

Happy Fourth of July!

I hope you all have a safe and blessed Independence Day! We are going down to our state capitol and having a picnic, watching a parade, listening to the Navy Band play, and - naturally - catching the fireworks show. Promises to be fun!

On the menu:

Chicken Salad Sandwiches on Sourdough Bread

Sunbutter & Jelly Sandwiches on Allergen-Free Bread

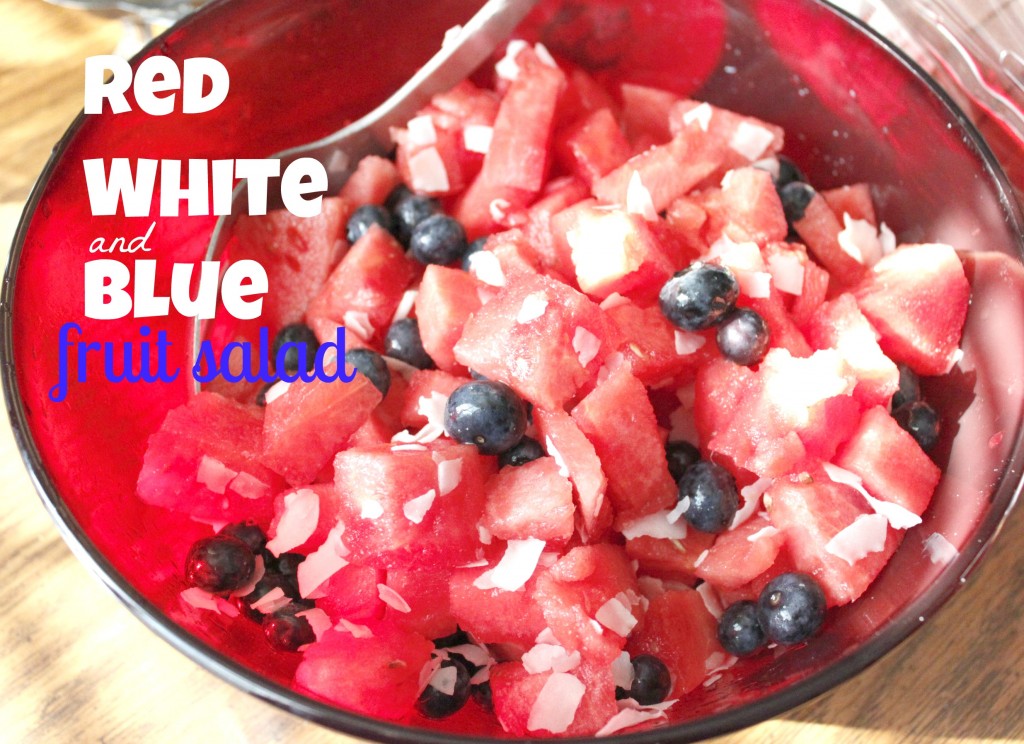
Red White and Blue Fruit Salad

Apples

Baby Carrots

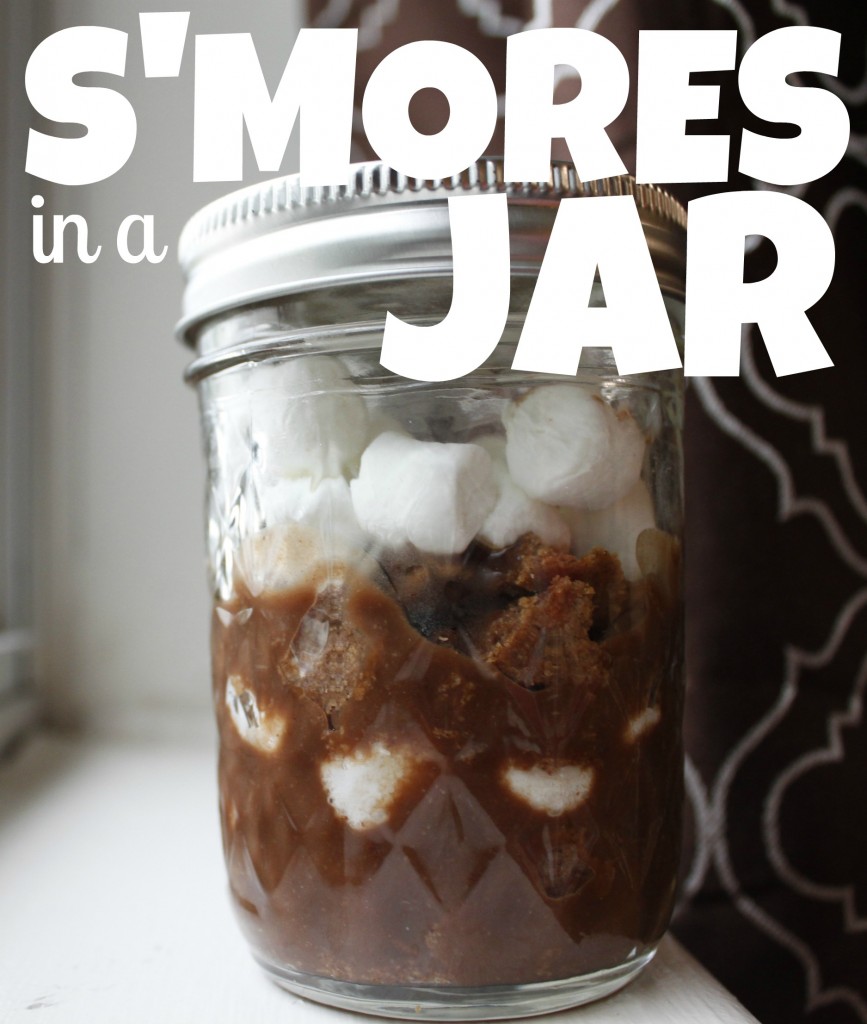
S’Mores in Jars

Speaking of S’Mores in Jars, here you go:

These are the easiest to make ever! In a pint-sized jelly jar, layer the following:

  • Crumbled graham crackers (Graham Cracker Recipe, Graham-Free Graham Crackers)
  • Chocolate pudding (use rice milk for a vegan/allergen-free version)
  • Mini marshmallows (a guilty pleasure!)

Repeat the layers, screw on the lid, and there you have it: a portable picnic dessert that everyone will love!

Sharing at Women Living Well Wednesday, Allergy Free Wednesday, Works for Me Wednesday

BundleoftheWeek.com, 5 eBooks for $7.40!

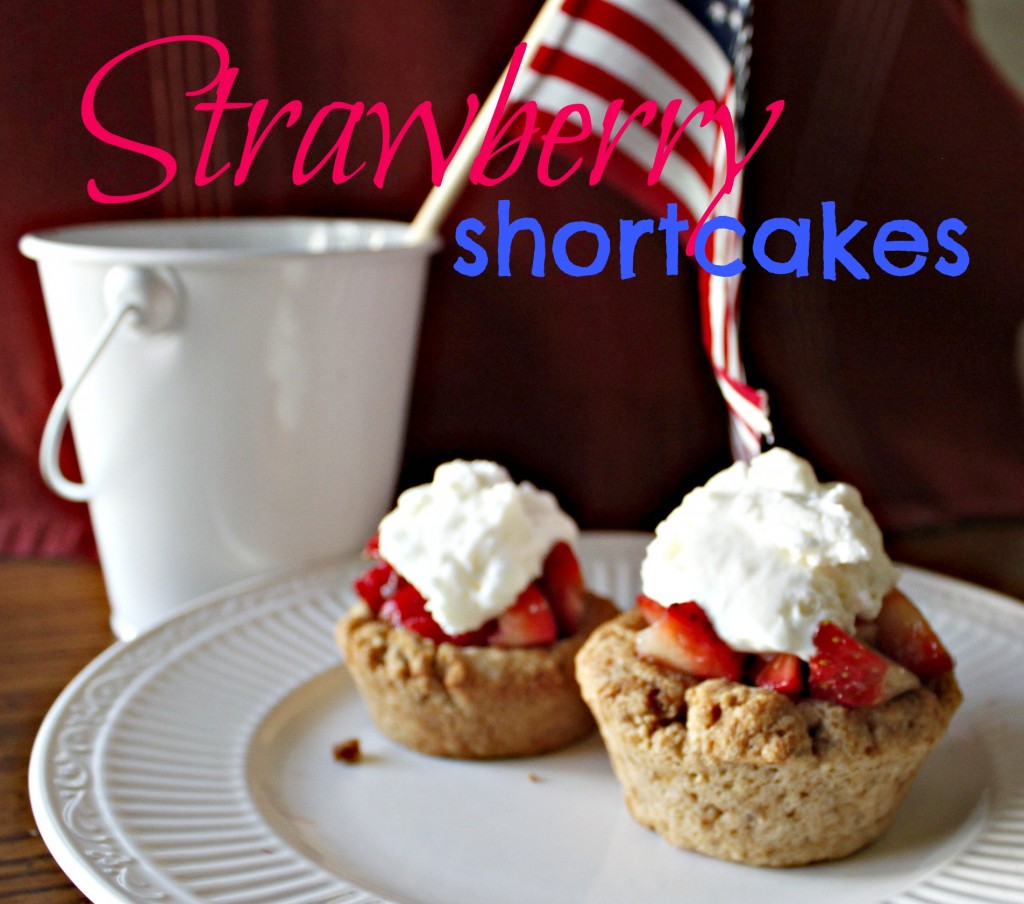
Lil’ Baby Strawberry Shortcakes

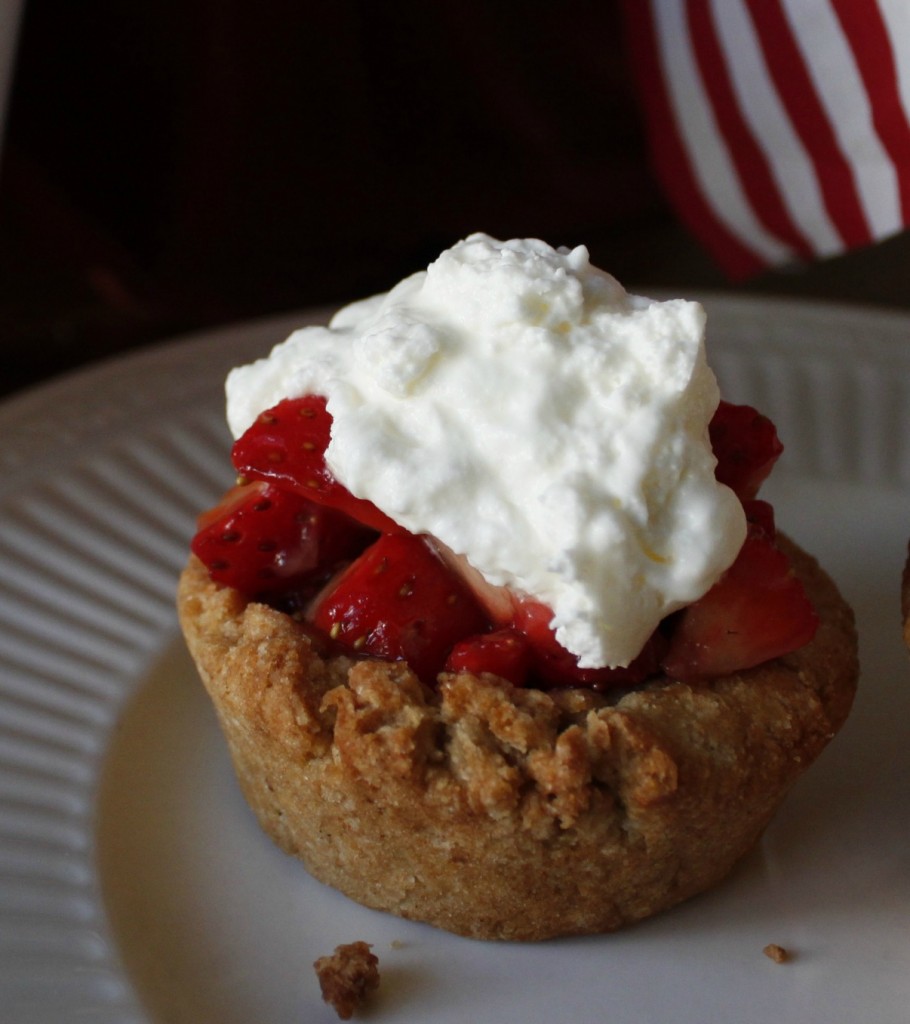
Aren’t these cuties… well… cute? Little bundles of shortcake joy! I brought them to our church’s annual Picnic on the Grounds to celebrate the Fourth of July as part of the potluck lunch. The platter was cleared so fast, I barely had time to grab one for myself and Baby Boy! Thankfully, I was a smart one and had saved a few of the biscuits at home, so the boys enjoyed those for breakfast this morning. (Dessert for breakfast is a wonderful thing, don’t you think?)

I made both a regular and an allergen-free version of these and both turned out pretty well. Both options are included in the simple recipe below.

Strawberry Shortcakes

Ingredients

  • 1 batch biscuit dough (regular or allergen-friendly*)
  • 1 lb strawberries
  • 1/4-1/2 cup unrefined sugar
  • 1 cup whipping cream or coconut milk
  • liquid stevia, to taste

Instructions

  1. Take a golf-ball sized piece of biscuit dough in your hand and roll it into a ball. Flatten into a disk and place in the bottom of a muffin tin. Press the dough up the sides of the tin. Continue with the remaining biscuit dough. Bake at 425F for 10-15 minutes or until golden. Remove from oven and cool on wire rack.
  2. Meanwhile, chop strawberries (you’ll need pretty small pieces) in a bowl and sprinkle with the sugar, to taste. Allow to sit for a while so the sugar will dissolve into the strawberries.
  3. Place the whipping cream in a mixer and beat on high until soft peaks form. Add in liquid stevia (or honey or sugar) to taste, and continue beating until fairly firm peaks form. To make an allergen-friendly “whipped cream”, place a can of coconut milk in the fridge for several hours. Spoon the solid portion into a mixer and beat briefly until it is the consistency of whipped cream. Stir in the sweetener to taste.
  4. When biscuits are cool, scoop the strawberries into the depression on each biscuit. Top with a spoonful of whipped cream.

*You can use your own favorite biscuit recipe, of course! If you use the ones linked here, simply omit the sweet potato or squash. Otherwise, follow the recipe as directed.

These are a QUICK yet festive option for your Fourth of July celebration!

They are fairly EASY, although they do involve a few extra steps.

How CHEAP they are depends on how much you have to pay for the strawberries. This time of year, they’re usually still available for a decent price.

They are pretty HEALTHY! I used white whole wheat in the biscuit dough, and palm shortening as the fat. I had sucanat for the sugar in the strawberries, which is the healthiest version of sugar you can find. Plus, I used the stevia in the whipped cream, which is an even better sweetener choice.

Sharing at Women Living Well Wednesday, Allergy-Free Wednesday, Frugal Days, Sustainable Ways, Real Food Wednesdays, Works for Me Wednesday, Simple Lives Thursday,

BundleoftheWeek.com, 5 eBooks for $7.40!

Red White and Blue Fruit Salad

This recipe is not late for Memorial Day. Nope. It’s right on time for Flag Day, and a little early for Independence Day. I’ve got you covered for your summer patriotic celebrations. (And you can use it for Memorial Day next year, too.)


A QUICK and EASY side dish for any summer celebration!

CHEAP when watermelons and blueberries are in season.

And so HEALTHY: watermelon has more lycopene than tomatoes, did you know that? That gorgeous red color means something healthy’s going on! And let’s not forget the antioxidant power of blueberries, and the healthy fats and fiber from the coconut.

Sharing at Traditional Tuesdays, Allergy Free Wednesday, and Healthy 2Day Wednesday

BundleoftheWeek.com, 5 eBooks for $7.40!

Happy Valentine’s Day: Make Your Reservations at Home!

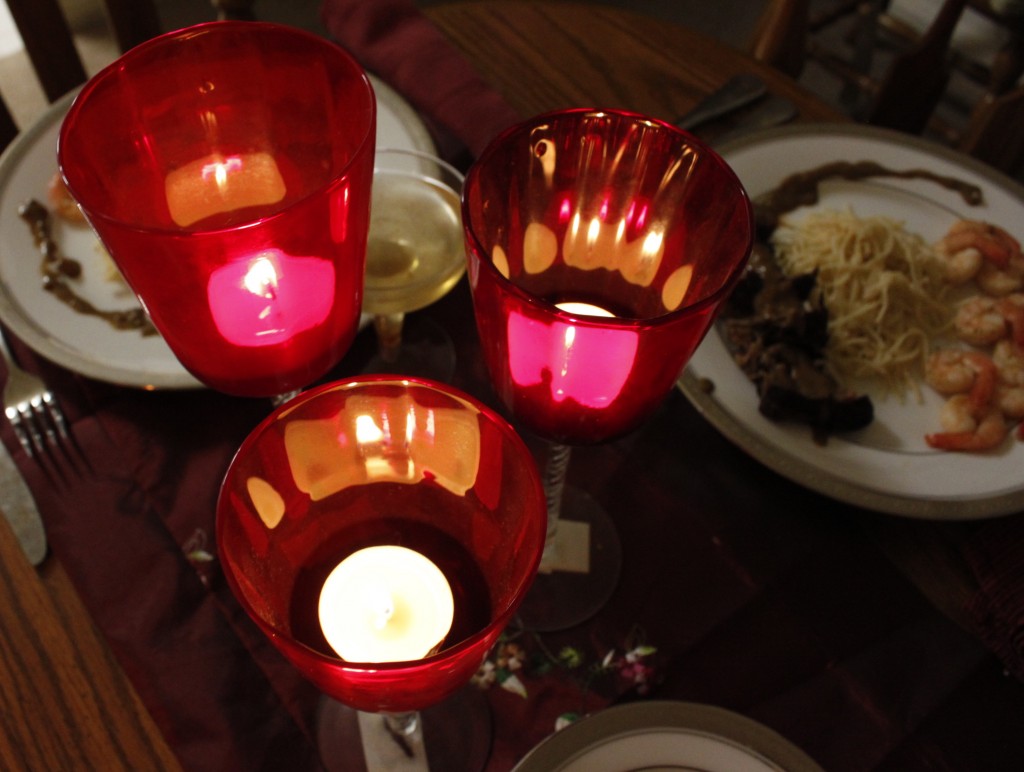
dining in Happy Valentine’s Day!

One of the trends I’ve noticed - and loved - this year is dining in for Valentine’s Day. Due to budget and time constraints, my husband and I have been ahead of the game for a while now. Dining in is one of our favorite ways to celebrate a special holiday - or even just to spend time together.

I’m over at Intentional by Grace today, sharing how you, too, can turn your dining room into a dining destination and enjoy a gourmet meal together on a budget.

You don’t have to be a gourmet chef to re-create a fine dining experience from your very own kitchen. All you need is a little creativity, a little planning ahead, and a little extra effort to turn the moment into a special occasion.

Pick a night when you can afford to stay up late (on the weekend, maybe) and mark it down on your calendar. When the day comes, send the kids to bed (a wee bit early if necessary) and then get busy turning your dining room into a dining destination!

So go ahead: celebrate Valentine’s Day by dining in!

Works for Me Wednessday

BundleoftheWeek.com, 5 eBooks for $7.40!

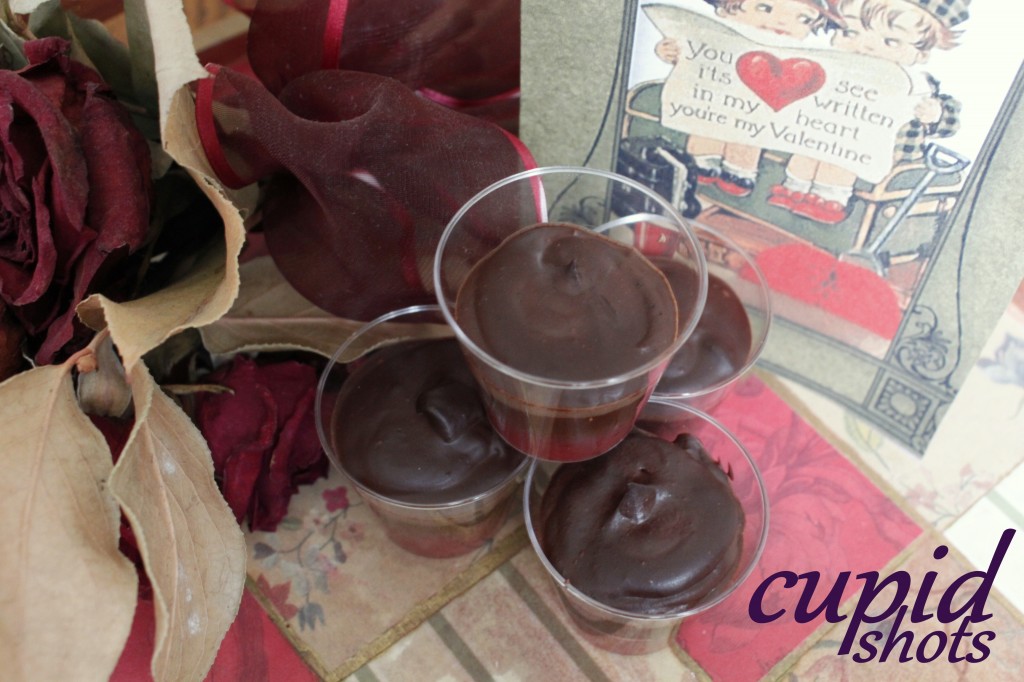
Cupid Shots {Mini Chocolate Mousse with Strawberry Filling}

Valentine’s Day is quickly approaching, and as usual, my mind turns to thoughts of chocolate. Chocolate daydreams and Valentine’s Day just go together perfectly, no matter your age.

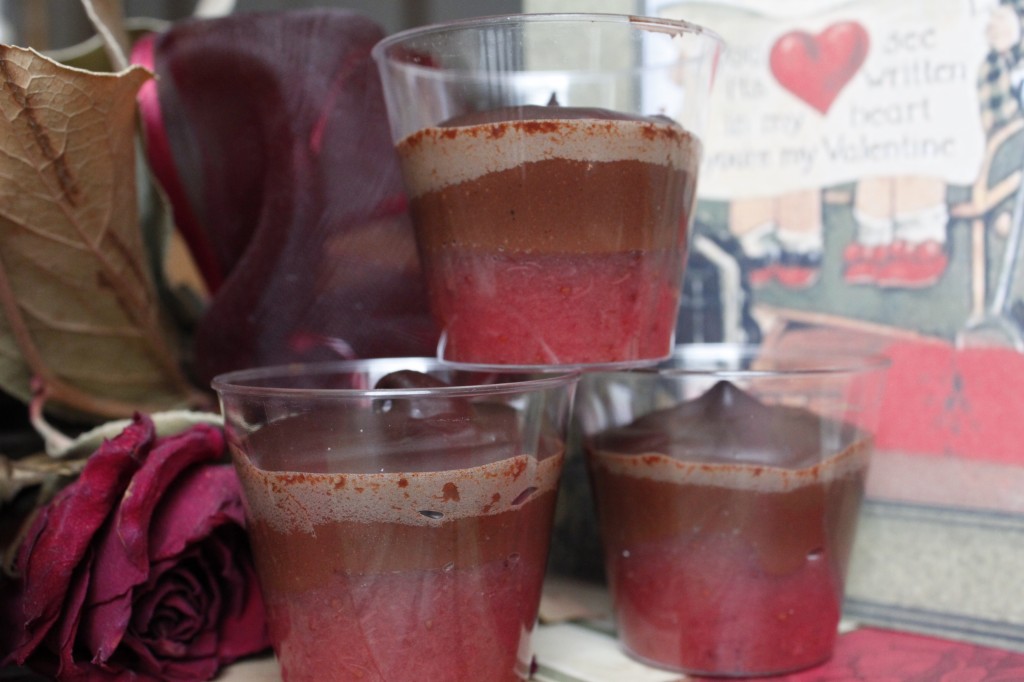
And so do chocolate and strawberries. Especially when they’re in cute little shot glasses! These will be a hit with adults and kids alike, and of course, true to form, they are so easy.

You will need the little plastic shot glasses if you want them to be in this cute little miniature form. I found mine at the Dollar Tree and thought it a worthy investment for such cuteness.


Notes:

  • You’ll probably have extra strawberry filling; no worries, you will certainly find another use for it!
  • You can use this chocolate pudding recipe instead of the mousse (more kid friendly if that’s what you’re going for). You will have to allow the pudding some time to chill and set, so keep that in mind.
  • To make the strawberry puree, I thawed frozen strawberries and ran them through the blender. You can strain it at that point if you want it really smooth, but I didn’t.
  • You can top this off with some whipped cream (yum!).
  • I used corn starch because I was completely out of tapioca starch, which is my preferred starch. I’m pretty sure it will work just as well with the tapioca, but you may need more of it.
  • Boxes and bars of baking chocolate typically have the grams noted right by the ounce measurements. This takes about two and a half of the large baking bars.
  • These really need to be served immediately. The mousse just doesn’t keep well. (In the pictures, you can see how the mousse has hardened and looks “burnt” on top. It tastes fine, but the texture is not like mousse at all!)
This is not super QUICK, but it’s not super time-consuming either. I don’t remember exactly how long it took me, but it was less than an hour (including cooling time for the strawberry layer).
It’s very EASY, though, even the mousse. I’d never made chocolate mousse before and I thought it might be complicated, but it was actually quite simple.
The chocolate is not CHEAP, I’ll admit. I didn’t buy mine especially for this, though, I used some that I bought in after-Christmas sales, which made it cheaper than it would have been otherwise. And I used strawberries that had been frozen from strawberry season last year.
It’s a lot HEALTHY-er than the average Valentine’s treats you’ll see popping up everywhere. There’s not a ton of sugar in this recipe, which makes it a great choice! And it has the added benefit of some vitamins from the strawberries, as well as the antioxidants from the chocolate. (My favorite thing about chocolate, of course.)
Sharing at Katherine Martinelli’s, and…

Hearth & Soul Hop Works for Me Wednessday realfoodallergyfree Photobucket

BundleoftheWeek.com, 5 eBooks for $7.40!

Chicken Dip, Not from Buffalo

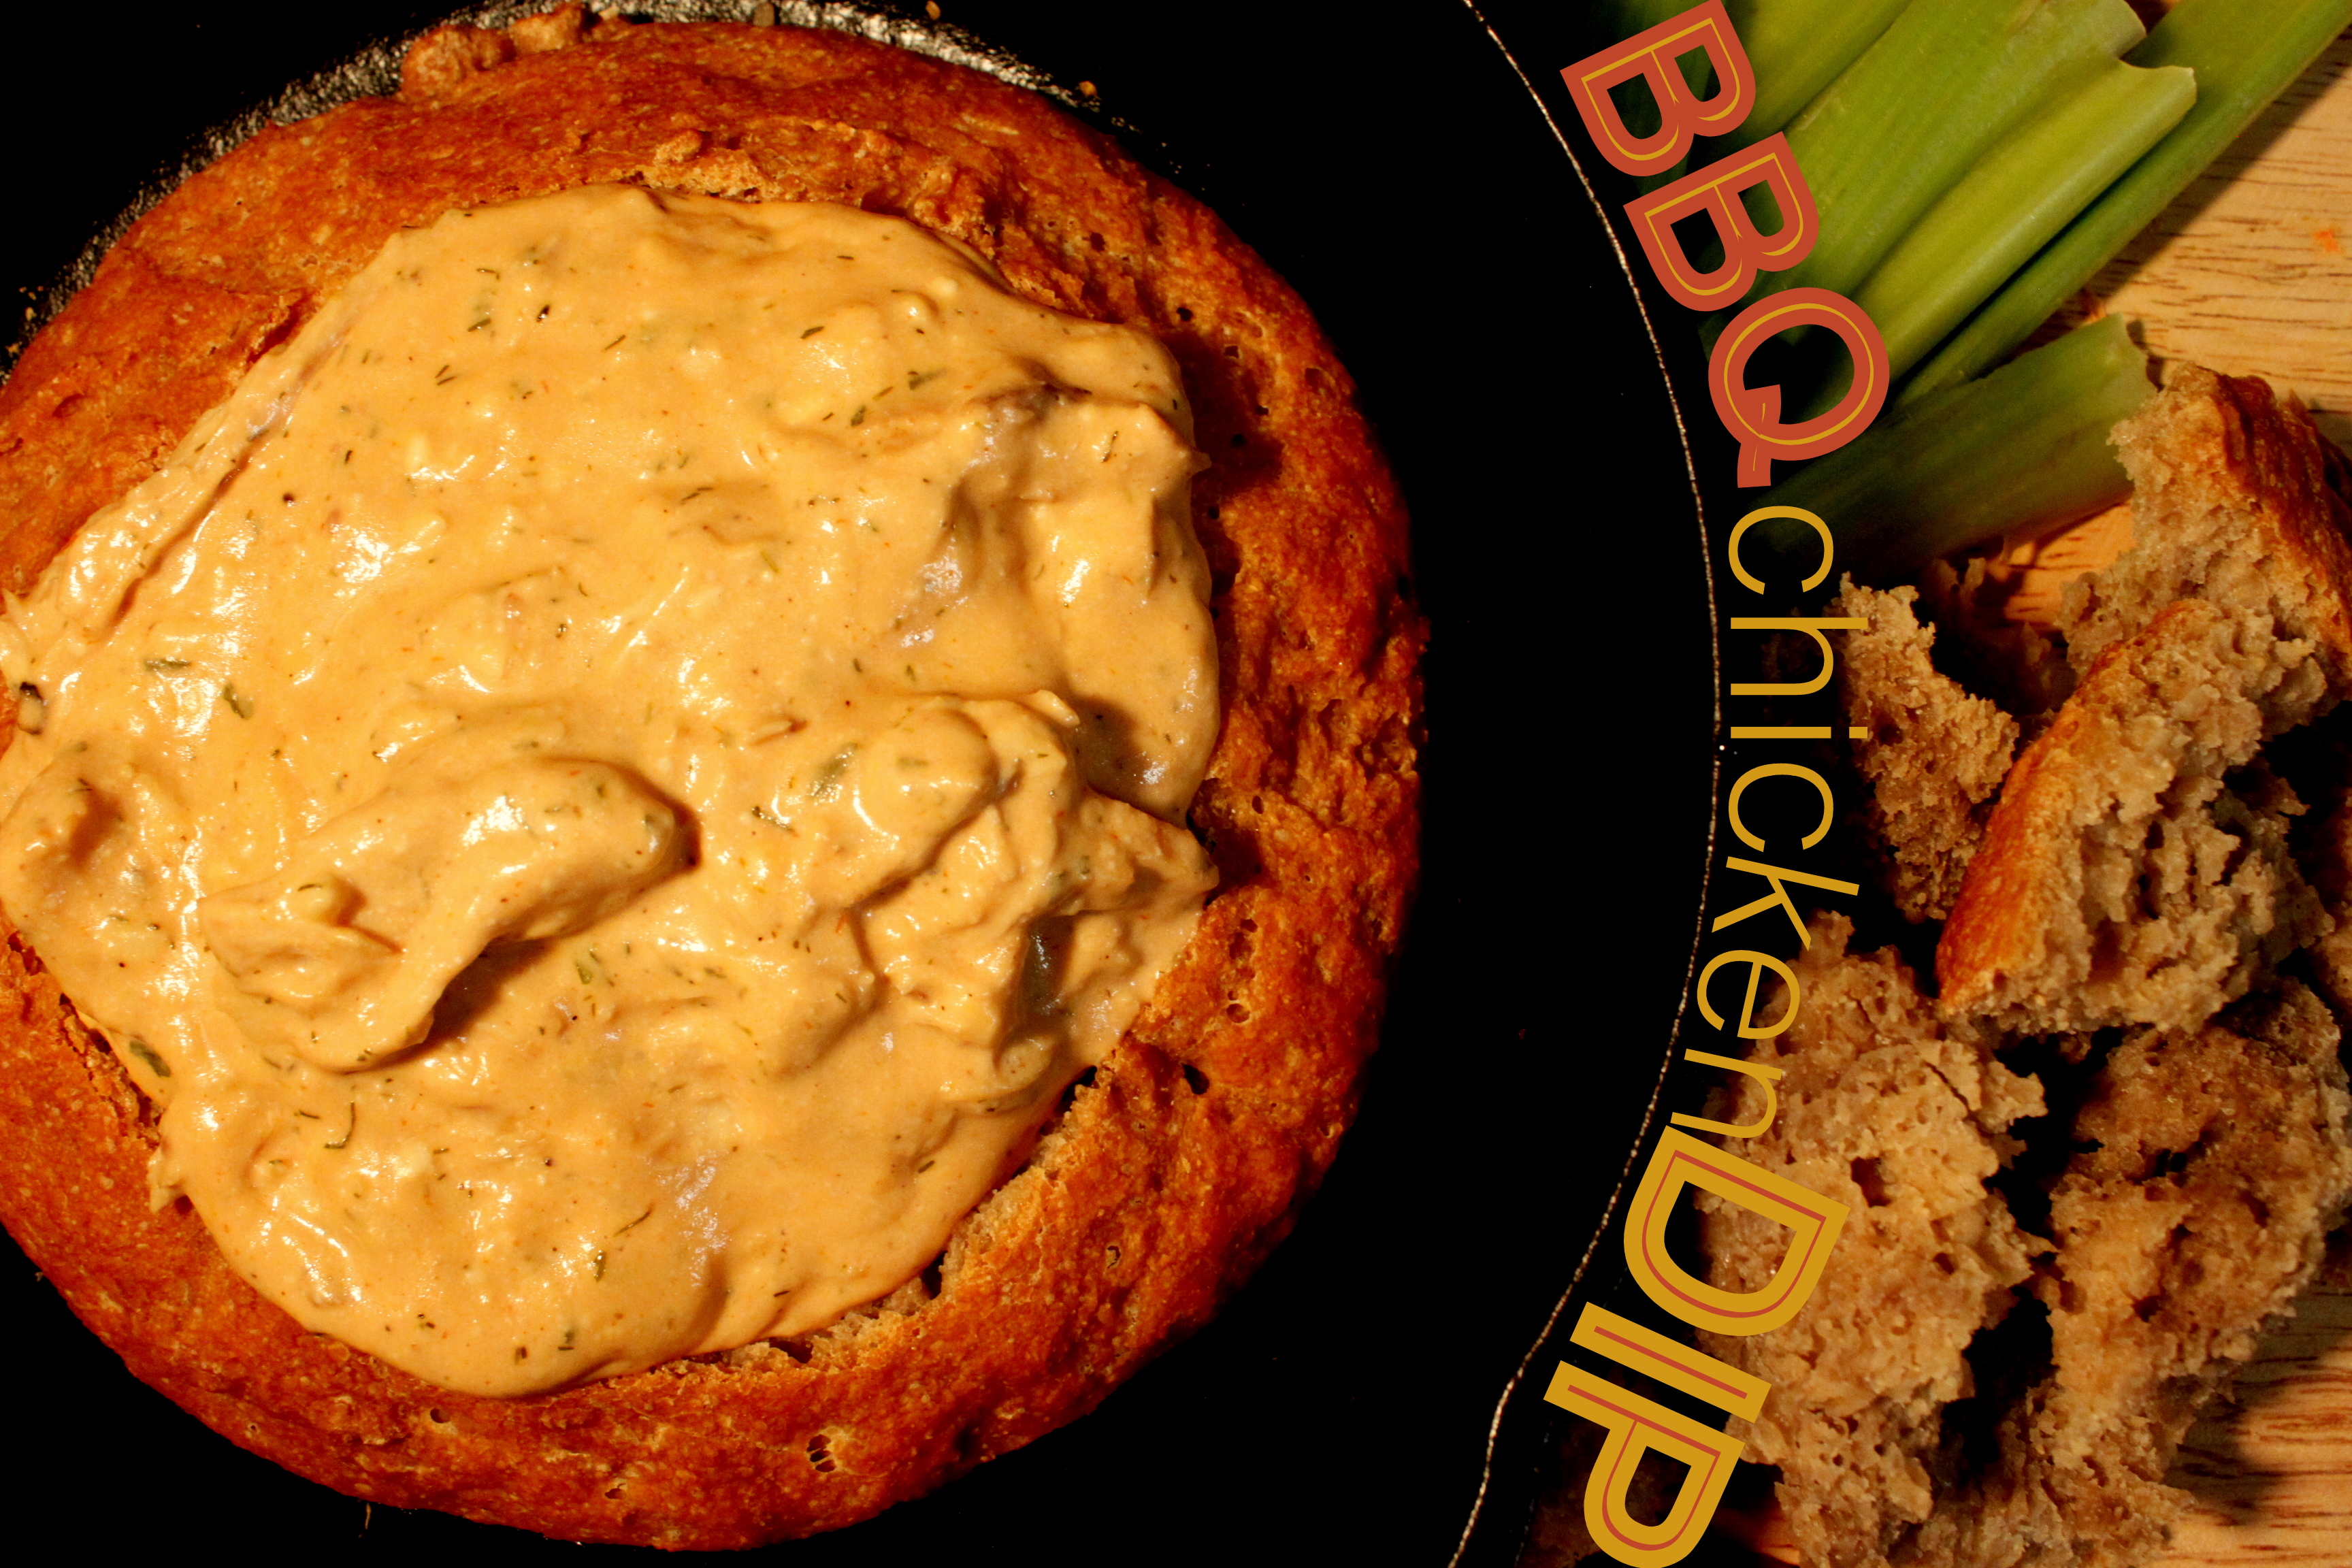
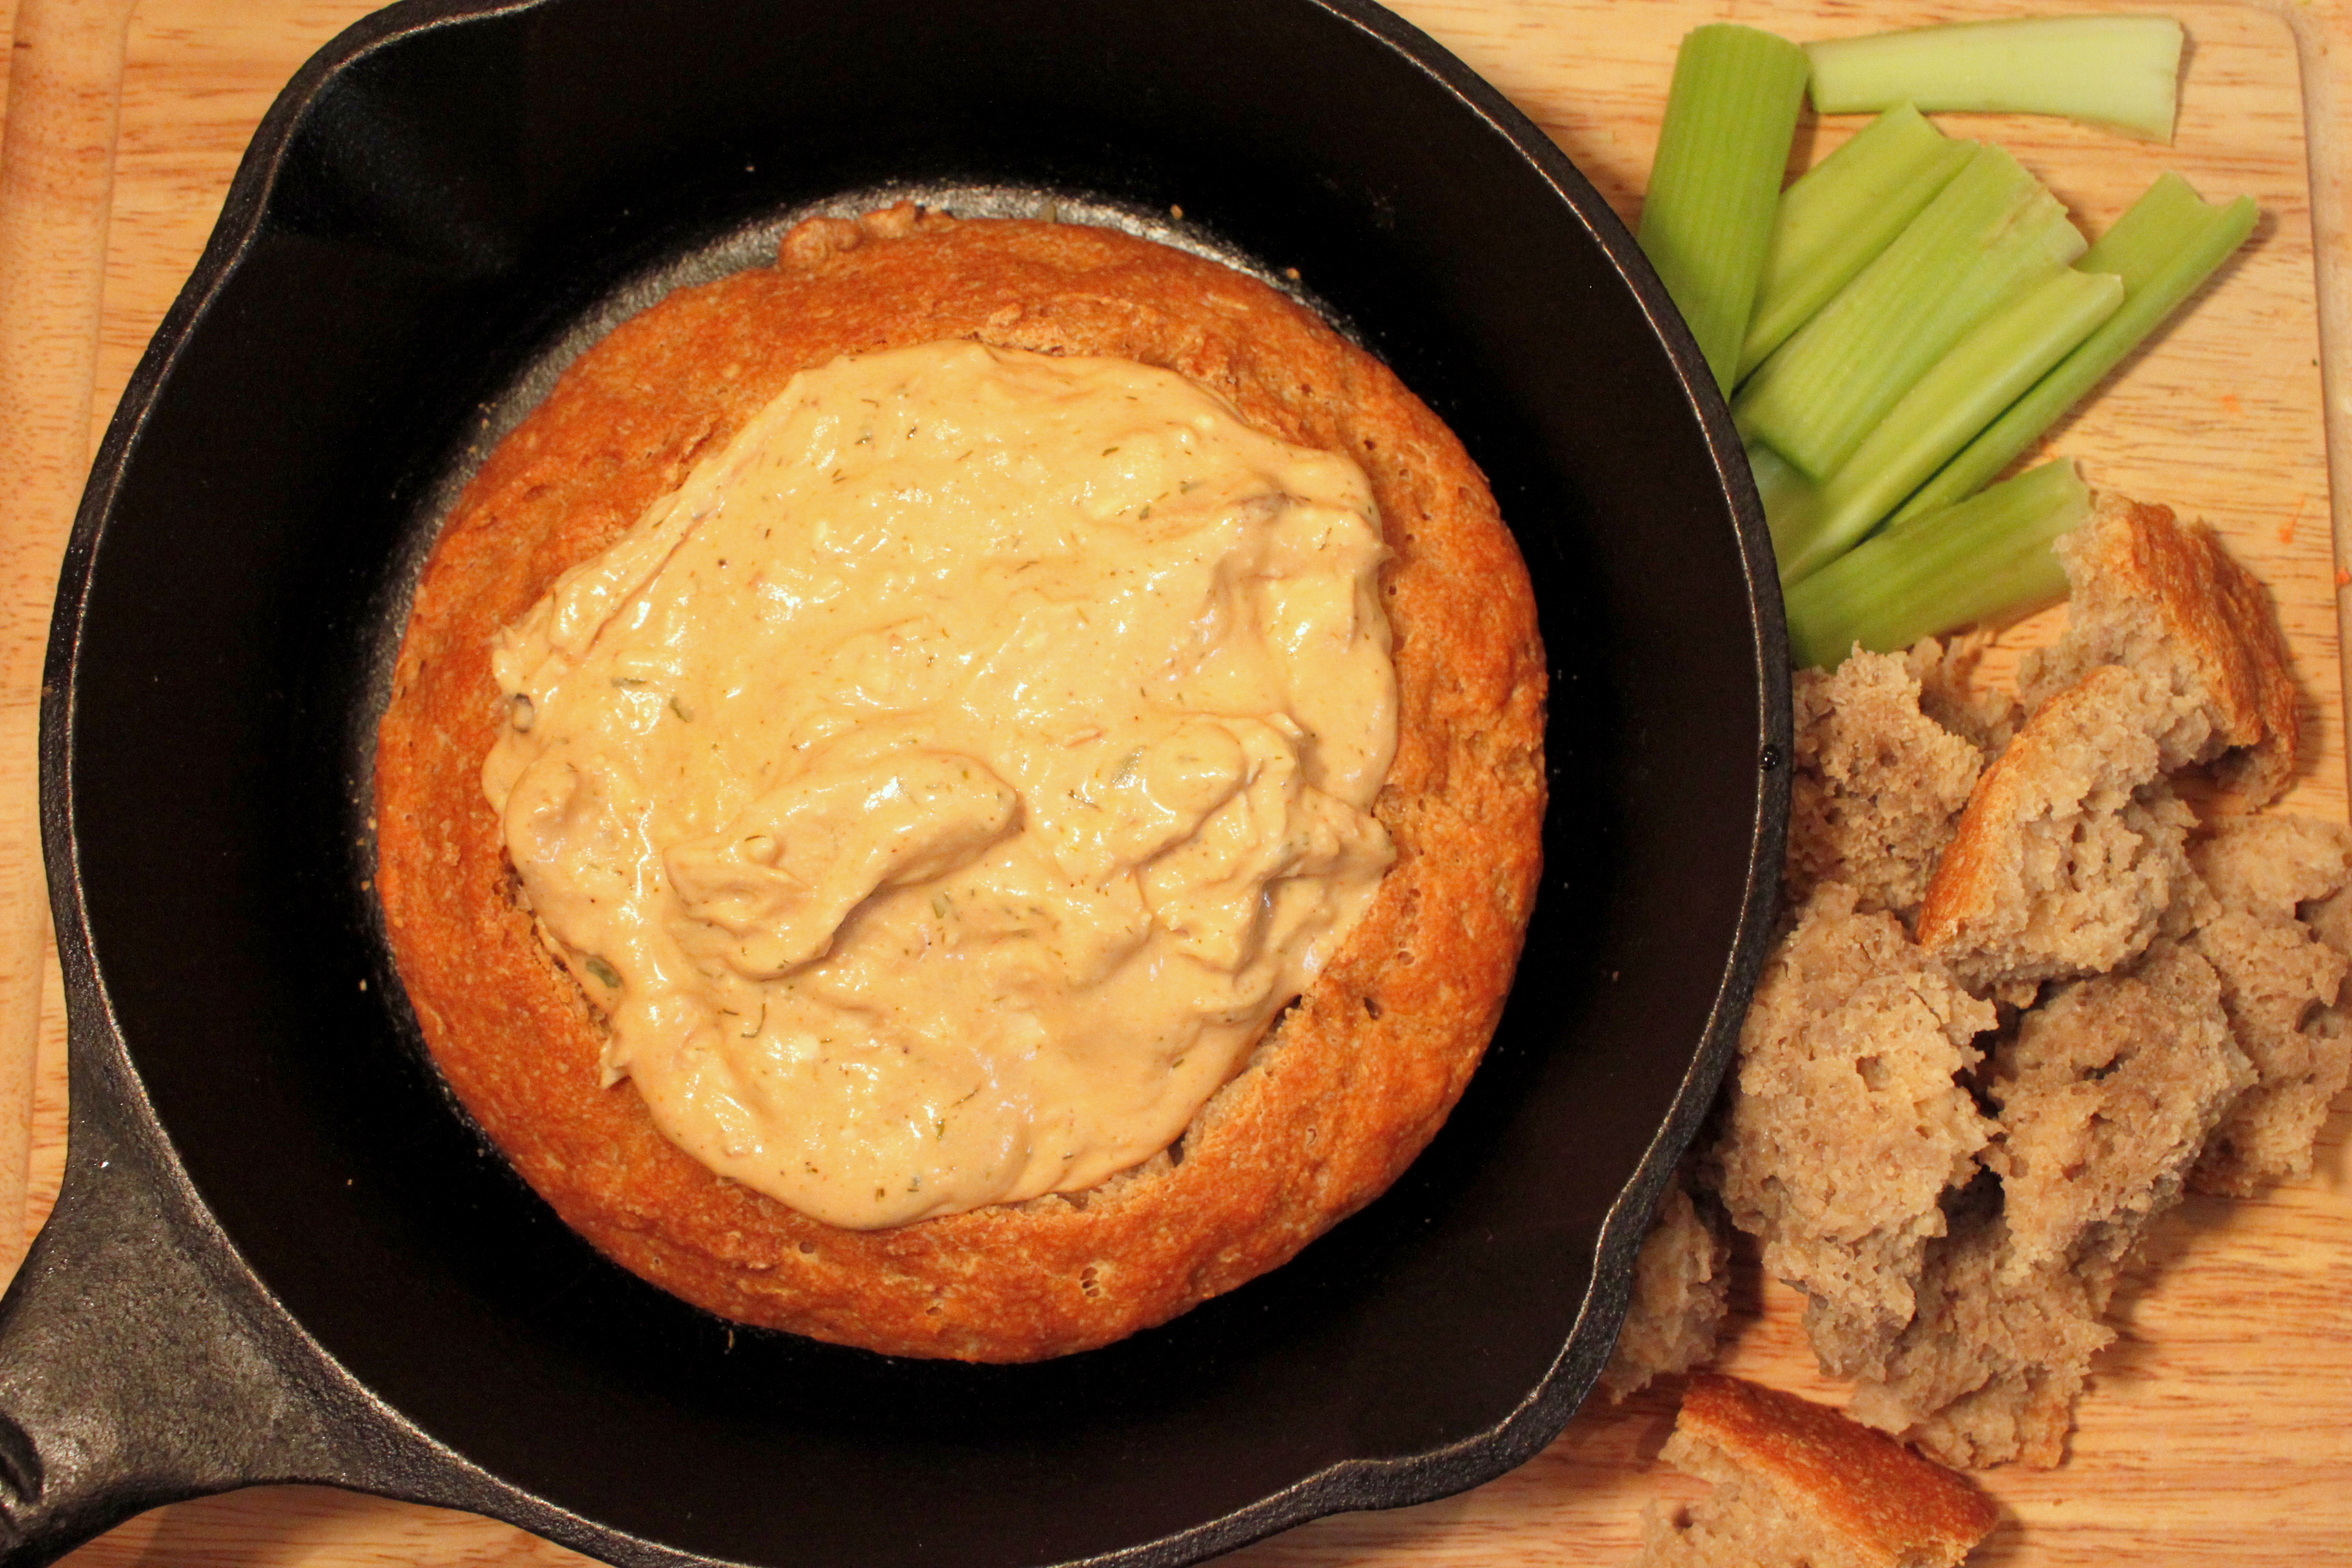
bbq chicken dip

I was actually going to call this dip “Chicken Chicken Dip“, the first “chicken” standing for the cowardly human variety, because it doesn’t have hot sauce in it. Due to sensitive tummies in my household, I never buy any because it would sit around in our fridge until it went bad (does it ever go bad?). Henceforth and therefore, we have never had Buffalo Chicken Dip, because, as you no doubt know, it has hot sauce. And we don’t eat hot sauce.

Instead, we have Non-Buffalo Chicken Dip, more specifically BBQ Chicken Dip, seeing as it’s made with BBQ sauce instead of hot sauce. It’s a milder-tasting, almost lightly sweet, version of the famous party dip, that goes just as perfectly with chunks of hearty bread, crudites, and tortilla chips. Hey, it even makes celery taste good!

I really think you should add this dip to your Super Bowl menu right now because your friends are gonna love it! If you want to be really cool, you can make a bread bowl shaped like a football. (I don’t know why I didn’t do that - I guess because I didn’t think of it until right this minute!)

One note: I wanted to try this recipe with yogurt cheese, since I’m embarking on my journey of make-your-own-dairy, but I ran out of milk and time, two essential qualities for that particular delicacy. So I bought a last-minute bar of cream cheese instead. I still want to try it with the yogurt cheese to see how it turns out; if you do, let me know! I really feel like cream cheese is just too over-processed for my taste, and would prefer the healthier version.

I did use my own homemade Ranch dressing and BBQ sauce for this recipe, which is easier if you already have some on hand, but not a huge problem if you don’t. They’re both easy to whip up in a jiffy! I’ve included the Ranch dressing in the recipe because I don’t have it anywhere else on the blog, but you can find my two favorite BBQ sauce recipes here: Quick BBQ Sauce, and Cooked BBQ Sauce.

bbq chicken dip


I served mine in a bread bowl(alas, not a football-shaped one). Of course, I used my artisan bread dough recipe, and I just baked it in a round shape in a small cast iron pan. I used up the last of my dough, so it ended up being kind of flat because I didn’t have enough - next time I will definitely use more, probably about a pound or pound and a half.

Since I made it with real ingredients (mostly, anyway), it was not quite as QUICK perhaps as regular Buffalo Chicken Dip. But I mixed up the dressings while the cream cheese was melting, so that didn’t really add much time. Still about half an hour or so from start to finish.

It’s very EASY, too. Again, the added steps of making the dressings, but nothing too overwhelming.

Cream cheese ain’t CHEAP, another reason why I wanted to use homemade yogurt cheese. Otherwise, it’s made with affordable, common ingredients that anyone can afford.

I like my HEALTHY-er version quite a bit! I love that I know each and every ingredient in this recipe - no packaged or bottled goods (with the exception of the cream cheese, which I hope to change in the future).

Linking with Tastetastic Thursday, Katherine Martinelli, and…

Cast Party Wednesday

BundleoftheWeek.com, 5 eBooks for $7.40!

An UNO Birthday: The Cake

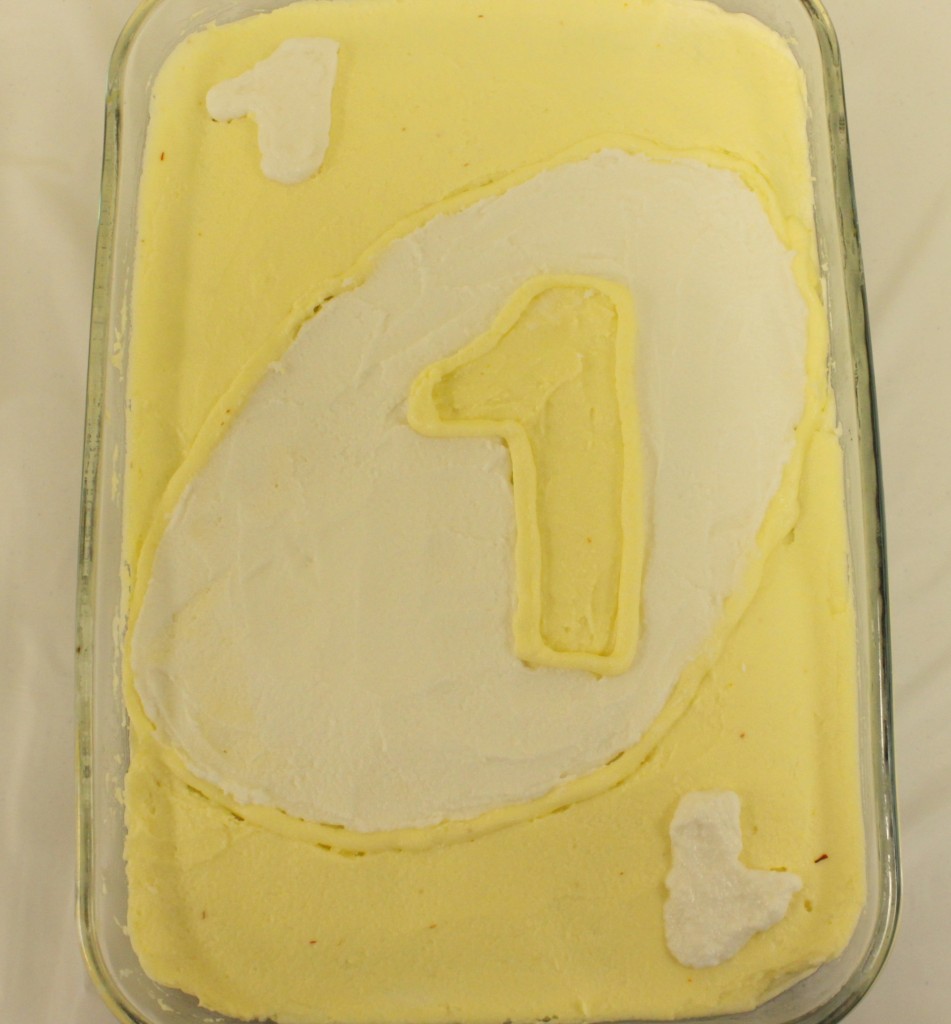
UNO birthday - cake

The cake is, after all, the most important part of the whole shebang. Decorations are nice, and everybody loves food, but the cake is the real show-stopper. Or it should be.

I wouldn’t exactly call this particular birthday cake a “showstopper”. It’s cute and all, but it doesn’t scream, “LOOK AT ME!”. My previous decorated cake attempts were all a lot more spectacular (the rainbow fish cupcakes, the Thomas Aquaduct, and the race car) than this one, which was sort of a let-down.

But I couldn’t handle too much more than this, coming off of Christmas and all, and having very little time to prepare. Quick and Easy was my main concern, and Cheap was right behind it.

Healthy was also of concern - I wanted to finally make a cake with natural food coloring! I’ve been intending to for years, but never have actually done it. With this simple design, I figured it was the right time.

So, with all those things in mind, here is what we ended up with.

UNO birthday cake

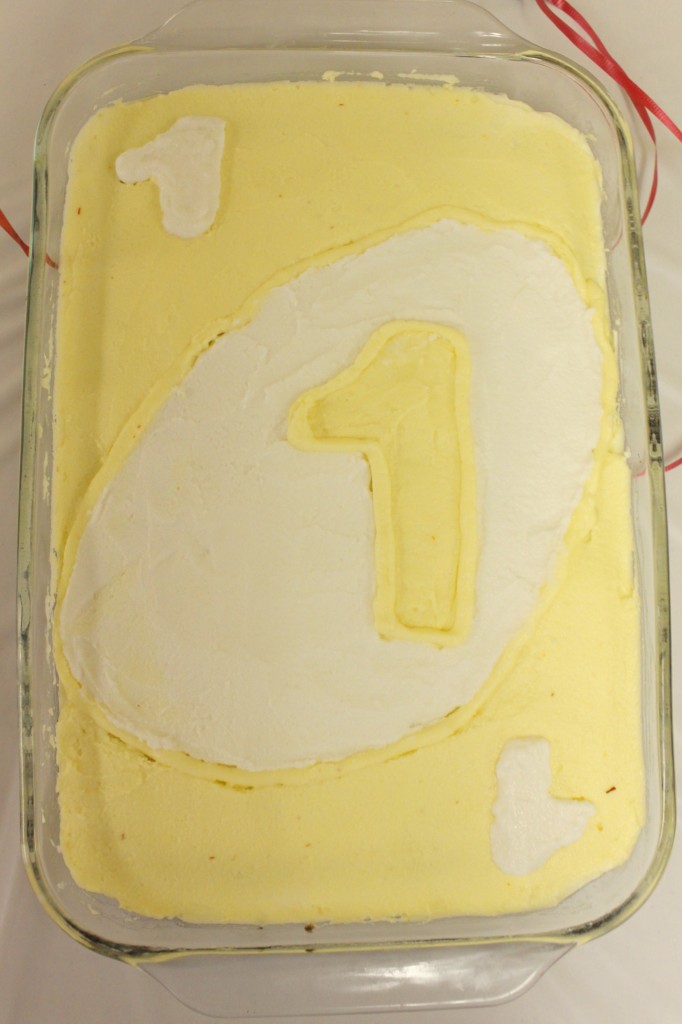
Of course, it’s patterned after an UNO card with the number 1. It was very easy. I used 2 batches of homemade dairy-free decorators frosting, tinting one of them yellow with saffron.

Let’s talk about saffron for a second. Saffron is one of - if not the most - expensive spice due to its labor-intensive and tedious method of harvesting. At a regular grocery store, you can spend as much as $20 for only a small amount. The small bottle I have (which has lasted me for quite some time since I rarely cook with saffron) was actually purchased at Trader Joe’s for a much lower price. I don’t remember exactly how much it was, but I can tell you it was less than $10. And it is still available there, as I have seen it on recent trips. I wouldn’t have used saffron as my coloring agent except that I happened to have it on hand. Another option for yellow coloring is turmeric, which is not quite as expensive.


To color the frosting, I replaced the 3 TBSP of water called for in the recipe with saffron-dyed water. To color the water, I placed some saffron in a small bowl and crumbled it in my fingers. Then I poured 3 TBSP of hot water over it, swished them all together and let it sit for a while until the color deepened. Don’t worry if it looks orange; that’s actually a good thing, and indicates a stronger yellow color. I probably didn’t put as much saffron in the water as I should have, hence my very pale yellow. I would recommend a good well-filled teaspoon worth of saffron for a stronger yellow. Mine was probably more of a half teaspoon.

To make the design, I first frosted a 9×13 single-layer cake with one thin layer of yellow frosting. I let it set for a little while to create a “crumb coat” so I could avoid picking up crumbs in the actual design. Once the crumb coat was set, I used a toothpick to trace out the slanted oval, stretching from a couple inches down from the top right corner all the way to a couple inches above the bottom left corner. Then I traced out a large UNO-style number one in the center of the oval.

Next was my big mistake. I really should have piped everything with the star tip, but I had most recently used my frosting decorator bag with meringue frosting, and I was concerned that there would be some egg protein left behind. Not good for my allergic little guys! So I just spread the yellow frosting on the background areas with a knife, smoothing it the best I could. (To get it really smooth, I could have dipped the knife in water between each stroke on the frosting, but I didn’t take the time to do that.) Then I just did the old ziploc-bag trick to pipe the outline for the “1″ in the center, and the oval. I finished up by frosting the oval plain white, and then piping in some small “1″s in the upper left and bottom right corners.

Of course, any UNO-themed color can be used to make this card (blue, green, or red), and any number can be used (up to 9 anyway!). Or you could do a Wild Card for someone whose age should remain a secret!

UNO birthday cake 1

As for the cake itself, I used a new allergen-free recipe at Back to the Kitchen, and wasn’t 100% pleased with the result. It was probably my fault, though. I made my own GF flour blend, but didn’t have any potato starch, so just did without. I think that was probably a big mistake. Looking back, I think that my most successful cakes all had potato starch as part of the flour blend. Plus, I accidentally set the temperature on the oven a little too low, so the cake cooked up funny: it was kind of hard on the bottom. Not overcooked, just sort of… hard. It was weird.

Consequently, I had my DH whip up a batch of Rice Krispies treats (using Erewhon Cocoa Rice Crispy cereal, so it was at least a tiny bit healthier than you-know-the-usual-kind) for all the non-allergic guests to enjoy since the cake was kind of a bust, at least in terms of taste and texture. You know what? Next time, I just might decorate the Rice Krispies treats instead. That’s what the Cake Boss does! Then everybody will be happy. Not healthy, but happy.

Read the Rest of An Uno Birthday Series:
The Food
The Decorations
Linking to Lunchbox Love

Ingredient Spotlight

BundleoftheWeek.com, 5 eBooks for $7.40!

An UNO Birthday: The Food

UNO party food

The decorations were the easy part of Baby Boy’s UNO themed birthday. The next item on the checklist - the food - was a lot trickier.

Let me count the reasons why:

  1. It was right after Christmas, so we weren’t exactly loaded with cash if you know what I mean.
  2. I wanted all the food to be safe for both him and his brother and their allergies.
  3. I also wanted it to appeal to all the guests at the party.
  4. I didn’t have a huge amount of time to prepare it because I only officially settled the date of his party less than a week in advance! Oy!
Yes, you are right. I needed the food to be Quick, Easy, Cheap and Healthy (or at least safe). It’s all sounding very familiar, isn’t it?
Thankfully, I am used to this driving need for QECH food - as if you couldn’t tell - so it didn’t take me long to come up with a menu. And a time for the party. This is of ultra-importance: if you don’t have a lot of money to feed a crowd, then don’t plan your party during a meal time. If you do, your guests will expect a full meal and it would be rude not to provide one for them. But if you plan the party in between meals, say at 3pm, a buffet of snacks will suffice.
And so we had a small buffet of snacks. On the menu:

Tortilla Chips, Salsa and Guacamole

The guacamole (not pictured) was a big hit, possibly because of my addition of cumin, and possibly because I followed my sister’s recommendation to use fresh rather than dried cilantro. Both add a lot of flavor.

I used canned diced tomatoes for the salsa because it’s not tomato season around here, and I didn’t want to risk mealy tomatoes (blech!) in my salsa. In the summer, it’s fresh tomatoes all the way, baby. I do still have some frozen peppers from the farmers’ market this past summer, so a couple of them went into this salsa. The freezer is like a time machine sometimes! Fresh peppers in December… mmmm. This is a very basic salsa recipe, and how I usually make it.

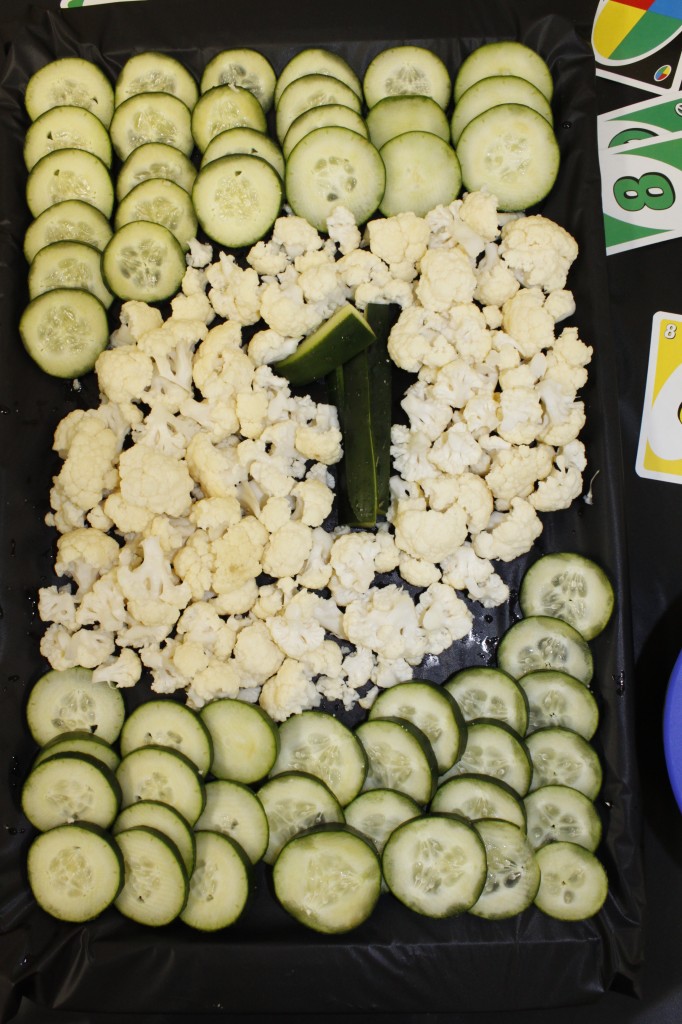
UNO Veggie Tray

UNO veggie tray Following the success of my Christmas tree-shaped veggie tray, I was inspired to try my hand at an UNO-card shaped veggie tray. You can be the judge of how successful I was, but honestly, I wasn’t 100% satisfied. It was OK, but not great. I’m open to suggestions on how to make it a little more obvious about what I was going for!

Here’s how I did it:

  • Wrap a cookie sheet with a large piece of black plastic (from a plastic table cloth), securing it in back with tape.
  • Set it in a “portrait” orientation (vertical).
  • Slice 1 1/2 large cucumbers in thin rounds. Cut the remaining 1/2 cucumber in sticks.
  • Cut the florets off about 3/4 of a head of cauliflower.
  • In the middle of the “tray”, shape a number 1 using the cucumber sticks.
  • Surround the “1″ with the cauliflower florets in a slanted oval.
  • Overlap the cucumber rounds above and below the cauliflower oval to finish out the card shape.
Homemade ranch dip is my usual accompaniment of choice for a veggie tray, but alas, my children are allergic to dairy, and I have not found a suitable dairy-free and soy-free way to make ranch dressing yet. So I opted for bean dip, instead, which was actually quite yummy! Since then, I’ve used the dip as a spread on sandwiches and wraps, and it’s equally tasty that way. I used Annie’s Eats White Bean Dip, except with pinto beans that I soaked and cooked instead of the canned cannellini beans.

Wild Card Fruit Tray

I was also not 100% satisfied with the final look of this one, at least in part because I couldn’t find any blueberries anywhere! I know it’s out of season, but typically you can find them somewhere, even if at a price. So I used red grapes, which were kind of purple-ish and therefore the closest thing I could find.
The Dollar Tree had a perfect little oval shaped plastic tray that worked pretty well to form the slanted oval shape found on UNO cards. The UNO wild card design I was working from (from a deck probably at least 10 years old) is just a slanted oval divided into four equal parts, each one a different color (in the pattern you see here.). The newer design actually has WILD written across the middle in big letters, which would clearly make it more obvious, but I’m not sure what you’d use to do that. Anyway, here’s how I made my Wild Card Fruit Tray:
  • Cover a cookie sheet with part of a black plastic table cloth, and secure in the back with tape.
  • Place an oval tray at a slant, centered lengthwise, on the cookie sheet (oriented “portrait” style, once again).
  • Mentally divide the oval into 4 equal parts: in the top left, place chopped strawberries; in the top right, grapes (or blueberries); in the bottom left, chopped pineapples; in the bottom right; green grapes (or kiwi).
To round out the menu, I also had planned a deli meat tray (for meals at home, I always buy nitrate-free uncured meats, but I wasn’t about to spring for enough of that to feed a whole crowd!), and bought a whole pound of ham. Alas, the party was held elsewhere because we didn’t have enough room in our apartment to fit everyone, and I left the ham at home. So now we are feasting (ahem!) on nasty store-bought deli ham. Oh well. I suppose we’ll live!
I also served potato chips because they are a big favorite of my Certain Little Someone, and I was pretty sure the rest of the guests would be just as happy to eat them as well.
With the exception of the bean dip, all of the things I made for this menu - the guacamole, salsa, bean dip, and fruit trays - came together very QUICKly the morning of the party. The beans did have to be soaked and cooked the day before, but very little of that was hands on time.
It was all EASY, certainly. Not exactly gourmet stuff, here!
This menu was relatively CHEAP. My goal was to spend less than $30 on the food, and I’m honestly not sure if I succeeded or not. The week of the party was so crazy, and I was just buying stuff randomly here and there when I had the chance, that I don’t even know exactly how much I paid. The produce was kind of expensive because it was mostly out-of-season, but in-season produce isn’t exactly conducive to finger foods (a hunk of raw parsnip anyone?). I’m guessing my total was between $30-$40. Not too shabby.
It was relatively HEALTHY, as well. With the exception of the potato chips, and would-be deli lunchmeat, it was fairly healthy spread. I didn’t even mind that my Certain Little Someone had 4 plates full! Some may quibble that the fruit was neither in-season, nor local, nor organic, but such folks likely have a much larger purse than I, and can afford to feed the starving hordes such luxury.
Read the Rest of An Uno Birthday Series:
The Decor
The Cake
Sharing with Tastetastic Thursday.

Cast Party Wednesday Miz Helen’s Country Cottage

BundleoftheWeek.com, 5 eBooks for $7.40!