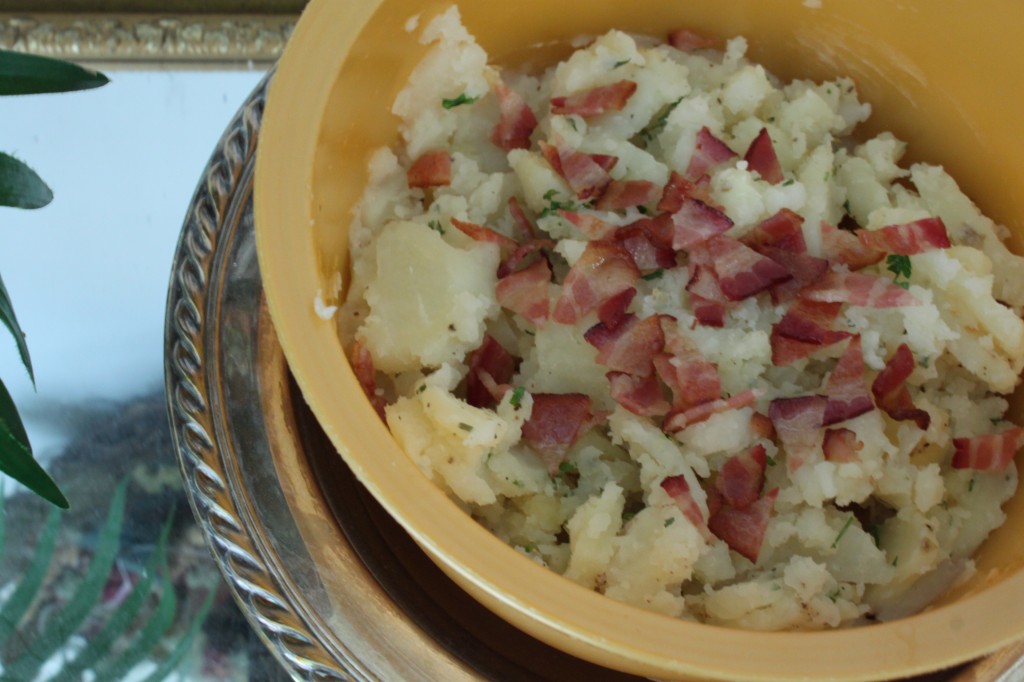
French Potato Salad. Ish.

Maybe I shouldn’t admit this, but I’m a huge fan of the TV show Psych, and I’m super bummed that it’s on cable TV, and I don’t have cable. {insert pouty face} I can watch old episodes on Netflix, but when the brand new season starts in October, I’m going to be hopelessly behind! Sad, sad.

The only reason I mention it is because the main character, Shawn, has quite a few “-isms” that are repeated regularly throughout the show, and one of them is “ish”. He intentionally stretches the truth in many areas of his life, and occasionally, when he does, he rectifies the situation by adding an “ish” at the end to make it all better. A lie followed by an ish = truth. Ish.

Who needs to be exact and precise when you’ve got “ish”?! Not me. For example, this potato salad. I’m currently egg- and dairy- free for the sake of my nursing son, who is allergic, which makes it pretty difficult to enjoy a good potato salad. As you no doubt know, American potato salads are dressed with a delicious concoction made mostly of dairy products and eggs. The alternative is a German potato salad, made with mustard and vinegar, which is not my favorite (although I make it on occasion and eat it happily enough).

This past summer, I was grateful to discover French Potato Salad. French Potato Salad requires neither dairy, nor eggs, nor mustard, although it does have a touch of vinegar. I found it to be far more delicious than German Potato Salad ( nothing against the Germans, mind you, just personal preference here!), and was thrilled to bring it to a family function. (Never mind that we completely forgot about it and never ate it at said family function!)

I am talking about Julia Child’s French Potato Salad, you must understand, which is where the “ish” first starts sneaking in. I have my suspicions that Julia Child’s version is not quite as French as it is supposed to be, considering many other recipes out there that seem far more French to my untrained eye. That doesn’t matter to me, though, because it meets all my vital requirements: Quick, Easy, Cheap, Healthy. Oh, and dairy- and egg-free.

It definitely gets even more ish-y when you see my tweaked-up version of Julia Child’s version. This final concoction would likely not be even remotely recognized by any French-ish person, but it’s still delicious. So who cares?


It’s a very QUICK potato salad, just as quick as the regular old American kind.

It’s very EASY, too, despite the “French” descriptive.

It’s even CHEAPer than regular potato salad because it doesn’t have eggs or mayo or other expensive ingredients in it.

It’s a decently HEALTHY potato salad, too, except that it’s mostly potato. Not that I mind potatoes; they’re very good for you, it’s just there’s no added nutrition. If you feel like un-Frenchifying it even further, go ahead and add some veggies like diced carrots or peas.

Shared with Side Dish Saturdays and the following:

 /></a><a href=

BundleoftheWeek.com, 5 eBooks for $7.40!

Feeding Baby: Moving On from Purees

Ideally, the baby food puree stage shouldn’t last all that long. As baby gets accustomed to different tastes, and the process of mashing and swallowing, he’ll quickly be ready to try more textured foods. Right on the heels of that will be his developing pincer grasp, which will enable him to eat finger foods, too.

Baby Boy is now 8 months old, and has been eating progressively more chunky and textured foods for the past few weeks. I’ve also experimented off and on with finger foods, but have started in earnest now, as I’ve noticed his pincer grasp developing quite nicely.

So how to transition from the purees to real table food? Here is what I’m doing:

1. Gradually decreasing the smoothness of the purees so they become thicker and chunkier with more texture. Homemade baby food is rarely quite as fine as store-bought anyway, which is actually a good thing, because it’s far more like real food that baby will eventually eat. But you don’t want her to be stuck on purees forever (It can happen: if textured foods aren’t introduced soon enough, some babies refuse to try them and can be difficult to wean completely to table food.) in any case! Some babies will go with ease from purees to real solids, but my Baby Boy has a strong gag reflex still, and also doesn’t really seem to understand the concept of mashing. Inhaling is more his style. A few times, I gave him some “real” table food, and he wasn’t really quite sure how to handle it. However, when I offer him some purees that are quite chunky, he handles them fairly well, so now we’ve been able to move on from there.

You can create a chunkier texture simply by processing the food for a shorter time in the blender or food processor. Also, if you’ve been adding liquids of some kind (breast milk, formula, water or broth, for example) to help thin out the purees, you could start eliminating those to retain a more accurate texture of the food in question. I also recently read a suggestion to grate foods on a grater instead of pureeing them.

2. Offering certain foods in their whole state for him to gum and mash. Foods perfect for this are:

  • soft, ripe, melons on the rind
  • bananas
  • sweet potato fries
  • peach slices (although these can be stringy, so watch carefully)
  • soft-cooked green beans (canned or French cut)

3. Experimenting with finger foods. Certain vegetables and fruits lend themselves well to a baby perfecting her pincer grasp. Anything is game as long as it is soft, either naturally or cooked. If baby is eating grains, I have read suggestions to roll the pieces of food in dry crushed cereal, or rice cereal, or oatmeal to help give more of a grip to a struggling eater. You can cut the food into small pieces or cubes (small enough to go down her throat whole without gagging or choking), or you can take a cue from Baby Led Weaning, and cut it in a French-fry shape so that she can hold it in her fist and eat what’s sticking out the top. Some healthy finger food ideas (no Puffs or Cheerios!):

  • sweet or white potato (diced or in sticks)
  • diced banana
  • very soft cooked carrots, diced or in sticks (Be careful: I find that carrots sometimes harden back up as they cool, so make sure they are truly soft enough for baby to mash.)
  • diced cooked squash or pumpkin
  • diced or sliced cooked apples
  • soft cut green beans
  • beans (any kind)
  • cooked peas
  • broccoli ( baby can hold the “trunk” and eat the “foliage”)
  • diced peaches and nectarines or very ripe pears
  • chicken thigh meat, cut in strips or diced
  • ground meat of any kind
  • grated cheese

One thing my Certain Little Someone enjoyed as a fledgling self-feeder was fishing peas out of mashed potatoes. Simply stir some cooked peas gently into a dish of mashed potatoes, and let baby fish them out with his fingers! Fun and filling!

4. Moving on to grains when ready. I’m holding off on the grains for now, but once we start with those, a whole new world of finger foods opens up, including:

  • homemade teething biscuits
  • pasta
  • small pieces of bread, any kind (tortillas, wraps, sliced, rolls, etc.)
  • organic and all-natural cereals (this for a treat, not a mainstay in the diet)
  • rice
  • barley

Here’s a delicious recipe for one of Baby’s First Finger Foods:

BundleoftheWeek.com, 5 eBooks for $7.40!

Simple Sides: Fresh Summer Corn Salad

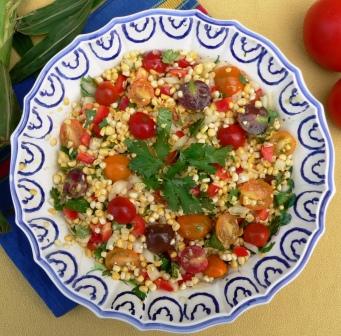
Welcome to the last installment of Simple Sides! In case you missed it, Steph the Cheapskate Cook shared her Tomato Bruschetta the first week, and I brought my Melon Citrus Salad the next week. Last week, Mary from Barefeet in the Kitchen shared her Mango Summer Salad, and this week, Nancy from Real Food, Allergy Free brings us her Fresh Summer Corn Salad.


Here’s what she says about her favorite simple side dish:

This week I offer you Fresh Summer Corn Salad. This recipe can be made year round using frozen corn and tomatoes from the supermarket but it really shines with fresh in season produce from your garden or local farmer’s market. Is there anything that says summer more than fresh corn on the cob and homegrown tomatoes? Throw in some chopped bell pepper, onion and cilantro and toss them with a simple dressing made of lime juice and olive oil and you have a delightful summer side dish with a zing. If you have any leftovers, add some gluten-free taco seasoning and transform your salad into a Mexican corn salad.

Read the rest of her post to get the recipe for her Fresh Summer Corn Salad.


BundleoftheWeek.com, 5 eBooks for $7.40!

Simple Sides: Mango Summer Salad

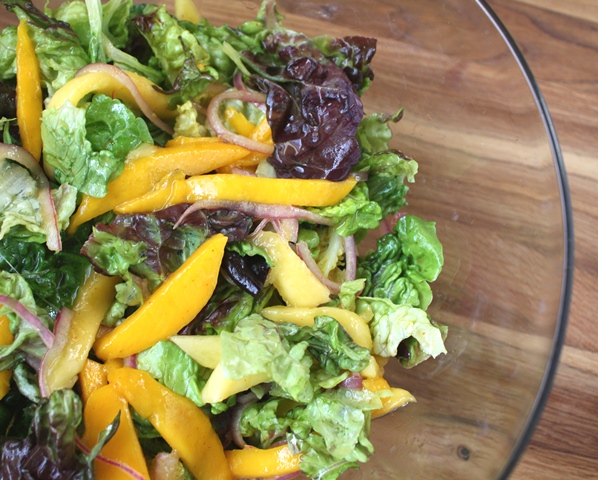
I don’t know about you, but I’ve been loving these Simple Sides this month! In case you missed it, Steph the Cheapskate Cook shared her Tomato Bruschetta the first week, and I brought my Melon Citrus Salad last week. Next week, you’ll meet Nancy from Real Food, Allergy Free and her side dish, but this week, it’s Mary from Barefeet in the Kitchen.

Here’s what she says about her favorite simple side dish:

In the summertime especially, I’m a huge fan of fresh fruit in our salads. Whether it’s a Strawberry Spinach Salad, Spring Salad with Poppyseed Dressing,Red Wine and Honey Salad with Fruit, or Cashew Chicken Salad with Grapes, there is often fruit in our salads or in the dressings.

Crisp lettuce, sweet mango slices and sharp red onions combine to make this a deliciously simple summer salad. With a light and slightly spicy dressing, this salad was a hit with my family.

Read the rest of her post to get the recipe for her Mango Summer Salad.

And don’t forget to join us next week for one more Simple Side!


BundleoftheWeek.com, 5 eBooks for $7.40!

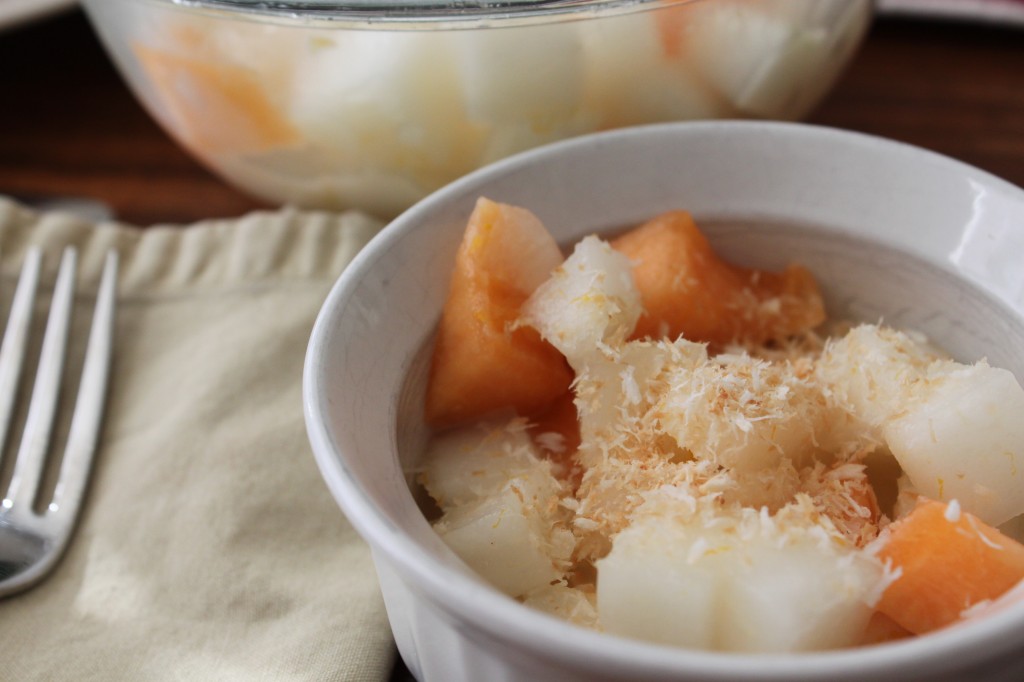
Simple Sides: Refreshing Melon Salad

Welcome back to Simple Sides! Every Thursday this month, some bloggy friends and I will be bringing you super simple and delicious side dishes to get you through the dog days of summer. Last week, Steph The Cheapskate Cook shared with us her Tomato Basil Bruschetta. In the next couple weeks you’ll hear from Mary at Barefeet in the Kitchen and Nancy from Real Food Allergy Free, but today you’re stuck with me.

I hope you don’t mind. Hopefully you won’t be disappointed.

Not much compares with fruit for its simplicity in preparation, which is probably why my mind often goes in that direction when seeking a quick side dish that won’t heat up my kitchen. If you browse through my meal plans, you’ll realize quickly that fresh fruit is featured frequently every week, usually multiple times. My DH can’t tolerate very many raw vegetables (none, actually), but he can eat quite a variety of raw fresh fruits, which is one more reason they show up at our table on a regular basis.

I often just chop up whatever fruit is in the fridge into a take-it-or-leave-it conglomeration, but I also like to come up with intentional creations that take into consideration flavors, textures and colors. There are a few such standbys that serve me well (like Stone Fruit Salad, or Honey Lime Fruit Dressing), but now and then the urge strikes to try something new and perk up the taste buds with some additional, unexpected flavor.

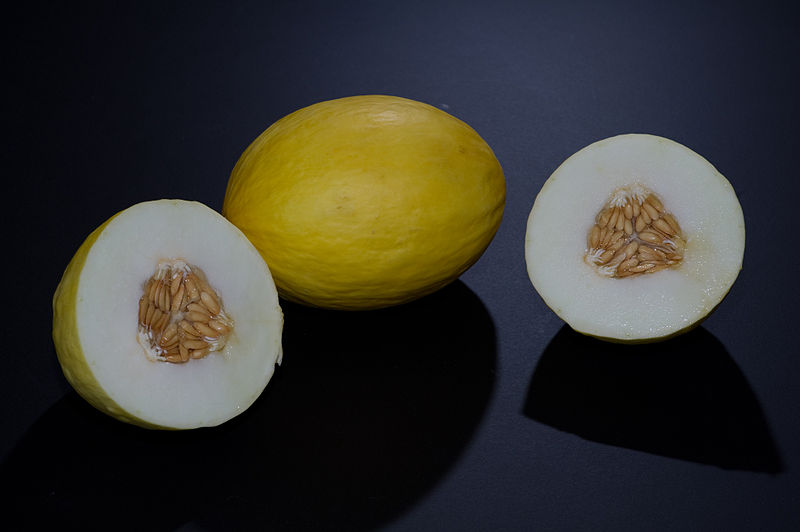
This was the position I found myself in a couple weeks ago, when I had a strange new melon I had bought at the Farmer’s Market. I think it was a canary melon, at least it looked alot like this:

At only $2.00, I figured it wasn’t that much of a risk if we didn’t love it, but thankfully, even that $2.00 was not a waste. The flesh tasted like a mild honeydew melon and had a pleasantly smooth texture. Its fragrance was fresh and inviting, which may be why the thought of combining it with citrus was tempting.

In my search for melon inspiration, I found a recipe originally intended for casaba melon, but easily adapted to other melons. I was hooked by the combination of ingredients far removed from my typical honey-based fruit dressings; in fact, there was no sweetener involved at all, which is of course a huge plus in my book. I was also quite pleased that it was naturally allergen-free, requiring no adaptation to make it suitable for my Certain Little Someone.

The original recipe calls for the juice and zest of a lime combined with coconut milk (Let’s hear it now: “Put the lime in the coconut, the lime in the coconut….”), which is a pairing I love, but alas, I had no limes. I did, however, have a bag full of clementines I had found on sale, so I switched out the lime with a clementine.

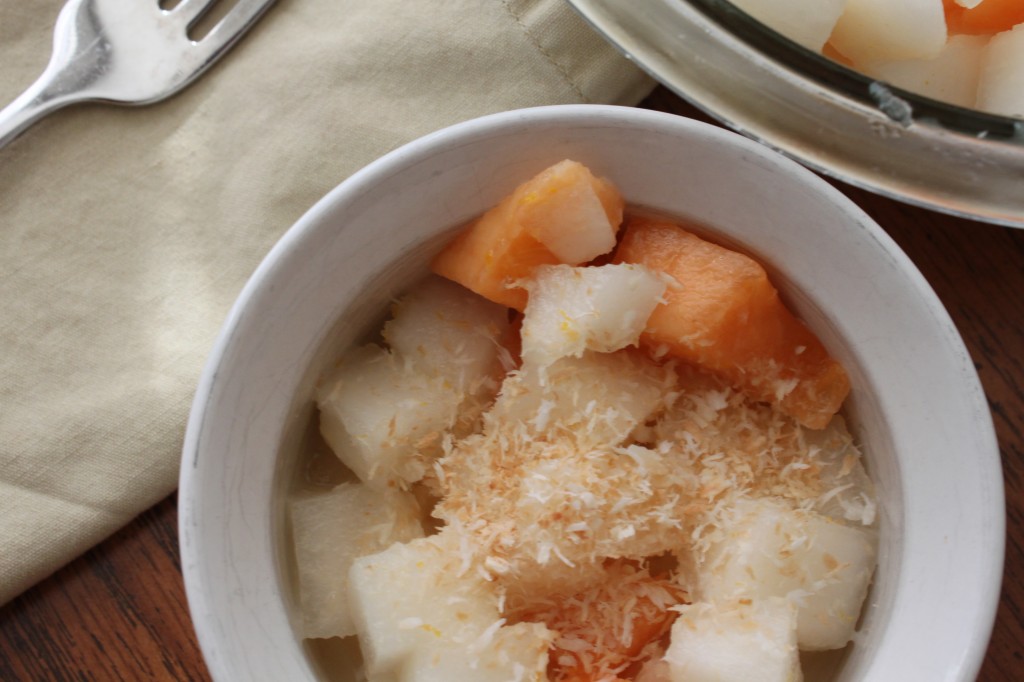
An inspired choice, truly. The lighter tang of the clementine joined perfectly with the mild flavor of the melon, highlighting it but not overpowering it, and adding a delightful touch of extra flavor. And despite the lack of sweetener, the resulting fruit salad was deliciously sweet just as it was.

And the best part? No oven was turned on in the process of making this fruit salad.

How QUICK was that? OK, so refrigeration can take a while, but here’s a time-saving tip: Make this salad first before starting the rest of your meal, and it will be ready to go when you are.

So EASY, too, except maybe chopping the melon. Here’s another tip: Chop your melon when you buy it, and store it in a container made specifically for the purpose of storing produce (I like Tupperware’s FridgeSmart series), so it’s ready to eat when you want to eat it. Be sure to use it within a few days, though.

Let’s break down the cost and figure out how CHEAP it is (or isn’t): I bought the melon for $2.00, as I said, and I used about half of it or so. I have recently discovered that Bloom carries Goya canned coconut milk for $0.99 a can (Trader Joe’s carries the lite version for the same price), and this recipe uses less than half a can. I used a clementine from a bag that cost $2.99 and contained 10-12 clementines, and the cost of the shredded coconut is negligible. That brings our total for this dish to less than $2.00, not too bad!

It’s certainly very HEALTHY! Combining the fruit with the coconut milk is a stroke of genius, because the fat in the coconut helps your body to absorb the many nutrients found in the melon and citrus fruits.

BundleoftheWeek.com, 5 eBooks for $7.40!

Join Us Every Thursday in August for Simple Sides

Although, ironically enough, it’s actually rather cool for this time of year (74 degrees) and raining to beat the band at this precise moment, a few fellow bloggers and myself have joined forces to bring you some easy breezy Simple Sides recipes to get you through the hottest days of summer. You know, those days when it’s just so hot, you don’t even want to lift a finger, let alone cook a full-course meal. Don’t worry; we’ve got you covered! Come back each Thursday in August for another super simple side dish recipe that is delicious, nutritious, frugal… and simple!

Up first this week is Stephanie, The Cheapskate Cook, who cooks delicious and healthy food for her family on a limited budget. And she certainly knows a thing or two about Simple Sides: I absolutely love her Cucumber & Tomato Salad and have made it at least once a week this summer with fresh cucumbers and tomatoes from the farmer’s market and my in-law’s garden. Yummy stuff, and so easy!

She has some more tomato goodness up her sleeves for us this week:

While our culture tends to equate easy meals as something that comes from a box or is popped in the microwave, I’ve found it isn’t always practical. When you’re trying to eat healthy and super frugally, routinely making up meals based on convenience food literally doesn’t fit the bill.


What does fit our bill right now is tomatoes. Not only are they fairly cheap at the grocery stores, and farmer’s markets, we’ve also been carting home boxes of them from our local produce stand. At the end of the day, they give us their slightly bruised and damaged fruit, which we can then chop up and use in the next few days or freeze for the coming months (read more about this little arrangement here).


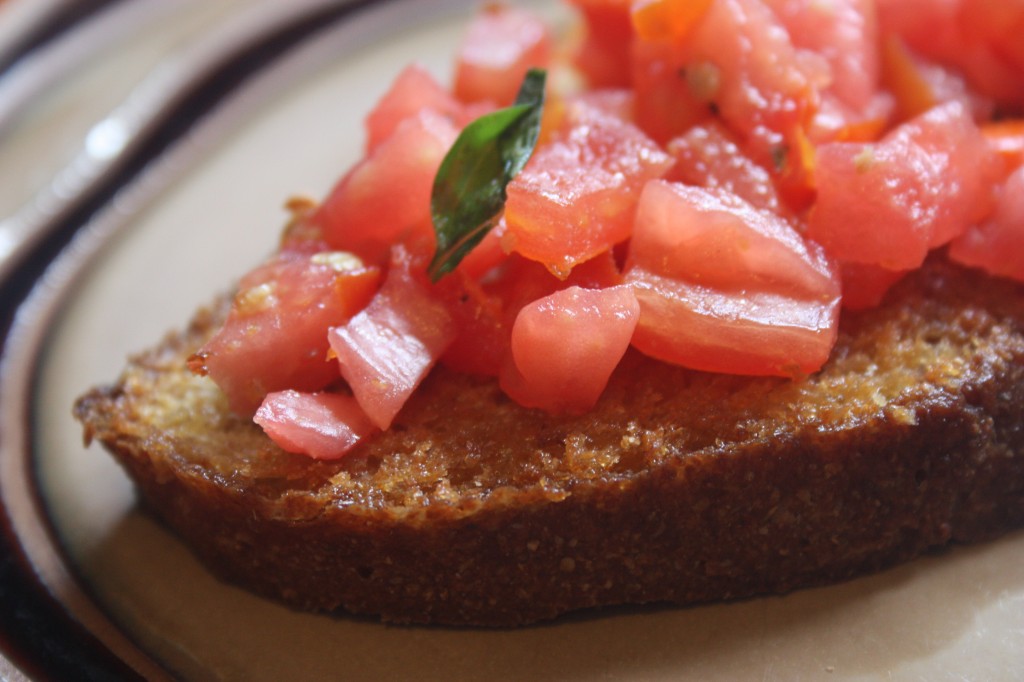
And apparently tomatoes are in abundance. So on the weekends, when I’m looking for a cheap, fresh way to fill our stomachs, I pull out the tomatoes and make bruschetta.

Read more about Steph and her recipe for bruschetta here. Then come back next Thursday to read more from our other Simple Sides contributors:

Mary at Barefeet in the Kitchen

BundleoftheWeek.com, 5 eBooks for $7.40!

Savory Cinnamon Rice

photo by nixxphotography

I love the Taste section of my local paper (The Baltimore Sun). Not necessarily because they do a fabulous job writing it - I’m guessing it is about the same as every other Food or Taste section in every other paper - but because I love finding out about local foodie happenings, and I especially love coming across new and creative recipes that they feature.

This is one of those recipes, which was apparently originally created by Chef Steve. Nobody seems to know who he is, so I hope he won’t mind me sharing it with you. I apologize, because I did take some pictures, but in the process of buying a new camera and switching around memory cards and all that… the pictures disappeared somewhere! Just take my word for it, that this dish is quite delicious! You know my relationship with rice… it isn’t pretty! So every time I come across a successful rice recipe, I mark it down and make it again.

Whoever Chef Steve is, I thank him profusely for this recipe, which I changed hardly at all, if you can believe it.


Brown rice is not QUICK, no matter what. It still is going to take almost an hour to prepare, when everything is said and done. And for this recipe, you really want the rice to simmer in the spices and the broth, so there really are no shortcuts to get the desired flavor. So sadly, no, this is not the quickest recipe in my repertoire (but worth it for days when you have time!).

It’s as EASY as rice gets. If you’re really pressed for time, make it without the vegetables, but at only 1/4 cup each, you don’t need to chop a lot, so it doesn’t take that much extra effort.

Rice is always a nice CHEAP side dish that is filling, too, so it lasts longer in your tummy!

This is a deliciously HEALTHY way to prepare rice. If you’re not used to brown rice, I highly recommend this preparation, as it has a lot of flavor to it. And cooking in the stock not only enhances the flavor, it adds extra calcium and other nutrients, particularly if it’s homemade. Throw in some extra veggies for even more nutrition; and don’t forget the valuable antioxidants found in even small amounts of spices!


BundleoftheWeek.com, 5 eBooks for $7.40!

Have a Cupcake: Birthday Celebration Honey Lime Dressing

If you’ve been following along this week, you know that I planned and executed a cupcake-themed mini birthday party for my mother-in-law and sister-in-law last week and am detailing the results here. Yesterday, I told you about the main dish, Crunchy Chicken Salad with Cilantro Vinaigrette, and today I will tell you about one of the side dishes, Fruit Salad with Honey Lime Dressing.

You can’t beat a light and citrusy fruit salad for spring entertaining: it’s light and refreshing and reminds one of beautiful green and bright spring days. It was the perfect accompaniment to the aforementioned chicken salad and rounded out the luncheon perfectly (together with parmesan crisps and crudites).

I have to admit I jumped at the chance to make a fruit salad dressing. You see, my DH is kind of a little… resistant… when I get to tampering with his food. Plain and simple is the way he likes it. That means fruit salad is made of fruit and nothing else. Me, on the other hand, I get bored out of my mind fixing something the same way every time, all the time. I mean really, where’s the fun in that?! We compromise by me almost always making the fruit salad plain (although he’s OK with the occasional twist, like my Harvest Fruit Salad or Stone Fruit Salad) when it’s just us, but exercising my creative juices when we entertain.

Well… perhaps not all that creative: honey and lime isn’t exactly a ground-breaking combination. It is, however, delicious and easy and perfect for almost any fruit combination. I used a combination of apples, pears, bananas and grapes, which is what I had. Pineapples or mandarin/orange segments would add a pleasant tang, and dried cranberries or pomegranate seeds would add color and texture. Kiwi or honeydew melon would be tasty additions that also add another layer of color. A little shaved or shredded coconut is always welcome in a fruit salad, too.

Fruit salad is a super QUICK side dish any day, and using a dressing like this ratchets it up a notch when you have company without adding a great deal of extra time.

It’s very EASY, too! A tip to make squeezing the lime even easier: microwave it for 10-15 seconds, then roll it under the palm of your hand on the counter, applying pressure until you feel it become more flexible. Slice in half and squeeze out all the juice! Another tip: get the zest before squeezing out the juice.

It’s pretty CHEAP, although neither (healthy) honey nor lime are exactly inexpensive. One lime is not likely to break the bank, though, usually costing well under $1.00. If you’re lucky enough to live in citrus-growing land, then the cost is practically nothing!

It’s a very HEALTHY recipe, especially if you use the right honey: raw organic honey. I buy mine at Trader Joe’s and use it only for fresh (not cooked) recipes like this. If it’s cooked, the advantage of being raw and unprocessed is negated, so I just buy regular organic honey (also from Trader Joe’s) for any baking or cooking I do with honey. Read this really old -but useful- post for more information about raw honey.

BundleoftheWeek.com, 5 eBooks for $7.40!

Fall Fest 2010: Yet Another Thanksgiving Side Dish

Mashed Potatoes, check.

Gravy, check.

Sweet Potatoes, check.

Rolls, check.

Carrots… Check!


I agreed to make carrots for Thanksgiving, but I was stumped for quite a while as to what exactly I was going to do with the carrots. It would be boring to make them the way I always do (or one of the ways I always do), but to be honest, I don’t really love carrots cooked most other ways; you know, with a glaze or some other kind of sweet treatment. Nor do I really like creamed carrots, another option.

Enter roasting. With parsnips!


Roasting carrots is something I don’t do very often, although I do enjoy them prepared in that way. The addition of parsnips adds extra color, flavor and texture to make it even more interesting. And the use of cumin is genius! At least I think so. I love cumin! Usually, it’s combined with other spices, but it stands alone as the star flavor in this dish.

Just in case you need another last-minute addition to your Thanksgiving menu, this one’s for you!

Cumin, Carrots and Parsnips
2 lbs carrots
1 lb parsnips
2 TBSP olive oil
1 1/2 tsp ground cumin
1 tsp salt
1/2 tsp freshly ground black pepper

Peel the carrots and parsnips and cut into 3″ strips. Be sure not to cut them too thinly, because they will burn (I speak from experience!). Place in a large bowl and drizzle with oil. Stir until all pieces are coated. Add spices and continue to stir until they are distributed throughout the vegetables. Divide the carrots and parsnips equally between 2 greased cookie sheets, and spread into a single layer. Place pans, on separate racks if necessary in a 450F oven and roast for 15 minutes. Use a spatula to flip all the vegetables, and if they are on two separate oven racks, switch them at this point. Continue roasting for 15 minutes or until vegetables are tender when pierced with a fork.

The wonderful thing is that this recipe can be made ahead, which is why I made it today. My plan is to reheat it in a 350ish oven for 20-25 minutes or so on Thanksgiving Day. So if you have more time on Wednesday than you will on Thursday, it’s ideal for you!

It’s certainly not as QUICK as my usual method of microwave steaming, then mixing with melted butter and seasonings. And I have to admit that peeling and chopping all those vegetables took what seemed like forever! This is why I don’t roast carrots on a regular basis, but it’s worth it for Thanksgiving. AND because I can make them ahead, it saves considerable time on the actual day.

It is EASY, though, aside from the hard labor of peeling and chopping.

It’s pretty CHEAP, aside from the massive quantities of vegetables, which totaled close to $4 for me. If I were just fixing it for my family for a regular weeknight dinner, I’d use half the vegetables or less, which puts it into perspective.

I CAN say that it is definitely HEALTHY! You know carrots are healthy, with all the vitamin A evident in that vivid orange, but parsnips are also very good for you. They are great sources of folic acid, vitamin C, niacin and fiber, so eat up!

BundleoftheWeek.com, 5 eBooks for $7.40!

Fall Fest 2010: On the Wild Side with Rice

One doesn’t usually think of rice as “wild”; in fact, it’s really rather more of a sedate food in general. No exciting flavor, nothing really exotic about it, kind of bland overall in fact, the wallflower of the food world. Dependable, available, loyal, wonderful qualities often overlooked.
Of course, rice does have a cousin that likes to live on the wild side: difficult to cultivate, much more expensive, and loves to play hard-to-get. Yes, that would be wild rice. And yes, it’s true: wild rice is significantly much more difficult to cultivate than regular old rice, usually costs a lot more, and is not nearly as readily available as plain old boring -not-very-wild rice.
Which would be why I have never made wild rice in my life before. Because, you know, I like quick and easy things, and it didn’t seem to fit the bill. However, recently I was able to procure a bunch of wild rice for a really good price at a couple different grocery stores in town, thanks to some coupons and sales, so I set about finding a way to tame it without having to get wild myself.
Soup seemed a good solution, since it wouldn’t be the star of the show, and therefore wouldn’t have to cook perfectly in order to still be good. I also needed to use up some leftover turkey (yes, already!) so I thought that sounded like a delicious combination.
It ended up being extremely easy, and quite delicious. I did make the mistake of falling asleep while the soup was simmering on the stove, and it simmered a little bit too long, leaving very little broth in the soup and resulting in very soft wild rice. Still delicious, though, so this is a good recipe to try if you’ve got a lot going on. Apparently, a little extra time on the stove doesn’t ruin it completely.
**Hint: This recipe will be a great use of your leftover turkey after the big day. Use the turkey bones to make a broth (I got 2 batches out of my 14lb turkey) as the base for this soup. **
Wild Turkey Soup
6-8 cups chicken or turkey broth
1 cup wild rice
2 carrots, peeled and sliced
2 celery stalks, chopped
2 cups chopped cooked turkey
1 TBSP salt
1 tsp thyme
1 tsp marjoram
1 tsp oregano
freshly ground black pepper
Bring the broth to a simmer in a large soup pot; add the rice, carrots and celery. Simmer, covered, for about 30 minutes, then add remaining ingredients. Continue to simmer for another 15-20 minutes until all vegetables and rice are tender.
You can also add 1/2 cup of cream at the end if you prefer a creamy soup. Serve with a thick slice of hot buttered bread.
This is a great QUICK weeknight recipe, particularly if you have leftovers of turkey (or chicken) on hand. It comes together in less than an hour.
It’s also very EASY. Wild rice, at least in this format, was not as tricky as I was expecting (I have trouble with rice).
Wild rice is not the CHEAPest form of rice (well, it isn’t actually even rice, but whatever) available, to be sure. However, I am testimony to the fact that it can be found for a good price if you keep your eyes peeled for deals.
It’s very HEALTHY; it’s actually one of the healthiest “grains”. It is particularly famous for being high in folic acid, which is of particular interest to pregnant women. It’s also low in calories but high in protein, so it’s great for anyone trying to lose weight.

BundleoftheWeek.com, 5 eBooks for $7.40!