Honey Fondant: The Healthiest Easy Fondant Recipe You’ll Find Anywhere

I love making fun birthday cakes for The Boys - I actually really look forward to it from one birthday to the next! The problem is trying to balance cost, nutrition, and simplicity - those three things don’t always meet together and play nicely when it comes to cakes and decorative frostings! Fondant, in particular, seems to be a matter of expense, difficulty, and chemical-laden ingredients, yet it can turn out some of the cutest and most gorgeously decorated cakes.

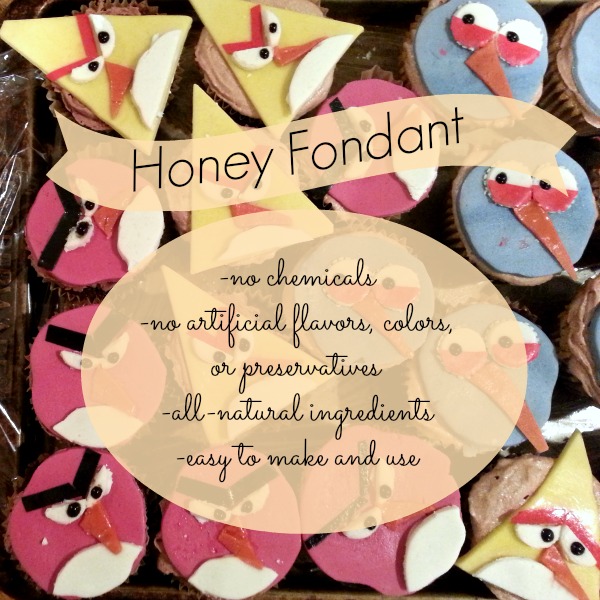
However, for my Certain Little Someone’s fifth - yes, fifth! - birthday cake, I happened upon an amazing recipe for fondant that contained absolutely no chemical or processed ingredients. What’s more, all the ingredients were something I had in my cupboard already, and it was just as easy - or seemed to be - as any other fondant recipe out there.

A Healthy Fondant Recipe that’s Easy?

Here’s how I stumbled across this gem of a recipe:

  • My Certain Little Someone wanted Mario cupcakes for his birthday (which he later switched to Angry Birds). When I was browsing Pinterest for ideas, most of the ones he liked involved fondant, which I had never used before.
  • I took a gander at the ingredient list on the label of store-bought fondant. My eyebrows rose so high they practically rocketed off my forehead, and I hastily put the container back on the shelf and said, “No way!”.
  • I found a healthy-ish recipe for marshmallow fondant, but when I priced the ingredients…. well, once again my eyebrows got a little too high and I reluctantly admitted that was not do-able. Those “healthy” marshmallows cost $4 a bag, and you need two for the recipe! Not to mention the cost of the healthier sugar/powdered sugar.
  • I started researching alternative fondant recipes - my goodness, there are a lot of different ways to make fondant! Who knew? Not me, that’s for sure. There was the original true recipe for fondant, which involved candy thermometers and boiling sugar water, which I decided against (way too complicated, plus I don’t have a candy thermometer). There were also a lot of recipes that called for strange ingredients I don’t keep on hand and didn’t really want to invest in anyway.
  • Then there were a whole variety of powdered-sugar based recipes, most of which involved corn syrup. I wondered if honey could replace the corn syrup (because that’s what I usually sub when corn syrup is called for in a recipe and it usually works well), but I didn’t want to risk it because I didn’t have the time to deal with it. I searched specifically for “honey fondant” wondering if someone else had tried it and if it worked.
  • Well, whaddya know?! I found a whole bunch of recipes for something that beekeepers feed their bees during the winter (no, thank you, I don’t have any bees) instead of more fondant frosting recipes… but there was ONE little precious gem of a recipe buried in all of that honey-bee stuff: Honey Fondant.

I made it pretty much as written, except that I had to add significantly more powdered sugar than I was expecting. Like, I mean, significantly, she says with significance. I honestly don’t know how much powdered sugar ended up in this batch of fondant, but let me tell you it is way more than I have ever put in any one recipe any other time in my life.

So I decided that when it comes to fondant, your choice pretty much boils down to this:

chemicals

or

sugar.

Lots and lots of sugar.

I’m glad I want with the sugar option because at least it’s something your body recognizes and knows what to do with. The chemicals are just scary, frankly - at least sugar is a known danger!

I haven’t made any other kind of fondant so I have nothing with which to compare it, but this seemed to be just as simple as any of the other recipes out there, and definitely simpler than the boiling sugar version. As long as you understand you might have to use a metric ton of powdered sugar, you’ll be OK.


A few ingredient notes:
  • The original recipe called for margarine - I would have used butter except that my Certain Little Someone is allergic to it. I considered using palm shortening but I wasn’t sure if that was a good sub or not (probably would be fine), so I opted to stick with the original recipe and use my Certain Little Someone’s “butter”, which is actually a coconut-based all-natural butter-like spread. I think either butter or palm shortening or some other similar margarine would work. Just don’t use the nasty chemical margarine.
  • The next time I make this, I’ll probably try starting with less liquid, maybe even half as much as is indicated here.
  • I made my own powdered sugar by processing raw sugar in my Vitamix. I wanted it to be pretty fine, or I would have gone with powdered sucanat or even coconut sugar. Either of those would probably work, but with the quantity used, it would get expensive fast.
  • The original recipe called for 800g of powdered sugar, which is just under 2 lbs. I’d definitely consider that a starting point! You’ll probably use more like 4 pounds, maybe even more, unless you adjust the liquid (if you do adjust the liquid, let me know how that goes!).

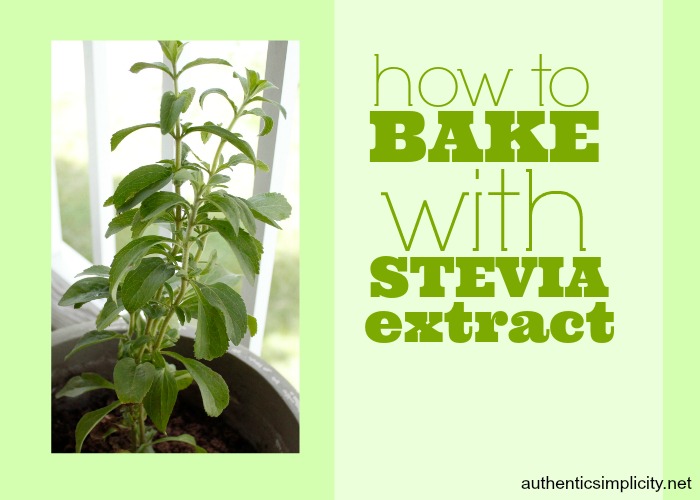
How to Bake With Stevia {Without Affecting Flavor}

How to Bake with Stevia Extract Almost a year ago, I wrote a post about how to convert sugar measurements to stevia for cooking and baking. All of the information in that post is true and accurate, but since then I’ve fine-tuned my routine a bit and developed a method for baking with stevia that doesn’t affect the texture or flavor of the final product. I’ve baked all kinds of things this way, and it seems to work across the board with all different kinds of recipes, so for the most part, this is how I bake with stevia.

1. Use Half the Amount of Sugar

The first step is to reduce the amount of sugar called for in the recipe by at least half. Now, for most conventional recipes, I already reduce the amount of sugar by as much as half anyway. So for the purposes of baking with stevia, I reduce the amount of sugar I would personally use by half.

For example:

  • A recipe calls for 1 cup of sugar. I think that sounds like a little bit too much sugar going on for that particular recipe, so I would probably only use 3/4 cup at most.
  • Since I’m going to also be adding stevia, I can reduce that 3/4 cup even more, and use 1/2 cup or less of sugar.
  • Most recipes can handle this without drastically affecting the final texture, but there are some recipes that for whatever reason will not work well with the reduced sugar. In those cases, I usually just forego that particular recipe!

If you’re starting with a recipe that’s already inherently fairly healthy and/or has been healthified, you can just reduce the sugar by half and move on to the next step.

2. Replace the Remaining Half of Sugar with Stevia

Now you can follow the conversion chart to replace the remaining amount of sugar the recipe requires.

For example:

  • The original recipe calls for 1/2 cup of sugar. You’ll put 1/4 cup of sugar in your batter.
  • You’ll add 1/4 t. of stevia to replace the remaining 1/4 cup of sweetener.

3. Proceed As Directed

Just finish up the recipe the way it’s written. You shouldn’t need to make any other adjustments unless you want to.

And that’s it! You’ve just significantly reduced the sugar in your baked goods without sacrificing taste or texture! It’s even better if you use a “healthier” sugar like coconut sugar or sucanat.

Stevia Plant

the stevia plant before processing into extract or powder

Where to Buy Stevia (Plus Also What Kind to Use)

I like to use liquid stevia (you can find either glycerin- or alcohol-based varieties), which is essentially an extract of stevia (like peppermint or vanilla extract). The powdered stevia goes through more processing and often has a bitter after-taste, so I stay away from it. (Plus, a lot of powdered stevia contains additional sugars which totally ruins the point.)
I usually get my stevia from one of the following sources:

  • Trader Joe’s (oh how I love Trader Joe’s!)- I *think* it costs around $7, but I’m not positive. I’ve had the same bottle for probably 6 months now, so I can’t remember exactly how much I paid. I do remember thinking it was an excellent price.
  • MOM’s - Mom’s Organic Market is a local chain and their stevia is actually a private label so I’m not sure the original manufacturer. I do know that their stevia tastes a lot better than other brands I’ve tried (NuNaturals, for example, which I like, but the stuff at Mom’s is better), so I’m thinking it’s probably from a more expensive brand that I haven’t tried yet, ha! The good news is that it is also priced very well (once again, not remembering the price, but remembering the impression that it was a great deal).
  • No access to either one of those stores? No worries! If your local health food store doesn’t carry reasonably priced stevia (and most of them don’t), you can order it online from Vitacost or Amazon (those are affiliate links right there). I ordered mine from both places before I was able to start purchasing it locally.

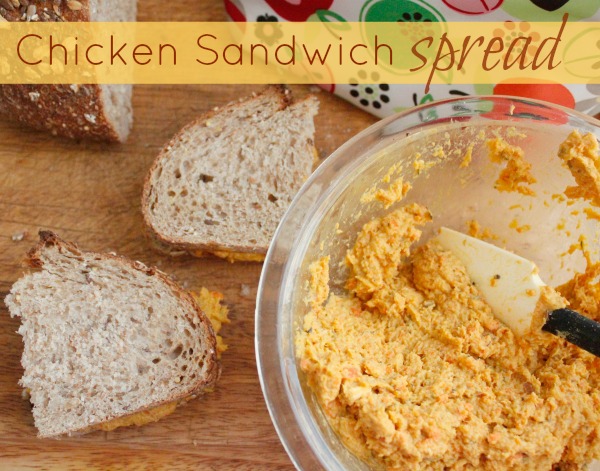
Chicken Sandwich Spread {Dairy-Free!}

This post contains affiliate links because every little bit helps! Chicken Sandwich Spread Chicken salad - especially one with cranberries, apples, and walnuts in it - is one of my favorite uses for leftover chicken. Unfortunately, I don’t get the chance to make it very often due to my Certain Little Someone’s dairy and egg allergies. I’ve tried making it with dairy-free products like coconut milk yogurt and the like, but it just doesn’t taste the same.

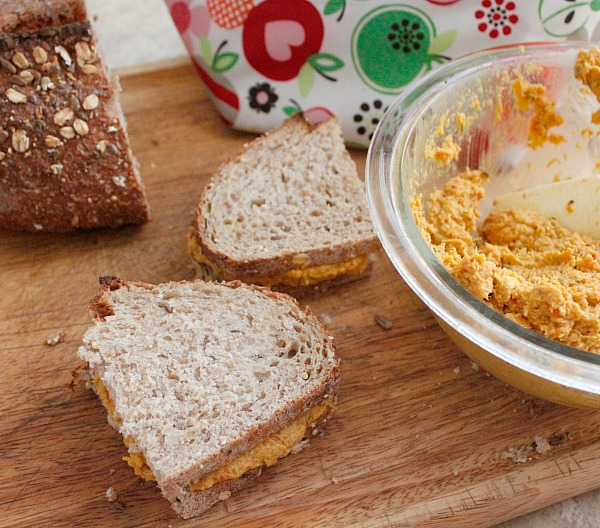
A while back, though, I hit upon a unique solution that offers up the chicken salad taste but doesn’t require any dairy whatsoever: instead of binding the salad together with a mayonnaise or yogurt based dressing, all you have to do is blend the chicken with a little bit of broth to create a consistency perfect for sandwiches or crackers! Whether or not you have a dairy allergy or sensitivity, you’ll love this delicious take on the traditional chicken salad. Chicken Sandwich Spread

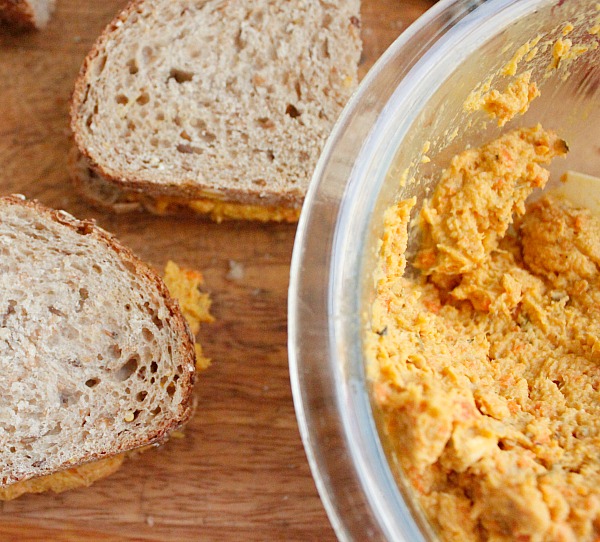
While this particular recipe is more of a spread than a typical chunky salad, you can control how smooth it is by how long you process or blend the ingredients together. Alternatively, you could divide the amount of chicken in half and stir in the second portion after the first has been processed.

I make mine in the Vitamix, but I would assume you can accomplish the same thing in a food processor. Chicken Salad Spread

This makes a great addition to your child’s lunchbox… or even your own lunchbox at work! For more great lunchbox ideas, read my recent post, “No More Boring Lunches!”

No More Boring Lunches!

This post here is just as much for me as it is for you. School for me and The Boys is about to start in another week, and that means lunchboxes for every member of the family every day of the week. (OK, every weekday, anyway.) That, in turn, means forethought and planning, things I’m not super good at. It also means I need some creative ideas at the ready because I hate - HATE - doing the same ol’ thing day in and day out. Hate it, I say.

So I’m doing a little browsing on Pinterest - where all good ideas roam - and am sharing my findings with you. (You can thank me later.)

Here’s to happy lunches! And a happy school year!

(Oh yeah - it doesn’t really matter if you pack the lunches or not. These ideas will still come in handy! Because, you know, no matter what - you still eat lunch.)

1. Chicken Cream Cheese Taquitos

This one was pinned by my friend Christy, The Simple Homemaker. You can make this recipe as healthy as you want… or not. Generally speaking, the more ingredients that are made-from-scratch-at-home, the healthier it will be. (Homemade tortillas, shredded chicken from a crock pot chicken, homemade cream cheese, etc. etc.)

2. Nut-Buttery Fruit Dip

This delicious-sounding dip was pinned by Adrienne, from her site, Whole New Mom. You can use any nut or seed butter that you want to comply with classroom rules and/or potential allergies. Kids love to dip their food, and this is a deliciously healthy way to encourage them to eat their fruits and veggies while they’re at it! (I really think celery sticks would be yummy with this.)

3. Breakfast for Lunch (Waffles, Anyone?)

Since we don’t get to eat a leisurely breakfast during the school year, why not fix it for lunch? Make a big batch on the weekend, and freeze the extras to pop into school lunches. You can also easily turn them into sandwiches by stuffing whatever normal sandwich filling you usually use in between two waffles. (I like almond or sunflower seed butter myself.) This particular waffle recipe is for Sourdough Pumpkin Waffles, pinned by Paula of Whole Intentions from her guest post at Intentional by Grace.

4. Bacon Guacamole Grilled Cheese

Take your grilled cheese sandwich up a notch (or two or three) by adding some bacon and guacamole to it. This was pinned by Diana of My Humble Kitchen from Closet Cooking.

5. Chili

If you have a Thermos, chili is a cinch to pack into a lunchbox! And so yummy, too. This version is pinned by Beth from her blog, Red and Honey.

6. Pizza Pizza!

Won’t the other kids be jealous of your kid’s lunchbox when he pulls a pizza out of it! Hilary from Accidentally Green posted this delicious version, made with BBQ chicken and bacon.

7. Individual 7-Layer Dip

My friend Jami of The Young Wife’s Guide pinned this gem from The Girl Who Ate Everything. Put these in a sealed container and you’re good to go!

8. Mini Lasagnas

Mini is just cuter. Every time. Crystal, The Money Saving Mom, pinned this idea from Catching Fireflies, and also blogged about it here.

Sadly, that’s all I have time to share for now, but you can check out my No More Boring Lunches Pinterest board for lots more ideas as we go through the school year.

A Healthy LunchBox Snack: Whole Grain Oatmeal Chocolate Chip Cookies

Those hungry little munchers are gonna want a sweet treat in their lunch box come the first day of school…. And I have just the thing for you! Packed full of whole grain goodness, honey sweetness, and just a little bit of deliciousness from chocolate chips, these Whole Grain Oatmeal Chocolate Chip Cookies will fill their tummies and their hearts.

You can find the recipe at Baking Whole Grains, where I am visiting for the day.


5 Vegan Breakfast Ideas

For the average person, breakfast typically consists of something along the lines of eggs & bacon, cereal and milk, or maybe a donut/muffin from the bakery on a really hectic day. But for someone who is trying to stick to the VB6 plan of eating, all 3 of those options are totally out of the question. VB6, after all, means no animal products, no processed food, no sugar and only whole grains from wake-up time to dinner time.

Since launching my own experimentation with VB6 (which, by the way, has been rather successful: I’ve gotten closer to my goal weight than I have in a year!), I quickly found that it was easy to get into a vegetarian groove for breakfast. I had worried that it might not be filling enough to last me until lunch time, but most days, I don’t even have a faint hunger pang until after the clock informs me it’s lunch time. (I also should note that I do consume some probiotic grass-fed dairy products during the day because I believe their nutritional benefits are worth it.)

My favorite vegan (or vegetarian) breakfast options are:

1. Smoothie & Toast

Vegan smoothie options galore exist! If you’re really wanting to avoid the animal products completely, almost all smoothie recipes can be made vegan with a simple swap of non-dairy products for any dairy.

Some of my favorite smoothies are:

  • Choco-Cado Smoothie
  • The Shamrock Shake
  • Coconut Smoothie
  • Orange Cream Smoothie: 1 banana, 1 orange or 2 clementines (peeled and seeded), 1/2 cup or so of any dairy or non-dairy probiotic product (yogurt, kefir), a splash of vanilla
  • Raspberry-Almond Smoothie (I just use my homemade yogurt or kefir.)

Now, I’m of the opinion that toast is mostly a vehicle for butter. I love me a slice of toast dripping with melted butter… mmmm! Delicious! However, I don’t currently have cultured butter, so that’s not part of my VB6 plan. Instead, I spread some coconut oil on my toast (made with my Super Simple Sourdough Bread), and surprisingly, it gives me the same satisfaction as butter. I also love to spread a little homemade almond butter on my toast.

2. Oatmeal

Once again, the options are endless: there is no reason to be bored when you have such versatile menu items available! Here’s some fresh new oatmeal inspiration for you:

the easiest breakfast you'll ever make

3. Muesli

I *love* muesli, and so do The Boys. The base is the same every time: oats and yogurt. But I just top it with whatever fruits (dried or fresh, doesn’t matter!) and nuts or seeds I have on hand. For a special treat, The Boys like a few chocolate chips sprinkled on top…. and I admit… so do I! Here’s my Better-Than-Oatmeal Muesli recipe to get you started in the right direction.

oat muffins in the tin 4. Vegan Oat Muffins

These Vegan Oat Muffins, which happen to be one of the most popular recipes on the blog, whip up quickly and can be transformed into just about anything you want with some simple ingredient swaps or additions. I like to make a batch whenever I have the time, and freeze the extras for a super-fast breakfast on the go.

5. Pancakes

Since I allow myself to eat the occasional egg during the day even on VB6 (once again, I feel it’s nutritionally worth it), I don’t bother to veganize my favorite pancake recipes unless I’m low on eggs or some other reason. But since I made vegan pancakes for quite a few years, due to My Certain Little Someone’s egg and dairy allergies, I am no stranger to the concept! In fact, there are a few recipes I got used to during his allergic days that I still make pretty regularly, and one of them is the oatmeal pancake recipe I used in this recipe for Pancake Apples. With or without the apples, it’s a delicious pancake everyone will love, no matter the diet! But I have to admit my most favorite pancake recipe is this one: The Best Pancakes.

5 Tips for a Perfect Picnic

We’ve been enjoying a lot of picnics as part of our day-at-a-time staycation, and I’ve learned a few tricks along the way.

Henceforth and therefore, without further ado, I share said tricks with you.

1. Bring along a basic first aid kit.

Eating outdoors just introduces a whole host of potential issues: bug bites, sunburns, scrapes, bruises, etc. Here’s what I always make sure to pack along with the food (Note to the FTC and whoever else cares - many of the links below are affiliate links.):

2. Pack a blanket or tarp.

If there’s a picnic table at your destination, this might not be necessary. Then again, it might be. You never know! We have a very basic picnic tarp-like blanket that is designed to be outdoors and has weights on the corners to keep it from blowing in the wind. You could also use an old sheet or blanket that you have lying around, of course.

3. Don’t forget the utensils!

I can’t tell you how many times I arrived at our picnic spot only to realize I forgot either the spoons, the forks, or a knife. So now it’s the first thing I think about! Even if you pack an entire spread of finger foods, just be on the safe side and pack a complete set (fork, spoon, knife) just in case.

4. No more boring picnic food!

Not being a huge fan of sandwiches, I’m always trying to think outside the box for creative picnic food ideas. I’ve compiled a list of picnic food options for you to consider, or you can check out the following articles:

  • Whole Foods has a whole bunch of ideas for you in every category… including dessert!
  • This compilation by Eating Well is more geared toward BBQ’s, but has some great ideas for picnicking as well.
  • And Woman’s Day brings us “Perfect Picnic Foods“.

5. Bring your picnic on wheels.

I probably wouldn’t even know such a thing as this existed - and I certainly wouldn’t put it on my top 5 picnic tips must-haves list! - if it weren’t for the fact that I picked one up at a yard sale for a ridiculously low price… and now find that I can’t live without our rolling cooler! This Rolling Cooler on Amazon is very much like the one we have, including the mesh pockets on the side that are perfect for the aforementioned first aid items. Ours also has a zippered pocket in front that’s perfect for paper plates, napkins, and utensils. There’s even enough space in the cooler to shove our picnic tarp, so our entire collection of picnic supplies fits into one convenient rolling case, which, incidentally, can even be pulled by our Certain Little Someone (who feels very proud of himself whenever he’s put in charge of it). I call that a total win-win!

What’s your perfect picnic tip?

5 Picnic Food Ideas

As part of our Day-at-a-Time-Staycation, we’ve had quite a few picnics this summer. My Certain Little Someone was trying to keep track of them at first, but he lost count somewhere around 4 or 5, and we’ve had quite a few since then!

Except for the minor issue of bugs (ahem), I love picnicking because:

  • it’s a fun way to experience the outdoors.
  • it’s a fun way to eat lunch.
  • it’s one way to enjoy local parks and historic areas.
  • IT SAVES MONEY! No need to eat out when you have a picnic in tow.

(In case you couldn’t tell, that last point was my favorite one, and in my opinion is reason enough for picnicking anytime.)

Picnicking all summer long is no fun if every picnic is the same, besides which I’m not a huge sandwich fan, so I’ve been getting creative with our picnic lunches. Here are a few of the things we’ve enjoyed on our outdoor luncheons:

1. Cold Plate

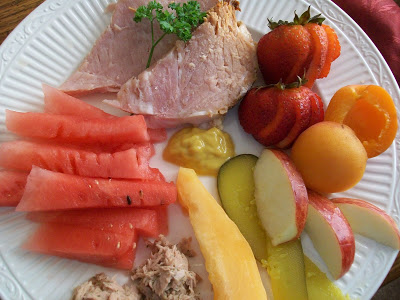
I actually posted about the idea of a Cold Plate lunch/dinner way back in 2009 (seems like ancient history now). The concept is this: just pack a variety of cold cuts and crudites that can be eaten with the fingers and with little fuss or mess.

Some ideas to include in your Cold Plate lunch:

  • Boiled Eggs
  • Cheese Cubes
  • Leftover Sliced Meat
  • Lunch Meat
  • Sliced Cheese
  • Various Vegetable Crudites: Celery Sticks, Carrot Sticks, Broccoli, Cucumbers, Peppers, etc.
  • Fruits: Grapes, Watermelon, Berries, Apple or Pear Slices, Clementines or Oranges
  • Dried Fruit

2. Meatballs & Dips

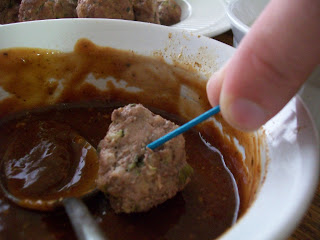
Another idea I posted way back when was a finger-food meal concept that included meatballs and sliced apples, both with dipping sauces. Meatballs can be made ahead, and can be made in pretty much any flavor profile desired, with an appropriate dip to match. Bring along some toothpicks and have a dippity-do-dah day!

Here are some meatball recipes I’ve enjoyed:

As a side dish, bring these super cute “Veggie Gardens”.

3. Bean Patties

Say wha?? Yep, bean patties. They’re healthy, sturdy, delicious, and super easy to make at home if you have some pre-cooked and/or canned beans. (I always keep a stash of cooked beans in my freezer ready to be used for occasions such as this.) Plus, like meatballs, you can make them pretty much any flavor you want!

I usually start with this black bean burger recipe, but the truth is that bean patties are really just a mixture of beans (pretty much any kind), shredded veggies (again, pretty much any kind), some sort of flour or starch (pretty much… yeah, you got it), and seasonings. Sometimes bread crumbs and/or eggs are added, and sometimes not. Whatever ingredients you use, just run them through your food processor until you have a consistency that’s able to be molded into patties. Fry your patties in a little bit of oil or bacon grease on medium-ish heat, and you’re done.

Falafels are a kind of bean patty (or meatless meatball, as they are sometimes formed in spheres rather than patties) made from chickpeas that are particularly delicious. Not a fan of beans? Try these Onion Quinoa Bites.

4. Boiled Eggs

My Certain Little Someone can’t have eggs, so I don’t do this one very often. However, at our last picnic, I made the aforementioned bean patties, which my DH cannot have, so I packed some boiled eggs for him instead. This is a super simple, portable dish that provides a great source of healthy protein and energy. Pair it with fresh fruits and veggies and you’ve got a winner meal right there.

5. Cheese & Crackers

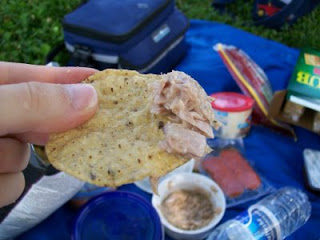
Here’s another idea from the olden days of my blog: Pack some crackers and assorted toppings for your picnic lunch. Cheese is an obvious choice, but tuna salad, egg salad, or chicken salad are great options, too. Really, just about anything you’d put on a slice of bread can be paired up with crackers, too, and it makes a fun lunch for everyone. In fact, bring a variety of toppings and everybody’s happy!

Happy Picnicking!

Allergen-Free S’Mores Stars

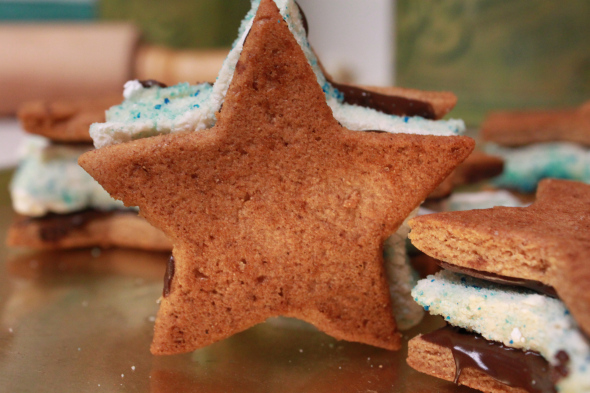
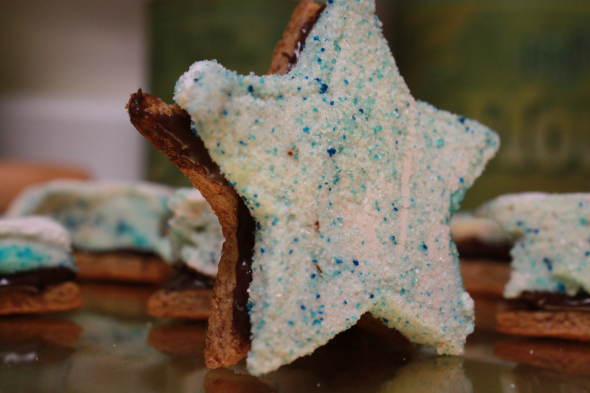
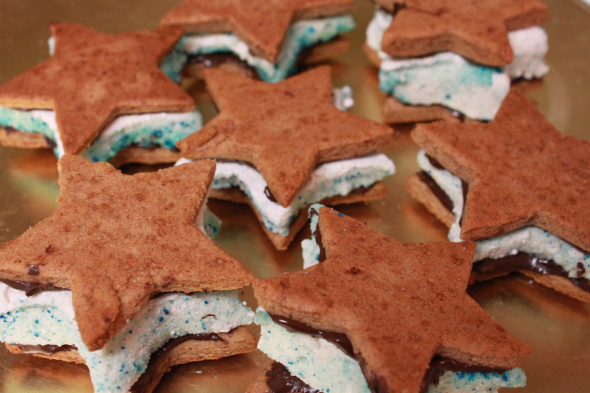
This post originally appeared on my food allergy blog in 2011. S'Mores Stars

These babies are a lot of work, but totally worth it for a spectacular Fourth of July celebration! Everything is made from scratch, except the chocolate, which is just melted chocolate chips. If you want to make these, plan on making the marshmallows first (giving them adequate time to set), then the graham cracker stars, and then assembling them.

I found the marshmallow recipe on Food.com, and made it pretty much as it described. I like that it’s also corn-free, which I think is healthier, and also great for those with corn allergies/sensitivities.

Corn-Free Marshmallows

Ingredients

  • 2 TBSP gelatin
  • 1 cup cold water, divided
  • 2 cups sugar (I used raw)
  • 1/4 tsp salt
  • 2 tsp vanilla
  • powdered sugar or colored blue sugar
  1. Pour 1/2 cup water in a small bowl, and sprinkle with gelatin. Set aside.
  2. In a large saucepan, stir together sugar and remaining 1/2 cup water. Cook over medium heat until dissolved, stirring constantly. When sugar is dissolved, add gelatin and bring to a boil, stirring occasionally to keep it from sticking to the bottom. Remove from the heat, and pour into the bowl of a stand mixer; allow to cool to room temperature.
  3. Stir in salt and vanilla, then beat on high speed with the whisk attachment until fluffy and doubled in volume, about 10 minutes or so.
  4. Sprinkle sifted powdered sugar over the bottom of a 9×13 pan and pour marshmallow mixer into it, smoothing the top. Allow to set until you can touch the surface with your finger and it doesn’t stick.
  5. Using a greased spatula to help release it from the pan, turn marshmallow onto a surface sprinkled with either more sifted powdered sugar or colored blue (or red) sugar. Cut out stars with a metal star-shaped cookie cutter, dipping it into a bowl of hot water in between each cut. Roll each star in your sugar of choice until all surfaces are covered.


Blue S'Mores Stars For the graham cracker stars, I simply used my allergen-free graham cracker recipe and rolled and cut it into star shapes instead of squares. If you don’t need an allergen-free recipe, try this graham cracker recipe from Smitten Kitchen.


Allergen-Free Graham Crackers

Ingredients

  • 2 1/4 cups sorghum flour mix
  • 1/2 cup turbinado (raw) sugar
  • 2 tsp cinnamon
  • 1 tsp baking powder
  • 1/2 tsp xanthan gum
  • 1/2 tsp baking soda
  • 1/2 tsp sea salt
  • 7 TBSP coconut oil
  • 3 TBSP cold water
  • 3 TBSP honey
  • 1 tsp vanilla

Instructions

  1. Whisk together dry ingredients in a large mixing bowl. Add coconut oil and blend with pastry blender until mixture is crumbly.
  2. Add remaining ingredients and stir until dough can be manipulated into a soft ball, adding cold water 1 TBSP at a time if necessary.
  3. Cover dough and refrigerate one hour.
  4. Roll out half of the dough into a large rectangle between two plastic zippered bags (Rip the bags down the sides to form long sheets of plastic. This is sturdier than wax paper or plastic wrap). Leave it pretty thick, around 1/4″ or so. Peel off the top bag, and use a star-shaped cookie cutter to cut out stars. Continue until dough is gone.
  5. Place the stars on lightly greased cooking sheets and bake in a 325F oven for 10-15 minutes or until golden brown. Remove from the pan to cool on a wire rack.


S'Mores Stars Chocolate

1/2 cup safe chocolate chips

Melt the chocolate chips at in the microwave at 50% or 60% power, stirring every 15 or 20 seconds. Use immediately.

To Assemble:

Use a knife to spread a small amount (about 1 tsp or less) onto the surface of a graham cracker star. Immediately top with a marshmallow. Leave as is, or spread chocolate on another graham cracker star and place it on top of the marshmallow to form a complete sandwich. Allow to cool until the chocolate is set.

Simple Hospitality: Host a Kaffeeklatsch

Some times I think we have the idea that hosting guests in our home has to be a big ordeal complete with written invitations (or at least an evite), a set of fine china, a sparkling clean home, and the perfect balance of dinner guests. And sometimes I think that our hours spent browsing on Pinterest have convinced us that no event is complete without handmade decor, cute-si-fied mason jars, and/or an assortment of creative, delicious, and - of course - uber-healthy treats for every dietary need possible.

Simple Hospitality

Forget all that stuff. That is not what hospitality is all about!

Hospitality is about people getting together, plain and simple. The setting doesn’t really matter - you don’t need to spend hours of time impressing your friends with either your millions… or your ability to create what looks like a million bucks out of nothing.

Sure, we all love good food, and I love a themed party as well as anybody! Cute decorations and creative touches make me smile and say “awww”. But really, when I host (or attend) a get-together of any kind, what I’m really looking for is good conversation and fun with other people. All that other stuff is auxiliary and completely unnecessary.

So if you’re not feeling up to scrubbing the house top-to-bottom, or if you don’t have a crafty bone in your body, or if the thought of cooking up a full-course meal for other folks makes you sick to your stomach… well, then, don’t. Don’t do all that stuff.

But do have other people over. One of the easiest ways to get some friends over to your house for a good time of conversation and fellowship is to have them over for coffee. The Germans even have a name for it - Kaffeeklatsch - so if you want to make it sound a little more exciting, then that’s what you can call it!

A Kaffeeklatsch is super simple, inexpensive, and enjoyed by just about everybody (even the non-coffee drinkers; I’ll get to that in a minute).

How to Host a Kaffeeklatsch

Here’s how I recently hosted a Kaffeeklatsch myself:

  • I invited my guests by text, Facebook message, and cell phone. No fancy-schmancy invitations needed!
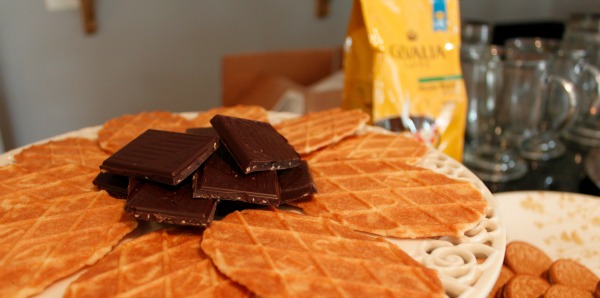
  • I ran to Safeway (literally at the last minute) and picked up some coffee (Did you know, by the way, that Gevalia coffee is now available in grocery stores? It used to be mail-order only back in the day, but now it’s available to pick up any time! And it’s yummy stuff, so that’s what I got. Decaf for the sleepy folks who wanted to stay that way, and regular for the rest of us.)
  • While at Safeway, I also picked up some healthy-ish treats. Since this was a total impromptu gathering, I didn’t bother taking the time to make some truly healthy treats at home; I chose instead to compromise health for the sake of hospitality! So we had all-natural ice cream, Newman-O’s ginger creme cookies, dark chocolate with fruit and nuts, and some bake-at-home cookies from the Immaculate Baking Company (also all natural).
  • Once home, I set out the cookies and treats on trays, and got my French press ready to go.
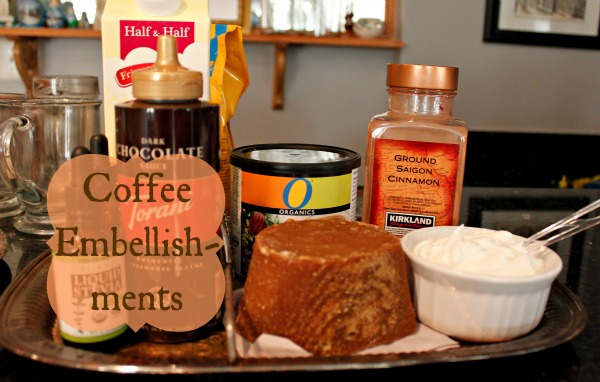
  • I also set out different kinds of sweetener (chocolate-flavored stevia, for one - yum!), some chocolate syrup (all natural again), real whipped cream, and cinnamon for my guests to dress up their coffee.
  • I also had some organic hot chocolate mix ready for friends who preferred not to drink coffee. And if I had any tea-drinking friends present, I would have set out some options for hot tea as well.
  • And we all sipped our coffee, nibbled our treats, and chit-chatted until it got dark!

That’s it, friend! All there is to it.

What’s your favorite easy hospitality?

I was selected for this opportunity as a member of Clever Girls Collective and the content and opinions expressed here are all my own.

Interesting reads