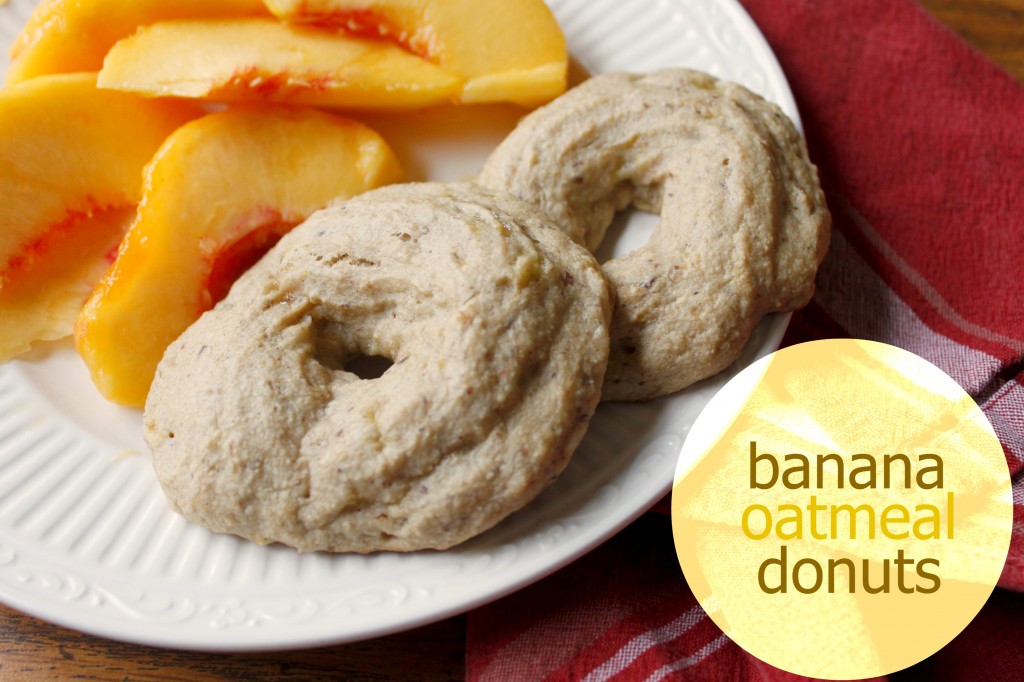
Banana Oatmeal Donuts

I just love it when I find a recipe that is so delicious I can’t resist it, and yet is healthy enough that I don’t feel the least bit guilty indulging. This is just such a recipe! These tasty and healthy donuts are made from whole grains, fruit, and healthy fats, with no refined sugars. They’re also egg-free, wheat-free and dairy-free if you’re on a limited diet. And they don’t taste like any of that! They just taste like yummy. Want the recipe? Get it at the Grain Mill Wagon: Banana Oatmeal Donuts.

I’ve got one more delicious grain mill recipe coming up for you next week - you’re going to love it! Another healthified indulgence, my favorite.

This post was made possible by the Grain Mill Challenge.

Sharing at Titus 2sday, Domestically Divine Tuesday,Teach Me Tuesday, Traditional Tuesday, Healthy 2Day Wednesday, Allergy-Free Wednesday, Whole Foods Wednesday, Works for Me Wednesday, Women Living Well Wednesday, Frugal Days Sustainable Ways, The Mommy Club, Tastetastic Thursday, Simple Lives Thursday, Your Green Resource, Freaky Friday, Fight Back Friday, Friday’s Favorites, Better Mom Mondays, Homestead Barn Hop, Motivating Monday

BundleoftheWeek.com, 5 eBooks for $7.40!

Healthy Cookies. Yes, HEALTHY Cookies! {Secret Recipe Club ~ August 2012}

My secret blog for this month’s Secret Recipe Club was Everyday Mom, written by Kim, whose love of baking is evident when you browse through her Recipes page! I’m pretty fond of baking myself, so I had fun looking through her archives and trying to decide which delicious-sounding treat I should make: Apple Cake with Maple Frosting (when autumn comes, for sure!)? Maple Mousse (I’d never heard of that one!)? Or maybe Yeasted Coffee Cake (complicated, but - I imagine - totally worth it)?

In the end, I settled for none of these, and instead made a treat that was angelically good in comparison: Banana Oatmeal Cookies, which happened to be her Secret Recipe Club post from last July. If you leave out the chocolate chips (but really, now, who does that?), they have absolutely no added sugar! And while I personally could probably never bring myself to make them without the chocolate chips, I think they would still be perfectly sweet without them because the bananas offer all the sweetness necessary.

You may or may not need quite as many bananas, depending on how big they are. I think mine were larger than usual, because 4 made the mixture very liquidy. I ended up adding some oat flour to make them more of a cookie consistency, but next time I’ll probably start with fewer bananas and see how it goes. Below is the recipe exactly as I made it.


These were so QUICK to make; I could make a batch every week if I had enough bananas!

They were super EASY, too. My Certain Little Someone happily helped me stir and spoon them out.

They are pretty CHEAP, as well, using very few ingredients.

And very HEALTHY, without the added sugars! The natural sugars in the bananas, plus whatever sweetener is in the nut butter and chocolate chips make these perfectly sweet.

If you’re curious about the Secret Recipe Club, you can read more about it here.


BundleoftheWeek.com, 5 eBooks for $7.40!

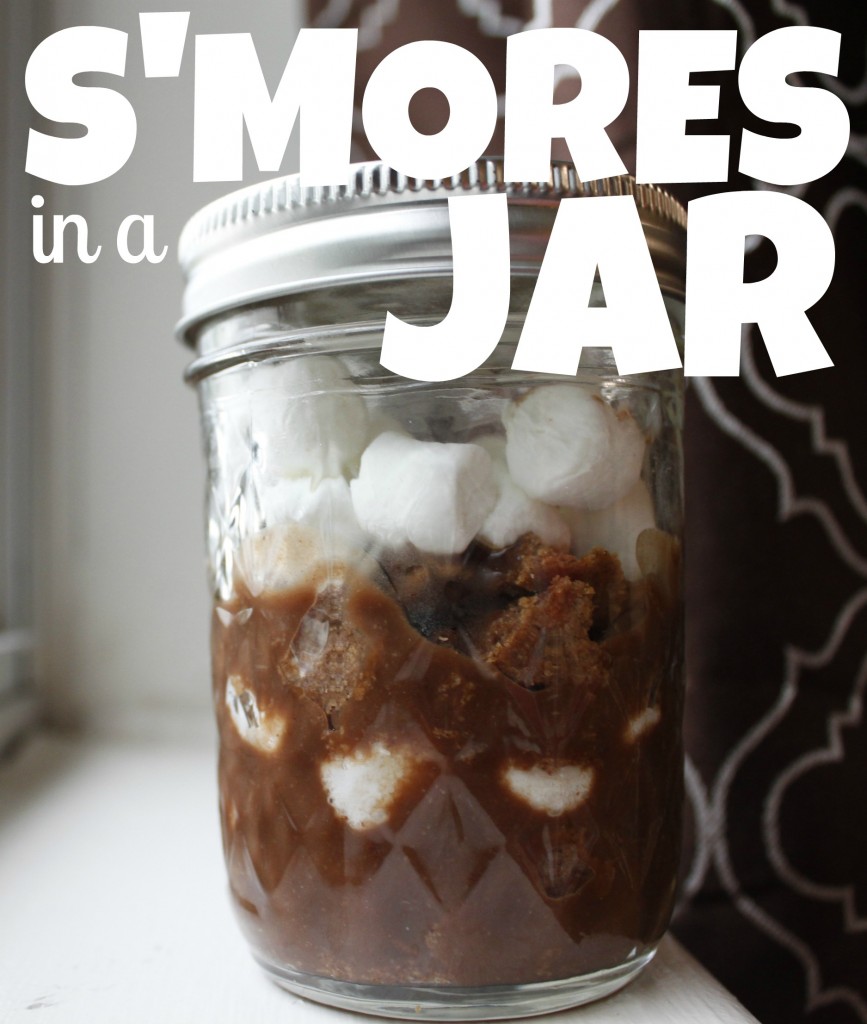
Celebrate the Fourth with S’Mores in a Jar


Healthy 2Day Wednesday is taking a break to celebrate the Fourth of July. We’ll be back next week!

Happy Fourth of July!

I hope you all have a safe and blessed Independence Day! We are going down to our state capitol and having a picnic, watching a parade, listening to the Navy Band play, and - naturally - catching the fireworks show. Promises to be fun!

On the menu:

Chicken Salad Sandwiches on Sourdough Bread

Sunbutter & Jelly Sandwiches on Allergen-Free Bread

Red White and Blue Fruit Salad

Apples

Baby Carrots

S’Mores in Jars

Speaking of S’Mores in Jars, here you go:

These are the easiest to make ever! In a pint-sized jelly jar, layer the following:

  • Crumbled graham crackers (Graham Cracker Recipe, Graham-Free Graham Crackers)
  • Chocolate pudding (use rice milk for a vegan/allergen-free version)
  • Mini marshmallows (a guilty pleasure!)

Repeat the layers, screw on the lid, and there you have it: a portable picnic dessert that everyone will love!

Sharing at Women Living Well Wednesday, Allergy Free Wednesday, Works for Me Wednesday

BundleoftheWeek.com, 5 eBooks for $7.40!

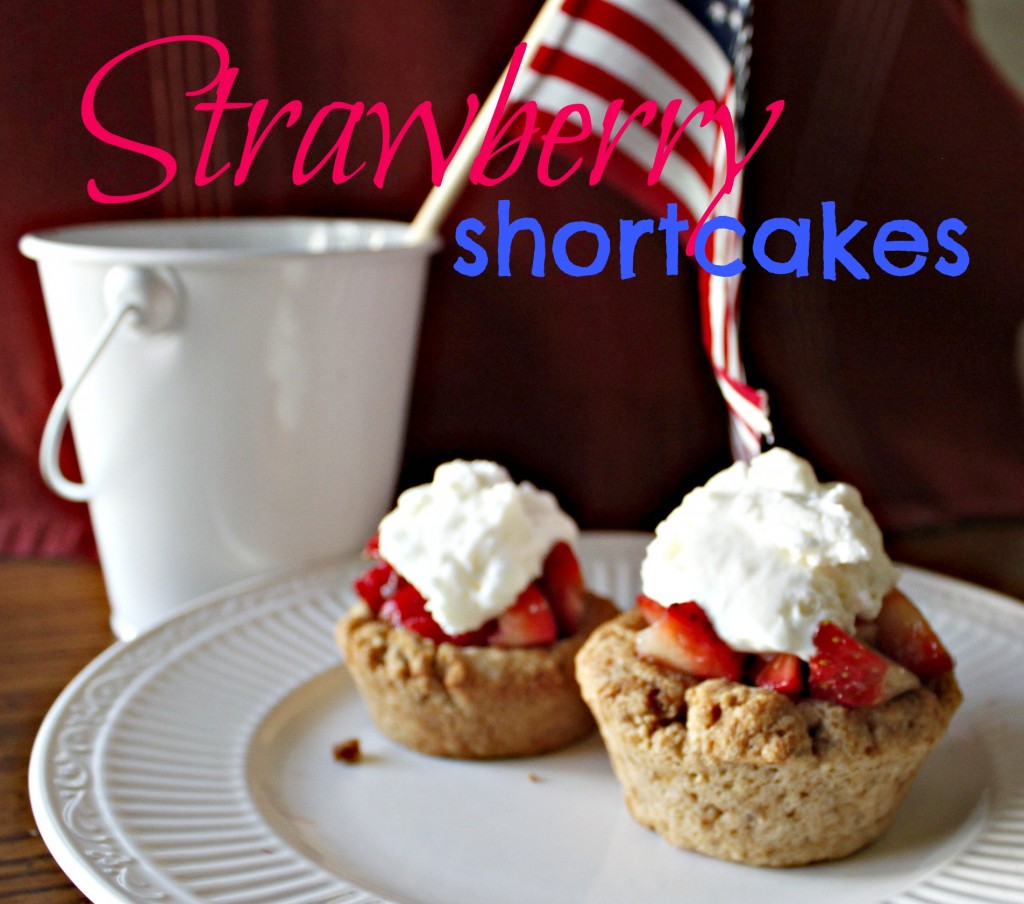
Lil’ Baby Strawberry Shortcakes

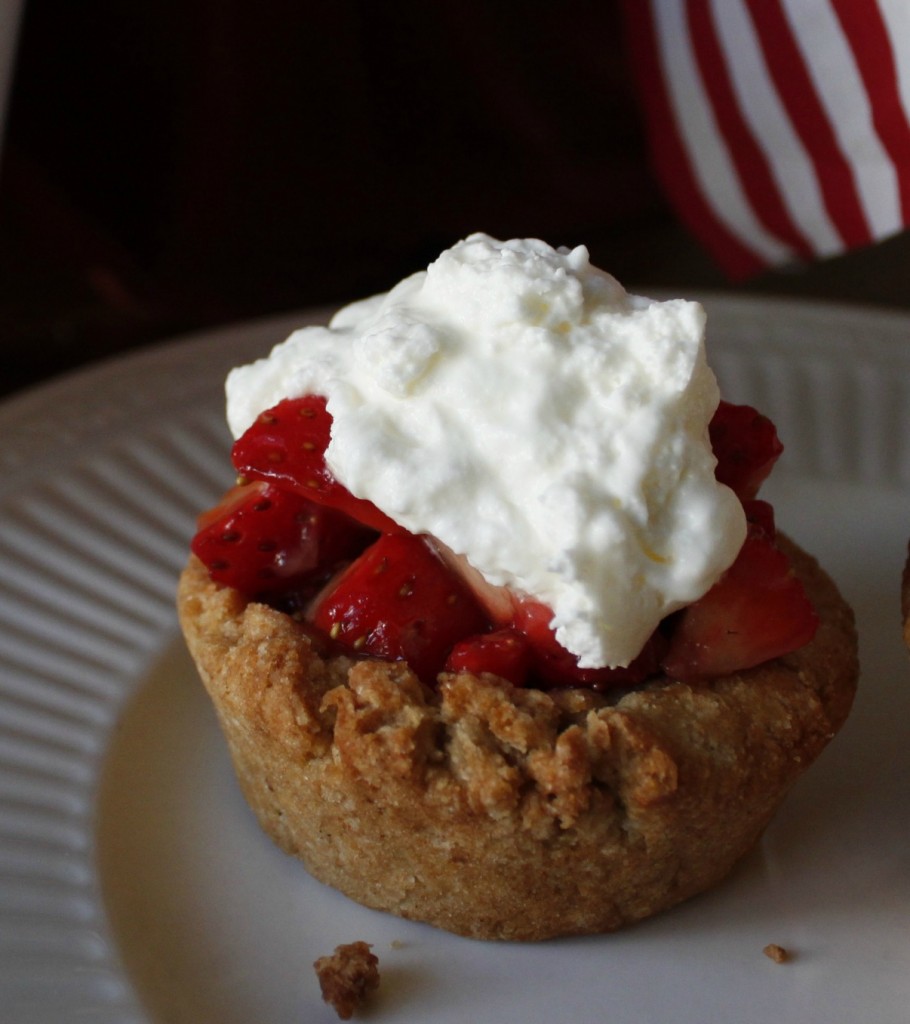
Aren’t these cuties… well… cute? Little bundles of shortcake joy! I brought them to our church’s annual Picnic on the Grounds to celebrate the Fourth of July as part of the potluck lunch. The platter was cleared so fast, I barely had time to grab one for myself and Baby Boy! Thankfully, I was a smart one and had saved a few of the biscuits at home, so the boys enjoyed those for breakfast this morning. (Dessert for breakfast is a wonderful thing, don’t you think?)

I made both a regular and an allergen-free version of these and both turned out pretty well. Both options are included in the simple recipe below.

Strawberry Shortcakes

Ingredients

  • 1 batch biscuit dough (regular or allergen-friendly*)
  • 1 lb strawberries
  • 1/4-1/2 cup unrefined sugar
  • 1 cup whipping cream or coconut milk
  • liquid stevia, to taste

Instructions

  1. Take a golf-ball sized piece of biscuit dough in your hand and roll it into a ball. Flatten into a disk and place in the bottom of a muffin tin. Press the dough up the sides of the tin. Continue with the remaining biscuit dough. Bake at 425F for 10-15 minutes or until golden. Remove from oven and cool on wire rack.
  2. Meanwhile, chop strawberries (you’ll need pretty small pieces) in a bowl and sprinkle with the sugar, to taste. Allow to sit for a while so the sugar will dissolve into the strawberries.
  3. Place the whipping cream in a mixer and beat on high until soft peaks form. Add in liquid stevia (or honey or sugar) to taste, and continue beating until fairly firm peaks form. To make an allergen-friendly “whipped cream”, place a can of coconut milk in the fridge for several hours. Spoon the solid portion into a mixer and beat briefly until it is the consistency of whipped cream. Stir in the sweetener to taste.
  4. When biscuits are cool, scoop the strawberries into the depression on each biscuit. Top with a spoonful of whipped cream.

*You can use your own favorite biscuit recipe, of course! If you use the ones linked here, simply omit the sweet potato or squash. Otherwise, follow the recipe as directed.

These are a QUICK yet festive option for your Fourth of July celebration!

They are fairly EASY, although they do involve a few extra steps.

How CHEAP they are depends on how much you have to pay for the strawberries. This time of year, they’re usually still available for a decent price.

They are pretty HEALTHY! I used white whole wheat in the biscuit dough, and palm shortening as the fat. I had sucanat for the sugar in the strawberries, which is the healthiest version of sugar you can find. Plus, I used the stevia in the whipped cream, which is an even better sweetener choice.

Sharing at Women Living Well Wednesday, Allergy-Free Wednesday, Frugal Days, Sustainable Ways, Real Food Wednesdays, Works for Me Wednesday, Simple Lives Thursday,

BundleoftheWeek.com, 5 eBooks for $7.40!

Guest Post: Healthified Strawberry Crisp

Today’s post is brought to us by my friend Erin at The Humbled Homemaker. She’s writing about one of my very favorite things… strawberries!

Ah-strawberry season. It’s almost over in my Southern state of North Carolina, but it’s just beginning elsewhere. One of my favorite summer pastimes is picking berries. And although I love eating them raw (and sometimes right off the plants!) or in a summertime smoothie, one of my family’s favorite desserts is a warm-from-the-oven, juicy strawberry crisp.

But I’ll admit: The strawberry crisps I’ve made in the past have been anything but healthy. But since we only have fresh strawberries once a year, we “sacrificed.” However, the more I’ve learned about healthier alternatives to conventional sweeteners, the more I’ve realized that with just a few minor tweaks I can convert old favorite recipes into treats that come with much less guilt-not to mention less detriment to my family’s health!

Without further ado, here’s my new, improved “healthified” strawberry crisp recipe!

getting the ingredients ready

slicing up fresh sweet berries

stirring together the dry ingredients

cutting in the butter... almost done!


Enjoy with a bowl of vanilla ice cream!

Have food allergies in your family? I make this gluten-free/dairy-free version for my daughter!

Thanks, Erin! Visit her at The Humbled Homemaker where you will find not only easy, healthy recipes like this; Erin is full of great tips for natural homemaking and child-rearing.

Sharing at Traditional Tuesdays, This Chick Cooks, Simple Lives Thursday, A Little Nosh

BundleoftheWeek.com, 5 eBooks for $7.40!

SRC: Orange Chocolate Macaroons

Wow,Secret Recipe Club time came around fast this month! It totally caught me by surprise near the end of my OAMS cycle, and due to poor planning on my part, I happened to be completely out of flour and oats. That pretty much eliminated any baking, and I didn’t have time to try any main dish recipes. Thankfully, Cupcake Muffin, my assigned blog, came to my rescue with a simple recipe that not only requires minimal ingredients (that I happened to have on hand, miracle of miracles) but that also tastes amazingly delicious. Even better? I’m the only one in the house that can eat them, so they are all mine. Muahahahahahahah! There are some perks to being the only person in the house without any dietary issues.

As for next month: I will not run out of wheat flour and I will finish my Secret Recipe Club long before it’s due. I’m trusting you all to keep me accountable, OK?

Now back to my assigned blog: Cupcake Muffin is written by Sara, a grad student at Berkeley who cooks up some pretty amazing stuff. From creative ways to serve vegetables (Carrot Fennel Salad, for example), to delicious new twists on old dinner-time favorites (try the Chicken Tinga Tacos), to decadent desserts (how about some Grapefruit Mint Tarragon Chocolate Tart?), she’s got you covered! After all, she’s been blogging since 2007, so there’s a lot of great content to be discovered.

For reasons already mentioned, I chose to make her Orange Chocolate Chip Macaroons, which turned out to be quite serendipitous. Orange and chocolate is a combination I love , and I always enjoy trying new recipes to utilize it. These macaroons were no exception! Delicious, in a word. You definitely won’t be able to eat just one.

I made only a portion of the recipe, since, as I mentioned, I’m the only one in the house who can eat these. So here’s my small batch version, which doesn’t differ much from Sara’s original recipe.


I would recommend using Let’s Do Organic or Tropical Traditions dried coconut for this recipe, as most other versions have lots of sugar and other unnecessary ingredients in them. If you use the right kind of coconut, these will actually be some pretty healthy cookies!

These cookies were so QUICK to make - they do take a long time to bake up (25 minutes) but the prep time was minimal, 10- minutes or less.

Deliciously EASY, too. For some reason I always thought macaroons were hard, but not so!

This recipe uses minimal ingredients (especially in a small batch, which is great if you don’t need a large quantity), so it’s a great CHEAP treat.

If you use the right kind of coconut, and chocolate chips with real ingredients, these cookies can be relatively HEALTHY. They still have sugar, so they’re not a health food, but they’re a healthier option for snack than most cookies (especially store-bought ones!).

Intrigued by the Secret Recipe Club concept? Join here!


Linking up at:
Hearth & Soul Traditional Tuesday


BundleoftheWeek.com, 5 eBooks for $7.40!

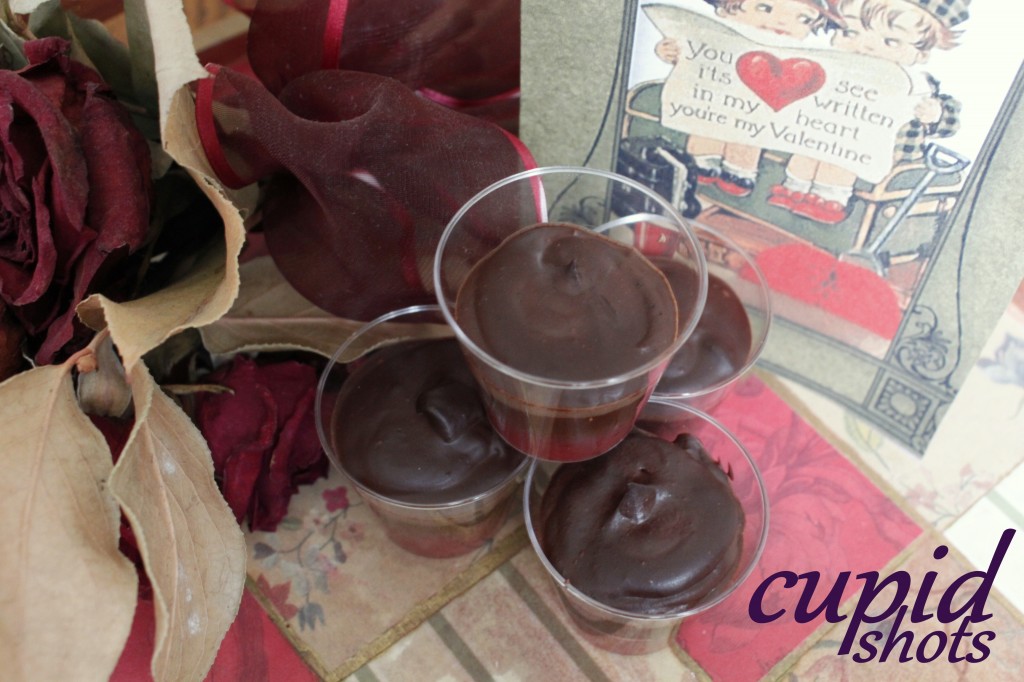
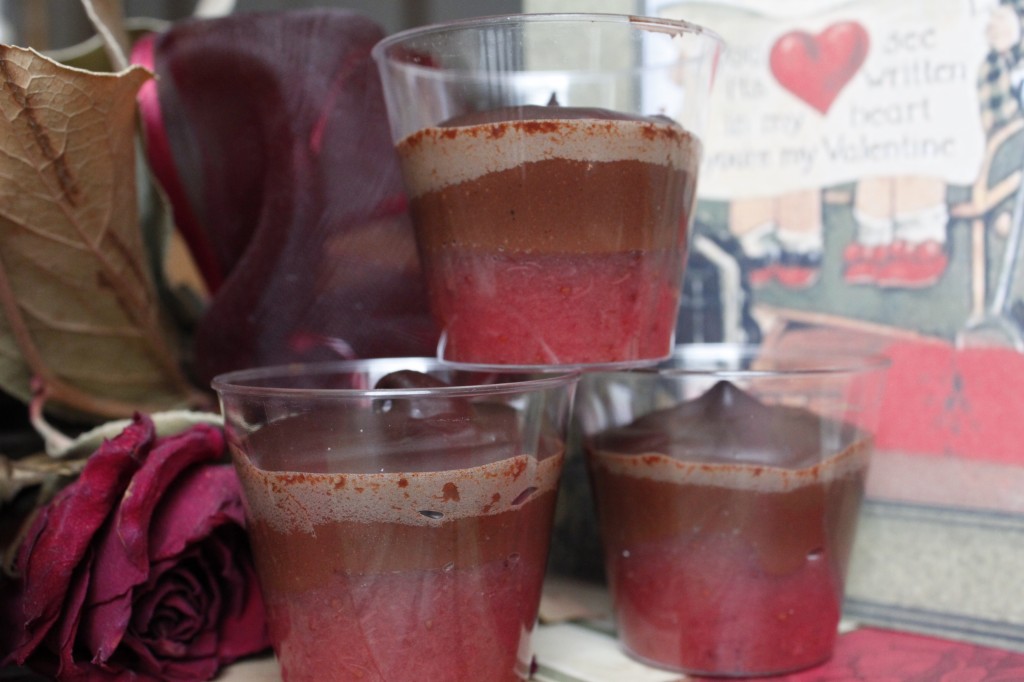
Cupid Shots {Mini Chocolate Mousse with Strawberry Filling}

Valentine’s Day is quickly approaching, and as usual, my mind turns to thoughts of chocolate. Chocolate daydreams and Valentine’s Day just go together perfectly, no matter your age.

And so do chocolate and strawberries. Especially when they’re in cute little shot glasses! These will be a hit with adults and kids alike, and of course, true to form, they are so easy.

You will need the little plastic shot glasses if you want them to be in this cute little miniature form. I found mine at the Dollar Tree and thought it a worthy investment for such cuteness.


Notes:
  • You’ll probably have extra strawberry filling; no worries, you will certainly find another use for it!
  • You can use this chocolate pudding recipe instead of the mousse (more kid friendly if that’s what you’re going for). You will have to allow the pudding some time to chill and set, so keep that in mind.
  • To make the strawberry puree, I thawed frozen strawberries and ran them through the blender. You can strain it at that point if you want it really smooth, but I didn’t.
  • You can top this off with some whipped cream (yum!).
  • I used corn starch because I was completely out of tapioca starch, which is my preferred starch. I’m pretty sure it will work just as well with the tapioca, but you may need more of it.
  • Boxes and bars of baking chocolate typically have the grams noted right by the ounce measurements. This takes about two and a half of the large baking bars.
  • These really need to be served immediately. The mousse just doesn’t keep well. (In the pictures, you can see how the mousse has hardened and looks “burnt” on top. It tastes fine, but the texture is not like mousse at all!)
This is not super QUICK, but it’s not super time-consuming either. I don’t remember exactly how long it took me, but it was less than an hour (including cooling time for the strawberry layer).
It’s very EASY, though, even the mousse. I’d never made chocolate mousse before and I thought it might be complicated, but it was actually quite simple.
The chocolate is not CHEAP, I’ll admit. I didn’t buy mine especially for this, though, I used some that I bought in after-Christmas sales, which made it cheaper than it would have been otherwise. And I used strawberries that had been frozen from strawberry season last year.
It’s a lot HEALTHY-er than the average Valentine’s treats you’ll see popping up everywhere. There’s not a ton of sugar in this recipe, which makes it a great choice! And it has the added benefit of some vitamins from the strawberries, as well as the antioxidants from the chocolate. (My favorite thing about chocolate, of course.)
Sharing at Katherine Martinelli’s, and…

Hearth & Soul Hop Works for Me Wednessday realfoodallergyfree Photobucket

BundleoftheWeek.com, 5 eBooks for $7.40!

Secret Recipe Club: Sweet Potato Rice Pudding

The Secret Recipe Club took a little break in January - which was kind of nice - but we are back in full swing now! Quick explanation for the uninitiated: we are each secretly assigned a different blog, and we choose a recipe from that blog to make and write about. (Sound like fun? Join the club here.)

This month, I was assigned Tea and Scones, written by Margaret, who loves trying out new recipes and sharing her adventures with the rest of us. She is an incredibly talented baker - look at this amazing Vienna Bread, and this Swedish Rye! Being on a buckwheat flour kick, I strongly considered making her Blueberry Buckwheat Pancakes but then I decided I wasn’t feeling up to the challenge of de-allergifying them (why, yes, I do believe I just made up a word!). Instead I went with her Pumpkin Rice Pudding.

I know; kind of a boring choice after all that amazing-ness, but what can I say?! We love us some rice pudding around here - for dessert AND for breakfast! And with pumpkin? Even better!

Only I didn’t have any pumpkin. Why yes, the queen of pumpkin was completely out of that commodity. I did, however, have plenty of sweet potato puree packed in the freezer, and sweet potato is orange, so sweet potato it was. Happy thought indeed! It was delicious. I even made a dairy-free version with rice milk that was just as good.


Since I had cooked rice and sweet potato in the freezer, this came together very QUICKly for me, but if you have to start those both from scratch, it can take a while.

It’s very EASY, though. It’s hard to mess up rice pudding! Well, as long as you can cook rice.

Rice is CHEAP, but rice pudding does take a lot of milk. That doesn’t stop me from making it, though!

It’s a very HEALTHY dessert and a passable breakfast (especially if made with honey rather than sugar). The sweet potato adds extra vitamins and fiber - as well as a lovely color and delicious flavor!

Sharing at Pennywise Platter, Superfood Sunday, and…

realfoodallergyfreeH2W


BundleoftheWeek.com, 5 eBooks for $7.40!

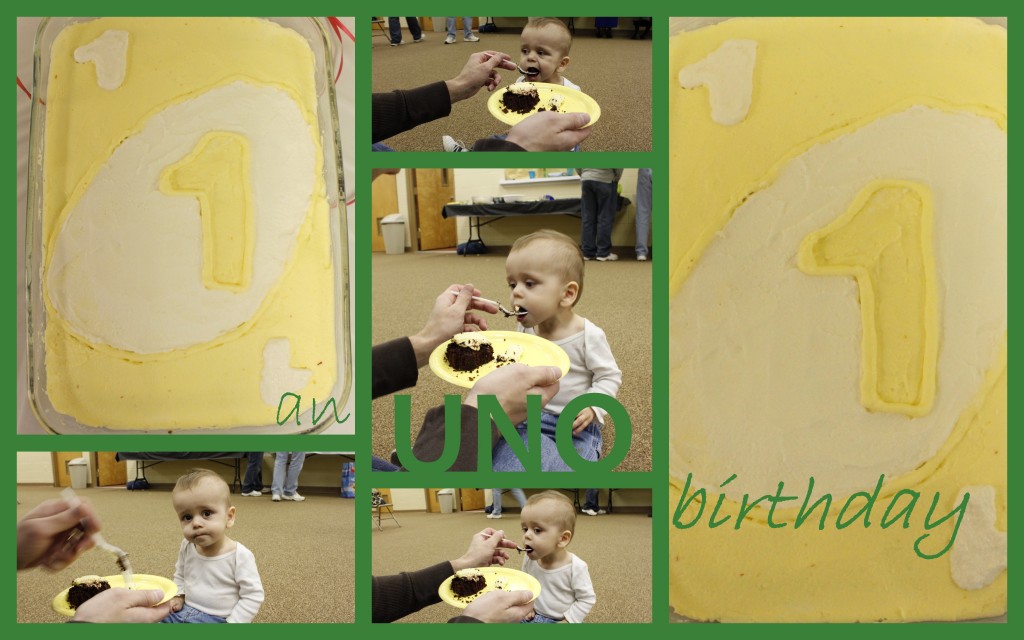
An UNO Birthday: The Cake

UNO birthday - cake

The cake is, after all, the most important part of the whole shebang. Decorations are nice, and everybody loves food, but the cake is the real show-stopper. Or it should be.

I wouldn’t exactly call this particular birthday cake a “showstopper”. It’s cute and all, but it doesn’t scream, “LOOK AT ME!”. My previous decorated cake attempts were all a lot more spectacular (the rainbow fish cupcakes, the Thomas Aquaduct, and the race car) than this one, which was sort of a let-down.

But I couldn’t handle too much more than this, coming off of Christmas and all, and having very little time to prepare. Quick and Easy was my main concern, and Cheap was right behind it.

Healthy was also of concern - I wanted to finally make a cake with natural food coloring! I’ve been intending to for years, but never have actually done it. With this simple design, I figured it was the right time.

So, with all those things in mind, here is what we ended up with.

UNO birthday cake

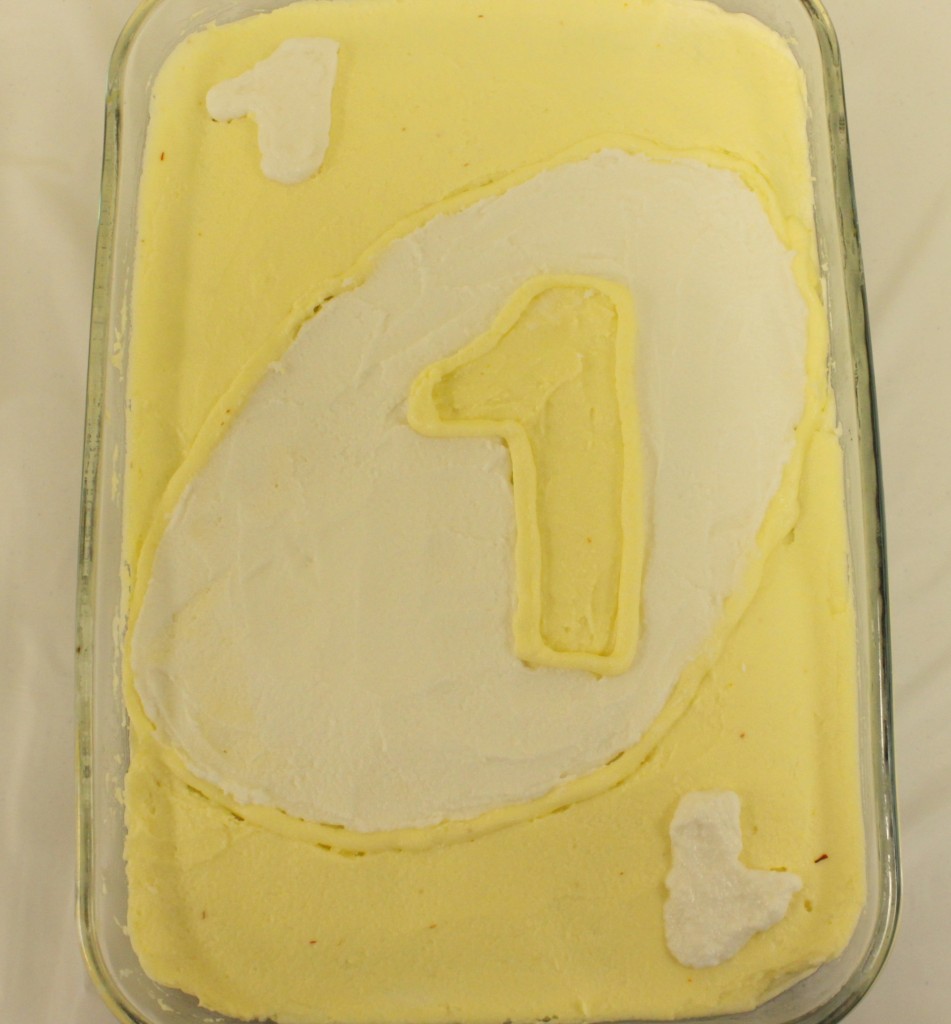
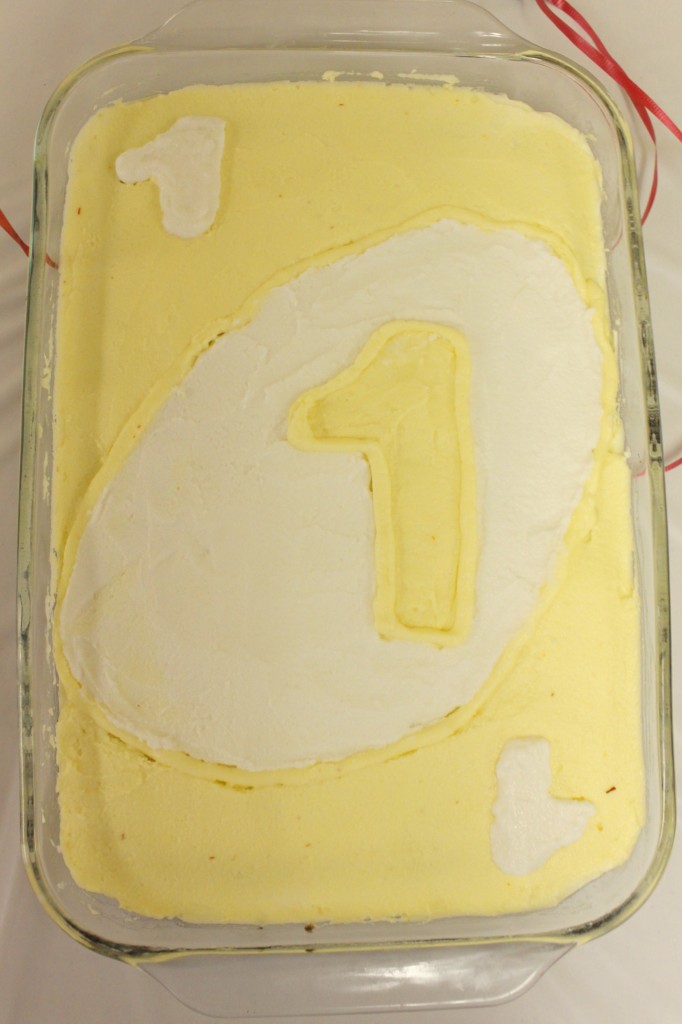
Of course, it’s patterned after an UNO card with the number 1. It was very easy. I used 2 batches of homemade dairy-free decorators frosting, tinting one of them yellow with saffron.

Let’s talk about saffron for a second. Saffron is one of - if not the most - expensive spice due to its labor-intensive and tedious method of harvesting. At a regular grocery store, you can spend as much as $20 for only a small amount. The small bottle I have (which has lasted me for quite some time since I rarely cook with saffron) was actually purchased at Trader Joe’s for a much lower price. I don’t remember exactly how much it was, but I can tell you it was less than $10. And it is still available there, as I have seen it on recent trips. I wouldn’t have used saffron as my coloring agent except that I happened to have it on hand. Another option for yellow coloring is turmeric, which is not quite as expensive.


To color the frosting, I replaced the 3 TBSP of water called for in the recipe with saffron-dyed water. To color the water, I placed some saffron in a small bowl and crumbled it in my fingers. Then I poured 3 TBSP of hot water over it, swished them all together and let it sit for a while until the color deepened. Don’t worry if it looks orange; that’s actually a good thing, and indicates a stronger yellow color. I probably didn’t put as much saffron in the water as I should have, hence my very pale yellow. I would recommend a good well-filled teaspoon worth of saffron for a stronger yellow. Mine was probably more of a half teaspoon.

To make the design, I first frosted a 9×13 single-layer cake with one thin layer of yellow frosting. I let it set for a little while to create a “crumb coat” so I could avoid picking up crumbs in the actual design. Once the crumb coat was set, I used a toothpick to trace out the slanted oval, stretching from a couple inches down from the top right corner all the way to a couple inches above the bottom left corner. Then I traced out a large UNO-style number one in the center of the oval.

Next was my big mistake. I really should have piped everything with the star tip, but I had most recently used my frosting decorator bag with meringue frosting, and I was concerned that there would be some egg protein left behind. Not good for my allergic little guys! So I just spread the yellow frosting on the background areas with a knife, smoothing it the best I could. (To get it really smooth, I could have dipped the knife in water between each stroke on the frosting, but I didn’t take the time to do that.) Then I just did the old ziploc-bag trick to pipe the outline for the “1″ in the center, and the oval. I finished up by frosting the oval plain white, and then piping in some small “1″s in the upper left and bottom right corners.

Of course, any UNO-themed color can be used to make this card (blue, green, or red), and any number can be used (up to 9 anyway!). Or you could do a Wild Card for someone whose age should remain a secret!

UNO birthday cake 1

As for the cake itself, I used a new allergen-free recipe at Back to the Kitchen, and wasn’t 100% pleased with the result. It was probably my fault, though. I made my own GF flour blend, but didn’t have any potato starch, so just did without. I think that was probably a big mistake. Looking back, I think that my most successful cakes all had potato starch as part of the flour blend. Plus, I accidentally set the temperature on the oven a little too low, so the cake cooked up funny: it was kind of hard on the bottom. Not overcooked, just sort of… hard. It was weird.

Consequently, I had my DH whip up a batch of Rice Krispies treats (using Erewhon Cocoa Rice Crispy cereal, so it was at least a tiny bit healthier than you-know-the-usual-kind) for all the non-allergic guests to enjoy since the cake was kind of a bust, at least in terms of taste and texture. You know what? Next time, I just might decorate the Rice Krispies treats instead. That’s what the Cake Boss does! Then everybody will be happy. Not healthy, but happy.

Read the Rest of An Uno Birthday Series:
The Food
The Decorations
Linking to Lunchbox Love

Ingredient Spotlight

BundleoftheWeek.com, 5 eBooks for $7.40!

The Secret to Perfectly Round Spiral Cookies

Christmas is pretty much the only time of year that I go all out with the cookie-baking, even busting out the rolling pin to make all kinds of complicated cookie varieties, like sugar cookies and spiral cookies. The rest of the year, I stick to the easy stuff, usually resorting to drop cookies and bar cookies because I’m lazy like that.

But if I’m going to go to all the trouble to make those kinds of cookies, then I want them to turn out right. And it always kind of annoys me that those silly spiral and icebox cookies get that flat edge where they rest on the counter or in the fridge. They’re supposed to be round for goodness’ sakes.

I’ve tried my best to form perfectly round logs, and treat them very gently so as to preserve the shape, to no avail. I always get that stinkin’ flat edge.

Until this year. This year, I have discovered the secret. I read about it on a blog (I forget which one now) for another purpose and immediately realized the possibilities of this little trick! My spiral and icebox cookies will now and forever more be round!

All you have to do is grab a toilet paper tube, or a paper towel tube, or a wrapping paper tube. For purposes of ease in handling, you will want to cut the paper towel tube in half, and the wrapping paper tube into several smaller portions.

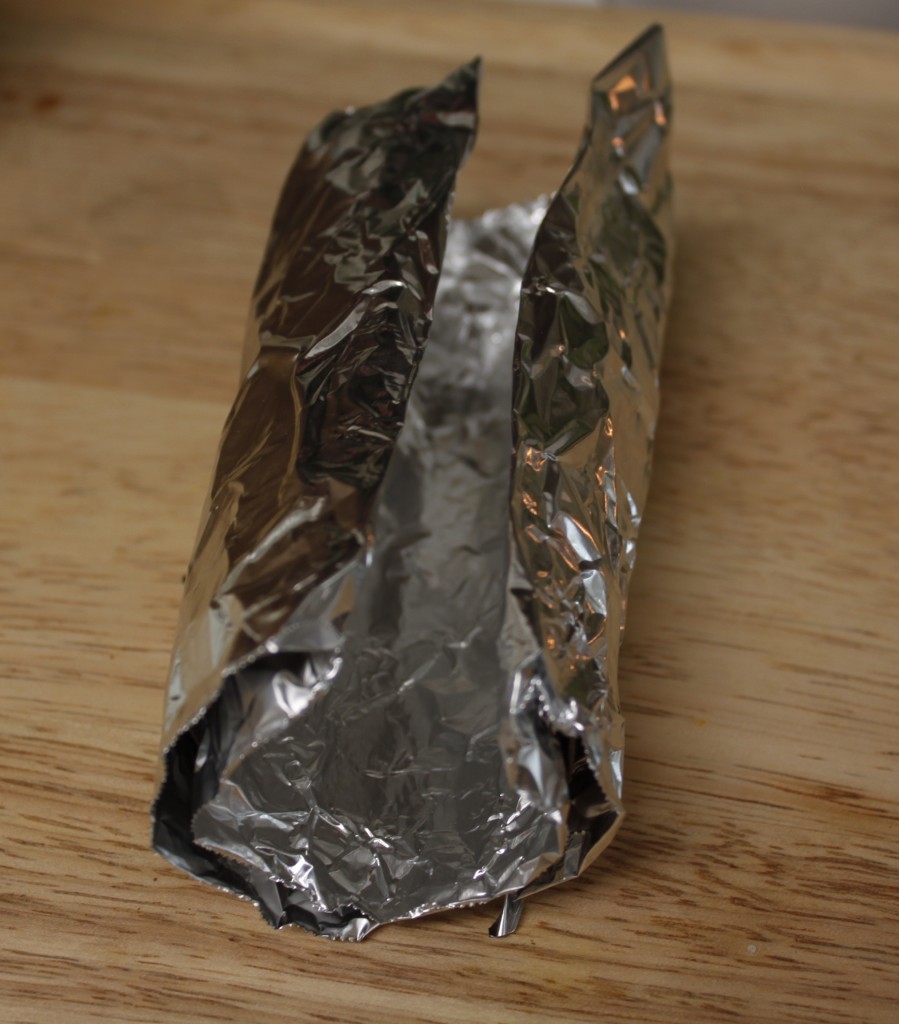
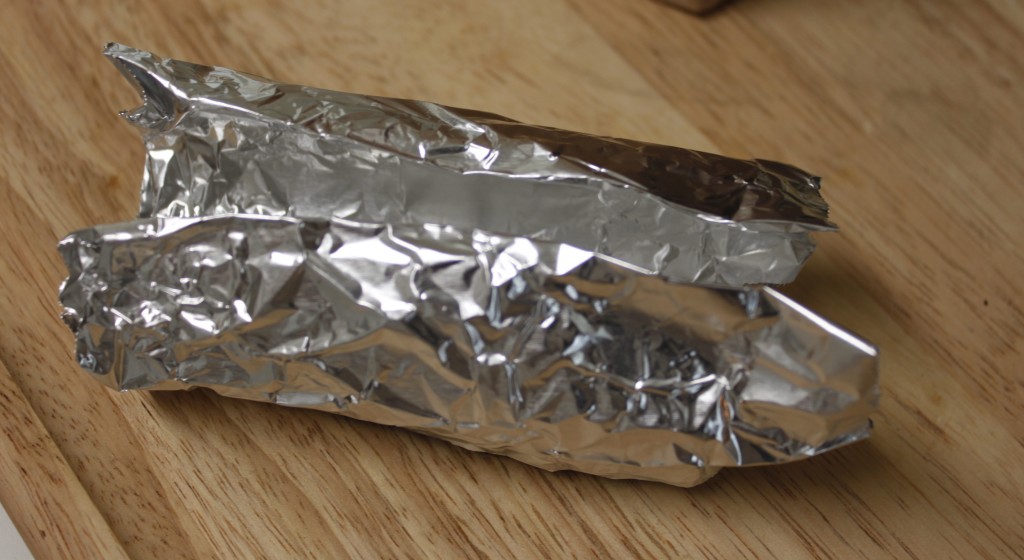
Once you have a cardboard tube approximately 6″ in length, cut a slit along one side of the tube so that it looks kind of like a hot dog bun. Take a piece of foil and wrap it around the inside of the cardboard-tube-hot-dog-bun, and fold it around the outside.

They say a picture is worth a thousand words, so here’s a picture of what I’m talking about:

Here’s another vantage point:

Now go about your business rolling up your perfectly round log of cookie dough, then gently place it inside the tube, like a hot dog in a bun.

The cardboard tube creates a mold that helps preserve the shape of the cookies. I’ve found that the toilet paper tubes are not as sturdy as the other kinds, and might need a piece of tape to hold the edges together.

Refrigerate or freeze your dough in this tube, then proceed to slice as usual. Voila! Perfectly round cookies!

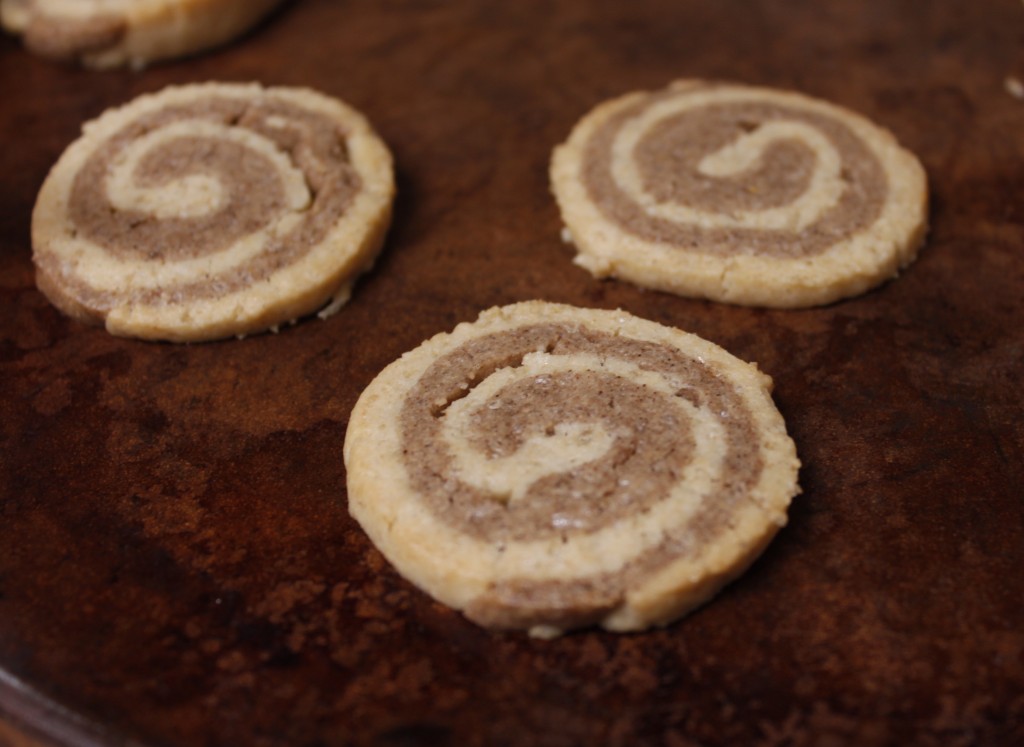
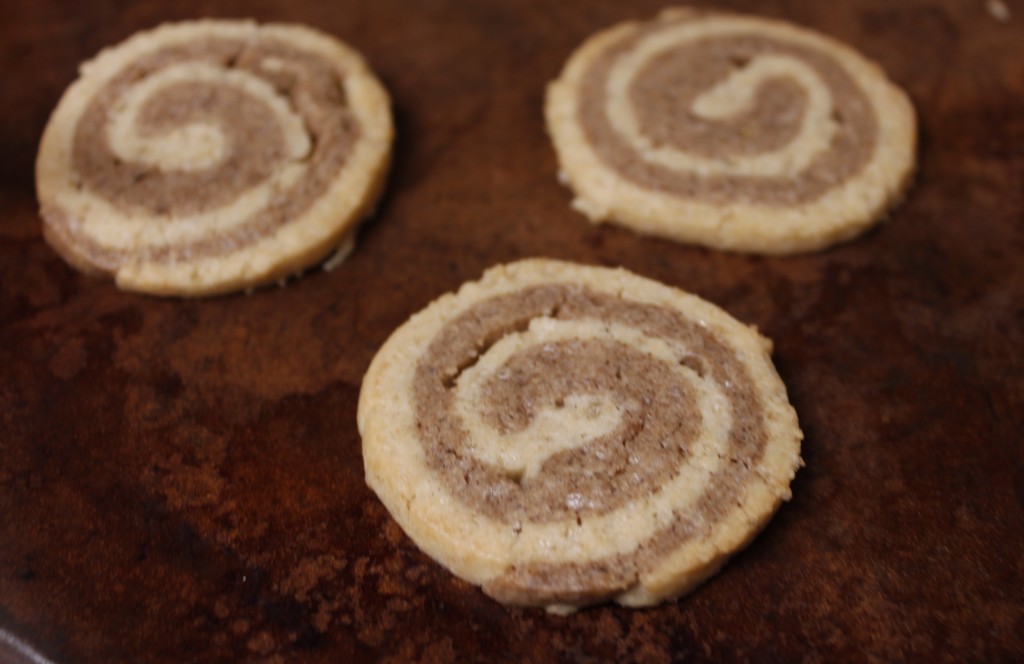
Pictured are my Cinnamon Pinwheel cookies.
Growing Home

BundleoftheWeek.com, 5 eBooks for $7.40!

Interesting reads