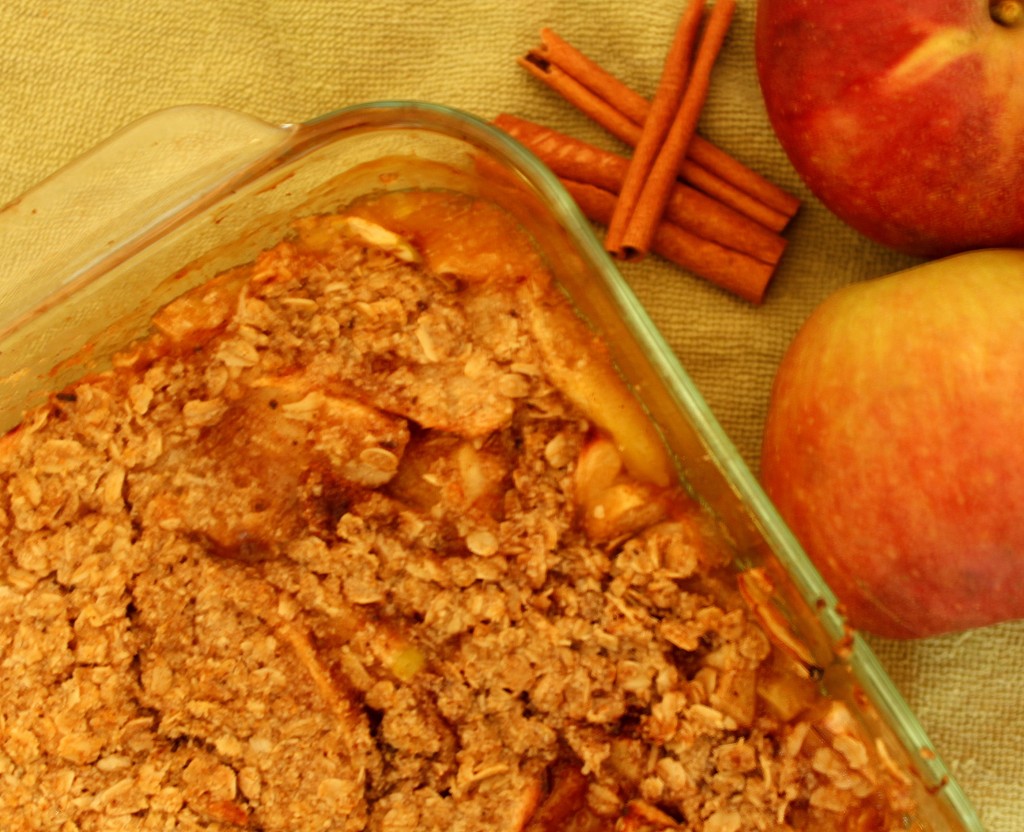
1-2-3 Fruit Crisp!

fruit crisp

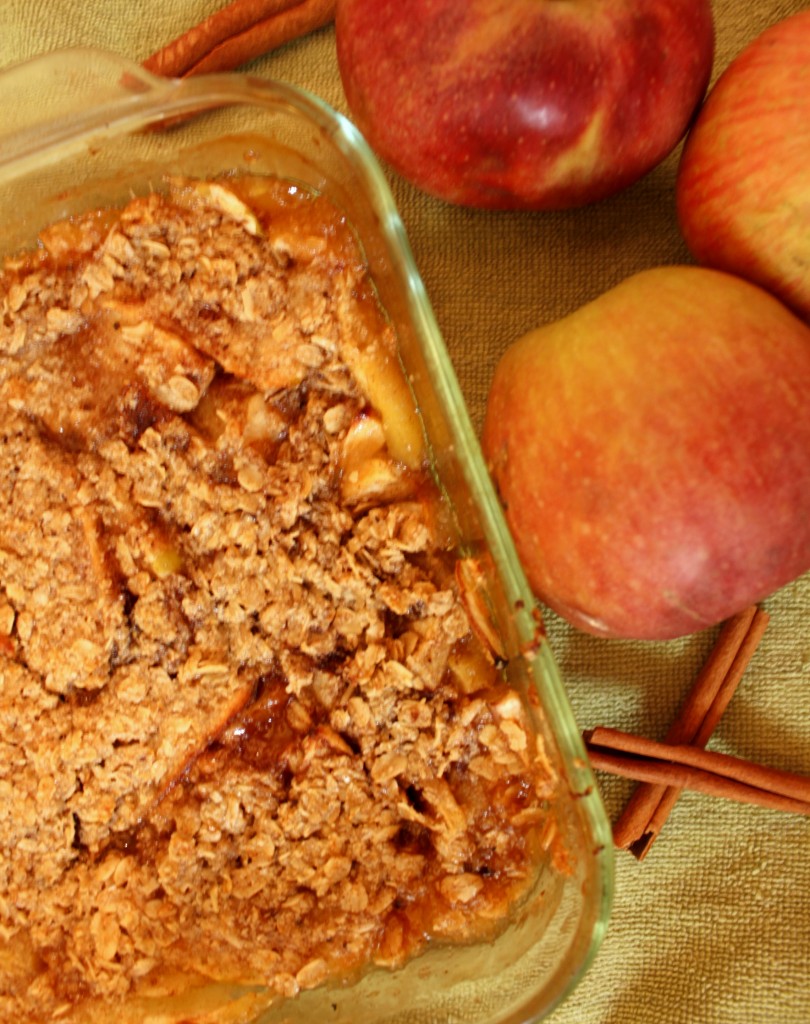
If October is the month for pumpkins, then November is the month for apples, or at least that seems to be the way it goes around here. A little over a week ago, in fact, I got a 1/2 bushel basket full of seconds apples, so for a week straight I was cooking nothing but apples. Or so it seemed anyway. In my apple-cooking/preserving spree, I made sure to save a few pounds of the crunchy little spheres to make some fruit crisp for dessert.

I have always thought that I am not at all a fan of cooked apples. And that’s still true. But I have discovered another layer of truth, and that is this: I like apples that are really really cooked. Cook them ju-u-ust until they’re about to turn into applesauce, and there you go: cooked apple perfection. None of that rubbery lumpy apple chunky stuff for me - I shudder at the thought! Give me a bowl full of mushy apple crisp, and I’m a happy girl. I’ll lick the bowl clean, in fact.

In the past, when I set out to make a fruit crisp, I always googled fruit crisp recipes, and sorted through them until I found one that I liked, or made a combination of all of them. With this last crisp, though, I read through The Cheapskate Cook’s apple crisp recipe and method, and decided I really liked her approach. She simplifies and demystifies the whole process, and furthermore, gives you permission to change it up just the way you like it.

Which is just the way I like it.

Who needs a recipe, really? It’s just a combination of 3 different elements: fruit, sugar and seasonings, and a streusel-like topping. No great mystery there.

So here you go. A fully customizable, perfectly simple formula for fruit crisp anyway you like it. (Except rubbery. Please don’t make rubbery fruit crisp.)

1. The Fruit

Go with any fruit you want, really, with the exception of citrus (Grapefruit crisp, anyone? No? Didn’t think so.), and perhaps other more exotic fruits, like starfruit. I have never made starfruit crisp, so I can’t vouch for its success. (But wait! A quick Swagbucks search reveals that someone else has indeed made starfruit crisp. See? Fully customizable!) Oh, and melon is probably not a great idea. Yuck.

Some more traditional fruit options include:

  • Peaches/Nectarines
  • Pears
  • Plums
  • Apples (Natch.)
  • Berries (YUM! Nothing beats a berry crisp in the summer!)
  • Cherries

Even better is a combination of fruits! Take any of the above and mix them together for a delicious flavor combination. Or, you can add in some fruits that may not stand very well on their own as a fruit crisp, but would work well together with others, like bananas, pineapple, or mango.

How much fruit do you need? Well, how much fruit crisp do you want? I’m being totally serious here. Start with the number of servings you want and work from there.

  • For a single serving, use a ramekin.
  • For dessert for a small family, use a square pan.
  • To bring to a potluck or family Thanksgiving, use 1 (or 2 or 3…) 9×13 pan.

You will need to at the very least cover the bottom of your dish with your fruit, but it’s better to fill it at least halfway, or up to 3/4 full.

Once you’ve got your dish picked out and filled with fruit, move on to element #2.

2. Sugar and Spice

This is not a precise science, folks. If you want a super sweet fruit crisp (for shame!), then dump a 1 cup or so of sugar on there. But if you want a lightly sweetened dessert that lets the flavor of the fruit shine through (good for you!), then sprinkle approximately 1/2-3/4 cup of sugar over the top of the fruit. Even better? Drizzle the same amount of honey or maple syrup and you have a delicious dessert with no refined sweeteners!

To be honest, I didn’t even measure my honey when I made it. I just drizzled all over until it looked like enough, and I would estimate it was about 1/2 cup or maybe even less. And it was perfectly sweetened! Part of it depends on the sweetness of your fruit. If your fruit is really ripe and of a sweeter variety, you will need less additional sweetener. Taste a piece or two of your fruit before you decide how much sweetener to add.

Sweetener choices:

  • Sugar (the less refined the better: raw or sucanat, for example)
  • Stevia
  • Honey
  • Maple Syrup

I would not recommend molasses because the flavor would be over-powering, but if you wanted to have a ginger-bread-esque taste, you could use a few tablespoons of molasses together with your other sweeteners.

Once you’ve drizzled an adequate amount of sweetener over your fruit, then you can sprinkle in some spices. Spices make everything nice! Some spices that go particularly well with fruit are:

  • Cinnamon (of course!)
  • Nutmeg
  • Ginger
  • Cardamom
  • Ground cloves
  • Star anise
  • Lemon, lime or orange zest
  • Mint (goes well with some berries)

You don’t want to use too much of any of these spices in your crisp. One or two teaspoons total of spice is plenty, depending on how large your dish is. (For a single serving, just a sprinkle will suffice.)

3. The Crisp = 1 part Oats, 1 part Flour, 1 part Fat

And it’s as simple as that? For a single serving, a tablespoon or two of each element will suffice. For a large pan, you’ll need a cup of each. And of course, if the crisp is your favorite part of the dish, by all means use more than that! Just keep the ratio the same.

I’ve successfully used both brown rice flour and sorghum flour to make a gluten-free crisp - in fact, no one will notice it’s gluten-free. You can also use 100% whole wheat flour in your crisp and even the most die-hard pastry lover will enjoy it.

Cold butter is the best fat for the crisp, but I’ve also used palm shortening and/or coconut oil for my food-allergic Certain Little Someone. They’re a little more greasy, but still quite yummy.

You’ll also want to add a little bit more sweetener (a few tablespoons of sugar should do it), and another little sprinkle of whatever spices you used on the fruit to give the crisp some flavor.

Stir together the dry ingredients, then cut in the fat with a pastry blender, a fork, a couple knives, or a blender.

4. 1+2+3= Fruit Crisp!

Evenly spread your crisp topping over the fruit in your pan. Bake at 400F until it’s done. I know, so specific, right? The thing is, it depends on what fruit you’re cooking, so just pay attention. After about half an hour, check on your crisp. The fruit should be tender enough to pierce with a fork, the crisp topping should be lightly browned, and the juices should be developed into a bubbly syrup all around the edges. (Yum, I’m getting hungry just picturing it!)

When all that has come to pass, remove your crisp from the oven and cool slightly before serving. It’s great as is, but it’s even better when topped with ice cream or whipped cream.

fruit crisp

Wasn’t that QUICK? Approximately an hour, start to finish, including baking time.

Using a formula like this just makes it so EASY, doesn’t it?

When using fruit in season, it’s a great CHEAP dessert. Except for berries, which are kind of expensive even in the summer. But apple crisp is definitely a frugal dessert choice!

And it’s so HEALTHY. I love Steph’s ideas for making it even healthier: leaving the skin on the fruit, using whole grains, using unrefined sweeteners, and limiting those. As they say in Russia, Na zdorovye! (To your health!)

For more in this series, check out:

1-2-3 Soup!

1-2-3 Granola!

What fruit do you like to use in your crisp?

Find more great recipe inspiration at $5 Dinner Challenge, Traditional Tuesdays, Real Food Wednesday, Ultimate Recipe Swap, and…

Tempt my Tummy TuesdaysHearth & Soul Hop

BundleoftheWeek.com, 5 eBooks for $7.40!

Fight the Flu with Breakfast: 1-2-3 Granola!

Who needs the flu shot!? This year, fight back with food instead! Come back each Wednesday as we reveal five different foods that are purported to support your immune system in the fight against the cold and flu viruses that plague us this time of year. What’s more, each post will a link-up, so you can share your favorite recipe as well as get lots of ideas for creative ways to serve these healthy ingredients to your family! To be sure you don’t miss a single post in the series, consider subscribing to one of these participating blogs:
Christian Mommy Blogger
Day 2 Day Joys
Intentional by Grace
Quick and Easy, Cheap and Healthy
The Purposed Heart
The Humbled Homemaker

And before we get to this week’s featured ingredient, I want to highlight a few of my favorites from last week’s link-up. In no particular order, my favorites were:


Pumpkin Spice Syrup for Pumpkin Spice Lattes - I like to keep this on hand!

Pumpkin Cranberry Bread - love that it's allergy-friendly!

Shepherd's Pie with Pumpkin Souffle - so creative!

And now for this week’s featured ingredient..


granola

This week’s featured food is not an ingredient, but a meal. You know, the most important meal of the day? Yes, that would be breakfast! Yeah, I know, everybody keeps telling you that you need to eat breakfast every day, but you just don’t have time/energy/appetite/insert-whatever-appropriate-excuse-that-works-for-you. Maybe this will convince you: a study in Great Britain a few years ago suggests that people who eat breakfast are less likely to catch the cold and flu.

The reasons why are not particularly clear, but the scientist in charge of the study thinks perhaps it has something to do with the process of nourishing white blood cells before getting started with your day. Or it could be that taking the time to eat breakfast indicates you have some good control over the stress in your life.

Whatever the case, add this to the list of reasons why you should make and eat a healthy breakfast every day! And by healthy, I don’t mean a pile of cereal poured from a box, even if that box bears the name of Kashi or Envirokidz. Sure, we eat those cereals sometimes, but although they may be composed of healthier ingredients than the General Mills or Post varieties, they’re still not as nurturing as breakfast can be. I prefer to leave those in the realm of “occasional” and “snack time”.

But that doesn’t mean you have to pull out the mixer, turn on the oven, or bring on the eggs and bacon. Well, you can, for sure, but a healthy breakfast is still just a bowl away. All you have to do is plan ahead a little bit. Once a week in your spare time, whip up a batch of homemade granola, and you have the makings of a healthy breakfast that you can fix in just minutes. Just like a box of cereal, you can pour it into your bowl, slosh on some milk, slice up some bananas and chow down! Or you can serve it with yogurt. Get really fancy and turn it into a parfait!

granola

And let me tell you, making granola is so easy, and you can customize it with the ingredients you like and have on hand. Just follow this basic 1-2-3 formula for tasty granola every time. (I have to credit The Kitchn for their genius in distilling the process down to this formula.)

5-6 Parts Grains, Seeds, and Nuts

Suggestions:

  • oats (approximately 3 parts of oats makes a fabulous base for granola)
  • steel-cut oats
  • any rolled or flaked grain
  • puffed rice, millet, kamut, corn or wheat
  • crispy rice cereal
  • sunflower seeds
  • pumpkin seeds
  • shredded coconut
  • walnuts
  • pecans
  • pine nuts

1 Part Liquid

This part of liquid should be divided into 3 parts liquid sweetener and 1 part oil. To that, add 1 tsp vanilla, 1/2 tsp salt, and any spices you’d like.

Sweetener Options:

  • honey
  • maple syrup
  • agave nectar (although I don’t personally consider this very healthy)
  • molasses (best if mixed with other sweeteners)

Oil Suggestions:

  • olive oil
  • coconut oil
  • any oil you like, really!

Spices:

  • cinnamon
  • cardamom
  • ginger
  • nutmeg
  • cloves
  • Chinese 5 spice

1-2 Parts Dried Fruit

The sky’s pretty much the limit here, but just in case you need them, here are some suggestions:

  • raisins
  • cranberries
  • chopped apricot
  • apple
  • banana
  • mango
  • pineapple
  • candied ginger
  • cherries

Process

Stir together the grains, nuts and seeds. In a separate bowl, stir together the liquid ingredients and the seasonings until well blended. Pour the liquid ingredients into the dry ingredients and stir until thoroughly coated. Pour the mixture into a cookie sheet. Bake at 225F for a couple hours, removing from the oven to stir every 30 minutes or so. When the granola begins to be very fragrant, check more frequently until you have the desired crunchiness. Remove from oven and sprinkle with the dried fruit. When granola is cooled, spoon into containers and store at room temperature.

Need a specific recipe? OK, here’s the very basic one I made just yesterday. Feel free to get creative!

granola

So it takes a while to cook up in the oven, but if you do this part on a weekend, it makes for a super QUICK weekday breakfast. Although I haven’t tried it myself, I’ve heard some people heat the oven, turn it off, and then leave the granola in it overnight if you want to save even more time. You can also try baking it at a higher temperature (like 325F) for 20-30 minutes, but in my experience, at higher temperatures, the texture changes. Not to mention that it goes from done to overdone in seconds.

Homemade granola is SO EASY there is absolutely no defense for buying the over-priced and questionably healthy versions at the store.

And of course, homemade granola is way CHEAPer than storebought.

And yes, granola is a great HEALTHY breakfast option. Do yourself a favor, though, and be sure to enjoy it with healthy fats, healthy proteins (the two often go together) and lots of fresh fruit (bananas, clementines, cantaloupe, etc.)

Check out my friendly co-hosts for some more amazing and healthy breakfast ideas:

A Traditional Costa Rican Breakfast at The Humbled Homemaker

Apple Chai Muesli at the Purposed Heart

Immune Boosting Breakfast Lentil Soup at Intentional By Grace

The Importance of Breakfast at Day 2 Day Joys

Sweet Apple Steel Oats at Christian Mommy Blogger

And now it’s your turn: Share your favorite breakfast recipes in the linkup below! Only two rules:

  1. Your link MUST be a breakfast recipe, or we will remove it.
  2. Please include a link back to this page, thanks! You can copy and paste this button if you’d like:

5 flu fighting foods button

BundleoftheWeek.com, 5 eBooks for $7.40!

1-2-3-Soup!

Well, it’s more like 1-2-3-4-5-Soup!, but 1-2-3 is just catchier, so there. And the credit for this post idea goes to Steph, the Cheapskate Cook, who just finished a round-up of great winter soup recipes.

The truth is, this is how I usually make soup: not with a recipe but with a basic guideline or formula (hence the 1-2-3-4-5). It’s hard to imagine that about a year ago or so, I could count on one hand the times I made soup. For some reason, soup seemed kind of nebulous to me, a concoction I couldn’t quite pin down to definable details and measurements, so I avoided it. When I did make soup, I wasn’t 100% satisfied with it, so I rarely tried.

Then I realized how frugal soup could be, as well as how cheap and quick. Of necessity, I needed some very quick, ready-at-the-instant weeknight dinners, and soup in the slow cooker was a perfect solution. So I began to experiment with a variety of soup recipes and began to realize that they all had an awful lot in common. And then the revelation deepened and I realized that most soups fit around a basic flexible formula.

And voila! There was no more mystery surrounding soup! I had uncoded it! Now I can make practically any soup using this formula and it almost always turns out great. I’ll share the formula with you in case there’s anyone else out there who hasn’t figured it out yet.

Note: this “formula” is for your basic broth-based soups. Creamy soups, stews, and other kinds of soup use different ingredients and methods.

I almost always make my soup in the slow cooker, because even though it takes a longer time, it’s ready immediately at dinner time, so it’s perfect for those days when you simply don’t have time to make dinner when it’s time to eat dinner. Also, even when I set the burner on the lowest setting possible, soup simmering on the stove-top tends to evaporate a lot more quickly than I think it will, which is just not good when combined with my absent-mindedness!

So without further ado, here’s how to make a perfect pot of soup any day. Just dump all the following into a slow cooker and cook on high 4-6 hours, or low 6-8 hours:

1. 6-8 cups liquid

This liquid could be any kind of broth (chicken, vegetable, beef), preferably homemade. Or it could be tomato juice (or combination of both). You can even use just plain water with a hamhock for a great ham and bean or ham and potato soup. For a slightly creamier soup, you can add a 1/2 cup or so of milk or cream about 15-20 minutes before serving.

2. Mirepoix + 1-2 additional cups chopped vegetables

The magical combination of onion, carrots and celery always ends up in soup. I would add a fourth member to that group, namely garlic. Those four ingredients can almost always be found in a broth-based soup, and for good reason: they add a lot of flavor and give depth to the broth. It’s kind of nice that they add a lot of nutritional value at the same time! You can saute them in butter or olive oil before adding them to the slow cooker, but that’s not necessary. I usually use about 1/4-1/2 cup chopped onion, 2 cloves minced garlic, 2 medium chopped carrots, and 2 chopped celery stalks.

Beyond the mirepoix, exactly what vegetable you use is limited only by what is in season and in your pantry, fridge or freezer. Corn and tomatoes are popular additions to soup, as are green peppers (hot peppers if you’re going for a spicy flavor!). Root vegetables do very well in soup: potatoes, carrots, parsnips, and beets (borscht, anyone?) all taste great in soup. I also like winter squash, like delicata, butternut, acorn or even pumpkin.

3. 2 cups cooked meat

This is where leftovers come in really handy! Pretty much any leftover meats can be worked into a soup with delicious results. I almost always end up with chicken or turkey soup, but I have also used sausage, ham, pork and beef. You can use seafood, lamb or buffalo if you want! If you want to go vegetarian, no problem: just throw any kind of beans in there instead. (If starting with dry beans, be sure to soak them before adding them to the soup.)

4. Seasonings to taste

Salt and freshly ground black pepper are a given and can be added any time. Dried herbs, like the Italian favorites parsley, oregano, rosemary, thyme and the like, can also be added any time. Hot spices like paprika and cumin - great in a Southwest bean soup or similar - can be added at the beginning. I prefer to add fresh herbs at the end, so they maintain a bit of their texture and flavor.

5. 2 cups cooked grains (added at the end)

Most grains don’t do so well in the slow cooker, so it’s best to cook them separately and add them at the end. Again, leftovers shine here! Barley is the exception here, as you will see in the recipe below. Barley actually cooks up nicely in a slow cooker (on high 4-5 hours), and bulks up quite a bit, so all you have to do is add 1/2 - 3/4 cup at the beginning. Any kind of pasta and any kind of rice (brown, white, wild, etc.) work very well in soup. Quinoa is a delicious and trendy option.

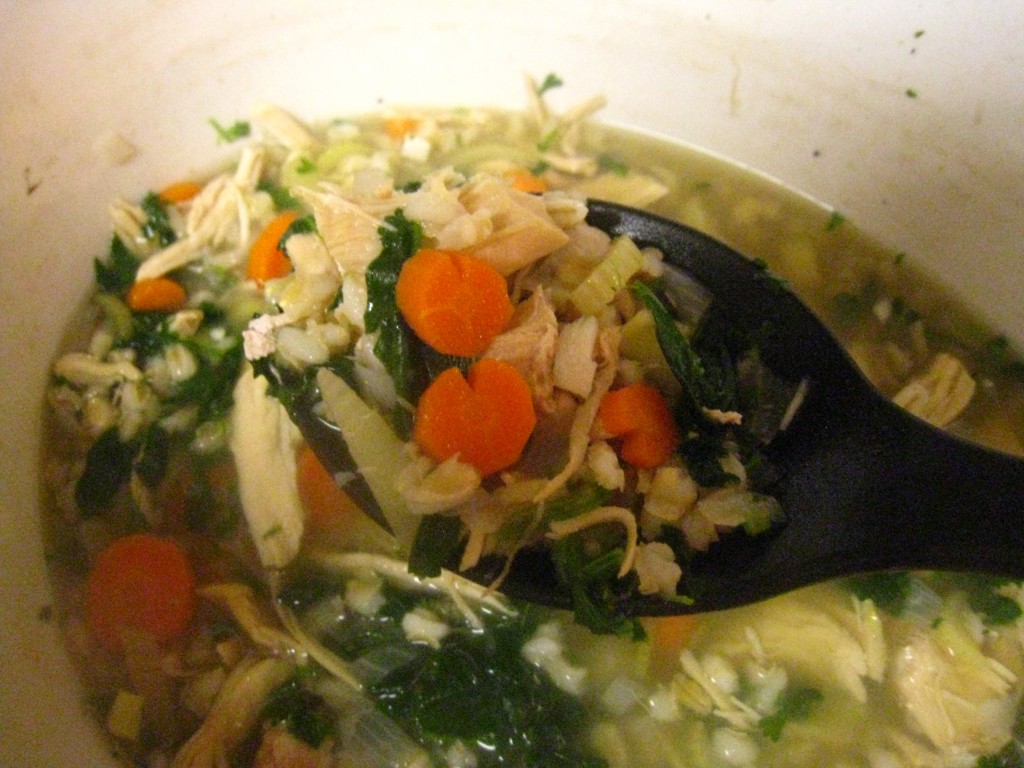
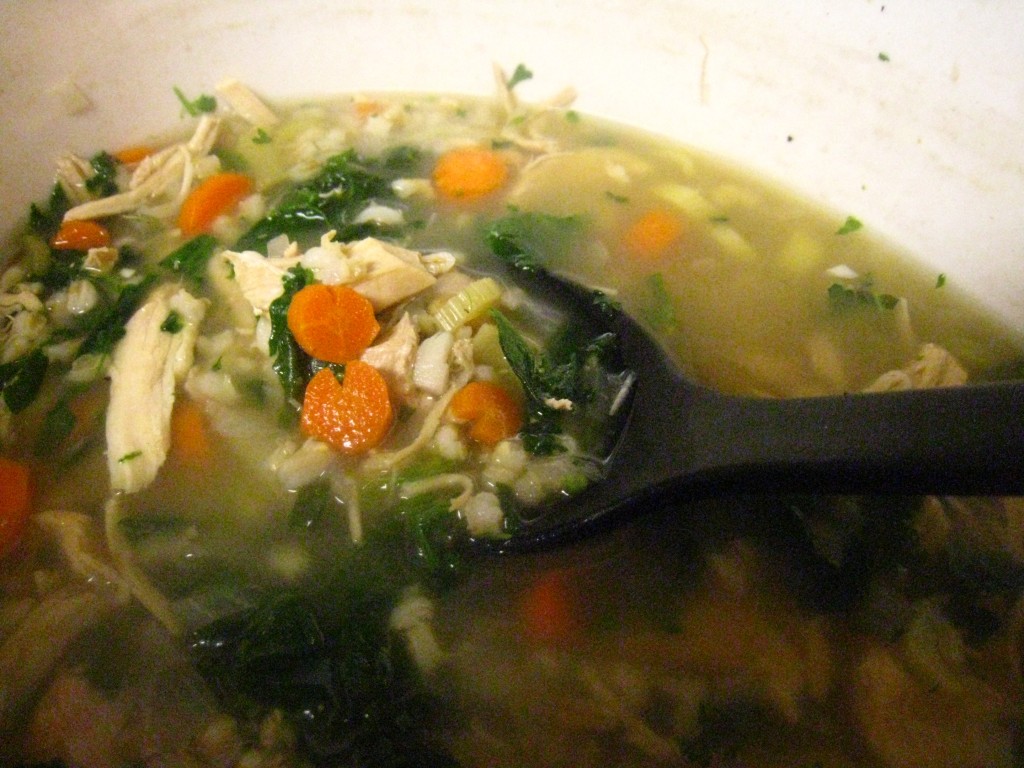
As you can see, starting with this basic formula, you can create a million different tunes soups, by mixing them up, like this:

Like I said, this makes a QUICK dinner when it comes to dinner time. All the work is done earlier in the day when you (hopefully) have a little more time.

It’s very EASY, especially when you follow the formula!

Soup is SO CHEAP! One of the most frugal meals available, for sure.

It’s also super HEALTHY. I actually think of soup as a healthy diet in microcosm. It has all the right proportions of protein, carbs, and vegetables, plus plenty of liquid (essential for our bodies made mostly of water!).

Inquiring minds want to know: What kind of soup do you like to make?

Sharing at Ultimate Recipe Swap

BundleoftheWeek.com, 5 eBooks for $7.40!

Interesting reads