Old-Fashioned Pumpkin Donuts

Old Fashioned Pumpkin DonutsYou know that super simple, super quick “donut” recipe that’s been going around for a while? The one where you open a can of biscuits, poke a hole in the middle, then fry it up and call it a donut?

Well, this is kind of like that. Except we don’t do canned biscuits around here, so the biscuit dough is fresh from scratch. (SO easy!) Oh yes, and it’s flavored with pumpkin and pumpkin spices so it’s perfect for fall weather.

Think you like the sound of that? (I know I do!) Then head on over to Baking Whole Grains to get the recipe for my Old-Fashioned Pumpkin Donuts!

BundleoftheWeek.com, 5 eBooks for $7.40!

Cook Pumpkins in your Crock Pot

Cook Pumpkin in Your Slow CookerTrue story: I had read this post at Stacy Makes Cents about cooking spaghetti squash in your slow cooker. Apparently, after reading it, my mind automatically replaced the spaghetti squash with pumpkin… which isn’t all that odd come to think of it, since I really don’t love spaghetti squash but I do looooovvvee pumpkin! Anyway, a few days later, I popped a pumpkin into my crock pot and posted a pic of it on Instagram, and was kind of surprised by the reactions that I received on Facebook (where all my Instagram photos instamatically appear). Everyone was asking me for directions and what I did with the pumpkin once it was cooked, so I went back to Stacy Makes Cents and searched for her post about cooking pumpkins in the crock pot.

Except that Stacy doesn’t have a post about cooking PUMPKINS in the crock pot. I searched and searched and searched every way I knew how on Stacy’s site. Then I searched on Google. Then I searched my browser history. I COULDN’T FIND THE DUMB POST ANYWHERE!!! (Pardon me for yelling, but I was extremely frustrated at this point.)

So in desperation, I asked Stacy herself. At this point, since I couldn’t even find it in my browser’s history, I was beginning to think I had dreamed the whole thing. Stacy very kindly informed me that she had indeed posted instructions… for cooking a SPAGHETTI SQUASH in the crock pot.

Oh.

Duh!

Silly me!Cook Pumpkin in Your Crock Pot

How to Cook a PUMPKIN in Your Crock Pot

So here is a post about cooking a PUMPKIN in your crock pot. Now if you google cooking pumpkins in your crock pot (Which I have. More than once.), you will find that everybody - and I mean everybody - tells you to cut your pumpkin apart before putting it in the crock pot. I say No Way! Cutting a pumpkin is hard work, and I prefer to work smarter, not harder. The trick is to purchase pumpkins that are small enough to fit in your crock pot - I’ve found that most of the Pie Pumpkins available will fit perfectly, although some need to have the stem cut off. If you want to cook up your jack-o-lantern pumpkin, well then, you’re on your own, honey. I don’t think that’s gonna fit in your crock pot unless you hack it into bits first. And then, what’s the point?

One more thing: Stacy put water in the crock pot when cooking the spaghetti squash, but I’ve cooked 4 pumpkins so far and haven’t used water with any of them. So you can put water in there if you want, but mine seem to cook fine without it.

BundleoftheWeek.com, 5 eBooks for $7.40!

Simplifying, Twenty-First Century Style

This is a sponsored post written on behalf of Staples. All opinions are mine, of course. (Are there any other?!)

Simplify 21st Century StyleAs much as I would love to return to a simpler time and a simpler place, I have to admit I would be loathe to give up certain modern conveniences. Like my washing machine, for example. I have absolutely no desire to wash all our clothes over a washboard in boiling hot water, no thank you! Are you kidding me?! The Boys go through so many clothes it’s not even funny. I will even graciously acknowledge that I contribute my own fair share to the wash load. So maybe it would be nice to go back in time about a century… as long as I was one of the lucky people with a washing machine!

But then again, that means I’d have to give up my tablet, which is my new favorite invention. You see, back - oh, about 10 years ago - I was kinda envious about those ladies who had kitchens large enough that they could fit an office type area in the corner. The reason for my envy? I loved that they had such easy access to a laptop or PC right there in their kitchen! It’s been a long time now since I’ve found my recipes and other household how-tos online almost exclusively, and I envied anyone who had it right there at their fingertips whenever they needed it.

Well, I still don’t have a big kitchen, but guess what?! The computers keep getting smaller (and are considerably cheaper than large dwellings with large kitchens) and it doesn’t take an entire office nook to house the all-important portal of all household knowledge (otherwise known as the internet) anymore. My recipes, my meal planner, my inspiration, my fix-it guide, and even my background music all can be held in my hand and set on any (clean… if I can find one) corner of the countertop. It’s almost like my own personal fairy godmother!

In particular, I am speaking of the Google Nexus 7, which Staples sent me to try out in my kitchen. Its size is perfect - larger than a phone, so easier to read a recipe, but small enough to fit comfortably in hand - and the screen is very high quality. I am honestly not so much into the techy details of this sort of thing… all I know is it works and it works well! It’s easy to use, and the battery is long-lasting.

Simplifying With a Tablet

What do I do with my tablet? This list is definitely not comprehensive:

  • Browse Pinterest for ideas and inspiration when I’m not sure what to make for dinner. Or snack. Or beverage. Whenever I’m hungry or thirsty.
  • Use Plan to Eat’s mobile site to help me plan and follow my menu. Which reminds me: I need to get back on that wagon. Oops.
  • Check the Groupon app for eating-out deals when I don’t feel like cooking.
  • Ask Google to find me instructions when I’m not sure what I’m doing (which is usually after I’ve made a mistake trying to do something without the instructions. Ahem.).
  • Pull recipes from my own blog. Why, yes, I do, all the time! Why do you think I post them here, anyway?
  • Access eBook recipes from my Amazon app. Hey, you can even read my book on there! Plus also I can access digital books from our library system and/or reserve print books right from my tablet, how awesome is that!?
  • Keep on top of my life (or try desperately anyway) by using a variety of different calendar tools. I honestly haven’t found one I love 100%; I’ll let you know when I do. If I do. I think my biggest problem is the whole calendar aspect of it, which is sort of hard to get around.
  • Post pics of my successes and failures in the kitchen on Instagram, because, oddly enough, everybody seems very interested in those sorts of things. Who knew?!
  • Fire off Facebook messages to friends and family to get last-minute much-needed info on this that or the other thing.
  • Listen to music on Pandora while I cook, bake, and otherwise putter around in the kitchen.

See why I would be hard pressed to live without my lovely tablet? As much as the turn of the 19th century seems like such a romantic time (those dresses!), I really don’t think I could give up the convenience of my tablet in order to stay there for any length of time. So if anybody can arrange a quick time machine visit, that’d be awesome, but otherwise I’m going to stay put right here in the 21st century. With my tablet in hand!

Do you have a tablet? Have you found it useful in the kitchen? Or have I just made you envious?

BundleoftheWeek.com, 5 eBooks for $7.40!

Safety Online

I was provided a year’s subscription to Covenant Eyes in exchange for this post, but all opinions and thoughts are my own. This is not a commercial; just my thoughts about a very real problem each of us faces in our world today. CovenantEyes.comGood and evil run on parallel tracks and they both arrive at the same time.

I heard a sermon once where the pastor repeatedly quoted that statement until it was stuck in my brain forever, and I’ve since repeatedly thought how true of a statement it was! The internet is a perfect illustration of its truth: it can be both good and evil.

The Internet Can Be Good

Very good. In fact, I make a little spare change for myself and my family via my little enterprises on the internet. I know many have established entire businesses and careers online to support themselves, and I think it’s so wonderful that they can stay home with their families (both mom AND dad!) and still earn a living. That’s a beautiful thing, in my opinion.

I’ve also learned SO much from the internet: my blogging friends have inspired me time and time again with fresh ideas and challenges on all sorts of fronts, and of course, there’s Google, which is always ready to help you find the answers to burning questions of any level of importance.

I use the internet all the time in planning for my preschool class; I’ve found it to be indispensable!

The internet helps me manage my household, decorate the house, decorate birthday cakes, raise my children, love my husband, keep up-to-date with friends and family, keep up-to-date (to the extent I want) with world events, and find fabulously new recipes.

BUT….!

The Internet Can Be Evil

Very, very evil. Men love darkness rather than light because their deeds are evil, and the internet provides the dark cover of what appears to be a cloak of secrecy that encourages all manner of evil deeds to take place.

Like cyber bullying for example.

Or trapping victims in an online web in order to perpetrate crimes in person.

Or porn. Or any other manner of deviant immoral behavior.

The internet can be evil indeed.

Arm Yourself for Battle

Thankfully, there are ways to reap the benefits of the internet without succumbing to the dangers. Just arm yourself and your family with a the right tools, and you can do battle with confidence!

One important step my family took recently was to install a filtering and monitoring service on all our devices: PC, laptop, phones, and tablets. This service, offered by Covenant Eyes, is completely customizable and adjustable to the particular needs of your family, and gives us a great peace of mind as The Boys get older and are exposed to the internet more and more. I highly recommend that every family take this proactive step to protect themselves against the dangers that can be found online.

There are, of course, other measures families can take, most of them involving a lot of time, attention, and discernment on the part of the parents. My DH and I have discussed at length how we will approach our growing boys’ time online as they get older, and there are various strategies we’ve heard about and read about that we’ll probably implement at one point or another. But ultimately, it comes down to how we train them. I am reminded more and more recently of the instruction God gave to the Israelites to teach their children about His commandments when they were at home, when they were on their way somewhere, when they wake up and when they go to sleep. Our goal right now is to fill our sons’ minds with the Word of God so that when they are older, the Holy Spirit can use it to give them wisdom to know what is right and the courage to do it.

What about you? How do you protect your family from online dangers?


BundleoftheWeek.com, 5 eBooks for $7.40!

Make Your Oils Go Further with This Simple Solution

Full Disclosure: I am a Young Living Essential Oils Distributor.

Diluted Essential Oils

Not “DEluded”. DIluted. Big difference! Just pointing that out.

So why is “D” for “diluted”? Because today I’m telling you how and why I dilute my oils and why I think you might want to consider doing the same. In the picture above, you see a bottle of Frankincense essential oil, an oil my DH uses every day (which is another story for another day). I’ve marked it with a “D” to help me remember that it’s diluted, so I don’t get it confused with the bottles that have the straight essential oil.

Why I Dilute My Oils

Really, it all boils down to two facts that support each other:

  1. The oils can be diluted and still be effective.
  2. Diluting the oils makes them last longer, which saves money.

In other words, instead of asking “Why should I dilute my oils?”, the question is, “Why wouldn’t I?”. The only time I wouldn’t dilute an oil is if it really doesn’t seem to be working as effectively as the undiluted version. But honestly, if they work undiluted, and it saves money… why not?

Someone also mentioned to me that there is a chance that using the oils undiluted on a regular basis could cause a person to become de-sensitized to a particular oil in much the same way that some people have become de-sensitized to antibiotics because of overuse. There is apparently less chance of that occurring if the oils are diluted. I haven’t had time to research that so I don’t even know if it’s true. I just go back to the previous point… if the diluted oil is just as effective as the undiluted oil, why not just dilute it and bypass the risk?

Another thing for me is that I use the oils quite frequently on my children, and for children the oils should be diluted in any case. Having diluted oils ready just makes it easier to use on whomever, whenever, and wherever the need arises!

How I Dilute The Oils

Essential oils can be diluted in water or in a carrier oil. If I’m wanting to spray the oil, I dilute it in water in a 2-4oz essential oil spray bottle. Usually a few drops of oil in the bottle will suffice.

If I’m wanting to apply it topically, I mix it with a carrier oil, usually jojoba oil because it doesn’t go rancid and it’s good for the skin. Young Living also carries a blend of oils they call V-6, which I have and like but don’t use it too often because it has almond oil and my boys are allergic to tree nuts. If you don’t have nut allergies, though, it’s a great carrier oil. You could also use olive or coconut oil (I use coconut oil with some lavender in it for my son’s eczema).

If you read a book, or browse through websites, or follow the directions on the bottle, you’ll find a whole rainbow of dilution ratios. At the risk of sounding careless, I don’t really bother with those too much. I just know that “hot” oils (like Thieves or Peppermint) need more carrier oil than other gentler oils like Lavender. Generally speaking, 5-10 drops of oil in a tablespoon of carrier oil will be plenty and you could probably even use less. If one of my boys has a cold, for example, I swirl about a tablespoon of carrier oil into an opaque container that has a lid, add a few drops of whatever essential oil I want to apply on them throughout the day, close the lid and shake it. That amount will last for a couple days of frequent generous application.

Storing Diluted Oils

I wouldn’t keep the diluted oils forever, especially if they’re made with carrier oils that go rancid, like olive oil. In fact, I wouldn’t store them long-term in any case. Generally speaking I only dilute the amount I plan to use over the next few days in the method I described above.

However, for some oils that we use on a regular basis - like lemon and frankincense - I love this little trick that a friend taught me. Once I have an empty or near-empty bottle of essential oil, I fill it part way with the essential oil on the label (so as not to get confused and also so as not to mix the oils) and top it off with a carrier oil. For example, the bottle in the above picture is a bottle of Frankincense that was almost empty. I added a little more Frankincense until it was about 1/3 of the way full, and then filled the rest with the V-6 oil. I put the dropper back on, screwed on the cap, and wrote a big “D” on the top so I know that this bottle of Frankincense is diluted. I love the simplicity of this little system, and do the same thing with lemon and lavender oil, which we also use quite frequently.

When Not to Dilute

Now don’t go around your house diluting ALL your essential oils! The dilution is only for topical application purposes. You’ll want some straight essential oils to use in your household cleaning, or to make various concoctions like bug spray. You’ll also want to use undiluted oils in diffusers, so make sure you keep undiluted versions of all your essential oils on hand to use in whatever way you need them.

For more information on essential oils, visit my Young Living website here. And of course, please do keep in mind that I’m not a doctor or a medical expert of any kind and I’m not offering medical advice. Just sharing what I do in my home!

BundleoftheWeek.com, 5 eBooks for $7.40!

Honey Fondant: The Healthiest Easy Fondant Recipe You’ll Find Anywhere

I love making fun birthday cakes for The Boys - I actually really look forward to it from one birthday to the next! The problem is trying to balance cost, nutrition, and simplicity - those three things don’t always meet together and play nicely when it comes to cakes and decorative frostings! Fondant, in particular, seems to be a matter of expense, difficulty, and chemical-laden ingredients, yet it can turn out some of the cutest and most gorgeously decorated cakes.

However, for my Certain Little Someone’s fifth - yes, fifth! - birthday cake, I happened upon an amazing recipe for fondant that contained absolutely no chemical or processed ingredients. What’s more, all the ingredients were something I had in my cupboard already, and it was just as easy - or seemed to be - as any other fondant recipe out there.

A Healthy Fondant Recipe that’s Easy?

Here’s how I stumbled across this gem of a recipe:

  • My Certain Little Someone wanted Mario cupcakes for his birthday (which he later switched to Angry Birds). When I was browsing Pinterest for ideas, most of the ones he liked involved fondant, which I had never used before.
  • I took a gander at the ingredient list on the label of store-bought fondant. My eyebrows rose so high they practically rocketed off my forehead, and I hastily put the container back on the shelf and said, “No way!”.
  • I found a healthy-ish recipe for marshmallow fondant, but when I priced the ingredients…. well, once again my eyebrows got a little too high and I reluctantly admitted that was not do-able. Those “healthy” marshmallows cost $4 a bag, and you need two for the recipe! Not to mention the cost of the healthier sugar/powdered sugar.
  • I started researching alternative fondant recipes - my goodness, there are a lot of different ways to make fondant! Who knew? Not me, that’s for sure. There was the original true recipe for fondant, which involved candy thermometers and boiling sugar water, which I decided against (way too complicated, plus I don’t have a candy thermometer). There were also a lot of recipes that called for strange ingredients I don’t keep on hand and didn’t really want to invest in anyway.
  • Then there were a whole variety of powdered-sugar based recipes, most of which involved corn syrup. I wondered if honey could replace the corn syrup (because that’s what I usually sub when corn syrup is called for in a recipe and it usually works well), but I didn’t want to risk it because I didn’t have the time to deal with it. I searched specifically for “honey fondant” wondering if someone else had tried it and if it worked.
  • Well, whaddya know?! I found a whole bunch of recipes for something that beekeepers feed their bees during the winter (no, thank you, I don’t have any bees) instead of more fondant frosting recipes… but there was ONE little precious gem of a recipe buried in all of that honey-bee stuff: Honey Fondant.

I made it pretty much as written, except that I had to add significantly more powdered sugar than I was expecting. Like, I mean, significantly, she says with significance. I honestly don’t know how much powdered sugar ended up in this batch of fondant, but let me tell you it is way more than I have ever put in any one recipe any other time in my life.

So I decided that when it comes to fondant, your choice pretty much boils down to this:

chemicals

or

sugar.

Lots and lots of sugar.

I’m glad I want with the sugar option because at least it’s something your body recognizes and knows what to do with. The chemicals are just scary, frankly - at least sugar is a known danger!

I haven’t made any other kind of fondant so I have nothing with which to compare it, but this seemed to be just as simple as any of the other recipes out there, and definitely simpler than the boiling sugar version. As long as you understand you might have to use a metric ton of powdered sugar, you’ll be OK.


A few ingredient notes:
  • The original recipe called for margarine - I would have used butter except that my Certain Little Someone is allergic to it. I considered using palm shortening but I wasn’t sure if that was a good sub or not (probably would be fine), so I opted to stick with the original recipe and use my Certain Little Someone’s “butter”, which is actually a coconut-based all-natural butter-like spread. I think either butter or palm shortening or some other similar margarine would work. Just don’t use the nasty chemical margarine.
  • The next time I make this, I’ll probably try starting with less liquid, maybe even half as much as is indicated here.
  • I made my own powdered sugar by processing raw sugar in my Vitamix. I wanted it to be pretty fine, or I would have gone with powdered sucanat or even coconut sugar. Either of those would probably work, but with the quantity used, it would get expensive fast.
  • The original recipe called for 800g of powdered sugar, which is just under 2 lbs. I’d definitely consider that a starting point! You’ll probably use more like 4 pounds, maybe even more, unless you adjust the liquid (if you do adjust the liquid, let me know how that goes!).

BundleoftheWeek.com, 5 eBooks for $7.40!

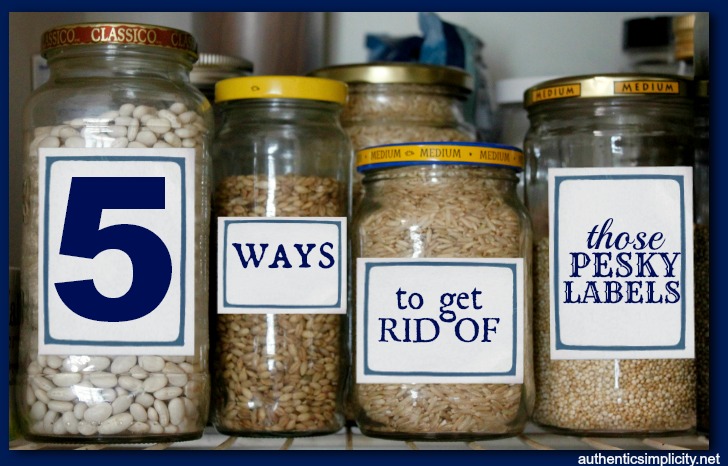
5 Ways to Remove Labels

This post contains affiliate links and other assorted money-making madness.

Remove labels from jarsYou know how I love to keep my pantry (which I actually don’t really have right now…) organized with glass jars, right? I waxed eloquent about it in this post: How I Organized My Pantry for Free with Empty Glass Jars. If you open up my fridge or any of my cupboards, you’ll see dozens of glass jars hard at work containing all our food.

But those pesky labels can really drive me crazy! Some come off quite easily… others not so much. I’ve had more than my fair share of label scrubbing, and I’ve learned a few tried-and-true methods for removing them with minimal fuss.

1. Soak in Warm Water

This should be the first step in any case. Sometimes (Ok, most of the time), I skip the “soak” part and just hold the jar under running water. Sometimes (Ok, quite frequently), I run the jar - with the label- through the dishwasher. In any case, the whole point is that I get the label on the jar thoroughly wet with warm or hot water, and that is the first step in the label-removal process. If you’re lucky, this will be all you have to do! Some labels just slip right off after a good washing. Usually, you won’t be that lucky, though, so on to the next step.

2. Scrape the Label

Sometimes the label just needs a little help coming off the jar, in which case you’ll want to employ some kind of scraping tool. I’ve used all sorts of things: plastic knives, fake credit cards (the kind they send you in the mail hoping to lure you to sign up), and who knows what else. But my favorite tool is a sturdy pan scraper like these I found on Amazon. They are the ultimate label scrubber-offer, so everybody should have one. (Cuz I said so.)

At the very least, the scraper will help you get rid of the paper label itself, so that all you will have left is sticky gunk. Sticky gunk is no good, so hang on to that scraper (cuz you’re gonna need it) and try one (or more!) of the following options:

3. Use Coconut Oil & Baking Soda

Combine equal parts coconut oil and baking soda (say, 1 TBSP of each) in a small container until you have a paste. Smear the paste all over the sticky residue and let it sit for 15-20 minutes or so. Scrub it off, and hopefully the label and sticky residue will come off, too. If not, repeat the process until it does. And don’t forget to use the scraper!

4. Use Peanut Butter

Smear it all over the sticky stuff and let it sit for a while. Scrub it off and repeat if necessary. You can use the scraper again to help get off some of the more stubborn sticky yuckiness.

You can also use any other heavy fat (like shortening, or other nut butters) with similar success.

5. Use Lemon Essential Oil

Nowadays I usually skip options #3 and #4 and go straight for the big guns. Lemon Essential Oil* is the bomb-diggety when it comes to removing that sticky gunk left behind by all those labels. All you have to do is drip one little drop right onto the jar. Rub the drop into all the sticky gunk, then scrub it off under hot running water. Magic! You might have to repeat this process once or twice with really stubborn stickiness, but it is far more effective than either of the other 2 options. Oh, and don’t forget the scraper! It can come in handy here, too.

*Lemon Essential oil comes in a 15ml bottle for less than $15 (just over $11 if you are a distributor), and that bottle can have as many as 400 drops in it. You can use Lemon Essential Oil all over the house in all kinds of cleaning applications, so you definitely get your money’s worth out of it.

BundleoftheWeek.com, 5 eBooks for $7.40!

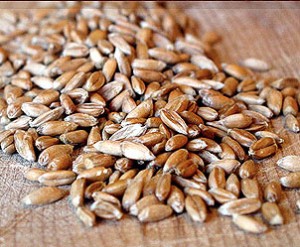
Spelt, The Delicious Whole Grain

So, let’s be brutally honest here. Among non-health-nuts (come on, you know your not-so-healthy friends call you that behind your back!), any mention of whole grains is likely to elicit a groan, a grimace, or maybe even a temper tantrum. Even among the healthiest of us (except for those who eschew grains altogether), we are forced to admit that in our SAD culture, the taste for whole-grain foods is an acquired one.

It’s true! Whole wheat breads and pastries can be slightly bitter in taste, and are almost always heavier in texture. If you want a really good croissant… it’s gotta be white flour, right? Let’s not kid ourselves now and pretend that whole wheat can make anything even close.

However, we also acknowledge the generally established truth that whole grains are much better for us than refined grains, and for lots of good reasons. Therefore we force ourselves to adopt the taste of whole grains and satisfy ourselves with occasionally less-than baked goods.

Well, I happen to think there is an alternative to this forced consumption of whole wheat, and that alternative is spelt.

Why Spelt?

I’ve waxed eloquent about spelt before , but let me sum up here:

  • Whole spelt tastes better than whole wheat. Period. I’ve been working through 50 pounds of hard white wheat berries for the past 6 months, and let me tell you - the difference between my sourdough bread made from the fresh ground wheatt flour and that made with the fresh ground spelt flour is the difference between edible and delicious. Clearly, this is all a matter of opinion, but my DH happens to agree, so that’s at least two of us! The loaves made with spelt are lighter in both taste and texture than those made with wheat. Everything else is exactly the same; the only difference is the type of grain used.
  • Spelt is just as easy to use as wheat. Many other alternative grains require adjustments of one kind or another when cooking, but I generally use spelt on a 1:1 ratio in all my recipes, and it usually turns out just fine. There have been a few times when I’ve had to add a little additional spelt to get just the right texture, but for the most part, if the recipe calls for a cup of flour, I use a cup of spelt flour.
  • In fact, spelt might be a little easier than wheat. When it comes to baking bread, spelt kneads a little more quickly than wheat does. Even knowing that, I was still surprised when my spelt bread dough was done kneading in my KitchenAid significantly sooner than my usual wheat-based dough. It kind of caught me off guard, to be honest, but it was a pleasant surprise! (Hence, one needs to remember not to OVER-knead when using spelt flour.)
  • Since it is more water-soluble, spelt is easier to digest than wheat.
  • Spelt is older than wheat. Way older. Unlike wheat, which has been hybridized over the years to be a very different grain from what it started out, spelt hasn’t changed since it was first cultivated thousands of years ago. I like things that have stood the test of time. Classics, they’re called, and they’re always good. You can read more about spelt here.

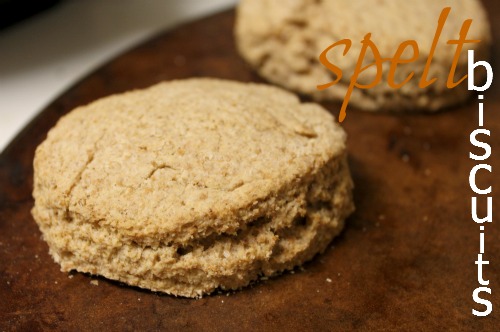
Spelt Recipes

I have a few tried and true spelt recipes here on the blog if you’re curious:

Vita-Spelt

I was recently privileged to sample a few high-quality spelt products made by Vita-Spelt, a well-established producer of all things spelt, and one of the companies that helped re-introduce it to the American public. I love Vita-Spelt’s passion for spelt, and the way they make it accessible to all of us.

  • PASTA: Spelt flour pasta is way yummier than whole-wheat pasta (although if I’m going to be 100% honest, it’s probably not *quite* as yummy as white-flour pasta, which most of us grew up with). Dinner guests will definitely find it more enjoyable than most whole-grain pastas available out there these days. It cooks up a little faster, too, which is a great time-saver. I tried Vita-Spelt’s whole spelt rotini, spaghetti, and macaroni noodles, and they were all fabulous!
  • SPELT BERRIES: In a word, awesome! If you have a grain mill, definitely try the whole grain spelt and see how it compares to wheat berries. Even if you don’t have a grain mill, the whole grain is delicious when cooked just like pasta and served in a whole-grain salad or pilaf.
  • SPELT FLOUR: The spelt flour was convenient and easy to use when I didn’t have time to grind up the berries. It was slightly darker in color than the freshly ground flour, but it worked just as well, and it’s a great option for anyone who doesn’t have a grain mill.

Win Some Spelt Products to Try For Yourself

Thanks to the generous folks at Vita-Spelt, one of my readers will win a case of spelt berries and flour to try for yourself! Whaddya think about that? Awesome, yes? Just fill out the Rafflecopter below for your chance to win and see if you like spelt as much as I do. (I know you will!) This contest is only open in the United States, and closes at midnight on Tuesday, October 1. Winner will be notified by email, and will have 3 days to respond, or another winner will be chosen.
a Rafflecopter giveaway

BundleoftheWeek.com, 5 eBooks for $7.40!

How to Bake With Stevia {Without Affecting Flavor}

How to Bake with Stevia ExtractAlmost a year ago, I wrote a post about how to convert sugar measurements to stevia for cooking and baking. All of the information in that post is true and accurate, but since then I’ve fine-tuned my routine a bit and developed a method for baking with stevia that doesn’t affect the texture or flavor of the final product. I’ve baked all kinds of things this way, and it seems to work across the board with all different kinds of recipes, so for the most part, this is how I bake with stevia.

1. Use Half the Amount of Sugar

The first step is to reduce the amount of sugar called for in the recipe by at least half. Now, for most conventional recipes, I already reduce the amount of sugar by as much as half anyway. So for the purposes of baking with stevia, I reduce the amount of sugar I would personally use by half.

For example:

  • A recipe calls for 1 cup of sugar. I think that sounds like a little bit too much sugar going on for that particular recipe, so I would probably only use 3/4 cup at most.
  • Since I’m going to also be adding stevia, I can reduce that 3/4 cup even more, and use 1/2 cup or less of sugar.
  • Most recipes can handle this without drastically affecting the final texture, but there are some recipes that for whatever reason will not work well with the reduced sugar. In those cases, I usually just forego that particular recipe!

If you’re starting with a recipe that’s already inherently fairly healthy and/or has been healthified, you can just reduce the sugar by half and move on to the next step.

2. Replace the Remaining Half of Sugar with Stevia

Now you can follow the conversion chart to replace the remaining amount of sugar the recipe requires.

For example:

  • The original recipe calls for 1/2 cup of sugar. You’ll put 1/4 cup of sugar in your batter.
  • You’ll add 1/4 t. of stevia to replace the remaining 1/4 cup of sweetener.

3. Proceed As Directed

Just finish up the recipe the way it’s written. You shouldn’t need to make any other adjustments unless you want to.

And that’s it! You’ve just significantly reduced the sugar in your baked goods without sacrificing taste or texture! It’s even better if you use a “healthier” sugar like coconut sugar or sucanat.

Stevia Plant

the stevia plant before processing into extract or powder

Where to Buy Stevia (Plus Also What Kind to Use)

I like to use liquid stevia (you can find either glycerin- or alcohol-based varieties), which is essentially an extract of stevia (like peppermint or vanilla extract). The powdered stevia goes through more processing and often has a bitter after-taste, so I stay away from it. (Plus, a lot of powdered stevia contains additional sugars which totally ruins the point.)

I usually get my stevia from one of the following sources:

  • Trader Joe’s (oh how I love Trader Joe’s!)- I *think* it costs around $7, but I’m not positive. I’ve had the same bottle for probably 6 months now, so I can’t remember exactly how much I paid. I do remember thinking it was an excellent price.
  • MOM’s - Mom’s Organic Market is a local chain and their stevia is actually a private label so I’m not sure the original manufacturer. I do know that their stevia tastes a lot better than other brands I’ve tried (NuNaturals, for example, which I like, but the stuff at Mom’s is better), so I’m thinking it’s probably from a more expensive brand that I haven’t tried yet, ha! The good news is that it is also priced very well (once again, not remembering the price, but remembering the impression that it was a great deal).
  • No access to either one of those stores? No worries! If your local health food store doesn’t carry reasonably priced stevia (and most of them don’t), you can order it online from Vitacost or Amazon (those are affiliate links right there). I ordered mine from both places before I was able to start purchasing it locally.

BundleoftheWeek.com, 5 eBooks for $7.40!

De-Odorize Stinky Carpets Easily and Naturally

I had never experienced stinky carpets in my life until recently… and whew! Not an experience I cared to repeat! And then… repeat it again I did. For some reason, our carpets (I don’t know if it’s because we’re in a basement apartment or what) seem to be particularly prone to collecting odors. What seems to happen is that moisture seeps into the carpet and never properly dries, thus creating a mildew-y nasty smell that can be tricky to eliminate.

Thank goodness for Google! I knew vaguely that baking powder was supposed to help with this problem, but wasn’t exactly sure how to go about it. Of course, every article I read had a slightly different approach to it, and some were more detailed than others, so in the end I kind of pulled my own method together based on what I read.

The first stinky carpet episode required several treatments (yes, it was that bad! The problem was that a drink had spilled underneath the couch, so we couldn’t find from whence the smell was emanating until it was really bad.). The second stinky carpet episode was significantly improved after just one treatment, and although it could probably use one more, I haven’t had the time to actually do that yet (on my lengthy to-do list…). So instead of actually doing it, I’m writing a blog post about how to do it. (Ha!)

The magic ingredient is baking soda. Yep, that’s it! I buy it in a big bag at Costco because I use it for all kinds of cleaning purposes. You’re gonna need a big bag for this particular project, too, because it uses up a LOT of baking soda.

I also added some Purification essential oil, which really helped a lot as well. You can add Purification or any essential oil, or you can just use the baking soda straight up.

How to DeOdorize Stinky Carpet

Here’s the process for de-stinkifying (that’s a word right?) your carpet:

  1. If moisture is involved (in my case, the first time it was), soak up as much of it as you can with rags.
  2. If you want to use essential oils (I recommend Purification), add a few drops to your baking soda (depending on the amount of carpet you want to cover, you’ll probably be using several cups of baking soda).
  3. Liberally (I mean liberally!) sprinkle pour baking soda over the affected area. Spread the baking soda around with your hands or a spoon (or a spatula, whatever gets the job done!) until all the stinky carpet is covered. Don’t be afraid to push the baking soda down into the carpet a bit; that will help it be more effective.
  4. Let it sit overnight.
  5. When you’re ready to clean it up, first use a broom and a dustpan to brush up as much of the baking soda as possible. Don’t try to vacuum it all up or you’ll run the risk of ruining your vacuum cleaner.
  6. When you have only a thin layer of baking soda left, vacuum it up.
  7. Once all the baking soda is removed, do a “sniff test”. Get your nose right up to the smelly spot on the carpet and take a whiff. Is it still stinky? Then repeat the process.
  8. Repeat as necessary until all odor is gone.

And there you have it folks: Better than Febreze or any other chemical-laden toxic carpet cleaner. Plus also, cheaper! Yeah, baby, that’s what I’m talkin’ ’bout.

BundleoftheWeek.com, 5 eBooks for $7.40!

Interesting reads